Articles
How To Install Attic Stairs
Modified: January 8, 2024
Learn how to install attic stairs with our comprehensive articles. Get step-by-step instructions and expert tips for a successful installation.
(Many of the links in this article redirect to a specific reviewed product. Your purchase of these products through affiliate links helps to generate commission for Storables.com, at no extra cost. Learn more)
Introduction
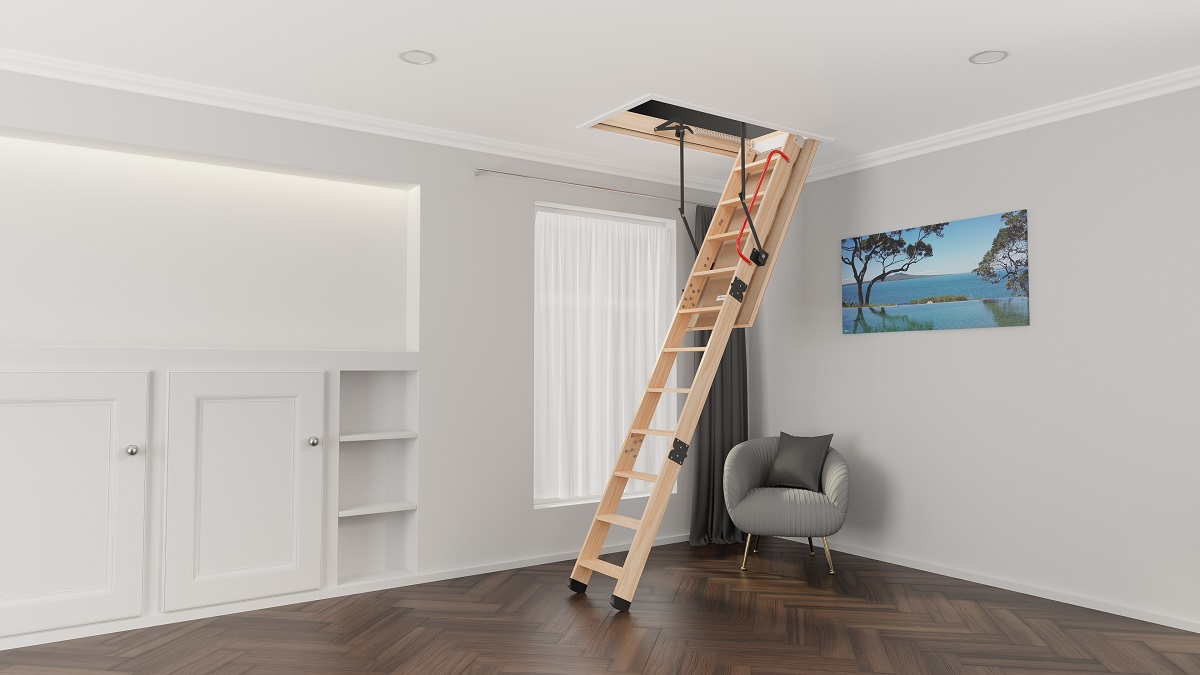
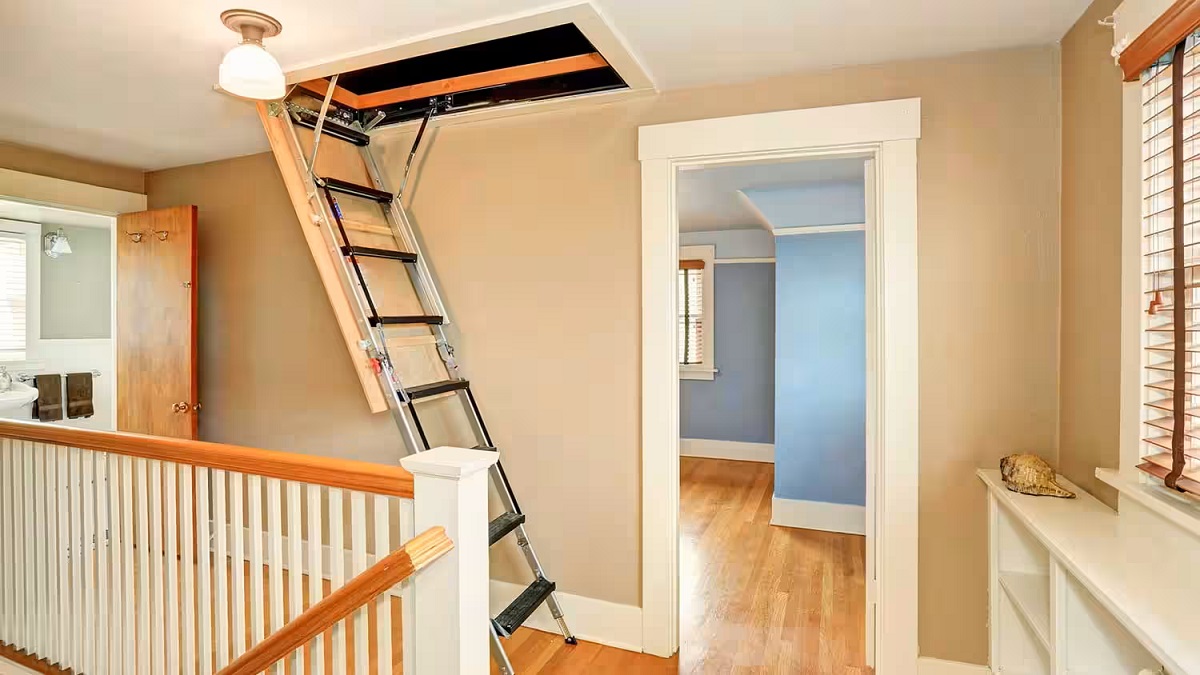
Attic stairs are a convenient and efficient way to access your attic space. Whether you are looking to create additional storage space or simply improve the accessibility of your attic, installing attic stairs is a practical solution that can enhance the functionality of your home. By following a few simple steps and using the right tools, you can successfully install attic stairs on your own.
In this article, we will guide you through the process of installing attic stairs, from measuring and planning to securing and adjusting the stairs. We will also provide tips on properly insulating and finishing the opening to ensure energy efficiency and a polished look. With our comprehensive instructions, you will be able to tackle this project with confidence and enjoy the benefits of easy access to your attic space.
Before you begin the installation process, it’s essential to gather all the necessary tools and materials. This will help ensure a smooth and efficient installation process. In the next step, we will discuss the tools and materials you will need for this project.
Key Takeaways:
- Installing attic stairs is a DIY-friendly project that enhances home accessibility and functionality. Careful planning, proper tools, and attention to detail are essential for a successful installation.
- Insulating and finishing the opening around attic stairs is crucial for energy efficiency and a polished look. Thorough testing and verification ensure the safety and functionality of the installation.
Read more: How Much To Install Attic Stairs
Step 1: Measure and Plan
The first step in installing attic stairs is to accurately measure the space where the stairs will be installed. Start by determining the width and length of the opening. Measure the distance between the joists to ensure that there is enough space for the stairs to fit comfortably.
Next, decide on the type of attic stairs you want to install. There are various options available, including folding stairs, telescoping stairs, and sliding stairs. Consider factors such as ceiling height, available space, and your personal preferences when choosing the type of stairs.
Once you have determined the type of stairs, measure the height from the floor to the attic’s landing area. This measurement will help you determine the length of the ladder or stairs needed. Be sure to choose a ladder or stairs that can safely reach the landing area without being too short or too long.
After taking accurate measurements, sketch out a plan for the installation process. Consider the placement of the stairs in relation to existing walls or obstructions. Make sure there is enough clearance around the opening for the stairs to fully extend and retract. It’s also a good idea to consult building codes and regulations to ensure compliance and safety.
By carefully measuring and planning, you can ensure that the attic stairs fit properly and function efficiently. In the next step, we will discuss the tools and materials you will need for the installation process.
Step 2: Gather Tools and Materials
Before you begin installing attic stairs, it’s essential to gather all the necessary tools and materials. Having the right equipment at hand will save you time and ensure a smooth installation process. Here is a list of tools and materials you will need:
- Measuring tape
- Pencil
- Safety goggles
- Work gloves
- Power drill
- Reciprocating saw
- Screwdriver set
- Level
- Hammer
- Stud finder
- Attic stairs kit (including ladder or stairs, mounting brackets, and hardware)
- Insulation material
- Drywall or plywood
- Nails or screws
- Paint or finish for the opening
Ensure that you have all the tools and materials listed above before you begin the installation process. This will prevent any delays and allow you to complete the project without interruptions.
Once you have gathered all the necessary tools and materials, you are ready to move on to the next step: preparing the opening for the attic stairs installation.
Step 3: Prepare the Opening
Preparing the opening for attic stairs installation involves creating a clean and properly sized space for the stairs to fit into. Follow these steps to prepare the opening:
- Clear the area: Remove any items or debris from the area where the stairs will be installed. This will ensure a safe and unobstructed work space.
- Mark the opening: Use the measurements from your plan to mark the opening on the ceiling. Use a pencil to draw the outline of the opening according to the dimensions you determined earlier.
- Check for obstructions: Before cutting into the ceiling, carefully inspect the area for any wiring, plumbing, or other hidden obstructions. Use a stud finder to locate any studs or joists in the ceiling.
- Cut the opening: Using a reciprocating saw, carefully cut along the marked lines to create the opening. Take caution to avoid cutting into any structural elements or wiring. Keep in mind that you may need to cut through drywall, plaster, or other materials depending on your ceiling type.
- Frame the opening: Using 2×4 lumber, frame the opening by attaching the boards to the ceiling joists. This will provide a sturdy structure for the stairs to be mounted on.
- Install support brackets: Depending on the type of attic stairs you are installing, you may need to install support brackets or brackets provided with the stairs kit. Follow the manufacturer’s instructions for attaching the brackets securely to the frame.
By carefully preparing the opening, you will create a solid foundation for the attic stairs installation. Once the opening is ready, you can move on to the next step: installing the attic staircase.
Step 4: Install the Attic Staircase
Now that you have prepared the opening, it’s time to install the attic staircase. Follow these steps to ensure a successful installation:
- Attach the ladder or stairs: If using a folding or sliding attic staircase, carefully attach the ladder or stairs to the support brackets previously installed. Make sure they are securely fastened and aligned properly with the opening.
- Secure the stairs to the frame: Use screws or bolts provided with the staircase kit to secure the stairs to the frame. Ensure that they are tightly fastened to prevent any wobbling or instability.
- Test the operation: Before moving on, test the operation of the attic stairs. Extend and retract the stairs several times to ensure smooth movement and proper alignment. Make any necessary adjustments to improve functionality.
- Attach handrails (if applicable): If your attic staircase includes handrails, follow the manufacturer’s instructions to attach them securely. Handrails provide added safety and support while using the stairs.
It’s important to note that each attic staircase installation may vary depending on the specific product and manufacturer’s instructions. Always refer to the provided instructions and follow them carefully to ensure proper installation.
Once the attic staircase is securely installed, you can move on to the next step: securing and adjusting the stairs for optimal performance.
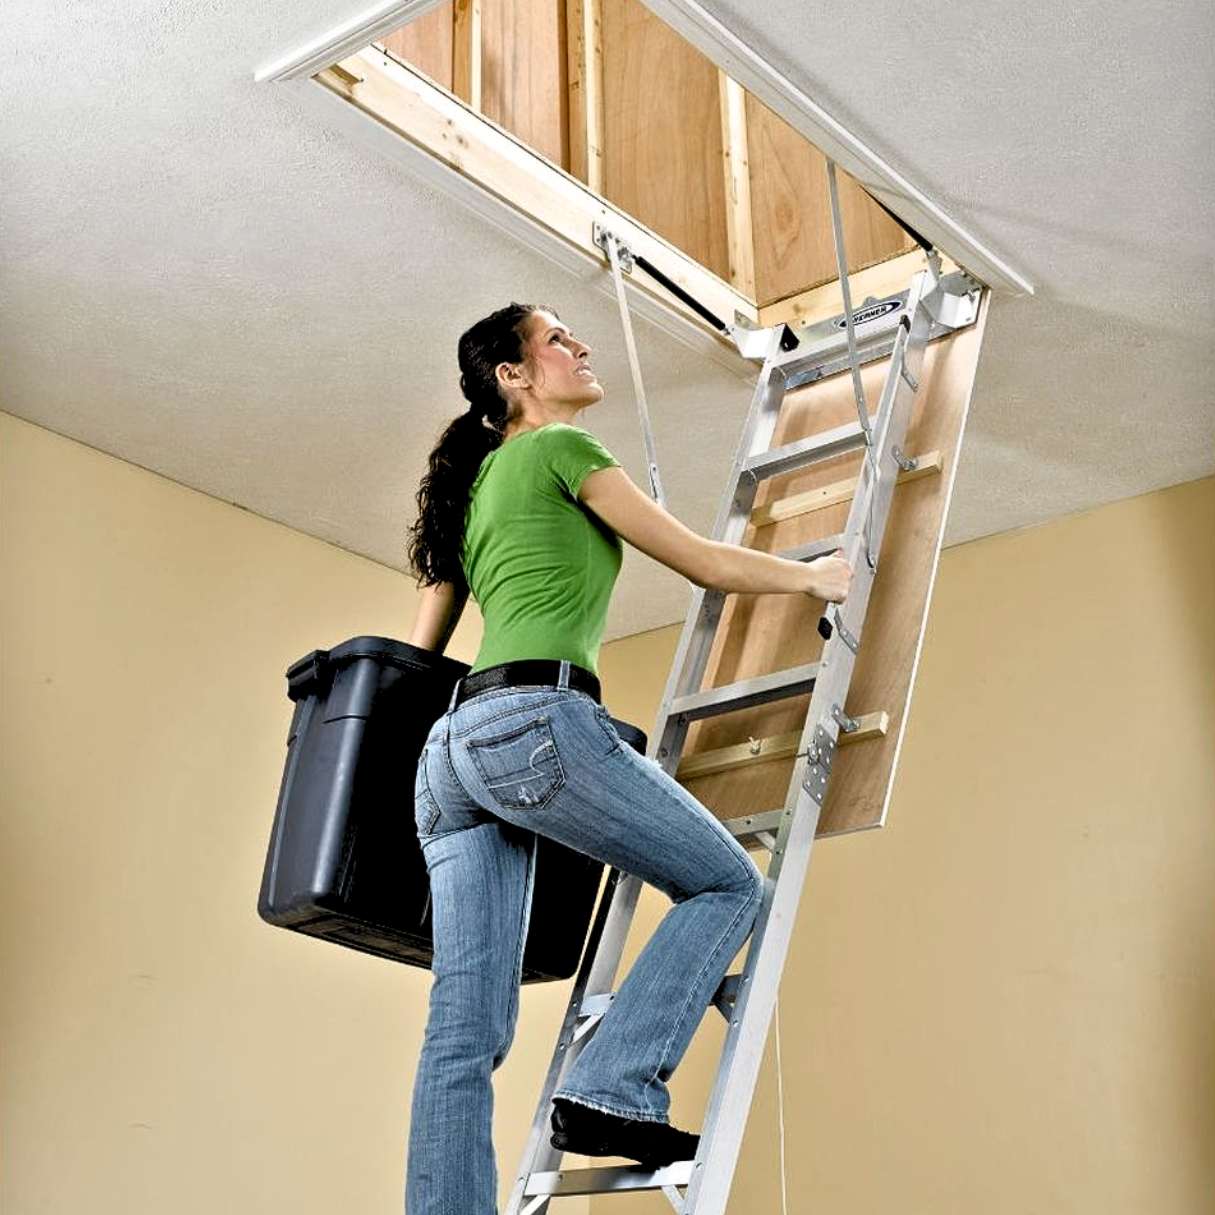
When installing attic stairs, make sure to measure the opening accurately and choose a suitable location. Use a sturdy ladder and follow the manufacturer’s instructions carefully for a safe and secure installation.
Read more: How To Add Stairs To Attic
Step 5: Secure and Adjust the Stairs
After installing the attic staircase, it’s crucial to secure and adjust the stairs to ensure they function properly and safely. Here are the steps to follow:
- Tighten fasteners: Check all screws, bolts, and fasteners used to secure the stairs and handrails. Make sure they are tightened securely, as loose fasteners can compromise the stability and safety of the stairs.
- Check for levelness: Use a level to ensure that the stairs are properly aligned and level. Adjust as needed by tightening or loosening the fasteners on the support brackets.
- Test the weight capacity: Before fully relying on the attic stairs, test their weight capacity. Gradually apply pressure and ensure that the stairs can support the anticipated weight without any signs of strain or instability.
- Ensure smooth operation: Extend and retract the stairs several times to ensure they operate smoothly. The stairs should open and close without any resistance or jamming. If you encounter any issues, refer to the manufacturer’s instructions for troubleshooting and adjustment.
- Inspect safety features: Check that any safety features, such as locking mechanisms or automatic closing systems, are properly functioning. These features are designed to enhance safety and prevent accidents.
By securing and adjusting the stairs, you can ensure their stability, levelness, and smooth operation. This step is crucial for the overall safety and functionality of the attic staircase.
Once you are confident that the stairs are secure and properly adjusted, you can move on to the next step: insulating and finishing the opening around the attic stairs.
Step 6: Insulate and Finish the Opening
Insulating and finishing the opening around the attic stairs is an important step to ensure energy efficiency and a polished look. Follow these steps to insulate and finish the opening:
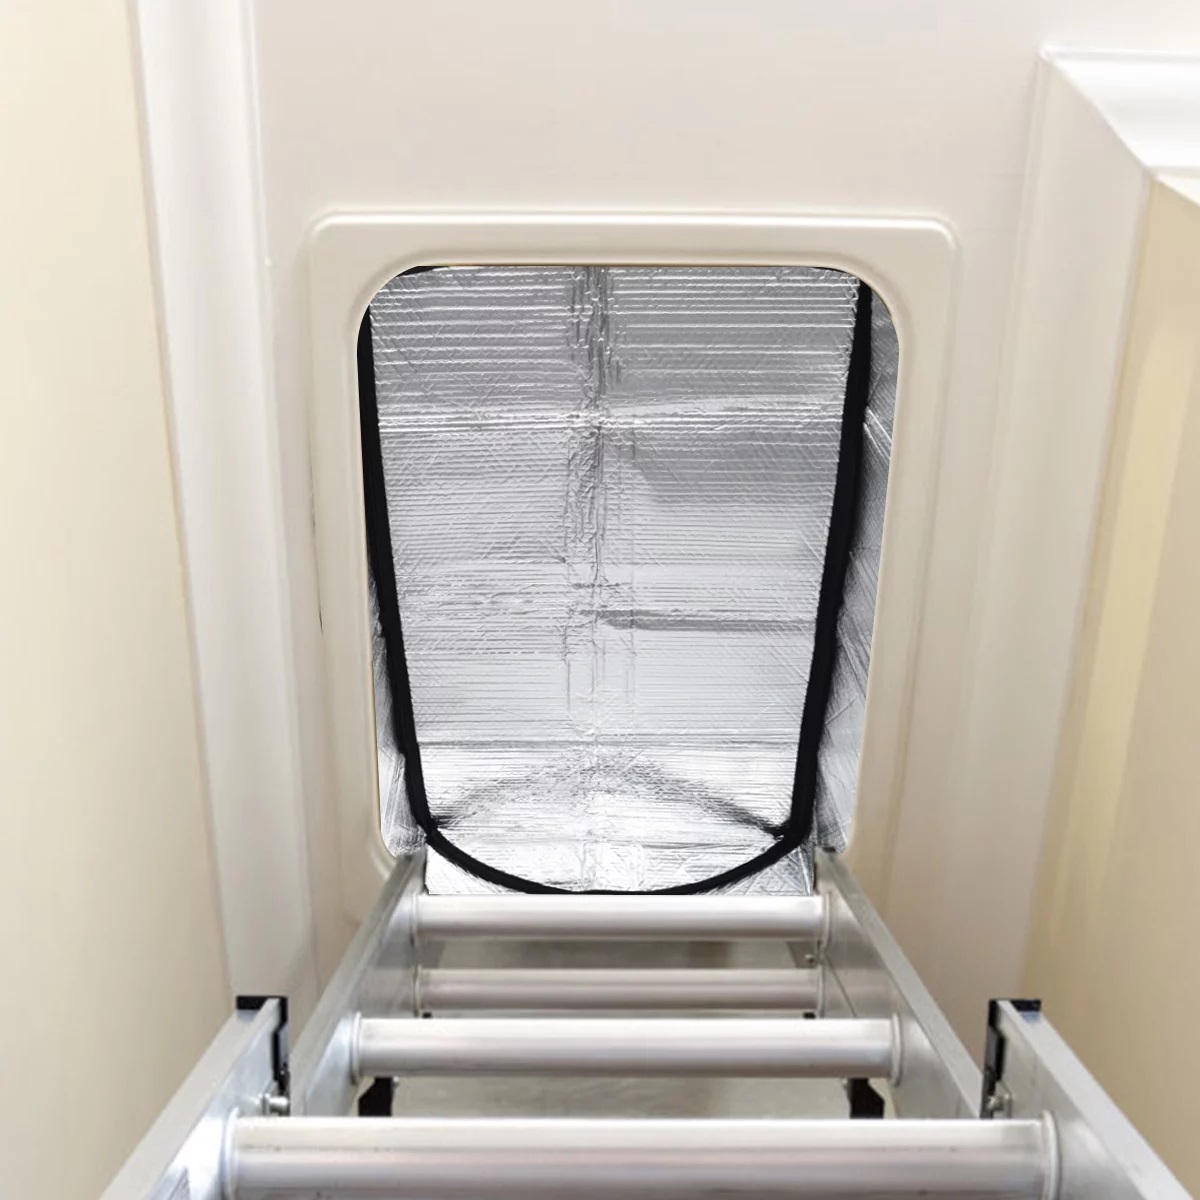
- Insulate the opening: To prevent heat transfer and air leakage, install insulation around the attic stairs opening. Use insulation material that is suited for your climate and meets building code requirements. Cut the insulation to fit snugly around the edges of the opening.
- Seal gaps and cracks: Use caulk or expanding foam to seal any gaps or cracks around the opening. Pay close attention to areas where the opening meets the ceiling and walls. This will help improve energy efficiency and prevent drafts.
- Install a door or cover: Consider installing a door or a cover for the attic stairs opening. This will provide an added layer of insulation and security. There are various options available, such as a hinged door or a retractable cover, depending on your preferences and the space available.
- Finish the opening: Depending on your aesthetic preferences, you may choose to finish the opening with drywall or plywood. Cut the material to fit the opening, and secure it in place using nails or screws. Once installed, you can paint or apply a finish to match the surrounding area.
- Apply trim or molding: To give the opening a finished look, consider adding trim or molding around the edges. This will provide a clean and professional appearance.
By properly insulating and finishing the opening, you can improve the energy efficiency of your home and create a visually appealing transition between the attic stairs and the surrounding area.
With the insulation and finishing complete, you can now move on to the final step: testing and ensuring the proper operation of the attic stairs.
Step 7: Test and Ensure Proper Operation
The final step in installing attic stairs is to thoroughly test and ensure their proper operation. Here are the key steps to follow:
- Test the stairs: Carefully test the attic stairs by fully extending and retracting them multiple times. Pay attention to any sticking or resistance in the movement. The stairs should operate smoothly and without any obstructions.
- Check for stability: Once the stairs are fully extended, check for stability by applying gentle pressure to different areas. The stairs should feel secure and not wobble or shake under normal use.
- Verify safety features: Ensure that any safety features, such as locking mechanisms or guardrails, are functioning correctly. These features are essential for ensuring the safety of anyone using the attic stairs.
- Inspect surrounding area: Check the area around the attic stairs for any damage or loose objects. This includes checking the ceiling, walls, and flooring near the opening. Make any necessary repairs or adjustments as needed.
- Test fire safety: If applicable, ensure that the attic stairs meet the necessary fire safety requirements. This may involve installing fire-rated materials or taking additional precautions to prevent the spread of fire through the attic access.
By thoroughly testing and verifying the proper operation of the attic stairs, you can ensure the safety and functionality of the installation. It is important to address any issues or concerns before considering the project complete.
With the final steps completed, you have successfully installed attic stairs! Enjoy the convenience and accessibility they provide to your attic space.
If you have any additional questions or need further assistance, consult the manufacturer’s instructions or seek advice from a professional.
Congratulations on completing your attic stairs installation project!
Conclusion
Installing attic stairs is a rewarding project that adds convenience, accessibility, and value to your home. By following the step-by-step process outlined in this article, you can successfully install attic stairs on your own.
Remember to start by measuring and planning carefully, ensuring that you have the right tools and materials to complete the project. Preparing the opening and framing it properly will provide a solid foundation for the attic stairs installation. Securely attaching and adjusting the stairs will ensure their stability and functionality.
Insulating and finishing the opening around the attic stairs is crucial for energy efficiency and a polished look. Take care to properly insulate, seal gaps, and finish the opening to prevent heat loss or drafts. Finally, test the stairs and ensure their proper operation and safety features.
Throughout the installation process, pay attention to safety precautions and consult building codes if necessary. If you encounter any challenges or are unsure about any step, it’s always a good idea to seek professional advice.
Now that you have successfully installed your attic stairs, enjoy the convenience of easy access to your attic space. Whether you use it for storage or as an additional living area, your attic will now be readily accessible and functional.
Remember, regular maintenance and inspection of the attic stairs are necessary to ensure their long-term performance. Address any issues promptly and follow the manufacturer’s instructions for care and maintenance.
By following the guidelines and putting in a little time and effort, you have accomplished a valuable home improvement project. Congratulations on your newly installed attic stairs!
Frequently Asked Questions about How To Install Attic Stairs
Was this page helpful?
At Storables.com, we guarantee accurate and reliable information. Our content, validated by Expert Board Contributors, is crafted following stringent Editorial Policies. We're committed to providing you with well-researched, expert-backed insights for all your informational needs.


0 thoughts on “How To Install Attic Stairs”