Home>Ideas and Tips>Creating A Functional Home Gym With Climbing Wall
Ideas and Tips
Creating A Functional Home Gym With Climbing Wall
Published: September 4, 2024
Learn how to build a functional home gym with a climbing wall. Get tips on design, materials, and installation for a versatile and engaging fitness space.
(Many of the links in this article redirect to a specific reviewed product. Your purchase of these products through affiliate links helps to generate commission for Storables.com, at no extra cost. Learn more)
Introduction
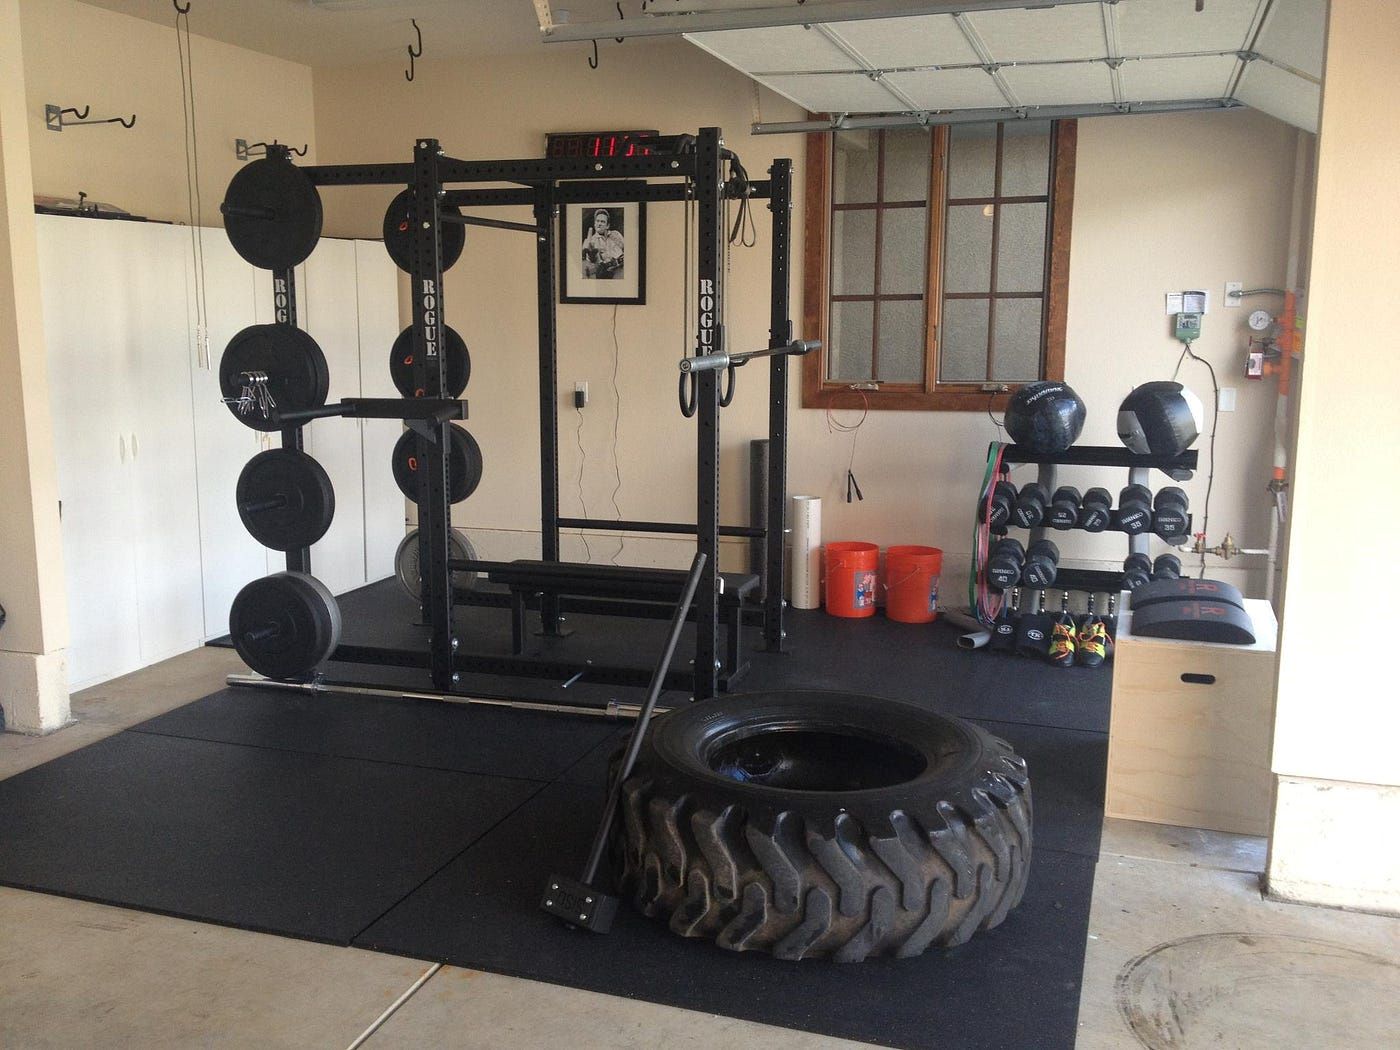
In recent years, home gyms have become increasingly popular as people seek to maintain their fitness levels without the need for expensive gym memberships. One of the most exciting and functional additions to a home gym is a climbing wall. Whether you're a seasoned climber or just starting out, building a home climbing wall can provide a versatile and engaging way to stay active. In this article, we will guide you through the process of creating a functional home gym with a climbing wall, covering everything from design considerations to installation and maintenance tips.
Why Build a Home Climbing Wall?
Building a home climbing wall offers numerous benefits, making it an ideal addition to any home gym. Here are some of the key advantages:
-
Convenience: With a home climbing wall, you can train whenever you want, without the need to commute to a gym. This flexibility is particularly beneficial for those with busy schedules or those who prefer to train at odd hours.
-
Personalization: A home climbing wall allows you to set your own routes and challenges, tailoring your training to your specific needs and goals. This personalization can be especially useful for climbers who want to focus on specific techniques or styles.
-
Cost-Effectiveness: While the initial investment in building a home climbing wall can be significant, it can be more cost-effective in the long run compared to frequent gym memberships.
-
Space Efficiency: Depending on the design, a home climbing wall can be integrated into various spaces within your home, such as a garage, basement, or even a dedicated room.
-
Family Fun: A climbing wall can also serve as a fun and engaging activity for family members, promoting physical activity and teamwork.
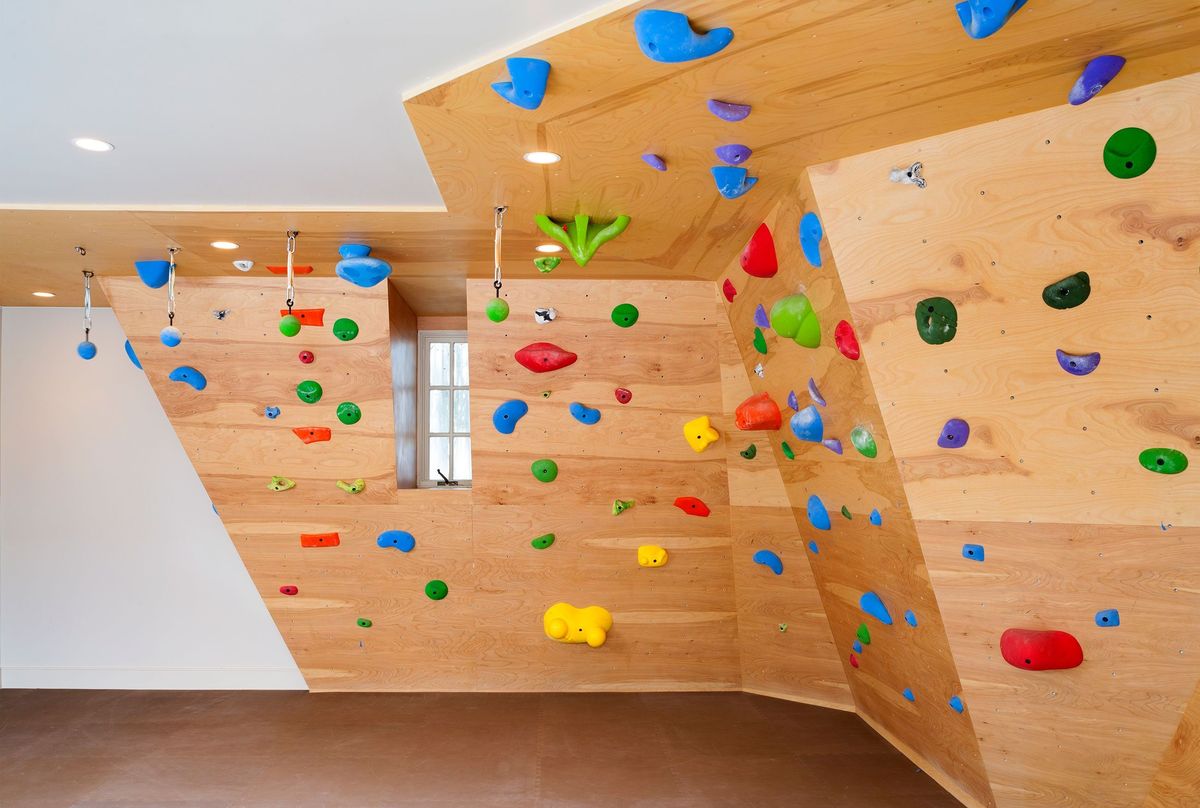
Design Considerations
Before starting your project, it's crucial to consider several design elements to ensure your home climbing wall is both functional and aesthetically pleasing.
-
Space and Layout:
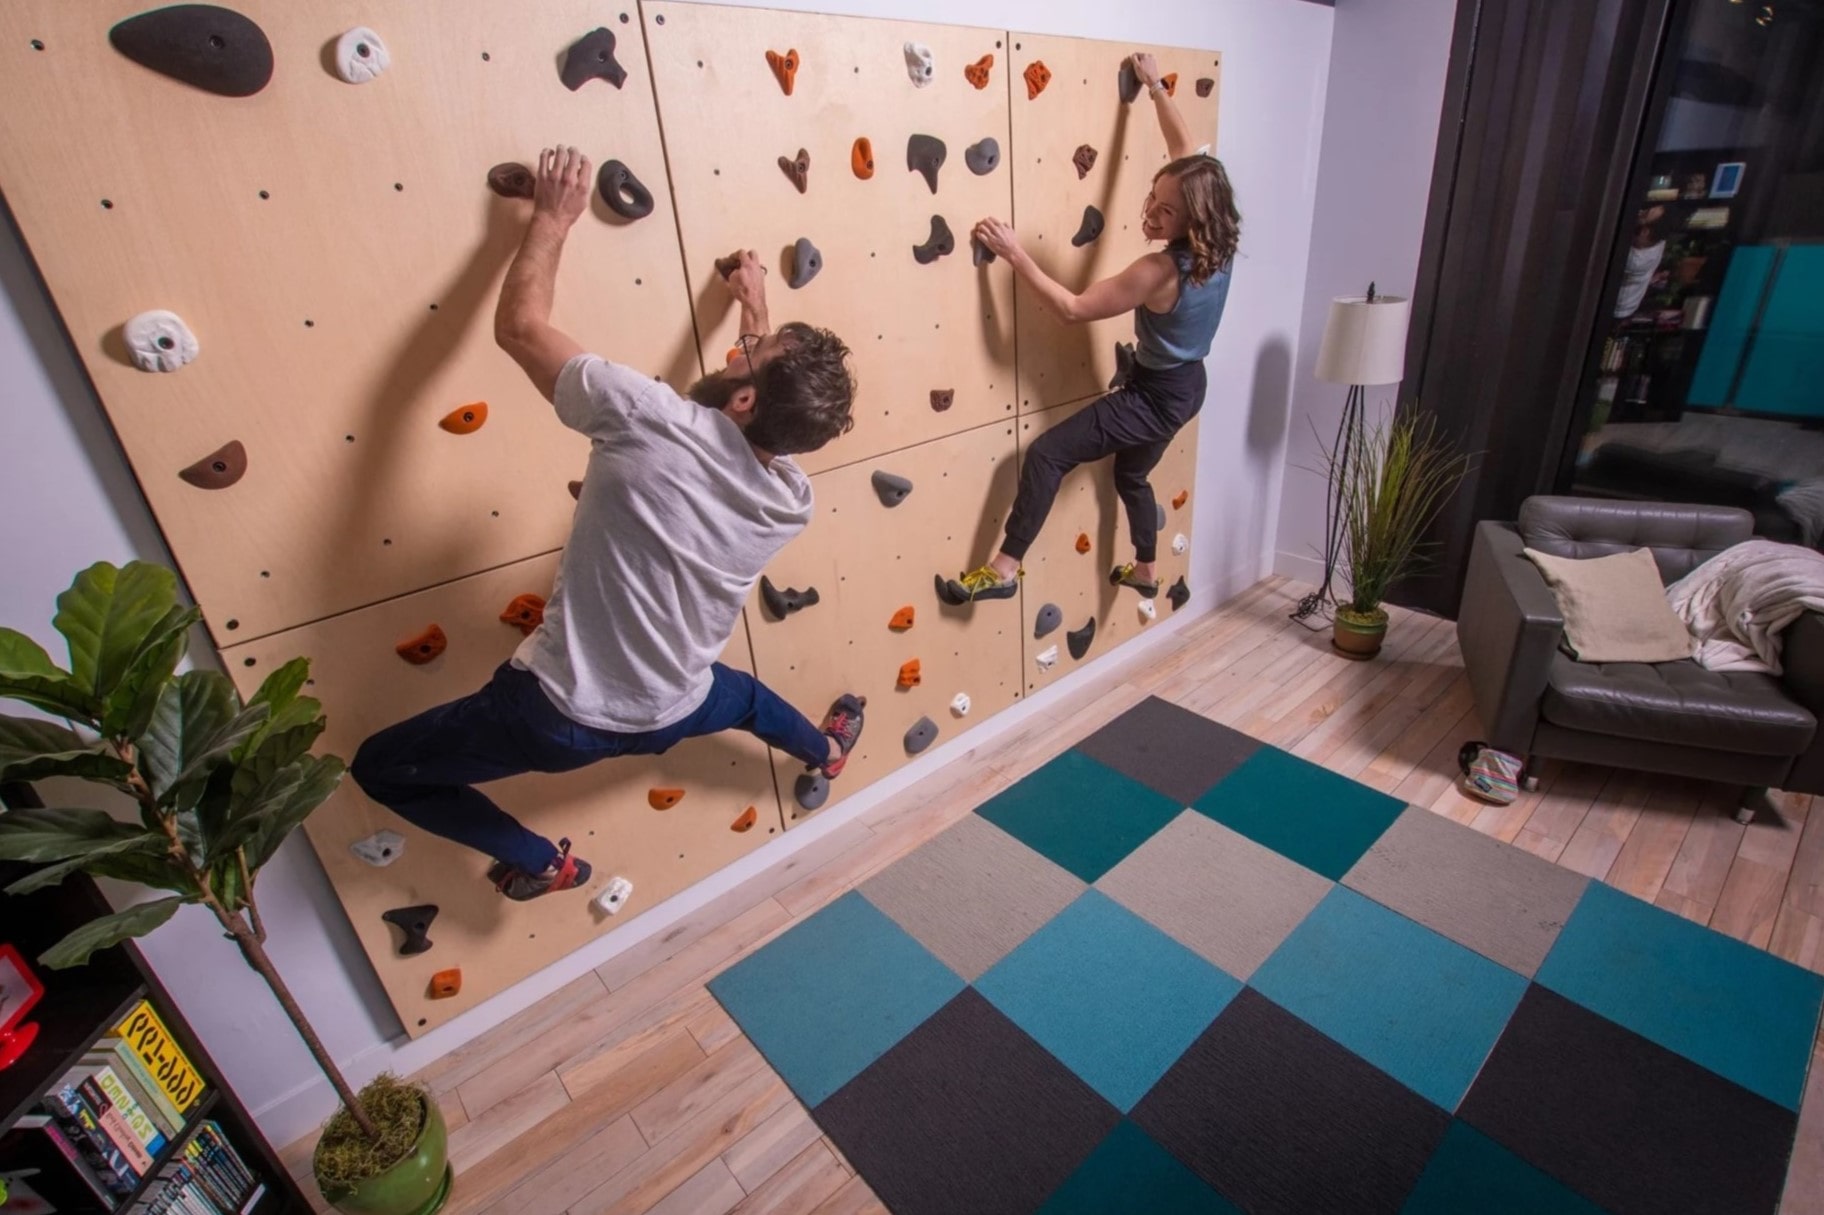
- Size: Determine the available space in your home and decide on the optimal size for your climbing wall. A typical home climbing wall ranges from 8 to 12 feet wide and 9 to 15 feet tall.
- Angle: The angle of your wall is important for both safety and functionality. A 30-degree angle is often recommended as it provides a good balance between ease of climbing and challenge.
- Layout: Plan the layout of your wall, including the placement of holds, footers, and any additional features like ledges or overhangs.
-
Materials:
- Studs and Framing: Use sturdy materials like 2×6 studs at 18-inch spacing for added stability and rigidity.
- Plywood Sheets: Painted plywood sheets can add visual appeal and provide a smooth surface for holds.
- T-Nuts and Holds: Industrial t-nuts ensure holds stay secure, while a variety of hold shapes and sizes keeps climbing interesting.
-
Safety Features:
- Footer: Including a footer can make the wall more functional and enjoyable by allowing you to use the entire surface area.
- Padding: Adding padding or crashpads under the wall can provide a safe landing area for climbers.
-
Aesthetics:
- Visual Appeal: Consider the visual appeal of your wall by choosing materials and designs that complement your home's aesthetic.
- Customization: Add custom inlays, hardwood curvatures, or accent colorings to create a unique and visually stunning piece of functional art.
Step-by-Step Guide to Building Your Home Climbing Wall
Building a home climbing wall involves several steps, from preparation to installation. Here’s a detailed guide to help you through the process:
Step 1: Planning and Design
-
Measure Your Space:
- Measure the available space where you plan to install your climbing wall. Use tape to outline the dimensions on the floor to visualize the project.
-
Consult Experts:
- Talk to design teams or experts in the field to discuss your training goals, height necessities, and angles.
-
Choose Your Design:
- Decide if you need a bouldering or top-rope wall. Bouldering walls are ideal for shorter climbs and more dynamic movements, while top-rope walls are better suited for longer climbs.
-
Plan Your Holds:
- Get creative with hold and volume choices. Choose a variety of hold shapes and sizes to keep climbing interesting.
Step 2: Preparation
-
Prepare Your Space:
- Clear the area where you will be building your climbing wall. Ensure it is free from any obstructions or hazards.
-
Install Scissor Trusses:
- If you're building in a garage or basement, install scissor trusses for added height and stability.
-
Add Blocking:
- Add blocking between studs to increase rigidity and prevent movement during use.
Step 3: Framing the Wall
-
Attach Studs:
- Attach 2×6 studs directly to the scissor trusses at 18-inch spacing for a sturdy frame.
-
Cut Plywood Sheets:
- Cut plywood sheets according to your design specifications, ensuring they fit snugly between the studs.
-
Paint and Drill Holes:
- Paint the plywood sheets for visual appeal and drill holes for t-nuts at 8-inch spacing.
Step 4: Installing T-Nuts and Holds
-
Secure T-Nuts:
- Use industrial t-nuts to secure holds firmly in place, ensuring they don’t spin during use.
-
Mount Wall Panels:
- Mount wall panels and secure them with Torx head screws every 6 inches for added stability.
-
Add Holds:
- Mount holds onto the t-nuts, ensuring they are securely attached and evenly spaced.
Step 5: Adding a Footer
-
Install Footer:
- Include a 12-inch tall footer to make the wall more functional and enjoyable by allowing you to use the entire surface area.
-
Pad the Footer:
- Add padding or crashpads under the footer for a safe landing area.
Materials Needed
Here’s a breakdown of materials you might need for your project:
| Name | Description | Cost | Notes |
|---|---|---|---|
| Screws | 3" Torx construction screws | $27 | Strong and reliable |
| Lumber | 2×6-10ft lumber for wall studs | $132 | Used for roof trusses and wall framing |
| Lumber | 2×4-10ft lumber for blocking | $8 | Added for higher blocking |
| Bolts | Hex bolts, nuts, and washers | $6 | Used for securing roof trusses |
| Plywood Sheets | 3/4" 4x8ft plywood sheets (3) | $106 | One sheet cut for footer and top board |
| Paint | Paint and rollers | $30 | For base color and design |
| Holds | Climbing holds (30 holds) | $195 | Initial batch to start |
| Holds | Simple jugs (12 holds) | $90 | Additional holds for variety |
| T-nuts | Industrial screw-in t-nuts (150) | $51 | Ensured holds stayed secure |
| T-nuts | Non-screw-in t-nuts (24) | $3 | Extras from a friend |
Tips for Improving Your Home Climbing Wall
Once your climbing wall is installed, there are several ways to improve its functionality and appeal:
-
Add Padding:
- Use crashpads or futons with no-slip futon strips to provide a safe landing area and prevent slipping.
-
Stepladder:
- Invest in a small metal stepladder for easy access to clean holds between burns and for wall maintenance.
-
Big, Soft-Bristled Brush:
- Use a big, soft-bristled brush to clean holds effectively, especially for blobbier grips that accumulate dust and chalk.
-
Lighting:
- Install good lighting around the climbing area to enhance visibility and create a welcoming environment.
-
Storage:
- Add storage solutions like shelves or cabinets to keep holds, cleaning supplies, and other equipment organized.
-
Variety of Holds:
- Regularly update your hold collection with new shapes and sizes to keep climbing interesting and challenging.
-
Community Engagement:
- Invite friends and family to use the wall, creating a sense of community and encouraging regular use.
Conclusion
Building a functional home gym with a climbing wall is a rewarding project that offers numerous benefits for both physical fitness and mental well-being. By following these steps and tips, you can create a versatile and engaging space that meets your climbing needs while enhancing your home's aesthetic appeal. Whether you're a seasoned climber or just starting out, investing in a home climbing wall is an excellent way to stay active and continuously challenge yourself in the comfort of your own home.
Additional Resources
For those looking for more detailed instructions or inspiration, here are some additional resources:
- REI Blog on Building a Climbing Wall: Detailed instructions with reference photos.
- Dave MacLeod’s YouTube Video: Insights on optimizing your home climbing wall.
- Metolius Climbing PDF Guide: Comprehensive resource referenced by REI.
- Alpine Vagabonds: Inspirational guide on building an adjustable Moon Board.
By following these guidelines and leveraging these resources, you can create a home climbing wall that not only enhances your fitness routine but also becomes a central part of your home's functional art collection. Happy climbing
Was this page helpful?
At Storables.com, we guarantee accurate and reliable information. Our content, validated by Expert Board Contributors, is crafted following stringent Editorial Policies. We're committed to providing you with well-researched, expert-backed insights for all your informational needs.


0 thoughts on “Creating A Functional Home Gym With Climbing Wall”