Home>Ideas and Tips>Upgrading Your Home’s Attic Ventilation: DIY Solutions

Ideas and Tips
Upgrading Your Home’s Attic Ventilation: DIY Solutions
Published: August 31, 2024
Learn how to upgrade your home's attic ventilation with DIY solutions. Improve energy efficiency, prevent moisture buildup, and extend roof lifespan.
(Many of the links in this article redirect to a specific reviewed product. Your purchase of these products through affiliate links helps to generate commission for Storables.com, at no extra cost. Learn more)
Introduction
Proper attic ventilation is crucial for maintaining a healthy and energy-efficient home. It helps regulate temperature extremes, prevents moisture buildup, and prolongs the lifespan of your roof. In this article, we will explore the importance of attic ventilation, identify common signs of inadequate ventilation, and provide detailed DIY solutions to upgrade your home's attic ventilation system.
The Importance of Attic Ventilation
Attic ventilation is often overlooked, but it plays a vital role in maintaining a comfortable and energy-efficient home. Here are some reasons why proper attic ventilation is essential:
-
Temperature Regulation: Attic ventilation helps regulate the temperature in your attic by allowing hot air to escape and cooler air to enter. This reduces the workload on your cooling system during summer and prevents overheating.
-
Moisture Control: Proper ventilation prevents moisture buildup in the attic, which can lead to mold, mildew, and ice dams. Moisture accumulation can damage your roof and compromise the structural integrity of your home.
-
Roof Longevity: Adequate ventilation extends the lifespan of your roof by reducing the risk of premature aging due to heat and moisture damage.
Signs Your Attic Needs Better Ventilation
Identifying the need for better attic ventilation is crucial. Here are common indicators that your attic doesn’t have proper airflow:
-
Excessive Heat in the Attic: During summer months, if your attic is excessively hot, it may indicate inadequate ventilation.
-
Ice Dams: Ice dams forming on the roof’s edge in winter are a sign of inadequate ventilation. This occurs when warm air rises and meets the cold roof surface, causing moisture to freeze.
-
Moisture or Frost Buildup: Moisture or frost buildup on the underside of the roof sheathing is another indicator of poor ventilation.
-
Mold or Mildew Growth: Visible mold or mildew growth in the attic suggests poor air circulation and high humidity levels.
-
Peeling Paint or Wallpaper: Peeling paint or wallpaper in rooms below the attic can be a sign that moisture is seeping through the ceiling, often due to inadequate attic ventilation.
DIY Solutions for Improving Attic Ventilation
1. Installing Soffit Vents
Soffit vents are one of the most effective ways to improve attic ventilation. They are installed in the soffits, which are the underside of the roof overhangs. Here’s how to install soffit vents:
-
Assess Your Soffits: Before starting, inspect your soffits to determine if they are solid or have existing vents. If your soffits are solid, you can install new vents.
-
Choose the Right Vents: There are various types of soffit vents available, including rectangular vents, round vents, and perforated soffit material. Choose the type that best fits your needs and budget.
-
Measure and Mark: Measure the space where you plan to install the vents and mark the locations with a pencil.
-
Cut Out the Soffit: Use a saw or a utility knife to cut out the marked sections of the soffit. Make sure to cut carefully to avoid damaging the surrounding structure.
-
Install Vent Panels: Place the vent panels into the cut-out sections, ensuring they are securely fastened with screws or nails.
-
Seal Gaps: Use caulk or weatherstripping to seal any gaps around the vents to prevent air leaks.
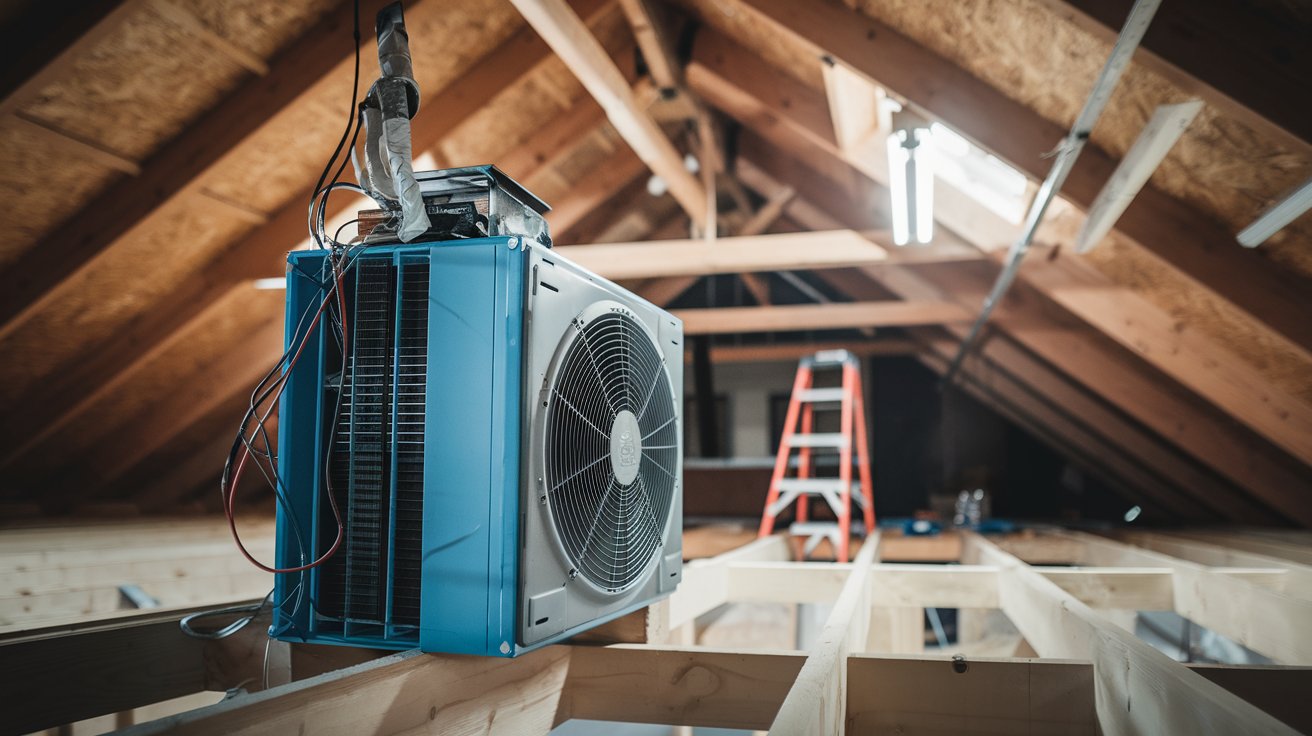
2. Adding Powered Attic Fans
Powered attic fans can provide an extra boost to your ventilation system, especially in hot climates or for large attic spaces. Here’s how to install a powered attic fan:
-
Choose the Right Fan: Select a fan that is suitable for your attic size and climate. Consider factors like noise level, energy efficiency, and airflow capacity.
-
Install the Fan: Mount the fan in an area where it can efficiently exhaust hot air from the attic. Typically, this is near the top of the attic or along the ridge line.
-
Ensure Intake Ventilation: Make sure you have adequate intake ventilation (such as soffit vents) to prevent the fan from pulling conditioned air from your living space.
-
Connect Power: Connect the fan to a power source, following the manufacturer’s instructions for wiring and electrical connections.
3. Installing Solar Attic Fans
Solar attic fans are an eco-friendly option to enhance attic ventilation. These fans use solar energy to power a small motor that helps exhaust hot air from the attic:
-
Choose the Right Fan: Select a solar attic fan that is suitable for your attic size and climate. Consider factors like energy efficiency and airflow capacity.
-
Install the Fan: Mount the fan in an area where it can efficiently exhaust hot air from the attic. Typically, this is near the top of the attic or along the ridge line.
-
Ensure Intake Ventilation: Make sure you have adequate intake ventilation (such as soffit vents) to prevent the fan from pulling conditioned air from your living space.
-
Position for Maximum Sunlight: Position the solar panel to receive maximum sunlight exposure to ensure optimal performance.
4. Using Turbine Vents
Turbine vents, also known as whirlybirds, use wind energy to help ventilate the attic:
-
Choose the Right Vent: Select a turbine vent that is suitable for your attic size and wind conditions. Consider factors like noise level and airflow capacity.
-
Install the Vent: Mount the turbine vent in an area where it can efficiently draw in wind and exhaust hot air from the attic. Typically, this is near the top of the attic or along the ridge line.
-
Ensure Proper Installation: Ensure that the turbine vent is installed correctly to maximize airflow and prevent damage from strong winds.
5. Maintaining Your Attic Ventilation System
Regular maintenance is crucial to keep your attic ventilation system in top condition:
-
Check for Moisture or Mold: Regularly inspect your attic for signs of moisture or mold growth.
-
Clean Debris: Clean debris from soffit and ridge vents to ensure efficient airflow.
-
Inspect Vents Annually: Inspect vents annually for blockages or damage.
-
Verify Mechanical Components: Verify that all mechanical components function properly, especially powered fans and solar panels.
Special Considerations for Hip Roofs
Hip roofs present unique challenges when it comes to attic ventilation. Here are some special considerations:
-
Rafter Intersections: Hip roofs often have rafters that intersect at different angles, which can make it difficult to install vents uniformly.
-
Limited Ventilation Space: The limited space between rafters may require more creative solutions for installing vents.
-
Balanced Ventilation System: Ensure that your ventilation system is balanced, with both intake and exhaust vents working together to maintain optimal airflow.
Case Study: Improving Ventilation in a 1901 Home
A homeowner in Minnesota faced challenges with their 1901 home, which had solid cedar soffits and no gable vents. Here’s how they improved their attic ventilation:
-
Assessing the Situation: The homeowner noticed yellowing plaster ceilings and suspected inadequate ventilation.
-
Identifying Blockages: They realized that the solid cedar soffits were blocking airflow and that ridge vents alone were insufficient.
-
Installing Soffit Vents: The homeowner decided to install rectangular soffit vents by cutting holes through the solid cedar soffits. They ensured that insulation was not blocking the openings by using cardboard dams.
-
Ensuring Proper Installation: After reinstalling the vinyl soffit with perforated material, they inspected the vents annually for blockages or damage.
Conclusion
Improving attic ventilation is a valuable investment in your home’s health and efficiency. By understanding the importance of proper ventilation, identifying common signs of inadequate ventilation, and implementing DIY solutions like installing soffit vents, adding powered attic fans, installing solar attic fans, and using turbine vents, you can create a healthier and more comfortable living environment. Remember to maintain your attic ventilation system regularly to ensure optimal performance. Whether you have a modern home or an older one like the case study above, these steps will help you upgrade your home's attic ventilation effectively.
Was this page helpful?
At Storables.com, we guarantee accurate and reliable information. Our content, validated by Expert Board Contributors, is crafted following stringent Editorial Policies. We're committed to providing you with well-researched, expert-backed insights for all your informational needs.


0 thoughts on “Upgrading Your Home’s Attic Ventilation: DIY Solutions”