Articles
How To Cook A Chuck Roast In Slow Cooker
Modified: February 29, 2024
Learn how to cook a tender and flavorful chuck roast in a slow cooker with our step-by-step guide. Perfect for hearty and delicious meals.
(Many of the links in this article redirect to a specific reviewed product. Your purchase of these products through affiliate links helps to generate commission for Storables.com, at no extra cost. Learn more)
Introduction
Cooking a chuck roast in a slow cooker is a wonderful way to create a delicious and tender meal with minimal effort. The slow cooking process allows the flavors to meld together and the meat to become incredibly tender, resulting in a mouthwatering dish that is sure to impress.
There are several factors to consider when preparing a chuck roast in a slow cooker, from choosing the right cut of meat to seasoning it properly. In this article, we will guide you through the process step by step, ensuring a perfectly cooked chuck roast that will have your family and friends coming back for seconds.
When it comes to choosing a chuck roast, it’s essential to select a well-marbled piece of meat. The marbling adds flavor and helps keep the roast moist during the slow cooking process. Look for a chuck roast that has a nice balance of fat and lean meat. Generally, a 2-3 pound chuck roast will be sufficient to feed a family of four.
Before cooking the chuck roast, it’s crucial to prepare it properly. Trim any excess fat or silver skin from the roast, as this can lead to a greasy texture. Pat the roast dry with paper towels to help the seasonings adhere better and promote a nice sear when searing the meat before slow cooking.
Seasoning the roast is another critical step in creating a flavorful dish. A simple blend of salt, black pepper, garlic powder, and onion powder is a classic choice. However, feel free to get creative and add other herbs and spices based on your personal preference. Rub the seasoning mixture over the entire surface of the roast, ensuring it coats evenly.
Slow cooking is the preferred method for cooking a chuck roast, as it allows for long, gentle cooking, resulting in a tender and juicy roast. The slow cooker traps in heat and moisture, infusing the meat with flavor and creating a melt-in-your-mouth texture.
In the next section, we will walk you through the step-by-step process of cooking a chuck roast in a slow cooker, starting with searing the roast to lock in the juices and ending with a perfectly cooked and succulent meal.
Key Takeaways:
- Searing the chuck roast before slow cooking or oven roasting creates a rich crust and enhances flavor. Choosing well-marbled meat, seasoning generously, and resting before slicing are key to a mouthwatering dish.
- Whether slow cooking, oven roasting, or pressure cooking, each method offers unique benefits. Experiment with seasonings and techniques to create a signature chuck roast recipe that will impress and satisfy.
Factors to Consider
Before diving into the process of cooking a chuck roast in a slow cooker, it’s essential to consider a few factors that will ultimately affect the outcome of your dish. By taking these factors into account, you can ensure a successful and flavorful meal.
The first factor to consider is the quality of the chuck roast. Look for a cut of meat that has good marbling – thin streaks of fat throughout the meat. This marbling adds flavor and helps keep the roast moist during the slow cooking process. Additionally, choose a roast with a nice balance of fat and lean meat. While you want some fat for flavor and moisture, too much may result in a greasy texture.
Size is another important factor to consider. A chuck roast that weighs around 2-3 pounds is generally sufficient to feed a family of four. This size ensures that the roast cooks evenly and has a manageable cooking time. However, feel free to adjust the size depending on your needs and the number of people you are serving.
Next, take into account the level of tenderness you desire. Chuck roasts are typically a tougher cut of meat, so slow cooking is ideal for breaking down the collagen and tenderizing the meat. If you prefer a more tender and falling-apart texture, you can extend the cooking time slightly to achieve that result.
Consider the amount of seasoning based on your personal preference. A simple blend of salt, black pepper, garlic powder, and onion powder works well as a base, but feel free to experiment with additional herbs and spices to enhance the flavor. Keep in mind that the slow cooking process intensifies the flavors, so be mindful not to over-season the roast.
Lastly, think about the overall timing and planning for your meal. Slow cooking a chuck roast usually takes several hours, so be sure to plan accordingly. If you’re serving the roast for dinner, it’s best to start the slow cooking process earlier in the day to allow for adequate cooking time.
By considering these factors, you can ensure that you choose the right cut of meat, season it appropriately, and plan your cooking time effectively. Now that we’ve covered the essential factors, let’s move on to choosing the perfect chuck roast for your slow cooker meal.
Choosing a Chuck Roast
When it comes to cooking a chuck roast in a slow cooker, choosing the right cut of meat is crucial. The chuck roast is a flavorful and affordable cut that comes from the shoulder area of the cow. It’s known for its rich, beefy taste and tender texture when cooked properly.
Here are some factors to consider when choosing a chuck roast:
- Grade of Meat: Look for a chuck roast that is USDA graded. The grades range from Select, Choice, to Prime, with Prime being the highest quality. While Prime grade chuck roast may be more expensive, it often yields a more tender and flavorful result.
- Marbling: Check for marbling in the meat. Marbling refers to the small streaks of fat that are distributed throughout the muscle. This fat marbling adds flavor and moisture to the roast. Look for a chuck roast with even and well-distributed marbling.
- Size: Consider the size of the chuck roast based on your needs. A 2-3 pound roast is generally sufficient to serve a family of four. If you’re feeding a larger crowd, you may want to opt for a larger roast. Keep in mind that larger roasts may take longer to cook.
- Butcher’s Recommendation: Seek the advice of your local butcher. They can guide you in selecting the best cut of meat and provide recommendations based on your preferences and cooking method.
When shopping for a chuck roast, it’s also essential to inspect the meat. Look for a roast that has a bright red color, as this indicates freshness. Avoid chuck roasts that have a grayish or brownish hue, as it may indicate spoilage. Additionally, check for any signs of excessive fat or connective tissue that may result in a chewy texture.
If possible, consider purchasing grass-fed or organic chuck roast. This ensures that the meat comes from animals raised without antibiotics or hormones and fed a natural diet. Grass-fed beef tends to have a richer flavor profile and higher nutrient content.
By choosing a high-quality chuck roast with good marbling, you set yourself up for success in creating a delicious and tender slow-cooked meal. Next, let’s move on to the essential steps of preparing the chuck roast for cooking.
Preparing the Chuck Roast
Before cooking a chuck roast in a slow cooker, it’s important to prepare the meat properly. Proper preparation ensures that the roast cooks evenly, develops a nice sear, and enhances the overall flavor of the dish.
Here are the steps to prepare the chuck roast:
- Trimming: Start by examining the roast and trimming any excess fat or silver skin. Too much fat can result in a greasy texture, while silver skin can be tough and chewy. Use a sharp knife to carefully remove any unwanted parts. Remember to leave some fat on the roast for flavor and moisture during the slow cooking process.
- Drying: After trimming, pat the chuck roast dry with paper towels. Excess moisture on the surface of the meat can hinder browning and searing. Drying the meat also helps the seasonings adhere better to the surface, resulting in a more flavorful crust.
- Searing: Searing the chuck roast before slow cooking is an optional but highly recommended step. Searing creates a nice crust on the outside of the meat, adding depth of flavor and enhancing the overall presentation of the roast. Heat a large skillet or Dutch oven over medium-high heat and add a small amount of oil. Once the oil is hot, carefully place the chuck roast in the pan and sear it on all sides until browned, about 2-3 minutes per side. This step can be done right before placing the roast in the slow cooker or a few hours in advance to save time.
- Resting: After searing, allow the chuck roast to rest for a few minutes. This allows the juices to redistribute throughout the meat before adding it to the slow cooker. Resting the roast also helps retain its moisture during the slow cooking process.
By trimming the roast, drying it thoroughly, and searing it to develop a flavorful crust, you set the stage for a delicious slow-cooked chuck roast. The next step is to season the roast to enhance its flavor profile, and we’ll explore that in the next section.
Seasoning the Roast
Seasoning the chuck roast is a crucial step in creating a flavorful and delicious slow-cooked meal. The right combination of herbs and spices can elevate the taste of the meat and complement its natural flavors. Here’s how to season your chuck roast:
- Salt: Start by generously seasoning the chuck roast with salt. Salt helps to enhance the natural flavors of the meat and creates a well-rounded taste. Use kosher salt or sea salt to ensure even distribution across the surface of the roast.
- Black Pepper: Next, add freshly ground black pepper to the roast. Black pepper adds a hint of spiciness and complements the beefy flavor of the chuck roast.
- Garlic Powder: Sprinkle garlic powder over the roast to infuse it with a savory and aromatic taste. Garlic pairs perfectly with beef and adds depth of flavor to the dish.
- Onion Powder: Similarly, onion powder contributes to the overall flavor profile of the roast. It adds a subtle sweetness and enhances the savory notes of the meat.
- Additional Seasonings: Feel free to get creative with additional seasonings based on your personal preference. You can add dried herbs like thyme, rosemary, or oregano for an earthy and aromatic touch. Smoked paprika or chili powder can add a hint of smokiness or spice to the roast.
Once you have selected your desired seasonings, rub the mixture evenly over the surface of the chuck roast. Make sure to coat all sides of the meat for maximum flavor. The seasonings will create a flavorful crust during the cooking process and infuse the roast with deliciousness.
After seasoning the roast, you can let it sit at room temperature for about 15-30 minutes to allow the flavors to penetrate the meat. This step is optional but can enhance the overall taste of the dish.
By properly seasoning the chuck roast, you can create a mouthwatering slow-cooked meal that is bursting with flavor. The next step is to choose your cooking method, and we’ll explore the slow cooker method in detail in the following section.
Cooking Techniques
When it comes to cooking a chuck roast, there are various techniques you can choose from, each offering its own unique benefits and flavors. Here are three popular cooking techniques for preparing a delicious chuck roast:
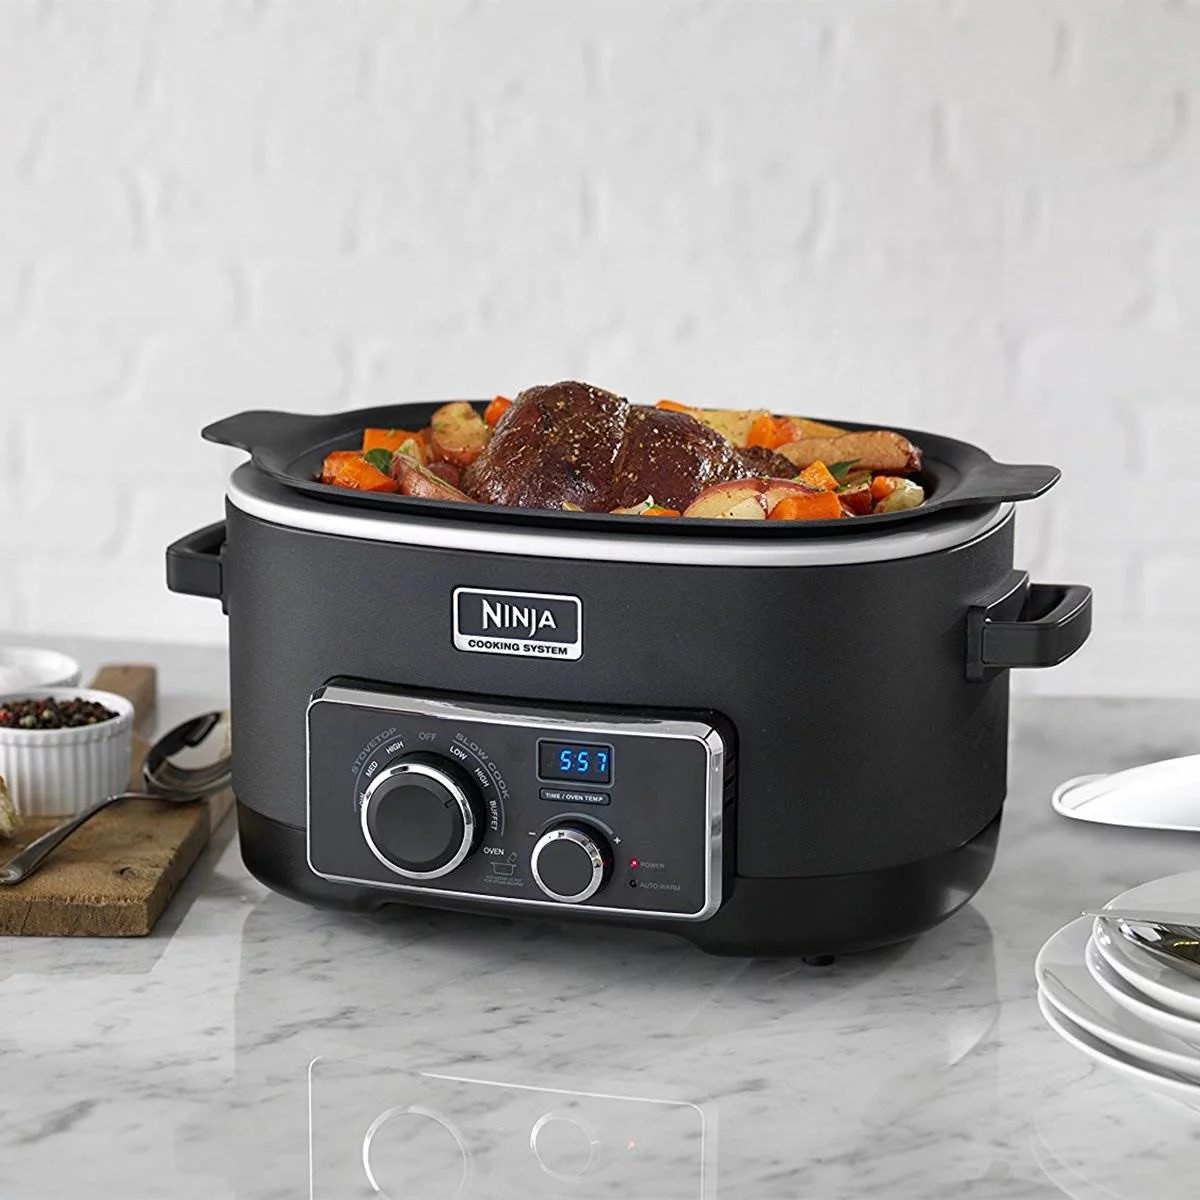
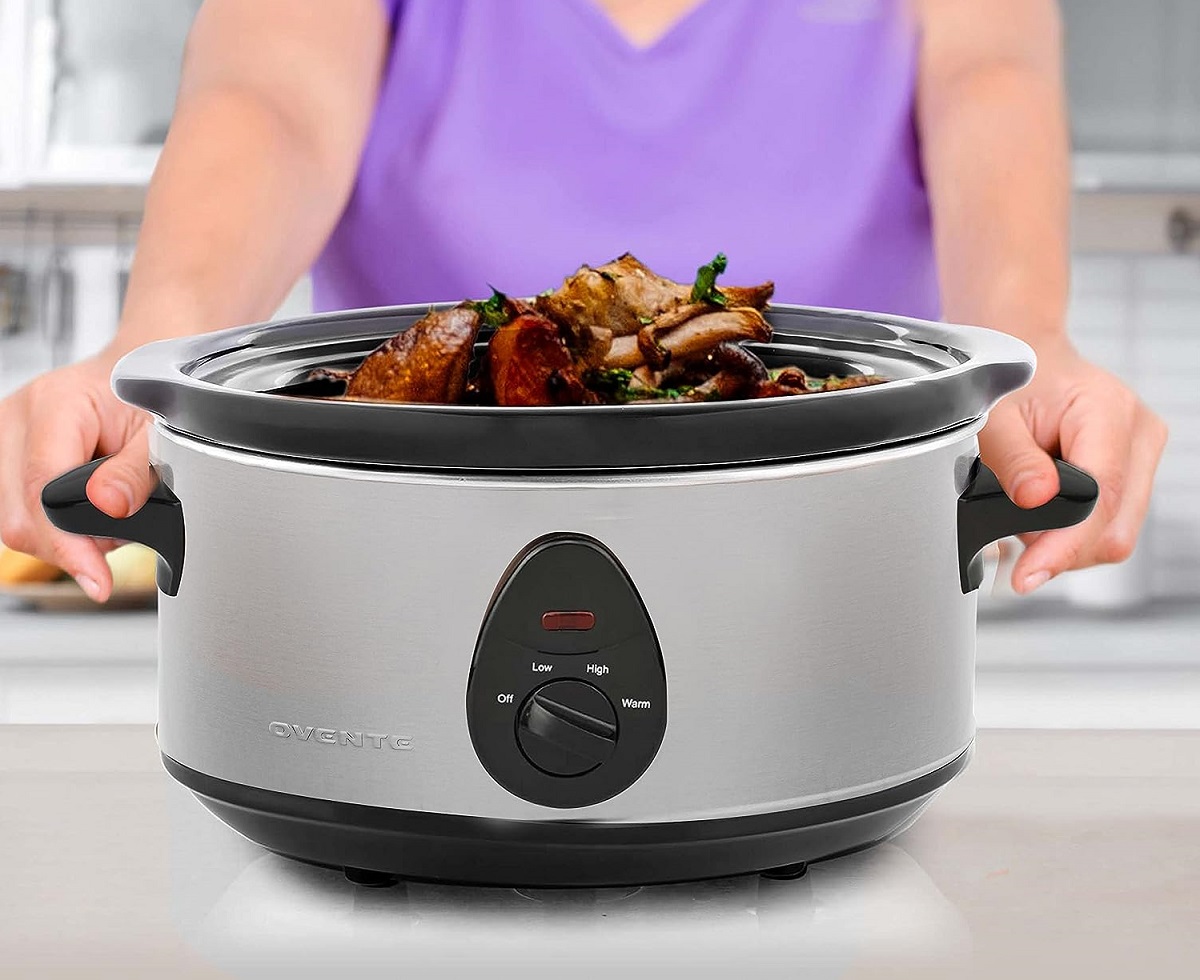
- Slow Cooker: Slow cooking is the most common method for cooking a chuck roast. This technique involves cooking the roast at a low temperature for an extended period, typically 8-10 hours, to allow the meat to become tender and flavorful. Slow cookers, also known as crock-pots, are convenient and ensure even cooking throughout the roast.
- Oven Roasting: Oven roasting is a versatile method that produces a flavorful chuck roast. Preheat the oven to a low temperature, usually around 275°F (135°C). Place the seasoned roast in a roasting pan and cook it for about 3-4 hours, or until tender. This method results in a tender roast with a nice, caramelized crust.
- Pressure Cooking: Pressure cooking is a faster alternative to slow cooking and ideal for those who are short on time. A pressure cooker creates a sealed environment that cooks the roast quickly under high pressure. This technique reduces the cooking time to around 45-60 minutes, depending on the size of the roast. Pressure cooking yields a tender and flavorful chuck roast in a fraction of the time.
Each of these cooking techniques has its advantages, but slow cooking is the most popular and reliable method for achieving a tender and succulent chuck roast. In the next section, we will focus on the slow cooker method and guide you through the step-by-step process for preparing a mouthwatering chuck roast.
Whether you choose to slow cook, oven roast, or pressure cook your chuck roast, these techniques ensure a delicious and satisfying meal that will wow your family and friends. It’s time to dive into the details of the slow cooker method, so let’s get started!
Slow Cooker Method
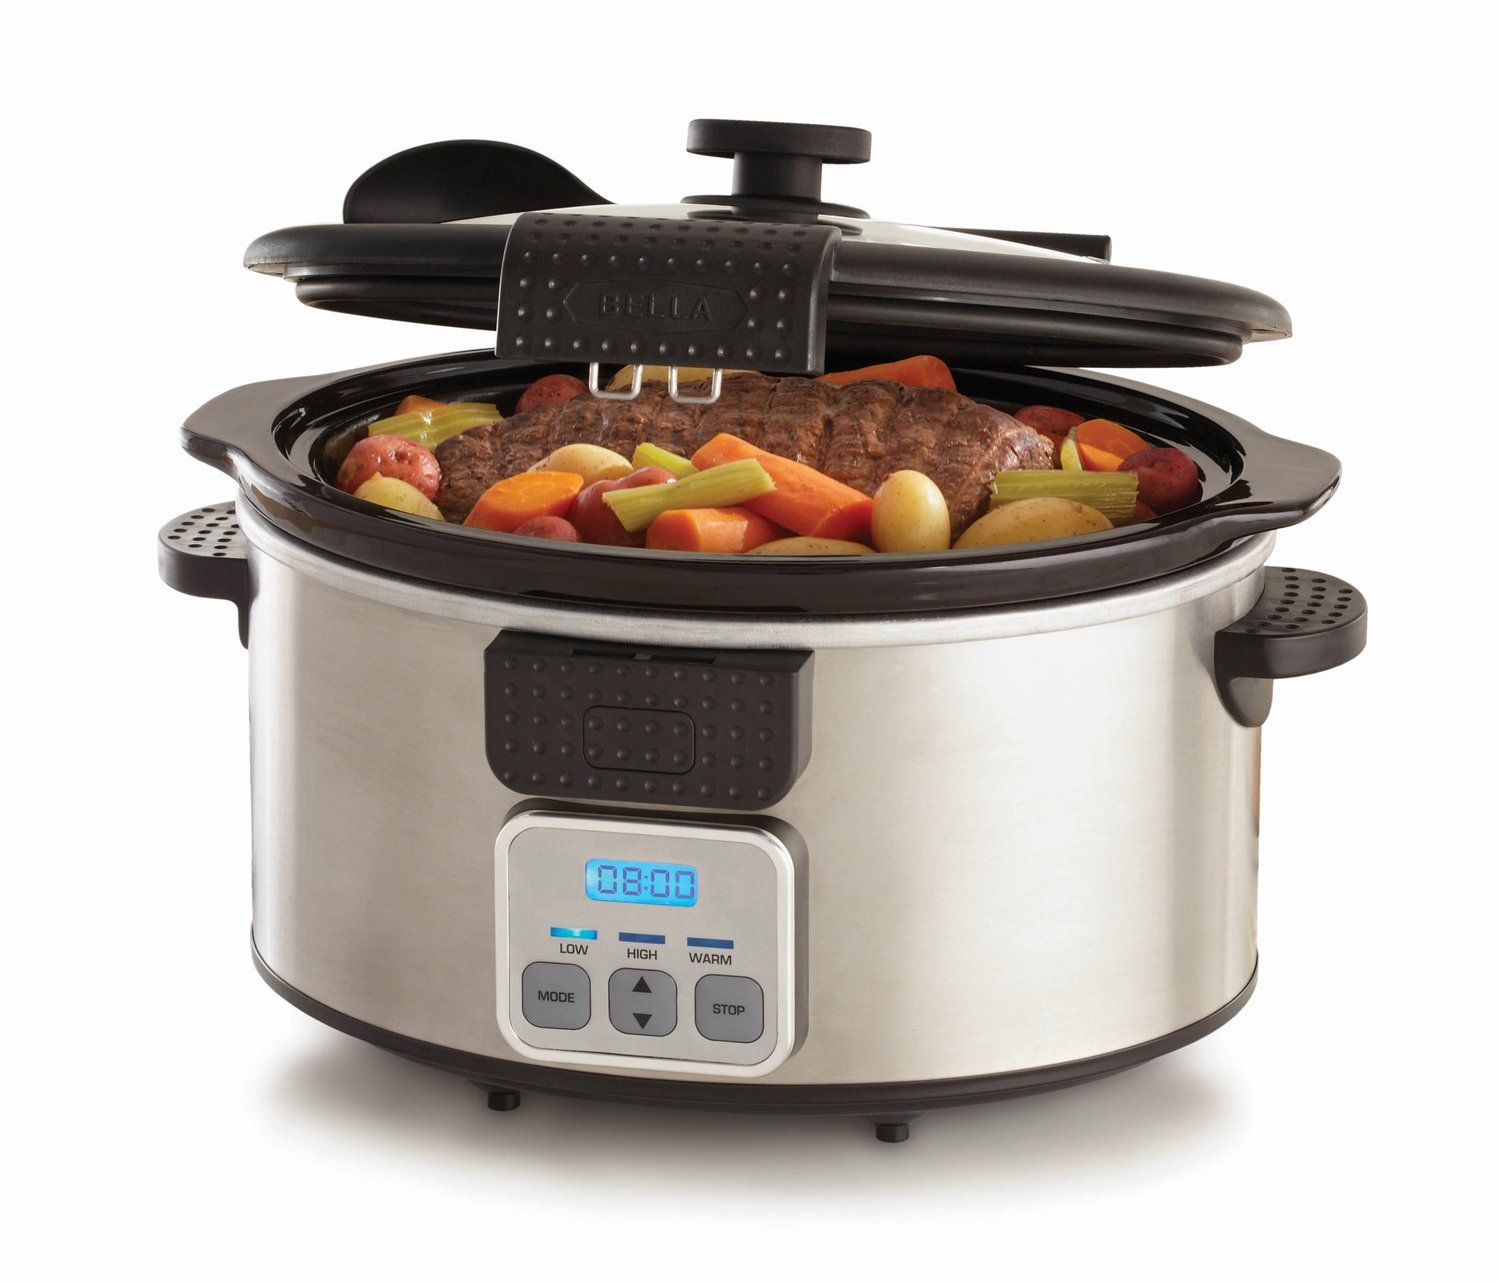
The slow cooker method is a popular and foolproof way to cook a chuck roast. This technique allows the meat to cook slowly and gently, resulting in a tender and flavorful roast. Here’s a step-by-step guide on how to use a slow cooker to prepare a mouthwatering chuck roast:
Step 1: Searing the Roast
Start by searing the chuck roast to add depth of flavor and create a nice crust. Heat a large skillet or Dutch oven over medium-high heat and add a small amount of oil. Carefully place the seasoned roast in the hot pan and sear it on all sides until browned, about 2-3 minutes per side. This step helps enhance the color, texture, and taste of the roast.
Step 2: Preparing the Vegetables
While the roast is searing, prepare your vegetables. The classic vegetable combination for a chuck roast includes onions, carrots, and potatoes. Peel and chop the onions, peel and cut the carrots into chunks, and wash and dice the potatoes. These vegetables will add flavor to the roast and create a delicious side dish.
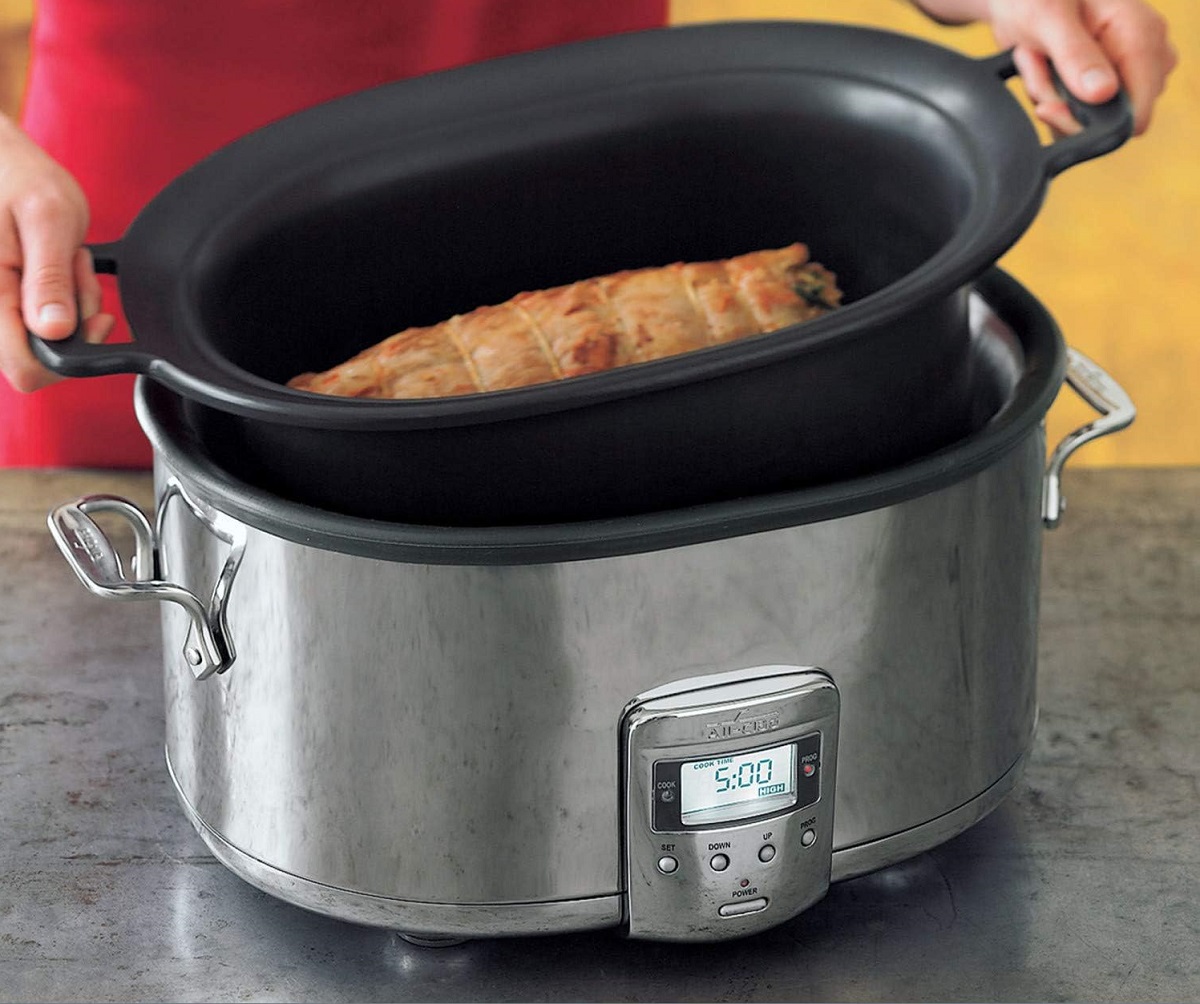
Step 3: Placing the Roast and Vegetables in the Slow Cooker
Once the roast is seared, transfer it to the slow cooker. Place the seared chuck roast in the center of the slow cooker, and then arrange the prepared vegetables around the roast. This allows the vegetables to cook in the flavorful juices released by the roast, enhancing their taste.
Step 4: Cooking the Chuck Roast
Set the slow cooker to the desired cooking time and temperature. The low setting is typically recommended for slow cooking a chuck roast, as it allows the flavors to develop and the meat to become tender. Cook the roast for approximately 8-10 hours on low or 4-6 hours on high, depending on the size and desired level of tenderness. This long, slow cooking time breaks down the tough connective tissues and turns the chuck roast into a melt-in-your-mouth delight.
Step 5: Checking for Doneness
After the recommended cooking time, check the chuck roast for doneness. Insert a fork into the meat and gently twist it. If it easily shreds or pulls apart, the roast is done. If it is still firm, continue cooking for another 30 minutes to an hour and check again. The internal temperature of the roast should reach at least 145°F (63°C) for medium doneness.
Step 6: Resting and Serving
Once the roast is done, carefully remove it from the slow cooker and let it rest for 10-15 minutes before slicing. Resting allows the juices to redistribute and ensures a juicy and flavorful roast. Slice the chuck roast against the grain into thick slices and serve it with the cooked vegetables. You can also strain the juices from the slow cooker, skim off any excess fat, and serve it as a delicious au jus.
The slow cooker method is a convenient and reliable way to cook a tender and flavorful chuck roast. The long and slow cooking process allows the flavors to meld together, resulting in a mouthwatering meal that will impress your guests. In the next section, we will explore alternative cooking methods for preparing a chuck roast.
Read more: How To Cook Sirloin Roast In Slow Cooker
Step 1: Searing the Roast
The first step in preparing a chuck roast using the slow cooker method is to sear the meat. Searing involves browning the surface of the roast to develop a rich, caramelized crust that adds depth of flavor to the dish.
To start, heat a large skillet or Dutch oven over medium-high heat. Add a small amount of oil to the pan and allow it to heat up until shimmering. The oil helps prevent sticking and promotes even browning.
While the pan is preheating, pat the chuck roast dry with paper towels. Removing excess moisture from the surface of the meat is essential for achieving a good sear. It allows the meat to brown rather than steam, resulting in a more flavorful sear.
Once the oil is hot, carefully place the seasoned chuck roast into the pan. Use tongs or a spatula to avoid any splattering of hot oil. Allow the roast to sear undisturbed for 2-3 minutes, or until the bottom develops a beautiful brown crust.
Once the bottom is nicely seared, flip the roast using tongs or a sturdy spatula to sear the other side. Repeat the process, allowing the roast to sear for an additional 2-3 minutes. The goal is to achieve a browned crust on all sides of the roast.
During the searing process, you may notice that the pan develops brown bits stuck to the bottom. These brown bits, also known as fond, are concentrated flavor bombs that will add depth to your dish. Do not discard these bits, as we will deglaze the pan later to incorporate their flavors into the slow cooker.
Once the chuck roast is fully seared on all sides, remove it from the pan and set it aside. The meat will not be fully cooked at this point, but the seared crust will contribute to the overall flavor and appearance of the roast.
By searing the chuck roast before slow cooking, you enhance its taste and texture. The caramelized crust adds depth of flavor and creates a visually appealing presentation. Now that the roast is seared, we can move on to the next step of preparing the vegetables to accompany the roast in the slow cooker.
Step 2: Preparing the Vegetables
While the seared chuck roast rests, it’s time to prepare the vegetables that will accompany the roast in the slow cooker. The classic combination of onions, carrots, and potatoes pairs perfectly with the rich flavors of the chuck roast, creating a delicious and well-rounded meal.
To prepare the vegetables:
- Onions: Peel the onions and chop them into large chunks. The exact size of the chunks will depend on your personal preference. Some prefer smaller pieces that melt into the dish, while others prefer larger, more distinct chunks.
- Carrots: Peel the carrots and cut them into thick chunks or slices. Again, the size can be adjusted based on personal preference. Thicker chunks will hold up better during the long cooking process, while thinner slices will cook faster and become softer.
- Potatoes: Wash and dice the potatoes into chunks. These chunks will cook alongside the chuck roast, absorbing the delicious flavors and becoming tender. Leave the skin on for added texture, or peel them if desired.
Feel free to add other vegetables to the mix, such as garlic cloves, celery, or mushrooms, to further enhance the flavors. These vegetables will complement the chuck roast and create a flavorful side dish.
Once the vegetables are prepared, set them aside for now. We will add them to the slow cooker along with the seared chuck roast in the next step.
Preparing the vegetables in advance allows you to save time during the actual cooking process. It also ensures that the vegetables cook evenly alongside the roast, absorbing its flavors and becoming tender. With the vegetables ready, we’re now ready to move onto the next step, which involves placing the roast and vegetables in the slow cooker.
Step 3: Placing the Roast and Vegetables in the Slow Cooker
Now that the chuck roast has been seared and the vegetables have been prepared, it’s time to bring everything together in the slow cooker. The slow cooker will create a low and steady heat environment that will cook the roast and vegetables to perfection.
To place the roast and vegetables in the slow cooker:
- Slow Cooker Preparation: Before adding any ingredients, make sure your slow cooker is clean and in proper working condition. Follow the manufacturer’s instructions for using and setting the slow cooker temperature. Some models may require preheating, while others can be set to the desired temperature from the start.
- Roast Placement: Carefully place the seared chuck roast in the center of the slow cooker. Position it with the seared side facing up to prevent excessive moisture loss during cooking. The roast should fit comfortably in the slow cooker, with enough space around it for the vegetables.
- Vegetable Arrangement: Arrange the prepared vegetables around the roast in the slow cooker. Ensure that they are evenly distributed and surround the roast for even cooking. This allows the vegetables to soak up the flavorful juices released by the roast during the slow cooking process.
Ensure that the slow cooker is not overfilled, as this can interfere with even heat distribution. Leave about an inch of space between the top of the ingredients and the rim of the slow cooker to allow for proper circulation and cooking.
If desired, you can add additional liquid to the slow cooker at this stage. This can include beef broth, red wine, or a combination of both, which will contribute to the flavor of the dish. However, the natural juices released by the roast and vegetables should be sufficient to create a flavorful and moist outcome.
With the roast and vegetables placed in the slow cooker, you are ready to move on to the cooking process. In the next step, we will explore the recommended cooking time and temperature for a perfectly cooked chuck roast.
Step 4: Cooking the Chuck Roast
Once the chuck roast and vegetables are placed in the slow cooker, it’s time to let them cook low and slow to achieve a tender and flavorful result. Slow cooking allows the collagen in the meat to break down, resulting in a moist and melt-in-your-mouth texture. Here’s how to cook the chuck roast:
- Setting the Temperature: Depending on your slow cooker model and the desired cooking time, set the temperature to low or high. Cooking the chuck roast on low heat is recommended to ensure thorough cooking and optimal tenderness. If you prefer a quicker cooking time, you can choose the high heat setting. However, keep in mind that the low setting will yield the best results.
- Cooking Time: The cooking time for a chuck roast in the slow cooker can vary depending on the size of the roast and the desired level of tenderness. As a general guideline, cook the chuck roast for approximately 8-10 hours on low or 4-6 hours on high. The low setting allows the flavors to develop gradually and the meat to become tender. However, keep an eye on the roast as it cooks to prevent overcooking and ensure the desired level of doneness.
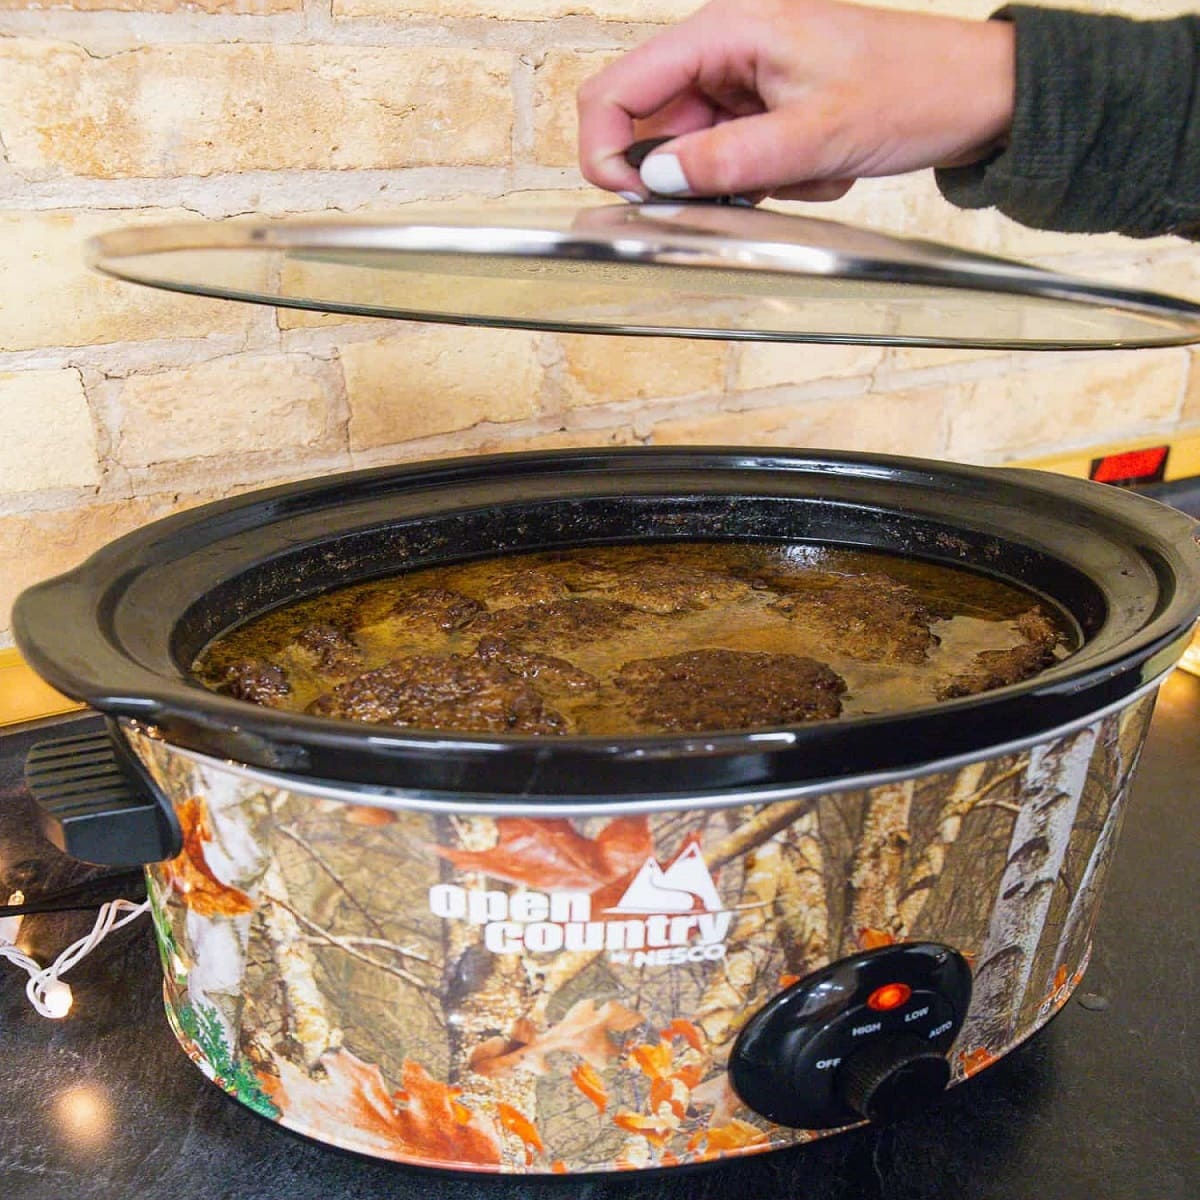
- Avoid Lifting the Lid: While the chuck roast is cooking in the slow cooker, it’s important to resist the temptation to lift the lid. Opening the lid releases valuable heat and prolongs the cooking time. Each time the lid is lifted, the slow cooker needs time to regain its temperature, which can hinder the cooking process. Only check the roast for doneness when it nears the recommended cooking time.
- Basting (Optional): If desired, you can baste the chuck roast with the cooking juices during the cooking process. This helps to keep the meat moist and enhances the flavor. Use a ladle or spoon to gently pour the juices over the roast, taking care not to disturb the vegetables.
Remember that the key to a tender and delicious chuck roast is patience. Allow the slow cooker to work its magic, transforming the tough cut of meat into a mouthwatering main dish. The long cooking time ensures that the flavors meld together and the roast becomes fork-tender.
As the chuck roast cooks, the aroma will gradually fill your kitchen, building anticipation for the flavorful meal that awaits. In the next step, we will discuss how to check the chuck roast for doneness to ensure it’s perfectly cooked.
Read more: How To Cook A Rump Roast In Slow Cooker
Step 5: Checking for Doneness
When slow cooking a chuck roast, it’s essential to check for doneness to ensure that it’s cooked to perfection. While the recommended cooking time provides a general guideline, the actual cooking time may vary depending on the size of the roast and the heat of your slow cooker. Here’s how to check if the chuck roast is done:
- Fork Test: The most common method to check for doneness is the fork test. Use a fork or tongs to gently poke the chuck roast. If the meat easily shreds or pulls apart, it is likely done and tender. The meat should be moist, flavorful, and easily separable with little resistance.
- Internal Temperature: For a more precise measurement, you can use a meat thermometer to check the internal temperature of the chuck roast. The minimum safe internal temperature for beef is 145°F (63°C) for medium doneness. Insert the thermometer into the thickest part of the roast without touching the bone. If the temperature reads 145°F (63°C) or higher, the roast is ready to be removed from the slow cooker.
It’s important to note that the longer you slow cook the chuck roast, the more tender it will become. If you prefer a falling-apart texture, you can cook the roast for a longer period until it reaches the desired tenderness. However, be careful not to overcook it, as the meat may become dry and stringy.
If the roast is not yet done, return it to the slow cooker and continue cooking for an additional 30 minutes to an hour. Check for doneness again using the fork or thermometer method. Remember to keep the lid closed during the cooking process to maintain the heat and moisture in the slow cooker.
Once the chuck roast is done, carefully remove it from the slow cooker using tongs or a sturdy spatula. Transfer it to a cutting board and let it rest for about 10-15 minutes. Resting allows the juices to redistribute, ensuring a moist and flavorful roast.
With the chuck roast cooked to perfection, it’s time to move on to the final step – resting and serving the roast with the deliciously cooked vegetables.
Step 6: Resting and Serving
After the chuck roast has finished cooking, it’s important to let it rest before slicing and serving. Resting allows the juices to redistribute throughout the meat, resulting in a juicier and more flavorful roast. Here’s how to rest and serve the chuck roast:
- Resting: Carefully transfer the cooked chuck roast from the slow cooker to a cutting board using tongs or a sturdy spatula. Tent the roast loosely with aluminum foil to retain heat and let it rest for about 10-15 minutes. Resting allows the muscle fibers to relax, which helps to retain moisture and ensures a more tender and succulent roast.
- Slicing: After the resting period, it’s time to slice the chuck roast. Using a sharp carving knife or a chef’s knife, cut the roast against the grain into thick slices. Cutting against the grain helps to ensure more tender and easy-to-chew meat. Aim for slices that are about 1/2 to 3/4 inch thick, or adjust based on your preference.
- Serving: Transfer the sliced chuck roast to a serving platter or individual plates. You can arrange the slices beautifully, overlapping them slightly for an appealing presentation. Surround the roast slices with the cooked vegetables, spooning some of the flavorful cooking juices over the top. The cooking juices serve as a delicious sauce, enhancing the flavors of the roast and vegetables.
- Au Jus: If desired, you can strain the cooking juices from the slow cooker to create a homemade au jus. Skim off any excess fat and serve the au jus on the side in a small bowl or gravy boat. This savory and flavorful sauce pairs perfectly with the chuck roast and can be drizzled over the meat and vegetables at the table.
Once the roast and vegetables are plated and garnished, your slow-cooked chuck roast is ready to be enjoyed. Serve it with your favorite side dishes, such as mashed potatoes, roasted vegetables, or a fresh salad, to complete the meal. The tender and flavorful meat, along with the perfectly cooked vegetables, will be sure to impress your family and friends.
Remember, the resting period is a crucial step in achieving the best results. Though it may be tempting to dig in immediately, allowing the roast to rest ensures a more enjoyable eating experience. So, be patient, savor the aroma in the air, and get ready to indulge in a delicious and satisfying meal.
With the chuck roast rested and served, you’ve successfully completed the slow cooker method. Alternatively, there are other cooking methods you can explore, such as oven roasting or pressure cooking, to achieve equally delicious results with your chuck roast. These alternative methods will be discussed in the next section.
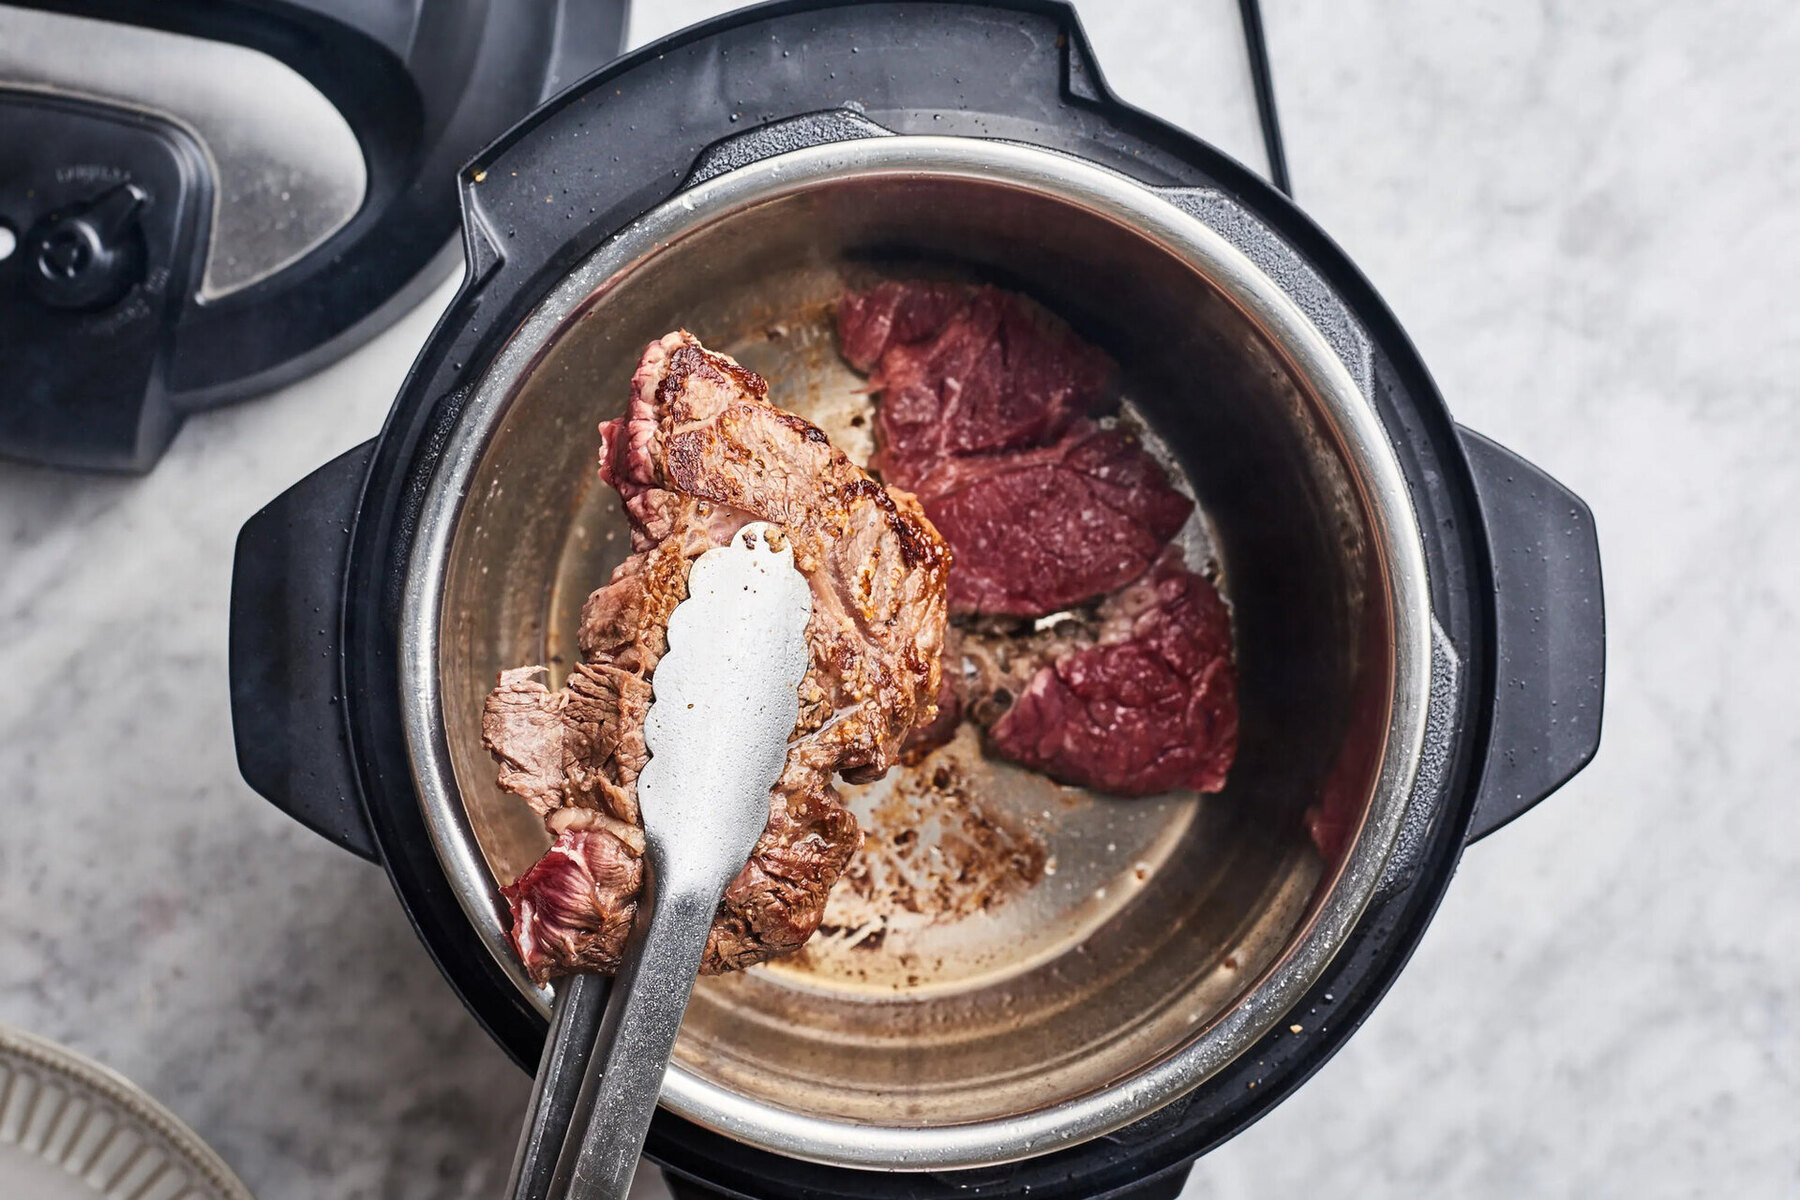
For a flavorful chuck roast in the slow cooker, sear the meat on all sides before placing it in the slow cooker. This will help lock in the juices and enhance the overall flavor of the roast.
Alternative Cooking Methods
While the slow cooker method is a popular and reliable way to cook a chuck roast, there are alternative cooking methods that can produce equally delicious results. These methods offer different techniques and flavors, allowing you to choose the one that best suits your preferences and available time. Here are two alternative cooking methods for preparing a mouthwatering chuck roast:
Oven Roasting
Oven roasting is a versatile method that yields a tender and flavorful chuck roast with a beautifully caramelized crust. Here’s how to oven roast a chuck roast:
- Preheat the Oven: Preheat your oven to a low temperature, typically around 275°F (135°C). This low and slow method ensures even and gentle cooking.
- Season the Roast: Prepare and season the chuck roast with your preferred blend of spices, herbs, salt, and pepper. Ensure that the roast is evenly coated with the seasoning.
- Place the Roast in a Roasting Pan: Transfer the seasoned roast to a roasting pan. If desired, you can place a rack in the pan to elevate the roast and promote even cooking.
- Cooking Time: Roast the chuck roast in the preheated oven for approximately 3-4 hours, or until the meat is fork-tender and reaches the desired level of doneness.
- Baste and Rest: Optional but recommended, baste the roast with its own juices periodically during the cooking process to enhance moisture and flavor. Once cooked, let the roast rest for 10-15 minutes before slicing and serving.
Read more: How To Cook A Pork Roast In Slow Cooker
Pressure Cooking
Pressure cooking is a faster alternative to slow cooking that results in a tender and juicy chuck roast in a fraction of the time. Here’s how to pressure cook a chuck roast:
- Season and Sear the Roast: Begin by seasoning the chuck roast with your desired spices. Preheat the pressure cooker on the sauté function and sear the roast on all sides until browned. Browning enhances flavor and appearance.
- Add Liquid: Once seared, pour in a small amount of liquid, such as beef broth or red wine, to deglaze the bottom of the pressure cooker and add flavor to the roast.
- Cooking Time: Secure the lid on the pressure cooker and set it to the appropriate cooking time according to the manufacturer’s instructions. Generally, pressure cooking a chuck roast takes around 45-60 minutes, depending on the size and desired level of tenderness.
- Natural Release: After pressure cooking, allow the pressure to release naturally for about 10-15 minutes. This ensures that the meat retains its moisture and remains tender.
- Slice and Serve: Carefully remove the chuck roast from the pressure cooker and slice it against the grain. Serve the tender meat with the cooking liquid as a flavorful sauce.
Both oven roasting and pressure cooking methods offer their own set of benefits and flavors. Oven roasting creates a beautifully browned crust and a more concentrated flavor, while pressure cooking saves time without sacrificing tenderness. Choose the method that aligns with your preferences and available resources.
Regardless of the cooking method you choose, a properly cooked chuck roast will reward you with a mouthwatering and satisfying meal. Remember to rest the roast before slicing to ensure optimal juiciness and flavor. Now that you have explored the alternative cooking methods, let’s move on to some helpful tips and tricks to further enhance your chuck roast cooking experience.
Oven Roasting
Oven roasting is a versatile and traditional method for cooking a chuck roast. This method allows for the development of a deliciously caramelized crust while tenderizing the meat, resulting in a flavorful and succulent roast. Here’s how to oven roast a chuck roast:
- Preheat the Oven: Begin by preheating your oven to a low temperature, typically around 275°F (135°C). This low heat setting ensures gentle and even cooking, allowing the chuck roast to become tender and juicy.
- Season the Roast: Prepare the chuck roast by seasoning it with your choice of herbs, spices, salt, and pepper. Consider using classic flavors like garlic powder, onion powder, thyme, rosemary, or a dry rub blend. Massage the seasoning into all sides of the roast to ensure even distribution.
- Choose a Roasting Pan: Select a roasting pan or a deep baking dish that is large enough to accommodate the size of your chuck roast with some extra space for airflow. A roasting rack can be used to elevate the roast, allowing hot air to circulate and promote even browning.
- Place the Roast in the Pan: Put the seasoned chuck roast into the roasting pan, fat-side up. This positioning allows the fat to render and baste the meat as it cooks, resulting in added moisture and flavor.
- Cooking Time: Place the roasting pan with the chuck roast into the preheated oven. The overall cooking time will depend on the size and desired level of doneness. As a general rule of thumb, roast the chuck for approximately 3-4 hours. Monitor the internal temperature with a meat thermometer to ensure that it reaches a safe minimum of 145°F (63°C) for medium doneness.
- Basting (Optional): Throughout the cooking process, you can baste the chuck roast with its own juices or a basting liquid of your choice. Simply use a baster or spoon to drizzle the liquid over the roast to keep it moist and enhance the flavor further.
- Rest and Carve: Once the chuck roast reaches the desired level of doneness, remove it from the oven and transfer it to a cutting board. Loosely tent it with aluminum foil and let it rest for 10-15 minutes. This resting period allows the juices to redistribute within the meat, resulting in a juicier and more tender roast. Then, carve the chuck roast against the grain into thick slices to ensure tenderness.
Oven roasting allows the chuck roast to develop a flavorful crust while simultaneously becoming tender and succulent. The slow and low cooking method of oven roasting results in a memorable and delicious meal that will impress your family and guests.
Now that you have mastered the art of oven roasting a chuck roast, it’s time to explore other cooking methods such as slow cooking or pressure cooking. Each method offers a unique approach to preparing this delectable cut of meat. And of course, don’t forget to incorporate your desired side dishes and enjoy a wonderful dining experience!
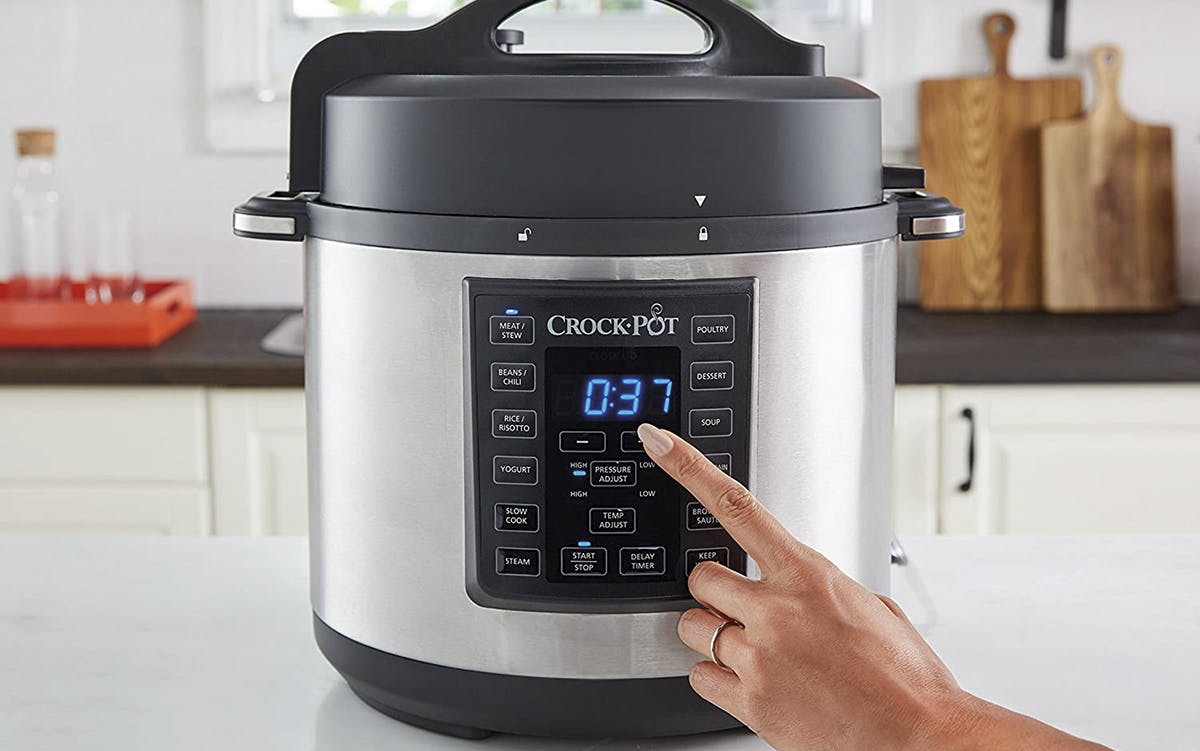
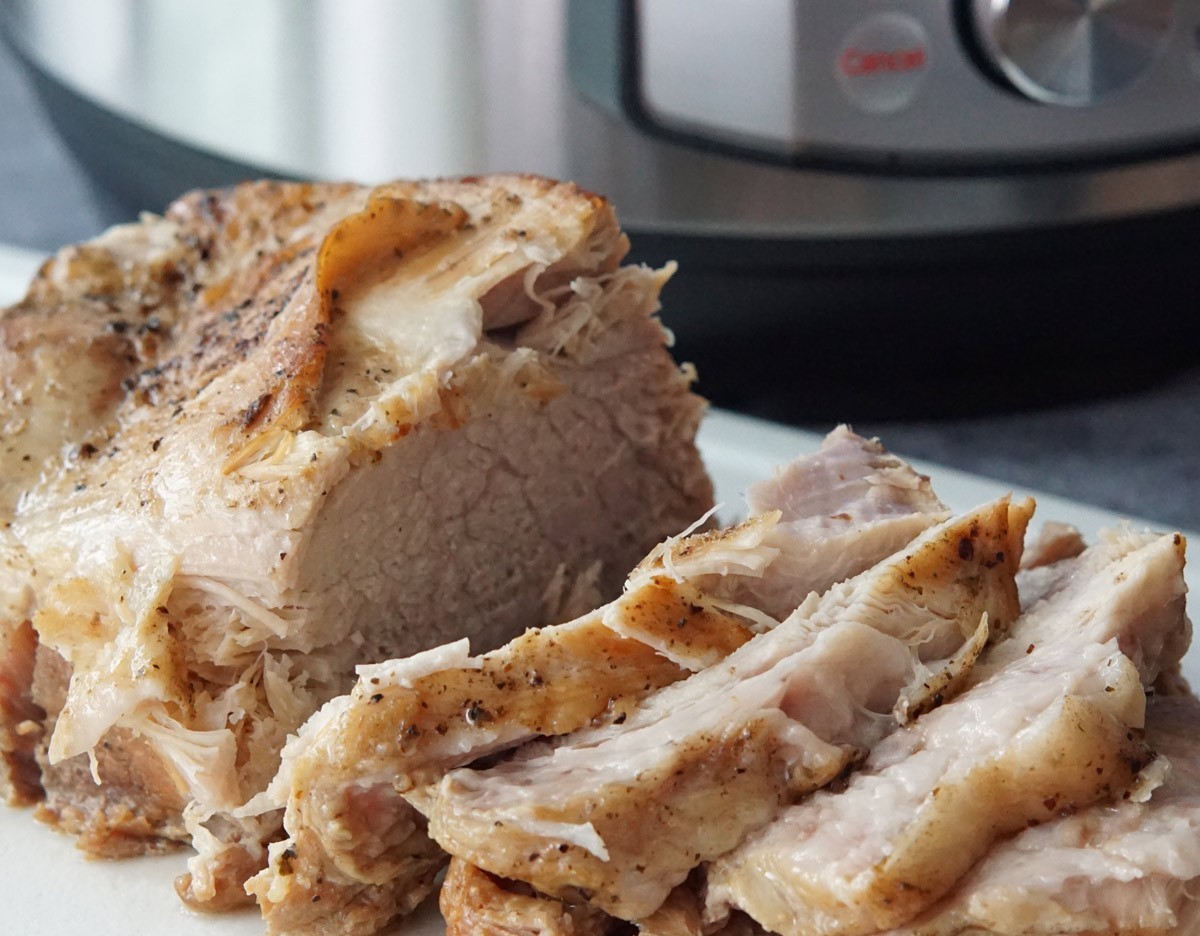
Pressure Cooking
Pressure cooking is a fast and efficient method that yields a tender and flavorful chuck roast in a fraction of the time compared to traditional methods. This cooking technique utilizes high-pressure steam to cook the roast quickly while retaining its moisture and tenderness. Here’s how to pressure cook a chuck roast:
- Season and Sear the Roast: Begin by seasoning the chuck roast with your preferred blend of spices, herbs, salt, and pepper. Preheat the pressure cooker on the sauté function and sear the roast on all sides until browned. Searing helps to develop a crust and enhances the overall flavor.
- Add Liquid: After searing the roast, add a small amount of liquid to the pressure cooker. This liquid can be beef broth, red wine, tomato juice, or a combination of flavors. The added liquid will not only contribute to the flavor but also create steam and help pressurize the cooker.
- Cooking Time: Secure the lid on the pressure cooker according to the manufacturer’s instructions. Set the pressure cooker to the appropriate cooking time, usually around 45-60 minutes for a chuck roast. The cooking time may vary depending on the size and thickness of the roast, as well as the desired level of tenderness.
- Natural Release: After the cooking time has elapsed, allow the pressure to release naturally for about 10-15 minutes. This natural release helps to prevent moisture loss and maintain the tenderness of the meat. Avoid venting or quick release methods, as they may result in tougher meat.
- Remove and Rest: Carefully remove the chuck roast from the pressure cooker using tongs or a sturdy spatula. Place the roast on a cutting board and let it rest for about 10 minutes. This resting period allows the juices to redistribute within the meat, resulting in a juicier and more tender roast.
- Slice and Serve: After the resting period, slice the chuck roast against the grain into thick, juicy slices. Serve the slices with the cooking liquid as a flavorful sauce or gravy. You can also strain the liquid, skim off any excess fat, and thicken it with a bit of cornstarch or flour for a richer sauce.
Pressure cooking offers the convenience of quick cooking while preserving the delicious flavors of the chuck roast. The high-pressure steam ensures tender and succulent results, making it an excellent choice for busy cooks who want flavorful meals in less time.
Now that you have learned how to pressure cook a chuck roast, consider experimenting with different seasoning blends and liquids to create unique flavor profiles. The versatility of this method allows you to tailor the flavors to your preferences and explore different culinary possibilities.
Whether you choose to oven roast, slow cook, or pressure cook your chuck roast, each method has its own distinct advantages and can result in a delectable meal. Enjoy the process of preparing and savoring this versatile cut of meat, and let your taste buds revel in the flavorful and tender experience!
Tips and Tricks
Preparing a delicious chuck roast requires more than just following a recipe. Here are some tips and tricks to help you achieve the best results:
- Choose a Well-Marbled Roast: Look for a chuck roast with good marbling – thin streaks of fat throughout the meat. This marbling adds flavor and helps keep the roast moist during cooking.
- Trim Excess Fat: While some fat is desirable for flavor and moisture, trim any excess fat or silver skin from the roast to avoid a greasy texture.
- Season Generously: Don’t be shy when seasoning the roast. The slow cooking process can dull flavors, so be generous with your choice of herbs, spices, salt, and pepper to ensure a well-seasoned and flavorful roast.
- Sear the Roast: Before slow cooking, sear the chuck roast on all sides to develop a rich crust. Searing adds depth of flavor and enhances the overall appearance of the roast.
- Choose the Right Vegetables: Pair the chuck roast with complementary vegetables like onions, carrots, and potatoes. These vegetables cook alongside the roast, absorbing the flavors and adding a delicious side dish.
- Utilize the Slow Cooker: If using a slow cooker, avoid lifting the lid during the cooking process, as this will release heat and increase cooking time. Only check the roast for doneness when it nears the recommended cooking time.
- Baste the Roast: Basting the roast with its cooking juices throughout the cooking process will help keep it moist and flavorful. Use a ladle or spoon to gently drizzle the juices over the roast.
- Rest before Slicing: After cooking, allow the chuck roast to rest for about 10-15 minutes before slicing. Resting allows the juices to redistribute, resulting in a juicier and more tender roast.
- Slice against the Grain: When carving the roast, slice against the grain to ensure tenderness. Cutting against the grain shortens the fibers, making the meat easier to chew.
- Serve with Au Jus or Gravy: Enhance the flavors of the chuck roast by serving it with the cooking juices as an au jus or gravy. These liquids complement the meat and can be spooned over the slices for added flavor.
Remember, practice makes perfect. Don’t be afraid to experiment with different seasonings, cooking times, and methods to find the combination that suits your taste preferences. It’s all about learning and tailoring the cooking process to create exceptional meals.
By following these tips and tricks, you will be well-equipped to prepare a mouthwatering chuck roast that will impress your family and friends. Enjoy the process, savor the flavors, and create memorable dining experiences with this versatile and delicious cut of meat. Happy cooking!
Conclusion
Cooking a chuck roast is a delightful culinary adventure that rewards you with a flavorful and tender meal. Whether you choose to slow cook, oven roast, or pressure cook, each method brings its own unique benefits and flavors to the table. By following the steps and tips outlined in this article, you can confidently prepare a mouthwatering chuck roast that will impress your family and friends.
Start by choosing a well-marbled chuck roast and preparing it properly by trimming excess fat and patting it dry. Season the roast generously with herbs and spices to enhance its flavor. Searing the roast before slow cooking or oven roasting adds a beautiful crust and depth of flavor. Place the seared roast in the slow cooker or roasting pan with aromatic vegetables, allowing them to absorb the savory juices.
Slow cooking in a crock-pot or oven roasting at a low temperature allows the chuck roast to become fork-tender, developing rich flavors and tenderizing the meat. Pressure cooking is a time-saving alternative that offers quick yet equally delicious results. Checking the chuck roast for doneness using the fork test or a meat thermometer helps ensure it is cooked to perfection.
Rest the cooked chuck roast before slicing to allow the juices to redistribute, resulting in a juicier and more flavorful final dish. Serve the sliced roast with the cooked vegetables and au jus or a flavorful gravy to enhance the eating experience.
Remember to get creative and adjust the seasonings and cooking techniques to suit your taste preferences. Through experimentation and practice, you can develop your own signature chuck roast recipe that will become a family favorite.
So, whether you’re hosting a special gathering or simply craving a comforting and satisfying meal, a well-prepared chuck roast is sure to impress. Enjoy the process, savor the flavors, and create lasting memories around the dinner table with this quintessential comfort food.
Now armed with the knowledge and techniques outlined in this article, it’s time to unleash your culinary skills and embark on a flavorful journey with a succulent chuck roast as your centerpiece!
Frequently Asked Questions about How To Cook A Chuck Roast In Slow Cooker
Was this page helpful?
At Storables.com, we guarantee accurate and reliable information. Our content, validated by Expert Board Contributors, is crafted following stringent Editorial Policies. We're committed to providing you with well-researched, expert-backed insights for all your informational needs.

0 thoughts on “How To Cook A Chuck Roast In Slow Cooker”