Articles
How to Perform RAID Data Recovery?
Modified: May 9, 2024
Learn the essentials of RAID data recovery, including key steps and techniques to restore lost data effectively.
(Many of the links in this article redirect to a specific reviewed product. Your purchase of these products through affiliate links helps to generate commission for Storables.com, at no extra cost. Learn more)
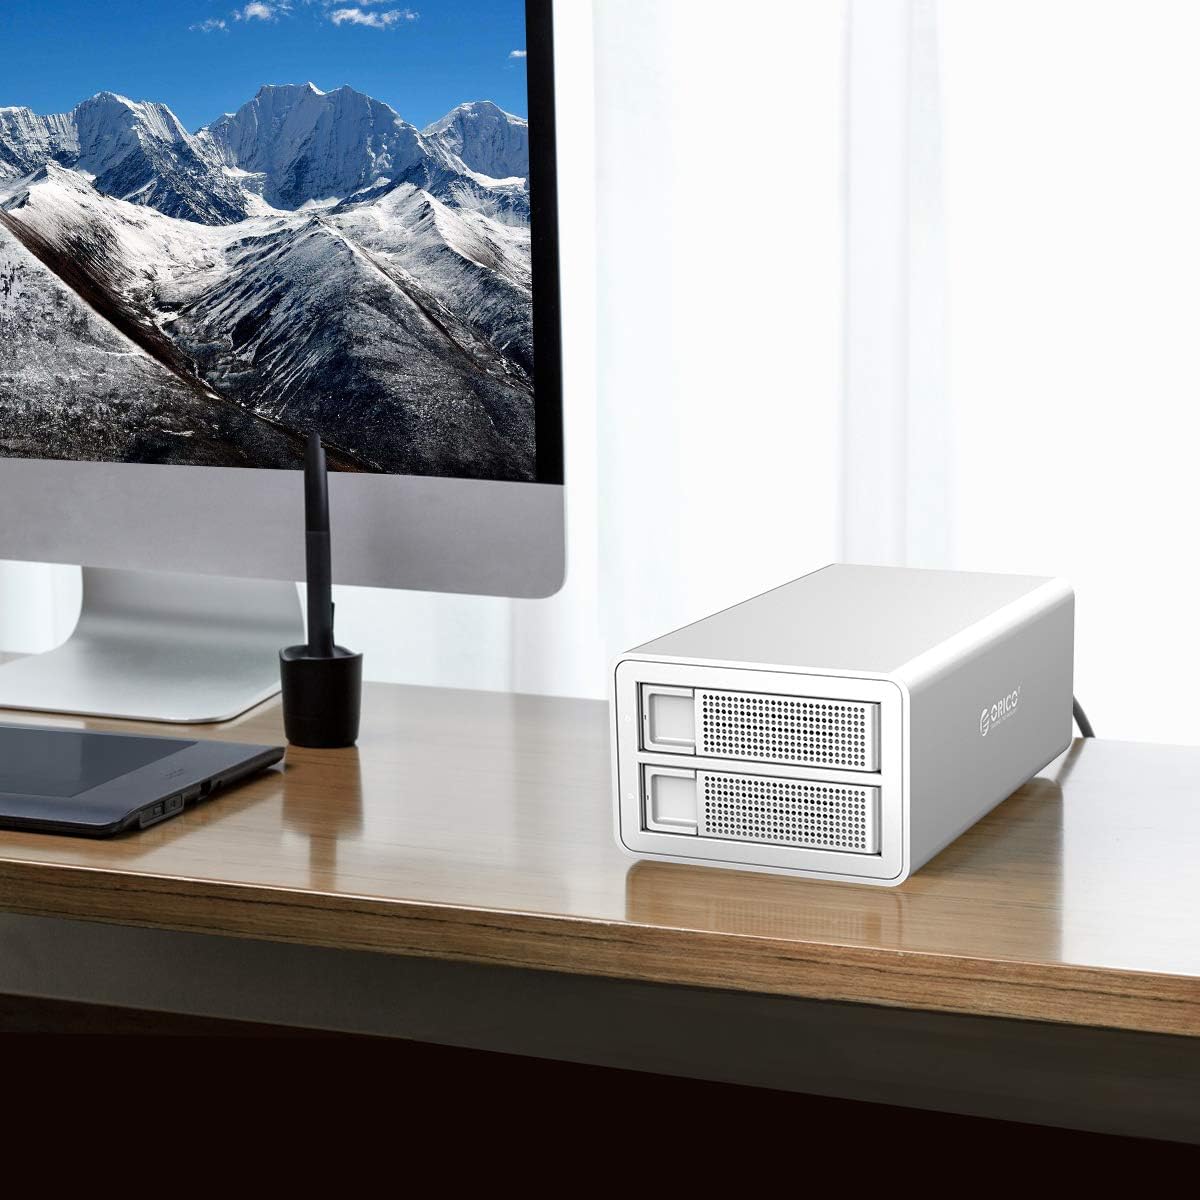
RAID (Redundant Array of Independent Disks) is a bunch of two or more drives that act as a single unit. Over the years, RAID has been an excellent solution for higher data storage capacity, improved performance, and data redundancy. Unlike traditional hard disks and SSDs, RAID can withstand drive/s failure depending on the RAID levels. Considering all such benefits, NAS users have started implementing RAID in the server.
However, even though RAID offers its users multiple advantages, it is still prone to drive errors and failures that lead to data loss. Moreover, since various drives exist in the RAID architecture, data recovery could be challenging and time-consuming unless you know your best way out. Don’t worry, though! This article guides you through an overview of RAID levels and the process of RAID data recovery.
Overview of RAID Levels
Different RAID levels are available, including RAID 0, 1, 5, and 6. Hybrid RAID or nested RAID levels are also available, including RAID 10 (1+0), RAID 50 (5+0), and RAID 60 (6+0). All these RAID levels are based on the three data storage mechanisms – Striping, Mirroring, and Parity. Depending on the RAID levels, you get higher performance and data redundancy, or both. For example:
- RAID 0 (Striping) offers the highest performance but lacks data redundancy. If one drive fails in the array, the whole array will fail.
- RAID 1 (Mirroring) can sustain one drive’s failure by duplicating the first drive’s data on the other drives in the array.
- RAID 5 and 6 offer good performance but can withstand one and two drives’ failure, respectively, with their Parity information included.
- RAID 10, 50, and 60 fall under the Hybrid RAID category, and they offer data redundancy while comprising the Mirroring and Parity information in their configuration as per the RAID level.
Considering all this, the RAID is also not immune to drive failures, controller failures, malfunctioning, and errors that ultimately put your data at risk. However, the risk could be mitigated by knowing how RAID data recovery works. Let’s read further without ado!
Read more: How To Store Data In Database
What Does RAID Data Recovery Mean?
RAID data recovery refers to retrieving lost, inaccessible, or deleted files, folders, emails, and other data from broken, crashed, or damaged RAID drives. It means recovering the necessary information and saving it to some other backup drive, cloud, or server to keep it safe for further reference and use. The recovery can be done manually or with an automated system.
However, manually recovering RAID data requires strong technical knowledge, expertise, and care. Additionally, one mistake and you could do more damage to the RAID and cause permanent data loss. Therefore, it is recommended to choose automated software such as Stellar Data Recovery Technician. It is a DIY RAID recovery tool that efficiently builds the RAID virtually and extracts data from it successfully, even if you don’t know the RAID parameters.
Continue reading this post to learn how data recovery for RAID works.
How to Perform RAID Data Recovery
Data recovery from RAID is undoubtedly not a duck soup. However, with the advanced data recovery software for RAID, such as Stellar Data Recovery Technician, by your side, you can do it quite easily. However, before you start with the actual process, begin with the initials as mentioned following:
Things to Do Before RAID Data Recovery
- Make a copy of all the drives in the RAID array
- Scan drives for errors or damage
- If all drives are in a healthy state, you’re good to proceed with the RAID data recovery.
- If any drive seems to have bad sectors or corruption, note it down.
- Use the copy of the affected drive to perform recovery, as the affected drive won’t be able to survive the recovery process and might fail the entire process.
- After that, note down the sequence in which the drives are aligned in the array.
- Attach the copied drive to the array, replace the affected drive, and connect the RAID to your system via USB or SATA cable.
Steps to Perform Data Recovery for RAID
- Download and install RAID Data Recovery Software on your system.
- Select ‘All Data’ from the ‘Select What to Recover’ screen, and click Next.

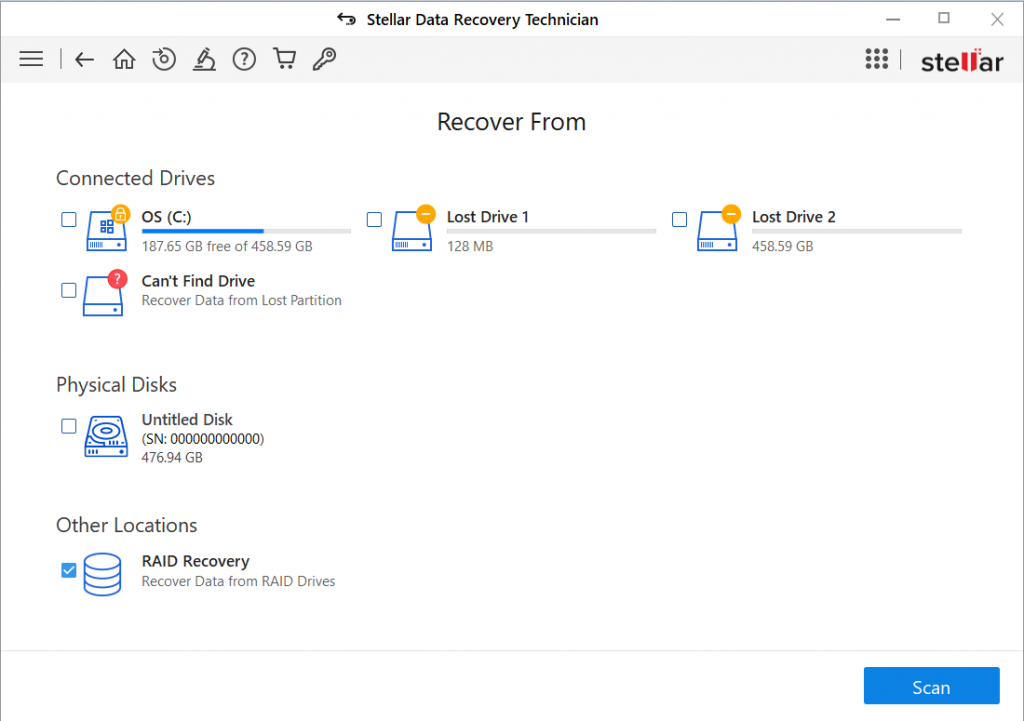
- Next, select RAID Recovery under Other Locations on Recover from the screen and click Scan.
- Select the RAID configuration from the left-top corner and select hard drives to reconstruct the RAID.
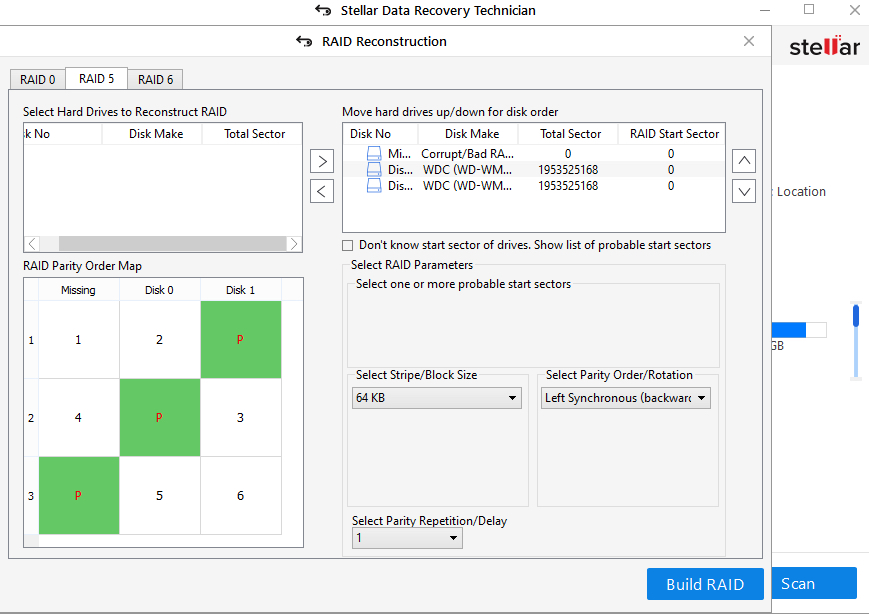
- Use the > arrow buttons to move the hard drives up/down for disk order.
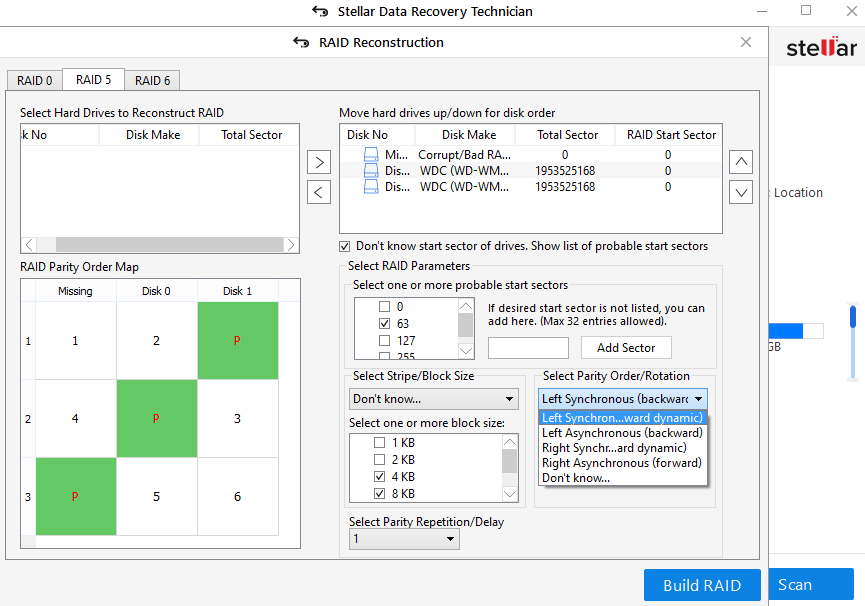
- Use the up or down arrow buttons to arrange the disks in sequence as they were in the RAID stack.
- If you know, enter the RAID parameters. Otherwise, select ‘Don’t know start sector of drives….’ from the respective options.
- Choose the probable start sectors, Stripe/Block size, and Parity Order/Rotation. Click Build RAID to reconstruct the failed RAID virtually.
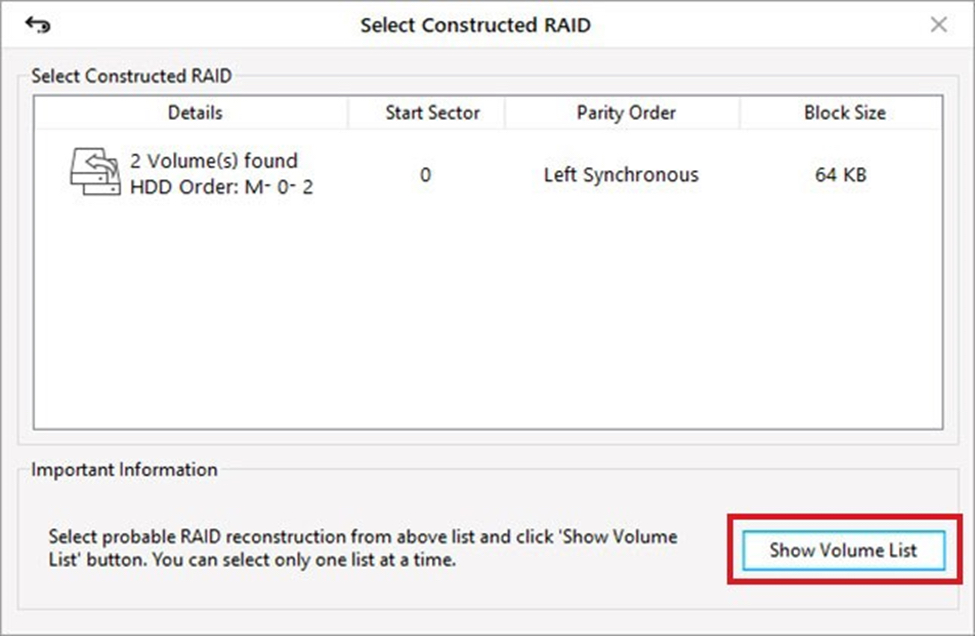
- After that, click ‘Show Volume List’ to view the reconstructed RAID drive(s).
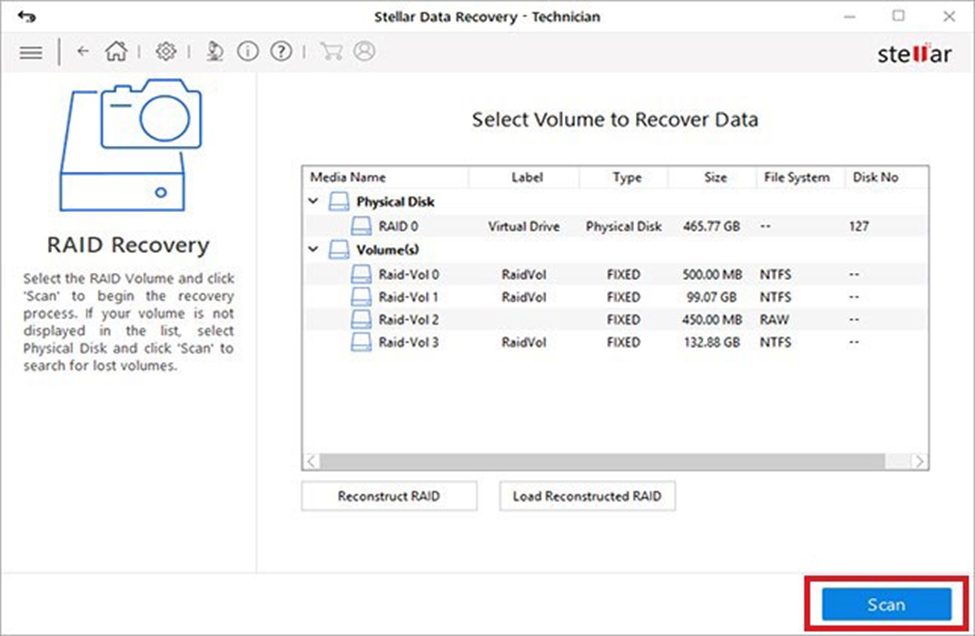
- Select the damaged/failed RAID drive from the list and Scan it.
- After the scan completion, choose the files/folders you want to retrieve and click Recover.
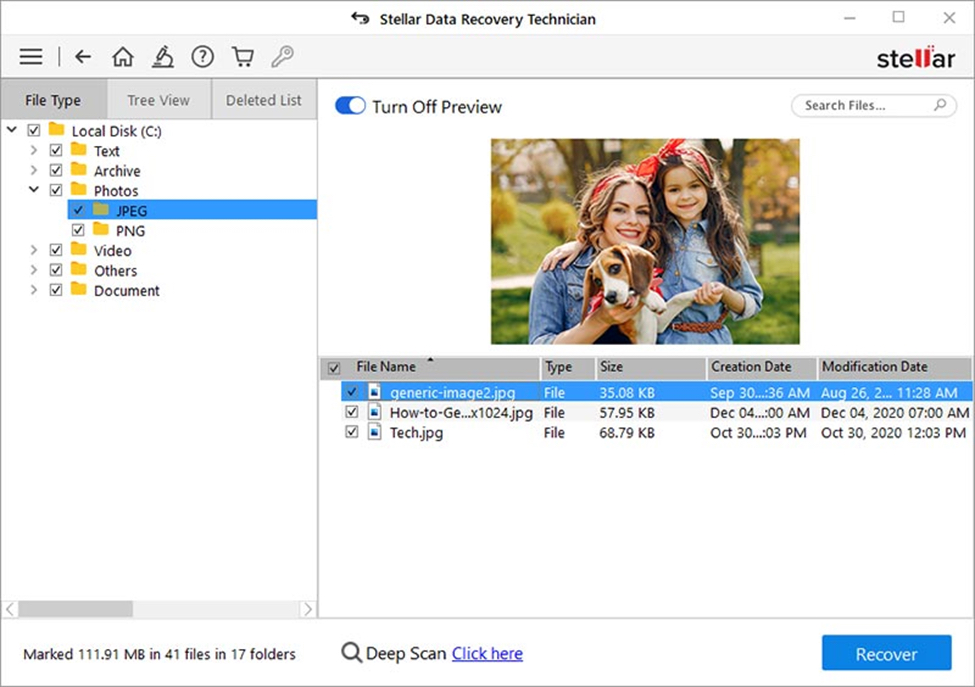
- Then, click Browse to choose the desired location and click Start-Saving to save the recovered data.
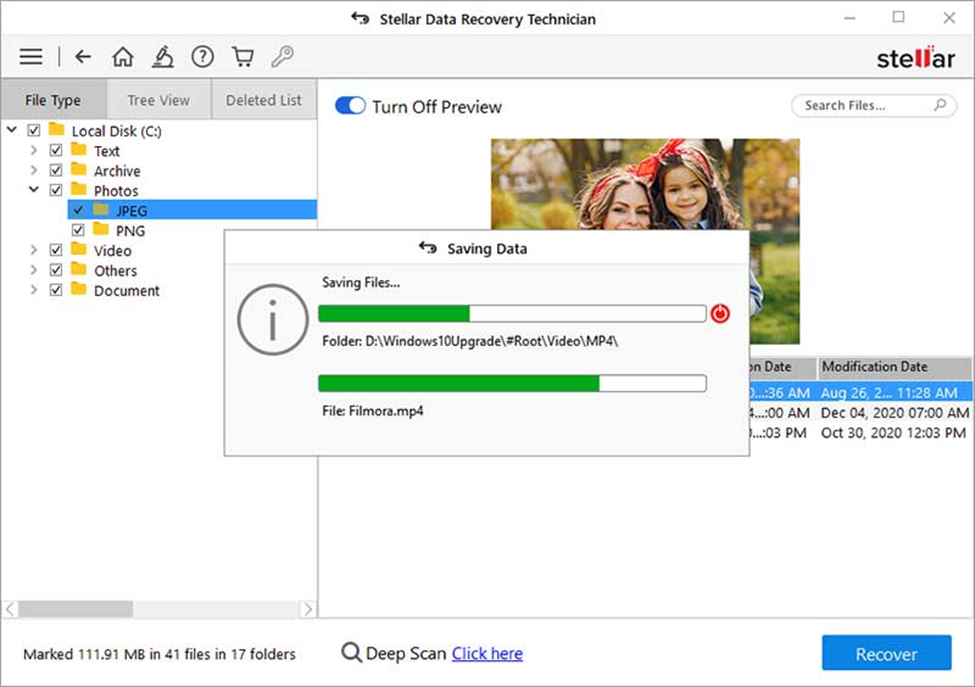
That’s it! RAID data recovery software will save the recovered data to your chosen location.
Read more: How To Store Data In Python
What to do After the RAID Data Recovery?
RAID recovery helps recover data from logically damaged, failed, or broken RAID arrays. However, RAID isn’t a substitute for Backups. So, ensure that once you’re done with the recovery process, you continue to take the backup of your RAID.
Also, you can run the Scan to check hard drives in the RAID stack monthly to monitor their health. This way, you can know the driver’s status and take precautionary actions to protect your data and drive from further damage.
Was this page helpful?
At Storables.com, we guarantee accurate and reliable information. Our content, validated by Expert Board Contributors, is crafted following stringent Editorial Policies. We're committed to providing you with well-researched, expert-backed insights for all your informational needs.


0 thoughts on “How to Perform RAID Data Recovery?”