
Articles
15 Best Idli Steamer for 2024
Modified: January 9, 2024
Looking for the best idli steamer for 2023? Discover the top 15 options for perfect fluffy idlis at home. Upgrade your cooking game today!
(Many of the links in this article redirect to a specific reviewed product. Your purchase of these products through affiliate links helps to generate commission for Storables.com, at no extra cost. Learn more)
When it comes to preparing the perfect idlis, having the right steamer can make all the difference. In 2023, there are plenty of options available that cater to every idli lover's needs. From compact designs for small kitchens to high-capacity steamers for large families, the 15 Best Idli Steamers for 2023 offer a diverse range of choices. These steamers not only ensure quick and efficient cooking but also help in achieving soft and fluffy idlis every time. Whether you are a seasoned idli enthusiast or just starting your culinary journey, these top-rated steamers are here to transform your idli-making experience.

Overall Score: 8/10
The Kuber Industries Plastic Big Idli, Dhokla Maker Combo Set is a versatile and convenient product that allows you to cook delicious and healthy idlis and dhokla in no time. Made of high-quality plastic, this combo set is 100% food grade and BPA free, ensuring the safety and healthiness of your meals. With its easy-to-use design, you can prepare idlis and dhokla in the microwave from the comfort of your home. The set includes three idli moulds and one dhokla pan, making it a must-have for any modern kitchen. Enjoy homemade idlis and dhokla with this innovative and efficient product.
Key Features
- Material: Plastic, Color: Blue
- Size: 20 x 20 x 14 Cm
- Made of Virgin Plastic material, 100% Food Grade & BPA Free
- Cooks Delicious and Healthy Idlis & Dhokla in a Microwave
- Must-have for any Modern Home
Specifications
- Color: Blue
- Dimension: 11.81Lx7.87Wx2.75H
Pros
- Easy to use and clean
- Quality product
- Value for money
- Cooks idlis and dhokla quickly and efficiently
Cons
- Received different color than expected
- Packaging could be better
The Kuber Industries Plastic Big Idli, Dhokla Maker Combo Set is a fantastic addition to any kitchen. It offers a simple and convenient way to cook delicious idlis and dhokla in the microwave. The plastic material is safe and durable, ensuring long-lasting performance. The set includes everything you need to make perfect idlis and dhokla, and it is easy to clean after use. While there may be some minor issues like receiving a different color or average packaging, overall, this combo set is great value for money. If you are a fan of Indian cuisine or simply want to try something new, this product is definitely worth considering.

Overall Score: 8.5/10
The Best Stainless Steel Idli Cooker Maker 3-Rack Idli Stand is a must-have kitchen appliance for idli lovers. Made with premium quality stainless steel, this idli stand ensures durability and even heat distribution. With a diameter of 7 inches, it can easily make 12 soft idlis or delicious dhoklas at a time. The idli slots are perfectly designed to accommodate both large and mini idlis. Additionally, this versatile cook n serve set can be used to prepare various other dishes like dhoklas and patras. The product is known for its top-notch quality and finishing. Fast delivery is also guaranteed to all customers.
Key Features
- Premium quality stainless steel construction
- 3 racks with 12 idli slots
- Perfectly designed slots for both large and mini idlis
- Multi-purpose cook n serve set
- Fastest delivery
- Weight: 0.350 grams
- Dimensions: Diameter: 7 inch (17.5 cm), Height: 4 inch (10 cm)
Specifications
Pros
- Premium quality construction
- Even heat distribution
- Versatile and multi-purpose
- Fast delivery
Cons
The Best Stainless Steel Idli Cooker Maker 3-Rack Idli Stand is a reliable and efficient kitchen tool for making perfect idlis and dhoklas. Its premium quality construction and even heat distribution ensure that you can enjoy soft and delicious idlis every time. The multi-purpose cook n serve set adds versatility to your cooking experience. With fast delivery, you can start preparing your favorite idlis and other dishes in no time. If you are an idli lover or enjoy Indian cuisine, this idli stand is a great addition to your kitchen.

Overall Score: 7/10
The IndiaBigShop Stainless Steel 4-Rack Idli Stand is a versatile and economical kitchen tool that allows you to make up to 16 idlis at a time. Made from high-quality stainless steel, this idli stand is durable and strong. It features four concave depressions on each tier for pouring the idli batter. The mini-hole mechanism ensures that the batter is thick and properly cooked for soft idlis. With its quick and convenient design, this idli stand is easy to clean. The plates are steam cooked without the use of oil, making it a healthy cooking option. The IndiaBigShop Stainless Steel 4-Rack Idli Stand is a must-have for all idli lovers.
Key Features
- Quick and convenient design
- Made from high-quality stainless steel
- Mini hole mechanism for perfect idlis
- Easy to clean
- Food grade material
Specifications
- Color: 4 Rack
- Dimension: 7.50Lx5.00Wx1.00H
- Size: 5 inch
Pros
- Versatile and economical
- Durable stainless steel construction
- Easy to clean
- Makes 16 idlis at a time
- Food grade material
Cons
- Some customers received damaged or used products
- Poor quality stainless steel
- Delicate plates
The IndiaBigShop Stainless Steel 4-Rack Idli Stand is a decent product for making delicious idlis at home. While it has received mixed reviews, its unique features like the mini hole mechanism and food grade material make it stand out. However, there have been complaints about the quality and condition of the product upon arrival. If you’re looking for a budget-friendly idli stand, this could be a good option, but be aware of the potential issues with the product’s quality. Overall, it offers convenience and versatility for idli lovers.

Overall Score: 7.5/10
Introducing the Tabakh 4-Rack Stainless Steel Idli Cooker with Strong Handles. This versatile cooker allows you to effortlessly make up to 16 delicious idlis at a time. Made from sturdy stainless steel, this cooker is built to last and is equipped with strong handles to prevent any breaking accidents. With its 4 racks, you can easily cook multiple batches of idlis in one go, saving you time and effort. The product has been made in India, ensuring its authenticity and quality. Its firm construction and user-friendly design make it a breeze to use. The Tabakh 4-Rack Stainless Steel Idli Cooker is a must-have for all idli lovers!
Key Features
- Stainless Steel Cooker and Rack
- Sturdy handles to prevent breaking
- 4 Idlis made per plate/rack; 4 Racks in this package
- Product has been made in India
- Firmly made and equipped for ease in use
Specifications
- Color: Silver
- Dimension: 10.00Lx10.00Wx11.00H
- Size: Small
Pros
- High-quality stainless steel material
- Easy to clean
- Can cook multiple batches of idlis at once
- Sturdy construction for long-lasting use
Cons
- The stands are too close, causing idlis to lose shape
- The lid can be difficult to open after cooking
- Some customers found the steel quality to be subpar
The Tabakh 4-Rack Stainless Steel Idli Cooker is a reliable and efficient tool for making delicious idlis. With its sturdy construction and strong handles, it ensures durability and safety during cooking. The ability to make 16 idlis at a time is a major time-saver for busy households. While some users found the stands to be too close together, resulting in imperfectly shaped idlis, the overall performance of this cooker is commendable. Keep in mind that the lid can be challenging to open, but using a standard lid cover from another pot can solve this issue. Despite some minor drawbacks, this cooker is a great addition to any idli lover’s kitchen.

Overall Score: 9.5/10
The Best Stainless Steel Idli Maker is a premium quality kitchen appliance that lets you easily cook up to 16 soft idlis or delicious dhoklas at a time. Made of high-quality stainless steel, this idli stand ensures even cooking and perfectly sized idlis. Its versatile design allows you to cook not just idlis, but also dhoklas, patras, and various other dishes. With its impeccable finishing and durable construction, this idli maker is built to last. It is a must-have cookware utensil for any kitchen. Experience the joy of making authentic idlis and other delectable dishes with this reliable and efficient idli maker.
Key Features
- Stainless Steel Premium Quality
- Makes 16 Idlis
- Evenly sized idli slots
- Multi-purpose cook n serve set
- Fastest delivery
Specifications
Pros
- High-quality stainless steel construction
- Evenly cooks soft idlis and delicious dhoklas
- Versatile design for various dishes
- Excellent finishing and durability
- Fast delivery
Cons
The Best Stainless Steel Idli Maker stands out as a reliable and efficient kitchen appliance that delivers perfectly cooked idlis and other dishes. Its premium quality stainless steel construction ensures durability and even cooking, allowing you to enjoy soft idlis and flavorful dhoklas. The versatile design adds value to this product, letting you explore various culinary possibilities. With its impeccable finishing and fast delivery, this idli maker is a must-have for any homemaker or cooking enthusiast. Bring the authentic taste of idlis and other traditional dishes to your home with the convenience and quality offered by this top-notch idli maker.

Overall Score: 6/10
The Tabakh Ckitze Stainless Steel Multi Kadai with Steamer Plate is a versatile and practical cooking utensil. Made from 100% food grade stainless steel, it ensures safe and healthy cooking. The induction base allows for compatibility with both induction and electric cooktops. With its strong and sturdy construction, this kadai is perfect for daily use. Its compact design minimizes storage space, while the modern engineering reduces cooking time. Use it to steam idlis or dhoklas, fry food, or cook vegetables. The set includes 1 kadai with lid, 2 dhokla plates, 2 idli plates, 1 mini idli plate, and 1 patra plate. Overall, it is a convenient and durable solution for your cooking needs.
Key Features
- Material: Stainless Steel
- Size: Kadai (28cm)
- Base type: Induction Base
- Included components: 1 Kadai With Lid, 2 Dhokla Plate, 2 Idli Plate, 1 Mini Idli Plate and 1 Patra Plate
- Safe cooking utensils made from 100% food grade stainless steel
- Base is also induction & electric compatible
- Strong and sturdy for daily use with premium quality Steel
- Dynamically structured to a compact design occupying minimum shelf space
- Modern design engineering to keep your cooking time minimal
- Steam your idlis or dhoklas in this stainless steel multi kadai
- Can also be used for frying or making vegetables
Specifications
- Color: Stainless Steel
- Dimension: 12.80Lx12.60Wx9.30H
- Size: Induction Friendly
Pros
- Made from safe and durable stainless steel
- Compatible with both induction and electric cooktops
- Strong and sturdy construction for daily use
- Compact design for easy storage
- Reduces cooking time
- Versatile – can be used for steaming, frying, and cooking vegetables
Cons
- Some customers experienced idlis sticking to the base
- Kadai has a plastic handle that melted during usage
The Tabakh Ckitze Stainless Steel Multi Kadai with Steamer Plate is a practical and versatile kitchen tool. While it offers safe and durable cooking with its premium stainless steel construction, some customers had issues with food sticking to the base and the plastic handle melting. However, its compact design, compatibility with induction and electric cooktops, and ability to steam, fry, and cook vegetables make it a useful addition to any kitchen. Overall, this multi kadai provides convenience and efficiency in your cooking endeavors.

Overall Score: 8/10
The Dynore Stainless Steel Multipurpose 4×4 Idli Plates Steamer Cooker Set of 5 is a versatile and efficient kitchen appliance. This cooker set is made of high-quality stainless steel, ensuring durability and even heat distribution. It features specially designed whistles that release extra steam, preventing any mishaps while cooking. The idli plates have a dimension of 18.5×18.5 cm, while the steamer measures 20.5×20.5×10.5 cm. With a weight of 894 grams, this cooker set is lightweight and easy to handle. The Dynore Stainless Steel Multipurpose 4×4 Idli Plates Steamer Cooker Set of 5 is the perfect addition to your kitchen for preparing delicious and healthy idlis.
Key Features
- Specially designed whistle for extra steam release
- Idli plates dimension: 18.5×18.5 cm
- Steamer dimension: 20.5×20.5×10.5 cm
- Weight: 894 grams
- Material: Steel
Specifications
- Dimension: 8.07Lx8.07Wx4.13H
Pros
- Durable stainless steel construction
- Efficient steam release prevents accidents
- Lightweight and easy to handle
- Suitable for preparing healthy idlis
Cons
The Dynore Stainless Steel Multipurpose 4×4 Idli Plates Steamer Cooker Set of 5 is a highly reliable and functional kitchen appliance. Its specially designed whistles ensure safe and efficient cooking, while the stainless steel construction guarantees durability. The compact size and lightweight nature make it convenient to use and store. If you’re a fan of idlis or looking to try out this healthy dish, this cooker set is a must-have. Prepare delicious idlis with ease using the Dynore Stainless Steel Multipurpose 4×4 Idli Plates Steamer Cooker Set of 5.

Overall Score: 7.5/10
The Tabakh 4-Rack Stand & Multi Purpose Plate Cooker is a stainless steel cook n serve set that makes 24 idlis and is perfect for cooking various dishes. It offers a full stainless steel body and pot type handles, making idli-making easier than ever before. With its multi-purpose design, you can also use it to cook dhoklas, patras, and more. The cooker comes in a sleek stainless steel color and has a dimension of 100.00Lx100.00Wx50.00H. Overall, it is a versatile and convenient tool for anyone who loves cooking traditional Indian dishes.
Key Features
- 4 Racks – Makes 24 Idlis
- Multi-purpose cook n serve set
- Cooks Idlis Dhoklas Patras & various other dishes
- Full stainless steel body
- Idli-making has never been easier
- Pot Type Handles
Specifications
- Color: Stainless Steel
- Dimension: 100.00Lx100.00Wx50.00H
- Size: Makes 24 Idlis
Pros
- Versatile and multi-purpose design
- Easy to use and clean
- Sturdy stainless steel body
Cons
- Issues with product quality and packaging
- Plastic parts have a bad smell
- No steam vent
The Tabakh 4-Rack Stand & Multi Purpose Plate Cooker is a reliable and convenient tool for making delicious idlis and various other dishes. While some customers have reported issues with the product quality and packaging, it offers great value for its price. The stainless steel body ensures durability and easy cleaning, while the multi-purpose design adds versatility to your cooking. However, the lack of a steam vent and the unpleasant smell from the plastic parts are drawbacks to consider. Overall, if you’re a fan of Indian cuisine and love making idlis, this cooker is a must-have addition to your kitchen.

Overall Score: 8/10
The Khandekar Stainless Steel 4-Rack Idli Maker is a versatile and economical tool for making delicious and soft idlis. With its quick and convenient design, you can easily stack and secure the trays through a center rod. Each tier has four concave depressions where the idli batter is poured, and the mini hole mechanism ensures that the batter is of the right consistency for perfect idlis. Made from high quality stainless steel, this idli maker is not only durable but also easy to clean. The compact and sturdy construction ensures that it will not bend or have dents during normal use. With the Khandekar Stainless Steel 4-Rack Idli Maker, you can enjoy homemade idlis anytime!
Key Features
- Quick and convenient Versatile and economical
- Finish Type – Stainless Steel, Number of Pieces – 4
- Food Grade Material and Exotic Shining
- The trays are stacked and secured through a center rod
- Mini Hole mechanism to serve as a check for thick and proper batter
- Made from high quality stainless steel
- Strong and durable construction
- Dimension – Diameter: Approx 7.5 inches, Height: 5 inches
- PMKRetail Quality Assurance – 100% satisfaction guaranteed
- 24-hour customer support
Specifications
- Dimension: 7.50Lx7.50Wx5.00H
Pros
- Quick and convenient to use
- Made of high quality stainless steel
- Durable construction
- Comes with 4 plates for making 16 idlis
- Food grade material ensures safety
Cons
- No handles for the plates
- Plates may not be suitable for large-sized idlis
The Khandekar Stainless Steel 4-Rack Idli Maker is a reliable and efficient tool for making delicious idlis at home. Its sturdy construction and high-quality materials ensure durability and safety. The mini hole mechanism helps in achieving the right consistency for soft and fluffy idlis every time. Although it lacks handles for the plates, this minor drawback is overshadowed by its overall performance and convenience. With its affordable price and excellent customer support, the Khandekar Stainless Steel 4-Rack Idli Maker is a must-have for every idli lover. Prepare a batch of 16 idlis effortlessly and enjoy a healthy breakfast or snack with this versatile idli maker.

Overall Score: 6.5/10
The PANCA Idli Maker (3 PLATE 18 IDLI) is a stainless steel idli maker that allows you to effortlessly prepare delicious idlis. With a capacity of 18 idlis, it is perfect for larger families or gatherings. The sturdy design ensures durability and even heat distribution for fluffy idlis. However, some users have reported issues with quality and rusting of the base. Overall, it is a decent idli maker with a plastic-free design, but it may not work on induction stoves. It is important to note that there have been mixed reviews regarding the product, with some customers praising its sturdiness while others expressing disappointment with the quality and customer service.
Key Features
- Idli maker
Specifications
- Color: Steel
- Dimension: 9.06Lx9.06Wx9.06H
- Size: 18 Idli big
Pros
- Sturdy design
- Easy to use and clean
- Large capacity for families or gatherings
Cons
- Quality issues reported by some users
- Base may rust after extended use
- May not work on induction stoves
The PANCA Idli Maker is a decent option for those looking to make a large batch of delicious idlis. Its sturdy design ensures durability and even heat distribution, resulting in fluffy idlis. However, some users have reported quality issues and rusting of the base after extended use. It may not work on induction stoves, which could be a drawback for some users. Overall, if you’re looking for a plastic-free idli maker with a decent capacity, the PANCA Idli Maker could be worth considering, but it’s important to carefully assess the potential quality concerns and compatibility with your stove.

Overall Score: 8.2/10
The Vinod Stainless Steel Multi Kadahi, Idli, Dhokla Maker is a versatile kitchen tool that allows you to steam idlis or dhoklas, fry food, or cook vegetables. Made with high-quality food-grade stainless steel, it features a thick encapsulated base with a clad aluminum core for even heat distribution. The mirror finish adds a touch of elegance to this multi kadai. It comes with 1 kadai with lid, 2 dhokla plates, 2 idli plates, and 1 patra plate, all with stainless steel handles. The kadai is induction friendly and suitable for various cooking methods. However, some users have reported that steam tends to escape when making idlis. While the handles are sharp, making it necessary to handle with care, the product is otherwise easy to use and clean. Overall, it is a reasonably priced kadai that works well for cooking idlis and more.
Key Features
- Material: Stainless Steel; Size: Kadai (26cm); Base type: Induction Base; Included components: 1 Kadai With Lid, 2 Dhokla Plate, 2 Idli Plate and 1 Patra Plate with Stainless Steel Handles; Colour: Silver
- Thick encapsulated base, with clad aluminium core for even heat distribution
- Crafted with food grade Stainless Steel, with a mirror finish
- Steam your idlis or dhoklas in this stainless steel multi kadai
- Perfect for frying or making vegetables
- Induction friendly
Specifications
- Size: Stainless Steel Multi Kadai
Pros
- Good quality and strong steel
- Versatile and useful for making idlis and more
- Reasonably priced
- Easy to wash
- Looks like a new item
Cons
- Steam tends to escape when making idlis
- Handles are sharp and require careful handling
- Not as thick base as expected
- Not induction friendly on some stoves
The Vinod Stainless Steel Multi Kadahi, Idli, Dhokla Maker is a reasonably priced and versatile kitchen tool. It allows you to steam idlis or dhoklas, fry food, and cook vegetables with ease. Made with high-quality stainless steel, it ensures even heat distribution and has a sleek mirror finish. While there have been some issues with steam escaping during idli making and the sharp handles, overall, it is an efficient and easy-to-use product. It is easy to wash and the perfect size for various cooking needs. If you are looking for a multi-purpose kadai at an affordable price, this one is worth considering.

Overall Score: 8/10
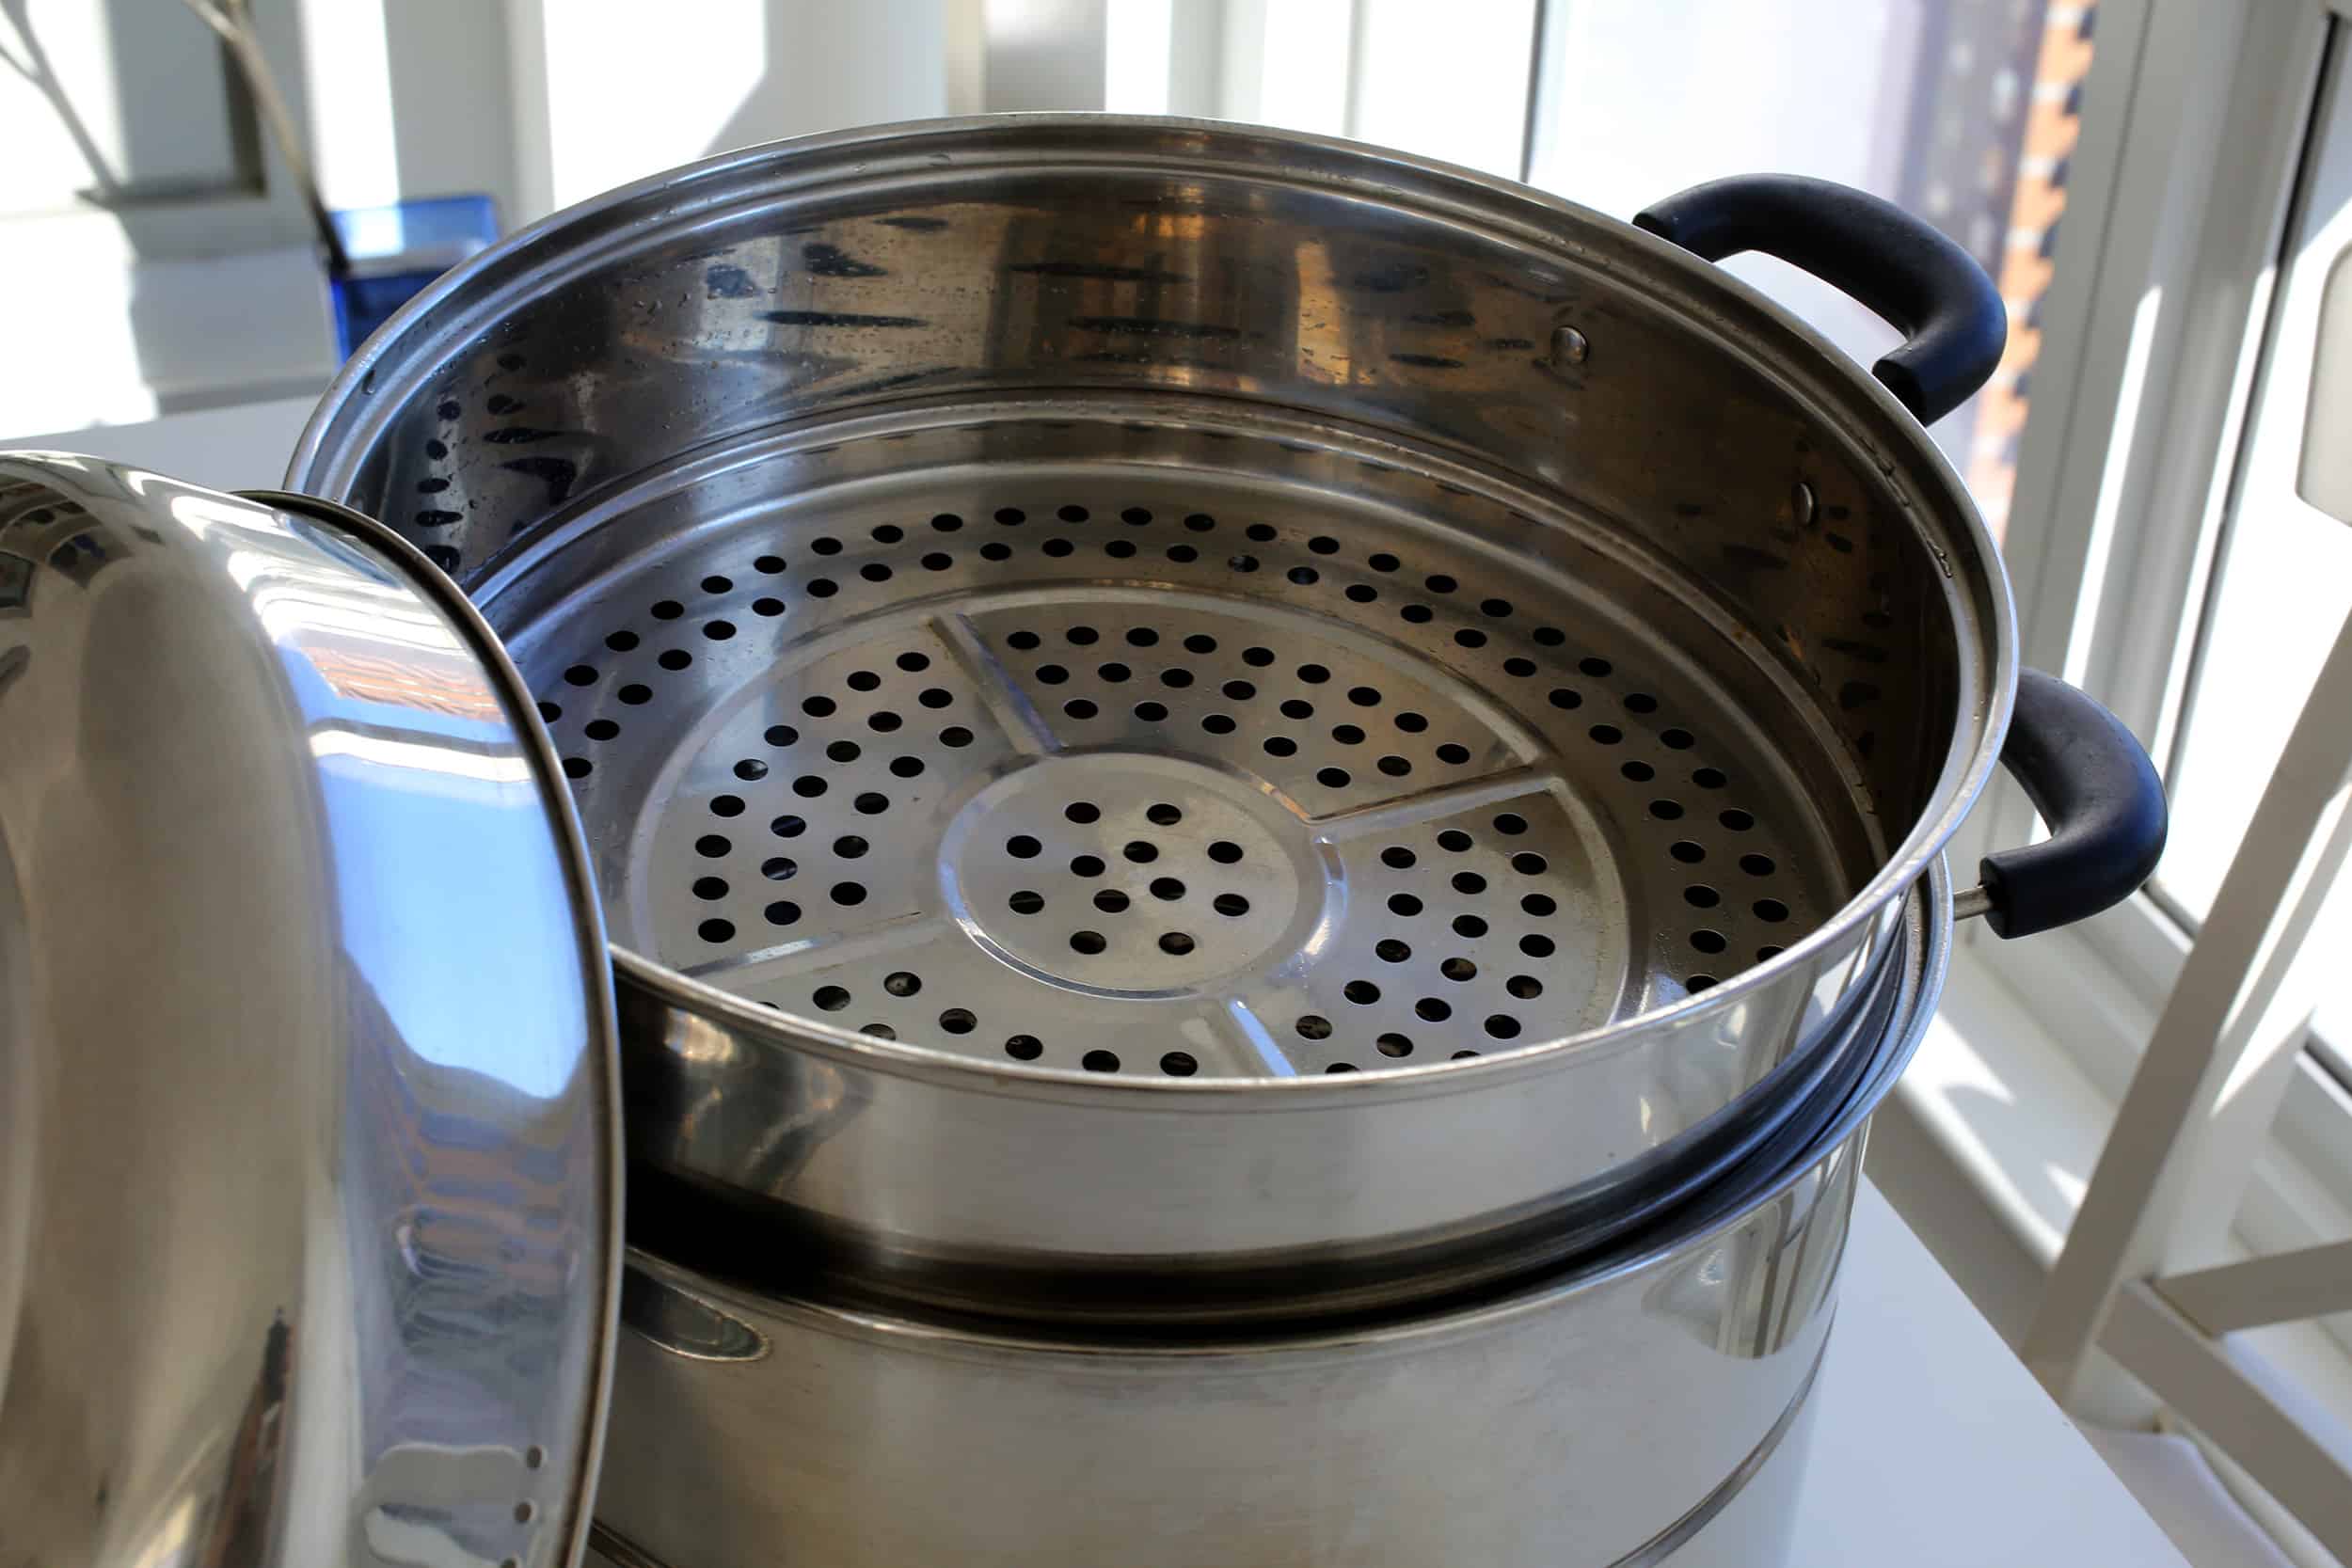
The Idli Cooker Idli Steamer Idli Maker Dhokla Maker Momos Steamer is a versatile kitchen appliance that allows you to easily prepare delicious idlis, dhoklas, and momos. It is made of high-quality stainless steel, ensuring durability and hygiene. With both induction and standard compatibility, you can use it with a variety of cooktops. This idli maker can prepare up to 24 idlis at a time, making it perfect for large families or gatherings. Its silver color adds a touch of elegance to your kitchen. Its compact size makes it easy to store when not in use.
Key Features
- Material – Stainless Steel
- Type: Induction & Standard
- Color – Silver
- Number of Idlis: 24
Specifications
- Color: Silver
- Dimension: 2.00Lx2.00Wx4.00H
- Size: Medium
Pros
- Durable and hygienic stainless steel construction
- Compatible with both induction and standard cooktops
- Large capacity of 24 idlis
- Elegant silver color adds style to your kitchen
- Compact size for easy storage
Cons
The Idli Cooker Idli Steamer Idli Maker Dhokla Maker Momos Steamer is a must-have if you enjoy preparing traditional Indian snacks like idlis, dhoklas, and momos. Its stainless steel construction ensures longevity and cleanliness, while its versatility allows you to use it on any cooktop. The generous capacity of 24 idlis is perfect for larger families or entertaining guests. With its sleek silver design, it also adds a touch of sophistication to your kitchen. Overall, this idli maker is a reliable and convenient appliance that will fulfill your cravings for these delectable snacks.

Overall Score: 8/10
Introducing the versatile Idli Stand Idli Maker Idli Steamer, perfect for making delicious and fluffy idlis. Made of durable stainless steel, this idli maker can prepare up to 16 idlis at once, giving you a hassle-free cooking experience. Its silver color adds a touch of elegance to your kitchen. With its dual functionality, it can be used on both induction and standard cooktops, making it suitable for all kitchen setups. Impress your family and friends with this easy-to-use and efficient idli maker.
Key Features
- Material: Stainless Steel
- Number of Idlis: 16
- Color: Silver
- Type: Induction & Standard
Specifications
- Color: Silver
Pros
- Durable stainless steel construction
- Large capacity of 16 idlis
- Suitable for both induction and standard cooktops
Cons
The Idli Stand Idli Maker Idli Steamer is a reliable and versatile kitchen tool for all idli lovers. Its stainless steel build ensures durability, while its large capacity allows you to prepare a generous batch of 16 idlis at once. The ability to use it on both induction and standard cooktops makes it a convenient choice for various kitchen setups. Whether you’re hosting a brunch or simply craving some authentic homemade idlis, this idli maker will not disappoint. Say goodbye to soggy or unevenly cooked idlis and say hello to perfectly steamed and fluffy delights!

Overall Score: 8.5/10
The Idli Cooker Idli Steamer Dhokla Maker Multi Kadai Copper Bottom With Lid is a versatile kitchen tool that allows you to prepare a variety of dishes including idlis, dhoklas, and patras. Made with stainless steel material and a copper bottom, this cooker ensures even heat distribution for perfectly cooked food. It comes with 5 plates, including 2 idli plates, 2 dhokla plates, and 1 patra plate, allowing you to make a large batch of delicious snacks. The cooker is suitable for both induction and standard cooking methods. With a sleek silver design, it adds a touch of elegance to your kitchen.
Key Features
- Made of stainless steel with a copper bottom
- Comes with 5 plates for versatile cooking
- Suitable for both induction and standard cooking methods
- Sleek silver design adds elegance to the kitchen
Specifications
- Color: Silver
- Dimension: 11.81Lx9.84Wx9.84H
Pros
- Even heat distribution for perfectly cooked food
- Versatile tool for making idlis, dhoklas, and patras
- Large capacity with 5 plates for batch cooking
- Suitable for both induction and standard cooking
Cons
The Idli Cooker Idli Steamer Dhokla Maker Multi Kadai Copper Bottom is a reliable and versatile kitchen tool for preparing a variety of snacks. With its sturdy construction and efficient heat distribution, it ensures consistent results every time. The large capacity and multiple plates allow for efficient batch cooking, saving you time and effort. Whether you’re a fan of idlis, dhoklas, or patras, this cooker has got you covered. Its sleek silver design adds a touch of style to your kitchen. Overall, it’s a highly recommended product for anyone who enjoys homemade snacks.

Overall Score: 8/10
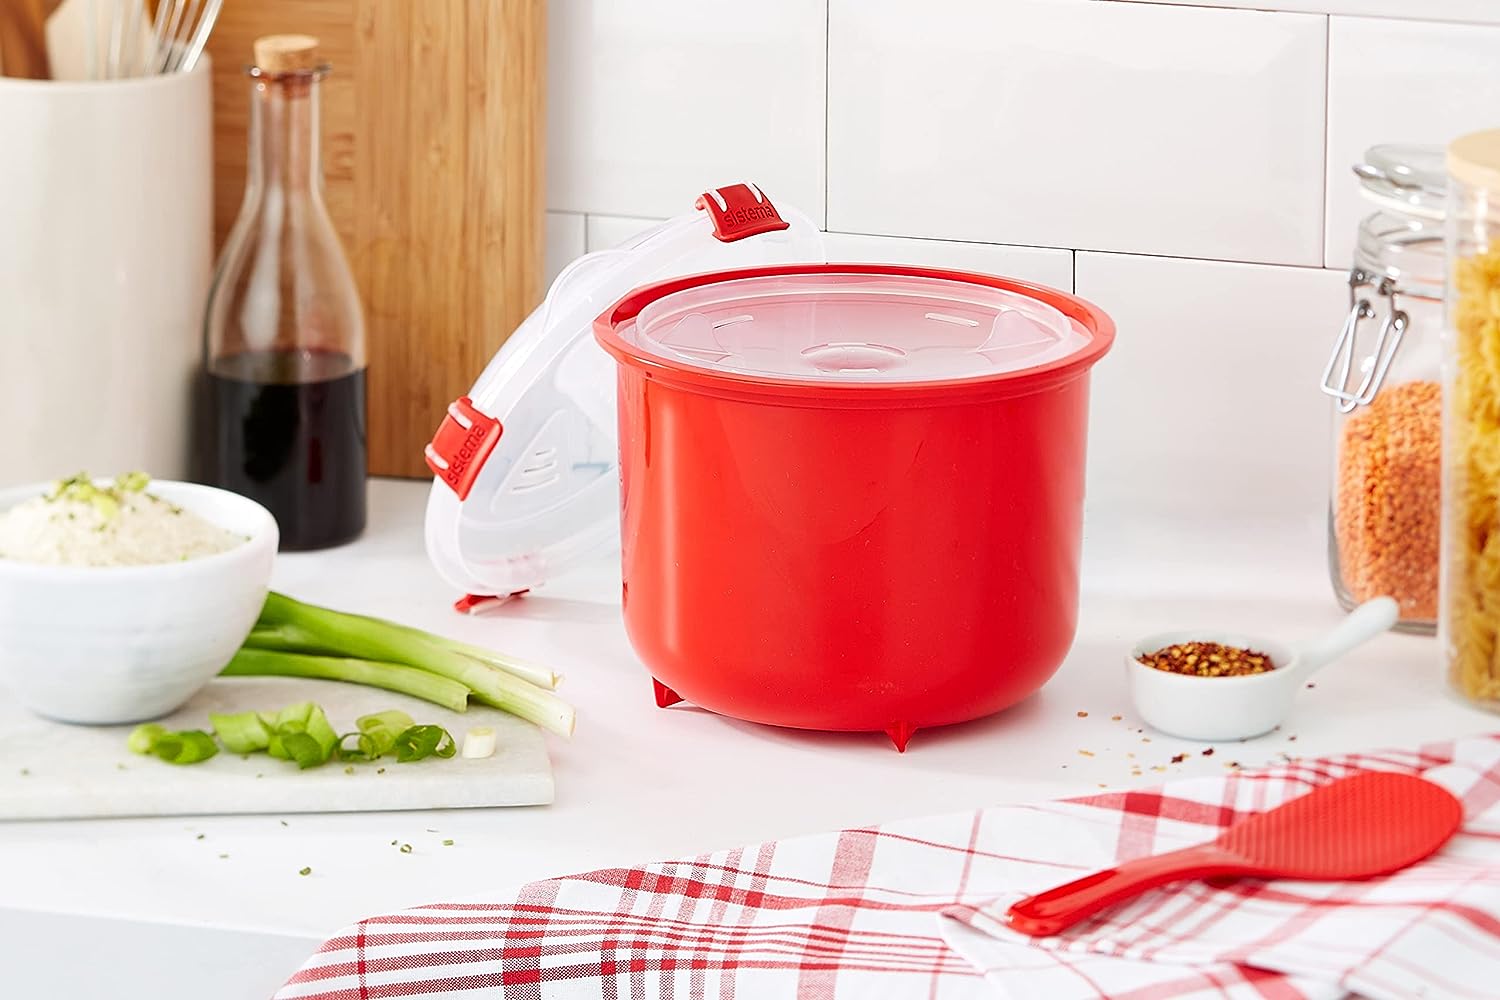
Introducing the Wonderchef Non-Stick Multi-Kadai All-in-1 Pan, Wok Pot, and Idli Steamer Combo. This versatile 5-piece set in a stunning red color is a must-have for any kitchen. It features a non-stick coating that ensures easy release of food, making cooking and cleaning a breeze. The set includes a kadai pan, wok pot, idli steamer, glass lid, and a stainless steel lid. The kadai and wok pot come with heat-resistant Bakelite handles for safe and comfortable handling. With its variety pack size, this combo is perfect for cooking delicious meals for your family and friends.
Key Features
- 5-piece set in red color
- Non-stick coating for easy release of food
- Includes kadai pan, wok pot, idli steamer, glass lid, and stainless steel lid
- Heat-resistant Bakelite handles for safe handling
Specifications
- Color: Red
- Size: Variety Pack
Pros
- Versatile and multi-functional
- Easy to clean
- Safe and comfortable handling
Cons
The Wonderchef Non-Stick Multi-Kadai All-in-1 Pan, Wok Pot, and Idli Steamer Combo is a highly recommended kitchen set. With its non-stick coating and variety of cooking options, it offers convenience and versatility. The heat-resistant handles ensure safe and comfortable handling. The red color adds a vibrant touch to your kitchen. Although it lacks any significant cons, it would be even better if it came with additional accessories. Overall, this combo is a great addition to any kitchen, making cooking enjoyable and hassle-free.
Buyer's Guide: Idli Steamer
Welcome to the ultimate buyer's guide for idli steamers! Whether you're a seasoned idli lover or a curious beginner, we've got you covered. In this guide, we'll walk you through everything you need to know about idli steamers so you can make an informed decision. Get ready to embark on a delightful idli-making journey!
Read also: 15 Best Mop Steamer for 2024
Things to Consider:
When choosing an idli steamer, keep the following factors in mind to ensure you end up with the perfect one for your needs:
- Size: Consider the number of idlis you want to make at once. Idli steamers come in various sizes, so choose one that suits your requirements.
- Material: Look for a steamer made of durable and food-grade materials like stainless steel or aluminum. They should be safe to use and easy to clean.
- Design: Opt for a steamer with a well-designed stacking system to maximize space and efficiency. Some steamers come with multiple trays for steaming different foods simultaneously.
- Handles and Lid: Check for sturdy handles that allow for easy handling and a tight-fitting lid to retain steam during the cooking process.
- Compatibility: Ensure that the steamer is compatible with your stove type, whether it's gas, electric, or an induction cooktop.
- Versatility: If you're looking to steam other foods like dhokla or momos, choose a steamer that offers multi-functionality.
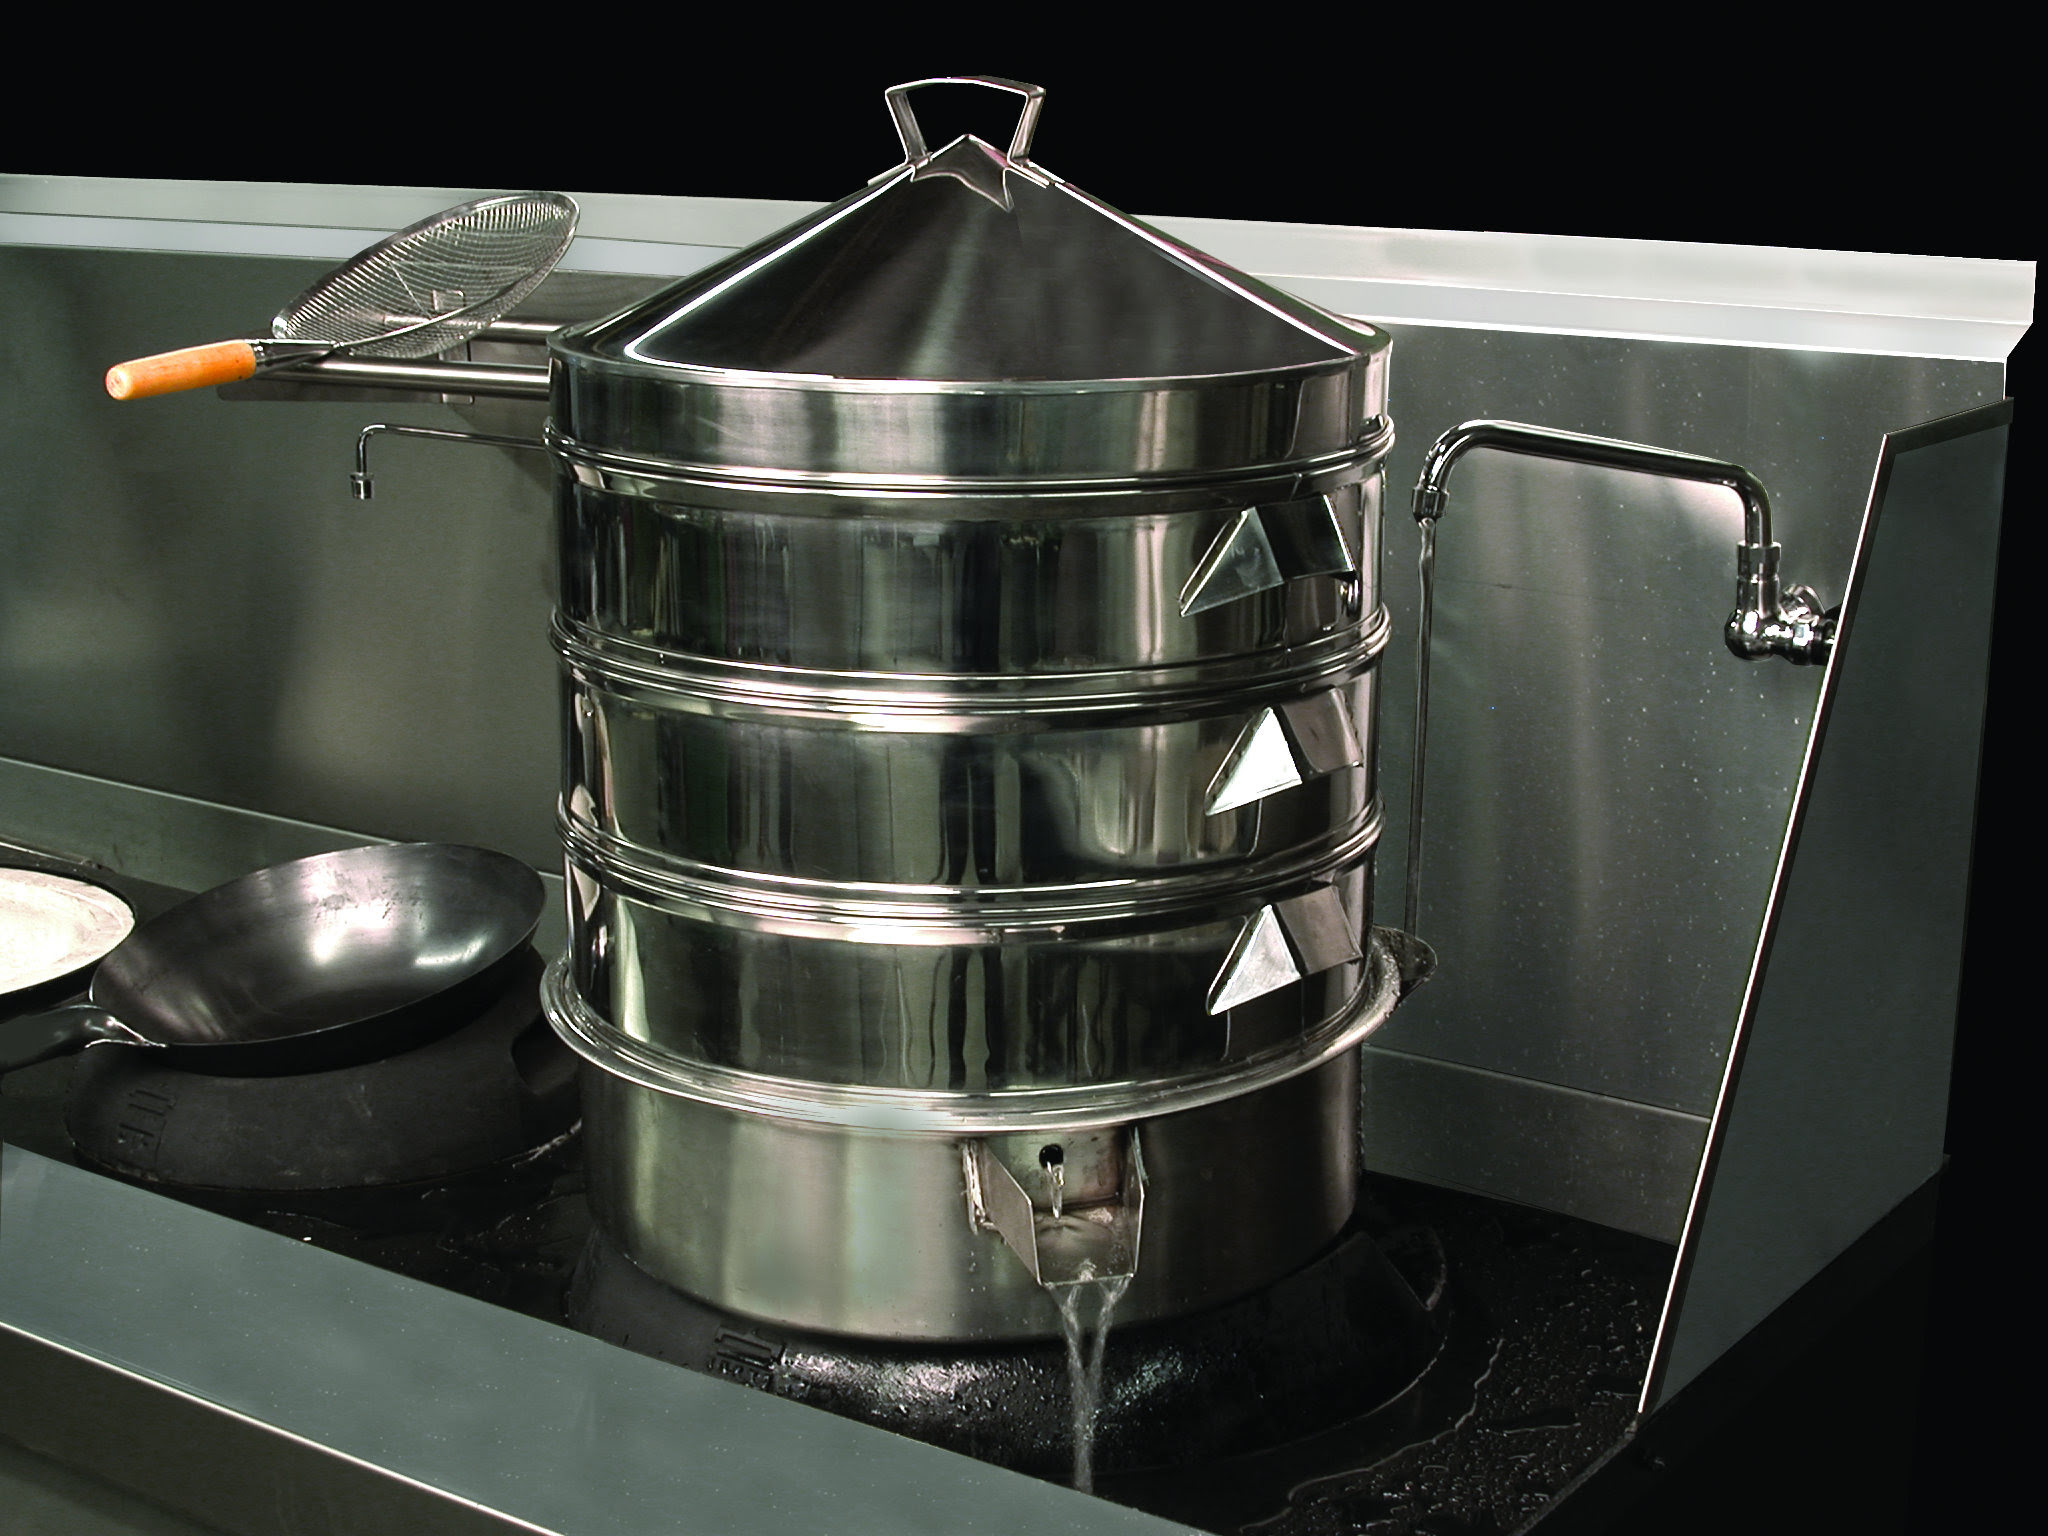
Types of Idli Steamers:
Idli steamers come in different types, each with its own benefits. Consider your preferences before making a decision:
- Traditional Idli Steamer:
- This type consists of stackable aluminum or stainless steel plates with indentations to hold the idli batter.
- Traditional steamers require a separate vessel or pressure cooker to generate steam.
- Ideal for those who enjoy the authentic process and flavor of idli-making.
- These steamers are plug-and-play devices specifically designed for making idlis.
- Electric steamers usually feature multiple trays and automatic timers.
- Perfect for those who prefer convenience and simplicity.
Additional Features:
While basic functionality is crucial, some idli steamers offer extra features to enhance your cooking experience. Consider the following:
- Non-Stick Coating: Some steamers have non-stick coatings, which prevent idlis from sticking to the plates and make them easier to remove.
- Heat-Resistant Handles: Look for steamers with heat-resistant handles that stay cool during cooking, ensuring safe handling.
- Indicator Lights or Buzzers: Electric steamers often feature lights or buzzers to indicate when the idlis are ready, taking the guesswork out of cooking time.
- Keep Warm Function: Certain electric steamers can keep your idlis warm for a period after they finish cooking.
- Dishwasher Safe: Check if the steamer is dishwasher safe for easy cleanup.
Maintenance and Care:
To ensure the longevity and performance of your idli steamer, follow these maintenance tips:
- Cleaning: Wash the plates, trays, and lid with mild detergent and warm water after each use. Avoid using abrasive pads or harsh cleaning agents.
- Drying: Thoroughly dry all parts of the steamer before storing it to prevent rust or mold.
- Seasoning: If using a traditional aluminum steamer, season it by coating the plates with cooking oil and heating them before the first use. This helps prevent sticking.
- Storage: Store the steamer in a clean and dry place to avoid any damage or unpleasant odors.
Read also: 15 Best Bedbug Steamer for 2024
Frequently Asked Questions about 15 Best Idli Steamer For 2024
Yes! Many idli steamers can be used for steaming other delicacies like momos, dhoklas, or even vegetables.
The number of idlis depends on the size and capacity of the steamer. Smaller steamers can make around 12 idlis, while larger ones can accommodate up to 24 idlis or more.
Absolutely! As long as you follow the instructions and guidelines provided with your steamer, they are perfectly safe to use. Just ensure they are made of food-grade materials.
The steaming time may vary depending on the quantity and size of the idlis. On average, it takes around 10-15 minutes for the idlis to cook thoroughly.
Not all idli steamers are compatible with induction cooktops. Look for steamers specifically designed for induction or check the manufacturer’s instructions.
Was this page helpful?
Trust Storables.com for unbiased and honest product reviews. Our reviews are rigorously assessed by our Expert Board Contributors and adhere to strict Editorial Standards. We ensure that each review is transparent and trustworthy, helping you make informed purchasing decisions.


0 thoughts on “15 Best Idli Steamer for 2024”