Articles
How To Store Classroom Headphones
Modified: August 16, 2024
Learn how to properly store and organize your classroom headphones with these helpful articles. Keep your headphones safe and organized for easy access and prolonged use.
(Many of the links in this article redirect to a specific reviewed product. Your purchase of these products through affiliate links helps to generate commission for Storables.com, at no extra cost. Learn more)
Introduction
Classroom headphones are an essential tool for students in today’s digital learning environment. Whether they are used for language learning programs, audio recordings, or online educational resources, having a proper storage system for classroom headphones is crucial to ensure their longevity and maintain a hygienic learning environment.
When headphones are not stored correctly, they can easily become tangled, damaged, or lost, leading to frustration for both students and teachers. Additionally, without a proper storage system, it becomes challenging to keep track of which headphones belong to each student, leading to confusion and potential hygiene issues.
In this article, we will guide you through the process of effectively storing classroom headphones. By following these steps, you will not only prolong the lifespan of your headphones but also create an organized and efficient system for headphone management.
Key Takeaways:
- Properly storing classroom headphones is crucial for maintaining a clean and organized learning environment, ensuring longevity and functionality, and promoting hygiene and accountability among students.
- Implementing a check-in/check-out system, regular inspections, and replacements are essential for managing classroom headphones effectively, ensuring fair usage, and maintaining high-quality learning tools.
Read more: How To Store Chromebooks In A Classroom
Step 1: Cleaning and Maintenance
The first step in properly storing classroom headphones is to ensure they are clean and well-maintained. Regular cleaning and maintenance not only help to prolong the lifespan of the headphones but also maintain optimal sound quality for the students.
Start by providing students with instructions on how to clean the headphones. Encourage them to wipe the ear cups and headband with a mild disinfectant wipe or a damp cloth regularly to remove any dirt, oils, or germs. Additionally, instruct them to gently clean the audio jacks with a soft brush or cotton swab to remove any debris that may affect the connection.
It is also important to regularly check the headphones for any damage or wear and tear. Ensure that the cables are not frayed or twisted and that the ear pads are intact. If any issues are detected, immediately replace or repair the headphones to prevent further damage.
Consider designating a specific time or day for headphone cleaning and maintenance. This can be done individually by the students or as a classroom activity where students assist in the cleaning process. By involving students in this task, they develop a sense of responsibility for their headphones and also learn valuable maintenance habits.
By implementing regular cleaning and maintenance practices, you not only ensure the longevity of the headphones but also promote cleanliness and hygiene within the classroom setting. This ensures that students have a comfortable and safe learning experience while using the headphones.
Step 2: Organizing Headphones
Once the headphones are clean and well-maintained, the next step is to organize them effectively. Chaos and disarray can easily occur if there is no system in place for storing and identifying each student’s headphones.
One approach to organizing headphones is to assign each student with a specific pair of headphones. This can be achieved by color-coding the headphones or using labels with the student’s name or assigned number. By having designated headphones for each student, it becomes easier to track ownership and maintain hygiene standards.
Consider creating a dedicated storage area for the headphones, such as a labeled and segmented drawer or cubby system. This allows for easy access and eliminates the risk of tangling the headphone cables. Additionally, having a designated storage area ensures that headphones are not misplaced or lost.
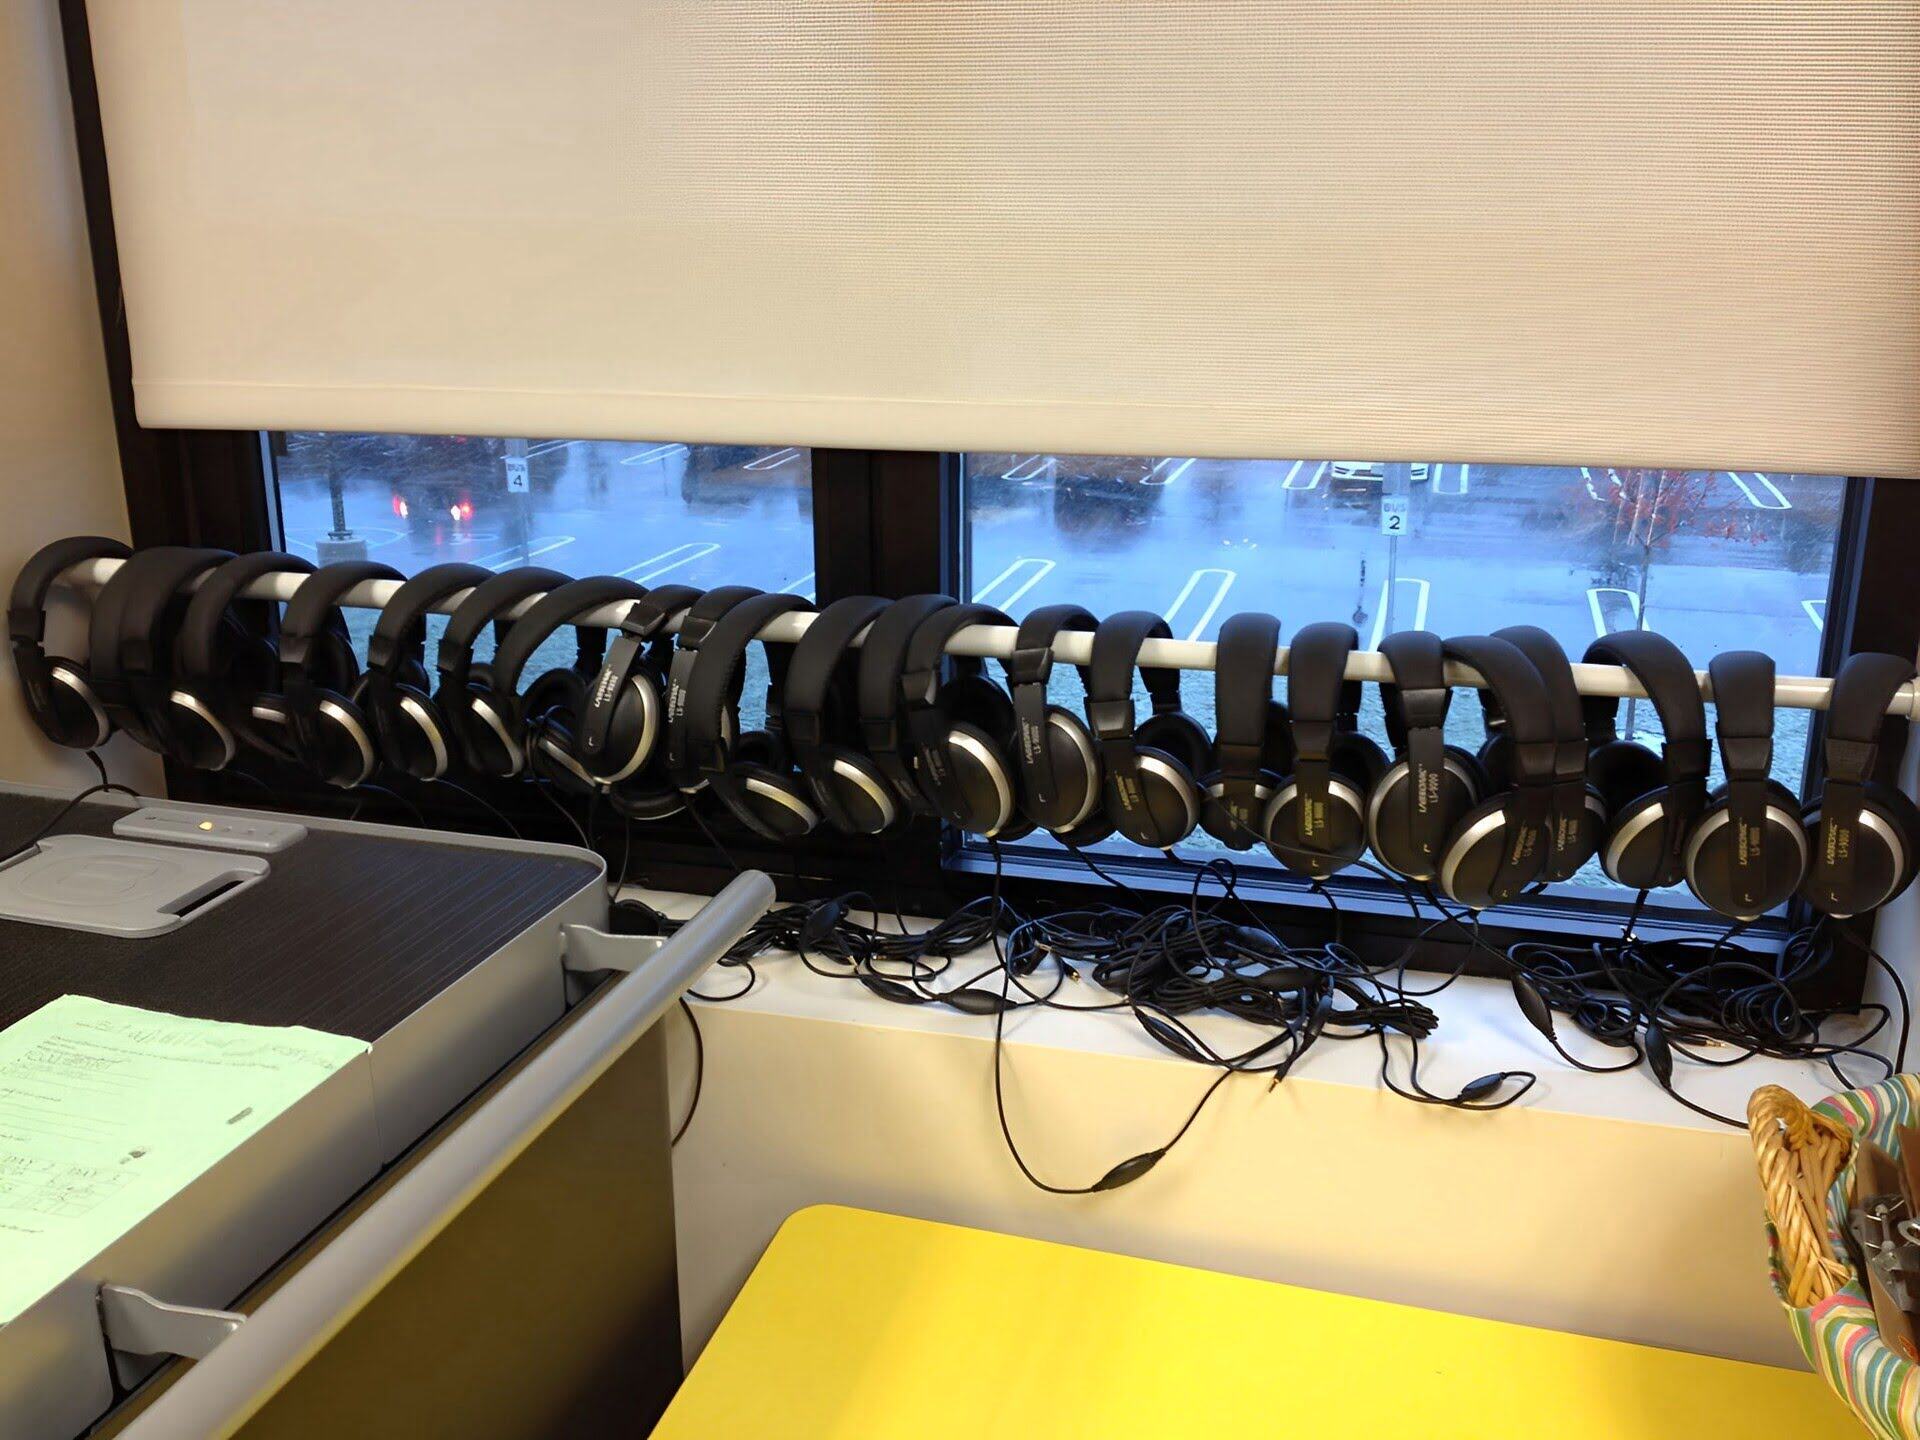
Another option for organizing headphones is to use headphone stands or hooks. These can be mounted on the wall or placed on desks, providing a convenient and visually pleasing solution. By using headphone stands or hooks, students can easily identify their assigned headphones and keep them within reach during class activities.
When organizing headphones, it is crucial to emphasize the importance of proper handling and storage to students. Encourage them to place the headphones in their designated storage area after use, ensuring that the cables are neatly coiled without any kinks or twists. This practice not only helps to maintain the longevity of the headphones but also prevents any damage that may occur due to careless handling.
By implementing an effective organizational system, you not only promote accountability and ownership among students but also reduce the likelihood of misplaced or tangled headphones. This ultimately saves time and frustration for both students and teachers.
Step 3: Labeling Headphones
Labeling headphones is an essential step in managing classroom headphone inventory and ensuring that each student can easily identify their assigned pair. By labeling the headphones, you create a clear visual indication of ownership, reducing confusion and the risk of mix-ups.
There are various ways to label headphones, depending on your preference and the resources available:
- Sticker labels: Using adhesive labels with students’ names or assigned numbers is a simple and cost-effective way to label headphones. Place the labels on the ear cups or headband, ensuring they are securely attached.
- Permanent markers: For a more permanent labeling solution, use a permanent marker to directly write the students’ names or assigned numbers on the headphones. This method is ideal for headphones with a smooth surface.
- Name tags: Attach individual name tags to the headphones using string or zip ties. This option allows for easy replacement of name tags if needed and can be easily removed for cleaning purposes.
When labeling headphones, it is important to ensure that the labels are clear and legible. Use bold or contrasting colors for the labels to make them easily noticeable. Encourage students to respect and maintain the integrity of the labels by avoiding scratching or removing them.
Furthermore, when implementing a labeling system, it is helpful to maintain a record of each student’s assigned headphones and corresponding label information. This record can be in the form of a spreadsheet or a physical logbook, ensuring that the ownership of each pair of headphones is easily traceable.
By labeling headphones, you promote ownership and responsibility among students while minimizing any confusion or disputes over headphone ownership. This simple step aids in maintaining an organized and efficient classroom environment.
Step 4: Choosing Proper Storage Containers
Choosing the right storage containers for classroom headphones is crucial to protect them from damage and ensure easy access for students. The containers should provide adequate protection, organization, and portability.
Here are some factors to consider when selecting storage containers for headphones:
- Durability: Look for containers made of sturdy materials that can withstand regular use and handling. Avoid containers that are flimsy or prone to cracking or breaking.
- Size: Choose containers that are large enough to accommodate the headphones without causing any strain on the cables or ear cups. However, avoid containers that are excessively spacious, as this may lead to headphones moving around and potentially getting damaged.
- Individual compartments: Opt for containers with individual compartments or dividers to prevent the headphones from tangling with each other. This helps to maintain the condition of the headphones and allows for easy identification and retrieval.
- Protection: Look for containers that offer adequate protection from dust, moisture, and other environmental elements. This is particularly important if the storage area is not climate-controlled or if the headphones will be stored for extended periods.
- Portability: Consider the need for mobility when choosing storage containers. If the headphones need to be moved between classrooms or locations, opt for containers with handles or wheels for easy transportation.
There are a variety of storage container options available, including plastic bins, drawer organizers, and carrying cases specifically designed for headphones. It may be helpful to assess the available storage space and consider the specific needs and constraints of your classroom environment before making a decision.
Remember to prioritize functionality and practicality when choosing storage containers, keeping in mind the number of students and headphones that need to be accommodated. By selecting the proper storage containers, you ensure that the headphones are well-protected and easily accessible for students during classroom activities.
To store classroom headphones, use a designated storage area such as a labeled bin or drawer to keep them organized and easily accessible for students. This will help prevent tangles and damage to the headphones.
Read more: How To Create An Outdoor Classroom
Step 5: Creating a Storage System
In order to maintain an organized and efficient classroom, it is important to establish a proper storage system for the headphones. A well-designed storage system ensures that headphones are easily accessible, reduces the risk of damage or loss, and promotes a tidy learning environment.
Here are some steps to create an effective storage system:
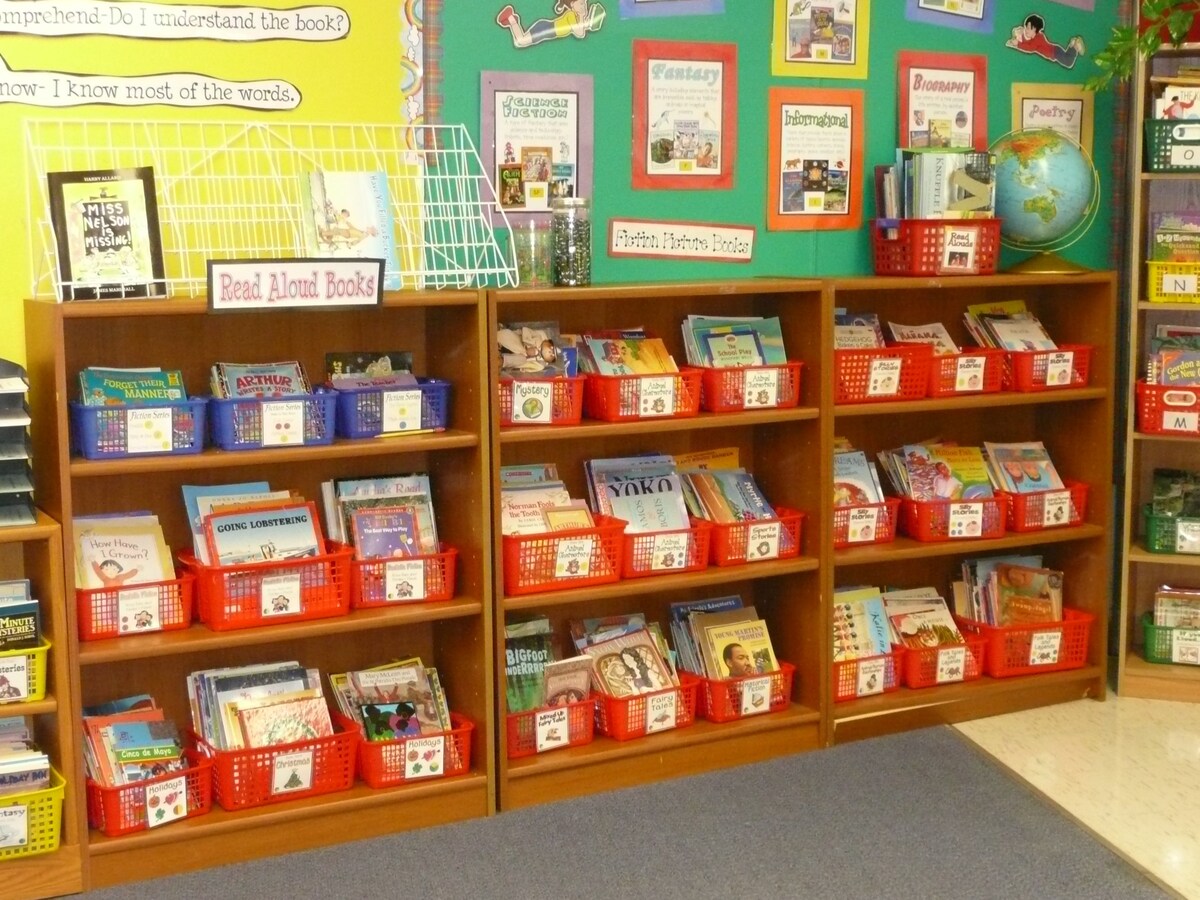
- Designate a specific area: Allocate a dedicated space in the classroom for storing the headphones. This could be a shelf, a cabinet, or a designated drawer. It is important to choose a location that is easily accessible to both students and teachers.
- Separate storage for each student: Assign individual storage compartments for each student’s headphones. This can be achieved by using labeled bins, cubbies, or dividers within a larger storage unit.
- Arrange storage compartments logically: Organize the storage compartments in a logical manner, such as alphabetically, numerically, or by assigned groups. This makes it easy for students to locate their headphones and helps to maintain an orderly storage system.
- Clearly label storage areas: Use clear and visible labels to indicate each student’s assigned storage area. This can be done with printed labels, name tags, or even pictures for younger students who may not be able to read yet.
- Create a check-in/check-out system: Implement a system where students are required to check in their headphones when they arrive in the classroom and check them out when they leave. This promotes accountability and helps to ensure that headphones are not misplaced or forgotten.
By creating a well-organized storage system, you can streamline the process of distributing and collecting headphones, reduce the likelihood of headphones getting lost or damaged, and instill a sense of responsibility among students for their belongings.
Take the time to train students on how to properly use and store their headphones within the designated storage system. Reinforce the importance of maintaining cleanliness, avoiding tangled cables, and treating the headphones with care.
Regularly monitor and maintain the storage system to ensure that it remains functional and efficient. Periodically assess the system to identify any areas of improvement and make adjustments as needed.
Overall, a carefully designed storage system for classroom headphones can greatly contribute to a well-organized and engaging learning environment.
Step 6: Implementing a Check-In/Check-Out System
Implementing a check-in/check-out system for classroom headphones is an effective way to track the whereabouts of each pair of headphones and ensure proper accountability among students. This system helps to prevent loss and confusion, and encourages responsible behavior when it comes to handling and returning the headphones.
Here are some steps to implement a check-in/check-out system:
- Create a sign-in/sign-out sheet: Design a sheet where students can record their names, the date and time they checked out the headphones, and the date and time they returned them. This sheet serves as a log of the headphones’ usage and helps to identify any potential issues or discrepancies.
- Assign a designated area for sign-in/out: Establish a specific location in the classroom where students can sign in and out their headphones. This could be a designated table or a small desk with the necessary materials, such as the sign-in/out sheet and a pen or pencil.
- Set clear guidelines and expectations: Clearly communicate the expectations and procedures for using the check-in/check-out system to students. Explain the importance of accurately recording their information and returning the headphones on time to ensure fairness and availability for other students.
- Train students on the check-in/out process: Take the time to educate students on how to properly complete the sign-in/out sheet, emphasizing the importance of accuracy and legibility to avoid confusion. Provide guidance on where to place the headphones after returning them.
- Regularly monitor the check-in/out process: Regularly review the sign-in/out sheet to ensure that all students are properly signing in and out their headphones. This helps to identify any patterns of non-compliance or potential issues that need to be addressed.
By implementing a check-in/check-out system, you can easily keep track of the headphones’ usage, ensure proper distribution among students, and hold them accountable for returning the headphones in a timely manner. This system also helps to create a sense of ownership and responsibility, instilling good habits for students to properly care for their assigned headphones.
Regularly communicate and reinforce the importance of the check-in/check-out system to students and parents. Emphasize how this system helps to maintain fairness and ensures that everyone has equal access to the classroom headphones. Encouraging open communication and addressing any concerns or questions from students or parents helps to foster a positive and cooperative learning environment.
Remember to regularly evaluate and update the check-in/check-out system to address any issues or areas for improvement. By consistently refining the system, you can create a seamless and efficient process for managing the classroom headphones.
Step 7: Regular Inspection and Replacement
Regularly inspecting and replacing classroom headphones is essential to ensure their functionality, hygiene, and overall quality. Over time, headphones may wear out, become damaged, or accumulate dirt and bacteria, requiring proactive maintenance and replacement.
Here are some steps to effectively inspect and replace classroom headphones:
- Schedule regular inspections: Establish a schedule for inspecting the headphones, whether it is weekly, monthly, or at the end of each semester. Consistency is key to maintaining the quality of the headphones and identifying any issues in a timely manner.
- Visual inspection: Start by visually inspecting the headphones for signs of wear and tear. Check the cables for fraying or damage, and ensure that the ear pads are intact and in good condition. Look for any loose screws or other structural issues that may affect the headphones’ performance.
- Functional testing: Test the functionality of the headphones by plugging them into a device and checking for clear audio output from both ear cups. Ensure that the volume control and any other features are working correctly. If there are any sound distortions or malfunctions, consider replacing the headphones.
- Cleaning and hygiene: As part of the inspection process, clean the headphones thoroughly to maintain hygiene standards. Use disinfectant wipes or a gentle cleaning solution to wipe down the ear cups, headband, and cables. Pay extra attention to areas that come into contact with the students’ ears.
- Replacement criteria: Establish clear criteria for when a headphone needs to be replaced. This could include significant damage, consistent performance issues, or signs of irreparable wear and tear. Having predetermined guidelines ensures consistency and fairness in determining when headphones should be replaced.
- Keep a replacement inventory: Maintain a supply of replacement headphones to quickly address any issues that arise during inspections. This allows for a seamless replacement process without disrupting classroom activities or causing delays for students.
- Communicate with students and parents: Inform students and parents about the inspection and replacement process. Explain the importance of maintaining functional and clean headphones for an optimal learning experience. Encourage students to report any issues they encounter with their headphones promptly.
By regularly inspecting and replacing classroom headphones, you ensure that students have reliable and hygienic tools for their learning activities. This practice also demonstrates your commitment to providing a high-quality educational environment.
Document the results of each inspection and keep a record of any replacements made. This allows you to track the lifespan of the headphones and identify any trends or patterns that may inform future purchasing decisions.
Finally, prioritize quality when purchasing replacement headphones. Consider the durability, sound quality, and functionality of the headphones to ensure they meet the specific needs of your classroom.
Conclusion
Properly storing classroom headphones plays a significant role in maintaining a clean and organized learning environment while ensuring the longevity and functionality of the headphones. By following the steps outlined in this article, you can create an effective system for headphone storage, organization, and maintenance.
Cleaning and maintaining the headphones regularly helps to preserve their sound quality and keep them hygienic for students to use. Organizing and labeling headphones ensures easy identification and reduces the risk of loss or confusion. Choosing suitable storage containers provides adequate protection and promotes easy access. Creating a storage system with a check-in/check-out process encourages accountability and helps keep track of headphone usage.
Regular inspections and replacements are essential to address wear and tear, maintain functionality, and promote hygiene. By implementing these steps, you can create a well-managed and efficient system that benefits both students and teachers.
Remember, while optimizing the storage system and maintaining the headphones are important, it is equally crucial to teach and reinforce proper headphone etiquette and care to students. Encourage them to handle the headphones with care, properly store them after use, and adhere to hygiene practices.
By investing time and effort into implementing these strategies, you can ensure that your classroom headphones remain in top condition, providing optimal learning experiences for your students. A well-organized and well-maintained headphone storage system not only enhances productivity but also fosters a more comfortable and engaging classroom environment for all.
Frequently Asked Questions about How To Store Classroom Headphones
Was this page helpful?
At Storables.com, we guarantee accurate and reliable information. Our content, validated by Expert Board Contributors, is crafted following stringent Editorial Policies. We're committed to providing you with well-researched, expert-backed insights for all your informational needs.


0 thoughts on “How To Store Classroom Headphones”