Home>Home Maintenance>What Does A Buyer Have To Do To Turn On Power For Inspection?
Home Maintenance
What Does A Buyer Have To Do To Turn On Power For Inspection?
Modified: March 6, 2024
Learn what steps a buyer needs to take to turn on power for inspection. Find out the importance of home maintenance and ensure a smooth inspection process.
(Many of the links in this article redirect to a specific reviewed product. Your purchase of these products through affiliate links helps to generate commission for Storables.com, at no extra cost. Learn more)
Introduction
Welcome to the exciting journey of buying a new home! As you embark on this adventure, one of the crucial steps involved is turning on the power for inspection. Understanding this process is essential to ensure a smooth transition and a successful home inspection.
When buying a property, it’s essential to have the power connected so that a thorough inspection can be conducted. The inspection will assess the overall condition of the electrical system, including the functionality and safety of outlets, wiring, switches, and other electrical components. Without power, it becomes challenging for inspectors to carry out a comprehensive evaluation.
In this article, we will guide you through the process of turning on power for inspection. From contacting the utility company to finalizing the power connection, each step plays a vital role in preparing your new home for inspection. So let’s dive in and discover what it takes to turn on power!
Key Takeaways:
- Contact your local utility company early to schedule a power connection for a home inspection. Be present during the installation, pay any required fees, and conduct a thorough inspection to ensure a smooth transition.
- Finalize the power connection after obtaining approval from the inspector. Prompt communication, timely payments, and clear documentation are crucial for a successful power connection process.
Understanding the Power Connection Process
Before we delve into the steps of turning on power for inspection, it’s important to have a clear understanding of the overall process. When you purchase a new home, the previous owner will generally disconnect the power. This means that before the inspection can take place, you will need to coordinate with the utility company to have the power reconnected temporarily.
The power connection process typically involves contacting the local utility company, providing necessary information, scheduling an appointment, and paying any required fees or deposits. Once these steps are completed, the utility company will send technicians to install or activate the power, allowing the inspection to proceed.
It’s important to note that the specific procedures and requirements may vary depending on your location and the utility company’s policies. Some utility companies may have online portals or dedicated customer service representatives to guide you through the process. It’s advisable to familiarize yourself with your local utility company’s procedures and contact them directly for the most accurate and up-to-date information.
Now that we have a general understanding of the power connection process, let’s move on to the step-by-step guide to turning on power for inspection.
Step 1: Contact the Utility Company
The first step in turning on power for inspection is to contact your local utility company. Most areas have a specific utility company that is responsible for providing electricity to residents. It’s important to reach out to this company as soon as possible to initiate the power connection process.
To contact the utility company, you can usually find their contact information on their website or on your current utility bills. Give them a call and inform them that you need to have the power turned on temporarily for a home inspection. The utility company will guide you through the necessary steps and provide you with any required forms or documentation.
During the call, be prepared to provide the utility company with details such as your name, address, phone number, and the date/time you would like the power to be connected. They may also ask for other specific information, such as the square footage of the property or any unique electrical requirements.
It’s important to note that utility companies may have different guidelines regarding the minimum notice required for power connection. Therefore, it’s advisable to contact them well in advance to secure a convenient appointment time for your inspection.
Once you have contacted the utility company and provided them with the necessary information, they will guide you to the next steps in the power connection process. This may include filling out forms, submitting identification documents, or arranging payment for any required fees or deposits.
Now that you have contacted the utility company, let’s move on to step 2: providing necessary information to initiate the power connection process.
Step 2: Provide Necessary Information
After you have contacted the utility company to initiate the power connection process, the next step is to provide them with all the necessary information they require. This information will help them process your request and ensure a smooth and efficient power connection for the home inspection.
When providing the necessary information, be prepared to furnish details such as your full name, current address, and contact number. Additionally, you may be asked to provide specific details about the property, such as the square footage, number of bedrooms, and any unique electrical needs or requests.
It’s important to be as accurate and detailed as possible while providing this information to the utility company. Any inaccuracies or omissions could potentially lead to delays or complications during the power connection process. If you are unsure about any specific details, it’s best to consult your real estate agent or the home seller to ensure accurate information is provided.
Some utility companies may also require additional documentation to complete the power connection process. This may include a copy of your identification, proof of ownership or tenancy, or any other relevant paperwork. Ensure that you have these documents readily available so that you can provide them promptly when requested.
By providing the necessary information accurately and in a timely manner, you can help expedite the power connection process and ensure that the home inspection can be carried out smoothly and efficiently.
Now that you have provided the necessary information, let’s move on to step 3: scheduling an appointment for the power connection.
Step 3: Schedule an Appointment
Once you have contacted the utility company and provided all the necessary information, the next step is to schedule an appointment for the power connection. This appointment is crucial as it allows the utility company to allocate resources and technicians to activate or install the power connection for your home inspection.
When scheduling an appointment, it’s important to be flexible and considerate of the utility company’s availability. They may have certain days or time slots dedicated to power connections, and it’s best to work within their schedule to ensure a smooth process. Keep in mind that utility companies often experience high demand, especially during peak seasons, so it’s advisable to schedule the appointment well in advance.
During the scheduling process, the utility company will provide you with a specific date and estimated time window for the power connection. Make sure to mark this appointment in your calendar and plan accordingly to be present at the property during this time. Being present ensures that you can provide access to the technicians and address any potential concerns or questions they may have during the power connection process.
In some cases, the utility company may also provide you with a confirmation or reference number for the appointment. This number can be useful for future reference or in case you need to make any changes to the appointment time or date.
It’s important to keep in mind that unforeseen circumstances such as inclement weather or technical issues may arise, causing delays or rescheduling of the appointment. Stay in contact with the utility company and be prepared for any necessary adjustments to the appointment if needed.
Now that you have scheduled an appointment, let’s move on to step 4: being present during the installation or activation of the power connection.
Before scheduling an inspection, a buyer needs to contact the utility company to turn on the power at the property. This will allow the inspector to check the electrical systems and ensure everything is in working order.
Step 4: Be Present during Installation or Activation
Being present during the installation or activation of the power connection is vital to ensure a successful home inspection. Your presence allows you to provide access to the technicians and address any questions or concerns that may arise during the process.
On the scheduled date and time of the power connection appointment, make sure you are present at the property. Arrive a few minutes early to ensure that you are ready to greet the utility company technicians and guide them to the necessary areas of the property.
The technicians from the utility company will be responsible for either installing a temporary power connection or activating the existing one. They will follow the necessary safety protocols and make the required connections to provide electrical power for the inspection.
During the installation or activation process, it’s advisable to stay close by and be available to answer any questions the technicians may have. They may need access to specific areas of the property, such as the electrical panel, so be prepared to provide them with the necessary access and information.
If you have any concerns or preferences regarding the power connection, such as specific areas that need closer inspection or certain electrical components that require attention, feel free to communicate this with the technicians. They will do their best to accommodate your requests within their scope of work.
Once the installation or activation is complete, the technicians will ensure that the power is running smoothly. They may perform some tests or checks to confirm that the electrical system is functioning properly.
During this step, it’s important to exercise caution and follow any safety instructions provided by the utility company technicians. They will guide you on any necessary precautions or actions to take to ensure a safe environment during the power connection process.
Now that the power connection is established, let’s move on to step 5: paying any required fees or deposits associated with the power connection.
Step 5: Pay Any Required Fees or Deposits
As part of the power connection process, utility companies may require you to pay certain fees or deposits. These fees are necessary to cover the costs associated with the temporary power connection for the home inspection. It’s important to comply with these requirements to ensure a smooth and uninterrupted power supply during the inspection.
Once you have scheduled the power connection appointment, the utility company will inform you about any fees or deposits that need to be paid. These fees can vary depending on the location and the specific policies of the utility company.
Typically, utility companies require a deposit to ensure that their services are paid for in case of any outstanding bills or damages. This deposit is usually refundable and will be returned to you after the inspection, assuming there are no outstanding charges or issues.
The utility company will provide you with instructions on how to make the payment. This can be done through various methods such as online payments, over the phone, or in person at their office. Be sure to follow their guidelines and make the payment within the specified timeframe to avoid any delays or complications.
Once the payment has been made, be sure to retain a copy of the payment receipt or confirmation. This will serve as proof of payment and can be helpful if any discrepancies arise in the future.
It’s important to note that failing to pay the required fees or deposits may result in a delay or cancellation of the power connection. To ensure a smooth and successful inspection, it’s crucial to fulfill the financial obligations as communicated by the utility company.
Now that you have paid any required fees or deposits, let’s move on to step 6: conducting the inspection and obtaining approval.
Step 6: Conduct Inspection and Obtain Approval
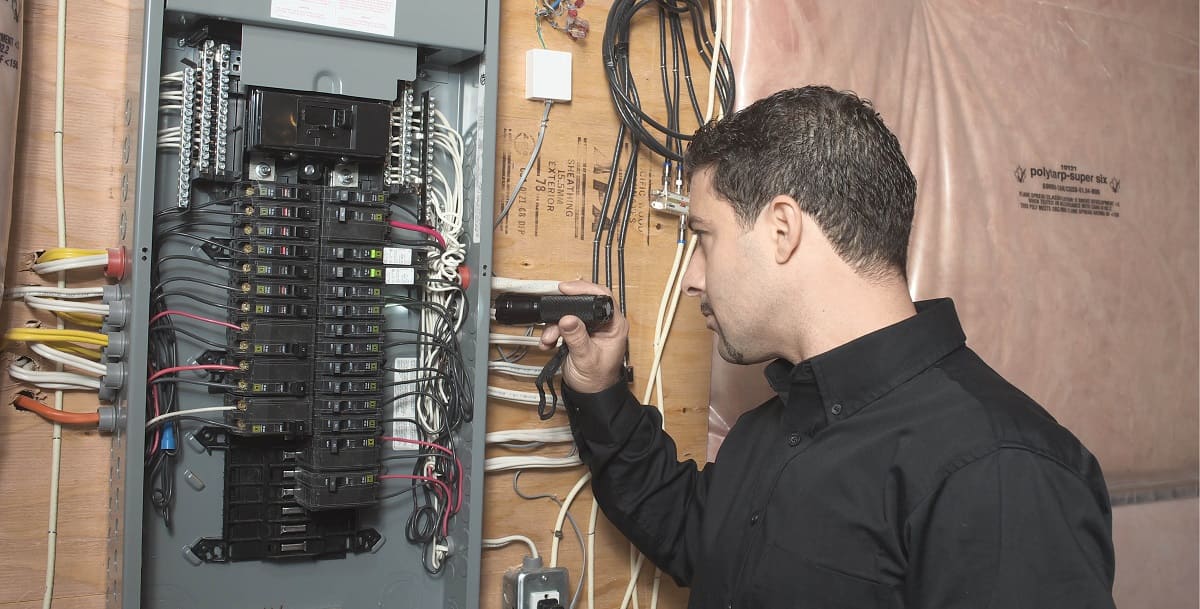
With the power connected, it’s time to conduct the home inspection. This crucial step allows the inspector to evaluate the electrical system and ensure its functionality and safety. It’s essential to conduct a thorough inspection to identify any potential issues or hazards that need to be addressed.
During the inspection, the inspector will assess various aspects of the electrical system, including outlets, wiring, switches, and other electrical components. They will check for any signs of damage, wear, or improper installation. Additionally, they will ensure that the electrical system meets the required safety standards and regulations.
As the buyer, it’s advisable to be present during the inspection. This gives you the opportunity to ask questions, gain a better understanding of the property’s electrical condition, and address any concerns that may arise during the process.
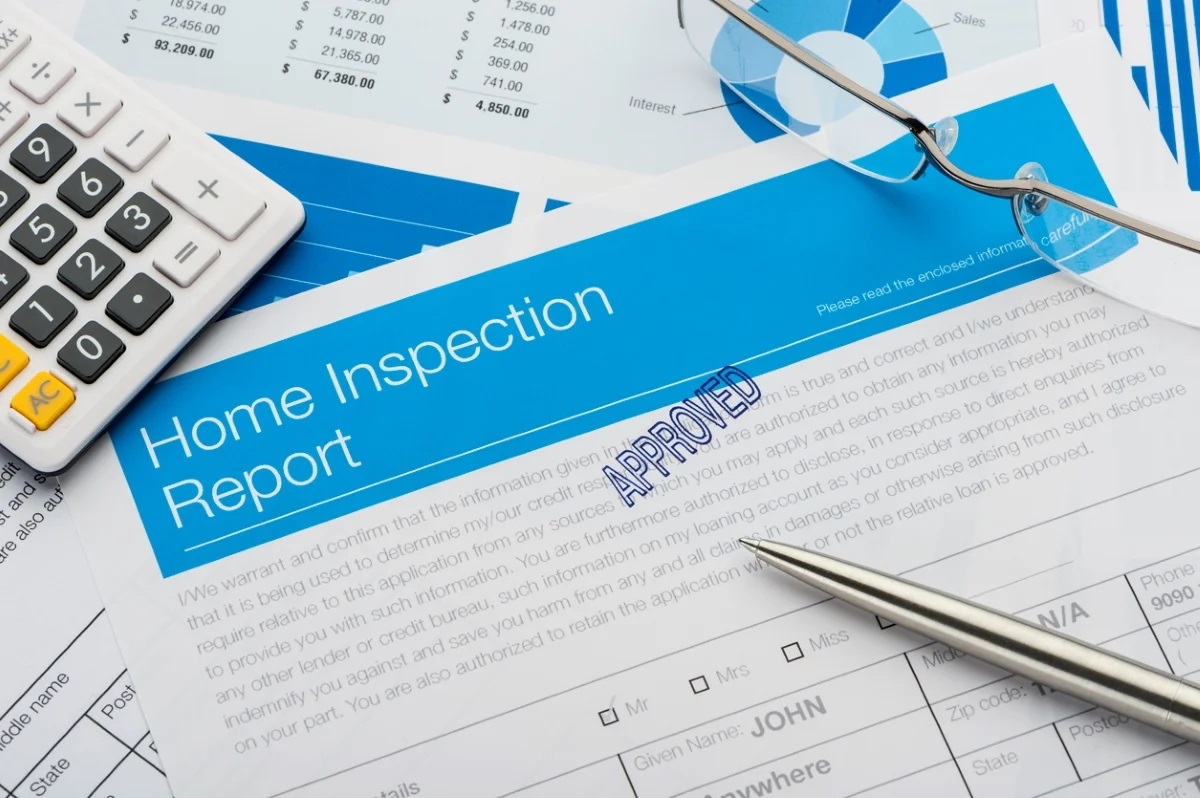
If the inspector identifies any issues or areas that require attention, they will provide you with a detailed report outlining their findings. This report will give you valuable insights into the condition of the electrical system and help you make informed decisions about any necessary repairs or upgrades.
Once the inspection is complete and any necessary repairs or upgrades have been addressed, you can obtain approval from the inspector. Approval indicates that the electrical system meets the required standards and is safe for use.
Having the inspector’s approval is crucial to ensure that your new home is electrically sound and provides a safe living environment for you and your family. It serves as a reassurance that the electrical system has been thoroughly assessed and deemed fit for use.
Now that you have conducted the inspection and obtained approval, let’s move on to the final step: finalizing the power connection.
Step 7: Finalize Power Connection
After the home inspection is complete and you have obtained approval, it’s time to finalize the power connection for your new home. This step ensures that the temporary power connection is transitioned into a permanent one, allowing you to enjoy uninterrupted electricity in your new property.
To finalize the power connection, you will need to contact the utility company once again. Inform them that the home inspection has been successfully completed, and you would like to establish a permanent power connection for your property.
The utility company will guide you through the necessary steps and requirements to transition from the temporary power connection to a permanent one. This may involve signing up for a residential power plan, providing additional documentation, or setting up a billing account.
During this process, it’s important to clarify any questions or concerns you may have regarding billing, meter readings, and any other relevant details. The utility company will provide you with the information you need to understand the billing cycle and how to manage your energy usage effectively.
Once the finalization process is complete, the utility company will make the necessary adjustments to ensure a seamless transition from the temporary power connection to the permanent one. This may include replacing temporary meters, updating account information, and finalizing the billing arrangements.
It’s essential to ensure that all required paperwork and financial obligations are fulfilled promptly during the finalization process. This will ensure that there are no delays or complications in establishing the permanent power connection.
By finalizing the power connection, you can enjoy the convenience and benefits of a permanent electrical supply in your new home. This allows you to settle in and make the most of your new property without any interruptions or concerns about power supply.
Congratulations! You have successfully completed the process of turning on power for inspection and finalizing the power connection for your new home. Now you can enjoy the comfort and convenience of a fully functional electrical system as you embark on this new chapter of your life.
Thank you for reading this guide, and we hope it has provided you with valuable insights into the power connection process during home inspections. If you have any further questions, don’t hesitate to reach out to your local utility company or consult with your real estate agent for additional guidance.
Conclusion
Turning on the power for inspection is a crucial step in the process of buying a new home. It allows for a comprehensive evaluation of the electrical system, ensuring its functionality and safety. By following the steps outlined in this guide, you can navigate the power connection process seamlessly and prepare your new home for a successful inspection.
Understanding the power connection process involves contacting the utility company, providing necessary information, scheduling an appointment, being present during installation or activation, paying any required fees or deposits, conducting the inspection, and finalizing the power connection. Each step plays an important role in ensuring a smooth and efficient transition.
Being proactive in contacting the utility company and providing accurate information helps expedite the process. Scheduling an appointment and being present during the installation or activation enables you to address any concerns and ensure a smooth power connection. Paying any required fees or deposits ensures uninterrupted power supply during the inspection.
Conducting a thorough inspection and obtaining approval from the inspector provide peace of mind, knowing the electrical system meets safety standards. Finally, finalizing the power connection transitions from a temporary to a permanent supply, allowing you to settle into your new home comfortably.
Remember, every utility company may have specific requirements and procedures, so it’s crucial to familiarize yourself with their guidelines and follow them accordingly. Prompt communication, timely payments, and maintaining clear documentation will facilitate a successful power connection process.
We hope this guide has provided you with valuable insights into the power connection process for home inspections. By following these steps, you can ensure a smooth and efficient transition, allowing you to move forward with confidence in the electrical safety and functionality of your new home.
If you have any further questions or need additional guidance, don’t hesitate to reach out to your local utility company or consult with your real estate agent. Wishing you a successful and enjoyable journey in your new home!
Frequently Asked Questions about What Does A Buyer Have To Do To Turn On Power For Inspection?
Was this page helpful?
At Storables.com, we guarantee accurate and reliable information. Our content, validated by Expert Board Contributors, is crafted following stringent Editorial Policies. We're committed to providing you with well-researched, expert-backed insights for all your informational needs.


0 thoughts on “What Does A Buyer Have To Do To Turn On Power For Inspection?”