Home>Home Maintenance>How To Respond To The Buyer’s Inspection Report
Home Maintenance
How To Respond To The Buyer’s Inspection Report
Modified: March 6, 2024
Learn essential tips on how to effectively respond to a buyer's inspection report for your home maintenance. Empower yourself with valuable insights and expert advice.
(Many of the links in this article redirect to a specific reviewed product. Your purchase of these products through affiliate links helps to generate commission for Storables.com, at no extra cost. Learn more)
Introduction
Welcome to the world of homeownership! Buying a house is an exciting milestone, but it also comes with its fair share of responsibilities. One crucial aspect of the home-buying process is the buyer’s inspection report. This report details any issues or concerns that have been identified during the inspection of the property. As a seller, it’s important to understand how to respond to the buyer’s inspection report in a professional and efficient manner.
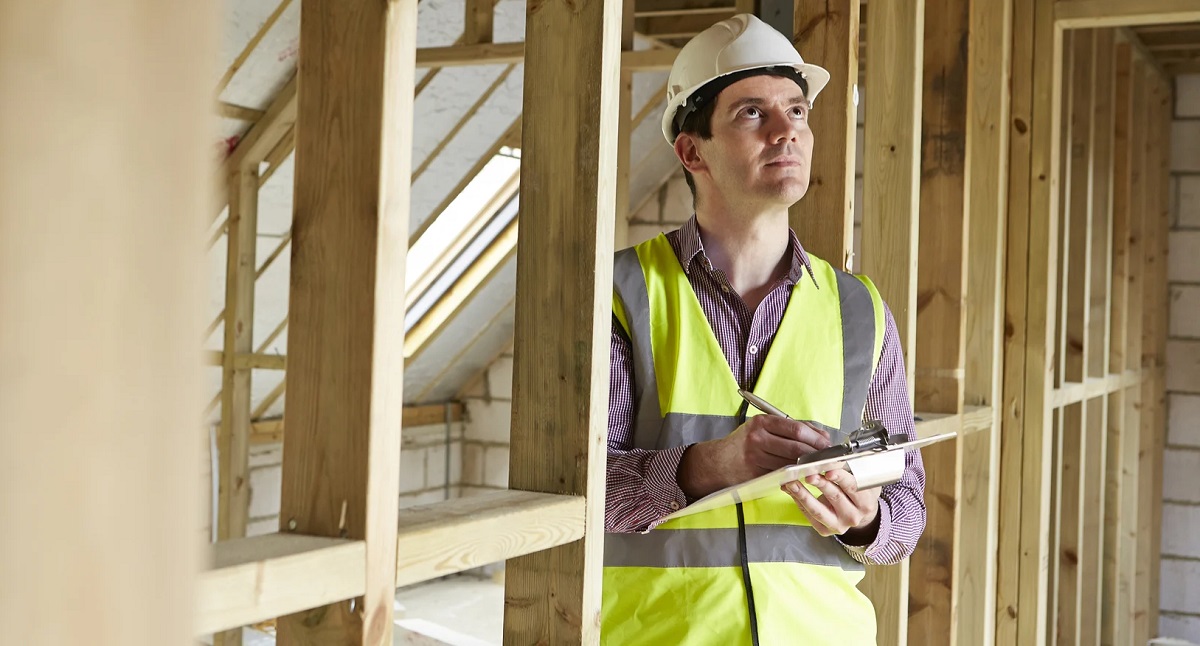
The buyer’s inspection report is a comprehensive document that outlines the condition of the property, including any defects, repairs, or maintenance tasks that need to be addressed. It is typically conducted by a licensed home inspector hired by the buyer. This inspection serves as a vital tool for both buyers and sellers, as it provides an objective assessment of the property’s condition.
Understanding the buyer’s inspection report is essential for sellers to make informed decisions about resolving any issues that arise. The report will typically contain a detailed list of findings, including both major and minor concerns. It’s important to note that not all findings will require immediate attention, but it is crucial to thoroughly evaluate the severity of each item and prioritize necessary repairs.
Responding to the buyer’s inspection report requires a strategic approach. It involves evaluating the findings, negotiating repairs with the buyer, hiring qualified contractors, documenting repairs, and ensuring completion before closing the sale. In this article, we will guide you through each step of the process, providing valuable insights and tips to navigate the buyer’s inspection report confidently.
By understanding how to respond effectively to the buyer’s inspection report, you can maintain a smooth and successful transaction while ensuring the satisfaction of both parties involved. So, let’s dive in and explore the various aspects of handling the buyer’s inspection report with confidence and professionalism.
Key Takeaways:
- Prioritize necessary repairs by considering safety, functionality, and structural impact. Negotiate with the buyer to reach a fair agreement on which repairs to address, ensuring a smooth and successful sale.
- Hire qualified contractors and document repairs thoroughly. Communicate openly with the buyer and complete the necessary work efficiently to facilitate a successful sale.
Understanding the Buyer’s Inspection Report
The buyer’s inspection report is a comprehensive document provided by a licensed home inspector that outlines the condition of the property. This report serves as a detailed assessment of the property’s structure, systems, and fixtures.
When the buyer’s inspection takes place, the home inspector thoroughly examines the property, looking for any issues, defects, or safety concerns. They assess the condition of essential components such as the roof, foundation, electrical systems, plumbing, HVAC, and more. The inspector meticulously documents their findings, including any repairs or maintenance tasks that may be needed.
Typically, the report will include both major and minor findings. Major findings refer to significant issues that may impact the property’s safety, functionality, or value. These could include problems like a leaky roof, electrical wiring problems, or structural issues. Minor findings, on the other hand, are less critical and usually involve cosmetic or minor functional issues that might need attention but are not urgent.
It is important to carefully review and understand the buyer’s inspection report to effectively respond to any concerns raised. Take the time to read through the report thoroughly, paying close attention to the descriptions and recommendations provided by the inspector. This will allow you to properly assess the severity of each issue and determine the necessary steps to address them.
While reviewing the report, keep in mind that not every item identified will require immediate attention. Some issues may be easily remedied with simple repairs or routine maintenance tasks. Others may warrant further investigation or the expertise of a qualified professional. By understanding the nature and significance of each finding, you can prioritize and plan the necessary repairs or negotiations.
Remember, the buyer’s inspection report is an opportunity for both buyer and seller to evaluate the property objectively. It is essential to approach any repairs or negotiations with transparency and a willingness to find mutually beneficial solutions. Open communication between both parties is crucial to ensuring a successful resolution.
In the following sections, we will discuss in detail how to evaluate the severity of the findings, prioritize necessary repairs, negotiate repairs with the buyer, hire qualified contractors, document the repairs, and complete them to meet the expectations of the buyer and finalize the sale. Let’s proceed to the next step.
Evaluate the Severity of Findings
Once you have received the buyer’s inspection report, it’s time to evaluate the severity of the findings. This step is crucial in determining the urgency and importance of each item identified in the report.
Start by going through the report carefully and making a list of all the issues mentioned. Each finding should be evaluated based on its impact on the safety, functionality, and value of the property. Consider the following factors:
- Safety: Assess whether any findings pose potential safety hazards to the occupants of the property. Issues such as electrical wiring problems, structural damage, or faulty plumbing could present significant safety risks and should be addressed with a high priority.
- Functionality: Determine if any findings affect the proper functioning of essential components in the house. This could include issues with the HVAC system, plumbing leaks, or malfunctioning appliances that may need immediate attention to ensure the home operates efficiently.
- Structural Impact: Consider findings that have an impact on the integrity of the property’s structure. Structural issues, such as foundation cracks, sagging floors, or roof problems, should be given serious attention as they can affect the long-term stability and value of the home.
- Maintenance and Cosmetic Issues: While they may not be as critical as safety or structural concerns, cosmetic and maintenance issues should not be overlooked. These include issues like peeling paint, minor plumbing leaks, or broken fixtures. While not urgent, addressing these items can help improve the overall appearance and appeal of the property.
As you assess the severity of each finding, it is also important to consider the potential cost and effort required to address the issue. Some repairs may be relatively simple and affordable, while others may be more complex and costly. This evaluation will help you prioritize the necessary repairs and allocate your resources accordingly.
Remember, not all findings need to be addressed by the seller. Negotiation is an essential part of the process, and it is common for buyers and sellers to come to an agreement on which repairs will be handled. However, it is crucial to approach these negotiations with a fair and objective mindset, considering the significance of the findings and their impact on the property.
Once you have evaluated the severity of the findings, you can move on to the next step: prioritizing the necessary repairs. This will allow you to address the most critical issues first and work towards a satisfactory resolution with the buyer.
Prioritize Necessary Repairs
After evaluating the severity of the findings in the buyer’s inspection report, it’s time to prioritize the necessary repairs. Not all issues will require immediate attention, so it’s important to focus on the ones that have the most significant impact on the property’s safety, functionality, and value.
To prioritize repairs effectively, consider the following factors:
- Health and Safety: Address any findings that pose a risk to the health and safety of the occupants. This includes issues such as mold, asbestos, or electrical hazards. These repairs should be given top priority to ensure the well-being of future residents.
- Structural Integrity: Focus on repairs that affect the structural integrity of the property. Structural issues, such as foundation cracks or roof damage, should be addressed promptly to prevent further deterioration and potential safety risks.
- Functionality: Give priority to repairs that impact the functioning of essential systems in the house. This includes addressing issues with plumbing, electrical, HVAC, or appliances that affect the daily activities and comfort of the occupants.
- Legal Compliance: Ensure any findings related to building code violations or safety regulations are addressed. This may involve obtaining the necessary permits and working with qualified professionals to bring the property up to code.
- Maintenance and Appearance: While not as critical as safety or structural concerns, addressing maintenance and cosmetic issues can improve the overall appeal and value of the property. Consider addressing issues like peeling paint, broken fixtures, or minor plumbing leaks to enhance the aesthetic appeal for potential buyers.
By prioritizing the necessary repairs, you can focus on the most crucial issues first and allocate your time and resources accordingly. It’s important to communicate with the buyer about your prioritization choices and negotiate any disagreements that may arise.
Keep in mind that it may not be feasible or necessary to address every item in the buyer’s inspection report. Some repairs may be beyond your means or not required by local building codes. In these cases, open and transparent communication with the buyer is key. Explain your reasoning for not addressing certain findings and find mutually acceptable resolutions.
Remember, the goal is to reach an agreement with the buyer that satisfies both parties and ensures the property is in a suitable condition for the new owner. By prioritizing the necessary repairs and approaching negotiations with a fair and objective mindset, you can work towards a successful resolution and a smooth transition to closing the sale.
Negotiating Repairs with the Buyer
Once you have evaluated and prioritized the necessary repairs from the buyer’s inspection report, it’s time to enter into negotiations with the buyer. This step is crucial in reaching a mutually agreeable resolution that satisfies both parties.
Here are some tips for negotiating repairs with the buyer:
- Review the report together: Schedule a meeting with the buyer and their agent to go over the inspection report in detail. This provides an opportunity to discuss each finding and clarify any questions or concerns. By reviewing the report together, you can ensure transparency and open communication throughout the negotiation process.
- Be prepared to justify your decisions: Be ready to explain your reasoning behind the repairs you have prioritized and those that you may choose not to address. Provide detailed explanations, backed by professional opinions or estimates, to support your choices.
- Consider offering alternative solutions: If you are unable or unwilling to complete certain repairs, consider offering alternative solutions. This could involve providing a credit towards closing costs or reducing the purchase price of the property to compensate for the necessary repairs the buyer will have to undertake.
- Be open to negotiation: Negotiation is a give-and-take process. Be open to hearing the buyer’s concerns and requests. It’s important to find a middle ground that meets both parties’ needs and ensures the successful completion of the sale.
- Document the agreed-upon repairs: Once an agreement has been reached with the buyer, it’s essential to document the details of the repairs in writing, either through an addendum to the purchase agreement or a separate repair agreement. This helps avoid any misunderstandings and ensures that both parties are clear on the expectations and responsibilities.
Remember, negotiations should be approached with a fair and collaborative mindset. The goal is to find a common ground that addresses the necessary repairs while also considering both the buyer’s and seller’s financial and practical constraints.
It is also worth mentioning that, depending on the terms of the sale agreement and local laws, there may be limitations on the repairs you are obligated to undertake as the seller. Understanding your rights and responsibilities in these negotiations is important and may require consulting with a real estate professional or attorney.
By engaging in open and transparent negotiations with the buyer, you can work towards a resolution that is satisfactory for both parties. This collaborative approach helps maintain a positive relationship throughout the process and ensures a smooth transition to closing the sale.
Be prepared to negotiate. Prioritize the most important repairs and be willing to compromise on smaller issues. Keep communication open and be willing to work with the buyer to reach a fair resolution.
Hiring Qualified Contractors
Once you have reached an agreement with the buyer regarding the repairs, it’s time to hire qualified contractors to carry out the necessary work. Hiring professionals with the right expertise and experience is essential to ensure the repairs are done correctly and efficiently.
Here are some steps to follow when hiring qualified contractors:
- Research and gather multiple quotes: Take the time to research and gather quotes from several contractors for the required repairs. This allows you to compare prices, assess the scope of work, and evaluate the credibility and reputation of the contractors.
- Check licenses and credentials: Before hiring any contractor, make sure they are licensed, insured, and bonded. This provides reassurance that they have the necessary qualifications and expertise to handle the repairs professionally.
- Ask for references: Request references from the contractors and follow up by contacting their previous clients. This allows you to gather feedback on the quality of their work, reliability, and professionalism.
- Review contracts and agreements: Once you have selected a contractor, review the contract carefully before signing. Ensure that all the details of the repairs, including timelines, costs, and materials, are clearly outlined and agreed upon.
- Communicate expectations: Clearly communicate your expectations to the contractors, including the quality of work, timelines, and any specific requirements. Maintaining open and transparent communication throughout the process helps to avoid delays and misunderstandings.
- Monitor the progress: Keep an eye on the progress of the repairs and address any concerns or issues that may arise promptly. Regular communication with the contractors allows you to stay updated on the status of the work and make adjustments if necessary.
- Ensure proper documentation: Keep records of all communication, agreements, and receipts related to the repairs. This documentation will be important for future reference and may be required for closing the sale.
Hiring qualified contractors is crucial in ensuring that the repairs are completed to a high standard and within the agreed-upon timelines. Taking the time to research and choose reputable professionals will help give you peace of mind and minimize any potential issues down the line.
Lastly, it’s important to note that the responsibility for coordinating and overseeing the repairs may vary depending on the terms of the purchase agreement and local regulations. It is advisable to consult with your real estate agent or attorney to understand your role and obligations in the process.
By hiring qualified contractors and maintaining open communication with them, you can ensure that the necessary repairs are completed professionally and efficiently, bringing the property one step closer to a successful sale.
Documenting Repairs
Properly documenting the repairs made to address the findings in the buyer’s inspection report is essential for several reasons. It provides transparency, ensures that the necessary repairs have been completed, and serves as evidence for future reference, including the closing of the sale and potential disputes.
Here are some steps to consider when documenting repairs:
- Photographic evidence: Take before and after photographs of the areas or components that were repaired. These photos serve as visual documentation to showcase the condition of the property before and after the repairs were completed. Be sure to capture clear images that clearly highlight the work that has been done.
- Receipts and invoices: Keep all receipts and invoices related to the repairs. This includes materials, labor costs, and any additional expenses incurred during the process. These documents serve as proof of the expenses associated with the repairs.
- Work completion certificates: If applicable, obtain work completion certificates or any other documentation provided by the contractors. This confirms that the repairs have been completed by qualified professionals and can be provided to the buyer as proof of the work performed.
- Repair log or journal: Maintain a log or journal that details the repairs, including the dates, descriptions of the work done, and any additional notes or observations. This can be a useful reference in case any questions or concerns arise in the future.
- Addendums or repair agreements: If there were specific agreements or addendums made regarding the repairs, ensure that all parties involved have signed and retained copies of these documents. This provides legal protection and clarity regarding the agreed-upon repairs.
- Communication records: Keep copies of any written communication, such as email exchanges or text messages, related to the repairs. This helps to establish a record of the discussions and decisions made throughout the process.
By documenting the repairs thoroughly, you can demonstrate to the buyer that the necessary work has been completed and provide reassurance of the property’s condition. This documentation also serves as valuable evidence in case any questions or disputes arise.
It is important to note that the specific documentation requirements may vary depending on local regulations and the terms of the purchase agreement. It is advisable to consult with your real estate agent or attorney to ensure compliance and to address any specific requirements.
By taking the time to document the repairs properly, you are ensuring transparency, providing tangible evidence, and protecting yourself during the closing process. This level of thoroughness will contribute to the overall confidence and satisfaction of the buyer, facilitating a successful sale.
Completing the Repairs
Once you have hired qualified contractors and documented the agreed-upon repairs, it’s time to focus on completing the necessary work. Taking a proactive and organized approach will help ensure that the repairs are done efficiently and to a high standard.
Consider the following steps when completing the repairs:
- Coordinate with contractors: Maintain regular communication with the contractors to ensure they have all the necessary information and access to the property. Address any questions or concerns they may have to keep the process moving smoothly.
- Monitor the progress: Keep track of the progress of the repairs and ensure that the work is being carried out according to the agreed-upon timeline. Regularly inspect the completed work to verify its quality and check if any additional touch-ups or adjustments are required.
- Address any unforeseen issues: During the repair process, unexpected issues or complications may arise. Promptly address these issues and communicate with the buyer about any necessary adjustments or delay in completing the repairs. Transparency is key to maintaining trust and ensuring a successful resolution.
- Follow up on permits and inspections: If permits or inspections are required for certain repairs, coordinate with the contractors to ensure these are obtained and scheduled accordingly. Adhering to local regulations and obtaining necessary approvals is crucial for the completion of the repairs.
- Communicate with the buyer: Keep the buyer informed about the progress of the repairs. Provide updates on when the work is expected to be completed and any adjustments that may arise during the process. This open communication helps manage expectations and maintain a positive relationship with the buyer.
- Retain records and documentation: As the repairs are completed, continue to keep all records and documentation related to the work, including invoices, receipts, and completion certificates. These documents will be necessary for the closing process and future reference.
By following these steps, you can ensure that the repairs are completed efficiently and to the satisfaction of both parties. Maintain clear communication, address any issues promptly, and prioritize quality to ensure the repairs are carried out in a professional manner.
It’s important to note that scheduling and completing the repairs in a timely manner is crucial to meeting the agreed-upon timelines for closing the sale. Delays or incomplete repairs can cause frustrations and potential complications. Be proactive in managing the process to ensure a smooth transition to the next stage of the sale.
Once the repairs are completed, you can move on to the final step: reinspection to confirm the satisfactory completion of the repairs. This will provide the buyer with the assurance that the necessary work has been done and help facilitate the final stages of the sale.
Reinspection
After completing the agreed-upon repairs, it is essential to schedule a reinspection to ensure the satisfactory completion of the work. This step provides an opportunity to verify that the repairs have been done to the required standard and address any remaining concerns before proceeding with the sale.
Here is a guide to follow when conducting the reinspection:
- Schedule the reinspection: Coordinate with the buyer and their agent to schedule a mutually convenient time for the reinspection. Ensure that all parties involved are aware of the purpose of the reinspection and its importance in finalizing the sale.
- Involve a licensed home inspector: Hire a licensed home inspector to conduct the reinspection. This will provide an unbiased assessment of the completed repairs and any additional issues that may have arisen during the process.
- Provide documentation: Furnish the inspector with all the necessary documentation related to the repairs, including invoices, receipts, completion certificates, and any permits obtained. This will serve as evidence of the work that has been done.
- Accompany the inspector: Accompany the inspector during the reinspection to provide any relevant information and answer any questions that may arise. This will help ensure a thorough assessment and address any concerns in real-time.
- Verify completion and quality: Verify with the inspector that the completed repairs meet the agreed-upon standard and comply with any relevant building codes or regulations. If any additional issues are identified, discuss possible solutions with the buyer and determine the best course of action.
- Document the reinspection: Keep a record of the reinspection, including any findings or observations noted by the inspector. This documentation serves as proof of the inspection and can be useful for future reference or potential disputes.
The reinspection is a critical step to ensure the buyer’s confidence in the completed repairs and the overall condition of the property. By conducting a thorough reinspection, you are demonstrating your commitment to addressing the buyer’s concerns and facilitating a successful sale.
If any additional repairs or adjustments are identified during the reinspection, it is important to address them promptly and communicate openly with the buyer. Transparency and responsiveness contribute to building a positive relationship and help ensure a smooth transition to closing the sale.
Once the repairs have been verified during the reinspection and any outstanding issues have been addressed, you can move forward confidently towards the final stages of the sale, such as preparing for closing and transferring ownership of the property to the buyer.
Conclusion
Responding to the buyer’s inspection report is a crucial step in the home-selling process. By understanding and effectively addressing the findings in the report, you can ensure a smooth and successful transaction while maintaining the satisfaction of both the buyer and seller.
Throughout this article, we have explored the necessary steps to respond to the buyer’s inspection report. Understanding the report and evaluating the severity of the findings allows you to prioritize the necessary repairs. By negotiating with the buyer in a fair and collaborative manner, you can reach an agreement that satisfies both parties.
Hiring qualified contractors, documenting the repairs, and completing them in a timely and professional manner are essential to ensure the successful completion of the necessary work. Conducting a reinspection provides the buyer with assurance that the repairs have been completed to their satisfaction.
Remember, open communication, transparency, and collaboration are key throughout this process. By maintaining a constructive and proactive approach, you can successfully navigate the buyer’s inspection report while fostering a positive relationship with the buyer.
As you embark on this journey, it is crucial to consult with professionals such as real estate agents and attorneys, who can provide guidance and ensure compliance with local regulations and contractual obligations.
Responding to the buyer’s inspection report may seem daunting, but with careful consideration and attention to detail, you can address the necessary repairs and move closer to completing the sale of your home.
By following the steps outlined in this article, you are equipped with the knowledge and strategies to effectively respond to the buyer’s inspection report and facilitate a successful and satisfying transaction. Best of luck as you navigate this process and move towards the next chapter of your homeownership journey!
Frequently Asked Questions about How To Respond To The Buyer's Inspection Report
Was this page helpful?
At Storables.com, we guarantee accurate and reliable information. Our content, validated by Expert Board Contributors, is crafted following stringent Editorial Policies. We're committed to providing you with well-researched, expert-backed insights for all your informational needs.


0 thoughts on “How To Respond To The Buyer’s Inspection Report”