Home>Ideas and Tips>Creating A Functional Craft Room With Adjustable Height Table

Ideas and Tips
Creating A Functional Craft Room With Adjustable Height Table
Modified: October 28, 2024
Design a functional craft room with an adjustable height table for comfort and versatility. Discover tips on lighting, storage, and ergonomic setup.
(Many of the links in this article redirect to a specific reviewed product. Your purchase of these products through affiliate links helps to generate commission for Storables.com, at no extra cost. Learn more)
Creating a craft room that’s both functional and comfy is key for any crafter. Whether you’re a seasoned artist or just starting out, having the right tools and space can make all the difference in your creative journey. So, how do you create a functional craft room with an adjustable height table? Let’s dive in.
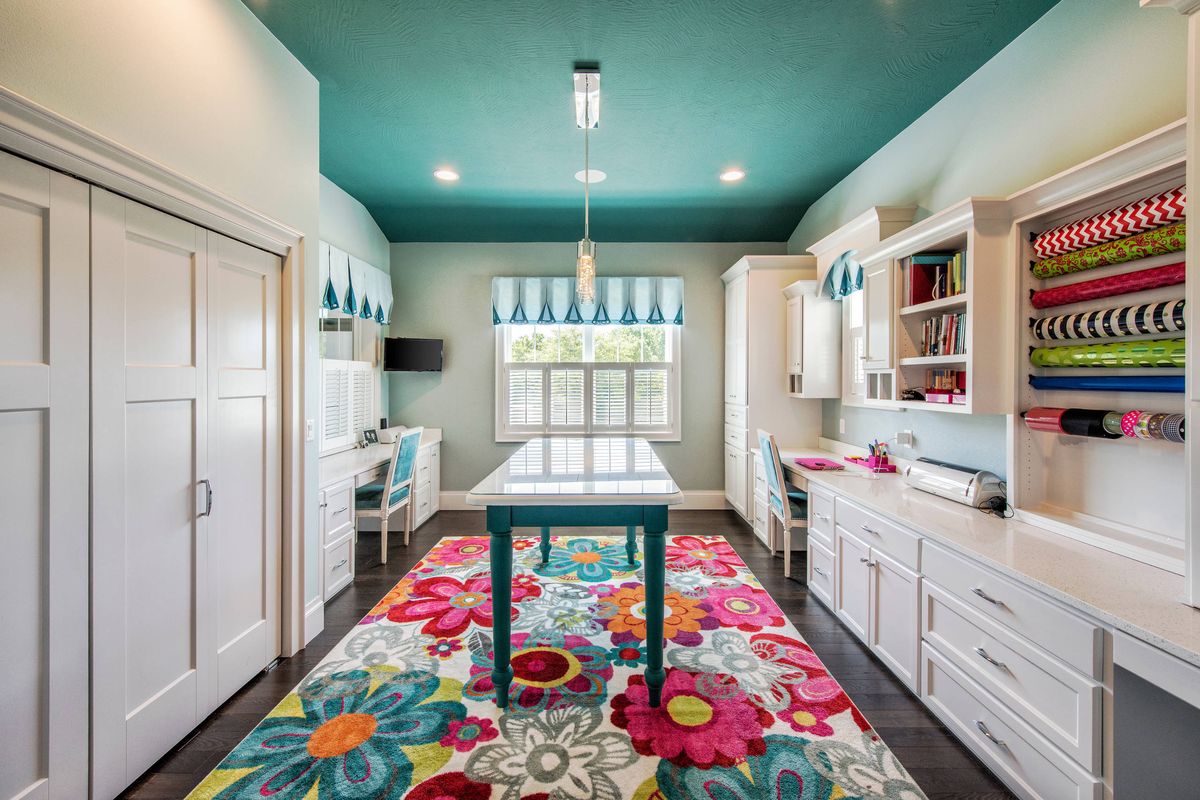
Identifying Your Crafting Needs
First things first, figure out what you need. Will the room be just for crafting, or will it double as an office or guest room? Some crafts, like knitting, can be done anywhere and may only need storage for tools and supplies. Other crafts, like painting or sewing, benefit from large spaces to spread out and stay organized.
Sitting vs. Standing
Think about whether you prefer to sit or stand when creating. If you sit in a traditional chair or low stool, a standard-height table will do. But if you work at an easel or with a tailor’s dress form, higher stools might be better. For those who sit and stand, a hybrid arrangement like an adjustable standing desk could be ideal. This type of desk lets you switch between sitting and standing throughout the day, which can ease pressure on your joints and improve overall comfort.
Lighting
Lighting is another biggie. Natural light is always best, but if that’s not possible, various layers of artificial lighting can be very useful. Ceiling-level track lights or hanging pendant lights can illuminate large areas, while desk lamps or under-cabinet lighting can spotlight fine detail work. Proper lighting not only enhances visibility but also reduces eye strain, making it easier to focus on your craft.
Flooring
Flooring is a practical concern that shouldn’t be overlooked. Carpet can be challenging if you use paints or work with pins or small beads, as it can stain easily and be hard to clean. Instead, consider flooring options that are easy to clean and maintain, like hardwood or laminate flooring.
Electrical Outlets and Light Switches
To make sure your workspace is fully functional, install electrical outlets and light switches in convenient spots. Installing them under upper cabinets or recessed into worktops can ease access and keep your workspace clutter-free.
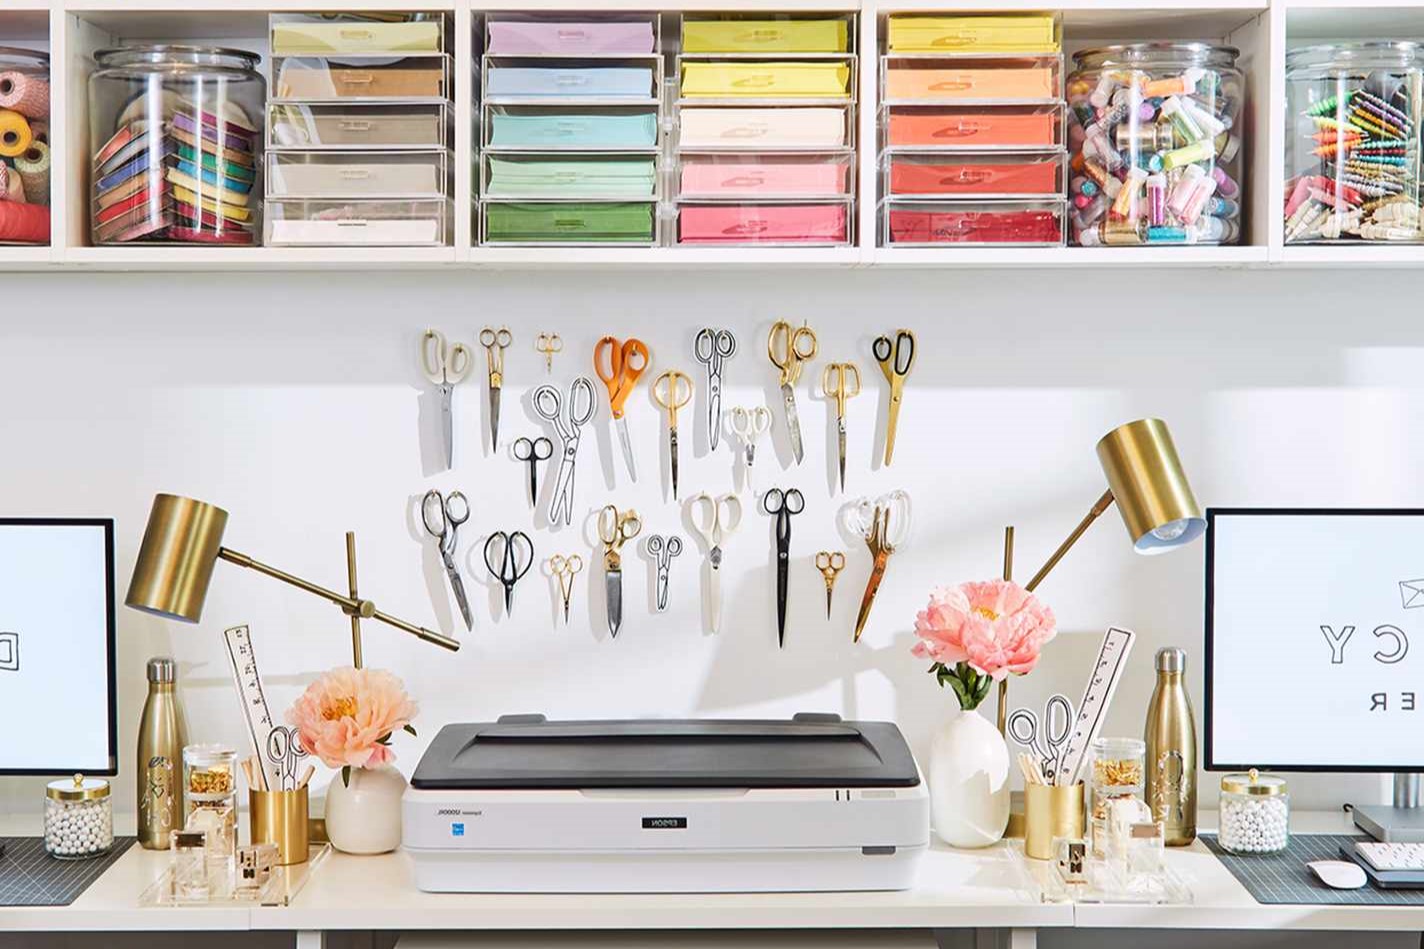
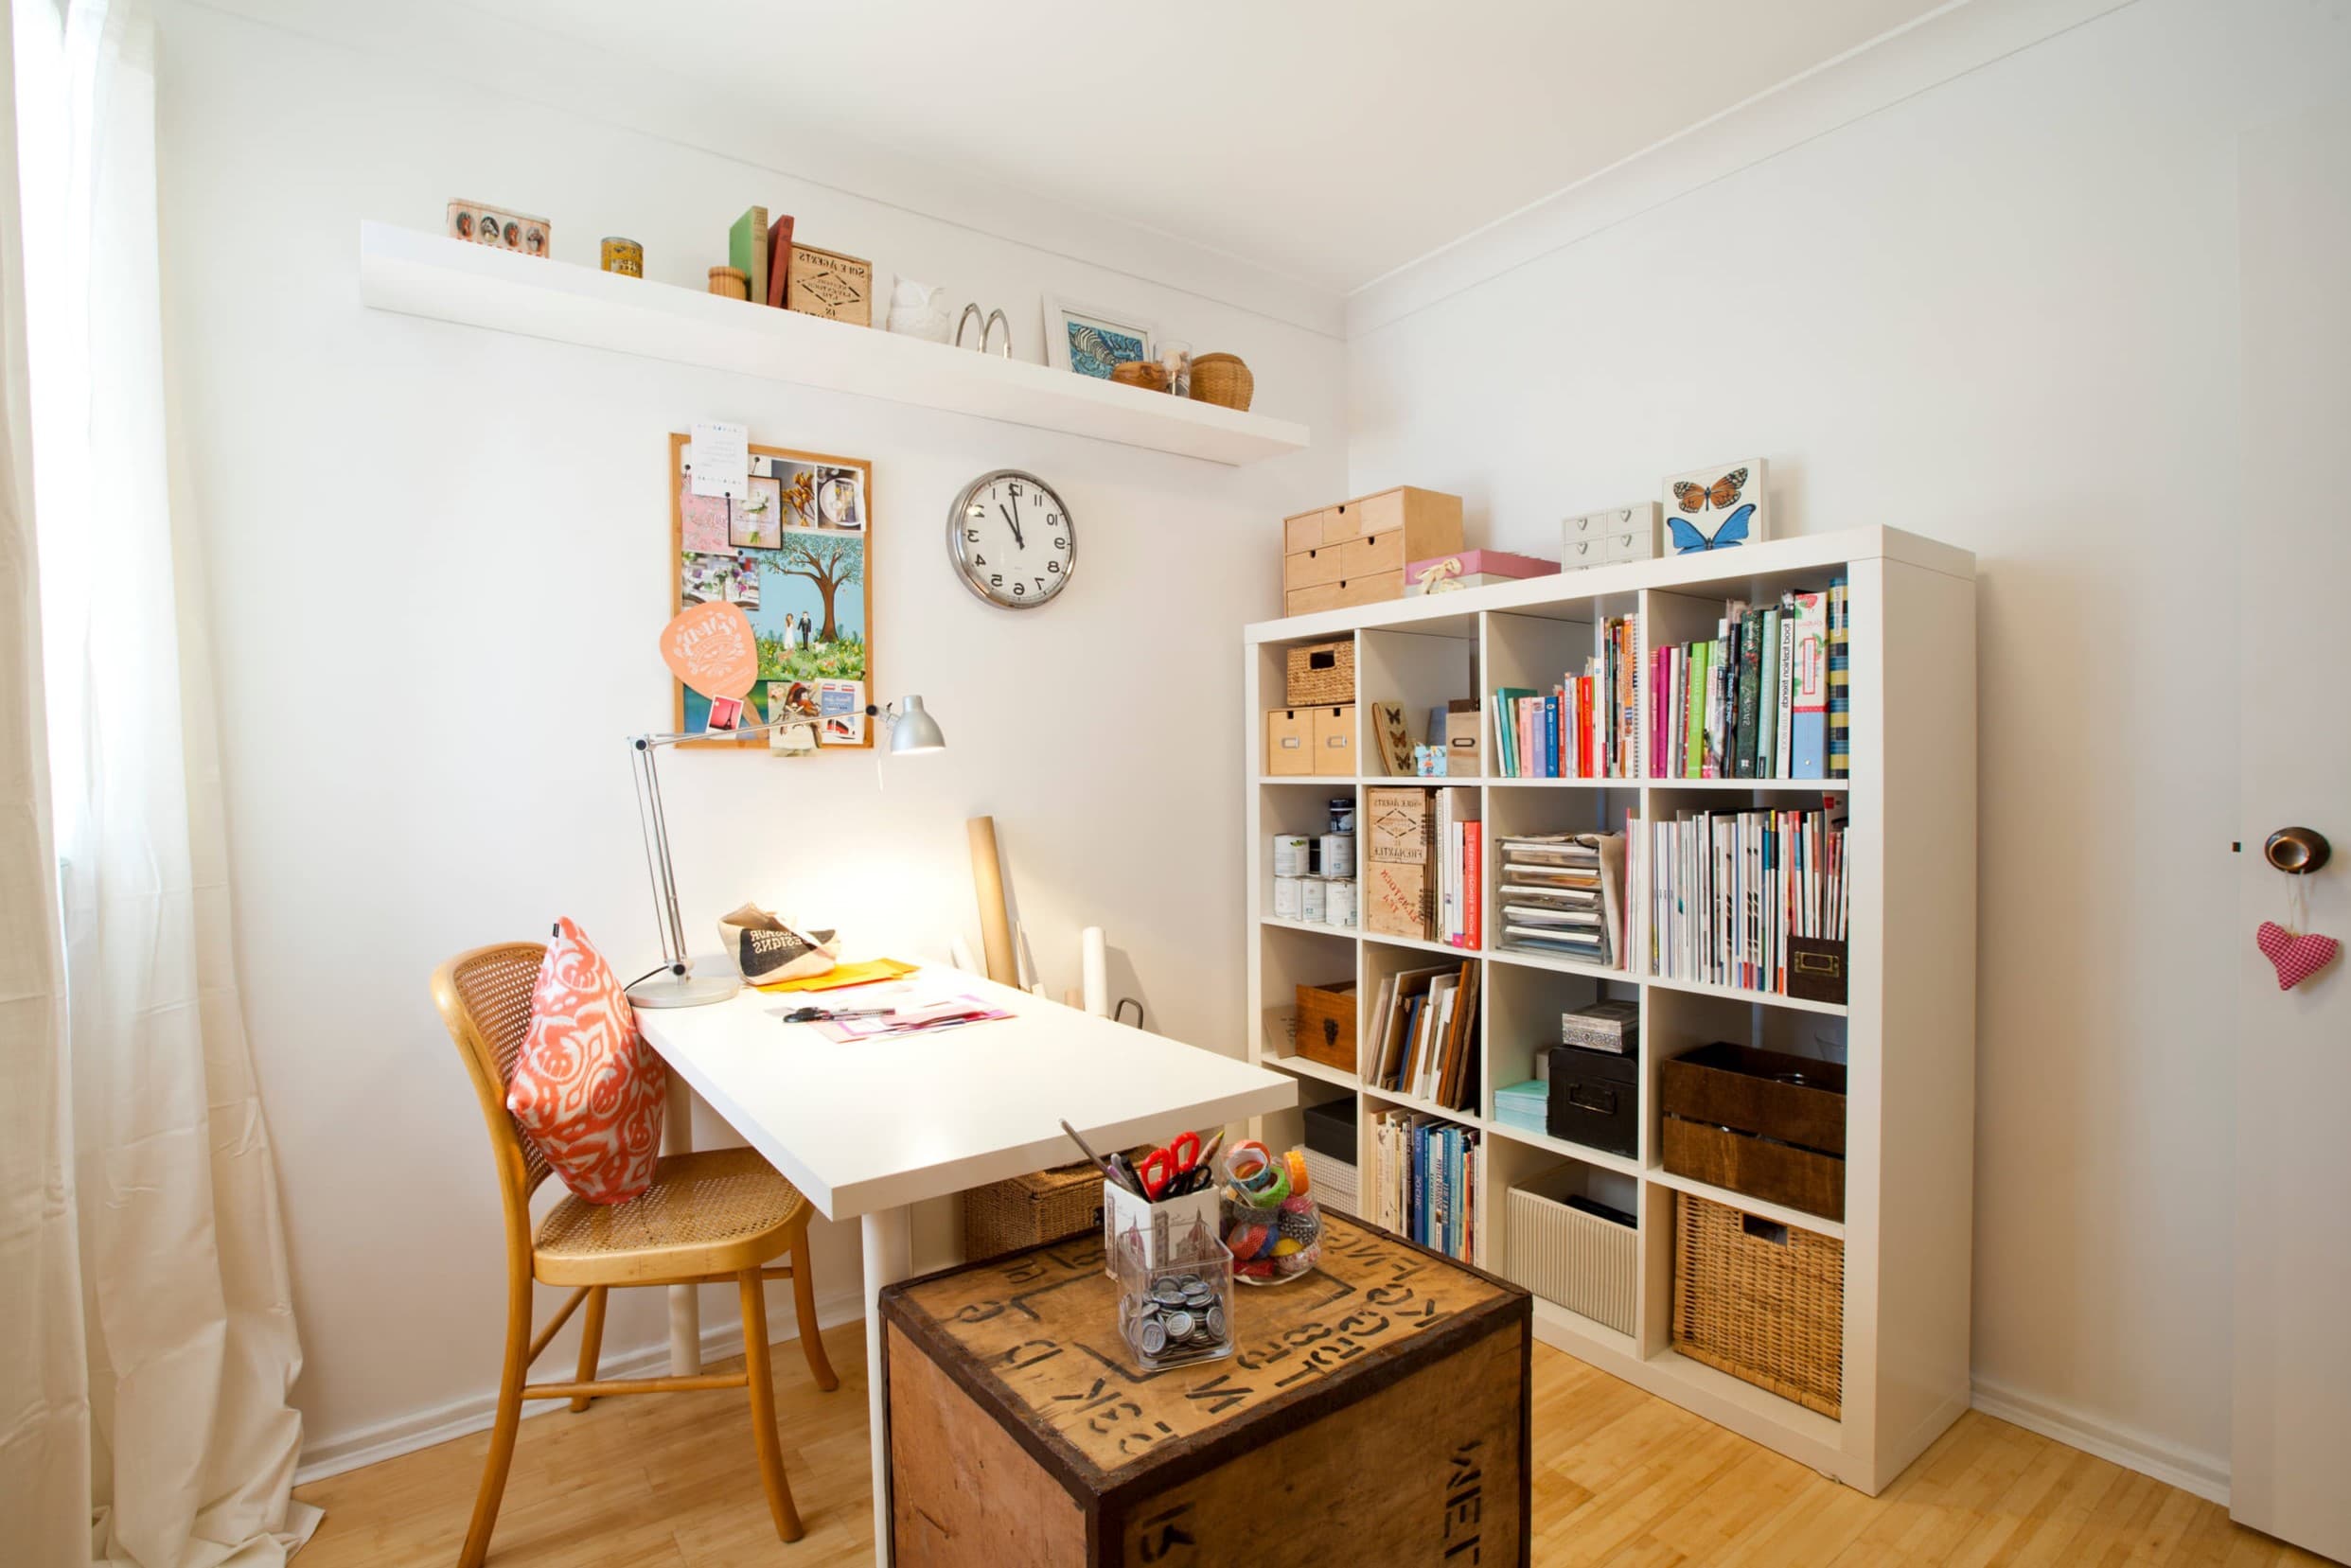
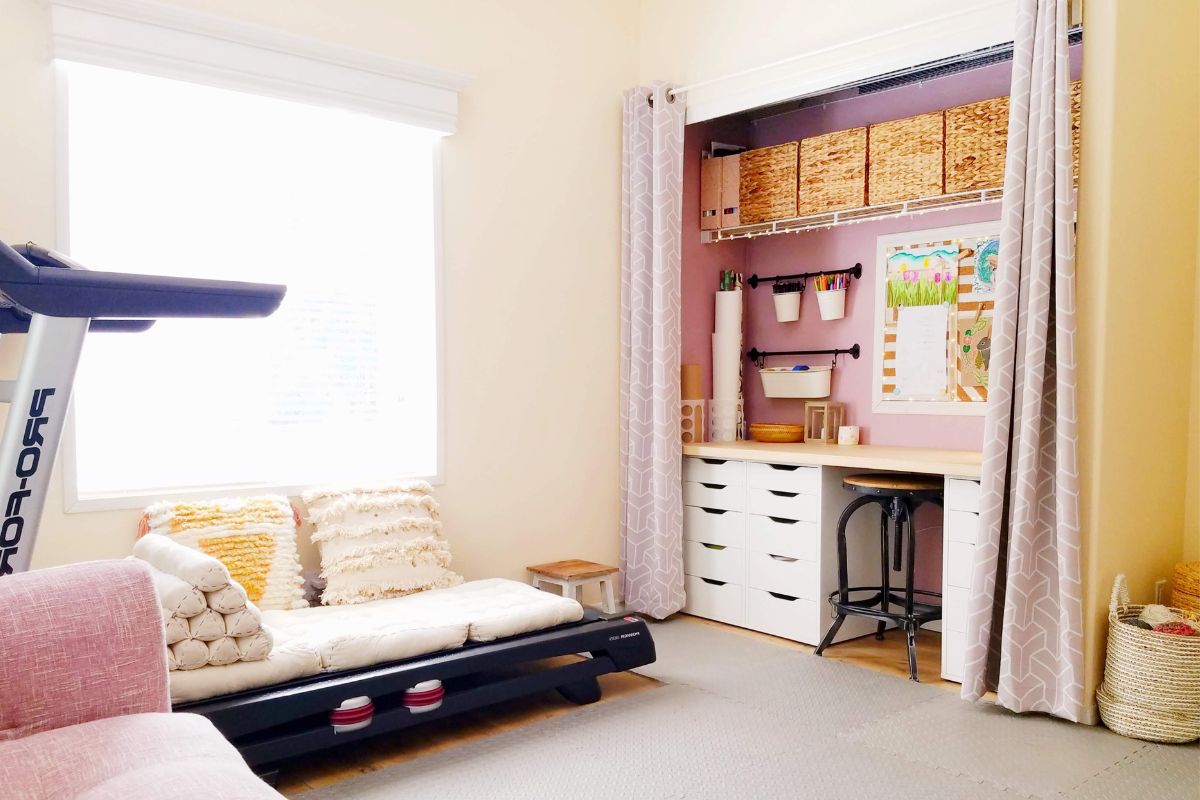
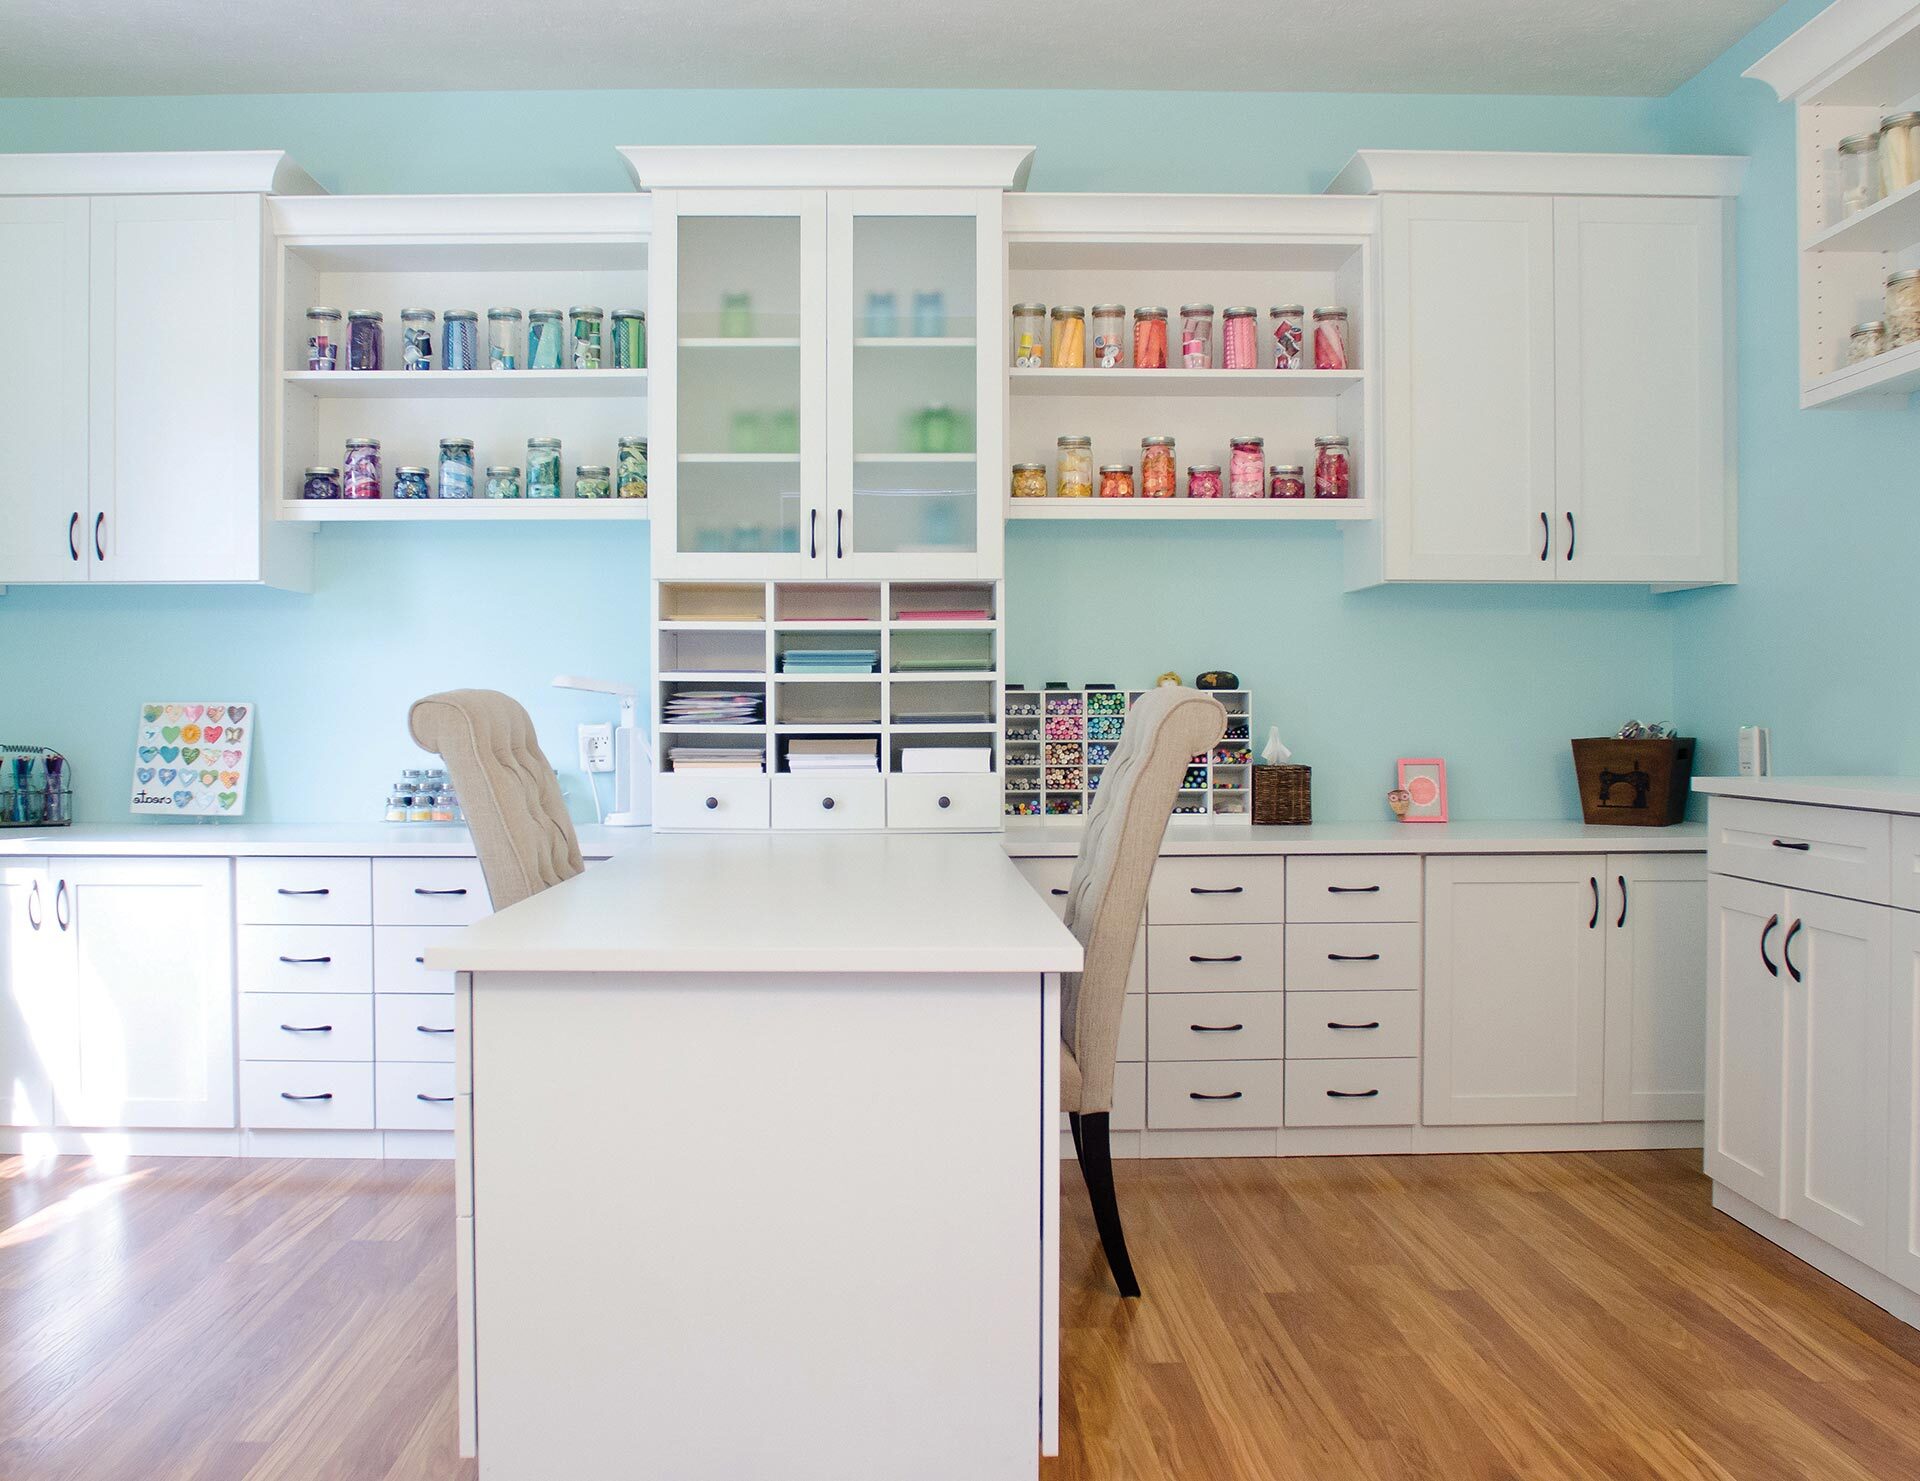
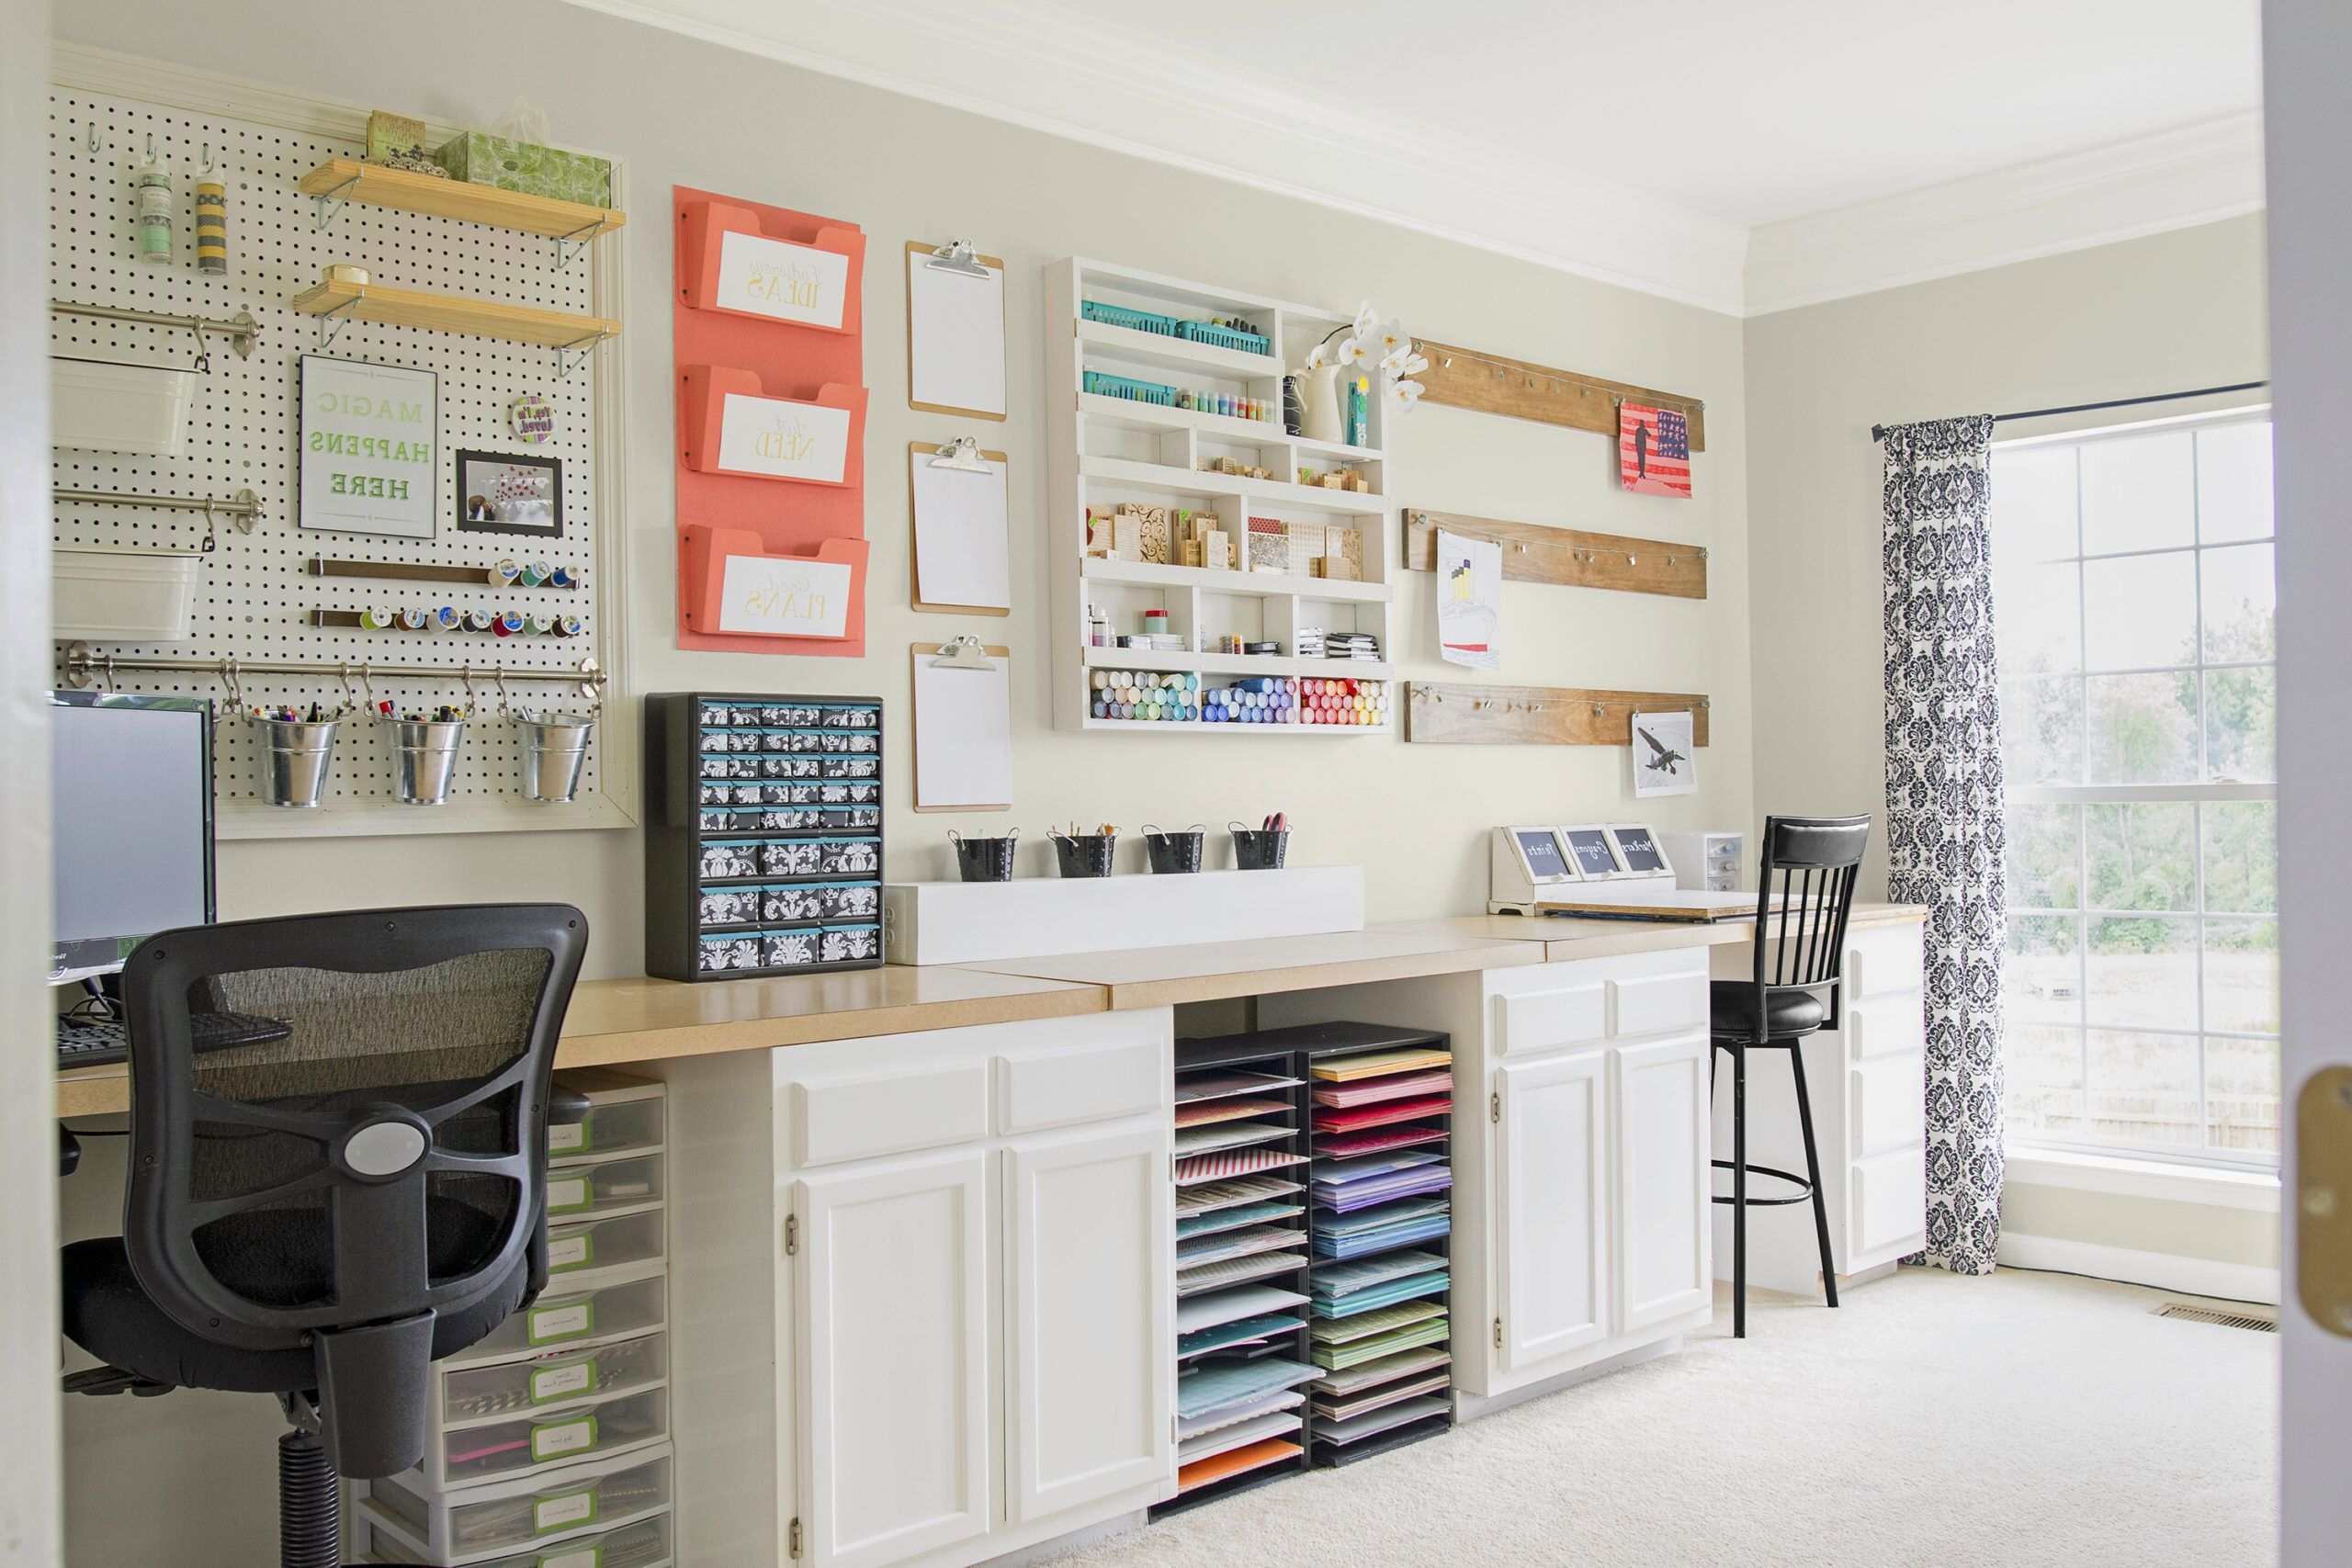
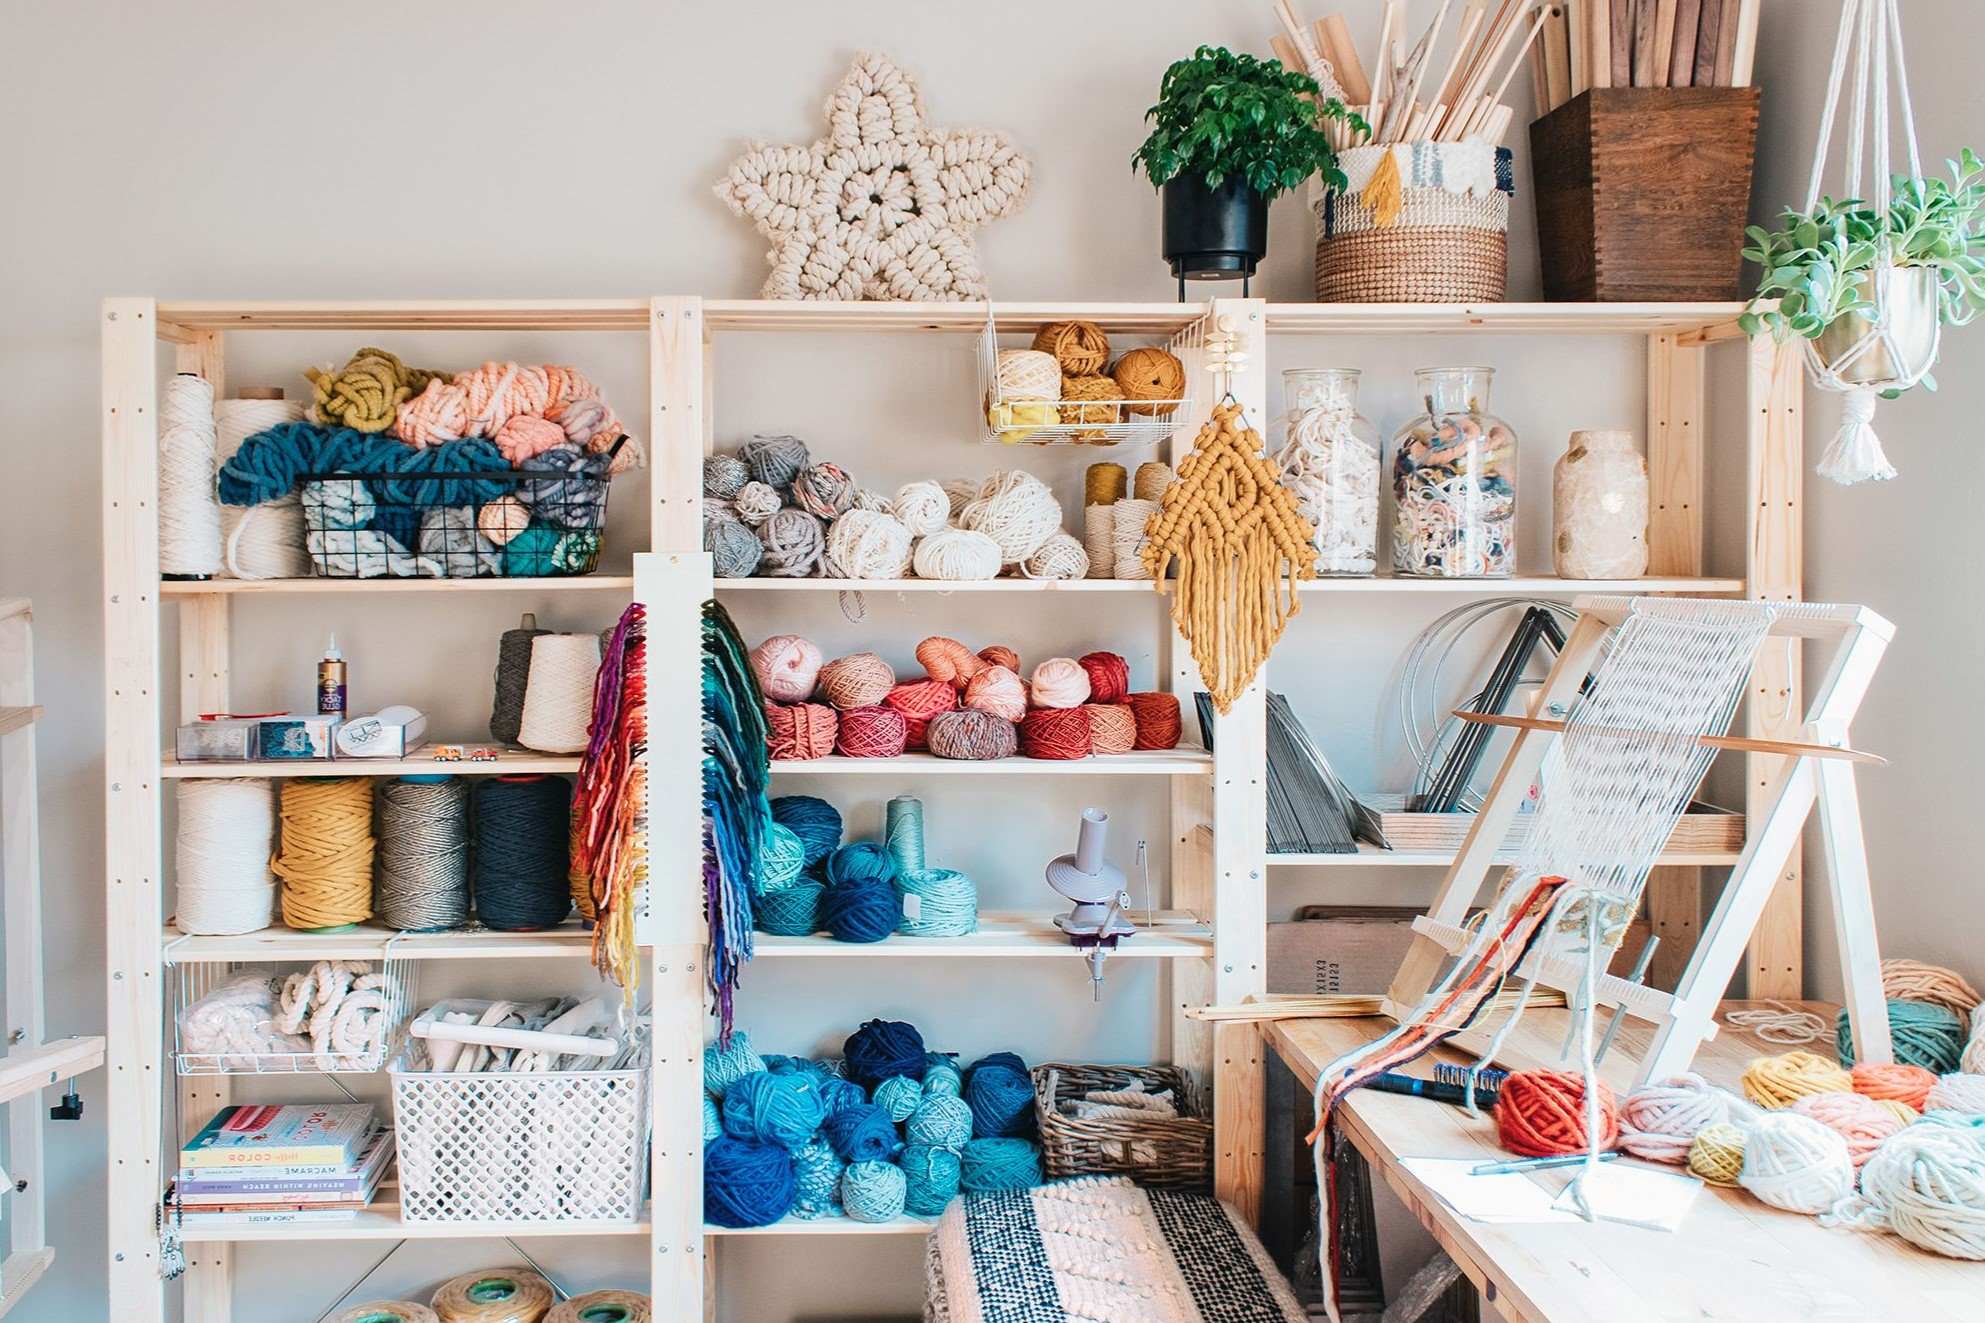
Storage Solutions
Storage is a vital part of any craft room. It helps keep your workspace organized and ensures you can easily find the tools and supplies you need. Here are some effective storage solutions to consider:
Visible Storage
Keep the tools you use most often visible on shelves or in vertical storage. This makes them easily accessible and encourages you to use them regularly. Tools that are out of sight are often out of mind, which can lead to clutter and disorganization.
Labeling
Labeling your storage containers is essential for maintaining organization. Clear labels help you quickly identify what’s inside each container, making it easier to put things away when you're finished using them.
Vertical Storage
Vertical storage solutions like bookshelves and pegboards are excellent for maximizing space in your craft room. These solutions let you store a variety of items such as fabric, yarn, and thread without taking up too much floor space.
Closed Cabinet Storage
For items you use infrequently, consider storing them behind closed cabinet doors or in labeled boxes. This keeps your workspace clutter-free and ensures that less frequently used supplies don’t interfere with your daily crafting activities.
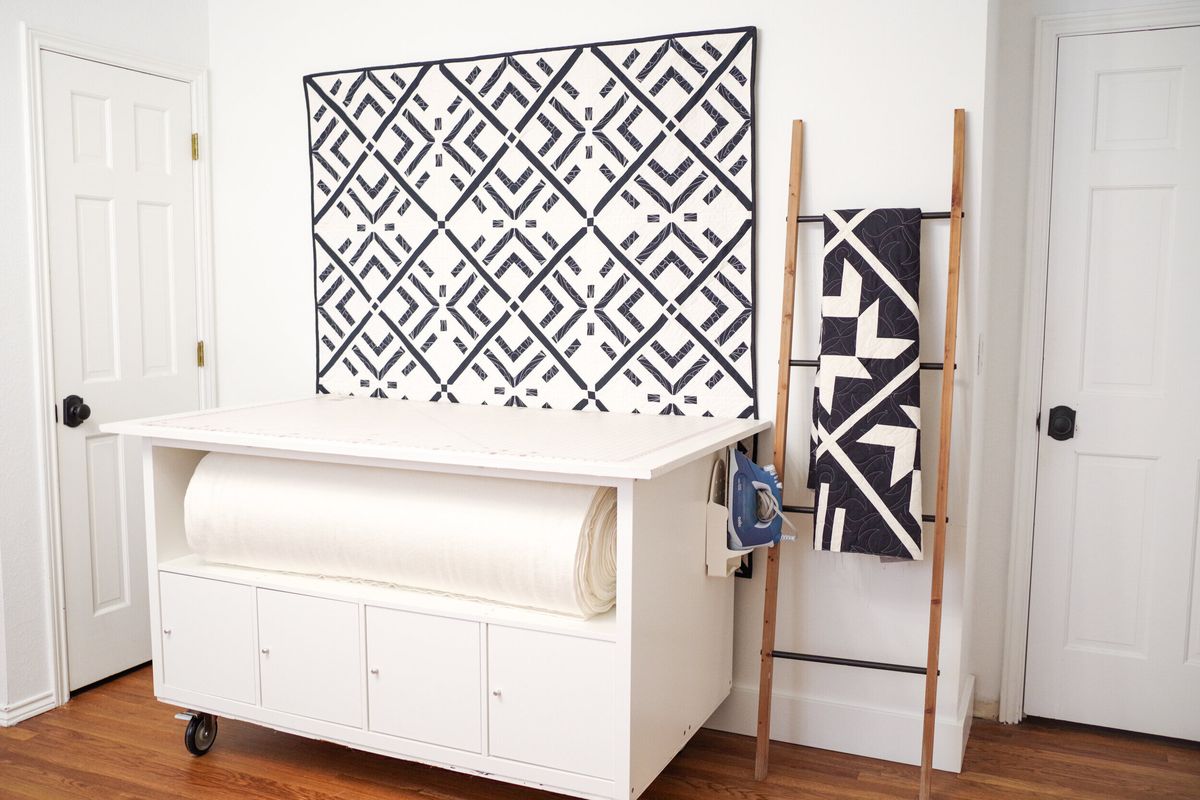
Adjustable Height Table
An adjustable height table is a versatile piece of furniture that can accommodate various crafting needs. Here’s how you can incorporate one into your craft room:
Benefits of Adjustable Height Tables
- Versatility: An adjustable height table lets you switch between sitting and standing throughout the day, which is good for both your physical health and productivity.
- Comfort: It ensures you can work at a comfortable height, reducing strain on your back and shoulders.
- Flexibility: It can be used for different types of crafts, from sewing to painting, making it a versatile addition to any craft room.
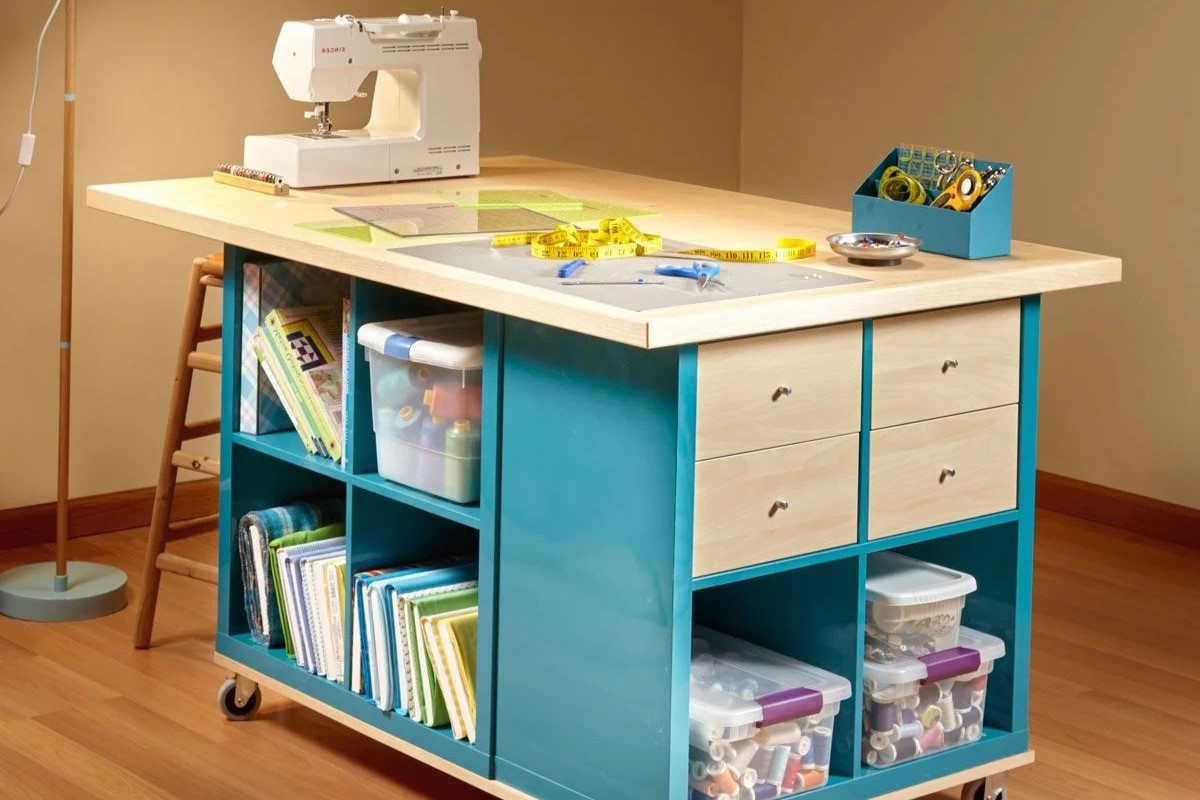
DIY Adjustable Height Table
If you prefer a custom solution, you can create your own adjustable height table using materials like IKEA Kallax shelves and a tabletop. Here’s a step-by-step guide:
-
Materials Needed:
- 3 Kallax IKEA bookcases
- Oak board
- Stain
- Polyurethane sealer
- Drill and impact driver set
- Flat brackets
- L brackets
- 2 ½ screws
-
Assembling the Kallax Bookcases:
The Kallax bookcases are relatively easy to assemble, which is one reason they’re popular for DIY projects. Follow the instructions provided with the bookcases to assemble them. -
Attaching the Table Top:
Once the bookcases are assembled, measure the size of the tabletop you want. Decide on a size that provides enough overhang so you don’t have to worry about being perfect with your measurements. -
Adding Shelves and Countertop:
Attach the shelves to the bookcases using flat brackets. Then, place the tabletop on top of the shelves and secure it using L brackets. For added stability, screw through the top of the shelf into the bottom of the table in all four corners. -
Finishing Touches:
Sand and stain the tabletop according to your preference. Apply a coat of polyurethane sealer for protection and durability.
Additional Tips for Your Craft Room
-
Inspiration Board:
An inspiration board is a great way to organize your sources of inspiration. You can use a framed corkboard or an erasable whiteboard/magnetic board to pin up ideas, sketches, and other creative materials. -
Project Containment:
When you’re not actively crafting, contain your projects so you can maintain the beautiful space you’ve created. Use bins or baskets labeled with “current project” to keep everything tidy. -
Donation of Supplies:
Be realistic about what crafts you really love and consider donating supplies you’ll no longer use. This helps declutter your space and ensures you focus on the crafts that bring you joy. -
Ergonomic Considerations:
Pay attention to ergonomic considerations such as using ergonomic chairs and standing desks. These can help reduce fatigue and improve overall comfort during long crafting sessions.
Real-Life Examples
Let’s look at some real-life examples of how craft rooms have been designed with adjustable height tables:
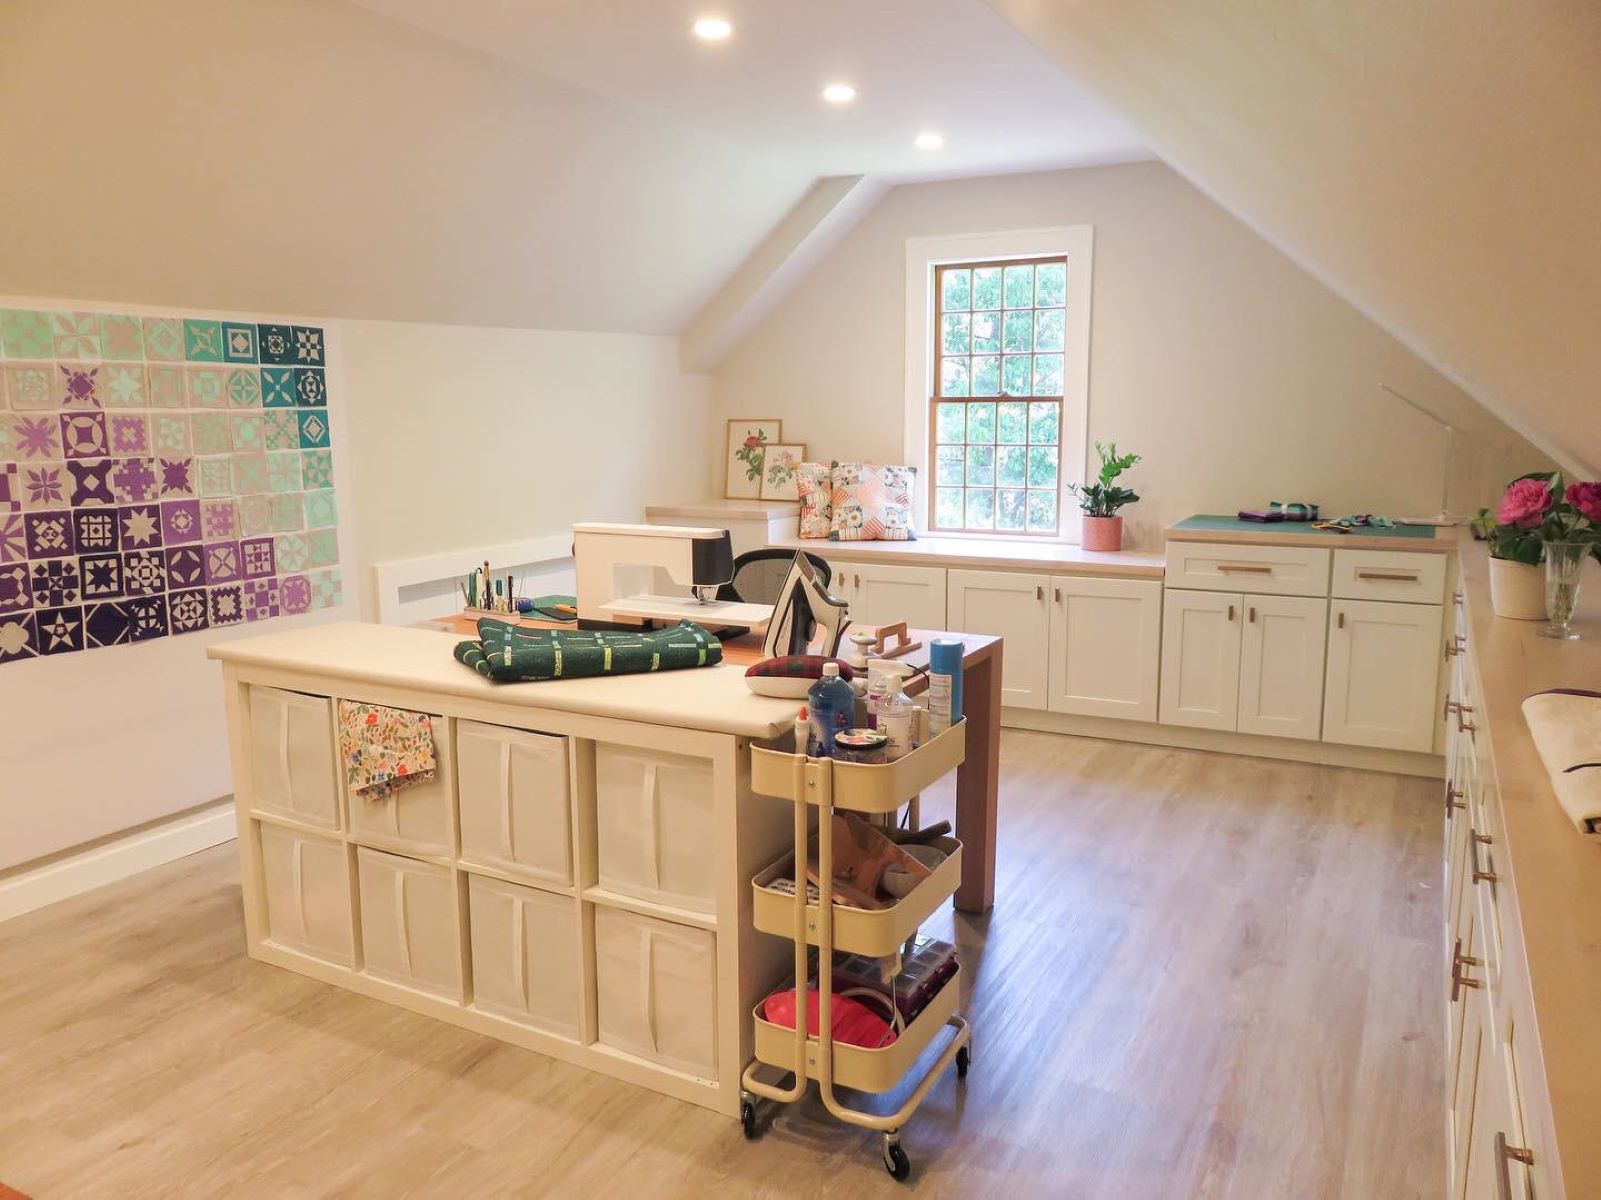
Example 1: DIY Craft Table with Storage
One crafter created a rolling DIY craft table with storage by using prefab cabinets and countertops from The Home Depot Canada. The table was designed to be functional for crafting, easy to stand at (counter height), and looked good for recording. It also had wheels so it could be moved against the wall for styling photos.
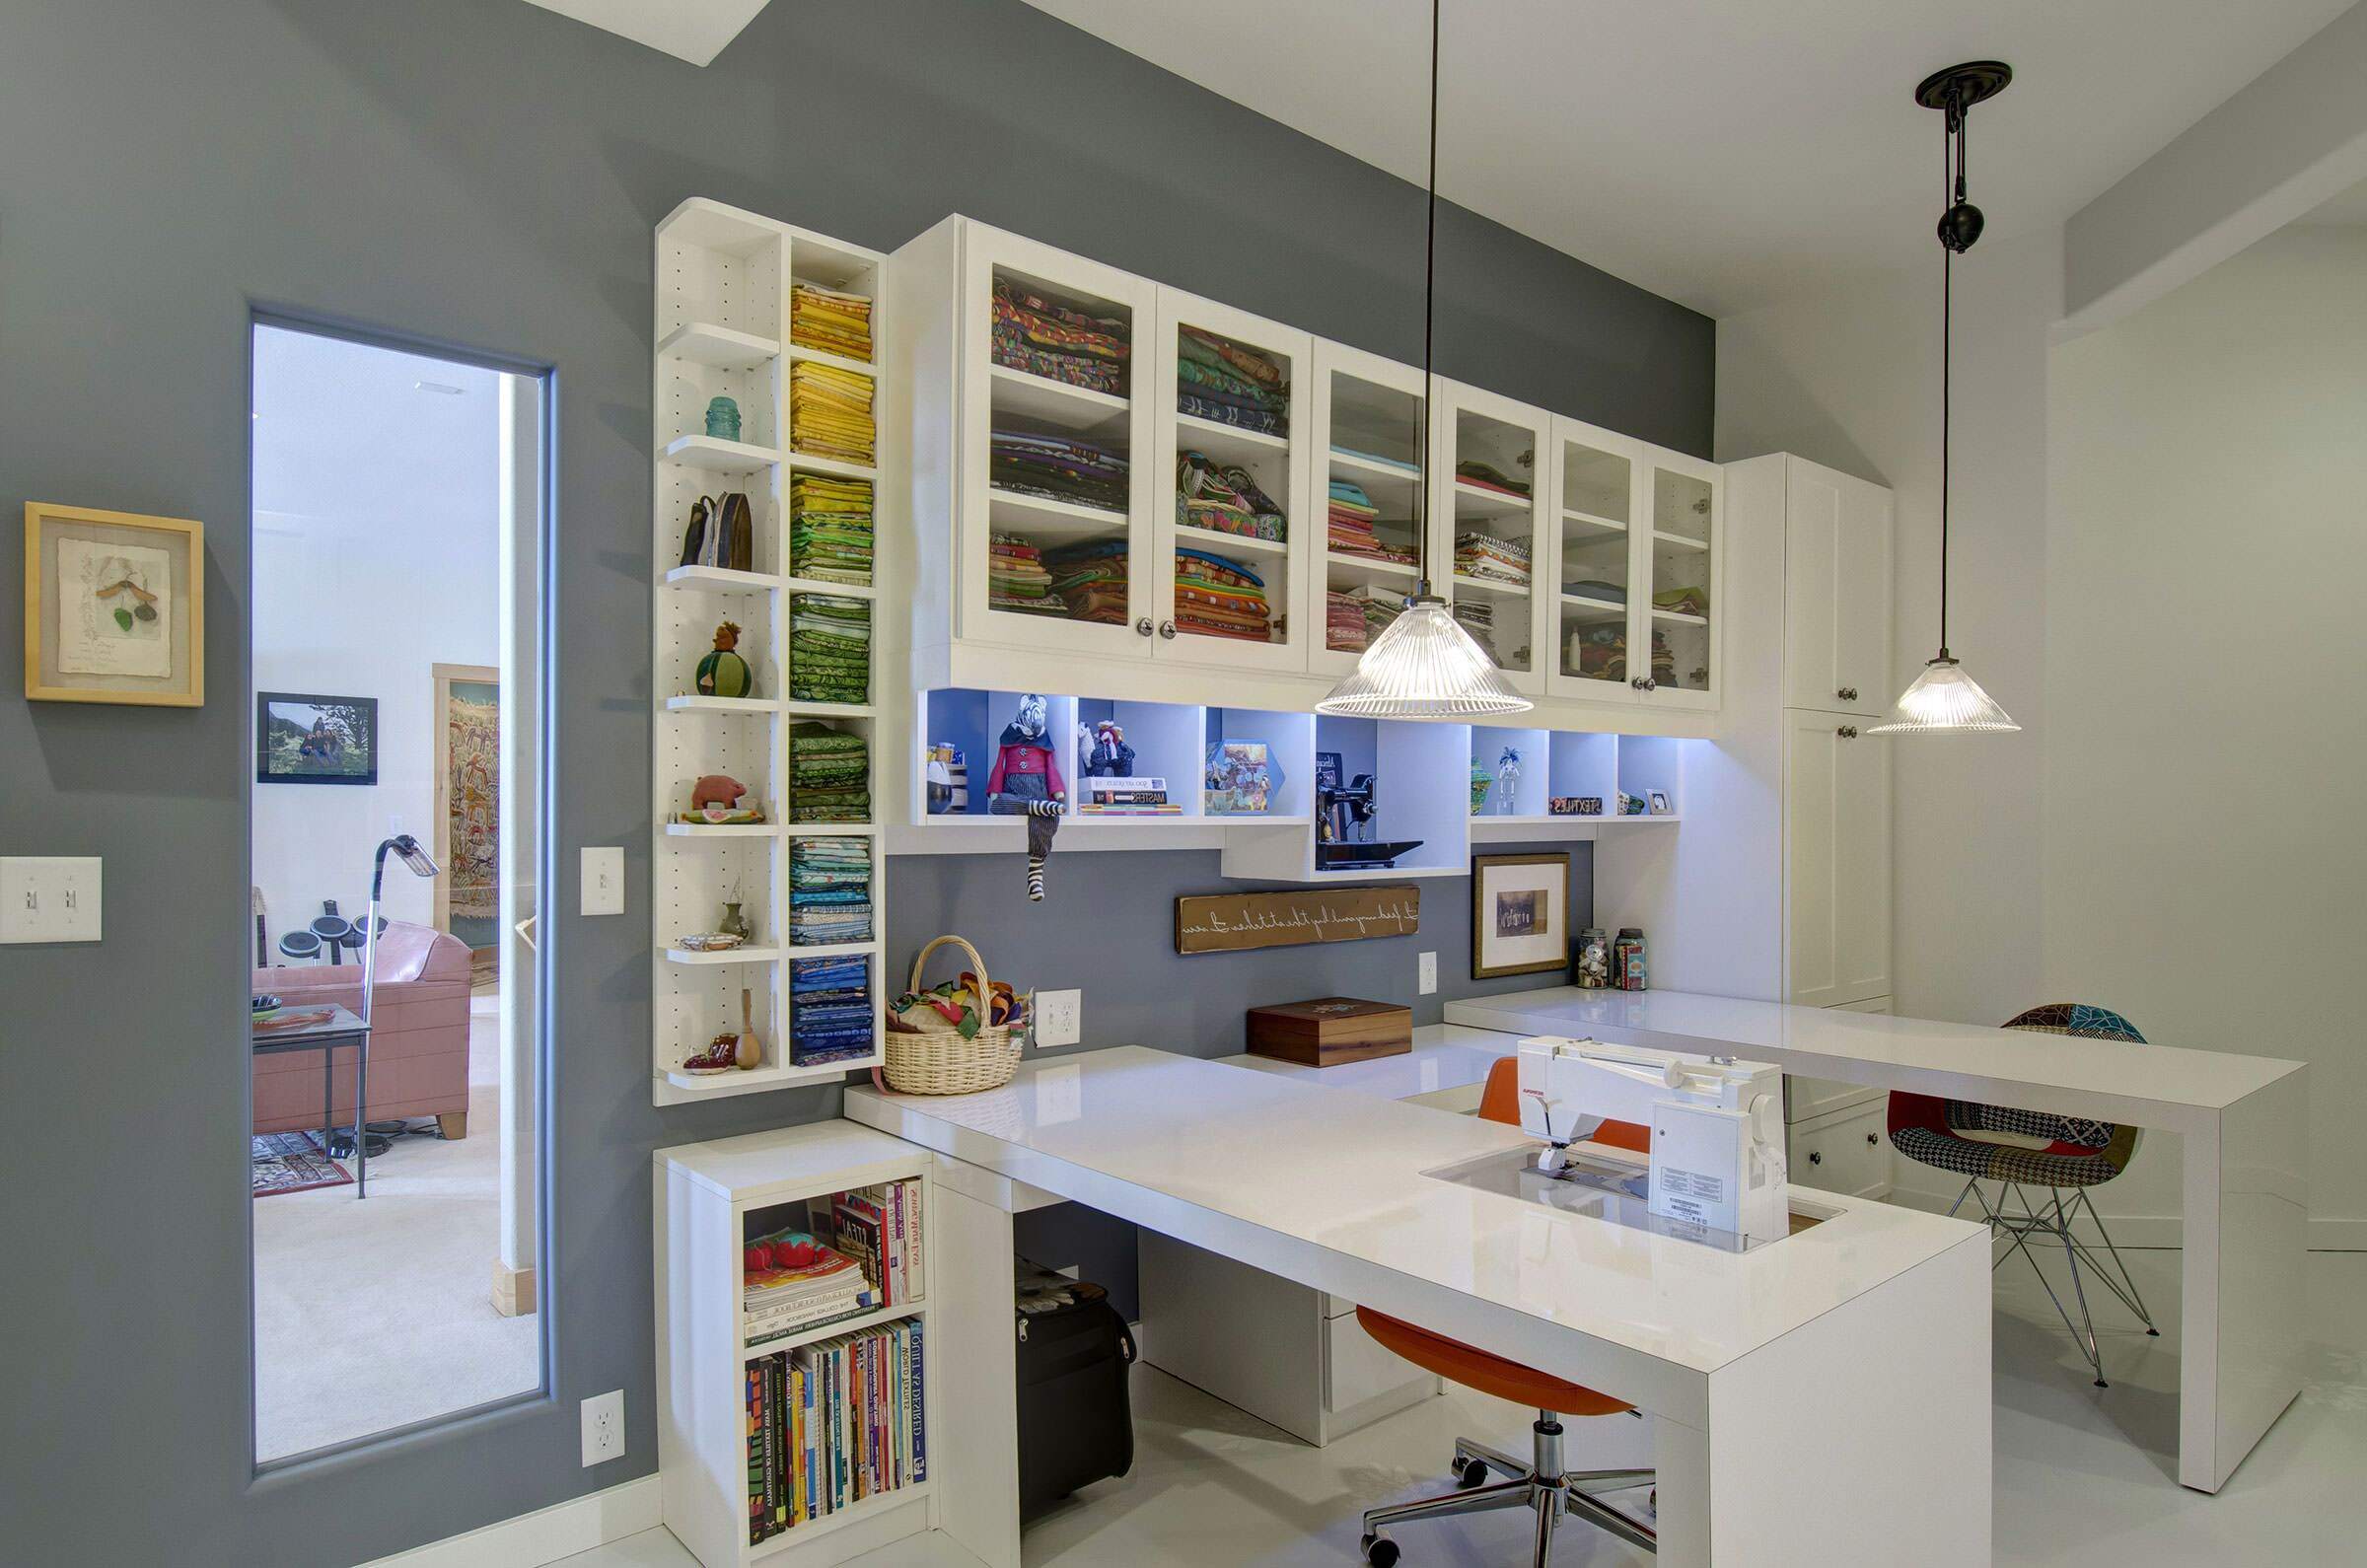
Example 2: Custom Craft Table Using IKEA Kallax Shelves
Another crafter made a custom craft table using IKEA Kallax shelves and a tabletop. The process involved assembling the Kallax bookcases, measuring and cutting the tabletop, staining it with English Chestnut by Minwax, and applying a clear semi-gloss sealer. The result was a beautifully functional table with ample storage space.
Read more: Creating A Functional Craft Room In A Garage
Conclusion
Creating a functional craft room involves considering several key elements including lighting, flooring, electrical outlets, and storage solutions. An adjustable height table is an excellent addition to any craft room as it provides versatility and comfort. By following these tips and examples, you can design a space that not only inspires creativity but also supports your physical well-being.
Whether you choose to build your own adjustable height table or purchase one pre-made, remember that the most important aspect is creating a space that feels comfortable and productive for you. Happy crafting!
Was this page helpful?
At Storables.com, we guarantee accurate and reliable information. Our content, validated by Expert Board Contributors, is crafted following stringent Editorial Policies. We're committed to providing you with well-researched, expert-backed insights for all your informational needs.

0 thoughts on “Creating A Functional Craft Room With Adjustable Height Table”