Home>Ideas and Tips>Upgrading Your Home’s Basement With DIY Radiant Floor Heating
Ideas and Tips
Upgrading Your Home’s Basement With DIY Radiant Floor Heating
Published: September 21, 2024
Learn how to upgrade your basement with DIY radiant floor heating. Enhance comfort and efficiency with our step-by-step guide.
(Many of the links in this article redirect to a specific reviewed product. Your purchase of these products through affiliate links helps to generate commission for Storables.com, at no extra cost. Learn more)
When it comes to upgrading your home's heating system, one of the most efficient and comfortable options is radiant floor heating. This method involves circulating warm water through tubes placed under the floor to provide a consistent and cozy warmth throughout your living space. In this article, we will delve into the process of retrofitting radiant floor heating in your basement, focusing on DIY installation to save costs and enhance comfort.
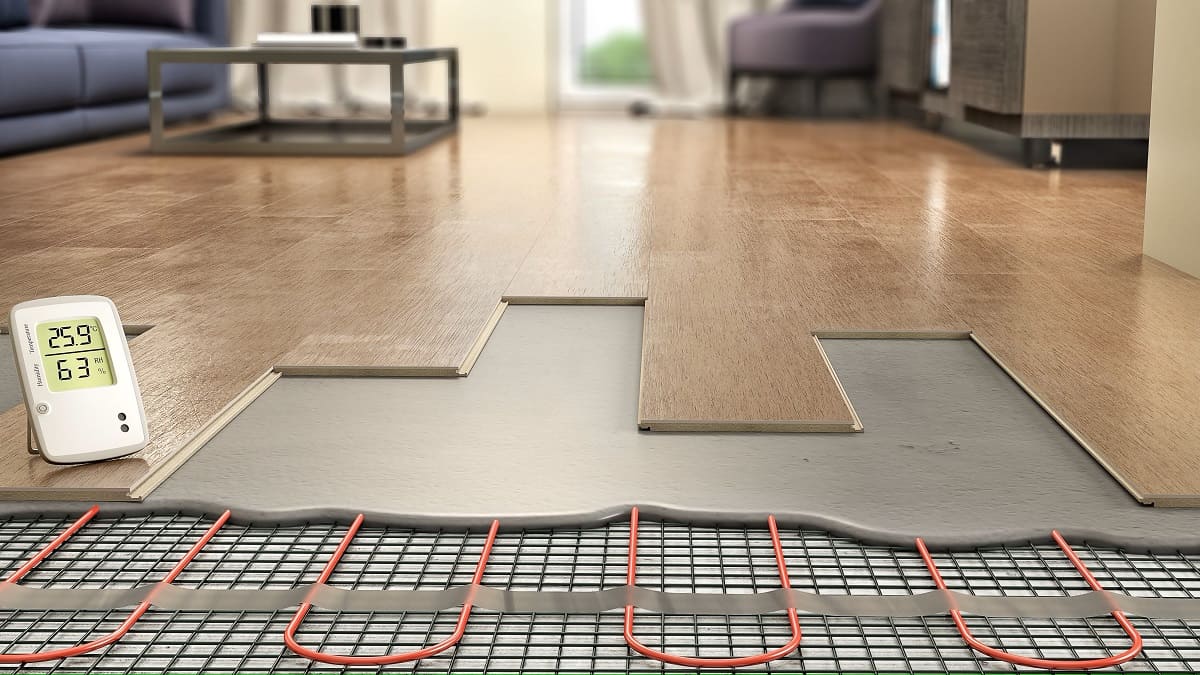
Radiant floor heating is a type of space heating where the heat is distributed through the floor. Unlike traditional forced-air systems, radiant heat warms objects and people directly, rather than just warming the air. This method is particularly effective in homes with single-pane glass or poor insulation, as it can help mitigate heat loss through these areas.
Benefits of Radiant Floor Heating
Efficiency: Radiant floor heating is highly efficient because it uses the thermal mass of the floor to retain heat, reducing the need for frequent adjustments to the thermostat.
Comfort: The warmth is distributed evenly, providing a consistent and comfortable temperature throughout the room.
Low Maintenance: Once installed, radiant floor heating systems require minimal maintenance, as they do not have moving parts like forced-air systems.
Energy Savings: By using a hydronic system (water-based) or electric mats, you can significantly reduce your energy bills compared to traditional heating methods.
Assessing Your Basement for Radiant Floor Heating
Before starting your project, it's crucial to assess your basement's conditions to ensure that radiant floor heating is feasible and compatible with your existing setup.
Insulation and Subfloor Conditions
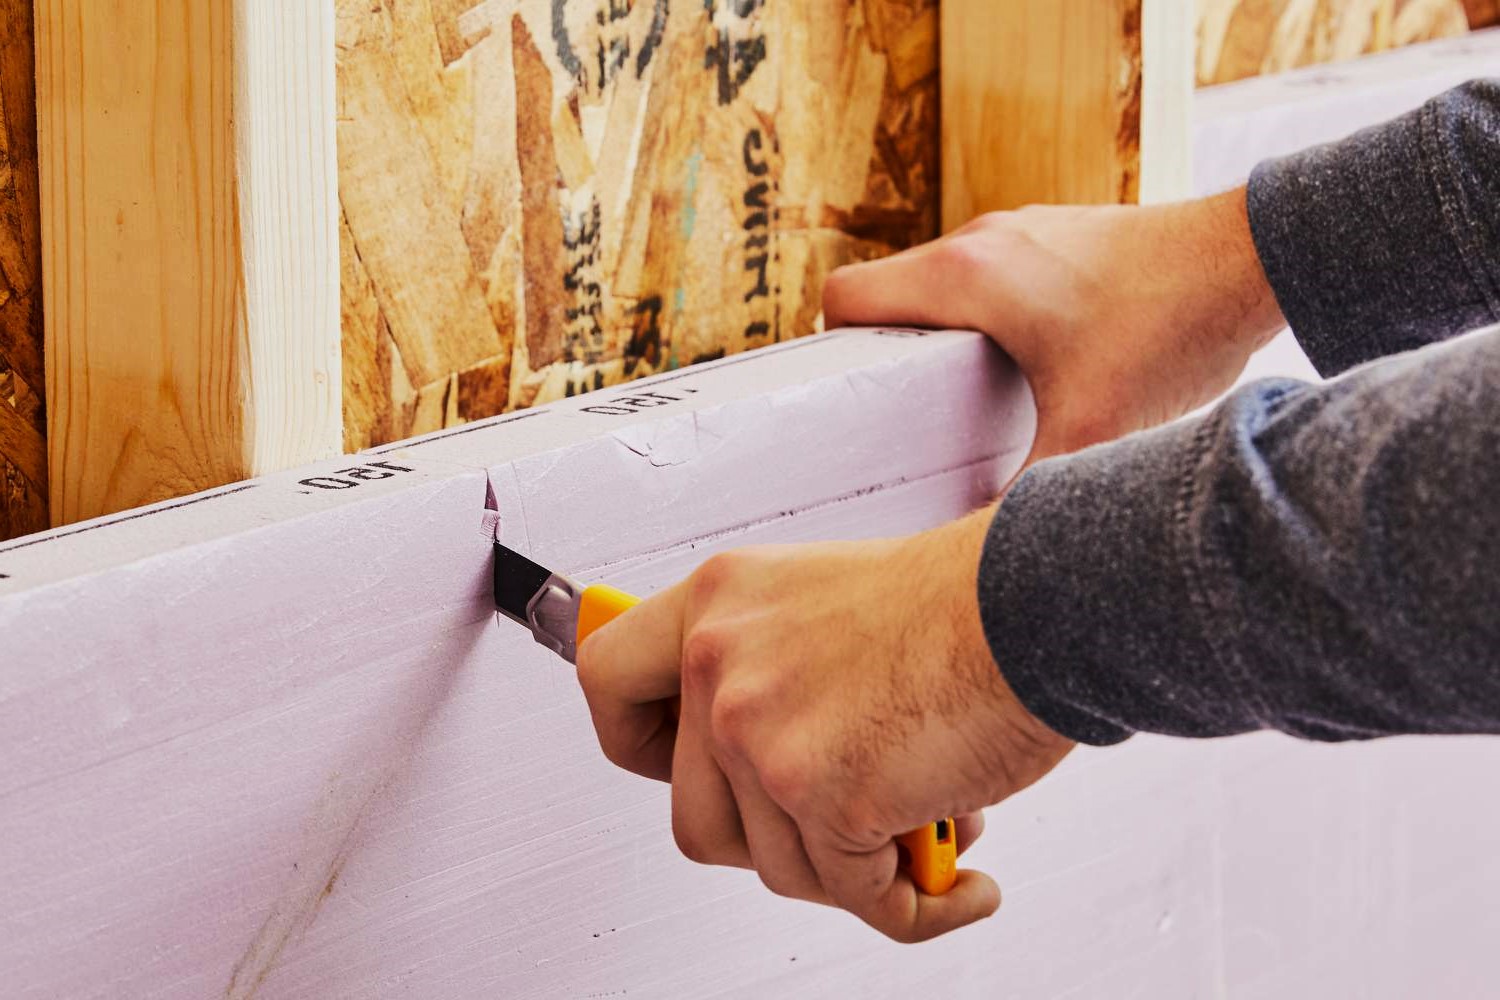
Insulation: Ensure that your subfloor has adequate insulation to prevent heat loss. Spray foam insulation is highly recommended as it forms a tight seal around the tubing, maximizing heat distribution upwards into the living space.
Subfloor Condition: The subfloor should be level and dry. Any unevenness or moisture issues can affect the performance of the radiant heating system.
Electrical and Plumbing Considerations
Electrical Requirements: If you're using electric mats, ensure that your electrical system can support the additional load. Consult with an electrician if necessary.
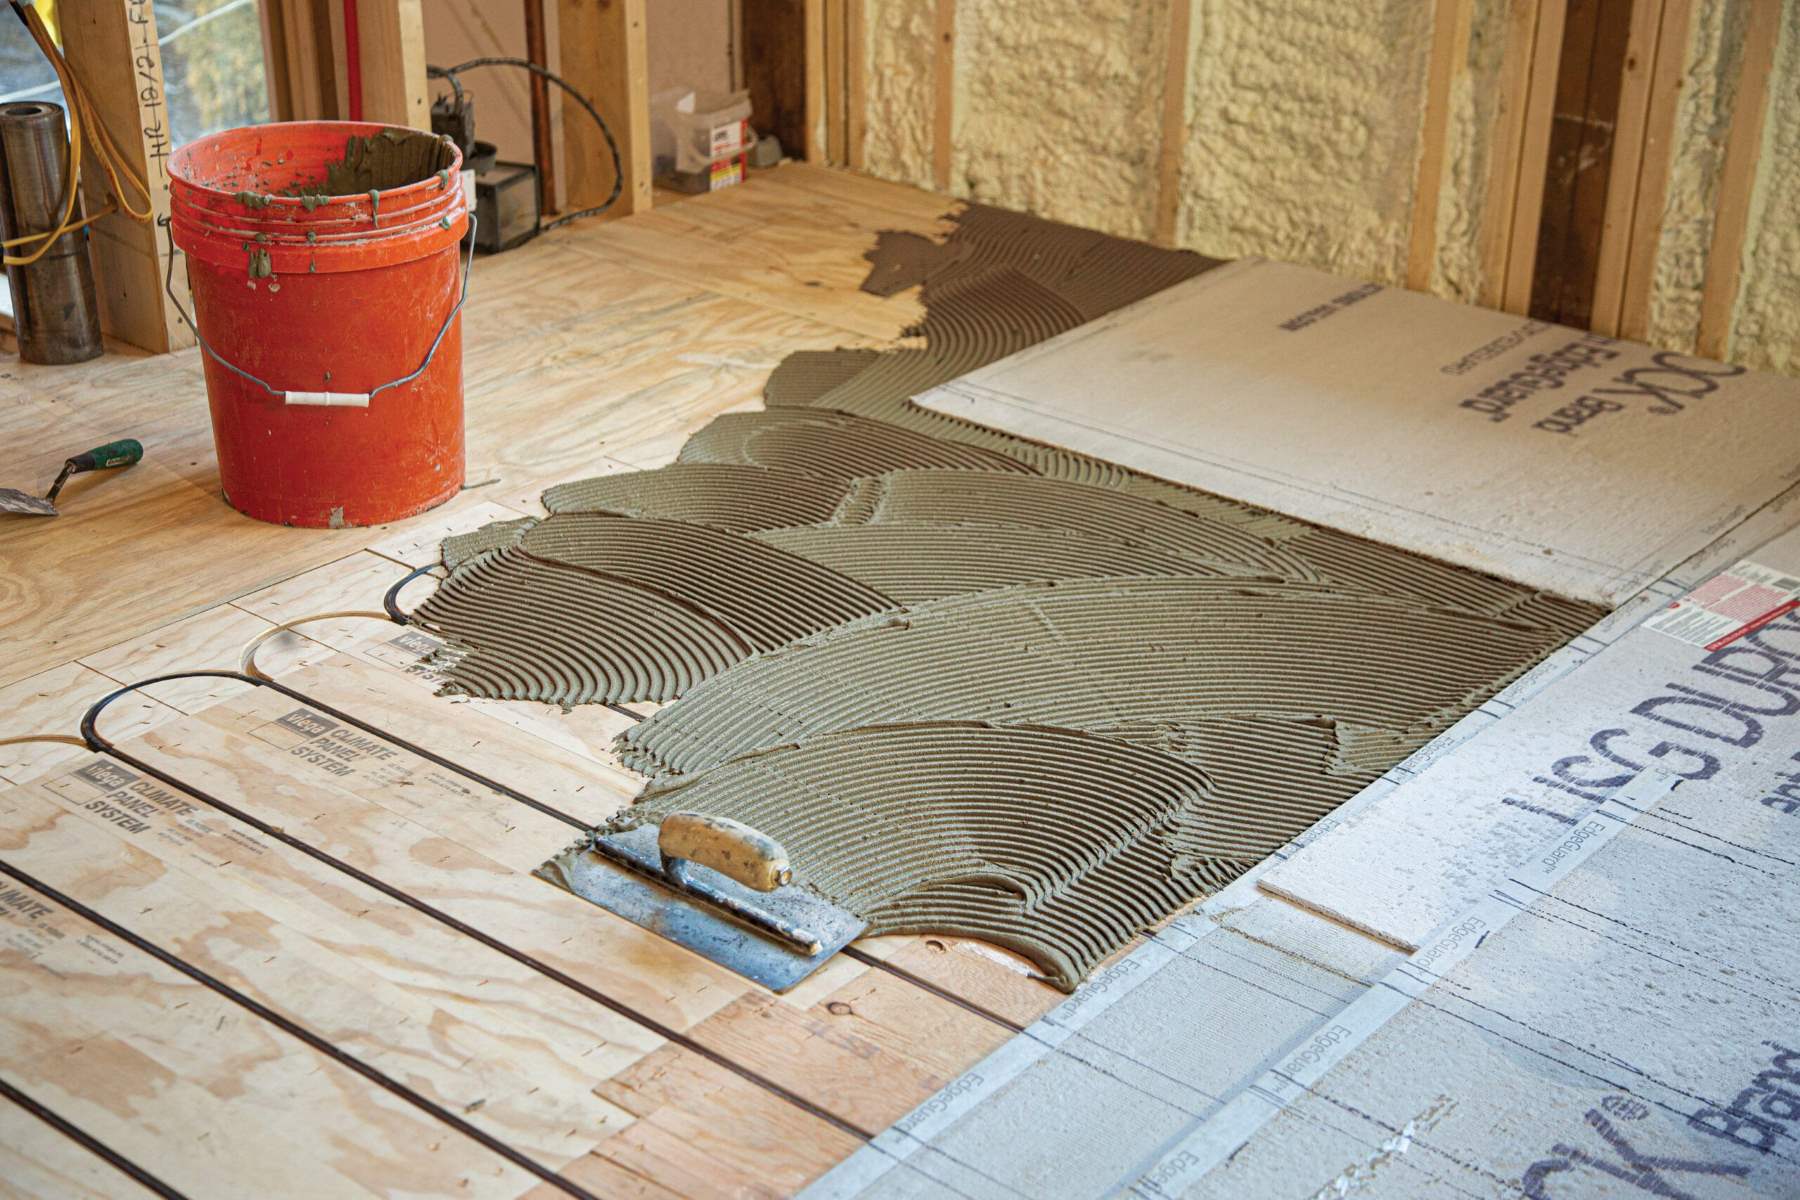
Plumbing Requirements: For hydronic systems, you'll need a boiler or a heat source connected to the PEX tubing. Ensure that your plumbing system can handle the additional water flow.
Planning Your Radiant Floor Heating System
Zoning Your Basement
Zoning involves dividing your basement into separate heating zones to optimize energy usage and comfort. This is particularly important in larger basements or those with varying usage patterns.
Zone Creation: Identify areas that require different temperatures, such as a family room versus a storage area.
Thermostat Placement: Install separate thermostats for each zone to control the temperature precisely.
Layout and Design
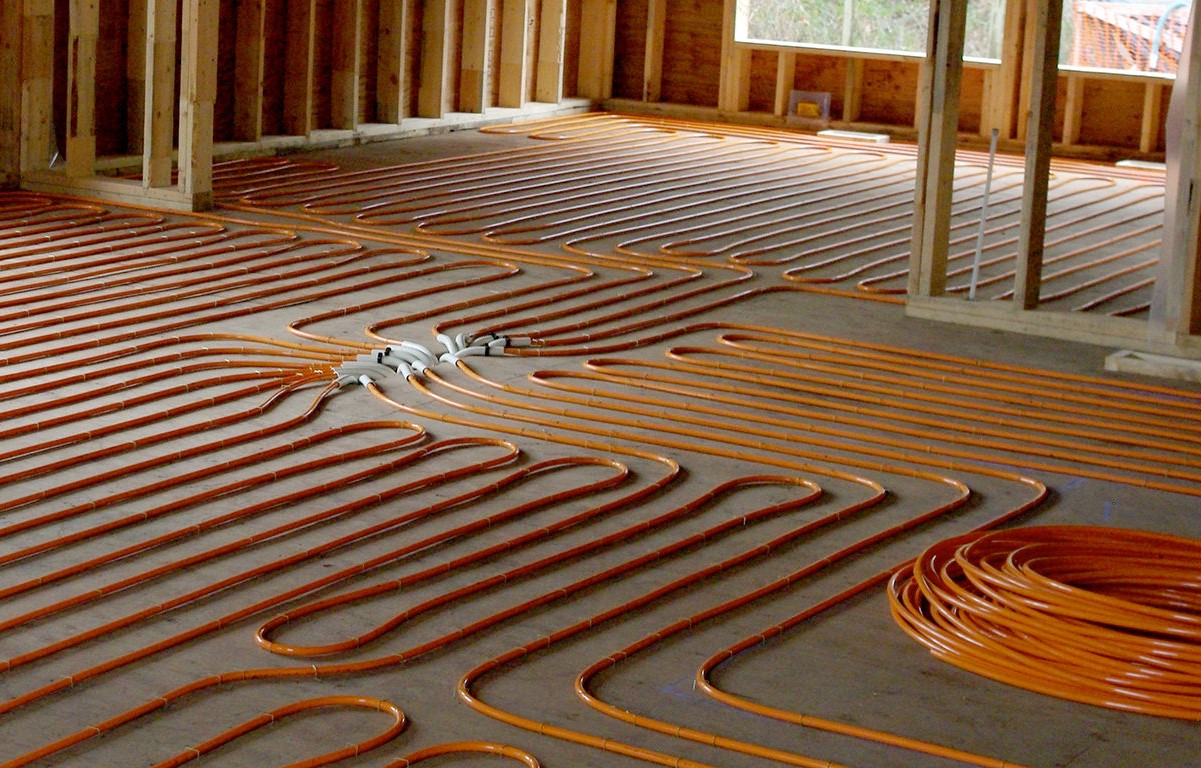
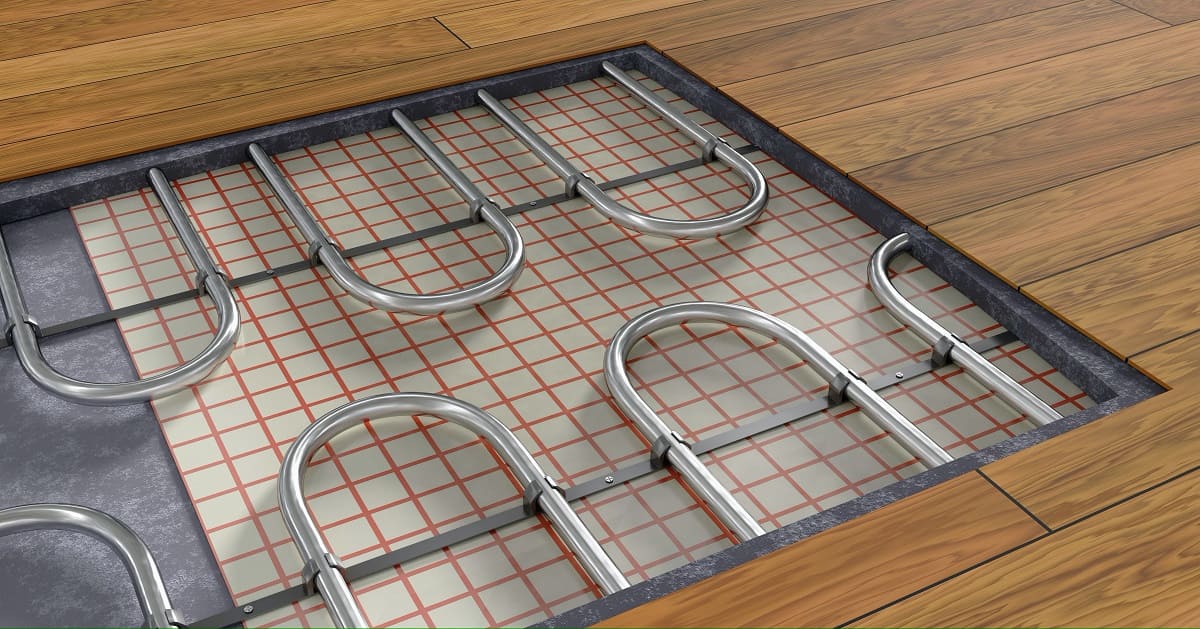
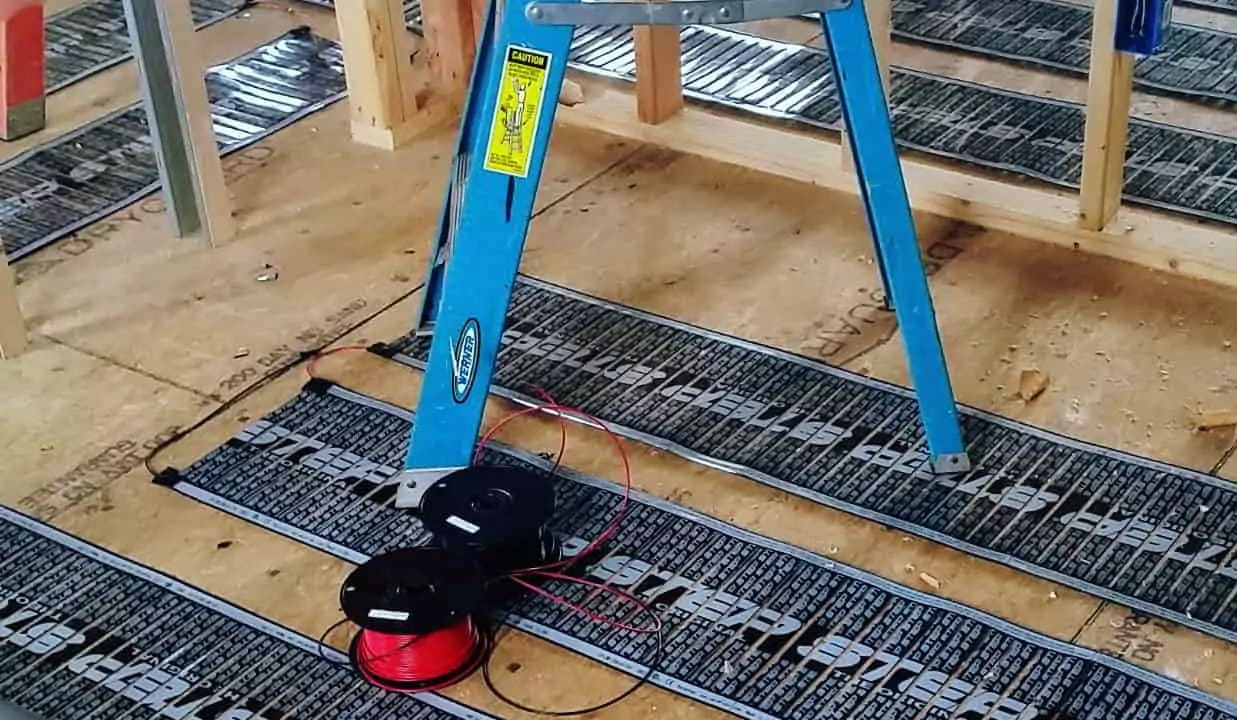
Heating Element Placement: Decide on the placement of heating elements (PEX tubing or electric mats) under your subfloor.
Track Installation: Use aluminum tracks to hold the PEX tubing evenly spaced at 6 to 8 inches to avoid cold spots.
Installing Your Radiant Floor Heating System
Step-by-Step Installation Guide
Assessment and Planning:
- Conduct a thorough evaluation of your existing flooring structure.
- Create a detailed plan and layout for the heating elements, considering the rooms and zones to be heated.
Joist Work:
- Gain access to the joists from below the floor.
- Prepare them for the installation of the heating system by drilling holes at least 2 inches from the edges of each joist.
Heating Element Installation:
- Lay down the electric radiant heat mats or PEX tubing according to your plan.
- Ensure that the tubing is not obstructed by furniture or built-ins.
Electrical Connections:
- Connect the heating system to the power supply if using electric mats.
- Connect PEX tubing to a boiler or heat source.
Insulation Placement:
- Apply insulation beneath the heating elements to minimize heat loss downwards and direct warmth upwards into the living space.
System Testing:
- Test the thermostat and heating system to ensure everything operates correctly.
Final Check:
- Perform regular tests during installation to detect any problems early on, ensuring smooth heat flow across the entirety of the floor.
Tips for Efficient Heat Distribution
Avoid Obstructions: Keep heating elements clear from obstructive objects like furniture to promote even warmth distribution.
Thermal Mass: Consider the thermal properties of your flooring material; denser materials retain heat longer, aiding in efficient distribution.
Reflective Layers: Utilize reflective barriers beneath the heating elements to efficiently direct heat upwards.
Consistent Testing: Perform regular tests during installation to detect any problems early on, ensuring smooth heat flow across the entirety of the floor.
Case Studies and Real-Life Experiences
Retrofitting Radiant Heating in an Existing Home
A homeowner in Pomona, NY, was looking to upgrade their heating system in a long, low rambling modern house with a crawl space. They were considering under-floor radiant heat due to the house's design and the inefficiency of their current gas-fired hot air furnaces. The homeowner was willing to do the installation themselves and had a crack plumber to advise on layout and boiler size. This project highlights the feasibility of retrofitting radiant floor heating in an existing home with minimal disruption.
DIY Radiant Heating Experiment
A blogger on Mr. Money Mustache shared their experience with building a radiant under-floor heating system on a low budget. They started by researching and learning to do their own plumbing. The blogger noted that while the initial cost was high, new technologies have made radiant heat more affordable. They also emphasized the importance of creating separate zones based on natural hot and cool spots in the house.
Upgrading your home's basement with DIY radiant floor heating is a rewarding project that can significantly enhance your comfort and energy efficiency. By following these steps and tips, you can create a cozy and warm living space without the need for major renovations. Remember to assess your basement's conditions, plan your system carefully, and ensure efficient heat distribution to maximize the benefits of radiant floor heating.
Additional Resources
- Warm Your Floor: A comprehensive guide to retrofitting radiant floor heating, including best practices and system requirements.
- This Old House: Detailed instructions on installing radiant floor heating in existing homes, including tips for first-floor living spaces and second-floor bathrooms.
- Reddit Home Improvement: Real-life experiences and debates on building a new home with radiant floor heating, highlighting its efficiency and comfort benefits.
Was this page helpful?
At Storables.com, we guarantee accurate and reliable information. Our content, validated by Expert Board Contributors, is crafted following stringent Editorial Policies. We're committed to providing you with well-researched, expert-backed insights for all your informational needs.

0 thoughts on “Upgrading Your Home’s Basement With DIY Radiant Floor Heating”