Articles
How Long To Cook Turkey Breast In Air Fryer
Modified: March 25, 2024
Looking for articles on how long to cook turkey breast in an air fryer? Find helpful tips and instructions for perfectly cooked turkey breast in no time.
(Many of the links in this article redirect to a specific reviewed product. Your purchase of these products through affiliate links helps to generate commission for Storables.com, at no extra cost. Learn more)
Introduction
Cooking turkey breast in an air fryer has gained immense popularity in recent years. This innovative cooking method allows you to achieve tender and juicy turkey breast with a crispy golden-brown skin, all in a fraction of the time compared to traditional oven roasting.
The air fryer is a countertop cooking appliance that uses a powerful fan and hot air circulation to cook food. It eliminates the need for excessive oil and produces healthier, lighter dishes. While it’s commonly used for frying foods, the air fryer can also be used to roast, bake, and grill a variety of dishes, including turkey breast.
Not only does cooking turkey breast in an air fryer result in a delicious and visually appealing dish, but it also offers several benefits worth considering. Firstly, the air fryer cooks food faster than a conventional oven, saving you precious time, especially when preparing meals for a crowd.
Additionally, the air fryer preheats quickly, which means you can get cooking almost immediately. It also maintains a consistent temperature throughout the cooking process, ensuring that your turkey breast is cooked evenly and retains its moisture.
Another advantage of cooking turkey breast in the air fryer is the convenience it offers. Most air fryers come with adjustable temperature and time settings, making it easy to customize the cooking parameters to suit your preferences. It also doesn’t require much supervision, allowing you to multitask and prepare other components of your meal.
Lastly, using an air fryer results in less clean-up compared to traditional cooking methods. Since the air fryer uses minimal oil, there are fewer greasy splatters and spills to deal with. This makes it a hassle-free option for cooking turkey breast.
In this article, we will explore the process of cooking turkey breast in an air fryer, from preparation and seasoning to recommended cooking times. We will also provide some tips and tricks to help you achieve the perfect turkey breast every time. So, let’s get started and elevate your turkey cooking game with the power of the air fryer!
Key Takeaways:
- Cook turkey breast in an air fryer for healthier, faster, and more convenient results. Enjoy crispy, golden-brown skin and moist, tender meat with minimal oil and easy cleanup.
- Prepare, season, and cook turkey breast in an air fryer for flavorful, succulent results. Use diverse seasonings, monitor closely, and allow for resting time to achieve delicious perfection.
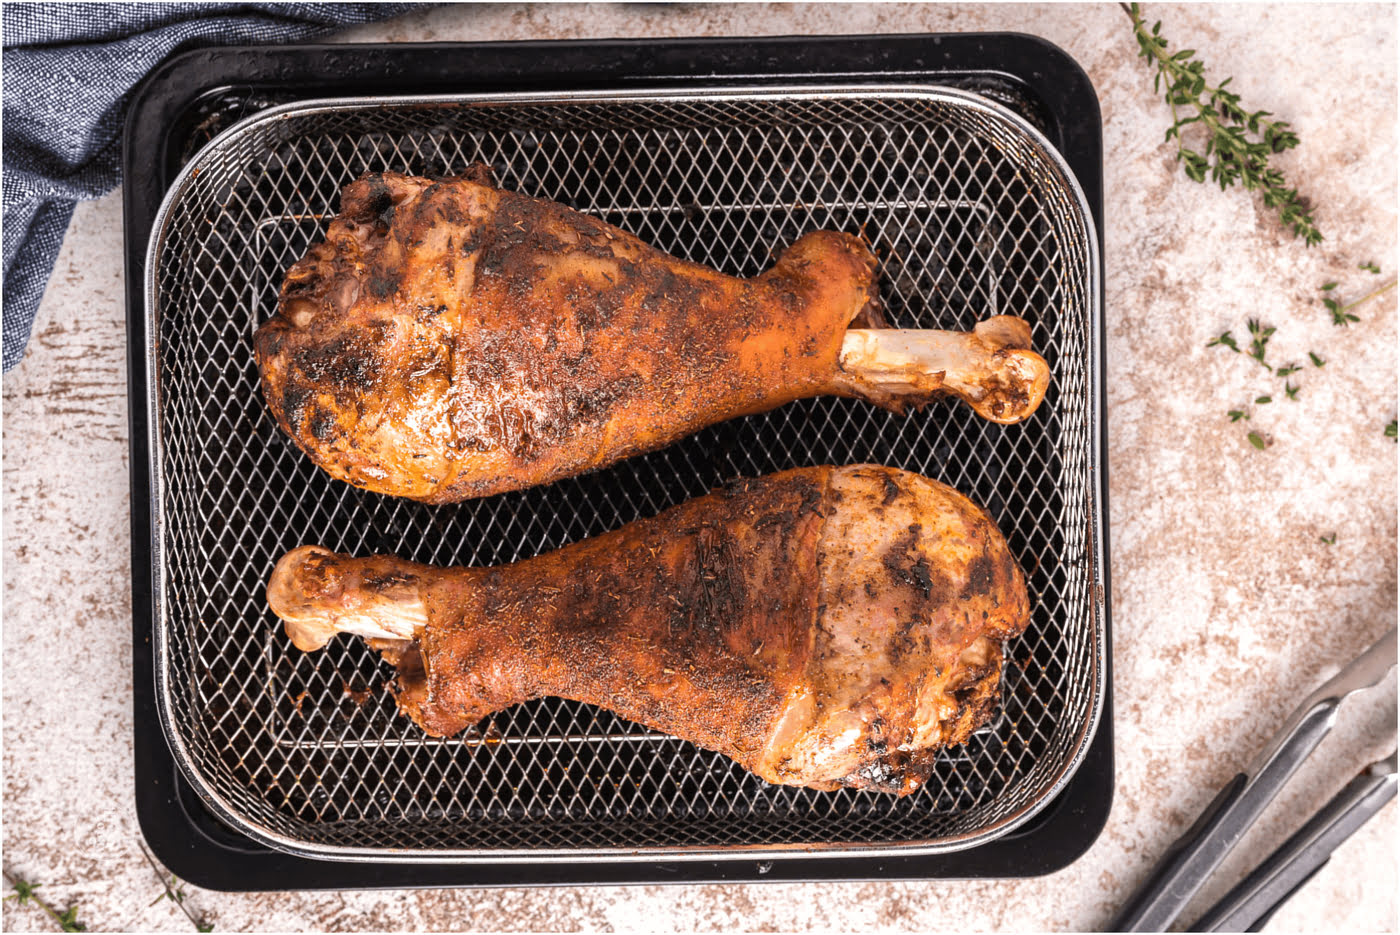
Read more: How Long To Cook Turkey Wings In Air Fryer
Benefits of Cooking Turkey Breast in an Air Fryer
Cooking turkey breast in an air fryer offers numerous advantages that make it a popular choice among home cooks. Here are some of the key benefits:
- Healthier Cooking Option: One of the major benefits of using an air fryer is that it requires little to no oil compared to traditional frying methods. This means you can enjoy a healthier version of turkey breast with significantly lower fat content. The hot air circulation in the air fryer ensures even cooking and a crispy exterior without the excess grease.
- Time-Saving Convenience: Air fryers are designed to cook food quickly, and turkey breast is no exception. The hot air circulates rapidly around the turkey, resulting in a faster cooking time compared to traditional roasting methods. This is particularly useful when you have limited time, such as during busy weekdays or when hosting a gathering.
- Moist and Tender Results: Despite the shorter cooking time, the air fryer produces moist and tender turkey breast. The hot air circulation helps to seal in the juices and retain moisture, ensuring that your meat doesn’t dry out. This is especially important when cooking turkey breast, as it tends to be leaner and can easily become dry if overcooked.
- Crispy and Golden Exterior: The beauty of using an air fryer is that it can achieve a crispy and golden-brown skin on the turkey breast, similar to what you would get from deep frying or roasting. The high heat and circulating air create a Maillard reaction, resulting in a deliciously crispy exterior that adds texture and flavor to your turkey breast.
- Versatile Cooking Methods: Air fryers are not limited to just frying. They can also be used for baking, roasting, grilling, and more. This versatility allows you to experiment with different cooking techniques and flavors when preparing your turkey breast. Whether you prefer a simple herb-roasted turkey breast or a more adventurous seasoned and grilled version, the air fryer can accommodate your culinary preferences.
- Easy Cleanup: Cleaning up after cooking can be a chore, especially when dealing with greasy pans and splatters. With the air fryer, you can bid farewell to those messy cleanups. Most air fryers have removable non-stick baskets that are dishwasher safe, making it easy to clean up after cooking your turkey breast.
With these benefits in mind, it’s no wonder that cooking turkey breast in an air fryer has become a popular choice for many home cooks. Not only does it offer health benefits and save time, but it also delivers deliciously cooked meat with the perfect balance of tenderness, juiciness, and crispiness. So, grab your air fryer and get ready to elevate your turkey cooking game!
Preparing the Turkey Breast
Before cooking the turkey breast in an air fryer, it’s essential to properly prepare the meat to ensure optimal results. Here are the steps to follow:
- Thawing: If you have a frozen turkey breast, make sure to thaw it completely before cooking. Thawing in the refrigerator is the safest method, allowing the turkey to thaw slowly and evenly. Depending on the size of the turkey breast, it may take 24 to 48 hours to thaw completely.
- Trimming: Inspect the turkey breast for any excess fat or skin. Trim off any visible fat to prevent excessive grease and to enhance the overall taste and texture of the final dish. However, be careful not to remove all the fat, as it contributes to the moisture and flavor of the turkey.
- Patting dry: Use paper towels to pat the turkey breast dry. This step is crucial as it helps in achieving a crispy skin. Moisture on the surface of the turkey can inhibit browning and crispiness, so ensure that the turkey is thoroughly dried before seasoning.
- Tying or Trussing: Although not necessary, tying or trussing the turkey breast can help it cook more evenly. If the turkey is unevenly shaped or has loose parts, you can use cooking twine to secure it in place. This will ensure that the turkey cooks uniformly, resulting in consistent texture and flavor.
- Brining (optional): Brining is an optional step but can greatly enhance the flavor and juiciness of the turkey breast. You can prepare a simple brine solution by dissolving salt and sugar in water and adding aromatic herbs and spices. Submerge the turkey breast in the brine solution for several hours or overnight in the refrigerator. Rinse the brined turkey breast thoroughly before proceeding with seasoning.
By following these steps, you will have a properly prepared turkey breast ready to be seasoned and cooked in the air fryer. Proper preparation sets the stage for a delicious and perfectly cooked turkey breast, ensuring that every bite is moist, flavorful, and tender.
Seasoning Options
When it comes to seasoning your turkey breast for cooking in an air fryer, there are endless possibilities to explore. The right combination of herbs, spices, and other flavor enhancers can take your turkey to the next level. Here are some popular seasoning options to consider:
- Classic Herbs and Spices: A classic blend of herbs and spices can enhance the flavor profile of your turkey breast. Try a combination of minced garlic, chopped fresh rosemary, thyme, sage, salt, and pepper. Rub this mixture generously all over the turkey, both on the skin and under the skin, to infuse the meat with savory flavors.
- Citrus-flavored Seasoning: For a bright and tangy twist, consider using citrus flavors in your seasoning. Combine fresh lemon or orange zest, along with their juice, with herbs like oregano, thyme, and parsley. This combination adds a refreshing and zesty note to your turkey breast.
- Smoky Spice Rub: If you enjoy bold and smoky flavors, a spice rub is the way to go. Use a combination of smoked paprika, cumin, chili powder, garlic powder, onion powder, salt, and pepper to create a rich and smoky seasoning. This works particularly well for grilled or barbecued-style turkey breast.
- Mediterranean Blend: Infuse your turkey breast with the flavors of the Mediterranean by using a blend of dried oregano, dried thyme, dried basil, garlic powder, onion powder, salt, and pepper. This seasoning combination brings a herbaceous and aromatic element to your dish, reminiscent of Greek or Italian cuisine.
- Sweet and Savory Mix: Create a sweet and savory profile by combining brown sugar, smoked paprika, cinnamon, cloves, nutmeg, salt, and pepper. This unique blend adds depth and complexity to your turkey breast, making it a memorable and flavorful experience.
Remember to adjust the amount of seasoning based on the size of your turkey breast and personal taste preferences. Feel free to experiment and customize the seasoning to create your own signature flavor. The key is to ensure an even distribution of the seasoning on the turkey breast for balanced flavor in every bite.
After seasoning, allow the turkey breast to sit for a while, preferably in the refrigerator, to allow the flavors to penetrate the meat. This resting period will enhance the taste and ensure that the seasoning melds with the turkey effectively.
Now that you have an array of seasoning options to choose from, you can elevate the flavor profile of your turkey breast and make it a standout dish when cooked in the air fryer.
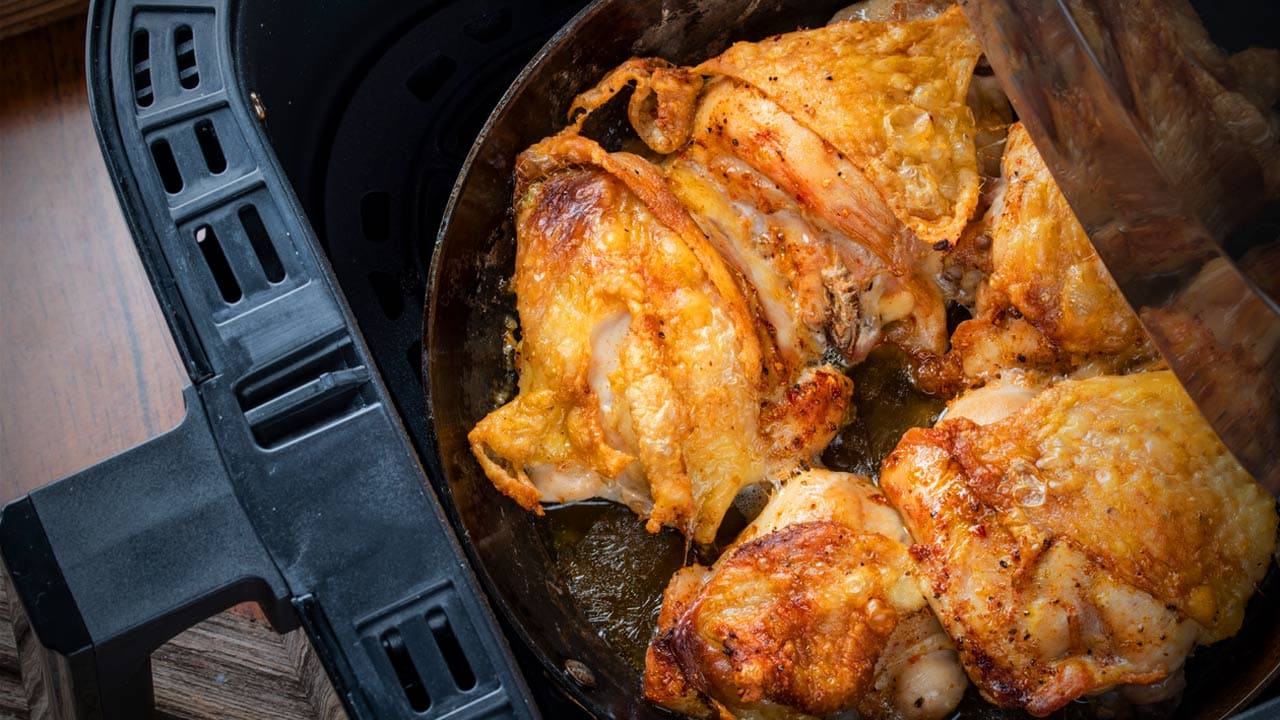
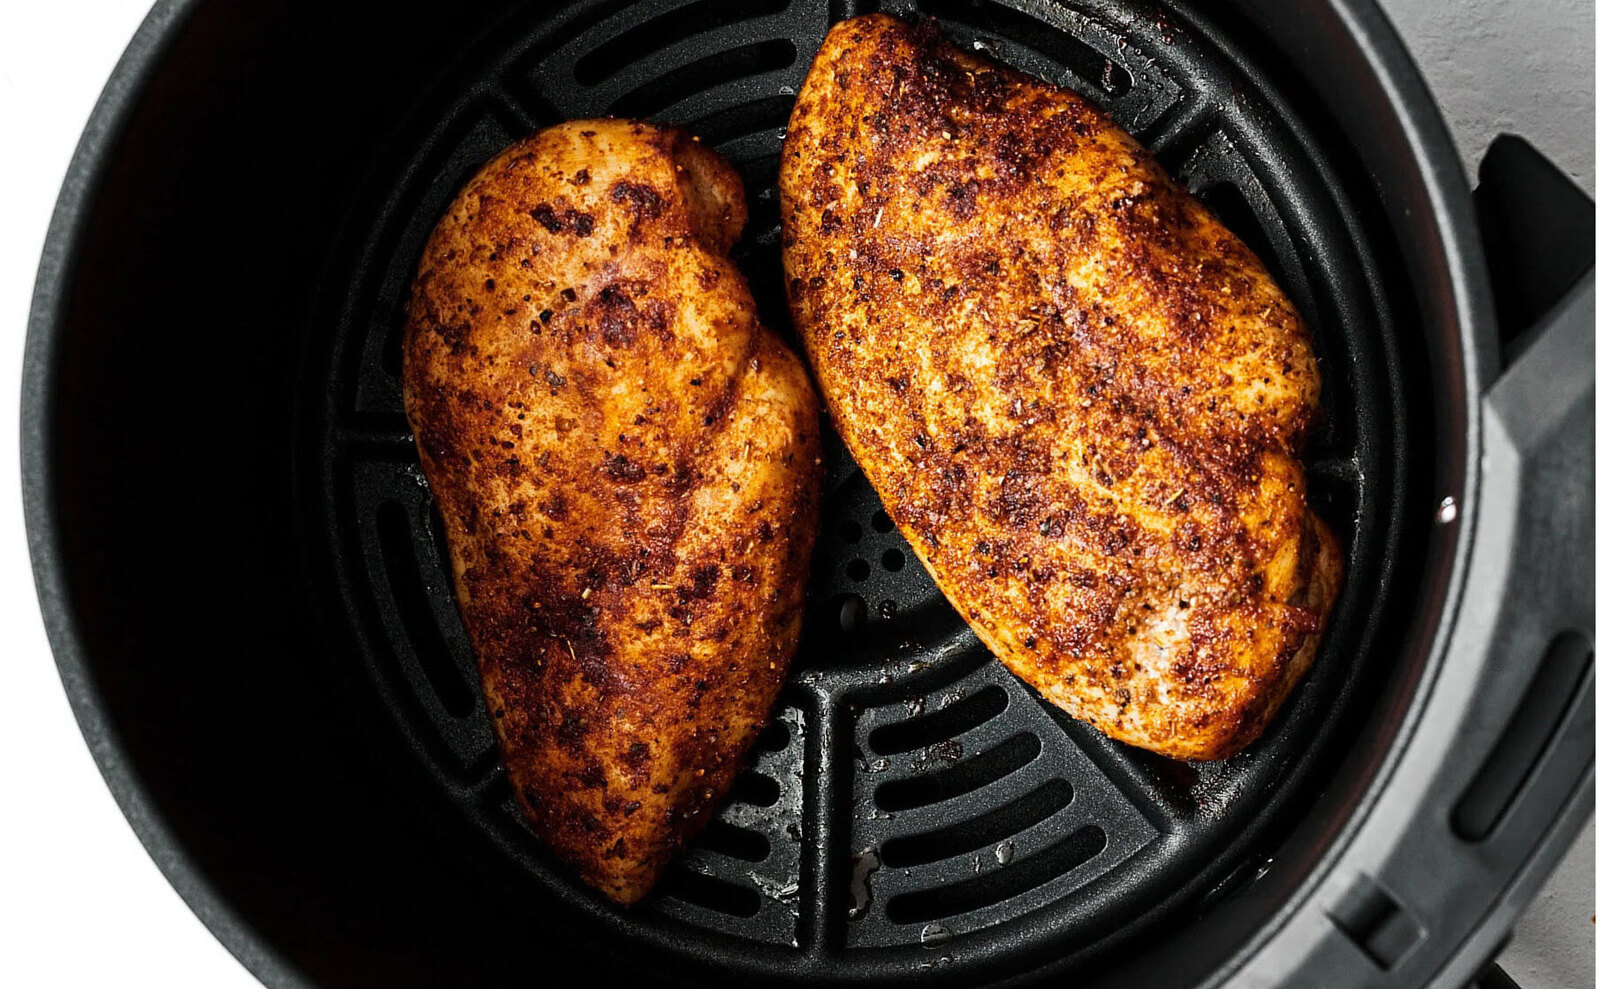
Cooking Turkey Breast in the Air Fryer
Once you have prepared and seasoned your turkey breast, it’s time to cook it in the air fryer. Here are the steps to follow for a deliciously cooked turkey breast using an air fryer:
- Preheat the Air Fryer: Preheat your air fryer to the recommended temperature, typically around 375°F (190°C). This ensures that the cooking process starts right away and helps to achieve a crispy exterior.
- Place the Turkey Breast in the Air Fryer Basket: Lightly coat the air fryer basket with cooking spray or line it with parchment paper. Then, carefully place the turkey breast in the basket, making sure it is not too crowded. If your air fryer is small, you may need to cook the turkey breast in batches.
- Cook at the Right Temperature and Time: Set the temperature and time according to the weight and thickness of the turkey breast. As a general rule, air fry the turkey breast at 375°F (190°C) for approximately 20 minutes per pound (450 grams). It’s important to note that cooking times may vary depending on the air fryer model, so it’s best to consult the manufacturer’s instructions for specific recommendations.
- Flip and Rotate: About halfway through the cooking time, carefully flip the turkey breast using tongs or a spatula to ensure even browning on both sides. You can also rotate the turkey breast to ensure even cooking, especially if your air fryer has hot spots.
- Baste or Brush with Oil (optional): If desired, you can baste or brush the turkey breast with a small amount of oil or melted butter during the cooking process. This helps to enhance the browning and adds extra moisture to the meat. However, be cautious not to add too much oil, as it can cause excessive smoking in the air fryer.
- Monitor the Internal Temperature: The most accurate way to determine if the turkey breast is cooked to perfection is to use a meat thermometer. Insert the thermometer into the thickest part of the turkey breast without touching the bone. The internal temperature should reach 165°F (74°C) for fully cooked turkey. If it’s not yet at the desired temperature, continue cooking for a few more minutes and recheck the temperature until it reaches the safe cooking level.
Remember that cooking times can vary depending on the size and thickness of the turkey breast, as well as the specific air fryer model. It’s essential to monitor the turkey closely to avoid overcooking or undercooking.
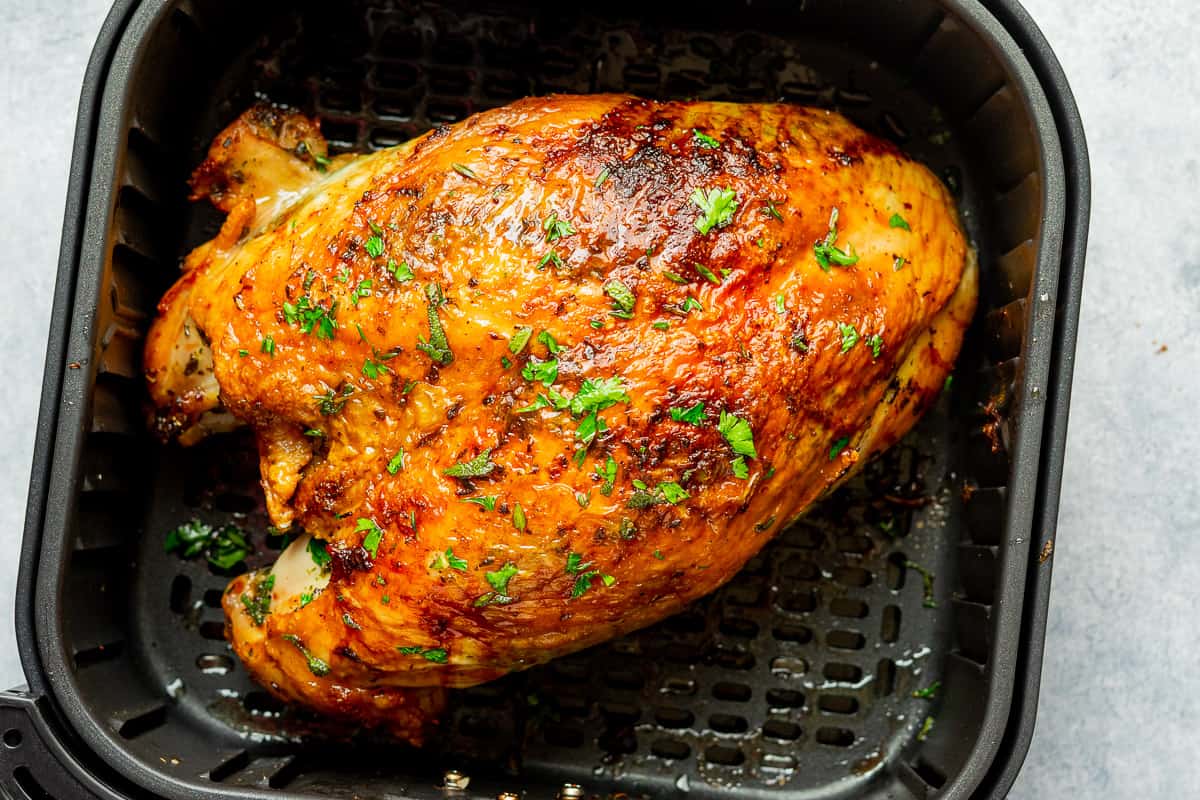
By following these steps, you can achieve a perfectly cooked turkey breast with a crispy exterior and juicy interior thanks to the powerful hot air circulation of the air fryer. Now it’s time to check for doneness and prepare the turkey breast for serving.
Preheat the air fryer to 360°F. Place the turkey breast in the air fryer basket and cook for 25-30 minutes, flipping halfway through, until the internal temperature reaches 165°F. Let it rest for 5 minutes before slicing.
Recommended Cooking Times and Temperatures
When cooking turkey breast in an air fryer, it’s important to use the appropriate cooking times and temperatures to ensure that the meat is cooked thoroughly and to your desired level of doneness. Here are some general guidelines:
- Temperature: Set your air fryer to a temperature of 375°F (190°C). This allows for even cooking and helps to achieve a crispy exterior while ensuring that the turkey breast remains tender and juicy.
- Cooking Times: The cooking time for turkey breast in an air fryer can vary depending on the size and thickness of the turkey breast. As a general rule of thumb, calculate approximately 20 minutes of cooking time per pound (450 grams) of turkey breast. However, it’s crucial to consult the manufacturer’s instructions for your specific air fryer model, as cooking times can vary.
- Internal Temperature: The internal temperature of the cooked turkey breast should reach a minimum of 165°F (74°C) to ensure it is safe to eat. Use a meat thermometer to check the temperature by inserting it into the thickest part of the turkey breast, without touching the bone. This will help you determine if the turkey breast is cooked to your desired level of doneness.
Keep in mind that these recommended cooking times and temperatures are just guidelines. Factors such as the specific air fryer model, the size and thickness of the turkey breast, and personal preferences can influence the cooking time required. It’s always best to rely on the internal temperature as the most accurate indicator of doneness.
For a visual reference and to confirm the accuracy of the cooking times, you can also refer to recipes or cooking charts specifically designed for air fryer turkey breast. These resources provide more detailed instructions and can help you achieve the perfect balance of crispiness, tenderness, and flavor.
Remember to always use caution when handling and consuming cooked turkey. Allow the turkey breast to rest for a few minutes before slicing to retain its juices and enhance the tenderness. Now that you know the recommended cooking times and temperatures, you can confidently cook turkey breast in your air fryer and enjoy a delicious, flavorful meal.
Checking for Doneness
Checking for doneness is a crucial step when cooking turkey breast in an air fryer. It ensures that the meat is cooked to the appropriate temperature and guarantees a safe and enjoyable eating experience. Here are some ways to check for doneness:
- Internal Temperature: The most accurate way to determine if the turkey breast is cooked to perfection is by using a meat thermometer. Insert the thermometer into the thickest part of the turkey breast, without touching the bone. The internal temperature should reach a minimum of 165°F (74°C) for fully cooked turkey. This ensures food safety and guarantees that harmful bacteria, such as Salmonella, are destroyed.
- Visual Appearance: While the internal temperature is a reliable indicator of doneness, you can also visually assess the turkey breast for signs of doneness. The skin should be golden brown and crispy, and there should be no traces of pink or raw meat. The turkey breast should be firm to the touch, and the juices should run clear when pierced with a knife or skewer.
- Resting Time: After removing the turkey breast from the air fryer, it’s essential to let it rest for a few minutes. This allows the juices to redistribute, yielding a more tender and flavorful meat. During the resting period, the internal temperature may continue to rise slightly, so keep that in mind when checking for doneness.
Remember that cooking times can vary depending on the size and thickness of the turkey breast, as well as the specific air fryer model. It’s important to monitor the internal temperature and visual appearance to determine if the turkey breast is cooked to your desired level of doneness.
If the turkey breast has not reached the minimum internal temperature of 165°F (74°C), continue cooking it in the air fryer in increments of a few minutes until the desired temperature is reached. Be cautious not to overcook the turkey breast, as it can result in dry and tough meat. It is always better to slightly undercook and let the residual heat carry over during the resting period.
By using a meat thermometer and following these guidelines, you can ensure that your air fryer-cooked turkey breast is perfectly cooked, delicious, and safe to enjoy with your family and friends.
Resting and Serving the Turkey Breast
Resting the turkey breast after cooking is a crucial step that allows the meat to relax and the juices to redistribute. This results in a more tender and flavorful turkey breast. Here’s how to properly rest and serve your air fryer-cooked turkey breast:
- Remove from the Air Fryer: Once the turkey breast has reached the desired internal temperature, carefully remove it from the air fryer using oven mitts or tongs. Place it on a clean cutting board or serving platter.
- Tent with Foil: To keep the turkey breast warm and to let the juices redistribute evenly, loosely tent it with aluminum foil. This helps to retain the heat and enhances the tenderness of the meat. Allow the turkey breast to rest for at least 10 to 15 minutes, although 20 to 30 minutes is ideal for larger cuts.
- Carving and Serving: After the resting period, it’s time to carve and serve the turkey breast. Use a sharp carving knife to make clean, even slices. Start by removing the skin if desired, then slice the turkey breast against the grain into thin or thick slices, depending on your preference. Arrange the slices on a platter and garnish with fresh herbs, if desired.
- Serving Suggestions: Serve your air fryer-cooked turkey breast alongside your favorite side dishes such as roasted vegetables, mashed potatoes, cranberry sauce, or stuffing. You can also use the sliced turkey breast in sandwiches, wraps, salads, or as a topping for homemade pizzas. The possibilities are endless!
While it may be tempting to dig into the turkey breast right away, allowing it to rest is essential for the best culinary experience. Resting helps the flavors meld together and ensures that the meat remains juicy and tender.
As you carve and serve the turkey breast, be mindful of the serving size and adjust accordingly to accommodate your guests’ preferences and dietary needs. Remember to store any leftovers promptly in an airtight container in the refrigerator to enjoy for future meals.
Now that you have successfully rested and served your air fryer-cooked turkey breast, sit back, savor the delicious flavors, and enjoy the fruits of your labor with your loved ones.
Tips and Tricks for Cooking Turkey Breast in the Air Fryer
Cooking turkey breast in an air fryer can be a game-changer, providing you with a flavorful and succulent dish. Here are some tips and tricks to help you achieve the best results:
- Choose the Right Size: Consider the size of your air fryer when selecting a turkey breast. Ensure that it will fit comfortably inside the air fryer basket, leaving enough space for hot air circulation. If your turkey breast is too large, you may need to cut it into smaller pieces or cook it in batches.
- Use a Meat Thermometer: To ensure that your turkey breast is cooked to the perfect temperature, use a reliable meat thermometer. Insert it into the thickest part of the meat without touching the bone. This will ensure accurate and safe cooking.
- Don’t Overcrowd the Basket: Avoid overcrowding the air fryer basket, as this can hinder the airflow and result in uneven cooking. Give the turkey breast enough space so that the hot air can circulate freely around it, promoting even browning and cooking.
- Preheat the Air Fryer: Preheating the air fryer is crucial for achieving a crispy exterior. Allow the air fryer to preheat for a few minutes before adding the turkey breast. This helps to create a sear on the exterior, locking in the juices and enhancing the overall taste and texture.
- Baste or Brush with Oil: To enhance browning and add moisture, you can baste or brush the turkey breast with a small amount of oil before cooking. This will help to achieve a crispy and golden-brown skin. However, be mindful of using too much oil, as it may cause excessive smoking in the air fryer.
- Flip and Rotate: To ensure even cooking, flip and rotate the turkey breast halfway through the cooking process. This helps to achieve a consistent browning on all sides of the turkey breast. Use tongs or a spatula to gently turn the turkey breast over.
- Experiment with Seasonings: The air fryer allows you to get creative with seasonings. Try different combinations of herbs, spices, and marinades to add flavor and variety to your turkey breast. Don’t be afraid to experiment and find your favorite seasoning blends.
- Allow for Resting Time: After cooking the turkey breast, let it rest for a few minutes before carving. This resting period allows the juices to redistribute, ensuring a more flavorful and tender meat. Tent the turkey breast loosely with foil to keep it warm during the resting period.
- Monitor Closely: Keep a close eye on the turkey breast as it cooks in the air fryer. Cooking times may vary depending on the size and thickness of the turkey breast, as well as the specific air fryer model. Adjust cooking times as needed to prevent overcooking or undercooking.
- Keep It Moist: To prevent the turkey breast from drying out, you can place a small cup or tray of water in the air fryer basket while cooking. This helps to add moisture and maintain the juiciness of the meat.
By following these tips and tricks, you can take your cooking skills to the next level and achieve a mouthwatering and perfectly cooked turkey breast in your air fryer. Enjoy the process and savor the delicious results!
Conclusion
Cooking turkey breast in an air fryer is a convenient and innovative way to achieve a delicious and well-cooked dish. The air fryer’s hot air circulation ensures a crispy exterior while keeping the meat tender and juicy. Throughout this article, we have explored the benefits of cooking turkey breast in an air fryer, as well as the steps involved in preparing, seasoning, and cooking it to perfection.
The benefits of using an air fryer for cooking turkey breast are numerous. It offers a healthier cooking option by requiring minimal to no oil, resulting in a lighter and less greasy dish. The air fryer also saves time with its quick preheating and efficient cooking process, making it an excellent choice for busy households or when entertaining guests.
Properly preparing the turkey breast by thawing, trimming, and patting it dry is essential for optimal cooking results. Seasoning options are diverse, allowing for a wide range of flavors and culinary creativity. Whether you prefer classic herbs and spices, citrus-infused blends, smoky rubs, or Mediterranean-inspired seasonings, the air fryer can accommodate your preferences with delicious results.
Cooking the turkey breast in the air fryer requires attention to detail, including preheating the appliance, monitoring the cooking time and temperature, and flipping or rotating the turkey to ensure even browning. Additionally, checking for doneness using a meat thermometer or visual cues is crucial to ensure that the turkey breast is cooked thoroughly and safe to eat.
Resting the turkey breast after cooking allows the meat to relax and the juices to redistribute, resulting in a more tender and flavorful dish. Finally, serving the air fryer-cooked turkey breast alongside your favorite side dishes or using it as a versatile ingredient opens up a world of culinary possibilities.
With the tips and tricks provided, you can confidently cook turkey breast in your air fryer, exploring different flavors and enjoying a moist and delicious end result. So, grab your air fryer and elevate your turkey cooking game with this modern cooking method. Happy cooking!
Frequently Asked Questions about How Long To Cook Turkey Breast In Air Fryer
Was this page helpful?
At Storables.com, we guarantee accurate and reliable information. Our content, validated by Expert Board Contributors, is crafted following stringent Editorial Policies. We're committed to providing you with well-researched, expert-backed insights for all your informational needs.


0 thoughts on “How Long To Cook Turkey Breast In Air Fryer”