Articles
How To Fix Overflowing Rain Gutters
Modified: October 18, 2024
Learn how to fix overflowing rain gutters with our informative articles. Find expert tips and DIY solutions to prevent water damage to your home.
(Many of the links in this article redirect to a specific reviewed product. Your purchase of these products through affiliate links helps to generate commission for Storables.com, at no extra cost. Learn more)
Introduction
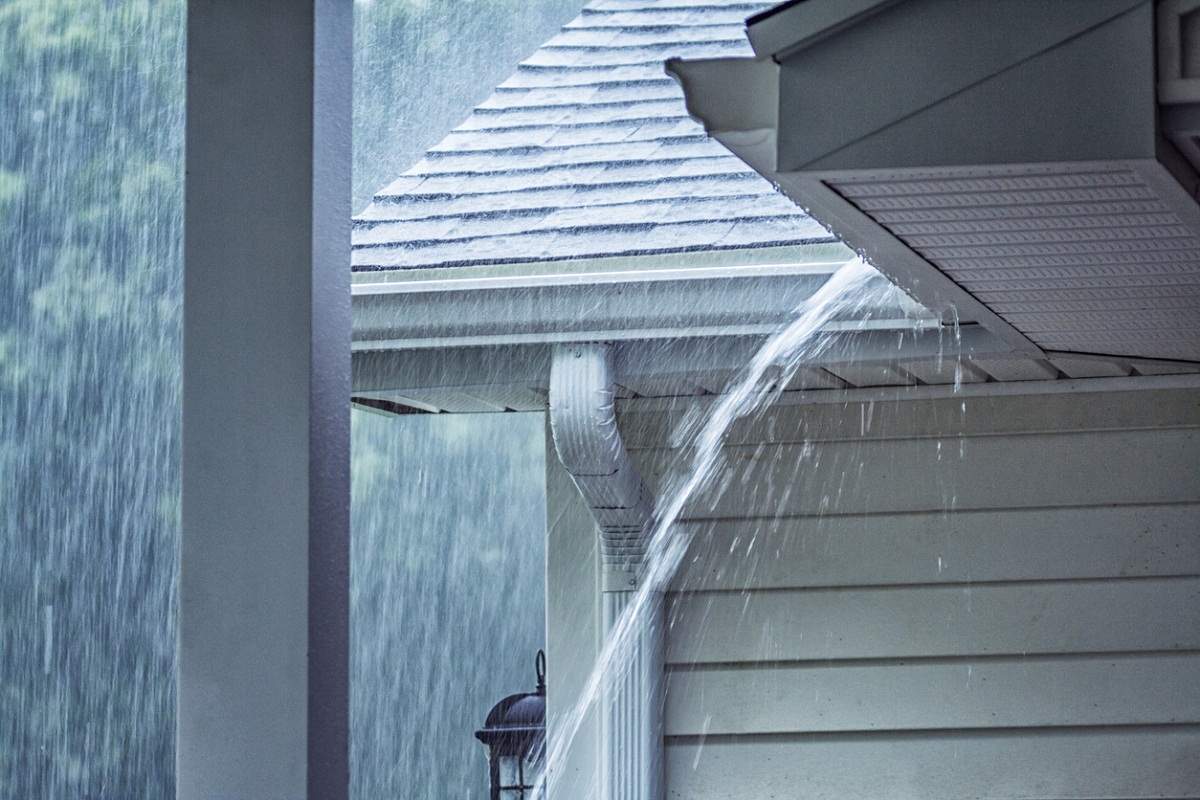
Proper functioning rain gutters are essential for protecting your home from water damage. When rain gutters become overwhelmed with debris or develop leaks, they can no longer effectively channel water away from your roof and foundation, resulting in overflow. This can lead to a variety of issues such as basement flooding, landscape erosion, and damage to the exterior of your home.
In this article, we will discuss the common causes of overflowing rain gutters and provide you with actionable steps to fix the problem. Whether you are a DIY enthusiast or prefer to hire a professional, these tips will help you ensure that your rain gutters are working optimally and keeping your home safe from water damage.
So, let’s dive in and explore the solutions to fix overflowing rain gutters!
Key Takeaways:
- Regularly cleaning your rain gutters and removing debris is essential to prevent overflow and maintain their functionality. Aim to clean them at least twice a year, preferably in spring and fall, but more frequently if you have trees near your home that shed leaves regularly.
- By incorporating preventive maintenance tasks such as cleaning gutters, inspecting for leaks, and ensuring proper alignment, you can keep your rain gutters in optimal condition, minimize the risk of overflowing, and protect your home from water damage.
Read more: How To Fix An Overflowing Toilet
Common Causes of Overflowing Rain Gutters
There are several factors that can contribute to overflowing rain gutters. Understanding these common causes will help you identify the root of the problem and take appropriate actions to resolve it. Here are some of the most frequent culprits:
- Debris Buildup: One of the primary causes of overflowing gutters is the accumulation of leaves, twigs, dirt, and other debris. When gutters become clogged, water cannot flow freely, leading to overflow. Regular maintenance, such as cleaning out gutters, is crucial to prevent blockages.
- Poorly Positioned Downspouts: Another common cause of overflowing gutters is inadequate downspout placement. When downspouts are improperly positioned or too few in number, they cannot handle the volume of water being directed to them. This results in water backing up and overflowing the gutters.
- Gutter Slope Issues: Proper gutter slope is essential for ensuring that water flows smoothly towards the downspouts. If the gutters are not sloped correctly, water may pool in certain areas, causing overflow. Regular inspection and adjustment of gutter slope can prevent this issue.
- Leaking Joints or Seams: Over time, gutters may develop leaks at the joints or seams. These leaks allow water to escape, causing overflow. Repairing or replacing faulty gutter sections can resolve this problem and prevent further damage to your home.
- Inadequate Gutter Size: Gutters come in different sizes, and their capacity to handle water flow varies accordingly. If your gutters are undersized for your roof, they may become overwhelmed during heavy rainfall, leading to overflow. Upgrading to larger gutters can effectively address this issue.
By identifying the specific cause of overflowing gutters, you can take targeted steps to fix the problem. In the next sections, we will discuss various solutions to address each of these common causes, helping you restore the functionality of your rain gutters and protect your home from water damage.
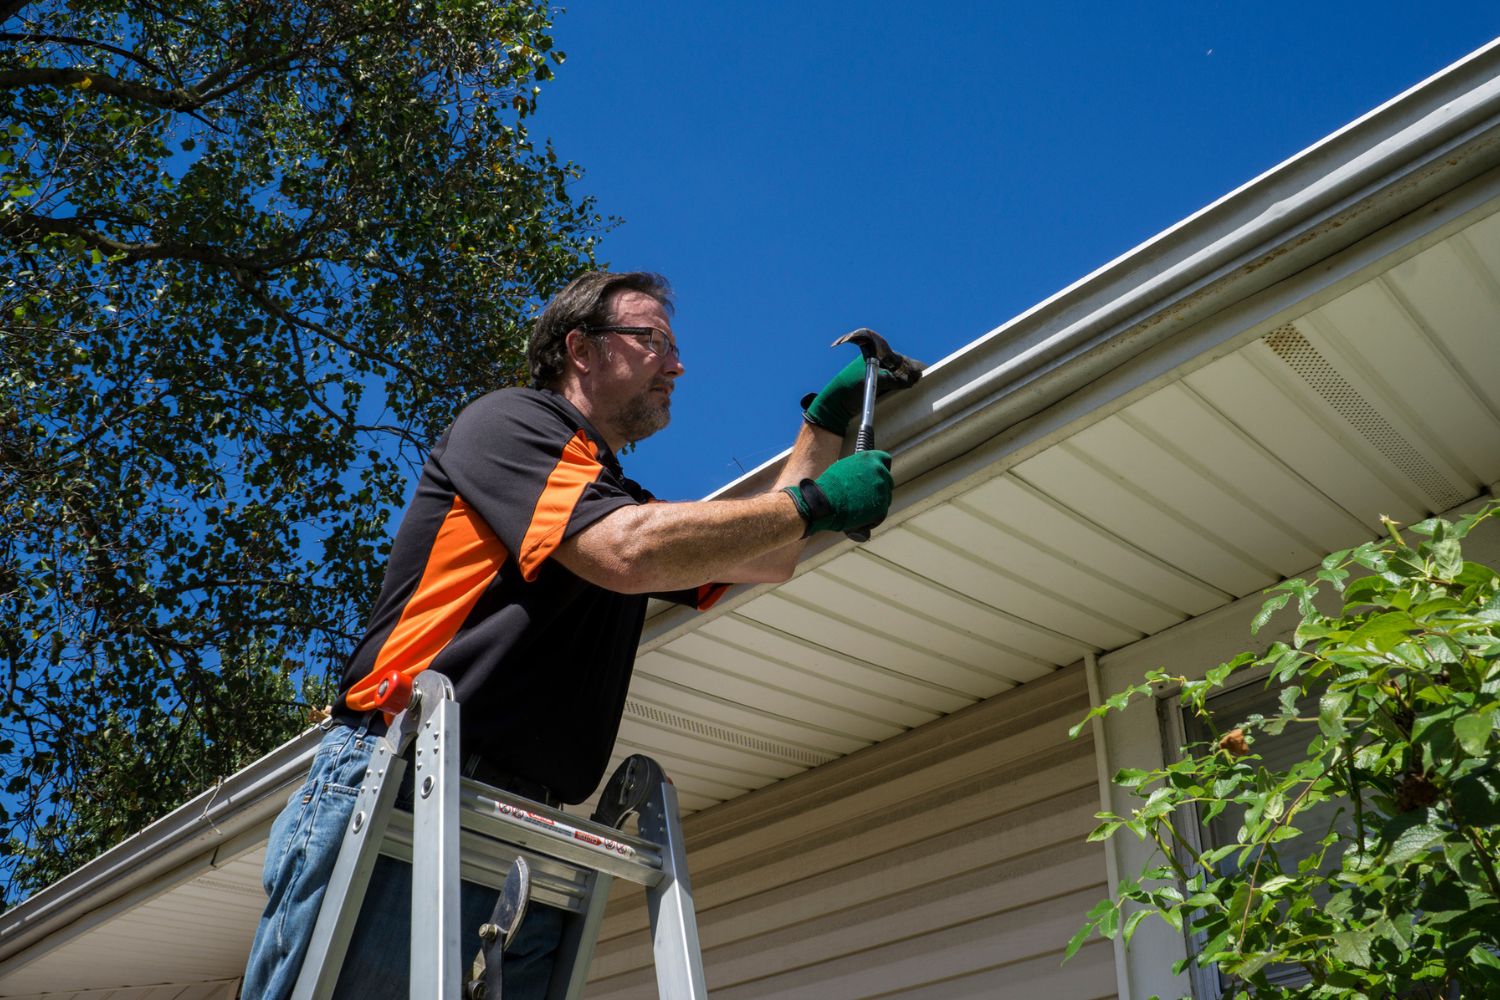
Clearing Debris from Rain Gutters
One of the most common causes of overflowing rain gutters is the accumulation of debris, such as leaves, twigs, dirt, and even small branches. This debris can clog the gutters and block the flow of water, leading to overflow. Fortunately, clearing the debris from your rain gutters is a relatively simple task that you can do yourself. Here’s how:
- Use a ladder: Safely position a ladder near the gutters, making sure it is stable and secure.
- Gather the necessary tools: Put on a sturdy pair of gloves to protect your hands and grab a bucket or a trash bag to collect the debris.
- Begin removing the debris: Start at one end of the gutter and work your way towards the downspout. Use your gloved hands or a small garden trowel to scoop out the leaves and other debris. Be careful not to push the debris into the downspout, as this can cause further blockage.
- Rinse with water: Once the majority of the debris is removed, use a garden hose to flush out any remaining dirt or small particles.
- Check the downspout: Make sure the downspout is clear of debris by running water through it. If needed, use a plumber’s snake or a hose with high pressure to dislodge any blockages.
- Inspect for damage: While clearing the debris, take the opportunity to inspect the gutter for any signs of damage, such as leaks or loose joints. Address any issues promptly to prevent further problems.
Regularly cleaning your rain gutters and removing debris is essential to prevent overflow and maintain their functionality. Aim to clean them at least twice a year, preferably in spring and fall, but more frequently if you have trees near your home that shed leaves regularly.
By following these steps and keeping your rain gutters free of debris, you can ensure that water flows smoothly through them, reducing the risk of overflow and potential water damage to your home.
Repairing Leaks in Rain Gutters
Leaking joints or seams in rain gutters can cause water to escape, leading to overflow and potential damage to your home. Repairing these leaks is essential to maintain the functionality of your gutters. Here’s a step-by-step guide to help you fix the leaks:
- Identify the source of the leak: Inspect the gutters during a rainstorm or use a hose to simulate rainfall. Look for any signs of water dripping or escaping from the joints or seams.
- Clean the area: Use a scrub brush or a wire brush to clean the surface around the leaking joint or seam. Remove any dirt, rust, or debris to ensure a clean and smooth surface for the repair.
- Apply gutter sealant: Use a gutter sealant or a silicone-based adhesive that is specifically designed for gutter repairs. Apply a generous amount of sealant to the leaking joint or seam, making sure to cover the entire area.
- Smooth and seal: Use a putty knife or your gloved finger to smooth out the sealant and create an even layer. This will ensure that the sealant adheres properly and forms a watertight barrier.
- Let it dry: Allow the sealant to dry completely according to the manufacturer’s instructions. This typically takes a few hours, but can vary depending on the product used.
- Test for leaks: Once the sealant is dry, run water through the gutters to check for any remaining leaks. If you notice any, apply an additional layer of sealant and repeat the drying process.
For larger or more extensive leaks, you may need to replace a section of the gutter or seek the assistance of a professional gutter repair service. It’s important to address leaks promptly to prevent further damage to your home and to maintain the effectiveness of your rain gutters.
Regular inspections of your rain gutters can also help you identify and address any potential leaks before they become a major problem. By keeping your gutters in good repair, you can avoid overflow and protect your home from water damage.
Regularly clean out your rain gutters to remove debris and prevent clogs. Install gutter guards to help keep leaves and other debris from accumulating.
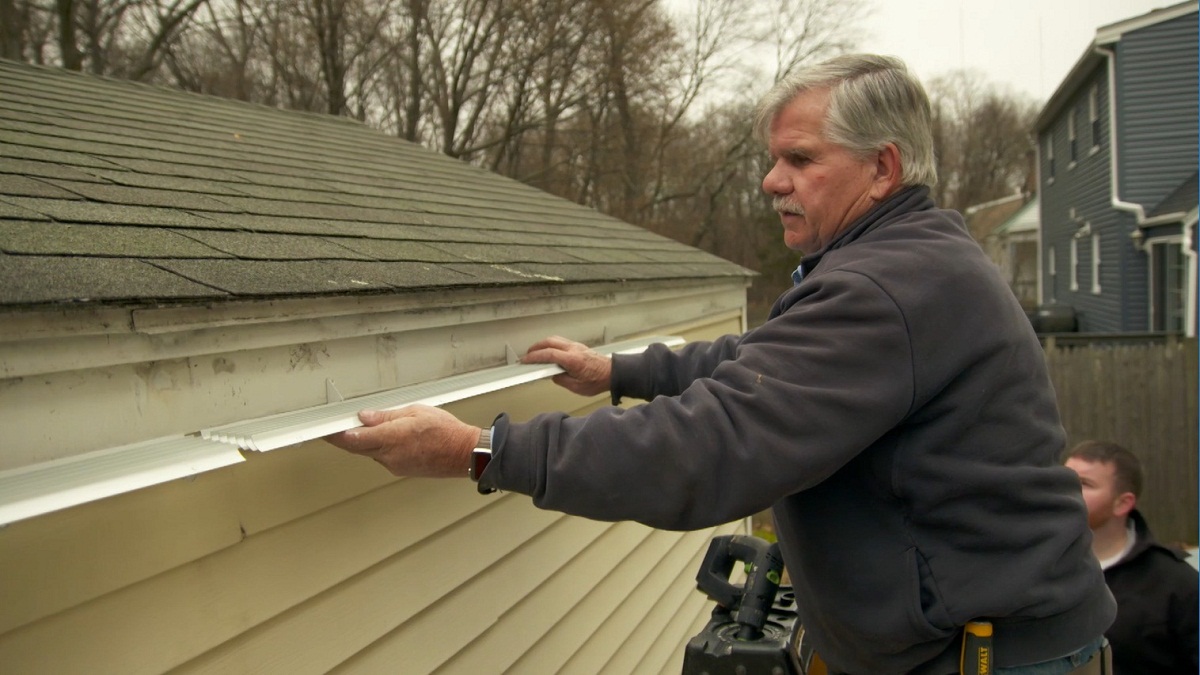
Adjusting and Realigning Rain Gutters
Proper alignment and slope are crucial for rain gutters to function effectively. If your gutters are not positioned correctly or have become misaligned over time, water may not flow efficiently, leading to overflow. Here are the steps to adjust and realign your rain gutters:
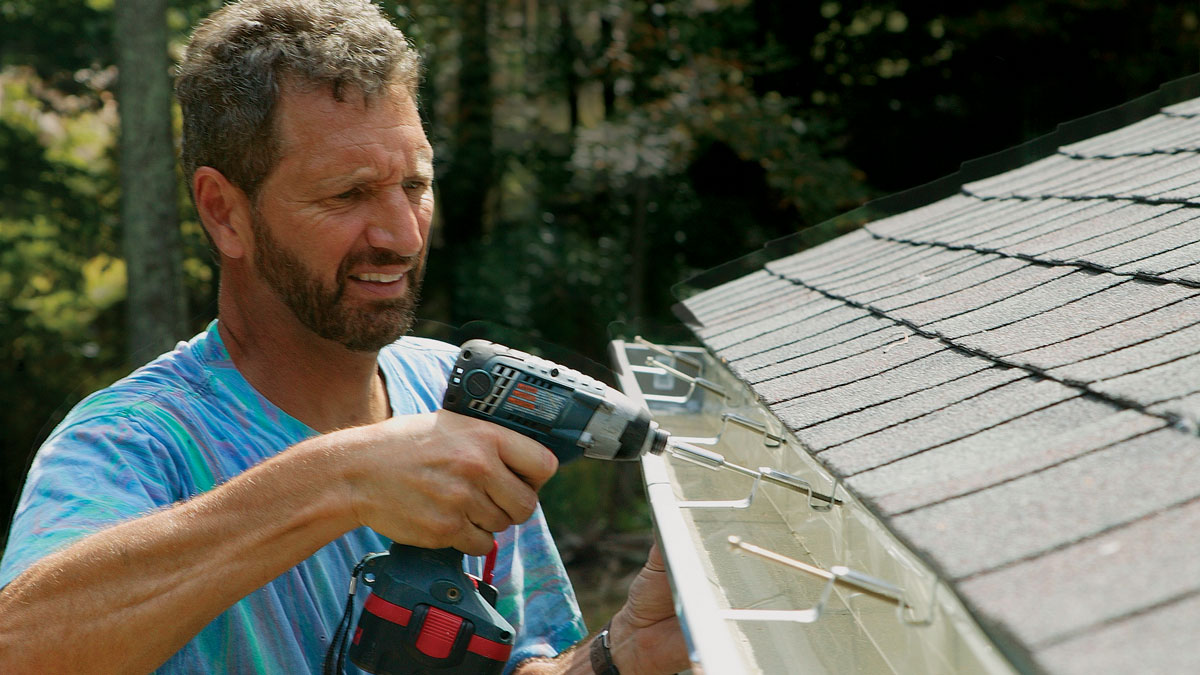
- Inspect the current alignment: Start by visually assessing the current position of your gutters. Look for any sections that appear uneven, sagging, or pulling away from the roofline.
- Detach and reposition gutter hangers: Locate the gutter hangers or brackets that secure the gutters to your roofline. Remove the screws or nails holding them in place and carefully readjust the position of the hangers to align the gutters properly.
- Check the gutter slope: Use a level to check the slope of your gutters. They should have a slight slant towards the downspouts to facilitate proper water flow. If the slope is insufficient, adjust the position of the hangers accordingly.
- Reattach the gutter hangers: Once you are satisfied with the alignment and slope, reattach the gutter hangers securely using screws or nails. Make sure they are tightly fastened to ensure stability.
- Test the water flow: After the realignment, run water through the gutters to check that it flows smoothly towards the downspouts. If you notice any pooling or stagnant water, adjust the slope further until the issue is resolved.
- Inspect for leaks or gaps: While adjusting the gutters, take the opportunity to inspect for any leaks or gaps between gutter sections or at the joints. Apply sealant or repair any damage found to ensure proper functionality.
It’s important to periodically inspect and adjust your rain gutters to maintain their optimal performance. Factors such as settling of the house, extreme weather conditions, or even the weight of debris can affect the alignment over time. By keeping your gutters properly aligned, you can prevent overflow and ensure that water is effectively channeled away from your home.
If you are not comfortable performing these adjustments yourself, consider hiring a professional gutter installation or repair service to ensure the job is done correctly and safely.
Read more: How To Install Rain Gutters On Mobile Home
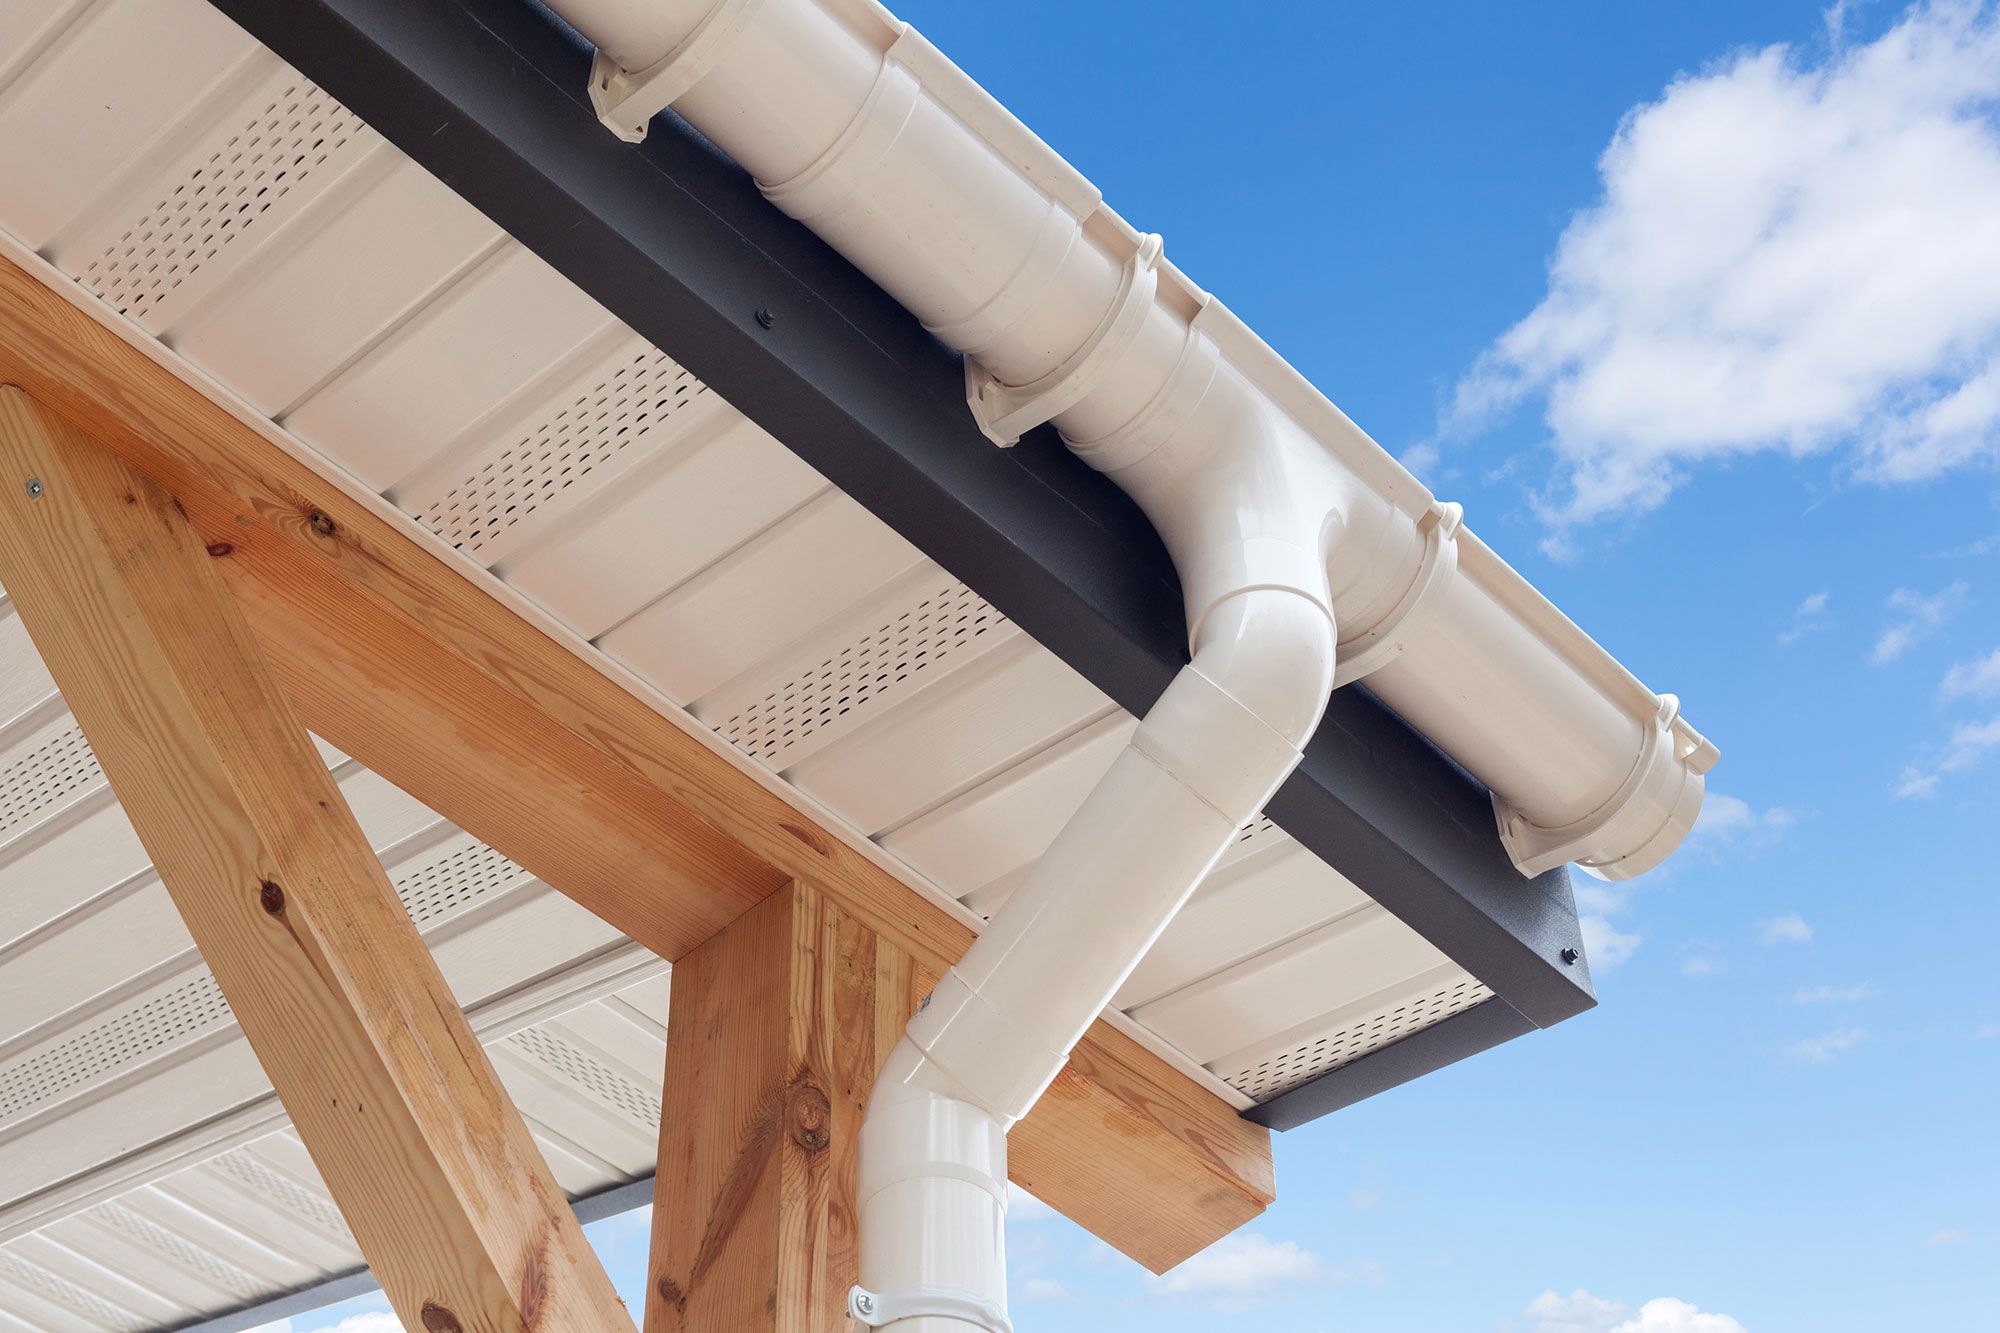
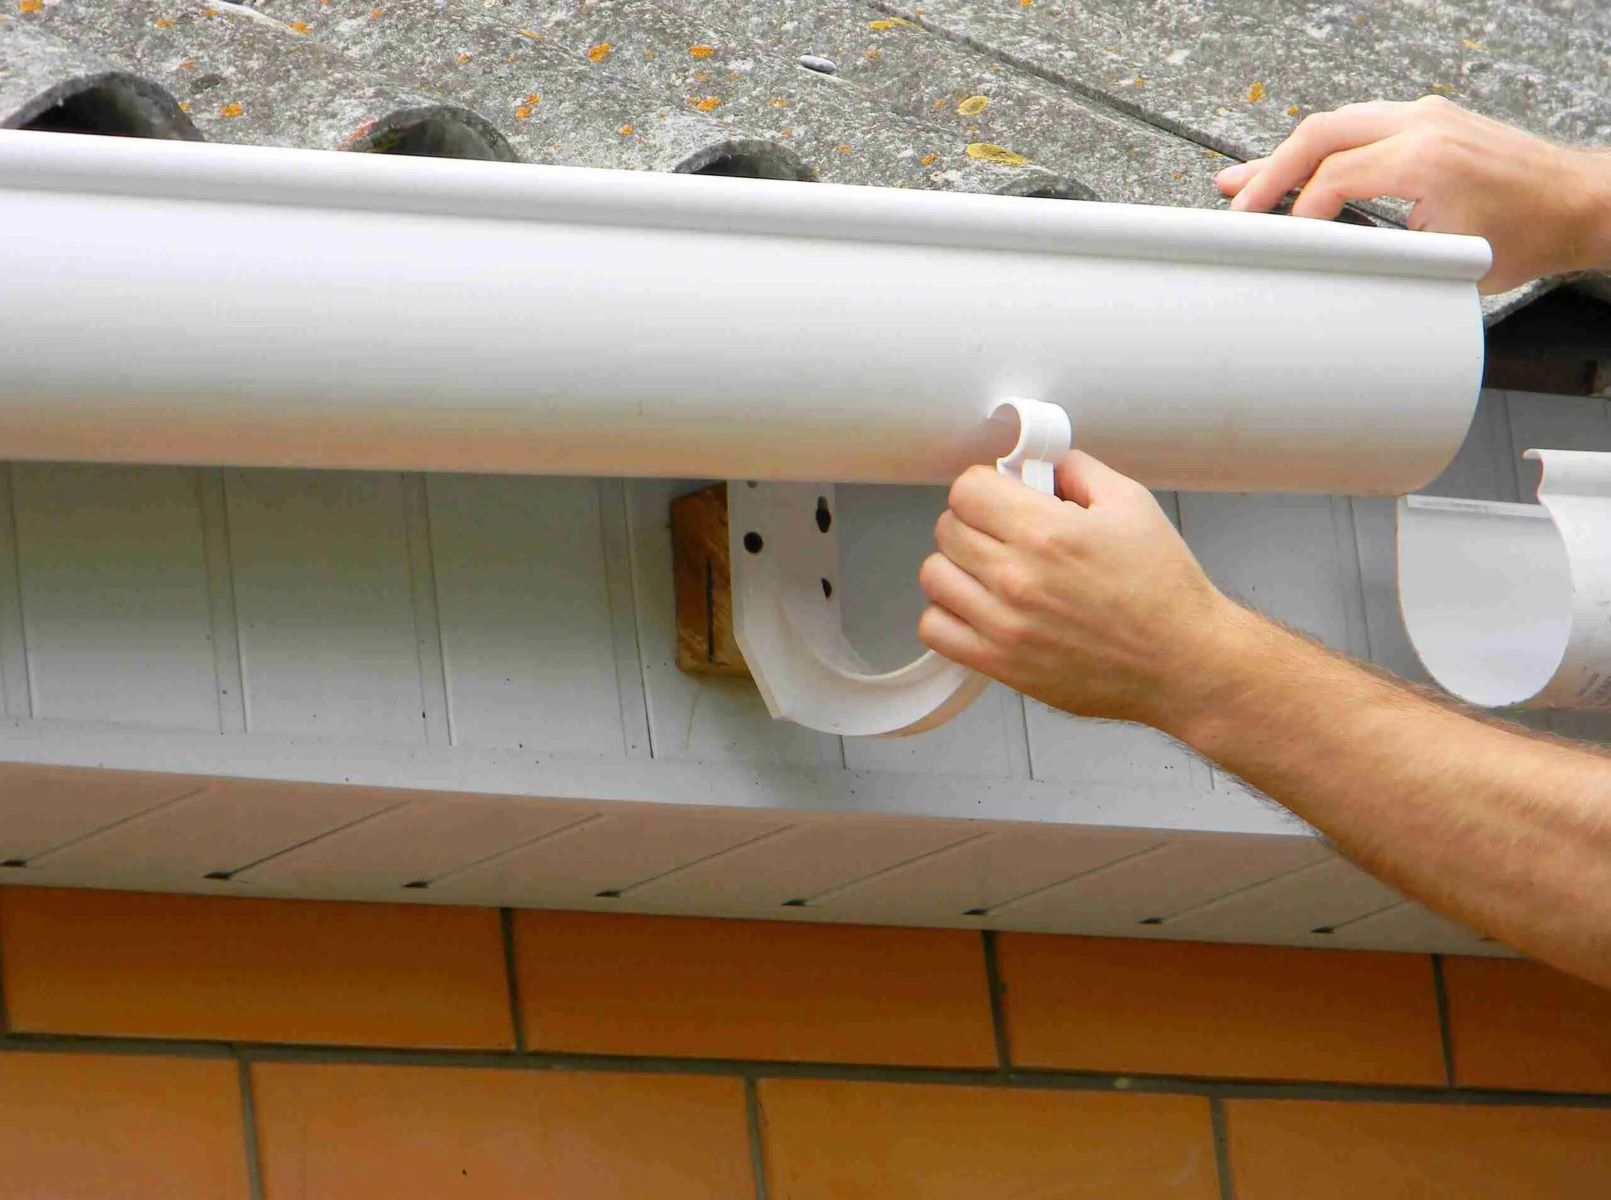
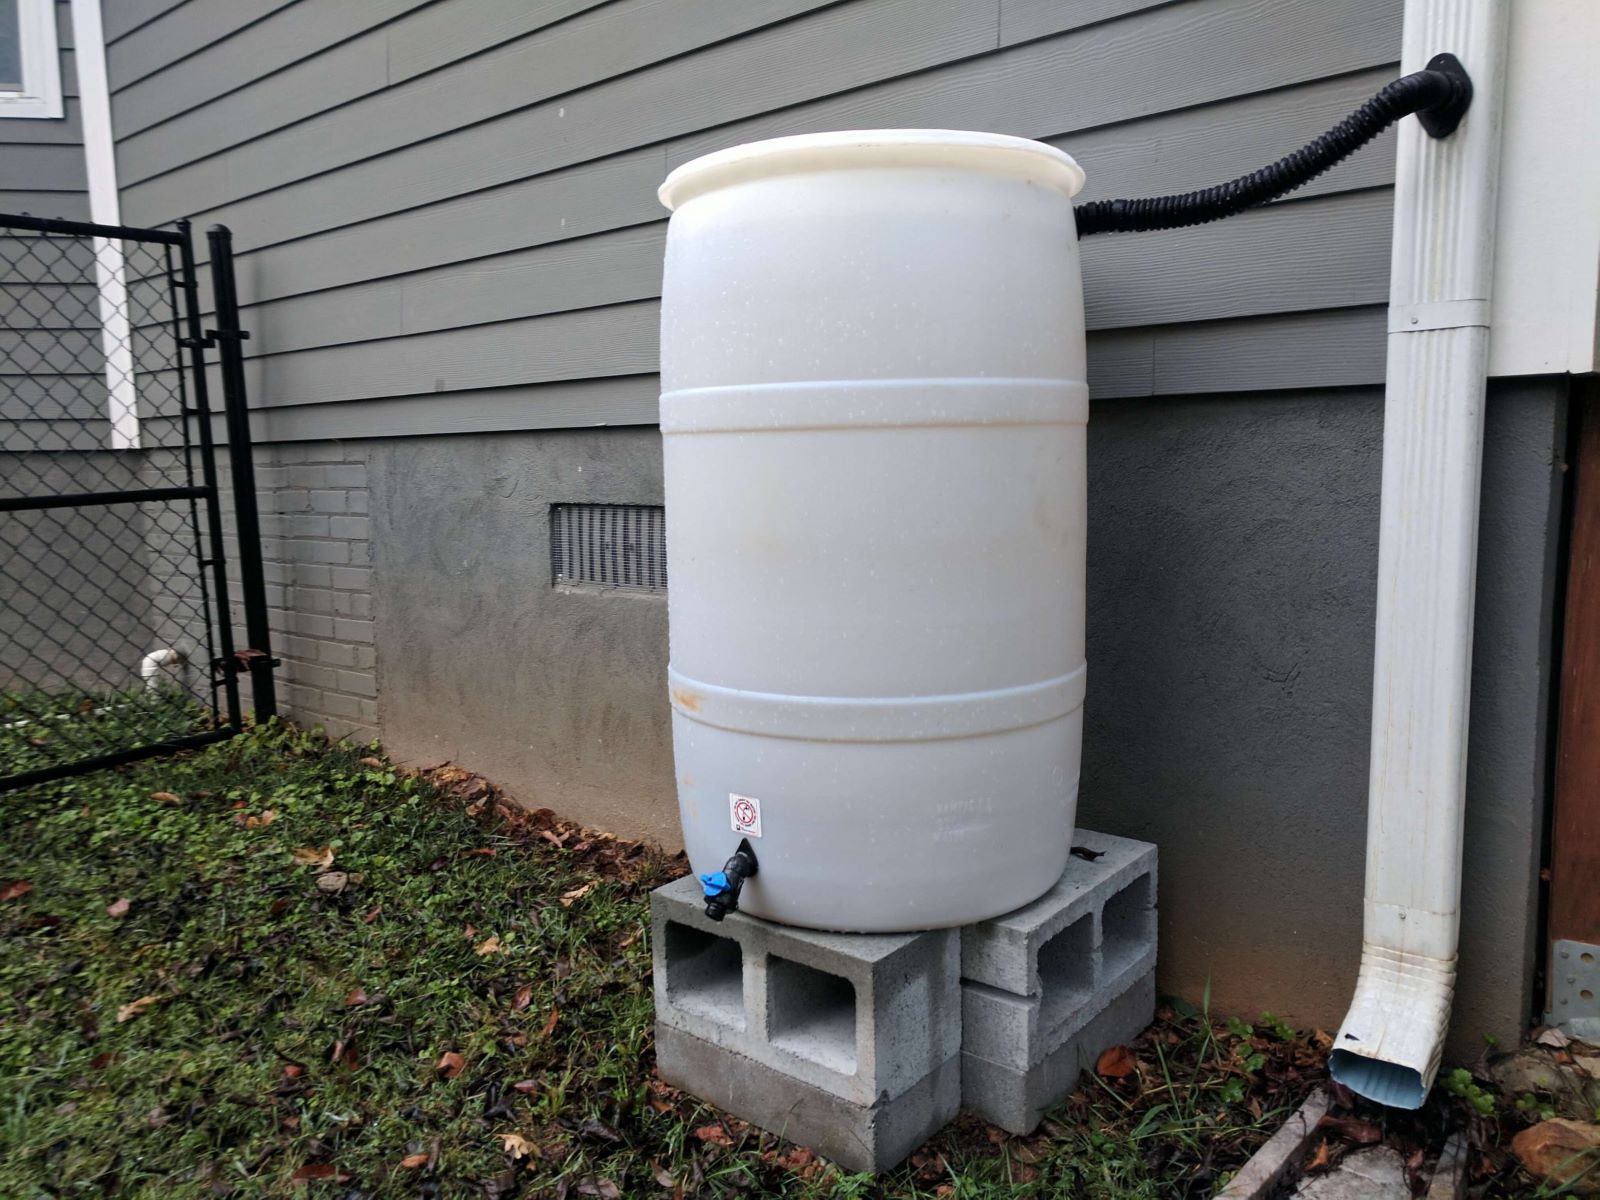
Installing Downspout Extensions
Inadequate downspouts or downspouts that are positioned too close to your home’s foundation can contribute to overflowing rain gutters. Installing downspout extensions is a simple and effective solution to redirect water away from your foundation and prevent overflow. Follow these steps to install downspout extensions:
- Determine the extension length: Measure the distance from the end of your existing downspout to the desired location where you want the water to be directed. This could be a drainage area, a garden bed, or simply farther away from your home’s foundation.
- Purchase downspout extensions: Visit a home improvement store or browse online for downspout extensions that match the length you measured. They come in various materials such as plastic or metal, and you can choose a style that blends well with your home exterior.
- Prepare the downspout: Remove the end cap or elbow from the existing downspout to create an opening for the extension. Follow the manufacturer’s instructions if there are specific guidelines for your chosen extension.
- Attach the extension: Slide the downspout extension into the opening of the existing downspout until it fits securely. Use screws or clips provided with the extension to ensure a stable connection.
- Direct the extension: Position the extension in the desired direction away from your home. Make sure it slopes slightly to allow water to flow freely. You may need to use additional components, such as elbows or splitters, to navigate around obstacles or to redirect water accordingly.
- Secure the extension: Use stakes or brackets to secure the downspout extension to the ground. This will prevent it from shifting or being dislodged during heavy rain or wind.
Installing downspout extensions is a relatively quick and straightforward task that can greatly alleviate overflowing rain gutters. It helps redirect water away from your home’s foundation, reducing the risk of water damage and foundation issues.
Be sure to periodically inspect the extensions to ensure they remain securely attached and free from clogs or obstructions. Cleaning out the extensions as part of regular gutter maintenance will help maintain their effectiveness.
If you are unsure about the installation process, consult a professional or hire a gutter installation service to ensure proper installation and functionality.
Preventive Maintenance for Rain Gutters
Maintaining your rain gutters regularly is crucial to prevent overflowing and ensure their optimal functioning. By incorporating a few simple preventive maintenance tasks into your routine, you can extend the lifespan of your gutters and protect your home from water damage. Here are some important preventive maintenance tips:
- Clean your gutters regularly: Regularly remove debris such as leaves, twigs, and dirt from your gutters. Aim to clean them at least twice a year, or more frequently if you have trees near your home that shed leaves regularly.
- Trim tree branches: Trim any overhanging tree branches that are in close proximity to your roof and gutters. This will help reduce the amount of debris that falls into your gutters and minimize the risk of damage from falling branches during storms.
- Inspect for leaks and damage: Regularly inspect your gutters for any signs of leaks, rust, or damage. Repair or replace any damaged sections promptly to prevent water from escaping and causing overflow.
- Check the gutter slope: Ensure that your gutters have the correct slope to facilitate proper water flow. Adjust the alignment and slope if necessary so that water drains towards the downspouts efficiently.
- Keep downspouts clear: Regularly check and clear any debris or obstructions from your downspouts. This will ensure that water can flow freely from the gutters and prevent overflow.
- Install gutter guards: Consider installing gutter guards or screens to help minimize the amount of debris entering your gutters. These protective coverings can prevent large items from clogging the gutters while allowing water to flow through freely.
- Monitor for signs of water damage: Regularly inspect the areas surrounding your gutters for any signs of water damage, such as discoloration or peeling paint. This can indicate overflow or leaking gutters that need attention.
- Address ice and snow buildup: In colder climates, ice dams and snow buildup can cause water to back up and overflow. Remove snow from your roof and use ice melt products to prevent ice dams from forming.
By incorporating these preventive maintenance tasks into your routine, you can keep your rain gutters in optimal condition, minimize the risk of overflowing, and protect your home from water damage.
If you are unsure about performing any of these tasks yourself or if you notice significant damage to your gutters, it is recommended to consult with a professional gutter maintenance or repair service for expert assistance.
Conclusion
Overflowing rain gutters can lead to significant water damage and pose a threat to the integrity of your home. Understanding the common causes of overflowing gutters and taking proactive measures to address them is essential for maintaining the functionality of your rain gutters and protecting your property.
In this article, we have discussed various solutions for fixing overflowing rain gutters, including clearing debris, repairing leaks, adjusting and realigning gutters, installing downspout extensions, and implementing preventive maintenance practices. By following these steps, you can ensure that your gutters effectively channel water away from your home, preventing potential water damage.
Regular maintenance, such as cleaning out gutters, inspecting for leaks, and ensuring proper alignment, is crucial to the ongoing performance of your rain gutters. Additionally, installing downspout extensions and considering gutter guards can further enhance their efficiency by preventing clogs and redirecting water away from your foundation.
Remember, prevention is key when it comes to maintaining your rain gutters. Regular inspections, timely repairs, and proactive measures will help you avoid overflowing gutters and the resulting damage. By incorporating these preventive maintenance practices into your routine, you can keep your rain gutters in top shape and safeguard your home against water-related issues.
If you’re not confident in your ability to address the issues with your rain gutters, it’s always a good idea to consult with a professional gutter maintenance or repair service. They can provide expert advice, perform necessary repairs or installations, and ensure that your rain gutters are functioning optimally.
By taking the time to care for your rain gutters, you are investing in the long-term protection of your home and ensuring that it remains a safe and comfortable place for you and your family for years to come.
Frequently Asked Questions about How To Fix Overflowing Rain Gutters
Was this page helpful?
At Storables.com, we guarantee accurate and reliable information. Our content, validated by Expert Board Contributors, is crafted following stringent Editorial Policies. We're committed to providing you with well-researched, expert-backed insights for all your informational needs.

0 thoughts on “How To Fix Overflowing Rain Gutters”