Home>Furniture & Design>Bathroom Accessories>How To Replace Overflow Drain On A Bathtub
Bathroom Accessories
How To Replace Overflow Drain On A Bathtub
Published: February 17, 2024
Learn how to replace the overflow drain on your bathtub with our step-by-step guide. Find the best bathroom accessories and get expert tips for a successful DIY project.
(Many of the links in this article redirect to a specific reviewed product. Your purchase of these products through affiliate links helps to generate commission for Storables.com, at no extra cost. Learn more)
Introduction
Replacing the overflow drain on a bathtub is a common maintenance task that can help prevent water damage and ensure the proper functioning of your bathtub. Over time, the overflow drain can become corroded or damaged, leading to leaks and other issues. By replacing the overflow drain, you can maintain the integrity of your bathtub and prevent potential water damage to your home.
In this comprehensive guide, we will walk you through the step-by-step process of replacing the overflow drain on your bathtub. Whether you're a seasoned DIY enthusiast or a novice homeowner looking to tackle a new project, this guide will provide you with the knowledge and confidence to successfully complete this task.
Before we dive into the process of replacing the overflow drain, it's important to gather the necessary tools and materials to ensure a smooth and efficient workflow. From basic hand tools to the new overflow drain kit, having the right equipment at your disposal will set the stage for a successful replacement process.
So, let's roll up our sleeves and embark on this DIY journey to replace the overflow drain on your bathtub. With the right guidance and a can-do attitude, you'll be well on your way to maintaining a watertight and fully functional bathtub in your home.
Key Takeaways:
- Keep your bathtub in top condition by replacing the overflow drain. With the right tools and steps, you can prevent water damage and maintain a watertight seal for a fully functional bathtub.
- Take pride in DIY home maintenance. Replacing the overflow drain not only safeguards your bathtub but also reflects your proactive mindset in preserving a safe and comfortable living environment.
Read more: How To Plug An Overflow Drain In Bathtub?
Step 1: Gather the necessary tools and materials
Before you begin the process of replacing the overflow drain on your bathtub, it's essential to gather all the required tools and materials. Having the right equipment at hand will streamline the replacement process and ensure that you can complete the task efficiently. Here's a comprehensive list of the tools and materials you'll need:
Tools:
- Adjustable Wrench: This versatile tool will be essential for loosening and tightening various components during the replacement process.
- Screwdriver Set: A set of screwdrivers, including both flathead and Phillips head, will be necessary for removing screws and other fasteners.
- Pipe Wrench: A pipe wrench will aid in securely gripping and turning pipes and fittings, facilitating the removal and installation of the overflow drain.
- Plumbers Putty Knife: This tool will come in handy for removing old plumbers putty and ensuring a clean surface for the new overflow drain installation.
- Tub Drain Removal Tool: If your bathtub features a separate drain and overflow assembly, a specialized tub drain removal tool will be necessary for extracting the old overflow drain.
- Safety Gloves and Goggles: It's important to prioritize safety during the replacement process, so be sure to have protective gloves and goggles on hand.
Materials:
- New Overflow Drain Kit: Purchase a high-quality overflow drain kit that is compatible with your bathtub model. The kit should include the overflow cover, gasket, screws, and any additional components required for installation.
- Plumbers Putty: You'll need plumbers putty to create a watertight seal between the new overflow drain and the bathtub.
- Teflon Tape: This tape will be used to seal the threads of the new overflow drain, preventing any potential leaks.
- Cleaning Solution: Have a suitable cleaning solution or solvent available to thoroughly clean the area around the old overflow drain and ensure a clean surface for the new installation.
- Rags and Towels: Keep a supply of rags and towels handy to wipe away excess water, debris, and cleaning solution during the replacement process.
By gathering these tools and materials before you begin, you'll be well-prepared to tackle the task of replacing the overflow drain on your bathtub. With everything in place, you can proceed to the next step with confidence, knowing that you have everything you need to complete the replacement process seamlessly.
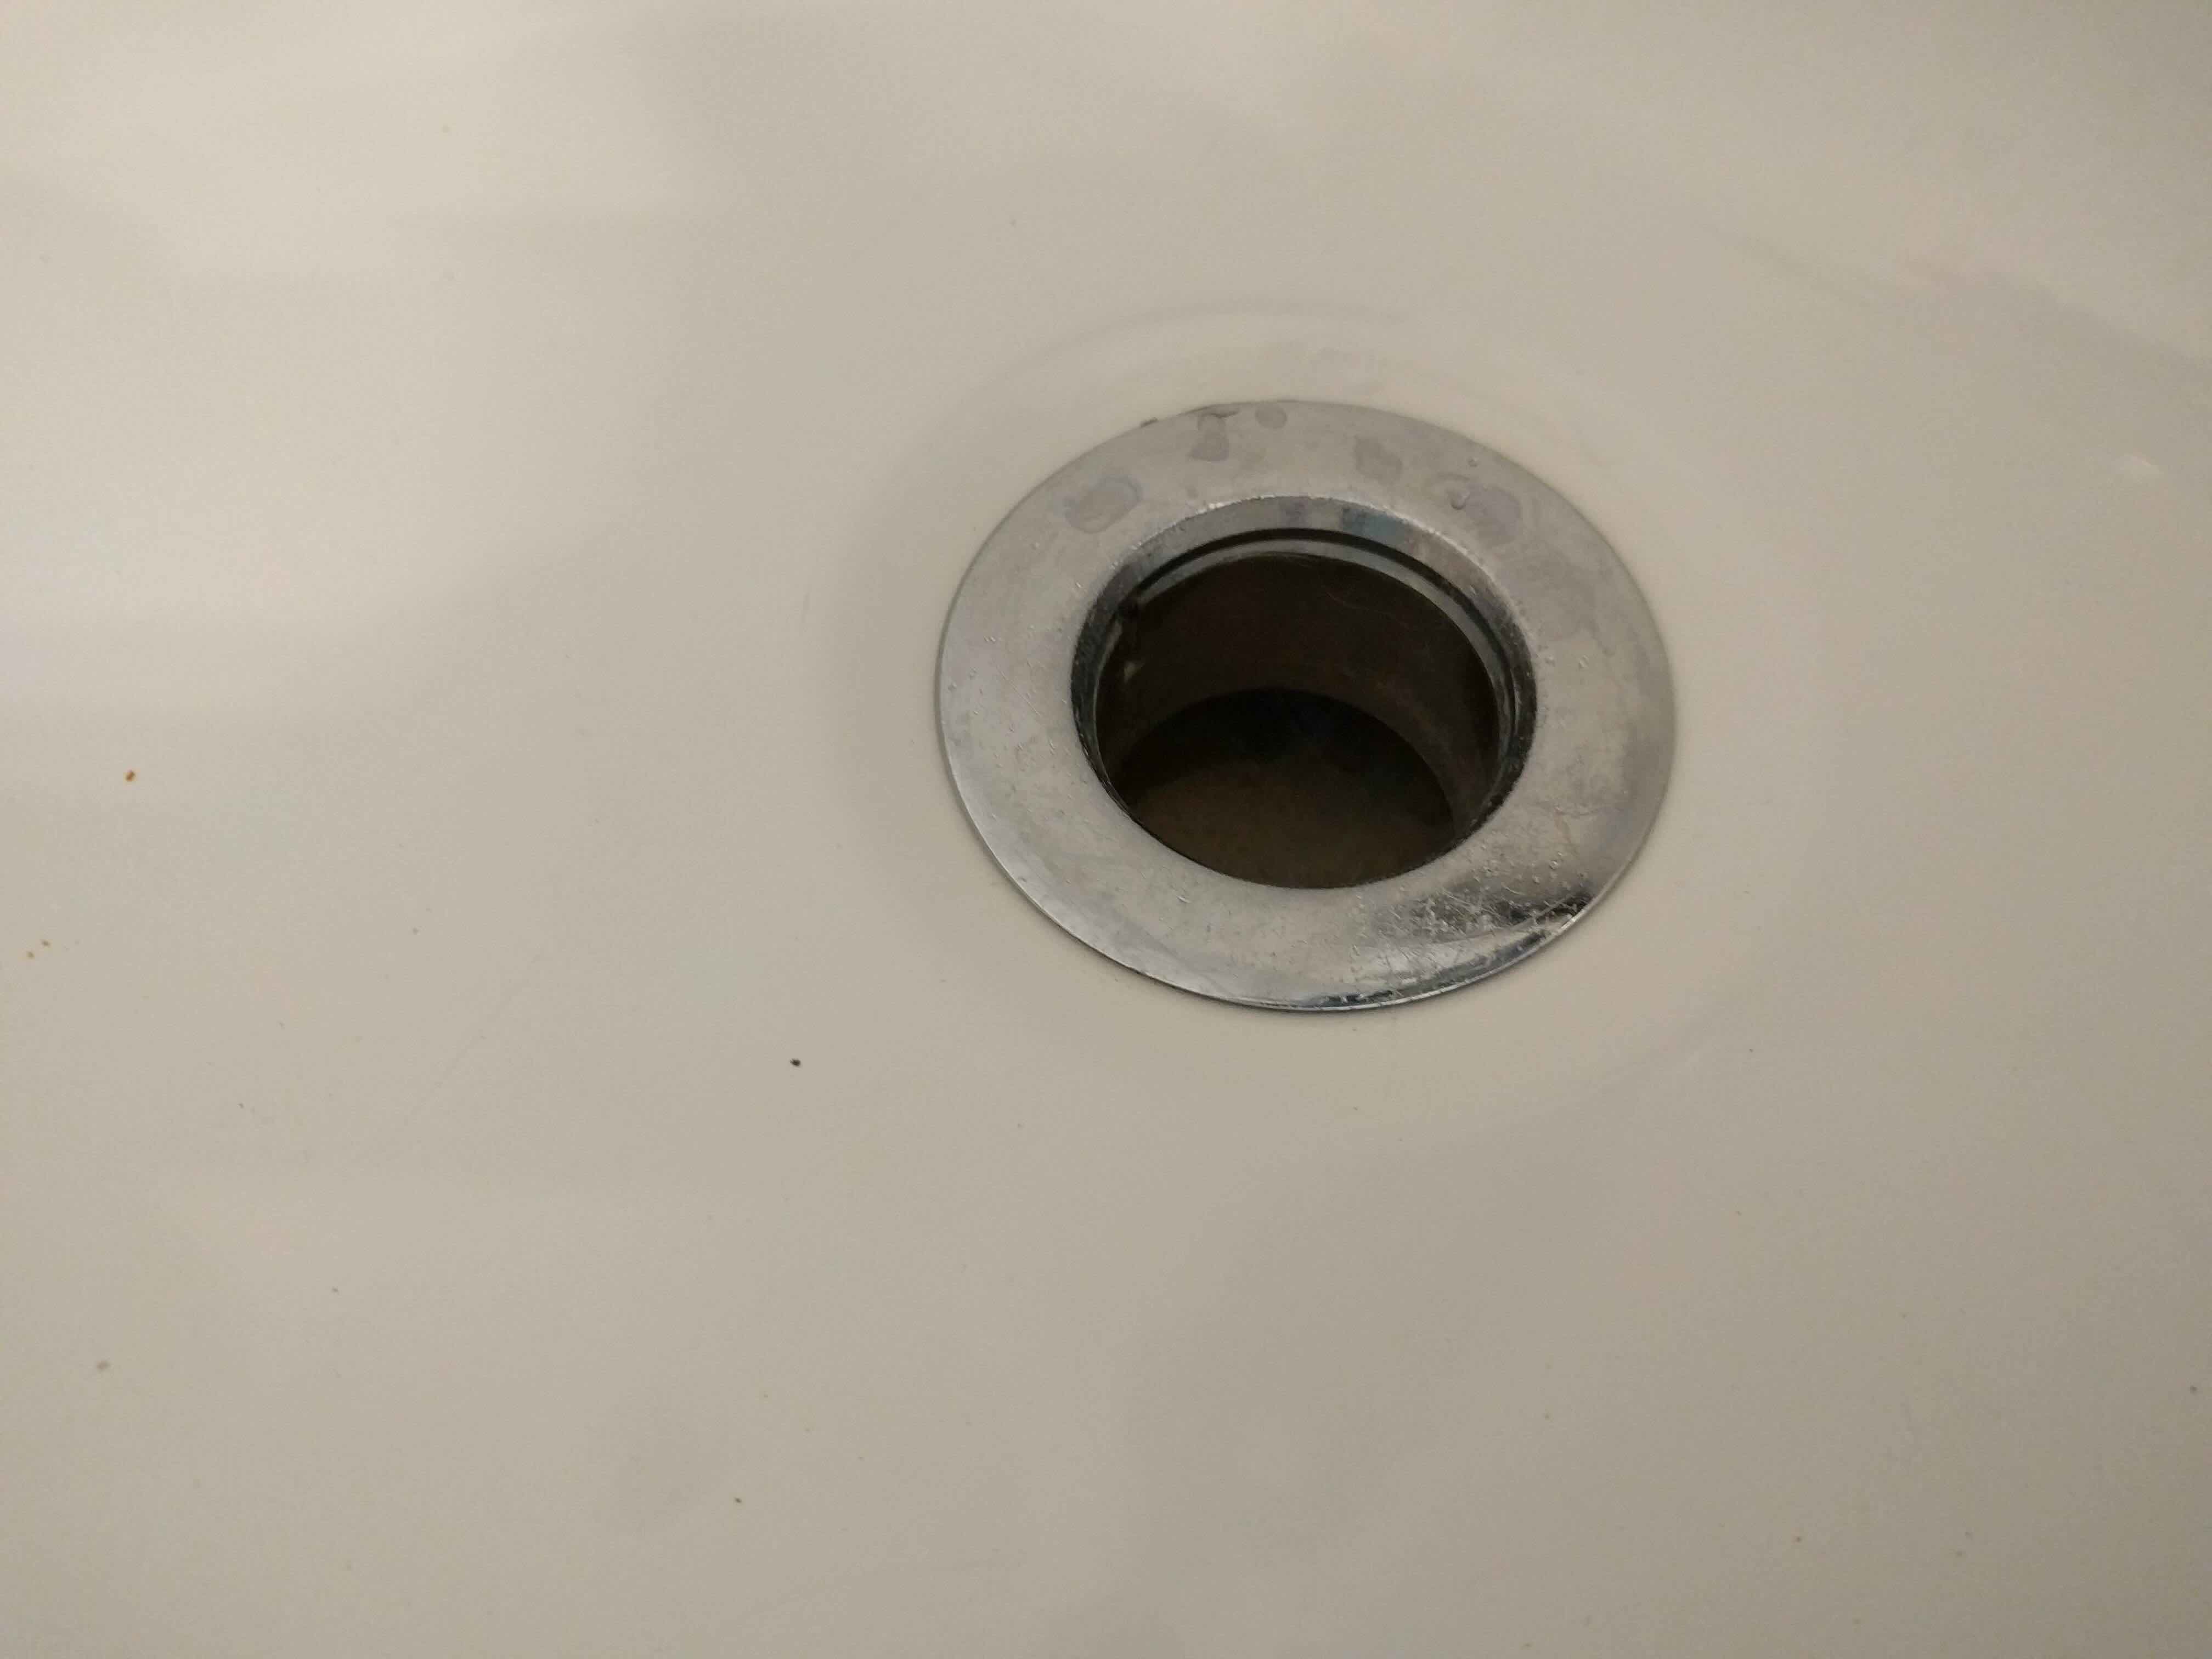
Step 2: Remove the old overflow drain
Removing the old overflow drain is a crucial step in the process of replacing it with a new one. This task requires careful attention to detail and the use of appropriate tools to ensure a smooth and efficient removal process. Here's a detailed guide on how to remove the old overflow drain from your bathtub:
-
Prepare the Work Area: Before you begin, it's essential to create a clean and organized work area around the bathtub. Remove any personal items or accessories from the vicinity to provide ample space for maneuvering and working comfortably.
-
Turn Off the Water Supply: Locate the main water shut-off valve for your bathtub and turn off the water supply. This precautionary measure will prevent any accidental water flow during the removal process.
-
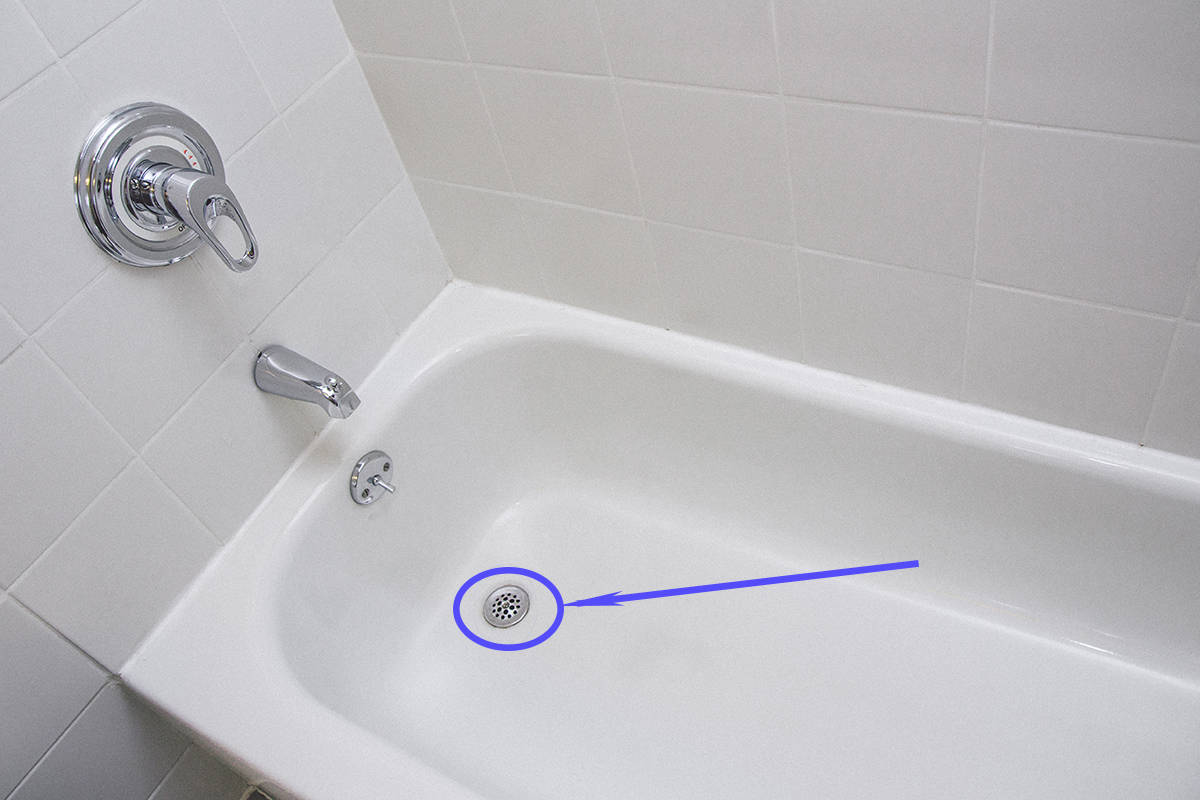
Access the Overflow Drain: Depending on the design of your bathtub, you may need to access the overflow drain from the front or back of the tub. Some tubs have an access panel that can be removed to reach the overflow drain, while others may require access from behind the tub.
-
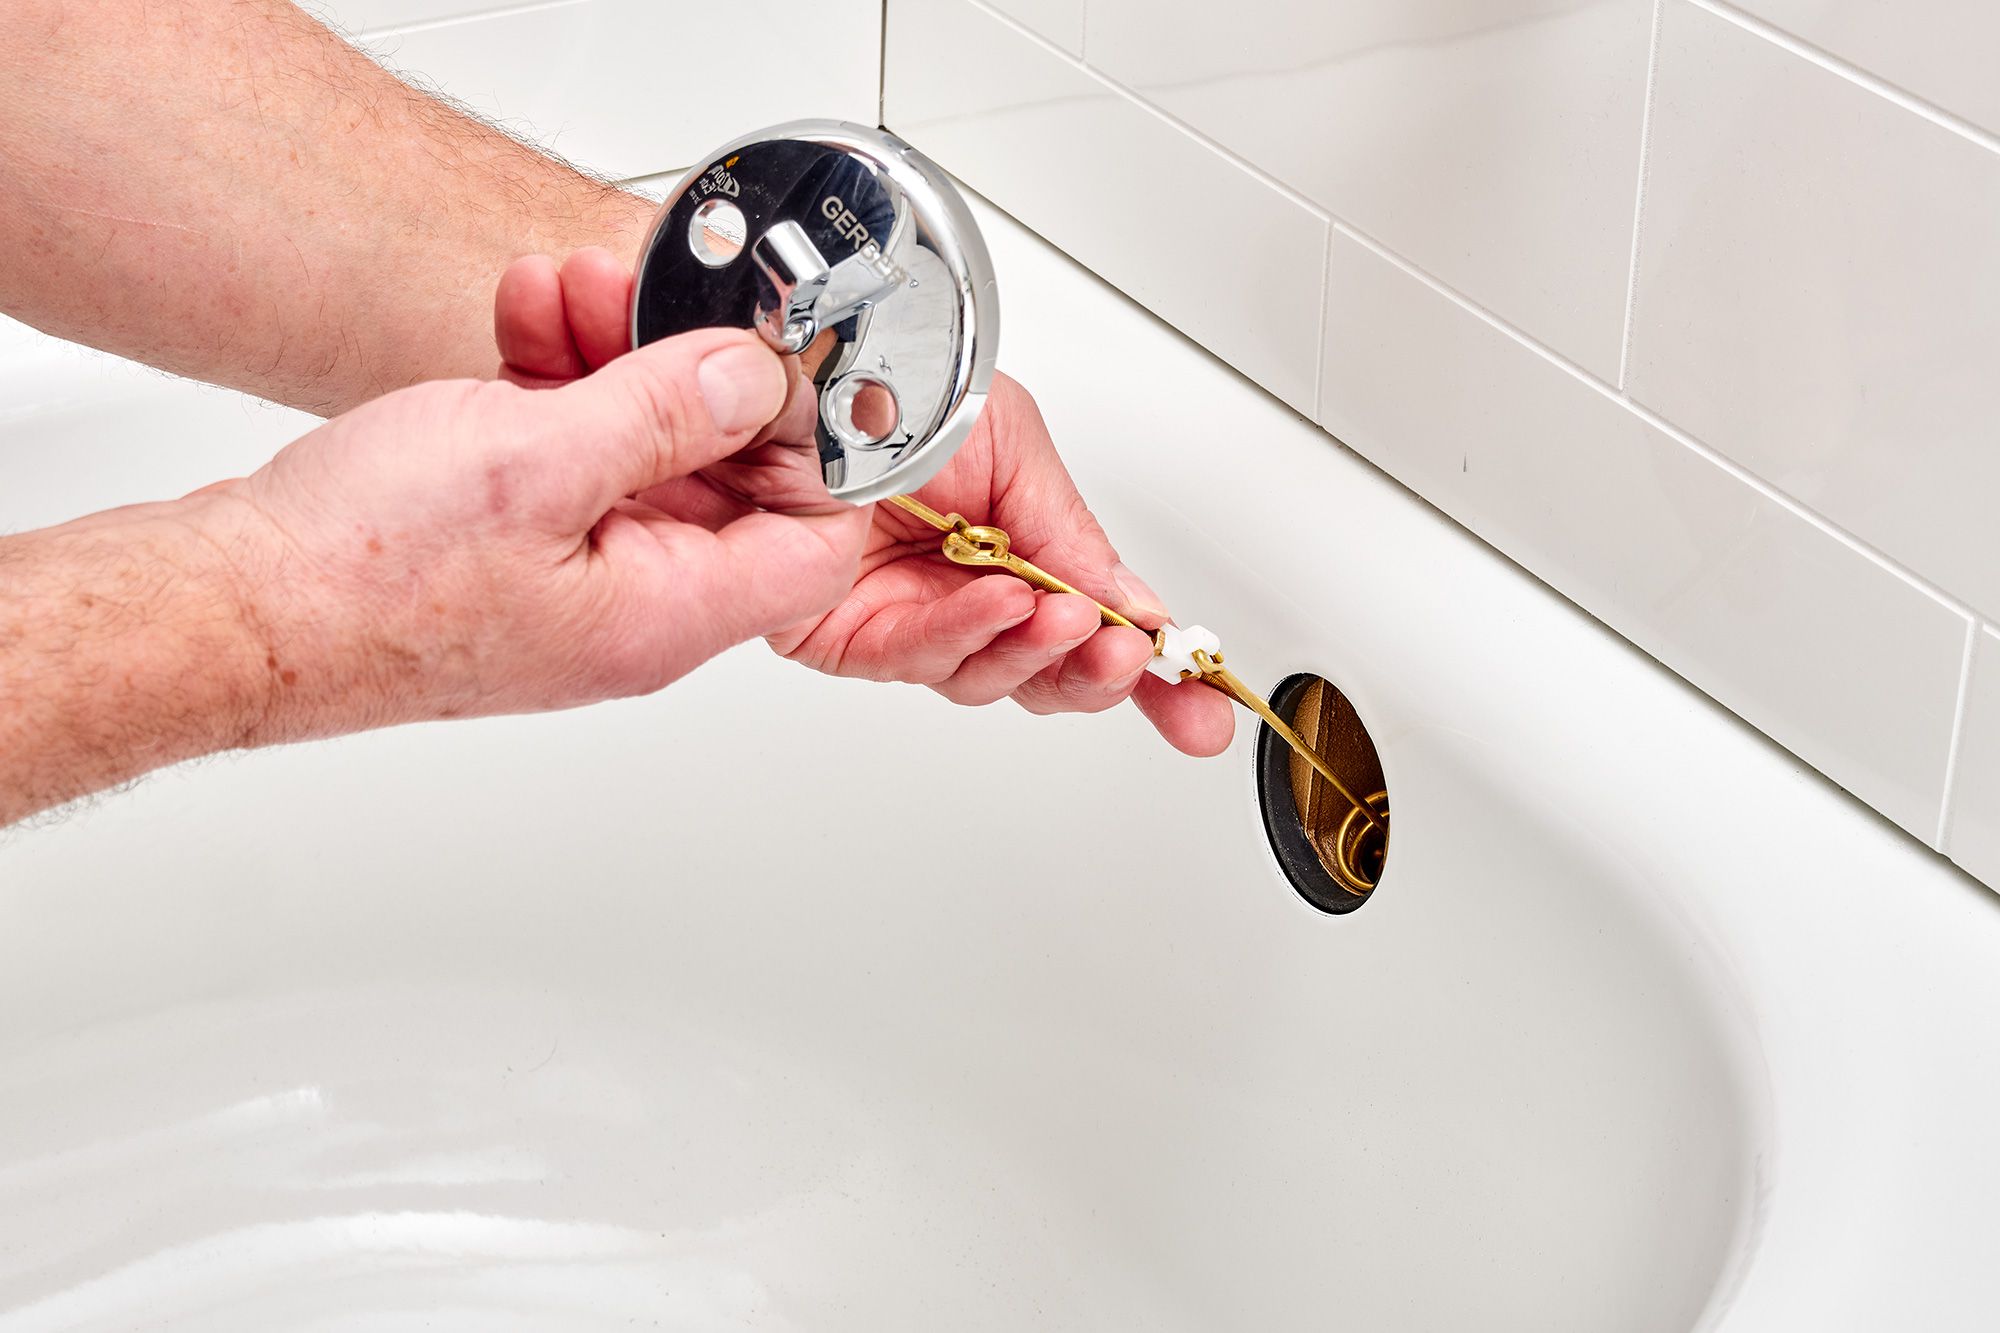
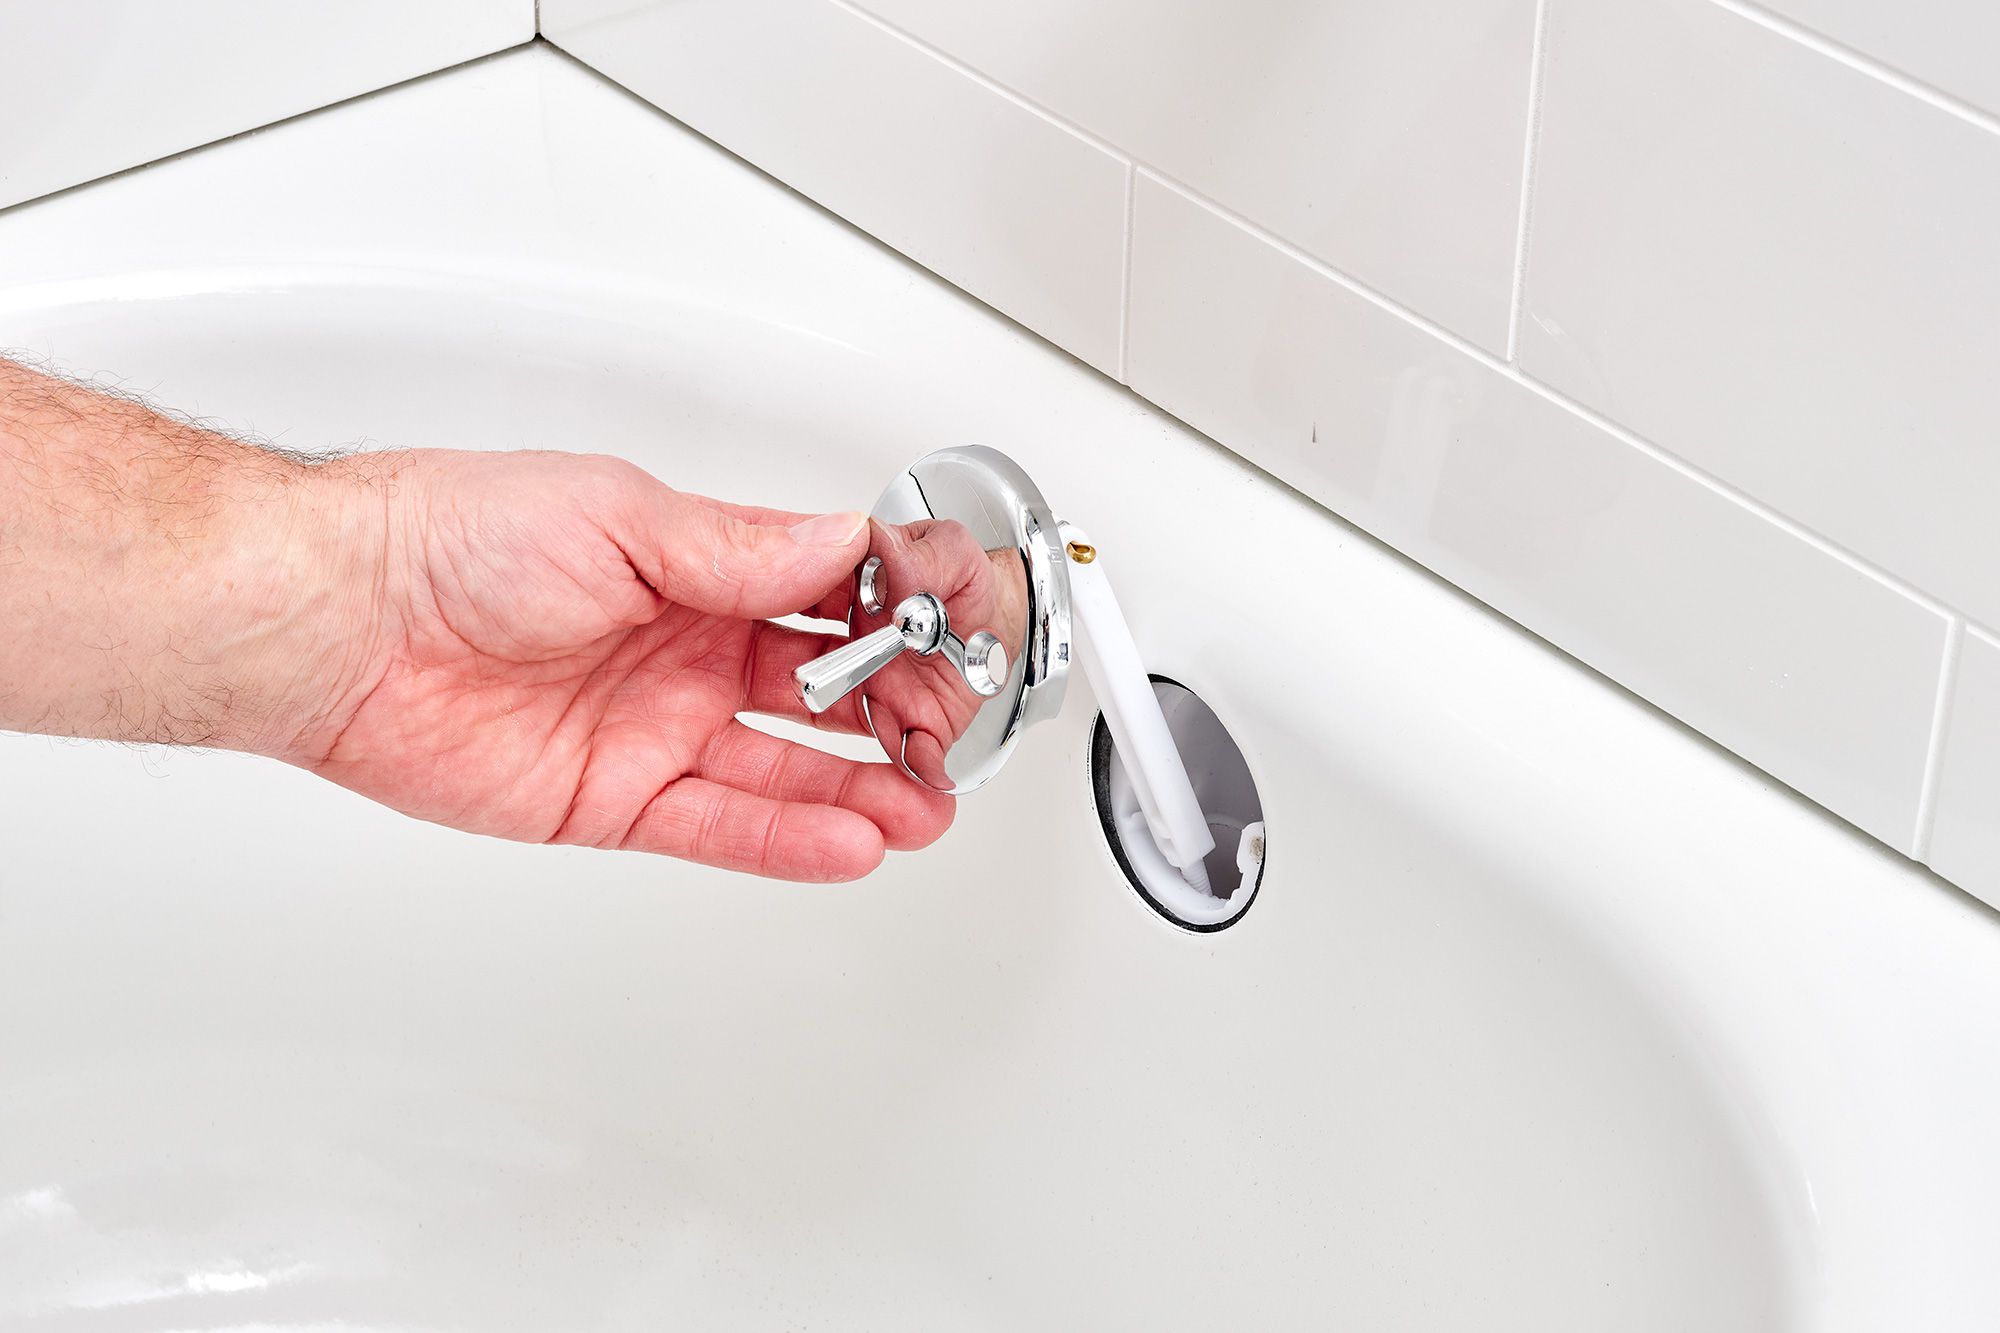
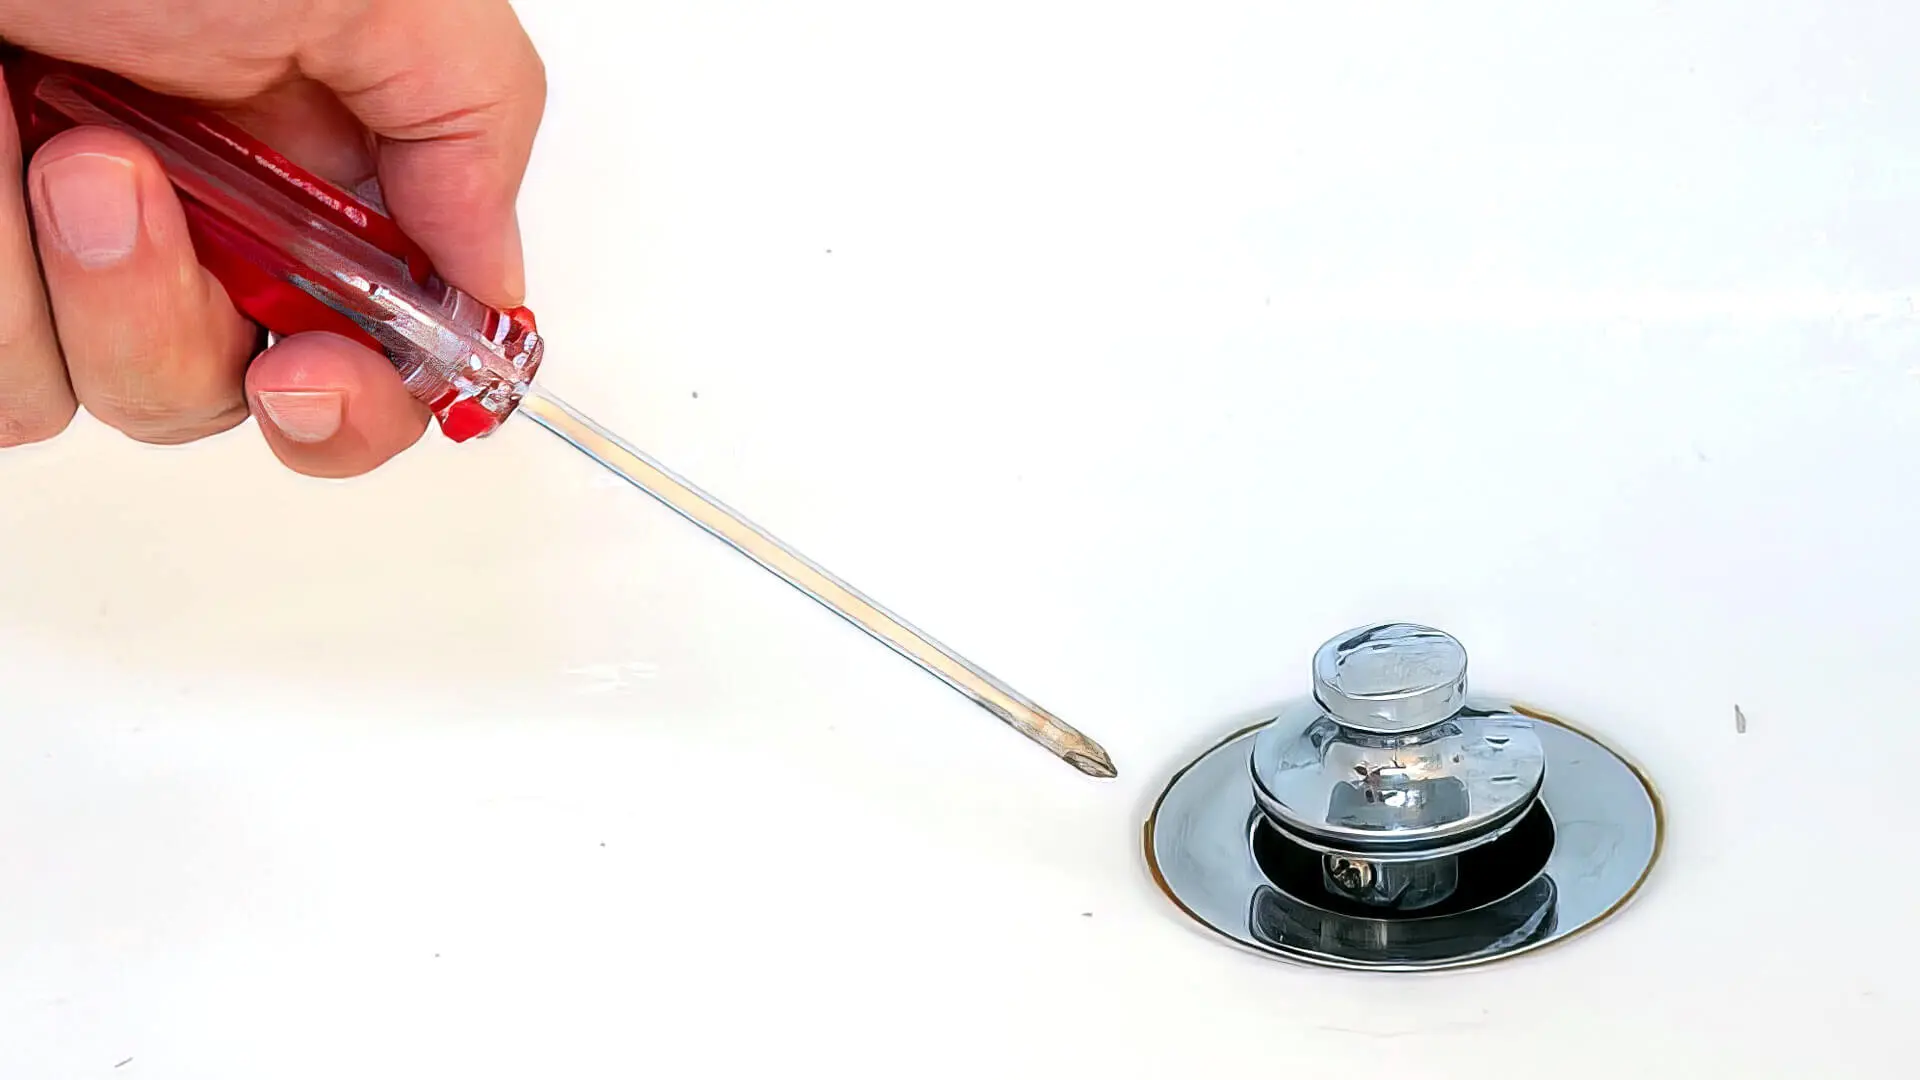
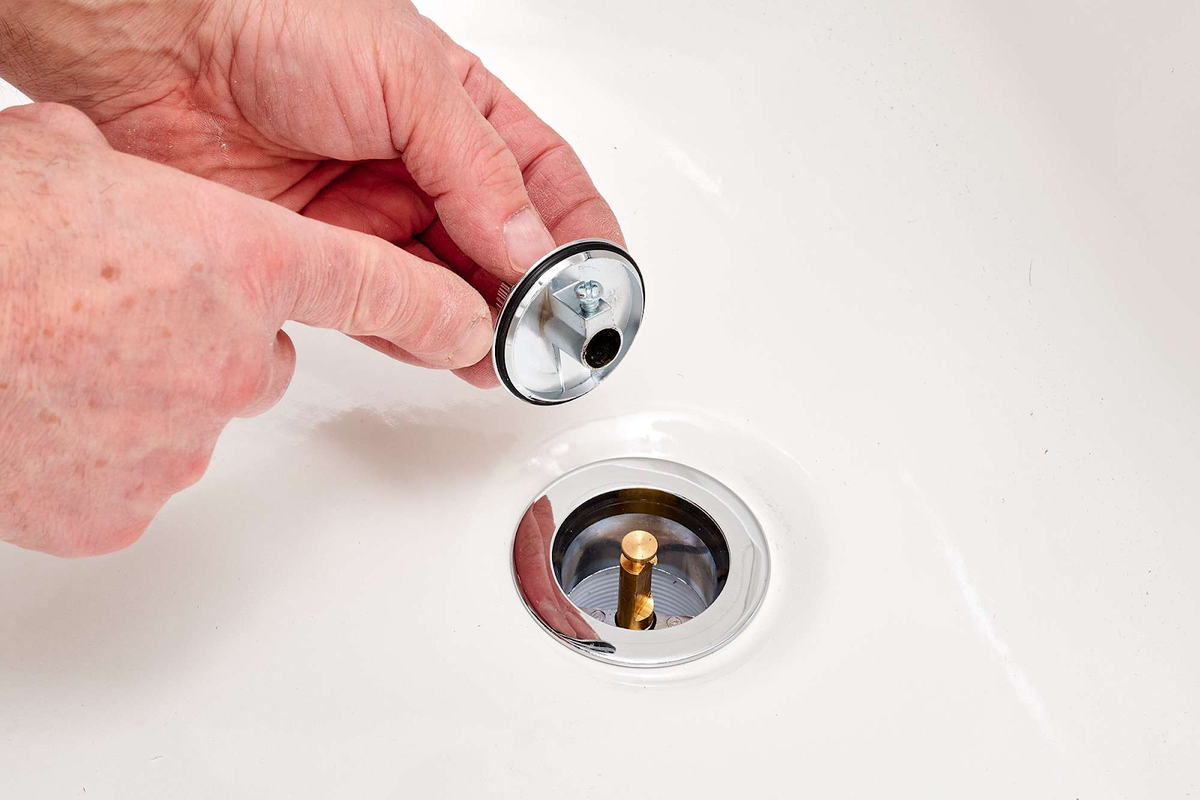
Remove the Overflow Cover: Using a screwdriver, carefully unscrew and remove the overflow cover from the bathtub. Set the screws aside in a safe place, as you may need them for the installation of the new overflow drain.
-
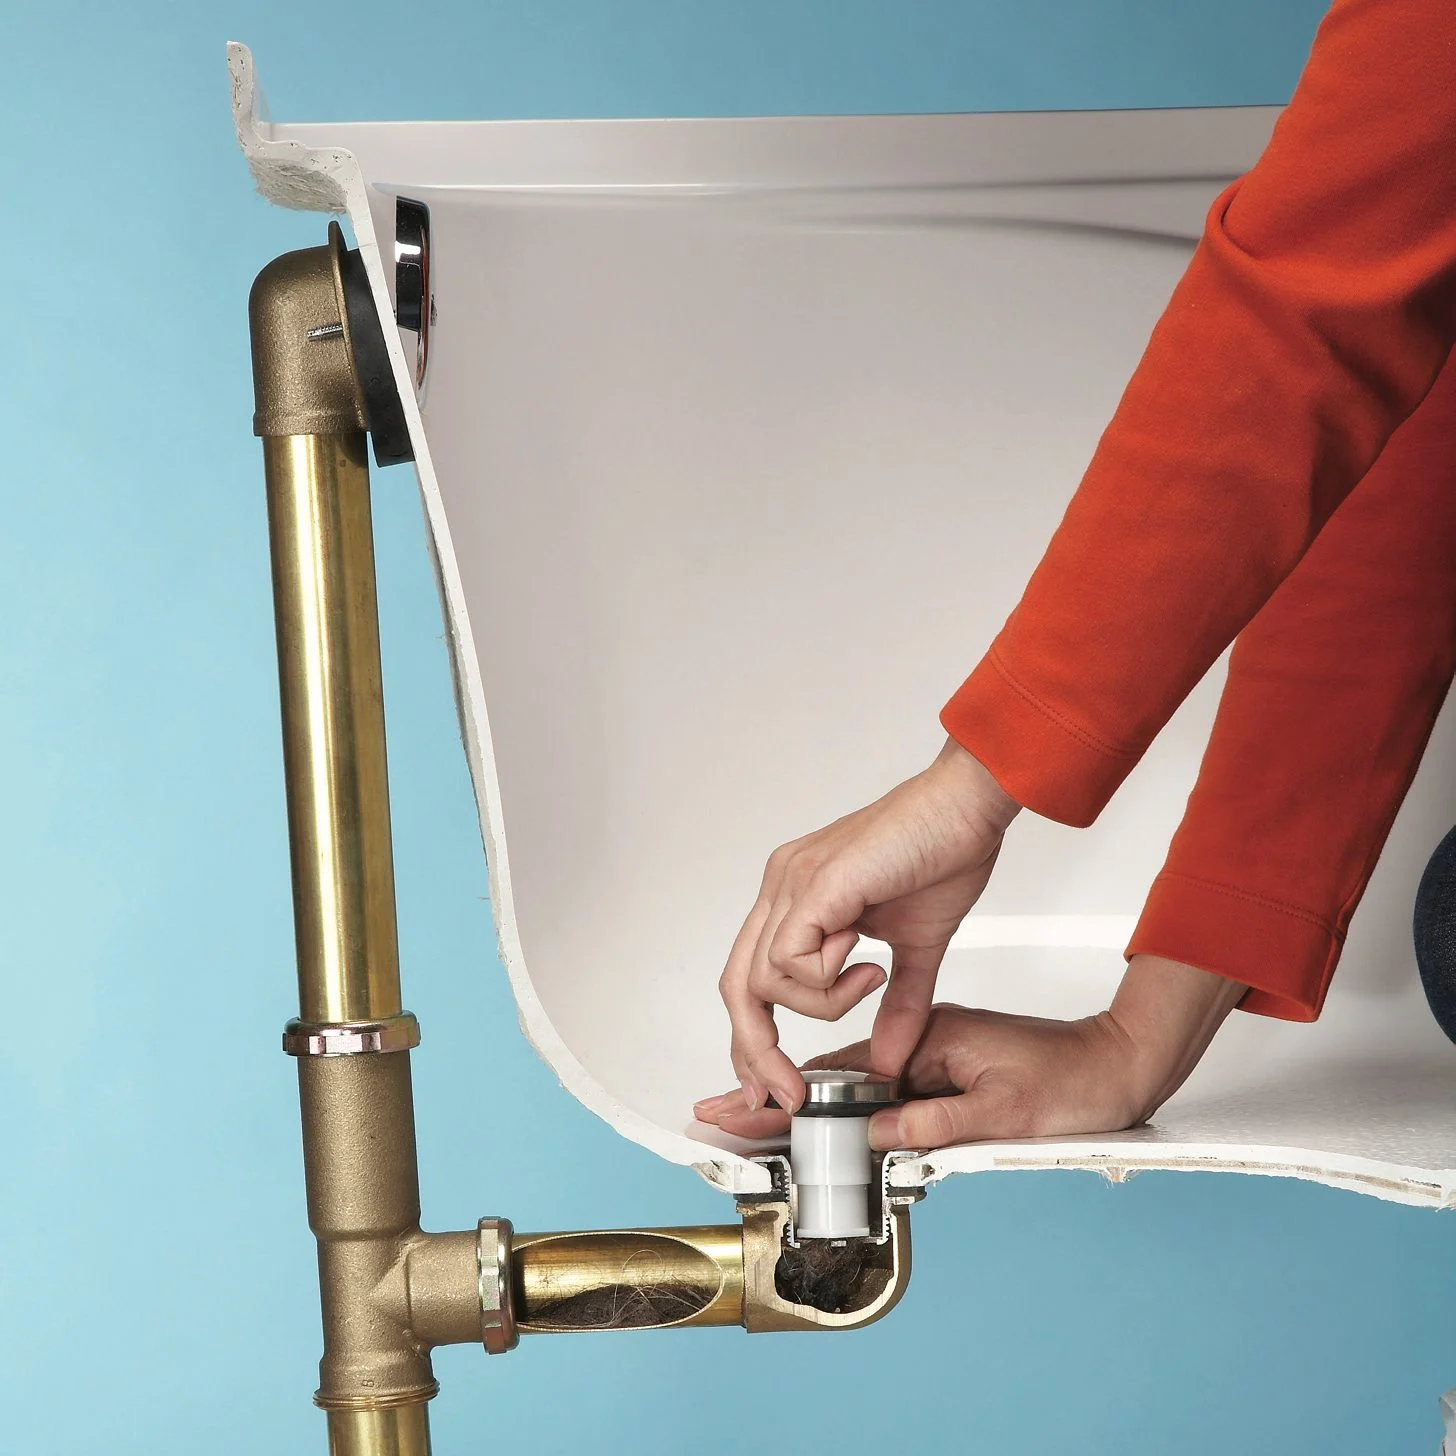
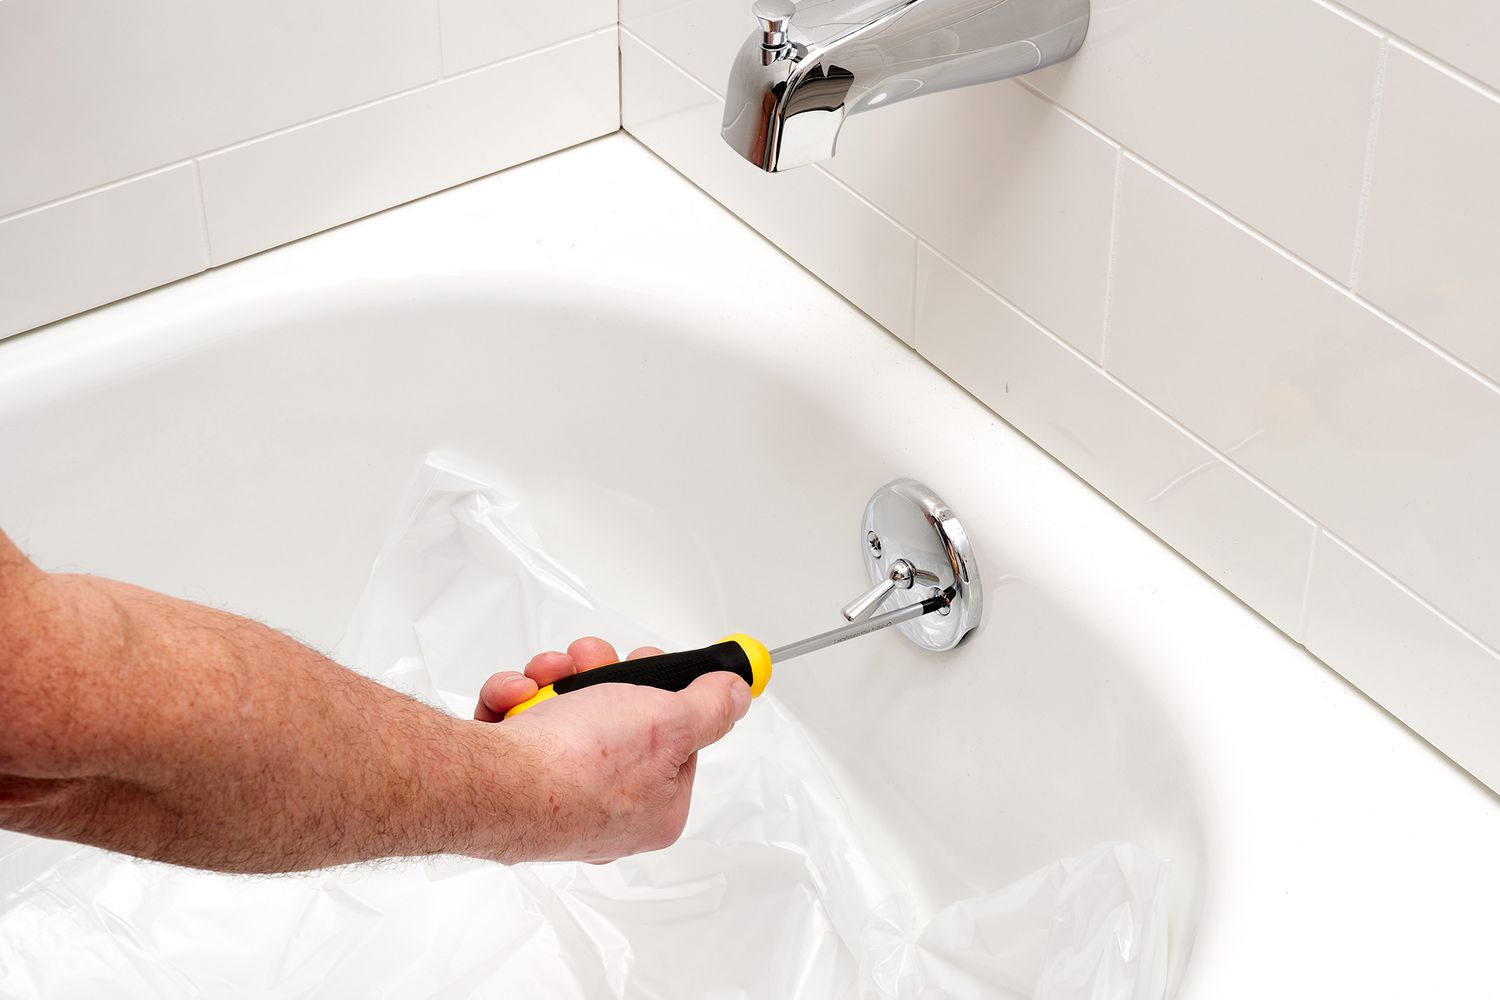
Loosen the Drain Fitting: Using an adjustable wrench or a pipe wrench, loosen the drain fitting connected to the overflow pipe. Turn the wrench counterclockwise to loosen the fitting and disconnect it from the overflow pipe. It's important to exercise caution and avoid applying excessive force to prevent damage to the surrounding plumbing components.
-
Extract the Old Overflow Drain: Once the drain fitting is detached, carefully extract the old overflow drain from the bathtub. Depending on the condition of the existing drain and the type of attachment, you may need to gently wiggle and maneuver the drain to free it from the overflow pipe.
-
Clean the Surrounding Area: With the old overflow drain removed, take the time to clean the surrounding area thoroughly. Use a suitable cleaning solution and a plumbers putty knife to remove any residual plumbers putty, debris, or buildup around the opening where the new overflow drain will be installed.
By following these steps and exercising care and precision, you can successfully remove the old overflow drain from your bathtub, paving the way for the installation of a new, reliable overflow drain. With the old drain out of the way, you're ready to proceed to the next step of installing the new overflow drain with confidence and clarity.
Read more: How Does A Bathtub Overflow Drain Work?
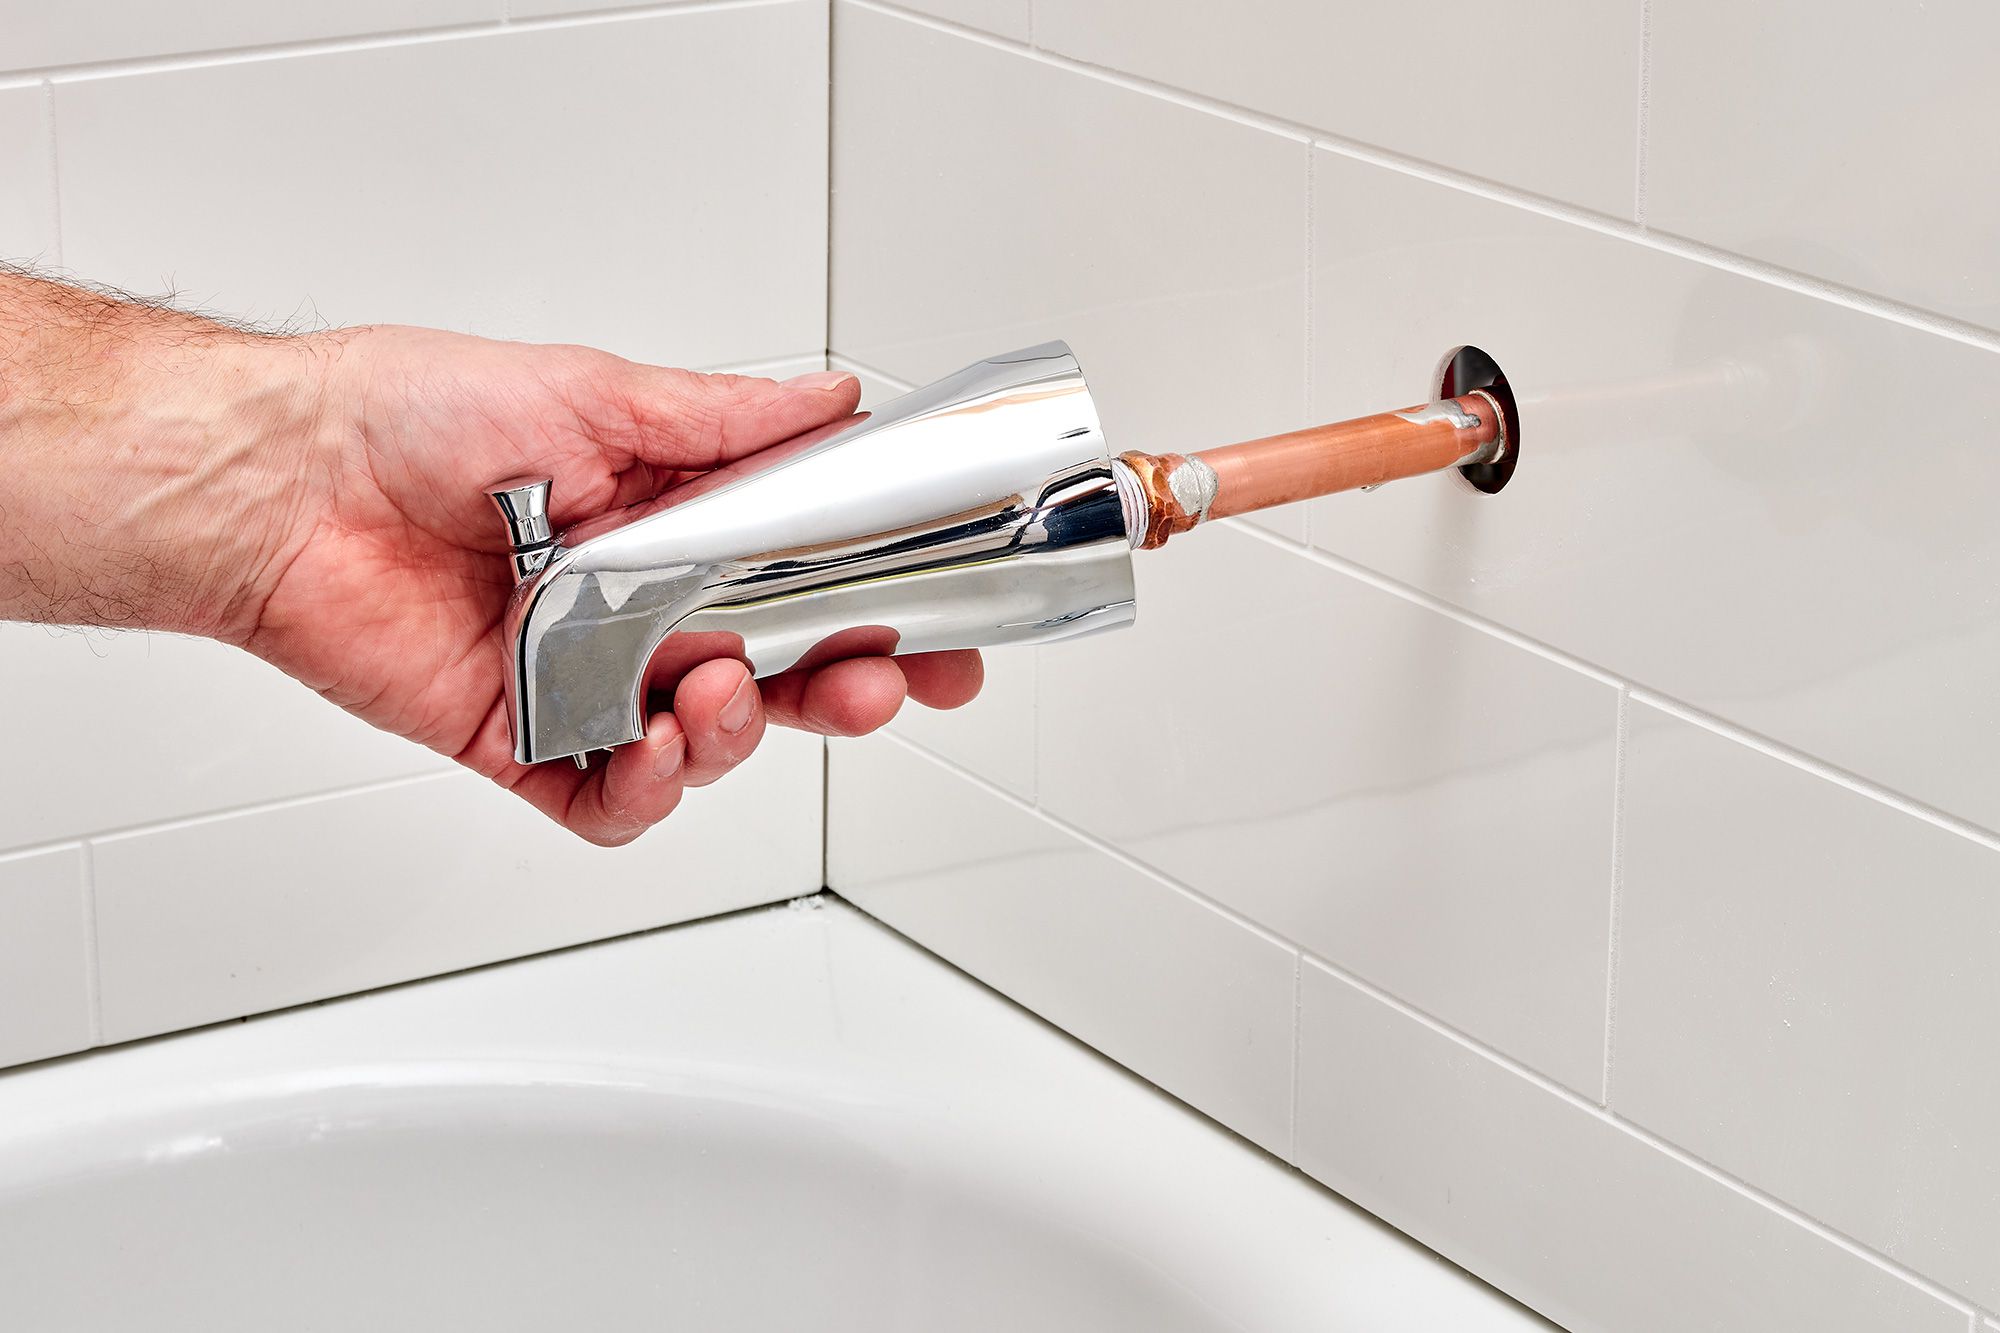
Step 3: Install the new overflow drain
With the old overflow drain successfully removed, it's time to embark on the installation of the new overflow drain. This pivotal step in the replacement process requires precision and attention to detail to ensure a secure and watertight fit for the new drain. Here's a comprehensive guide on how to install the new overflow drain on your bathtub:
-
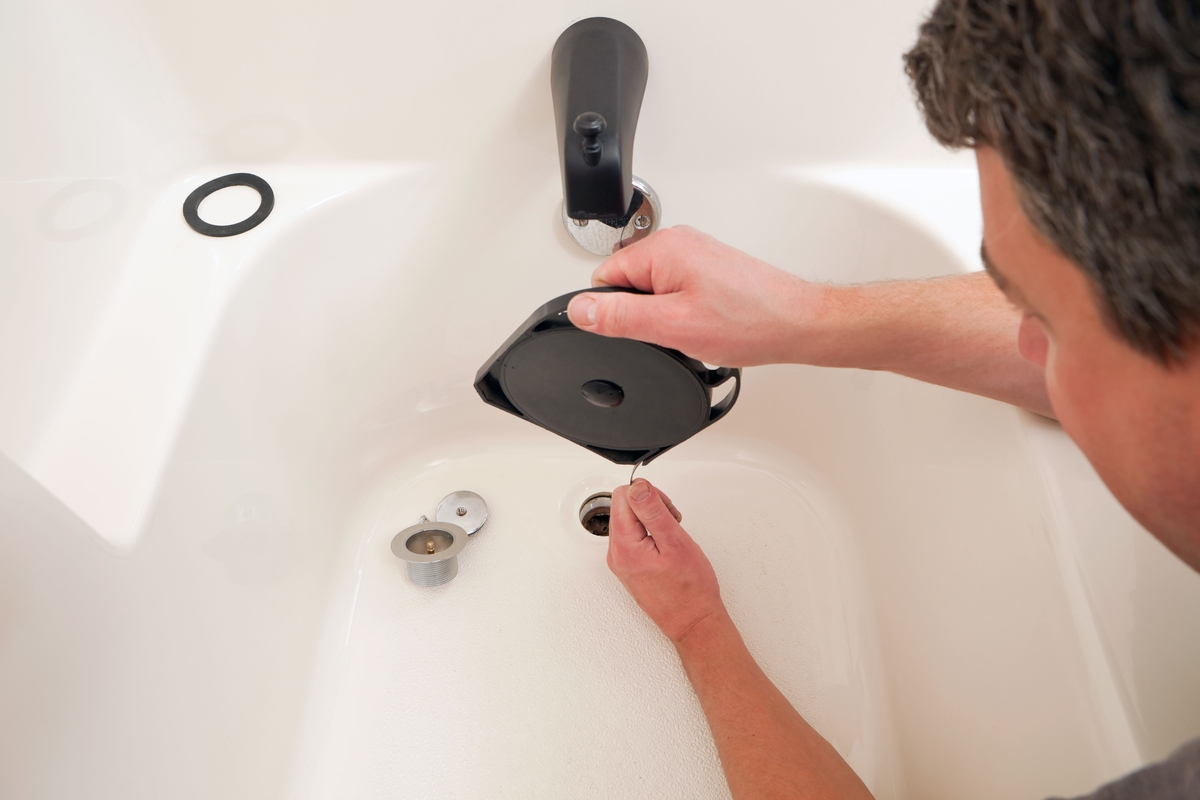
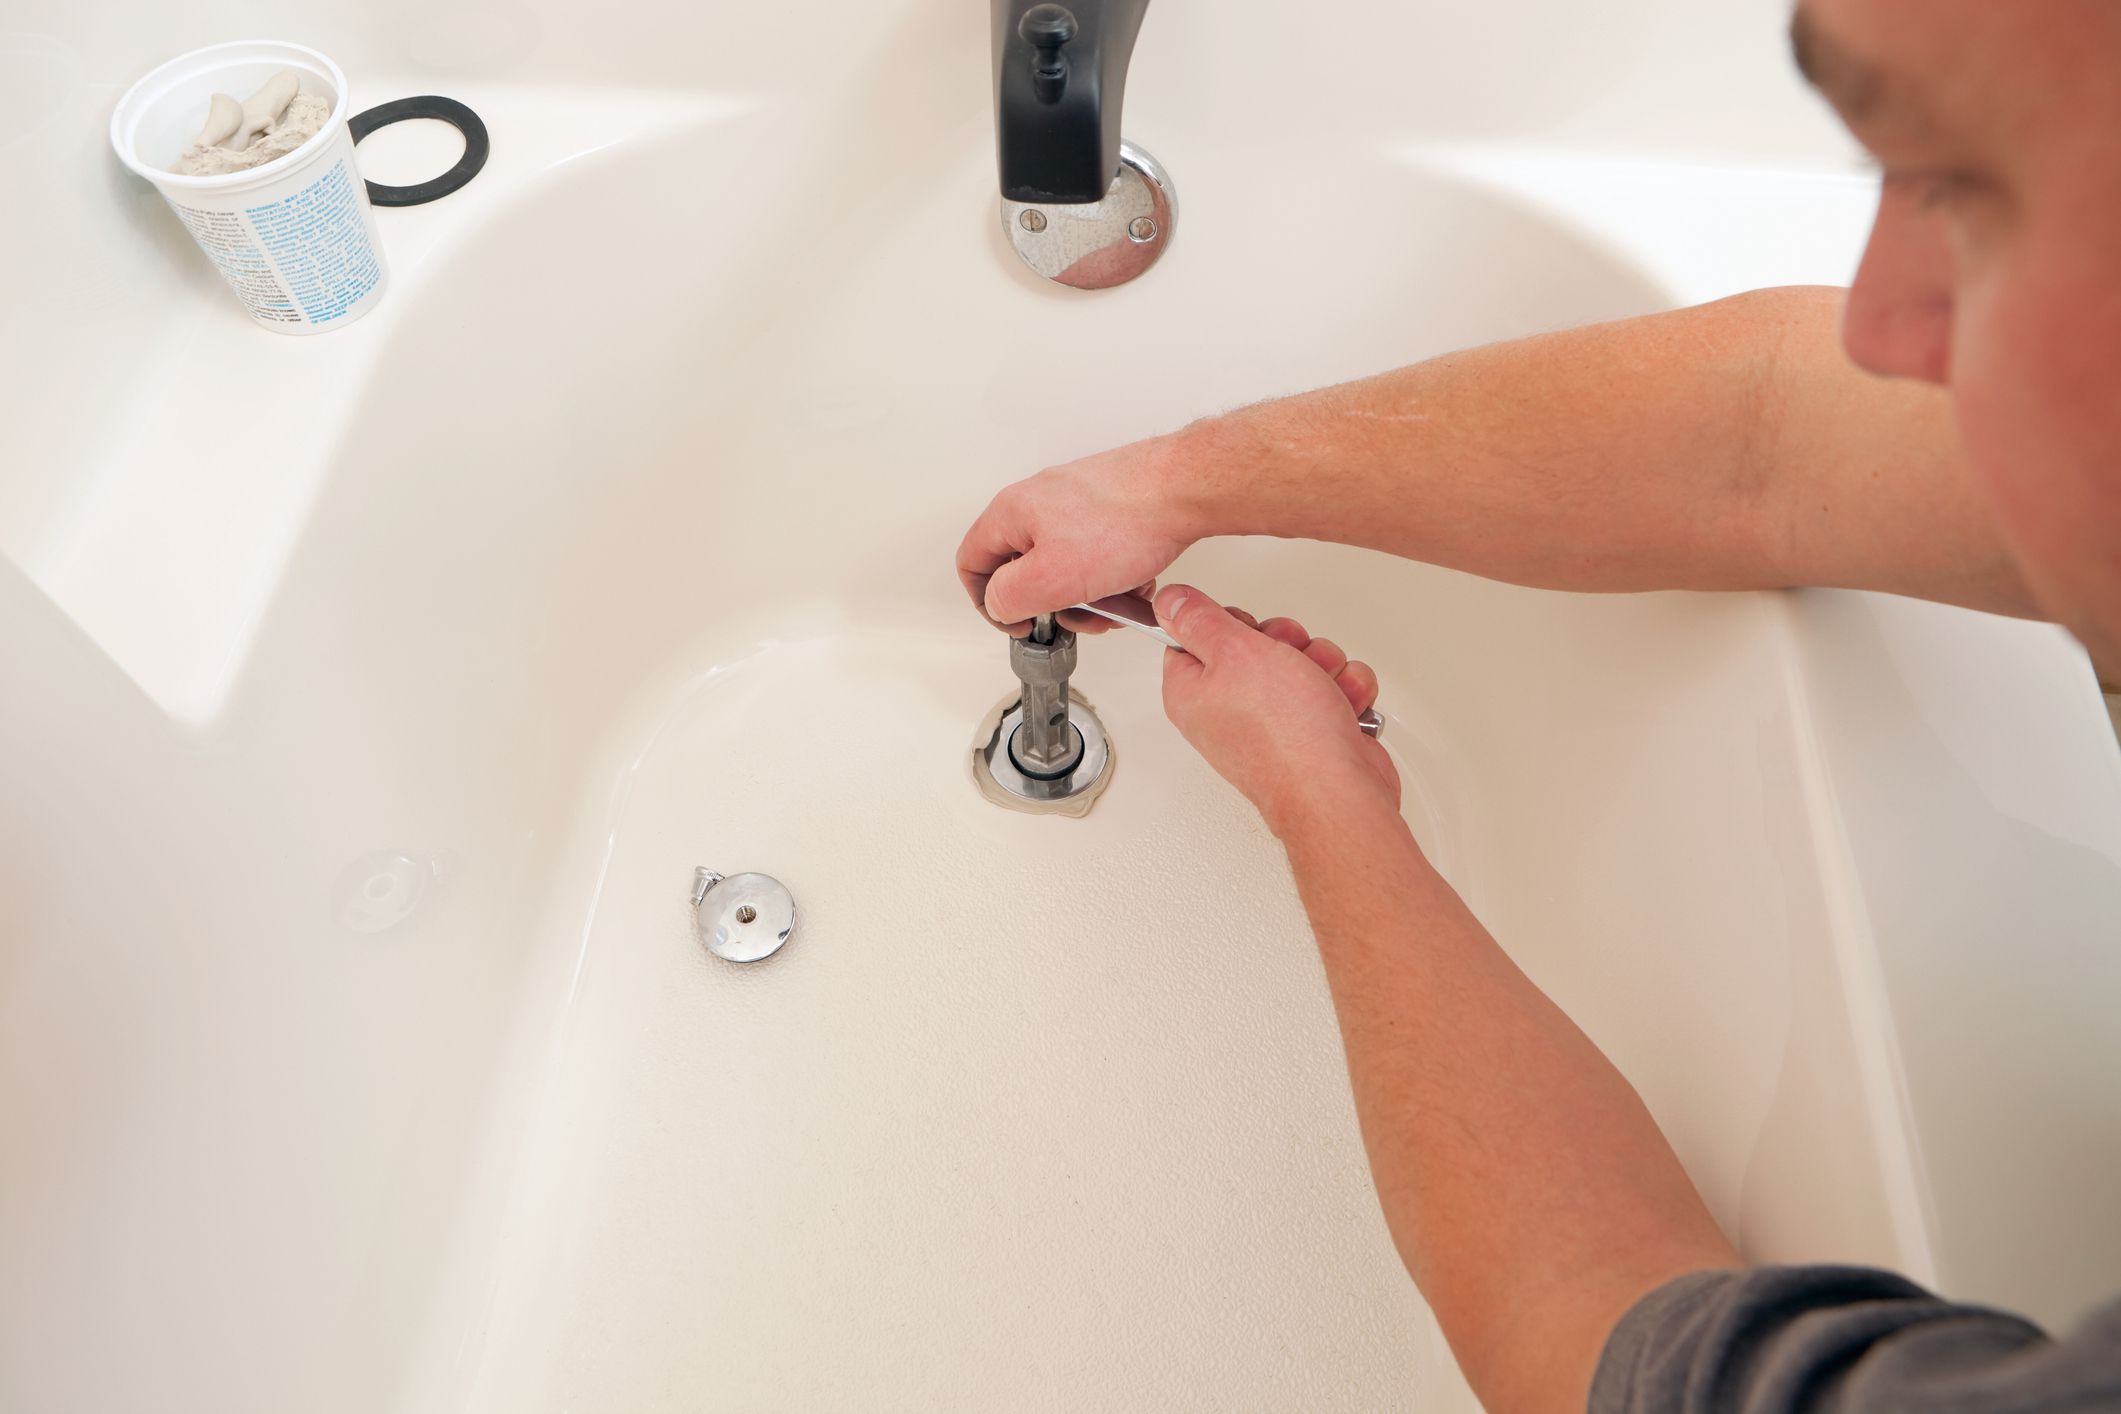
Prepare the New Overflow Drain Kit: Unpack the new overflow drain kit and familiarize yourself with its components. Ensure that all the necessary parts, including the overflow cover, gasket, screws, and any additional components, are present and in good condition.
-
Apply Plumbers Putty: Take a small amount of plumbers putty and roll it into a thin rope-like shape. Carefully apply the putty around the underside of the new overflow drain flange. This step is crucial for creating a watertight seal between the drain and the bathtub.
-
Position the New Overflow Drain: Gently insert the new overflow drain into the opening on the bathtub, ensuring that it aligns properly with the overflow pipe. Apply gentle pressure to seat the drain securely in place, allowing the plumbers putty to form a tight seal.
-
Secure the Overflow Cover: Place the overflow cover over the newly installed drain, aligning it with the screw holes on the bathtub. Insert the screws provided in the kit and tighten them using a screwdriver, ensuring that the cover is firmly attached to the bathtub.
-
Attach the Drain Fitting: If the new overflow drain kit includes a drain fitting, carefully attach it to the overflow pipe using an adjustable wrench. Ensure that the fitting is securely fastened, but avoid over-tightening to prevent damage to the components.
-
Apply Teflon Tape: If the threads of the new overflow drain require sealing, wrap them with Teflon tape to create a secure and leak-free connection. This step is essential for preventing any potential water leaks from the threaded connections.
-
Test for Leaks: Once the new overflow drain is installed, it's crucial to test it for leaks. Turn the water supply back on and allow the bathtub to fill with water. Observe the area around the new overflow drain for any signs of leakage, and address any issues promptly.
By following these detailed steps, you can successfully install the new overflow drain on your bathtub, ensuring a reliable and watertight seal that will contribute to the proper functioning and longevity of your bathtub. With the new overflow drain in place, you can proceed to the final step of testing the drain to confirm its functionality and integrity.
When replacing the overflow drain on a bathtub, make sure to turn off the water supply and remove the old drain carefully. Clean the area thoroughly before installing the new overflow drain to ensure a proper seal.
Step 4: Test the new overflow drain
Testing the new overflow drain is a critical phase in the replacement process, ensuring that the installation is secure and leak-free. By conducting a thorough test, you can verify the functionality and integrity of the new overflow drain, providing peace of mind and confidence in its performance. Here's a detailed guide on how to test the new overflow drain on your bathtub:
-
Fill the Bathtub: Begin the testing process by filling the bathtub with water to a level that activates the overflow drain. Allow the water to reach a point where it starts to flow into the overflow opening, simulating a typical bathing scenario.
-
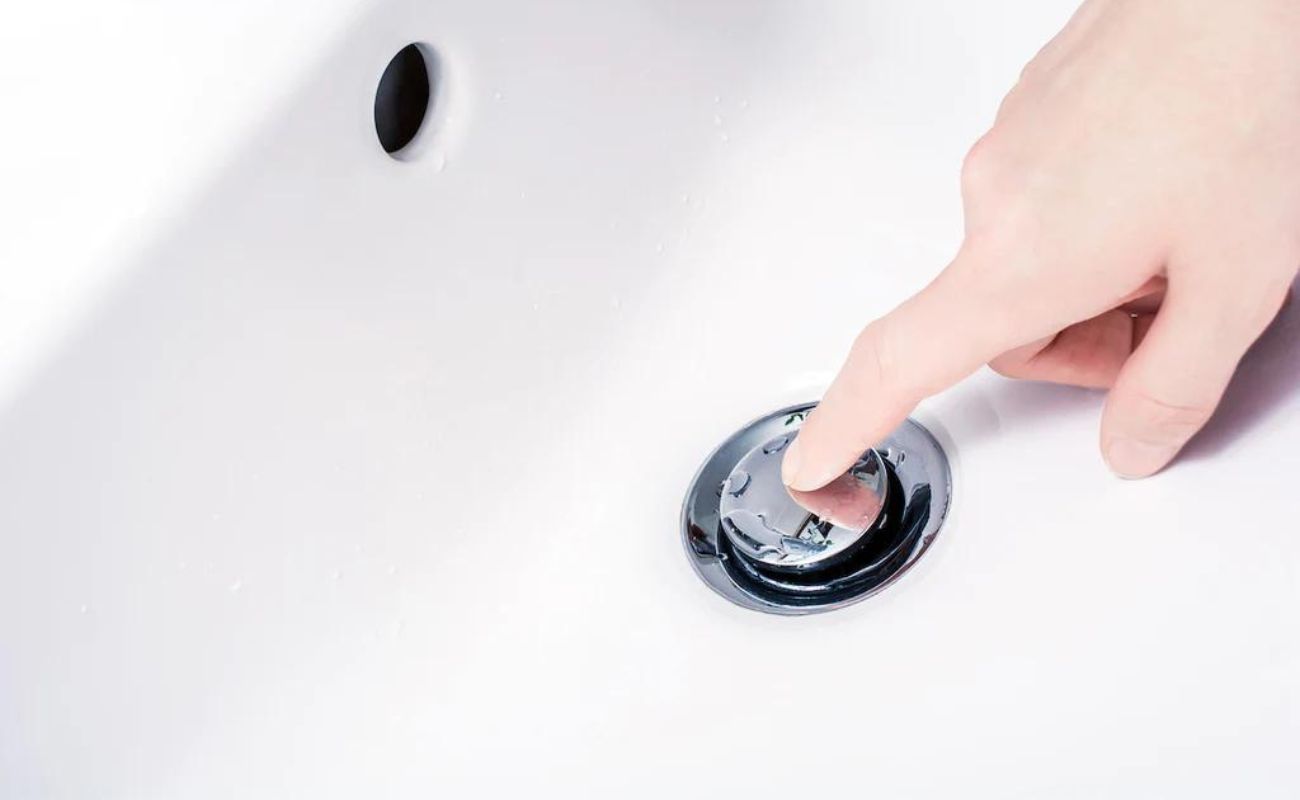
Observe the Drain: As the water level rises and reaches the overflow opening, carefully observe the new overflow drain for any signs of leakage or seepage. Pay close attention to the area around the drain flange and the overflow cover, looking for any water escaping from the connections.
-
Inspect the Surrounding Area: While the bathtub is filling, inspect the surrounding area of the new overflow drain for any indications of water accumulation, dampness, or discoloration. Thoroughly examine the joint between the drain and the bathtub surface, as well as the overflow cover and its attachment points.
-
Check for Drips and Leaks: After the bathtub has been filled for a few minutes, check for any drips or leaks emanating from the new overflow drain. Use a dry towel or tissue to wipe the area around the drain and cover, identifying any moisture that may indicate a potential leak.
-
Addressing Issues: If you observe any leaks or seepage during the testing process, it's essential to address the issues promptly. Tighten any loose connections, reapply plumbers putty if necessary, and ensure that the overflow cover and drain fittings are securely fastened to the bathtub.
-
Verify Proper Drainage: Once the testing is complete and no leaks are detected, allow the bathtub to drain completely. Observe the drainage process to ensure that the new overflow drain effectively removes excess water from the bathtub, preventing any potential overflow and maintaining proper water levels.
By following these steps and conducting a comprehensive test of the new overflow drain, you can confirm its reliability and functionality. A successful test will provide assurance that the replacement process has been completed effectively, and the new overflow drain is ready to serve its essential role in safeguarding your bathtub against potential water overflow and damage.
Conclusion
Congratulations on successfully replacing the overflow drain on your bathtub! By following the step-by-step process outlined in this guide, you've taken a proactive approach to maintaining the integrity and functionality of your bathtub. The completion of this DIY project not only ensures a watertight and reliable overflow drain but also contributes to the overall upkeep of your home.
As you reflect on the journey of replacing the overflow drain, it's important to acknowledge the significance of regular maintenance and attention to detail when it comes to household fixtures. The diligence and care invested in this task exemplify your commitment to preserving the quality and longevity of your home environment.
Furthermore, the knowledge and skills gained from this experience can empower you to tackle future maintenance and improvement projects with confidence. Whether it's addressing plumbing issues, upgrading fixtures, or enhancing the functionality of your living space, the successful replacement of the overflow drain serves as a testament to your capability as a proactive homeowner.
As you enjoy the peace of mind that comes with a secure and functional overflow drain, take a moment to appreciate the sense of accomplishment that accompanies the completion of a DIY endeavor. Your dedication to maintaining your home reflects a proactive and responsible mindset, contributing to a safe and comfortable living environment for you and your family.
Remember, the successful replacement of the overflow drain not only safeguards your bathtub against potential water damage but also underscores the value of proactive maintenance in preserving the overall condition of your home. With this accomplishment under your belt, you're well-equipped to handle future home improvement projects and continue nurturing a space that reflects your care and attention to detail.
In closing, the completion of this task signifies your commitment to maintaining a functional and well-cared-for home. Embrace the satisfaction of a job well done, and carry forward the knowledge and confidence gained from this experience as you embark on future endeavors to enhance and maintain your living space. Cheers to your successful replacement of the overflow drain, and to the continued care and maintenance of your cherished home.
Frequently Asked Questions about How To Replace Overflow Drain On A Bathtub
Was this page helpful?
At Storables.com, we guarantee accurate and reliable information. Our content, validated by Expert Board Contributors, is crafted following stringent Editorial Policies. We're committed to providing you with well-researched, expert-backed insights for all your informational needs.


0 thoughts on “How To Replace Overflow Drain On A Bathtub”