Home>Articles>How To Make Sticky Rice In Zojirushi Rice Cooker

Articles
How To Make Sticky Rice In Zojirushi Rice Cooker
Modified: May 6, 2024
Learn the art of making sticky rice in your Zojirushi rice cooker with these helpful articles. Master the technique and enjoy perfect sticky rice every time.
(Many of the links in this article redirect to a specific reviewed product. Your purchase of these products through affiliate links helps to generate commission for Storables.com, at no extra cost. Learn more)
Introduction
Rice is a staple food in many cultures around the world, and there are countless ways to prepare it. One particularly popular and delicious variation is sticky rice. Known for its chewy and sticky texture, sticky rice is a versatile ingredient that can be enjoyed in both sweet and savory dishes.
In this article, we will explore how to make sticky rice using a Zojirushi rice cooker. Zojirushi is a well-known brand that offers high-quality rice cookers with various features and settings to ensure perfectly cooked rice every time. Whether you are a seasoned chef or a novice in the kitchen, using a Zojirushi rice cooker can simplify the cooking process and yield consistent results.
Before we delve into the step-by-step instructions, it is important to note that the success of making sticky rice relies on two key factors: choosing the right rice and properly measuring the water. The type of rice used plays a crucial role in achieving the desired sticky texture, while the water-to-rice ratio ensures that the grains are cooked just right.
So, let’s get started on this culinary adventure and learn how to make sticky rice in a Zojirushi rice cooker. Get ready to experience the delightfully chewy and flavorful world of sticky rice!
Key Takeaways:
- Master the art of making sticky rice in a Zojirushi rice cooker by choosing the right rice, measuring water accurately, and utilizing the cooker’s settings for perfectly chewy and flavorful results.
- Enjoy the versatility of sticky rice by serving it with a variety of dishes, creatively garnishing, and repurposing leftovers into delicious treats, all while embracing the joy of cooking and sharing with loved ones.
Choosing the Right Rice
When it comes to making sticky rice, selecting the right type of rice is crucial. While regular long-grain rice can work in a pinch, it is best to opt for a specific variety that is known for its sticky texture. Two popular options include glutinous rice and sushi rice.
Glutinous rice, also known as sticky or sweet rice, is a type of short-grain rice that becomes sticky when cooked. It has a slightly sweet flavor and a chewy texture that is perfect for making sticky rice dishes like sticky rice balls and mango sticky rice.
Sushi rice, on the other hand, is a short-grain rice variety that is commonly used in making sushi. It has a sticky texture and a slightly sweet taste, making it an excellent choice for making sticky rice. The grains are slightly larger than glutinous rice, but they still retain the desired stickiness when cooked.
Both glutinous rice and sushi rice can be easily found in Asian grocery stores or well-stocked supermarkets. Ensure that you purchase rice specifically labeled as sticky or sushi rice to guarantee the best results.
Before using the rice, it is important to rinse it thoroughly under cold water. This helps to remove any excess starch or impurities clinging to the grains, resulting in cleaner and fluffier rice. Simply place the rice in a fine-mesh sieve or colander and rinse it under running water until the water runs clear.
Once rinsed, it is time to move on to the next step: soaking the rice. Soaking is an essential step in the preparation of sticky rice as it ensures even cooking and a fluffy texture. Let’s explore how to soak the rice properly in the next section.
Preparing the Rice
Before cooking sticky rice in a Zojirushi rice cooker, it is important to prepare the rice properly. This involves soaking the rice to ensure even cooking and a fluffy texture. Here is a step-by-step guide on how to prepare the rice for cooking.
1. Measure the desired amount of sticky rice: Determine the amount of sticky rice you want to cook based on your recipe or serving size. Use a measuring cup to accurately measure the rice.
2. Rinse the rice: Place the measured sticky rice in a fine-mesh sieve or colander and rinse it under cold running water. Gently agitate the rice with your hands to remove any excess starch or impurities. Continue rinsing until the water runs clear.
3. Soak the rice: Transfer the rinsed sticky rice to a large bowl and add enough water to fully submerge the rice. Allow the rice to soak for at least 30 minutes or up to overnight. Soaking the rice helps to soften the grains and promote even cooking.
4. Drain the soaked rice: Once the rice has finished soaking, drain the water using a fine-mesh sieve or colander. Shake off any excess water and ensure the rice is well-drained before transferring it to the Zojirushi rice cooker.
By properly preparing the rice, you are setting the stage for a successful cooking process. Soaking the rice allows the grains to absorb moisture and soften, resulting in a fluffy and tender texture once cooked. Now that the rice is ready, it’s time to dive into the next step: measuring the water.
Soaking the Rice
Soaking the rice is a crucial step in the preparation process that helps to ensure even cooking and a fluffy texture. Whether you are using glutinous rice or sushi rice, soaking allows the grains to absorb water, resulting in a more tender and delicious end result. Here’s how to soak the rice properly:
1. After rinsing the rice, transfer it to a large bowl.
2. Add enough cold water to fully submerge the rice. The water level should be about an inch above the surface of the rice.
3. Gently stir the rice with your fingers, ensuring all the grains are submerged in the water. This helps to evenly distribute the moisture.
4. Let the rice soak for at least 30 minutes. For optimal results, you can soak the rice for up to 4 hours or even overnight in the refrigerator. Soaking the rice for a longer period of time allows the grains to fully absorb the water, resulting in a softer texture when cooked.
5. Once the rice has finished soaking, drain the water. Use a fine-mesh sieve or colander to drain the rice, making sure to remove any excess water. Be gentle to avoid breaking or damaging the grains.
6. Give the rice a final shake to remove any excess water, and it is now ready to be cooked in the Zojirushi rice cooker.
By soaking the rice, you are not only ensuring an improved texture but also allowing the rice to cook more evenly. This step is especially important for sticky rice as it helps achieve the desired chewy and sticky consistency. With the rice now soaked and ready, it’s time to move on to the next crucial step: measuring the water.
Measuring Water
Properly measuring the water is essential for achieving perfectly cooked sticky rice. The ideal water-to-rice ratio ensures that the grains are adequately hydrated and cooked to the desired texture. Here’s how to measure the water accurately:
1. Drain the soaked rice: After soaking the rice, drain it using a fine-mesh sieve or colander. Shake off any excess water and ensure the rice is well-drained before transferring it to the Zojirushi rice cooker.
2. Use the right ratio: The general rule of thumb for cooking sticky rice is to use a ratio of 1:1 for water-to-rice. This means adding an equal amount of water as the amount of rice you are cooking. For example, if you are cooking 1 cup of sticky rice, you would add 1 cup of water.
3. Adjust for desired stickiness: Depending on your preference, you can adjust the water slightly to achieve your desired stickiness. If you prefer a stickier texture, you can add a little less water, while for a softer and less sticky texture, you can add a little more water. However, be cautious not to deviate too much from the 1:1 ratio, as it may affect the overall cooking result.
4. Use the rice cooker measuring cup: When measuring the rice and water, it is advisable to use the measuring cup provided with your Zojirushi rice cooker. This cup is specifically designed to measure the correct amount of rice and water for optimal results.
5. Be consistent: Consistency is key when measuring the water. Using the same cup or measuring device each time you cook sticky rice will ensure consistent results.
By measuring the water appropriately, you are setting the stage for achieving perfectly cooked sticky rice. The right amount of water will contribute to the desired texture and ensure that each grain of rice is evenly cooked. With the water measured and ready, it’s time to move on to the next step: adding the rice and water to the Zojirushi rice cooker.
Adding the Rice and Water to the Zojirushi Rice Cooker
Now that you have properly measured the water, it’s time to add the soaked rice and water to your Zojirushi rice cooker. The process is simple and straightforward, ensuring that the rice and water are added in the correct proportions for optimal cooking. Here’s a step-by-step guide:
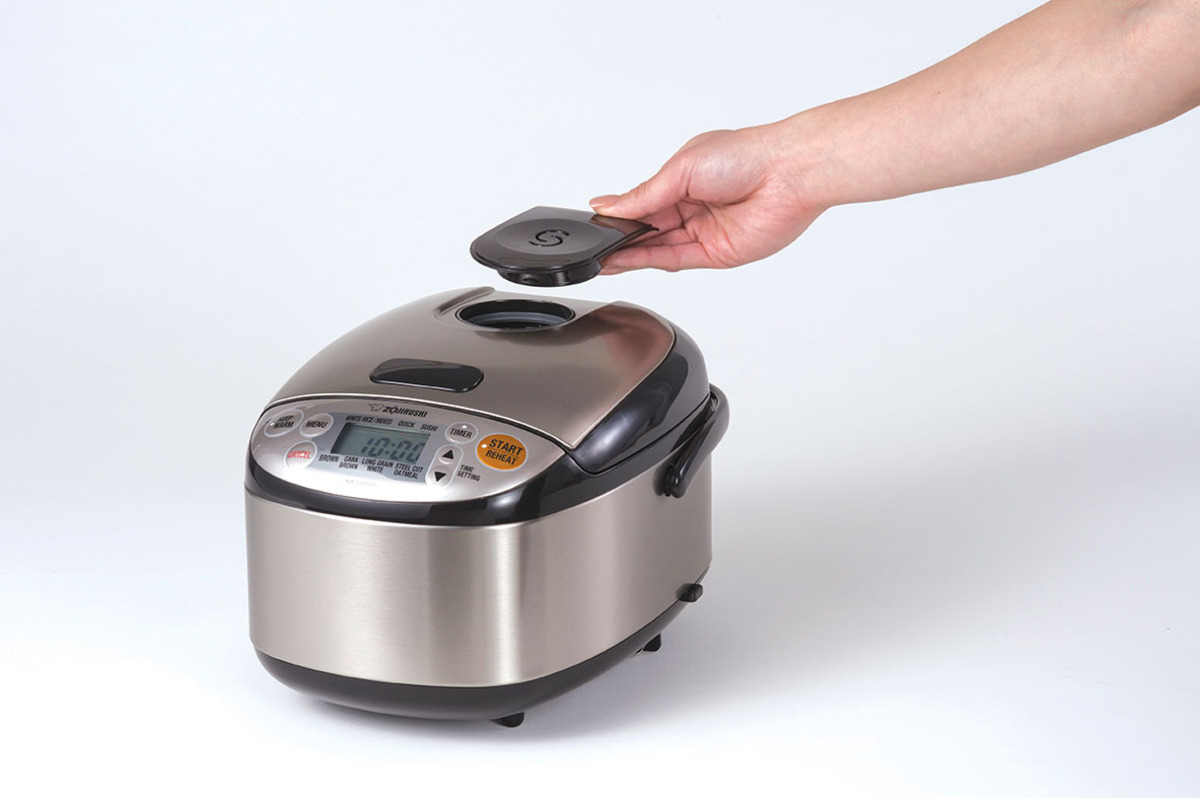
1. Open the lid of your Zojirushi rice cooker and remove the inner cooking pot.
2. Place the drained soaked rice into the cooking pot. Use a spatula or rice paddle to evenly distribute the rice and create a level surface.
3. Measure out the appropriate amount of water. Remember, the general rule for sticky rice is to use a 1:1 ratio of water-to-rice. Pour the water into the cooking pot, making sure to cover the rice completely.
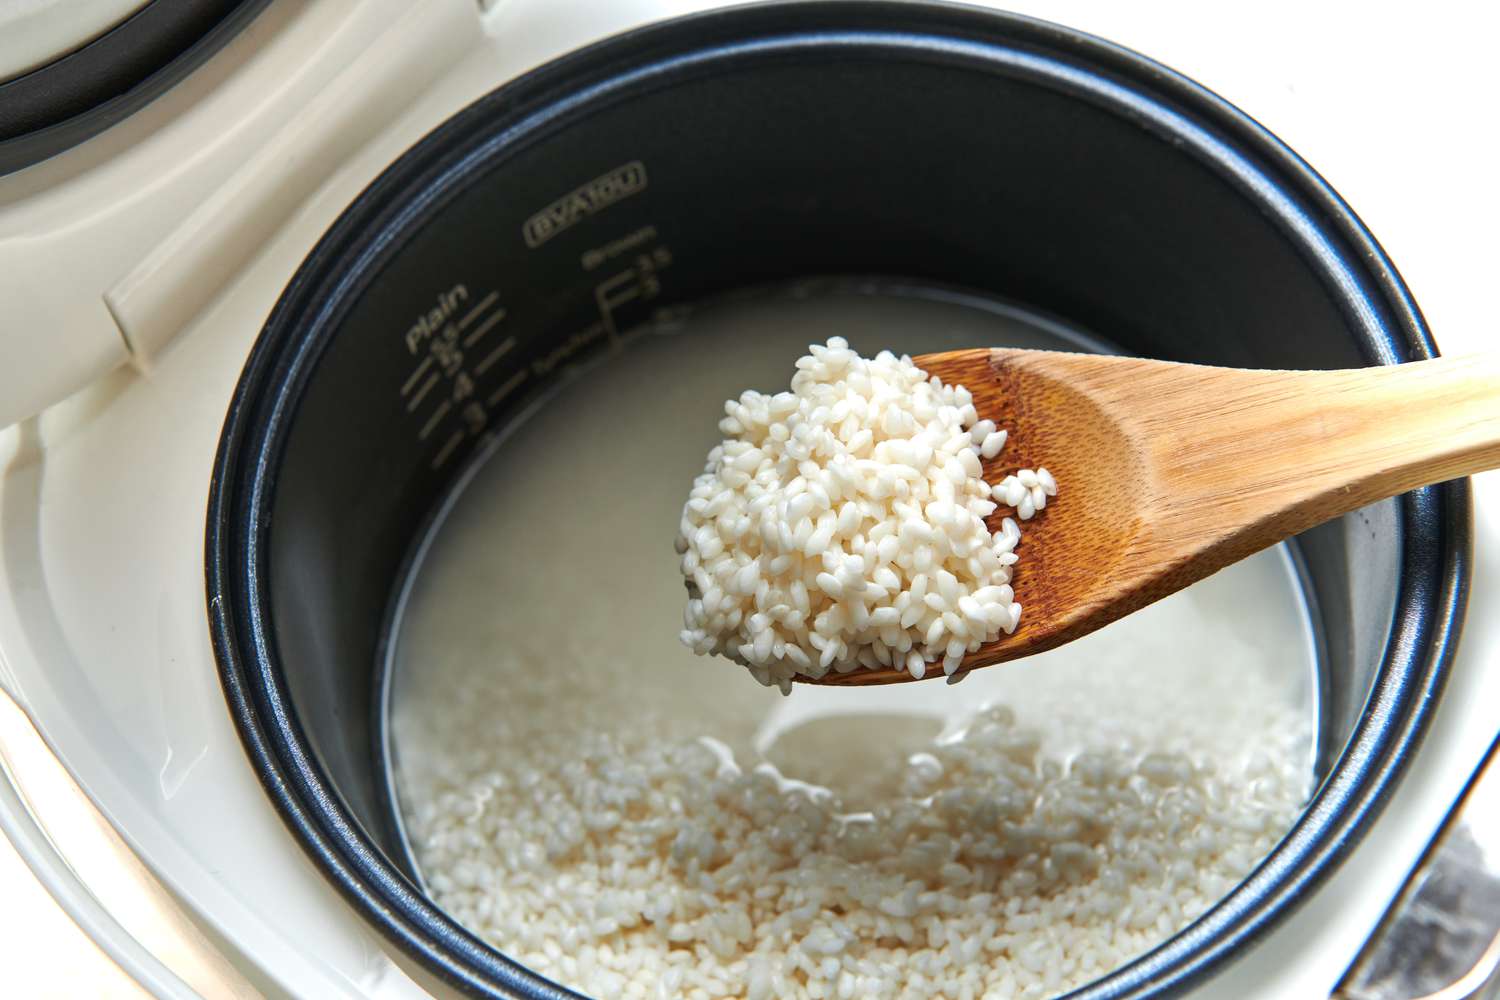
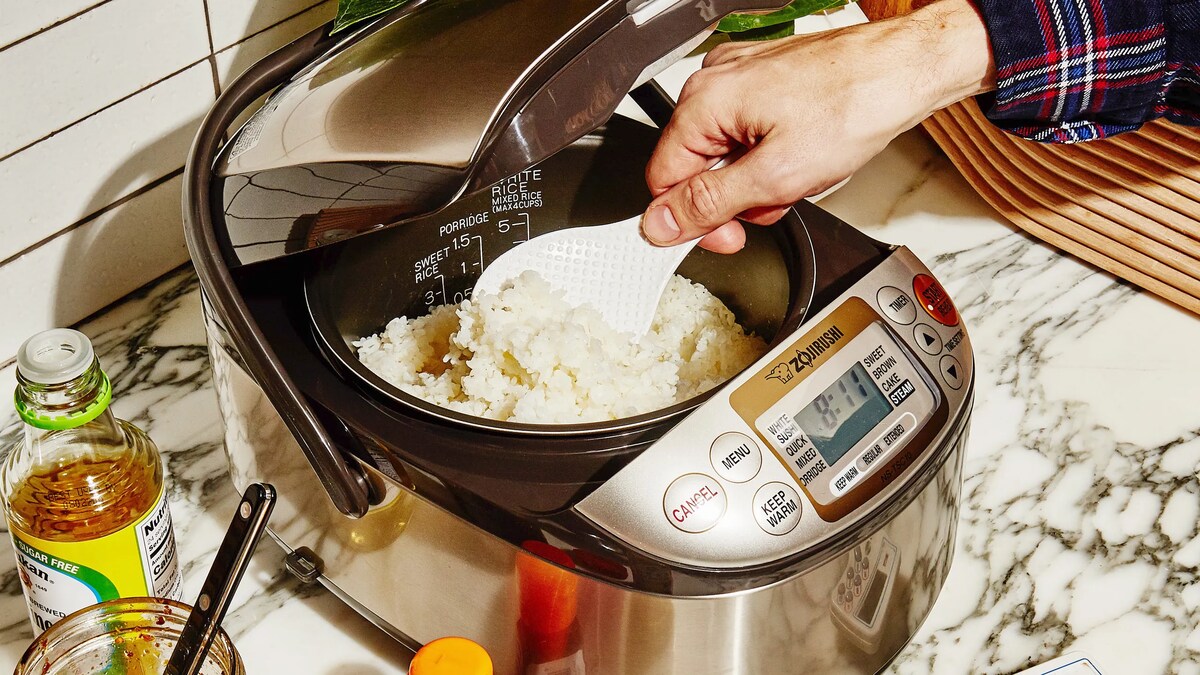
4. Use the markings inside the cooking pot as a guide. Most Zojirushi rice cookers have measuring lines printed on the inside of the pot to indicate the water level. These lines are usually labeled for different types of rice, including sticky rice or sushi rice.
5. Ensure that the rice and water are evenly distributed in the cooking pot. Gently shake the pot or use a spatula to level out the rice and water, ensuring that there are no clumps or uneven distribution.
6. Once the rice and water are properly measured and evenly distributed, carefully place the cooking pot back into the rice cooker.
By following these steps, you are ensuring that both the rice and water are properly measured and evenly distributed in the cooking pot. This is essential for achieving consistently cooked sticky rice in your Zojirushi rice cooker. With the rice and water added, it’s time to select the appropriate cooking setting on your rice cooker.
Add the appropriate amount of water to the rice in the Zojirushi rice cooker and let it soak for at least 30 minutes before cooking. This will help the rice become stickier when cooked.
Selecting the Cooking Setting
When using a Zojirushi rice cooker to make sticky rice, selecting the appropriate cooking setting is crucial to achieve the desired texture and consistency. The cooking setting may vary depending on the specific model of your rice cooker, but most Zojirushi models have a specific setting for sticky rice or sushi rice. Here’s how to select the cooking setting:
1. Refer to the instruction manual: Every Zojirushi rice cooker comes with an instruction manual that provides specific guidance on the cooking settings. Take a moment to review the manual and familiarize yourself with the available settings for sticky rice.
2. Look for the sticky rice setting: Zojirushi rice cookers typically have a dedicated setting for sticky rice or sushi rice. This setting is designed to cook the rice at the appropriate temperature and duration to achieve the desired sticky texture. It is often labeled as “Sticky” or “Sushi” on the control panel.
3. Press the appropriate button: Once you have identified the sticky rice or sushi rice setting on your Zojirushi rice cooker, press the corresponding button to select it. The control panel may have a digital display or buttons that allow you to navigate through the different cooking settings. Make sure to follow the instructions in the manual if there are specific steps to follow for your model.
4. Check for additional options: Depending on your rice cooker model, there may be additional options or settings that you can choose from. For example, you may have the option to adjust the cooking time or select a specific texture level for the rice. Take the time to explore these options, but ensure they are suitable for cooking sticky rice.
5. Start the cooking process: Once you have selected the appropriate cooking setting, press the start button or any button that initiates the cooking process on your Zojirushi rice cooker. The rice cooker will begin cooking the rice according to the selected setting.
By selecting the correct cooking setting on your Zojirushi rice cooker, you are ensuring that the rice is cooked at the right temperature and duration to achieve the desired sticky texture. Once the rice is cooked, it’s time to test for doneness and ensure it is cooked to perfection.
Cooking the Rice
Now that you have selected the appropriate cooking setting on your Zojirushi rice cooker, it’s time to start cooking the rice. The rice cooker will automatically control the cooking time and temperature, ensuring that the rice is cooked to perfection. Here’s how the cooking process unfolds:
1. Close the lid of your Zojirushi rice cooker: Make sure that the lid is securely closed to create a sealed environment for cooking the rice.
2. Press the start button: On most Zojirushi models, there is a start button or a button that initiates the cooking process. Press this button to start the rice cooker.
3. Allow the rice cooker to work its magic: Once the cooking process has started, the rice cooker will take care of the rest. It will regulate the temperature and cooking time to ensure that the rice is cooked to the desired texture.
4. Avoid opening the lid: While the rice is cooking, it is important to resist the temptation to open the lid and check on the progress. Opening the lid can cause a loss of steam and disrupt the cooking process, resulting in unevenly cooked rice.
5. Be patient: Depending on the model of your Zojirushi rice cooker, the cooking time may vary. As sticky rice tends to require a longer cooking time, it is not uncommon for the process to take around 45 minutes to an hour. Check the instruction manual for specific cooking time recommendations for sticky rice.
During the cooking process, the Zojirushi rice cooker will maintain a precise temperature and automatically adjust the cooking time to ensure that the rice is thoroughly cooked. The result is perfectly cooked sticky rice with a soft and chewy texture that is ready to be enjoyed.
Once the rice is cooked, it’s time to test for doneness to ensure that it has reached the desired consistency. Let’s explore how to do that in the next section.
Testing for Doneness
Testing for doneness is an essential step to ensure that the sticky rice in your Zojirushi rice cooker has been cooked to perfection. Although the rice cooker regulates the cooking time and temperature, it’s still important to check if the rice is fully cooked and has the desired texture. Here’s how to test for doneness:
1. Open the lid carefully: Once the cooking time is complete, carefully open the lid of your Zojirushi rice cooker to avoid any hot steam escaping. Use oven mitts or a towel to protect your hands.
2. Take a peek at the rice: Look inside the rice cooker to observe the cooked rice. Ideally, the sticky rice should appear soft and plump, with all the grains cooked through. If the rice still appears slightly undercooked or has excess liquid, it may need a bit more cooking time.
3. Press a spoon or fork gently: Take a spoon or fork and press it gently into the rice. The grains should be soft and yield easily to the pressure. If the rice feels hard or uncooked in the center, it needs more cooking time.
4. Check for stickiness: Sticky rice, as the name suggests, should have a sticky and chewy texture. Take a small portion of the cooked rice using a spoon and press it between your fingers. It should stick together without being mushy or clumpy.
If the rice isn’t completely cooked, close the lid of the rice cooker and allow it to cook for a few more minutes. Check the rice again by repeating the above steps until it reaches the desired doneness.
Once the sticky rice is cooked to perfection, it’s time to move on to the next step: keeping the rice warm until you’re ready to serve it.
Read more: How To Use Zojirushi Rice Cooker
Keeping Sticky Rice Warm
Once your sticky rice is cooked and at the desired doneness, it’s important to keep it warm until you’re ready to serve it. Sticky rice tends to dry out and lose its desirable texture when left at room temperature. Fortunately, Zojirushi rice cookers often come with a convenient “keep warm” function that helps maintain the rice’s temperature and texture. Here’s how to keep sticky rice warm:
1. Activate the “keep warm” function: After the cooking process is complete, check your Zojirushi rice cooker for a “keep warm” button or setting. Press this button to activate the function.
2. Close the lid: Ensure that the lid of the rice cooker is securely closed to maintain the warmth and moisture inside.
3. Set the timer: Depending on your Zojirushi model, you may have the option to set the duration for the “keep warm” function. Follow the instructions in your rice cooker’s manual to adjust the timer if necessary. The recommended setting is usually around 4-6 hours.
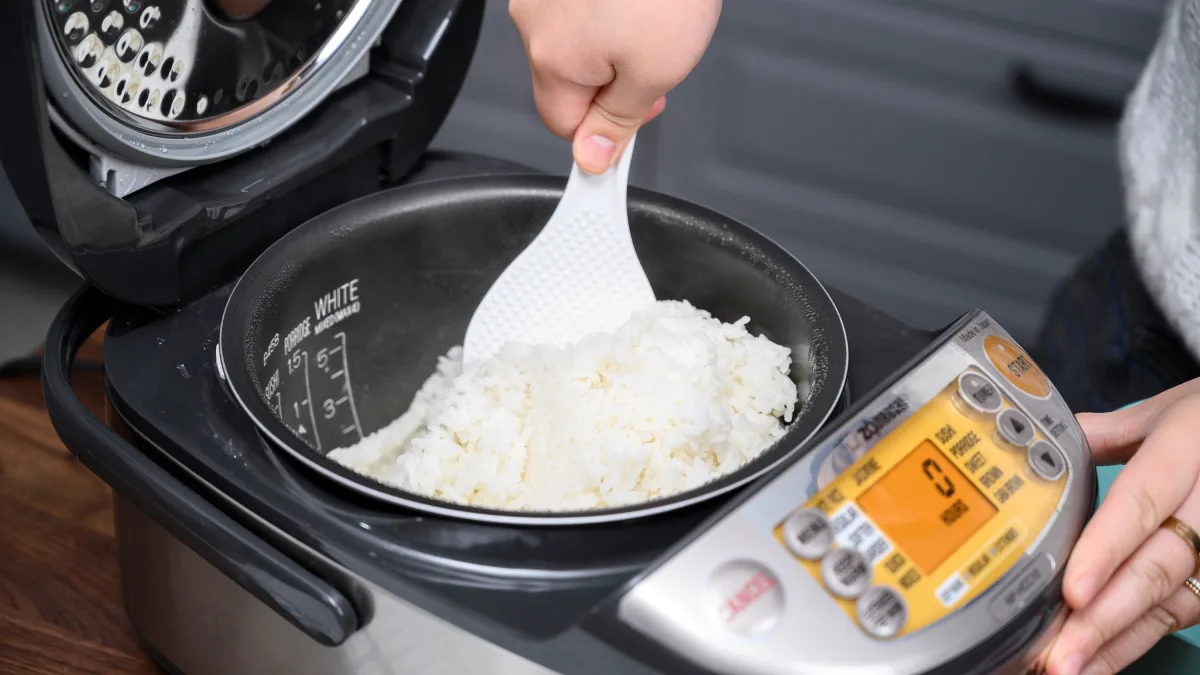
4. Periodically check the rice: While the rice is being kept warm, it’s a good idea to periodically check on it to make sure it remains fresh and moist. Use a rice paddle or fork to fluff the rice gently, redistributing any excess moisture that may have accumulated.
It’s important to note that while the “keep warm” function is convenient for short periods, sticky rice should not be left in the rice cooker’s “keep warm” mode for an extended duration of time, as it can become overcooked and lose its desired texture.
If you plan on serving the sticky rice later or need to keep it warm for a longer period, it’s recommended to transfer the rice to a heat-insulated container or wrap it in a clean cloth or towel. This will help to preserve its warmth and prevent it from drying out.
By using the “keep warm” function or adopting alternative methods to keep the rice warm, you can ensure that your sticky rice remains fresh, moist, and ready to be served whenever you’re ready to enjoy it.
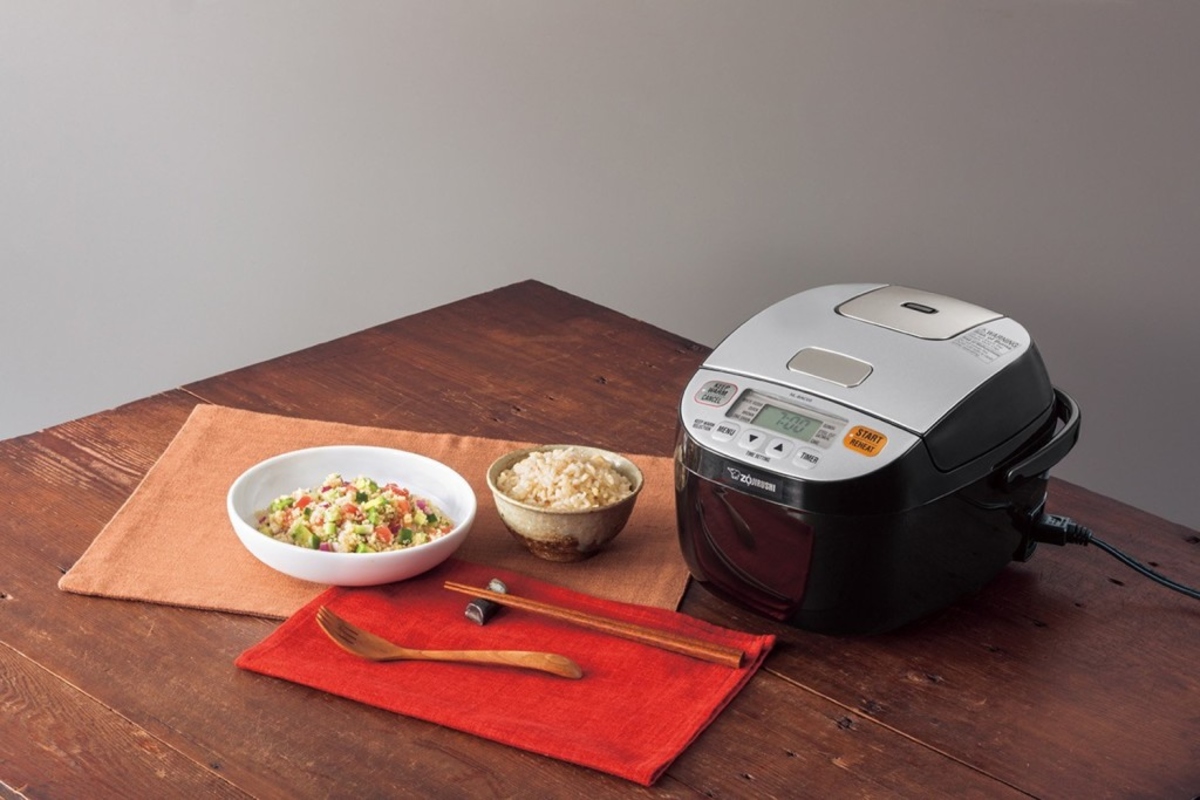
Serving and Enjoying Sticky Rice
Now that your sticky rice is cooked, warm, and ready to be served, it’s time to enjoy this delectable dish. Sticky rice pairs well with a variety of dishes, both sweet and savory. Here are some tips on serving and enjoying sticky rice:
1. Fluff the rice: Before serving, use a rice paddle or fork to gently fluff the sticky rice. This helps to separate the grains and maintain a light and fluffy texture.
2. Serve with your favorite dishes: Sticky rice is a versatile ingredient that can be enjoyed in various ways. It pairs well with savory dishes like stir-fries, curries, and grilled meats. You can also serve it with traditional Thai or Asian dishes such as mango sticky rice or sticky rice dumplings. Don’t forget to add your favorite sauces or condiments to enhance the flavors.
3. Mold the rice (optional): If you prefer a more traditional presentation, you can mold the sticky rice into small, bite-sized portions using a cup or a special sticky rice mold. This adds a decorative touch to your dish and makes it easier to handle and enjoy.
4. Garnish creatively: Add some visual appeal to your sticky rice by garnishing it with fresh herbs, toasted sesame seeds, or chopped scallions. This not only adds flavor but also enhances the overall presentation.
5. Enjoy leftovers creatively: If you have leftover sticky rice, don’t fret. It can be repurposed into other delicious dishes. You can make sticky rice balls, fried rice, or even use it as a stuffing for dumplings or sushi rolls.
6. Share the experience: Sticky rice is often enjoyed as a communal dish. Serve it family-style, allowing everyone at the table to help themselves and savor the flavors together. Sharing a meal with loved ones enhances the enjoyment of the dish.
Remember, sticky rice is best enjoyed when it is warm and freshly cooked. As it cools, it may lose some of its stickiness. If you need to reheat the leftover sticky rice, lightly sprinkle it with water and steam it in a steamer or use a microwave to restore its soft and chewy texture.
Now that you know how to serve and enjoy sticky rice, it’s time to get creative in the kitchen and indulge in this delightful culinary experience. Bon appétit!
Conclusion
Making sticky rice in a Zojirushi rice cooker is a convenient and foolproof way to achieve perfectly cooked, chewy, and delicious rice every time. By following the steps outlined in this article, you can create sticky rice that is the perfect addition to a wide range of dishes and a delight to your taste buds.
The key to successful sticky rice lies in the careful selection of the right rice variety, such as glutinous rice or sushi rice, and properly measuring the water-to-rice ratio. Soaking the rice before cooking helps to ensure even cooking and a fluffy texture. The Zojirushi rice cooker takes care of the rest, with its dedicated settings and precise temperature control.
From choosing the right rice to adding the correct amount of water, from selecting the appropriate cooking setting to testing for doneness, and finally to keeping the rice warm and serving it with flair, each step contributes to a satisfying culinary experience.
Whether you prefer savory dishes like stir-fries and curries or sweet treats like mango sticky rice, sticky rice is a versatile ingredient that can elevate any meal. Its sticky and chewy texture adds a unique and enjoyable element to your dining experience.
So, dust off your Zojirushi rice cooker and embark on a flavorful journey of preparing and savoring sticky rice. Whether you’re sharing a meal with friends and family or enjoying a comforting solo dinner, homemade sticky rice will surely impress and satisfy.
Remember, practice makes perfect. As you become more familiar with your Zojirushi rice cooker and the art of making sticky rice, you can experiment with flavors, textures, and dishes to create your own signature recipes.
Now, go ahead and embrace the joy of cooking and indulge in the delightful world of sticky rice made in your Zojirushi rice cooker. Happy cooking and bon appétit!
Now that you've mastered making sticky rice with your Zojirushi rice cooker, you might wonder why rice sometimes turns out stickier than expected. Our next guide dives into common pitfalls and tricks to ensure your rice is just right, not overly sticky. Whether you're aiming for perfection or troubleshooting a past attempt, this read has got your back. Plus, you'll find practical advice to refine your rice cooking skills further, making every meal better.
Frequently Asked Questions about How To Make Sticky Rice In Zojirushi Rice Cooker
Was this page helpful?
At Storables.com, we guarantee accurate and reliable information. Our content, validated by Expert Board Contributors, is crafted following stringent Editorial Policies. We're committed to providing you with well-researched, expert-backed insights for all your informational needs.


0 thoughts on “How To Make Sticky Rice In Zojirushi Rice Cooker”