Articles
How To Organize Refrigerator
Modified: October 28, 2024
Learn the best techniques to organize your refrigerator with these informative articles. Maximize space and easily locate your food items for a stress-free cooking experience.
(Many of the links in this article redirect to a specific reviewed product. Your purchase of these products through affiliate links helps to generate commission for Storables.com, at no extra cost. Learn more)
Introduction
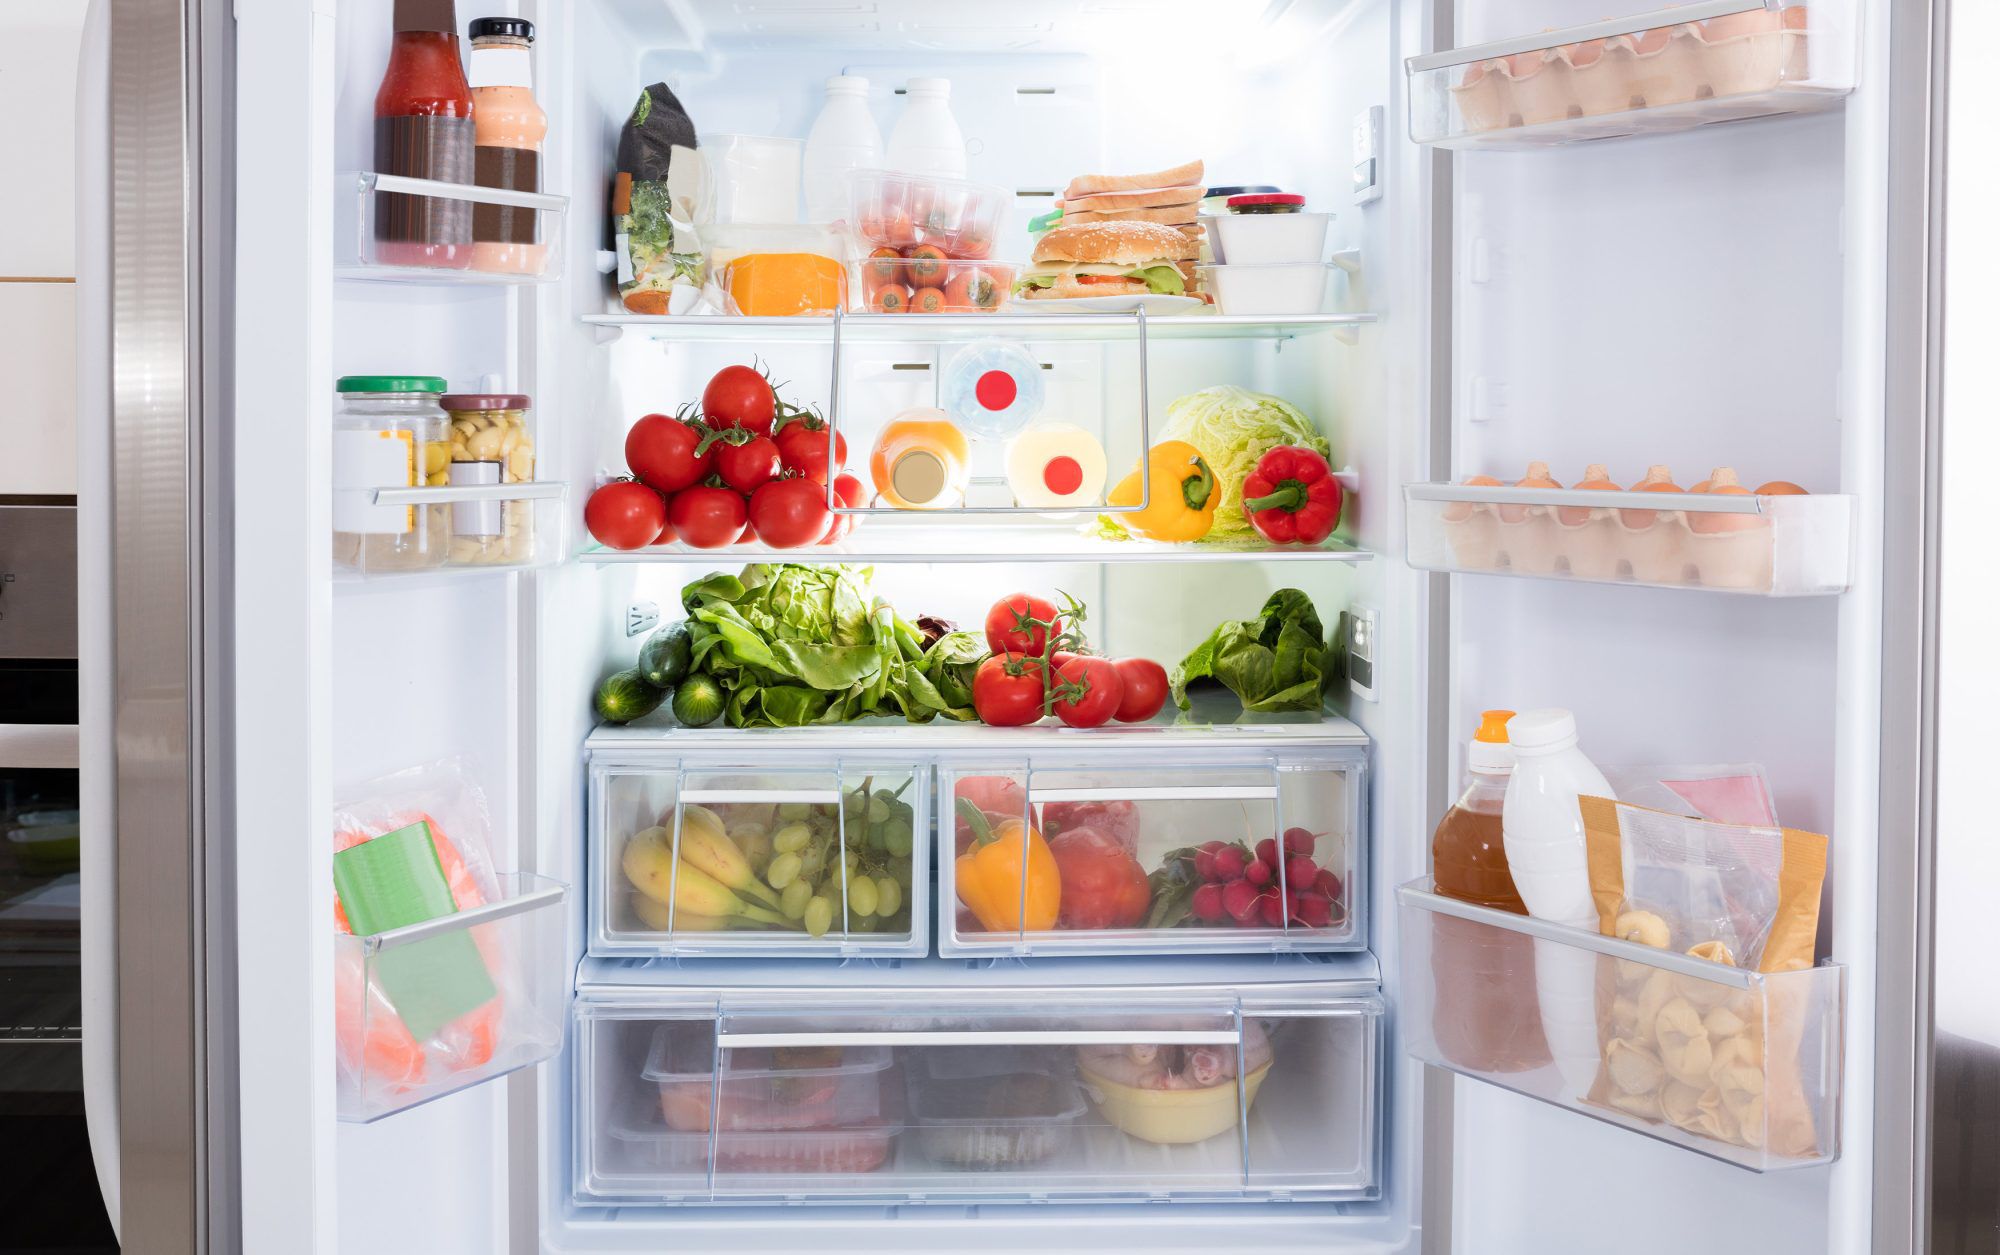
Organizing your refrigerator is essential for keeping your food fresh, reducing waste, and maximizing your storage space. A disorganized refrigerator not only makes it difficult to find what you need, but it can also lead to spoilage and potential health hazards. By implementing a few simple steps, you can transform the chaos into a tidy and efficient space that will make your daily life easier.
In this article, we will guide you through the process of organizing your refrigerator, from start to finish. We will cover everything from decluttering and cleaning to arranging shelves and utilizing storage containers. By following these steps and incorporating some organization techniques, you will be able to maintain an orderly fridge and make the most of its storage capacity.
So, let’s dive in and discover how to organize your refrigerator in a way that minimizes food waste, maximizes space, and simplifies your life!
Key Takeaways:
- Transform your refrigerator from chaos to order by following simple steps, such as decluttering, cleaning, and utilizing storage containers. Maximize space, minimize waste, and simplify your daily life with an organized fridge.
- Maintain a well-organized refrigerator by establishing habits like checking for expired items, cleaning up spills promptly, and meal planning. Enjoy the benefits of a clutter-free and functional fridge for a healthier and more enjoyable cooking experience.
Step 1: Take everything out
The first step in organizing your refrigerator is to take everything out. This allows you to start with a clean slate and gives you a chance to assess what you have and what needs to be discarded.
Begin by unplugging your refrigerator or turning off the power if possible. Empty out all the contents, including food items, condiments, and any removable shelves or drawers. Place the items on your kitchen counter or table, grouping similar items together to make it easier to organize them later.
As you remove items from your fridge, check their expiration dates. Discard anything that is past its prime or shows signs of spoilage. This will help you get rid of any potential hazards and make room for fresh and healthy food.
While you’re taking everything out, use this opportunity to give your refrigerator a thorough cleaning. Wipe down the interior surfaces with a mixture of mild soap and warm water. Be sure to clean the removable shelves and drawers as well. This step will remove any lingering odors and ensure a fresh start for organizing your fridge.
Once everything is out and your refrigerator is clean, move on to the next step: sorting and discarding.
Step 2: Sort and discard
Sorting and discarding is a crucial step in organizing your refrigerator. It allows you to prioritize what items to keep, identify any expired or spoiled food, and create space for the items you use regularly.
Start by categorizing your food items into groups such as fruits, vegetables, dairy, meat, condiments, and leftovers. This will make it easier to find what you need later on. As you go through each category, check for any items that are past their expiration dates or have gone bad. Discard these items immediately to prevent them from taking up unnecessary space or causing potential foodborne illnesses.
Additionally, pay attention to any open or partially used items that have been sitting in the fridge for too long. If they have surpassed their recommended storage time, it’s best to discard them as well. This applies to items like sauces, dressings, and leftovers.
While sorting, consider the quantity of each food item. If you have multiples of the same item, evaluate whether you really need all of them. Discard or donate any excess items that you know you won’t be able to consume before they expire.
By sorting and discarding, you can rid your refrigerator of unnecessary clutter and make room for the items you truly need and enjoy. Once you have completed this step, you’re ready to move on to the next stage: cleaning the refrigerator.
Step 3: Clean the refrigerator
Cleaning your refrigerator is an essential step in maintaining a fresh and hygienic environment for your food. It not only helps to eliminate odors but also prevents the growth of bacteria that can lead to foodborne illnesses.
Start by removing all the shelves, drawers, and any other removable parts from your refrigerator. Wash them with warm, soapy water, rinsing thoroughly to remove any residue. Let them air dry completely before placing them back into the fridge.
Next, tackle the interior of the refrigerator. Prepare a mixture of mild soap and warm water, or use a solution of equal parts water and white vinegar. Dip a clean cloth or sponge into the solution and wipe down all the surfaces, including the walls, shelves, and door compartments.
Pay special attention to any spills or stains and use a gentle scrub brush or toothbrush to remove any stubborn residue. Don’t forget to clean the rubber gasket around the door, as this is often a breeding ground for mold and bacteria. Finally, wipe down the exterior of the refrigerator, including the handles and control panel.
Once you’ve cleaned everything to your satisfaction, dry all the surfaces with a clean cloth or paper towel. This will help prevent the growth of mold or mildew. Before placing the shelves and drawers back into the refrigerator, double-check to ensure that everything is completely dry.
By regularly cleaning your refrigerator, you will create a fresh and odor-free environment for your food and extend its shelf life. Now that your refrigerator is clean, it’s time to move on to the next step: arranging the shelves.
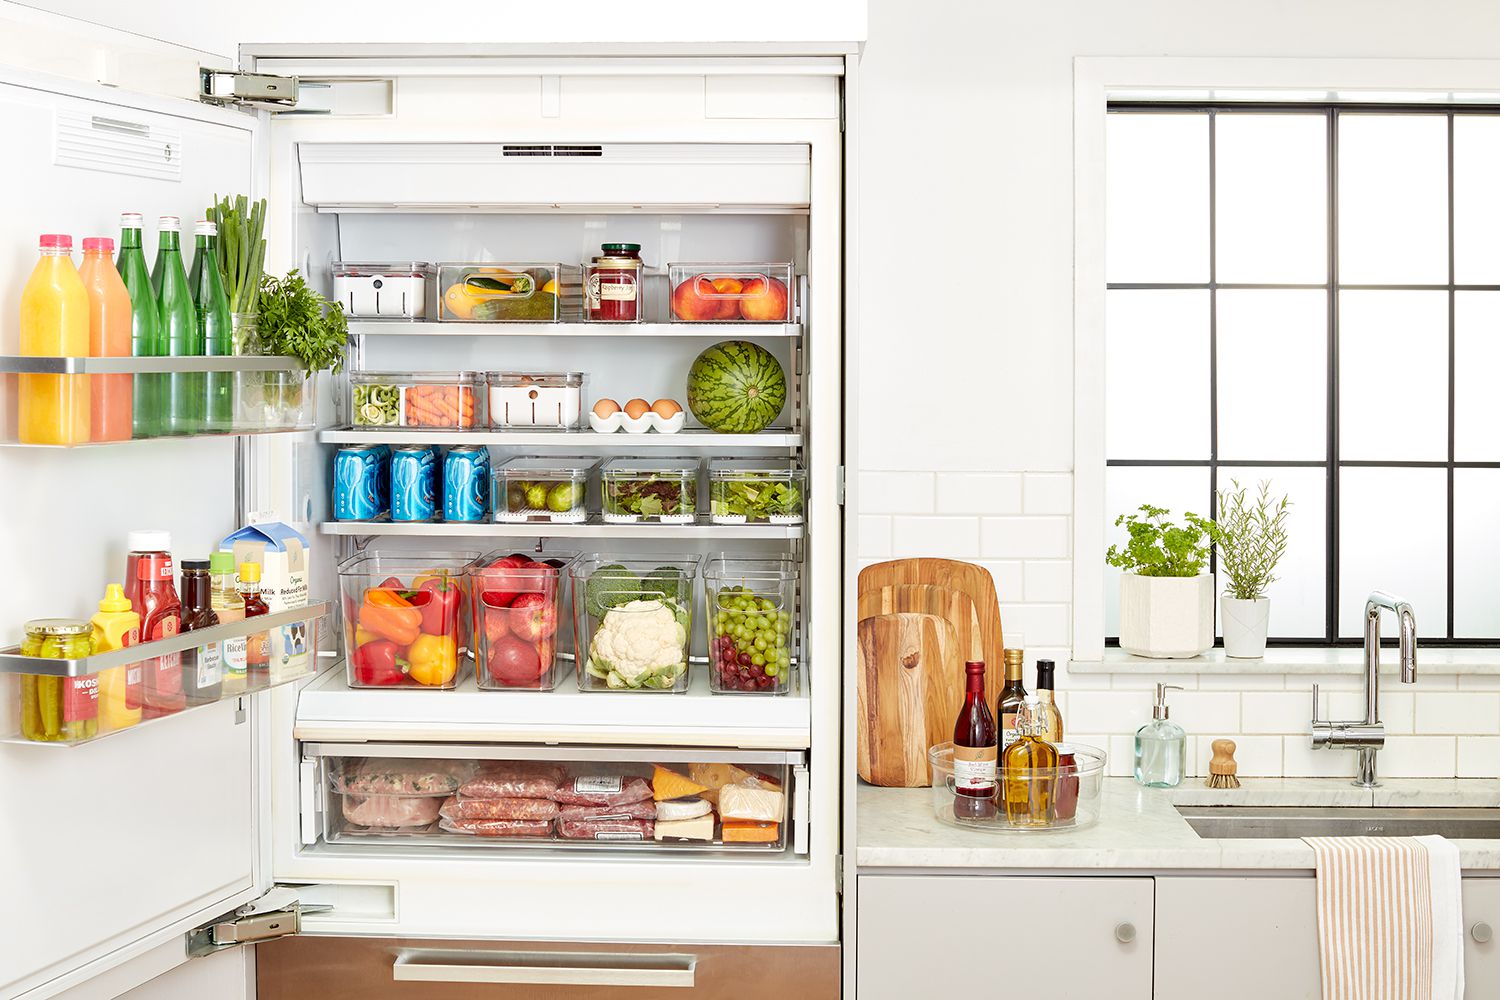
Step 4: Arrange the shelves
Arranging the shelves in your refrigerator is a crucial step in optimizing storage space and maximizing organization. It allows you to easily access the items you need and prevents overcrowding and potential food waste.
Start by assessing the height and depth of each shelf in your refrigerator. This will help you determine the best placement for different types of items. For example, taller items like bottles or pitchers can be placed on the top shelf, while shorter items can be placed on lower shelves.
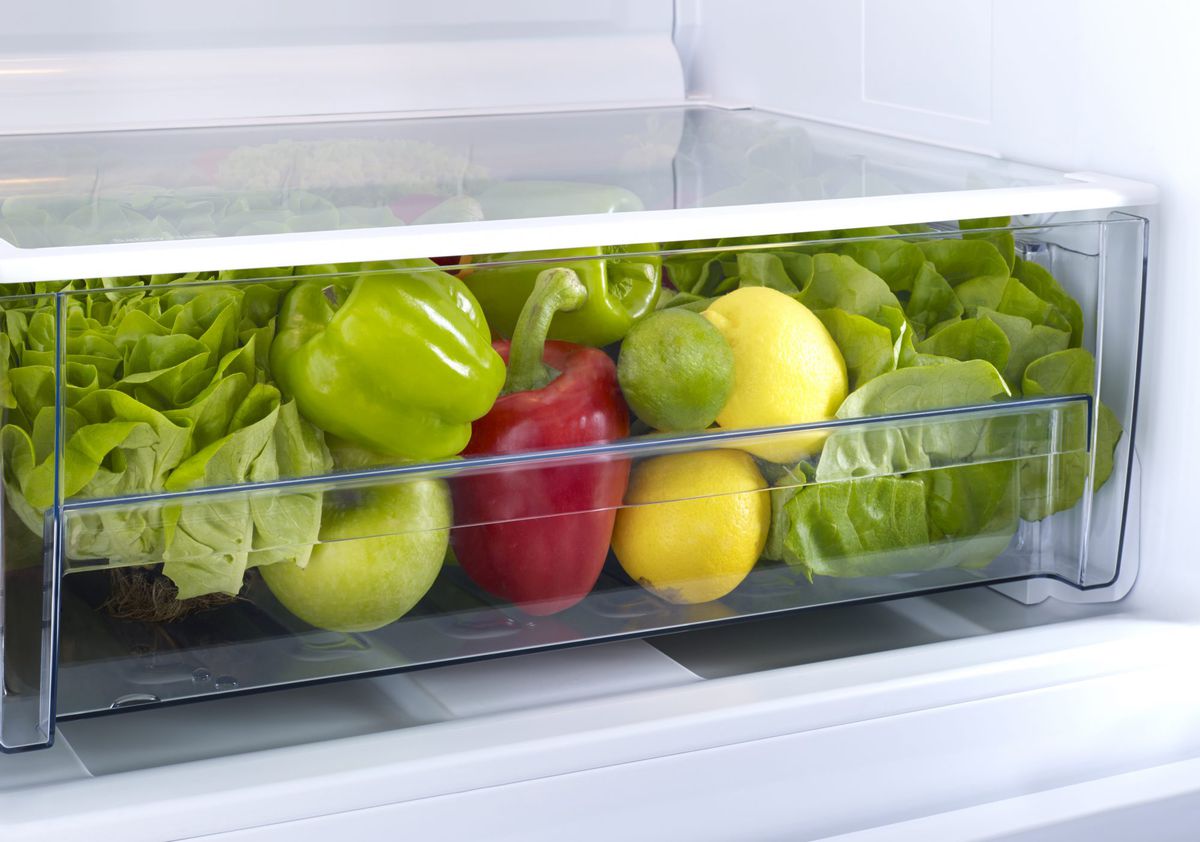
As you arrange your shelves, keep in mind the temperature zones within your refrigerator. Typically, the bottom shelves are colder, while the top shelves are warmer. Place items that require lower temperatures, such as raw meat and seafood, on the bottom shelves. Store dairy products and leftovers on the middle shelves, and keep fruits and vegetables on the top shelves.
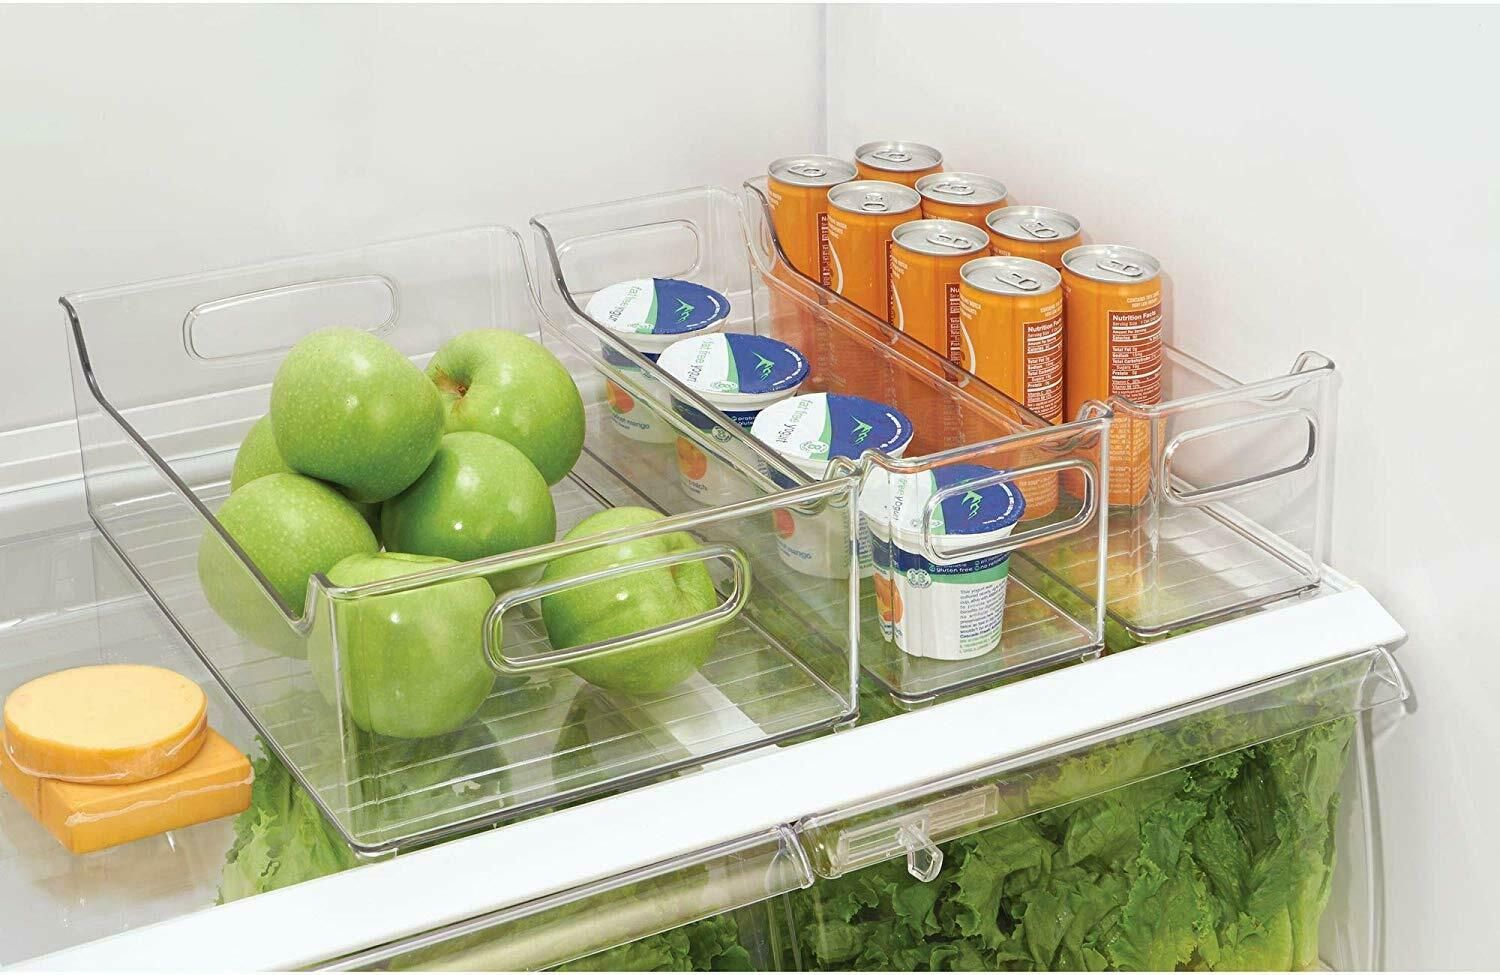
To further maximize space, consider utilizing storage containers or bins. These can help keep similar items together and prevent them from getting lost or forgotten in the depths of your refrigerator. Clear containers are especially helpful as they allow you to easily see what’s inside without having to dig through the fridge.
Arrange your items in a logical and organized manner. Group similar items together, such as condiments, sauces, or beverages. This will make it easier to find what you need and ensure that nothing gets pushed to the back and forgotten.
Lastly, make use of any adjustable shelves or dividers in your refrigerator to customize the space according to your needs. This allows you to accommodate larger or taller items without sacrificing the organization of other shelves.
By arranging your shelves strategically, you’ll create a well-organized refrigerator that is both functional and efficient. Now that the shelves are in order, let’s move on to the next step: utilizing storage containers.
Read also: 10 Amazing Refrigerator Basket for 2025
Step 5: Utilize storage containers
Using storage containers in your refrigerator can help to further optimize space and keep similar items organized. They provide a designated spot for specific food groups and prevent items from rolling around or getting lost in the back.
Start by selecting the appropriate size and type of containers for your needs. Clear, stackable containers are highly recommended as they allow for easy visibility and maximize the use of vertical space.
Consider the different food categories and assign a container for each. For example, you can use one container for storing small fruits, another for storing deli meats, and another for storing yogurts or snack packs. Labeling the containers can also help you quickly identify their contents.
Store similar items together in the containers to maintain organization. This can include condiments, salad dressings, or even jars of pickles. By keeping them in one designated area, you’ll save time searching for items and minimize clutter in your fridge.
Utilize smaller containers or compartments within larger containers to further separate items. This can be especially useful for organizing loose items like cheese, individual portions of leftovers, or small containers of sauces.
Additionally, storage containers can be used to store prepped or leftover food items. Place them in clear, airtight containers to extend their freshness and reduce food waste. Make sure to date the containers, rotating them so that older items are used first.
Keep in mind that different containers might be better suited for certain types of foods. For example, use leak-proof containers for storing liquids or saucy items, and stackable containers for maximizing space with items like fruits or vegetables.
By utilizing storage containers, you’ll maintain a neat and organized refrigerator with designated spots for different food categories. Now that your containers are in place, let’s move on to organizing the door compartments.
Use clear storage containers to group similar items together in the refrigerator. This will make it easier to find what you need and keep the fridge organized.
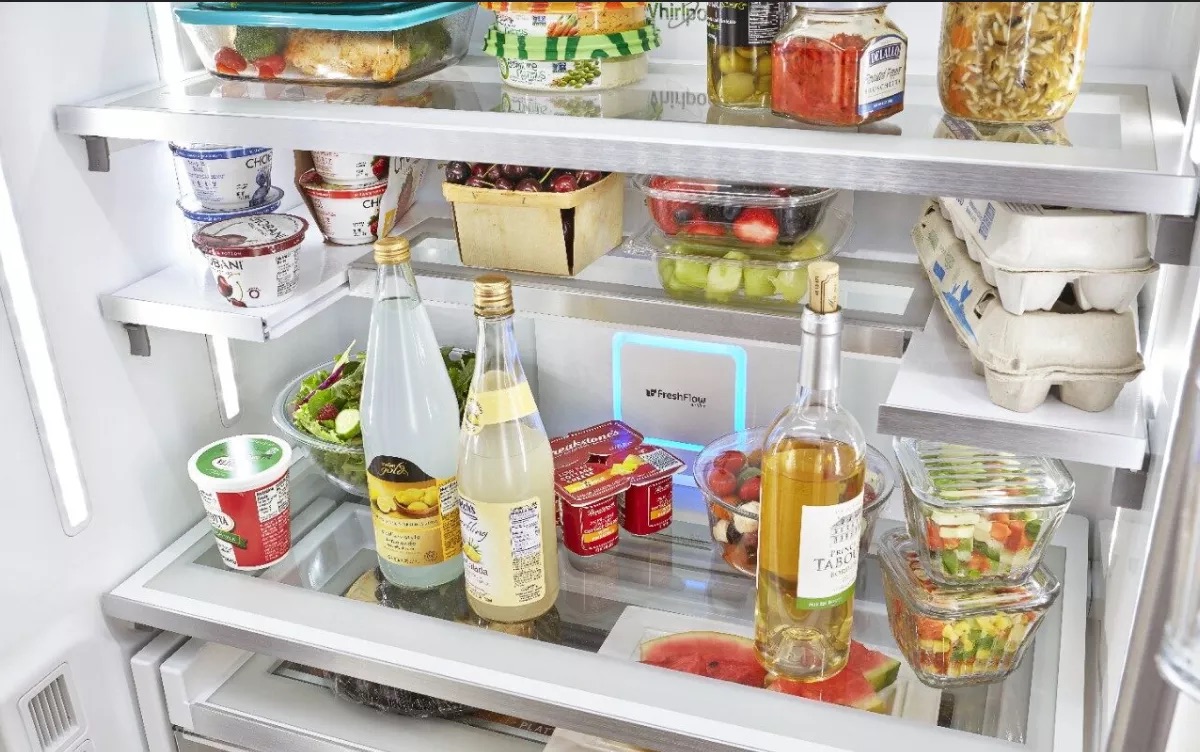
Step 6: Organize the door compartments
The door compartments of your refrigerator are often overlooked when it comes to organization. However, with proper arrangement, these compartments can be valuable storage spaces for condiments and other frequently used items.
Start by assessing the size and capacity of each door compartment. These compartments are typically designed to hold smaller items like jars, bottles, and condiments. Place items that are used frequently, such as ketchup, mustard, or salad dressings, in the front for easy access.
Consider utilizing door racks or organizers to maximize the space and keep items in place. These racks can be easily attached to the inside of the door and provide additional sections for storing items like eggs, butter, or small beverage bottles.
In order to prevent overcrowding and spills, it’s important to avoid overstocking the door compartments. Only keep items in the door that are stable and won’t spoil easily. Items such as milk or eggs are best stored on the main shelves where the temperature is more consistent.
Another useful tip is to group similar items together. Place all the condiments in one section, dairy products in another, and so on. This will make it easier to find what you need and keep the door compartments organized.
Regularly check the door compartments for expired or spoiled items. Since these compartments are constantly exposed to warm air when the refrigerator is opened, it’s important to be vigilant in rotating and discarding items that may have gone bad.
By organizing the door compartments, you’ll have a designated space for frequently used items and reduce clutter in your refrigerator. Now that the door compartments are organized, let’s move on to organizing the freezer.
Step 7: Organize the freezer
Organizing the freezer is just as important as organizing the refrigerator. A well-organized freezer allows for efficient use of space, easy access to frozen items, and prevents food from getting freezer burn or going to waste.
Start by clearing out the entire freezer. Remove all items and place them on your kitchen counter or table. This will give you a chance to discard any expired or freezer-burned items and assess what you have.
Sort the items into categories such as meats, vegetables, fruits, and prepared meals. This will make it easier to find specific items later on. Consider using freezer-safe storage bags or containers to help keep smaller items together and prevent them from getting lost or buried.
When placing items back into the freezer, keep in mind the type and frequency of use. Items that are used less frequently can be placed towards the back or bottom of the freezer, while those you use more often should be easily accessible at the front or top.
Consider using stackable bins or organizers to further maximize space and keep similar items together. This can include different types of meats, frozen vegetables, or individually portioned meals. Labeling the bins or containers can also help you quickly identify their contents.
If you have larger items, such as frozen pizzas or larger cuts of meat, it may be helpful to store them flat or vertically to save space. Make sure to secure and seal them properly to prevent any freezer burn.
Lastly, make it a habit to regularly check and rotate the items in the freezer. This will ensure that older items are used first, reducing food waste and maintaining the overall quality of the frozen food.
By organizing your freezer, you’ll have a well-structured space for frozen items, making it easier to find what you need and reducing the chances of food waste. With the freezer organized, let’s move on to the next step: creating a system for handling leftovers.
Step 8: Create a system for leftovers
Leftovers can easily become overwhelming and clutter your refrigerator if not managed properly. By creating a system for handling leftovers, you can ensure that you utilize them efficiently, minimize waste, and keep your refrigerator organized.
Start by designating a specific area or shelf in your refrigerator for leftovers. This can be a section on one of the shelves or even a dedicated container or bin. The important thing is to have a designated spot where leftovers are consistently stored.
Labeling the containers with the date of preparation is essential to keep track of their freshness. This helps you identify which leftovers should be consumed first to avoid spoilage. Consider using removable labels or erasable markers for easy updating.
To make it easier to grab and go, portion out larger quantities of leftovers into single-serving containers. This helps ensure that you only take out what you need and can easily heat up one portion at a time.
Organize the leftovers in your designated area based on their expiration date. Place the oldest leftovers at the front, so they’re most visible and are consumed first. This way, you minimize the risk of forgetting about them and let nothing go to waste.
If you find that you consistently have a surplus of leftovers, consider incorporating a “Leftover Night” into your weekly meal plan. This allows you to intentionally use up remaining dishes and helps keep your refrigerator from becoming overcrowded.
Regularly assess the leftovers in your refrigerator and discard any that have gone bad or are no longer safe to consume. It’s better to be cautious and minimize the risk of foodborne illness.
By creating a system for leftovers, you’ll eliminate the chaos of multiple containers and ensure that you use them in a timely manner. Now that you have a system for handling leftovers, let’s move on to the final step: maintaining the organization.
Step 9: Maintain the organization
Once you’ve organized your refrigerator, it’s important to establish habits and routines to maintain its organization in the long run. Here are some tips to help you keep your fridge organized:
1. Regularly check for expired items: Take a few minutes every week to check for expired or spoiled items in your refrigerator. Discard anything that is no longer safe to consume, including leftovers that have passed their prime.
2. Clean up spills and messes promptly: Accidents happen, but it’s important to clean up any spills or messes as soon as possible. This prevents odors, bacteria growth, and sticky residue from affecting other items in the refrigerator.
3. Stick to your designated spots: Make a conscious effort to return items to their designated spots after use. This helps you maintain an organized layout and easily find what you need. Encourage other household members to do the same.
4. Rotate items: When grocery shopping, place newer items towards the back of the refrigerator and bring older items to the front. This ensures that you use items in the order they were purchased, reducing waste and maintaining freshness.
5. Use transparent containers: Opt for transparent storage containers and bins. Being able to see the contents at a glance helps you quickly locate items and prevents things from getting forgotten or pushed to the back.
6. Regularly clean the refrigerator: Plan a deep cleaning session for your refrigerator every few months or as needed. This includes wiping down surfaces, cleaning shelves, and giving the interior a thorough refresh.
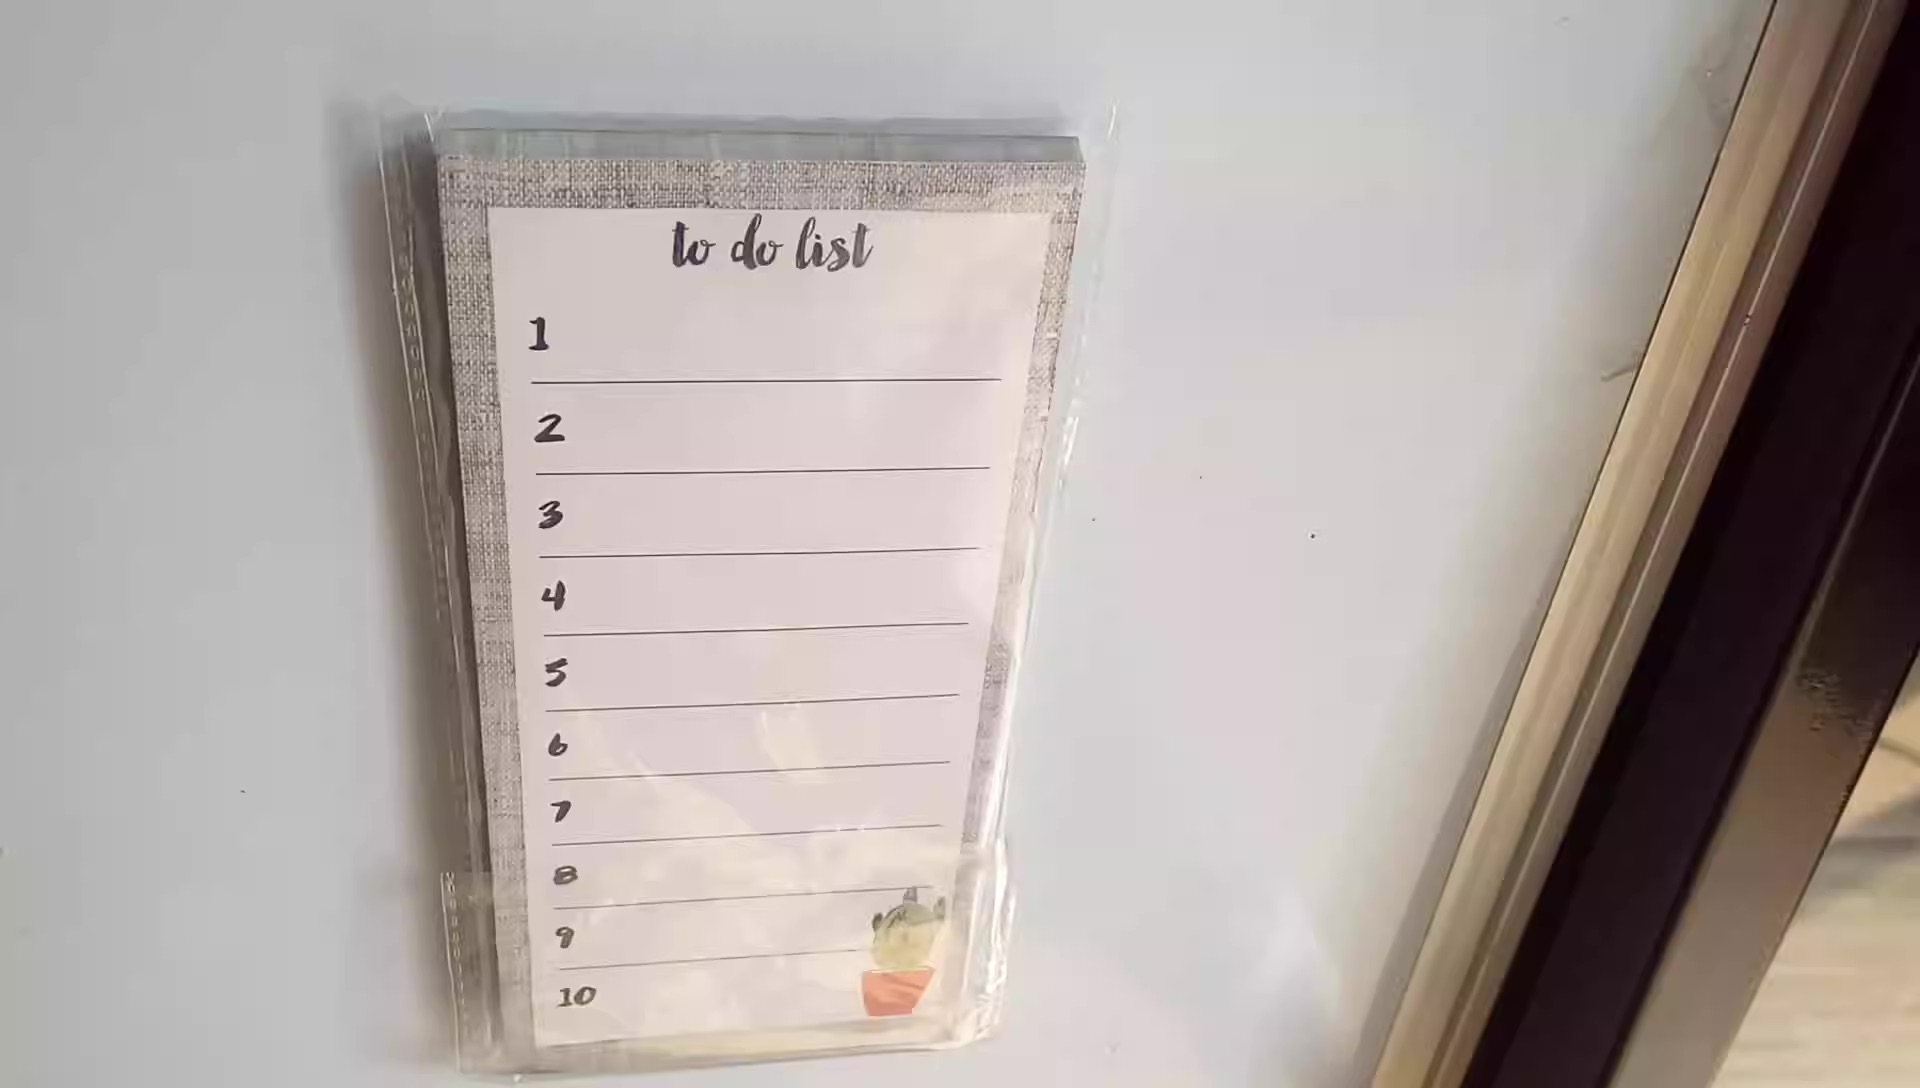
7. Meal plan and shop smartly: Plan your meals and grocery shopping so that you minimize impulse purchases and use up ingredients before they expire. This helps prevent overcrowding and ensures that you’re utilizing items efficiently.
By following these maintenance tips, you can ensure that your refrigerator remains organized and functional. A well-organized fridge not only saves you time and money but also contributes to a healthier and more enjoyable cooking and dining experience.
With these steps in mind, you’re now equipped with the knowledge and strategies to organize and maintain your refrigerator. Enjoy the benefits of an organized fridge as you effortlessly navigate your way through meal preparation and food storage!
–
Conclusion
Organizing your refrigerator is a simple yet impactful way to improve your daily life in the kitchen. By following the steps outlined in this article, you can transform your refrigerator from a chaotic mess to a well-organized and efficient storage space for your food.
Starting with the process of taking everything out and sorting through items, you ensure that you only keep what you need and discard any expired or spoiled food. Cleaning the refrigerator thoroughly not only eliminates odors but also provides a fresh start for your organization efforts.
Arranging the shelves and utilizing storage containers help you maximize space and keep similar items together. Organizing the door compartments and freezer ensures that everything has its designated spot and is easily accessible when needed.
Creating a system for handling leftovers helps you efficiently use up food and minimize waste. And finally, by maintaining the organization regularly, checking for expired items, and cleaning up spills promptly, you can ensure that your refrigerator remains in optimal condition and that you can easily find what you need.
The benefits of an organized refrigerator are numerous. You’ll waste less food, save money by avoiding overbuying, and reduce the time and frustration of searching for items. In addition, an organized refrigerator promotes a healthier and more enjoyable cooking and dining experience.
So, take the time to implement these steps and turn your refrigerator into a well-organized space that brings ease and efficiency to your daily life. By following the suggestions in this article, you’ll be on your way to a clutter-free and functional refrigerator that enhances your kitchen experience.
Remember, an organized refrigerator is not only about neatness and aesthetics, but it’s also about maximizing freshness and efficiently managing your food inventory. Start today, and enjoy the benefits of an organized refrigerator for years to come!
Frequently Asked Questions about How To Organize Refrigerator
Was this page helpful?
At Storables.com, we guarantee accurate and reliable information. Our content, validated by Expert Board Contributors, is crafted following stringent Editorial Policies. We're committed to providing you with well-researched, expert-backed insights for all your informational needs.

0 thoughts on “How To Organize Refrigerator”