Articles
How To Move A Freezer
Modified: August 28, 2024
Learn how to safely move a freezer with these helpful articles. Discover tips and tricks for a smooth and hassle-free relocation process.
(Many of the links in this article redirect to a specific reviewed product. Your purchase of these products through affiliate links helps to generate commission for Storables.com, at no extra cost. Learn more)
Introduction
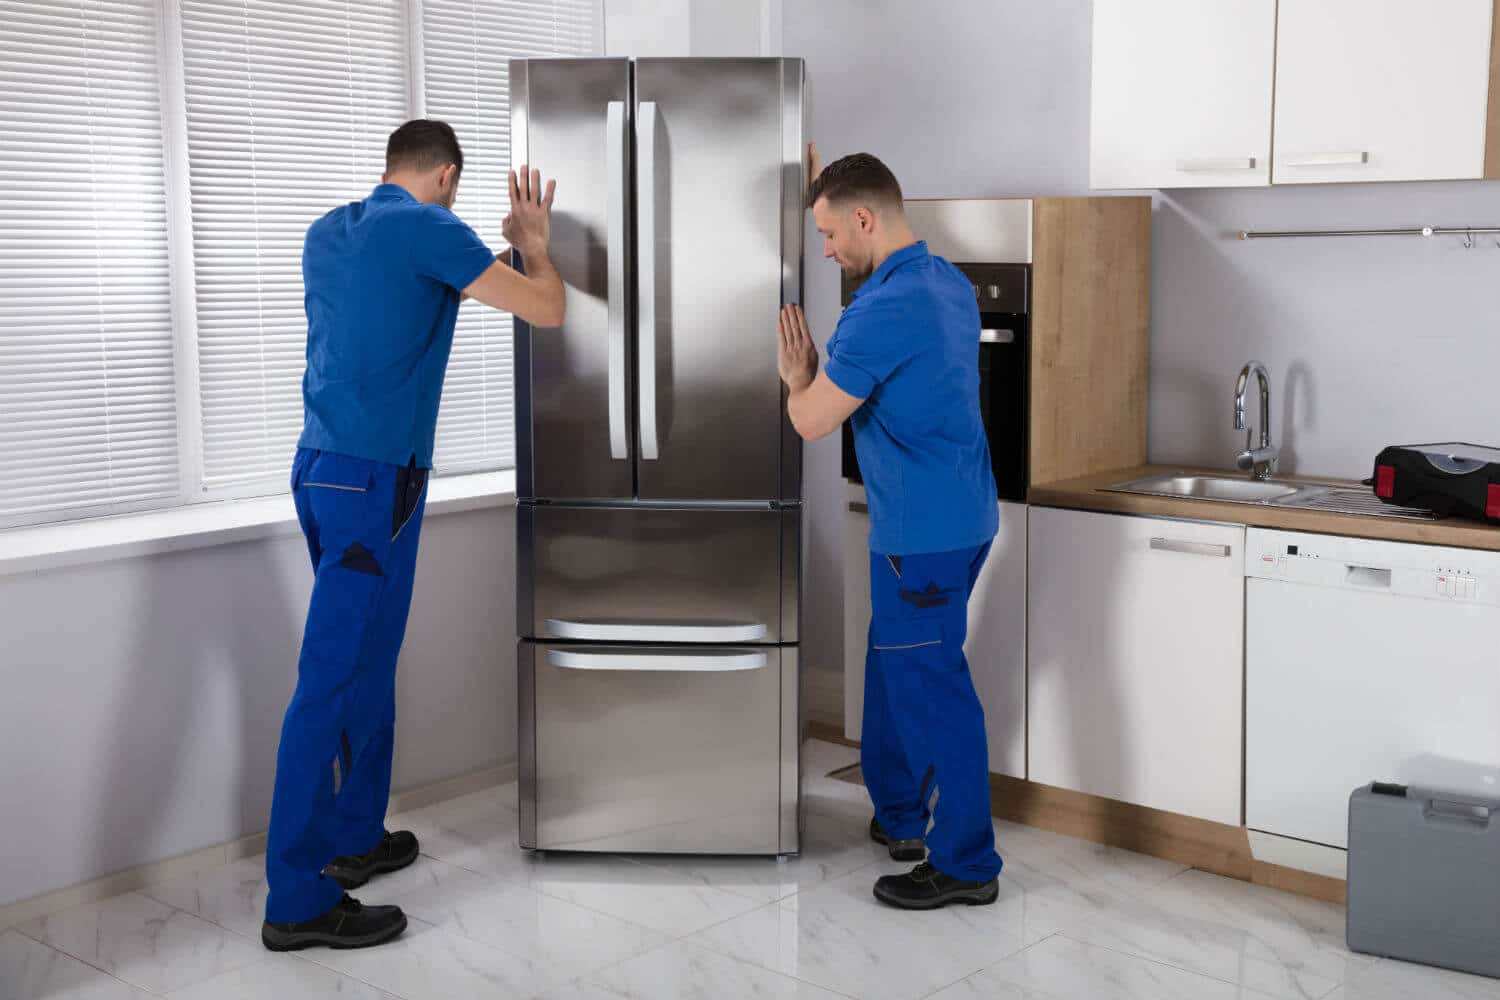
Moving a freezer can be a daunting task, especially if you don’t have prior experience or knowledge about the process. However, with proper planning and the right tools, you can safely and efficiently move your freezer to a new location. Whether you are relocating to a new home or simply rearranging your appliances, this guide will provide you with step-by-step instructions on how to move a freezer.
Before you start the moving process, it is important to ensure your safety and the safety of others around you. Moving a freezer involves heavy lifting and potential hazards, so taking precautionary measures is crucial. Additionally, by properly preparing the freezer and its contents, you can prevent any damage during the move. With a systematic approach and attention to detail, you’ll be able to relocate your freezer without any hassle.
In this article, we will outline the necessary steps to safely move a freezer. From emptying and defrosting the freezer to securely loading it onto a vehicle and setting it up in the new location, we will cover everything you need to know. So, let’s get started with step one: safety precautions.
Key Takeaways:
- Prioritize safety by wearing protective clothing, securing loose items, and using proper lifting techniques when moving a freezer to prevent accidents and injuries.
- Ensure a smooth move by emptying, defrosting, and securing the contents of the freezer, as well as gathering the necessary equipment and supplies for safe transportation.
Read more: How To Move A Wardrobe
Step 1: Safety Precautions
Moving a freezer can pose some risks, so it’s important to take the necessary safety precautions before you begin the process. Follow these guidelines to ensure your safety and the safety of others:
- Wear protective clothing: To prevent injuries, wear sturdy work gloves and closed-toe shoes. Additionally, consider wearing safety glasses to protect your eyes from debris.
- Clear the area: Make sure the path from the freezer to the vehicle is clear of any obstacles. Remove furniture, rugs, or any other objects that could potentially cause tripping hazards.
- Secure loose items: Any items that could potentially fall or get knocked over during the movement of the freezer should be removed or secured. This includes nearby decorations, fragile items, or anything that could cause accidents.
- Use proper lifting techniques: When lifting the freezer, remember to bend your knees, keep your back straight, and lift with your legs. Avoid twisting or jerking movements that could strain your muscles or lead to injuries.
- Ask for help: Depending on the size and weight of your freezer, it may require more than one person to lift and move it safely. Don’t hesitate to ask for assistance from a family member, friend, or neighbor.
- Disconnect the power: Before you start the moving process, make sure to unplug the freezer from the power source. This will prevent any electrical accidents or damage to the appliance.
- Secure cords and hoses: If your freezer has any attached cords or hoses, secure them properly to avoid tripping hazards or damage to the appliance.
By following these safety precautions, you can reduce the risk of accidents or injuries during the moving process. Once you have taken these necessary steps, you can proceed to the next step: emptying the freezer.
Step 2: Emptying the Freezer
Before you can safely move your freezer, you need to empty its contents. Follow these steps to ensure a smooth and efficient process:
- Remove all food: Start by taking out all the food items from the freezer. Check for any expired or spoiled food and discard them.
- Use coolers: If you have perishable items that need to be kept cold during the move, place them in a cooler with ice packs.
- Transfer items to a temporary freezer: If you have access to a temporary freezer, you can transfer your frozen items there until your main freezer is operational again.
- Empty the ice trays: If your freezer has ice trays, empty them and dispose of any ice cubes to prevent melting during the move.
- Clean the freezer: Take this opportunity to clean the freezer thoroughly. Remove any ice buildup, wipe down the interior, and let it dry completely before moving on to the next step.
By properly emptying the freezer and taking care of the cleaning process, you ensure that the freezer is ready to be moved without any leaking or unpleasant odors.
Now that the freezer is empty, you can move on to the next step: defrosting the freezer.
Step 3: Defrosting the Freezer
Defrosting the freezer is an essential step before moving it to prevent any water leakage or damage during the transportation. Follow these steps to defrost your freezer:
- Turn off the freezer: Make sure the freezer is unplugged and the power is completely turned off.
- Open the freezer door: Keep the freezer door open to allow the ice to melt naturally.
- Collect the water: Place towels or absorbent cloths on the floor of the freezer to collect the melting ice.
- Use a hairdryer: For faster defrosting, you can use a hairdryer on the lowest heat setting to melt the ice buildup. Be careful not to use excessive heat or aim the dryer directly at the freezer walls.
- Remove the ice: Once the ice has melted, gently remove any remaining ice or water using a sponge or cloth. Make sure the interior of the freezer is completely dry.
- Remove and clean the drawers and shelves: Take out any removable drawers, shelves, or dividers and clean them separately. Let them dry before placing them back in the freezer.
It’s important to note that defrosting a freezer typically takes several hours, so it’s advisable to start this process ahead of time. Make sure to plan accordingly and give yourself enough time to ensure the freezer is completely defrosted and dry before moving on to the next step.
With your freezer defrosted and ready to go, you can proceed to step four: disconnecting the freezer from power.
Step 4: Disconnecting the Freezer from Power
Before you can move the freezer, you need to safely disconnect it from the power source. Follow these steps to ensure a smooth disconnection:
- Unplug the freezer: Make sure the freezer is completely powered off and unplugged from the electrical outlet.
- Remove the power cord: Safely detach the power cord from the freezer. If the cord is attached to the back or side of the freezer, carefully untangle and remove it.
- Secure the power cord: Bundle up the power cord and secure it with tape or a twist tie to prevent it from dangling or getting in the way during the moving process.
By disconnecting the freezer from power, you eliminate the risk of electrocution and ensure a safer moving experience. With the power properly disconnected, you can move on to the next step: securing the contents of the freezer.
Read more: How To Declutter For A Move
Step 5: Securing the Contents
Securing the contents of your freezer is crucial to prevent any damage or shifting during transportation. Follow these steps to ensure that everything remains intact during the move:
- Secure loose items: Take out any loose items from inside the freezer, such as shelves, racks, or dividers. Wrap them securely with packing material, such as bubble wrap or towels, and store them separately.
- Use freezer-safe containers: If there are any perishable items or liquids inside the freezer, transfer them into freezer-safe containers. Make sure the containers are tightly sealed to prevent any leakage or spills.
- Secure the freezer door: Use strong tape, such as packing or duct tape, to secure the freezer door shut. This will ensure that the door does not unexpectedly open during transportation.
- Place non-slip material: To prevent items from sliding around inside the freezer, place non-slip material, such as rubber mats or shelf liners, at the bottom.
By properly securing the contents of the freezer, you minimize the risk of damage to both the freezer and its contents. This step is crucial, especially if you are moving over bumpy roads or maneuvering through tight spaces.
Now that the contents are secured, we can move on to step six: gathering the necessary equipment and supplies for moving the freezer.
Before moving a freezer, defrost it and remove all food. Secure the door with tape or rope, and use a dolly to transport it to avoid straining your back.
Step 6: Moving Equipment and Supplies
Gathering the necessary equipment and supplies is essential to ensure a smooth and successful move of your freezer. Here are the items you will need:
- Dolly or hand truck: A dolly or hand truck will make it easier to transport the heavy freezer. Make sure to choose one that is suitable for the size and weight of your freezer.
- Furniture sliders: Furniture sliders will come in handy if you need to move the freezer across a smooth surface or navigate tight corners.
- Packing materials: Stock up on packing materials such as moving blankets, bubble wrap, and packing tape to protect the freezer during transportation.
- Straps or bungee cords: Straps or bungee cords will help secure the freezer to prevent it from shifting or falling while in transit.
- Measuring tape: Use a measuring tape to ensure that the freezer will fit through doorways and hallways in both the old and new locations.
- Toolkit: Keep a toolkit handy with basic tools such as screwdrivers or wrenches in case you need to detach any parts of the freezer for easier transportation.
By gathering these essential equipment and supplies, you will be well-prepared to move your freezer safely and efficiently. Now that you have everything you need, it’s time to move on to step seven: lifting and moving the freezer.
Step 7: Lifting and Moving the Freezer
Lifting and moving a freezer requires proper technique and care to avoid strain or injury. Follow these steps to safely lift and move your freezer:
- Enlist the help of others: Lift and move the freezer with the assistance of at least one other person. This will ensure that the weight is evenly distributed and reduce the risk of accidents.
- Position the dolly or hand truck: Place the dolly or hand truck near the freezer, making sure it is stable and properly positioned for easy loading.
- Secure the freezer: Use straps or bungee cords to secure the freezer to the dolly or hand truck. This will prevent it from falling or shifting during transportation.
- Use proper lifting technique: When lifting the freezer, bend your knees and keep your back straight. Lift with your legs, not your back, to avoid strain or injury. Lift in sync with your partner to maintain stability.
- Move slowly and carefully: Take small, deliberate steps when moving the freezer. Avoid sudden movements or jerks that could cause the freezer to tip over.
- Use furniture sliders: If necessary, use furniture sliders to glide the freezer across smooth surfaces. This will help reduce the strain on your back and make the movement easier.
- Take breaks when needed: Moving a heavy appliance like a freezer can be physically demanding. Take breaks when needed to prevent exhaustion or injuries.
By following these steps, you can safely lift and move your freezer to its new location. Remember to communicate with your moving partners and work together to ensure a smooth and controlled relocation.
Now that you have successfully moved your freezer, it’s time for step eight: loading the freezer onto a vehicle.
Step 8: Loading the Freezer onto a Vehicle
Loading your freezer onto a vehicle requires careful planning and execution to ensure a secure and damage-free transport. Follow these steps to properly load your freezer:
- Choose the right vehicle: Select a vehicle that can accommodate the size and weight of your freezer. Ensure that there is enough space and that the vehicle is properly equipped for secure transportation.
- Clear a path: Make sure the pathway to the vehicle is clear of any obstacles or tripping hazards. Clear the area and ensure there is a clear and direct path to the vehicle.
- Prepare the vehicle: If necessary, remove any seats or fold-down seats in the vehicle to create more space. Lay down protective blankets or cardboard to prevent any damage to the vehicle’s interior.
- Position the dolly or hand truck: Position the dolly or hand truck near the vehicle’s loading area. Ensure that it is stable and easily accessible for loading the freezer.
- Transfer the freezer onto the vehicle: With the help of your moving partners, carefully lift the freezer from the dolly or hand truck and transfer it onto the vehicle. Take your time and use caution to avoid any unnecessary jostling.
- Secure the freezer: Once the freezer is in the vehicle, use straps or bungee cords to secure it in place. Make sure it is stable and will not shift during transportation.
- Double-check the doors: Before closing the vehicle’s doors, make sure they are securely closed and will not open during transit. This will prevent any accidental damage or injuries.
By following these steps, you can safely load your freezer onto a vehicle and ensure a secure transport. Once the freezer is securely loaded, you can move on to step nine: transporting the freezer safely.
Read more: How To Move A Dishwasher
Step 9: Transporting the Freezer Safely
Transporting your freezer safely is crucial to prevent any damage or accidents during the journey. Follow these steps to ensure a smooth and secure transport:
- Drive cautiously: While transporting the freezer, drive cautiously and avoid sudden movements or sharp turns. Accelerate and brake gently to prevent the freezer from shifting or tipping over.
- Avoid extreme temperatures: Extreme temperatures can affect the performance of your freezer. Keep it away from direct sunlight or extreme heat, especially if you are transporting it in the summer.
- Check the straps: Regularly check the straps or bungee cords securing the freezer to ensure they remain tight. If any need adjustments, stop in a safe location and make the necessary changes.
- Secure the freezer in the vehicle: If the freezer is in the back of a truck or van, make sure it is positioned securely against the vehicle’s walls to prevent it from shifting during transit.
- Minimize movement: If possible, try to minimize any unnecessary movement or jostling of the freezer during transport. This will help prevent any potential damage to the appliance.
- Avoid placing heavy items on top: When loading other items or furniture on top of the freezer, avoid placing heavy objects that could potentially damage it. Be mindful of the weight and distribution of items.
- Check regularly: During breaks or stops, take the opportunity to check on the freezer and ensure it is secure and undamaged. Look for any signs of shifting or loose straps.
By following these steps, you can transport your freezer safely and minimize the risk of any damage or accidents. It’s important to prioritize the security and well-being of both the freezer and yourself during the journey.
Now that you have successfully transported your freezer, it’s time for the final step: unloading and setting up the freezer in its new location.
Step 10: Unloading and Setting Up the Freezer in the New Location
After safely transporting your freezer to its new location, the final step is to unload and set it up properly. Follow these steps to ensure a smooth transition:
- Prepare the new location: Clear out a space for the freezer in its new location. Ensure that the area is clean and ready for the appliance.
- Position the freezer: Carefully unload the freezer from the vehicle and position it in its designated spot. Take measurements beforehand to ensure that it fits properly through doors and hallways.
- Remove securing straps: Remove any securing straps or bungee cords from the freezer, being cautious not to damage the appliance or surrounding furniture.
- Level the freezer: Use a spirit level to ensure that the freezer is level and stable. Adjust the feet or use shims if necessary.
- Connect the power: Plug the freezer back into the power source and ensure that it is properly connected. Check that the power is turned on and the freezer is functioning.
- Replace shelves and drawers: Reinstall any shelves, drawers, or dividers that were removed during the moving process. Make sure they are securely in place.
- Allow time to stabilize: After setting up the freezer, allow it some time to stabilize before loading it with food. Follow the manufacturer’s instructions regarding the recommended stabilization time.
By following these steps, you can safely unload and set up your freezer in its new location. Remember to take your time and ensure that everything is properly installed and functioning before placing any food back inside.
Congratulations! You have successfully moved and set up your freezer in its new location. With proper planning and care, your freezer will continue to serve its purpose in its new home.
Thank you for following this guide on how to move a freezer. We hope it has been helpful in guiding you through the process.
Conclusion
Moving a freezer may seem like a daunting task, but with proper planning and execution, it can be a smooth and successful process. By following the step-by-step guide outlined in this article, you can safely move your freezer to a new location without any hassle or damage.
Throughout the moving process, it is crucial to prioritize safety. Take the necessary precautions, such as wearing protective clothing, securing loose items, and using proper lifting techniques. By doing so, you can prevent accidents and injuries.
Remember to properly empty and defrost the freezer before moving it. This includes removing all food, cleaning the interior, and allowing it to defrost completely. Taking these steps will prevent water leakage and preserve the lifespan of your appliance.
Gathering the right equipment and supplies is essential for a successful move. Be sure to have a dolly or hand truck, furniture sliders, packing materials, straps or bungee cords, a measuring tape, and a toolkit. These tools will make the moving process easier and protect your freezer from damage.
During the actual move, lift and move the freezer with care, securing it to the dolly or hand truck. Drive cautiously while transporting the freezer, avoiding sudden movements and extreme temperatures. Regularly check the straps and ensure that the freezer is secure and undamaged throughout the journey.
Once you arrive at the new location, carefully unload and set up the freezer. Position it in its designated spot, level it, connect the power, and reinstall any shelves or drawers. Allow the freezer some time to stabilize before loading it with food.
By following each step in this guide, you can successfully move your freezer and ensure its safe arrival at the new location. Remember to take your time, ask for help when needed, and prioritize safety throughout the entire process.
We hope this guide has provided you with valuable information and guidance on how to move your freezer. Good luck with your move, and may your freezer continue to serve you well in its new space!
Frequently Asked Questions about How To Move A Freezer
Was this page helpful?
At Storables.com, we guarantee accurate and reliable information. Our content, validated by Expert Board Contributors, is crafted following stringent Editorial Policies. We're committed to providing you with well-researched, expert-backed insights for all your informational needs.


0 thoughts on “How To Move A Freezer”