Articles
How To Store A Snowblower Outside
Modified: August 28, 2024
Learn how to properly store your snowblower outside to protect it from the elements and ensure it stays in good condition. Our articles provide helpful tips and techniques for efficient storage.
(Many of the links in this article redirect to a specific reviewed product. Your purchase of these products through affiliate links helps to generate commission for Storables.com, at no extra cost. Learn more)
Introduction
Storing a snowblower outside requires careful planning and preparation to ensure that it remains in good condition throughout the off-season. Snowblowers are heavy, bulky machines that can be susceptible to damage if not properly stored and protected from the elements. Whether you don’t have enough storage space in your garage or simply prefer to keep your outdoor equipment neatly arranged, storing a snowblower outside can be a viable option if done correctly.
In this article, we will guide you through the steps to effectively store your snowblower outside. From assessing the location to preparing and protecting the equipment, we will provide you with valuable tips to keep your snowblower functional and protected until the next winter season arrives. Let’s dive in!
Note: Before proceeding with storing your snowblower outside, make sure to consult the manufacturer’s guidelines and warranty information to ensure that you don’t void any warranty or inadvertently neglect any specific storage requirements.
Key Takeaways:
- Properly storing a snowblower outside involves assessing the location, preparing the equipment, and protecting it from the elements. Regular cleaning and maintenance are essential for ensuring optimal performance and longevity.
- Choosing a sheltered location, cleaning and inspecting the snowblower, using a cover, and performing regular maintenance are key to keeping a snowblower in top condition when stored outside. Following these steps can extend its lifespan and ensure it’s ready for use when needed.
Read more: How To Store A Motorcycle Outside
Assessing the Location
Choosing the right location to store your snowblower outside is crucial for its long-term protection. Here are a few factors to consider when assessing the location:
- Shelter: Look for a spot that provides some form of shelter, such as a covered porch, shed, or carport. This will help protect your snowblower from direct exposure to rain, snow, and strong winds.
- Ground: Ensure that the ground where you plan to store your snowblower is level and stable. Avoid areas prone to flooding or pooling water, as excess moisture can damage the machine.
- Ventilation: Choose a location that allows for proper airflow to prevent condensation and moisture build-up. This will help prevent rust and other potential damage to the snowblower.
- Accessibility: Consider proximity to an electrical outlet if your snowblower is electric-powered. Additionally, make sure the location is easily accessible for maintenance and operation when needed.
- Security: Depending on the safety concerns in your area, consider locations that are not easily accessible to potential thieves. If possible, lock the snowblower to a secure structure using a heavy-duty lock or chain.
After evaluating these factors, you can determine the most suitable location to store your snowblower outside. Keep in mind that while these guidelines are important, the ultimate goal is to find a location that offers the best protection and convenience for your specific situation.
Preparing the Snowblower
Before storing your snowblower outside, it is essential to prepare it properly to minimize the risk of damage and ensure its longevity. Here are the steps to follow for preparing your snowblower:
- Clean the snowblower: Thoroughly clean the snowblower to remove any dirt, debris, or salt residue that may have accumulated during use. Use a brush or compressed air to clean hard-to-reach areas, ensuring that all parts are free from any contaminants.
- Inspect for damage: Take the time to inspect the snowblower for any signs of damage or wear. Check the belts, cables, ignition system, and other components for any visible signs of damage or deterioration. If any parts need replacement or repair, address them before storing the snowblower.
- Change the oil: If your snowblower has a combustion engine, consider changing the oil before storage. Used oil may contain impurities that can cause corrosion over time. Refer to the owner’s manual for specific instructions on oil changing.
- Empty the fuel tank: If your snowblower runs on gasoline, it is recommended to empty the fuel tank before storing it outside. Gasoline left in the tank can deteriorate over time, leading to engine problems. Run the snowblower until it runs out of gas, or use a hand pump to drain the fuel.
- Remove the battery (if applicable): For snowblowers with electric start features, remove the battery before storage. This will prevent the battery from discharging and potentially freezing during cold weather, which can damage the battery.
By following these steps, you will ensure that your snowblower is in optimal condition before storing it outside. Performing a thorough cleaning, inspection, and maintenance routine will help prevent any issues and make it easier to start and use the snowblower in the next winter season.
Protecting the Snowblower
When storing a snowblower outside, it is crucial to protect it from the elements to prevent damage and ensure its longevity. Here are some effective ways to protect your snowblower:
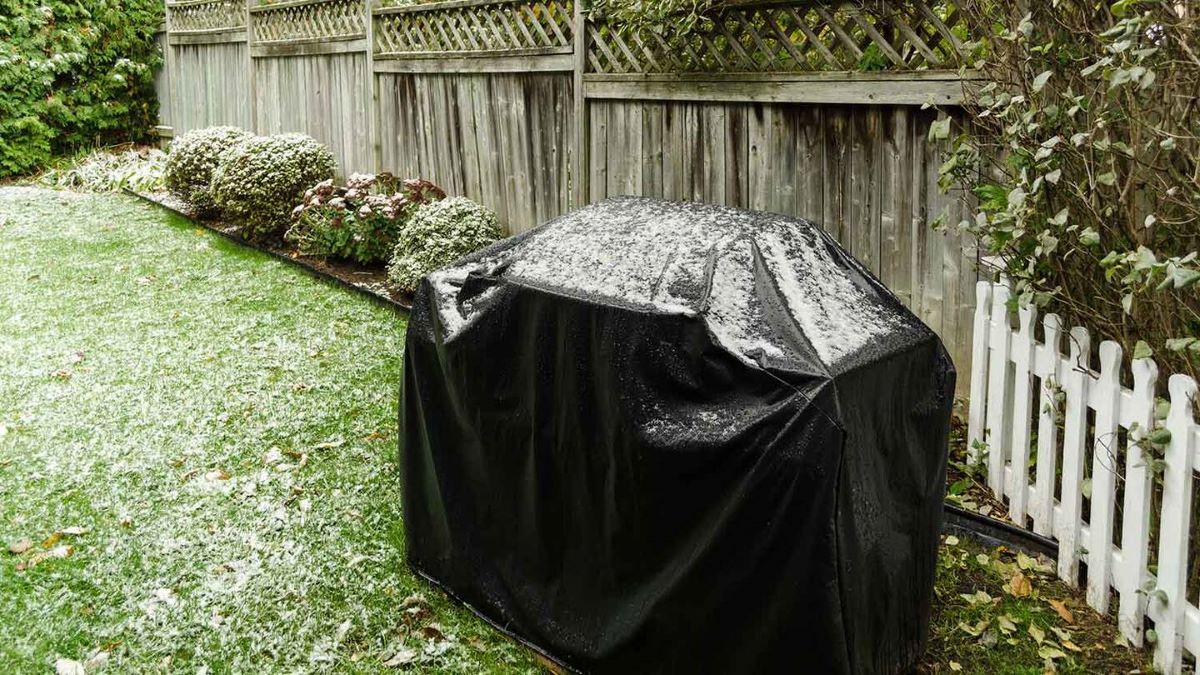
- Use a tarp or snowblower cover: Invest in a durable tarp or specifically designed snowblower cover to shield your machine from rain, snow, and UV rays. Make sure the cover fits securely and is made of waterproof material to provide adequate protection.
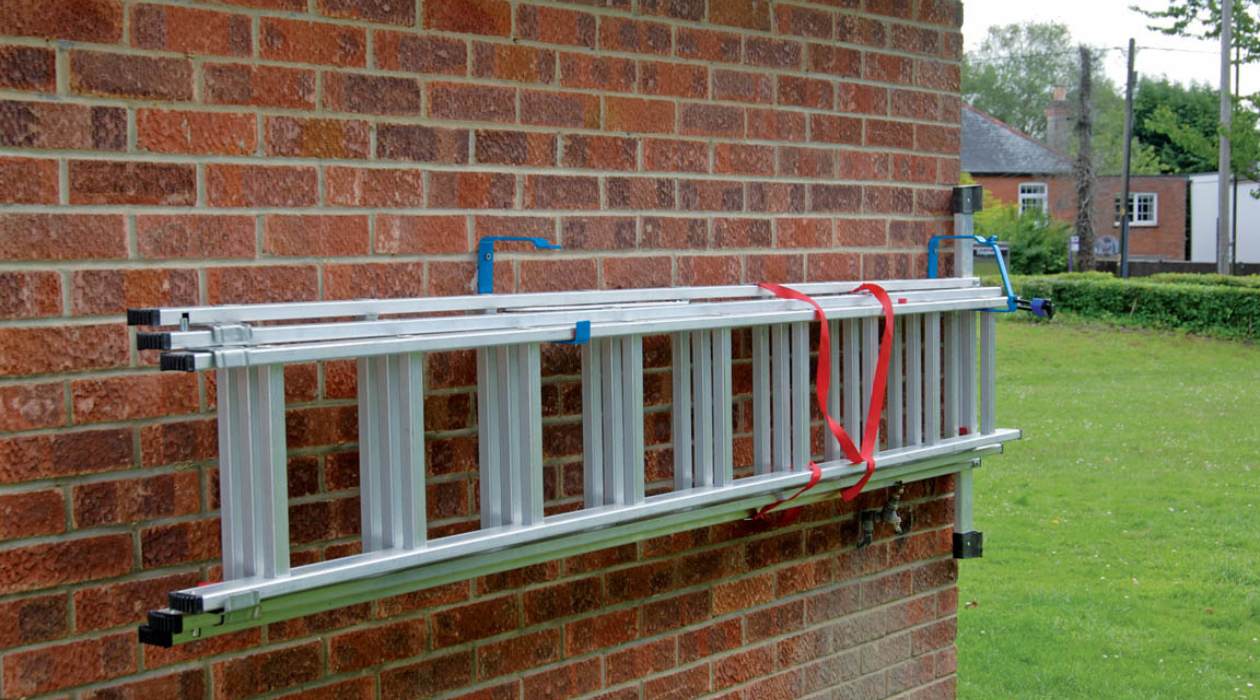
- Elevate the snowblower: Place the snowblower on a raised platform, such as wooden pallets, to keep it off the ground. This will help prevent moisture absorption and potential rusting. Ensure the platform is sturdy enough to support the weight of the snowblower.
- Protect the chute: Cover the chute opening with a plastic bag or a piece of cardboard to prevent moisture, debris, or small animals from entering. Secure it tightly to keep it in place during windy conditions.
- Consider a lockable storage box: If security is a concern, consider investing in a lockable storage box or cabinet to keep your snowblower safely locked away. This will provide an additional layer of protection against theft or unauthorized use.
- Apply a rust protectant: Before storing, apply a rust protectant to the metal parts of the snowblower. This will help prevent rust and corrosion during the storage period. Follow the manufacturer’s instructions for the specific protectant you choose.
Implementing these protective measures will significantly reduce the risk of damage to your snowblower while it is stored outside. By shielding it from moisture, debris, and potential theft, you can ensure that your snowblower remains in good working condition until the next winter season.
Consider using a waterproof cover to protect your snowblower from the elements when storing it outside. Make sure to clean and dry the machine before covering it to prevent rust and damage.
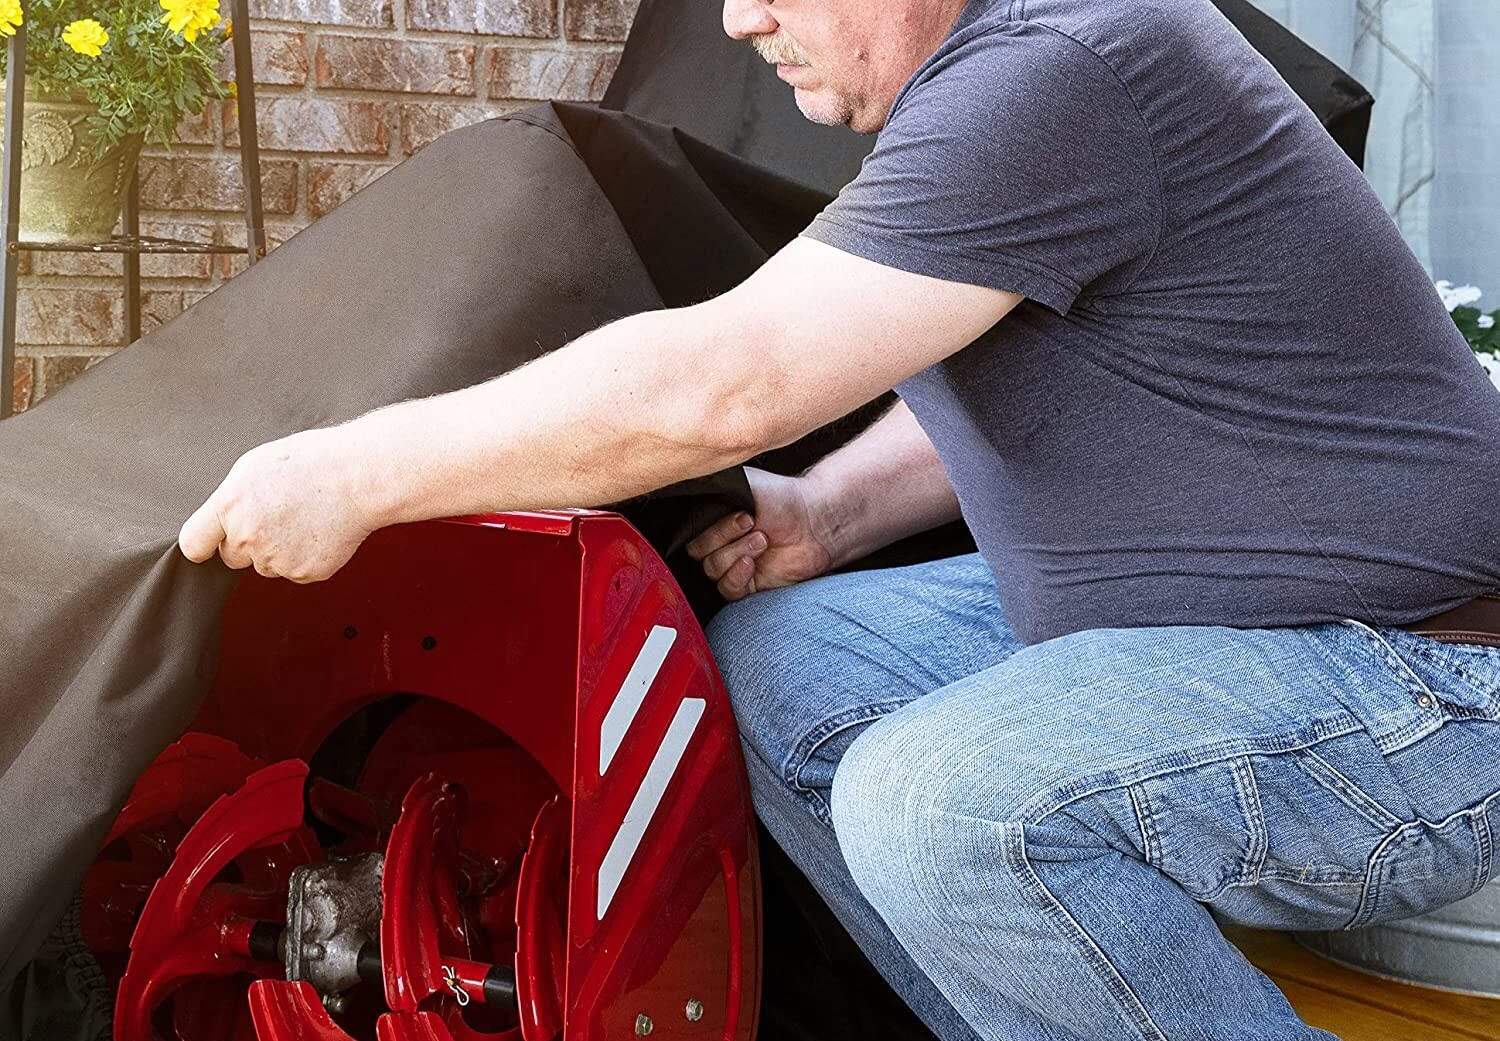
Covering the Snowblower
One of the most crucial steps in storing a snowblower outside is properly covering it to provide an additional layer of protection against the elements. Here are some tips to effectively cover your snowblower:
- Ensure a snug fit: Use a cover that fits your snowblower properly. It should be large enough to completely cover the machine but not too loose, as it may get blown away by strong winds. A snug fit will also prevent moisture from seeping in.
- Secure the cover: Use bungee cords, straps, or rope to secure the cover tightly to the snowblower. This will prevent it from being blown off during windy conditions and keep it in place.
- Pay attention to vulnerable areas: Make sure the cover adequately protects the engine, belts, control panel, and other vulnerable areas from moisture. Ensure there are no openings or loose ends where water can seep in.
- Check for ventilation: While it is essential to protect the snowblower from moisture, it is equally important to allow for proper ventilation to prevent condensation. Ensure that the cover allows air to circulate to prevent the buildup of moisture inside.
- Regularly inspect the cover: Periodically check the cover for any tears, holes, or signs of damage. Repair or replace the cover as necessary to ensure continued protection.
By properly covering your snowblower, you add an extra layer of defense against rain, snow, sunlight, and other elements that can damage the machine. It helps to extend its lifespan and ensures that it is ready for use when needed.
Read more: How To Store Soil Outside
Cleaning and Maintaining the Snowblower
Proper cleaning and maintenance of the snowblower are crucial for its performance and longevity, even when storing it outside. Follow these steps to keep your snowblower in top shape:
- Remove debris: After each use, remove any snow, ice, or debris that may have accumulated on the snowblower. Use a brush or broom to clean the chute, auger, and other parts to prevent them from freezing or clogging.
- Inspect and tighten fasteners: Regularly inspect and tighten all nuts, bolts, and fasteners on the snowblower. Vibrations during use can cause them to become loose, so tightening them ensures that the machine remains in proper working order.
- Check the oil: If your snowblower has an internal combustion engine, regularly check the oil level. Refer to the owner’s manual for the specific oil type and how to check and change it, if necessary.
- Replace spark plugs and filters: Depending on the manufacturer’s recommendations, replace the spark plugs and air filters annually or as needed. This keeps the engine running smoothly and ensures optimal performance.
- Inspect and adjust belts: Check the snowblower’s belts for signs of wear or damage. Replace any worn or damaged belts, and adjust them according to the manufacturer’s recommendations to ensure proper operation.
- Grease moving parts: Lubricate moving parts, such as the chute rotation mechanism and auger shaft, with appropriate grease. This helps reduce friction and prevents parts from seizing up during storage.
- Charge the battery (if applicable): If your snowblower has an electric start feature and a removable battery, periodically charge it. This ensures that the battery remains in good condition and ready for use when needed.
By regularly cleaning and maintaining your snowblower, you can prevent any issues that may arise during storage. This practice will make it easier to start and use the machine when the next winter season arrives.
Final Thoughts
Storing a snowblower outside requires careful consideration and proper preparation to ensure its longevity and performance. By assessing the location, preparing the snowblower, protecting it from the elements, and following a regular cleaning and maintenance routine, you can keep your snowblower in optimal condition while it is stored outside.
Remember to choose a location that offers some form of shelter, ensures proper ventilation, and is easily accessible. Prepare the snowblower by cleaning it thoroughly, inspecting for damage, changing the oil (if applicable), and emptying the fuel tank. Protect the snowblower by using a cover, elevating it off the ground, and applying rust protectant. Additionally, consider using a lockable storage box for added security.
When covering the snowblower, ensure a snug fit, secure the cover tightly, and pay attention to vulnerable areas. Regularly inspect the cover for any tears or damage and repair or replace it as needed. Finally, maintain the snowblower by cleaning debris, tightening fasteners, checking oil levels, and replacing spark plugs and filters as recommended.
By following these guidelines, you can extend the lifespan of your snowblower and ensure that it remains in good working condition for seasons to come. However, always refer to the manufacturer’s instructions and warranty information for specific storage recommendations and precautions.
Properly storing your snowblower outside not only protects your investment but also ensures that it is ready to tackle the winter weather when needed. By taking the time to assess the location, prepare and protect the snowblower, and perform regular maintenance, you can enjoy the convenience and efficiency of your snowblower year after year.
Frequently Asked Questions about How To Store A Snowblower Outside
Was this page helpful?
At Storables.com, we guarantee accurate and reliable information. Our content, validated by Expert Board Contributors, is crafted following stringent Editorial Policies. We're committed to providing you with well-researched, expert-backed insights for all your informational needs.

0 thoughts on “How To Store A Snowblower Outside”