Articles
How To Store Children’S Artwork
Modified: January 19, 2024
Learn effective ways to store and preserve children's artwork with these helpful articles. Find solutions for organizing and protecting your little one's creative masterpieces.
(Many of the links in this article redirect to a specific reviewed product. Your purchase of these products through affiliate links helps to generate commission for Storables.com, at no extra cost. Learn more)
Introduction
Welcome to the wonderful world of children’s artwork! As parents and guardians, we are often amazed at the creativity, imagination, and talent displayed by our little Picassos. From finger-painting masterpieces to colorful drawings and crafts, every piece of artwork holds a special place in our hearts.
However, as the collection of artwork grows, we may find ourselves facing a daunting challenge – how to store and preserve these precious creations for the long term. In this article, we will explore the importance of storing children’s artwork and provide you with practical tips and strategies to ensure their safekeeping.
Children’s artwork is more than just piles of papers cluttering up our homes. It holds immense sentimental value, capturing a snapshot of our child’s development, self-expression, and artistic journey. It’s a tangible symbol of their growth, creativity, and the milestones they achieve along the way. Moreover, as they grow older, these cherished pieces can serve as a beautiful reminder of their early artistic endeavors.
Properly storing children’s artwork not only preserves its beauty and sentimental worth but also instills in children a sense of pride and appreciation for their own creativity. When they see their artwork being treated with care and displayed or stored in a designated area, it validates their efforts, boosting their self-esteem.
Beyond the sentimental value, there may also be practical reasons for storing children’s artwork. It can serve as a documentation of their artistic progress, providing insight into their evolving skills and interests. Additionally, preserving their artwork allows for the possibility of showcasing it in school projects, competitions, or even future exhibitions.
As you embark on the journey of storing children’s artwork, keep in mind that your approach will largely depend on personal preferences, available space, and the amount of artwork you have accumulated. This article aims to provide you with a variety of options and strategies so that you can tailor your storage system to best suit your needs.
In the following sections, we will discuss the importance of setting up a designated storage area, selecting the right storage materials, sorting and organizing artwork, preserving and maintaining the artwork, displaying and showcasing the artwork, exploring digital storage and backup options, creating a sentimental keepsake portfolio, and finally, donating or repurposing artwork when the time comes. Let’s dive in and discover how to properly store and cherish children’s artwork!
Key Takeaways:
- Cherish and preserve children’s artwork by setting up a designated storage area, using acid-free materials, and involving kids in the organization process. Create a sentimental keepsake portfolio to honor their artistic journey.
- Embrace digital storage options to protect and share children’s artwork. Consider donating or repurposing pieces to spread joy and inspire others while preserving a select few as cherished keepsakes.
Read more: How To Store Children’s Books Long Term
Why it’s important to store children’s artwork
Children’s artwork is a treasure trove of creativity and self-expression. It captures precious moments, showcases their imagination, and documents their artistic journey. But why is it important to store and preserve these masterpieces? Let’s explore some compelling reasons:
1. Preservation of memories: Children’s artwork is a tangible representation of their growth and development. Each piece tells a unique story, reflecting their emotions, experiences, and milestones. By properly storing and preserving their artwork, you can create a lasting memory of their childhood that can be cherished for years to come.
2. Boosting self-esteem: When children see their artwork being stored and displayed with care, it validates their artistic efforts and boosts their self-esteem. It sends a powerful message that their creativity is valuable and worthy of recognition.
3. Encouraging creativity: Storing children’s artwork in a designated space encourages them to continue exploring their artistic talents. It creates a sense of pride and accomplishment, motivating them to engage in further creative endeavors.
4. Documenting artistic progress: By organizing and storing artwork over time, you can track the progress of your child’s artistic skills and interests. It allows you to witness their development, from simple doodles to more complex compositions. This documentation can be a valuable piece of their artistic journey.
5. Showcasing achievements: Storing children’s artwork provides the opportunity to showcase their talent in various ways. Whether it’s displaying their art in a gallery wall at home, entering pieces into school competitions, or using their artwork for creative school projects, storing their artwork facilitates the recognition and celebration of their achievements.
6. Creating a sense of heritage: Children’s artwork is a part of their personal history. By preserving and storing their artwork, you contribute to their sense of heritage and create a connection to their past. It’s a beautiful way to honor their creativity and provide a link to their childhood memories.
7. Promoting environmental consciousness: In a world increasingly focused on sustainability, storing children’s artwork can contribute to reducing waste. By preserving and protecting their pieces, you avoid the need to discard them, ensuring that they have a lasting presence in your family’s story.
8. Building family bonds: Collaborating on the organization and storage of children’s artwork can be a fun and engaging family activity. It provides an opportunity to reminisce about past creations, discuss favorite pieces, and create a shared appreciation for art within the family.
As you can see, storing children’s artwork is about more than just keeping their creations safe. It’s about preserving memories, nurturing their creativity, and creating a sense of pride and accomplishment. So go ahead and find the best way to store and preserve their artwork – your child’s artistic legacy awaits!
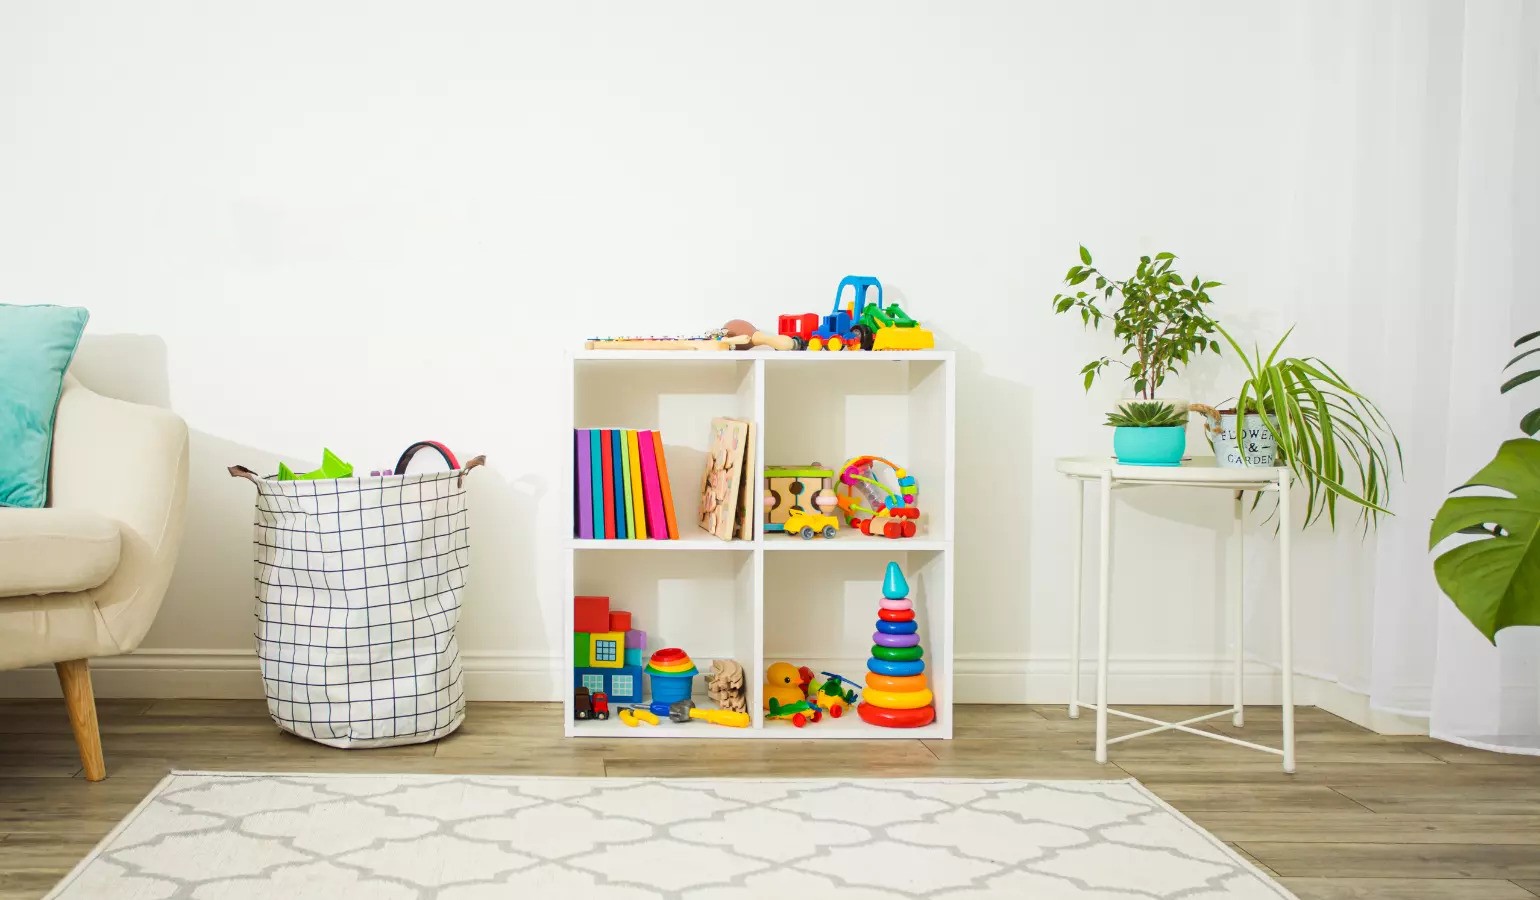
Setting up a designated storage area
When it comes to storing children’s artwork, having a designated storage area is essential. A dedicated space not only helps keep the artwork organized but also ensures its safekeeping. Here are some tips on how to set up an effective storage area:
1. Choose a suitable location: Select a location in your home that is easily accessible and free from excessive moisture, direct sunlight, and extreme temperature fluctuations. Consider a space like a closet, a spare room, or a corner of your child’s bedroom.
2. Prepare the space: Clear out any clutter and make sure the area is clean and well-lit. If needed, install shelves or storage units to maximize the use of vertical space.
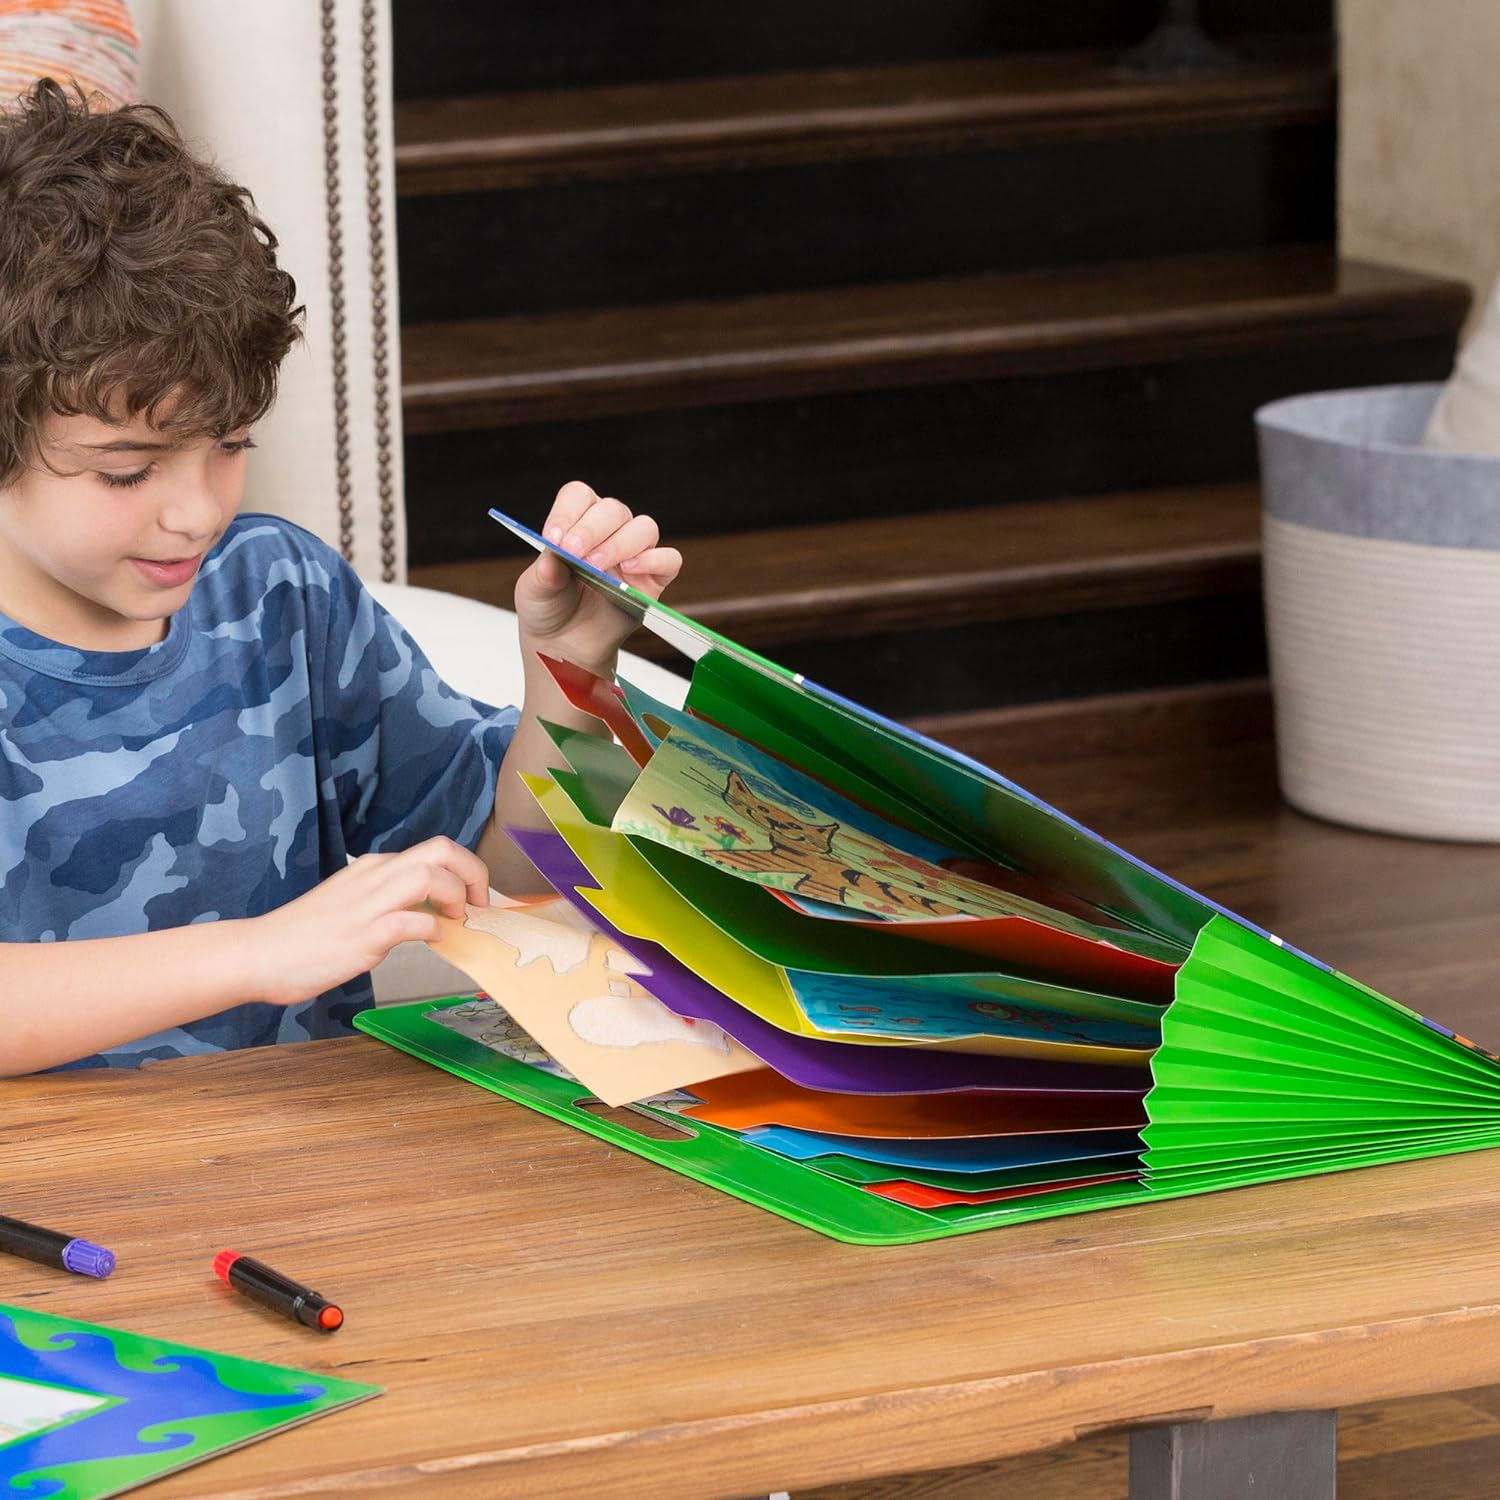
3. Determine the storage method: Decide on the type of storage method that works best for you and your child’s artwork. Some options include folders, portfolios, binders, boxes, or even hanging racks for larger pieces. Consider the size, quantity, and fragility of the artwork when choosing your storage solution.
4. Use acid-free materials: Acid-free materials are essential for preventing deterioration and damage to the artwork. Invest in acid-free folders, portfolio sleeves, and archival boxes to protect the pieces from yellowing, fading, and other forms of degradation over time.
5. Label and categorize: Create a labeling system to categorize the artwork. You can use labels, dividers, or colored folders to differentiate between different themes, ages, or types of artwork. This will make it easier to locate specific pieces when you want to revisit or showcase them.
6. Involve your child: Encourage your child to take part in setting up the storage area. Let them choose their favorite pieces to display or have a say in organizing their artwork. This involvement will make them feel a sense of ownership and pride in their artistic creations.
7. Regularly review and rotate: Children create art at an astonishing rate, so it’s important to review the artwork periodically. Determine which pieces hold the most significance or resonate with your child, and consider rotating them in and out of the display area. This allows you to keep the storage area organized and prevents it from becoming overwhelmed with too much artwork.
8. Consider digital storage: If you have limited physical storage space or want to create a backup of the artwork, consider digitizing it. Take high-quality photographs or scan the artwork and store the digital files on your computer or in cloud storage. This ensures that even if the physical artwork is damaged, you still have a record of it.
Remember, the goal is to create a dedicated space where your child’s artwork can be stored safely, while also allowing for easy access and organization. By following these tips, you can establish a designated storage area that preserves the artwork and allows you to appreciate your child’s creativity for years to come.
Choosing the right art storage materials
When it comes to storing children’s artwork, selecting the right art storage materials is crucial for preserving its quality and longevity. Here are some considerations to keep in mind when choosing the appropriate storage materials:
1. Acid-free folders and sleeves: Acid-free folders and archival sleeves are essential for protecting artwork from deterioration caused by acids present in regular paper products. These acid-free materials prevent yellowing, discoloration, and the breakdown of the artwork over time.
2. Sturdy portfolios: Portfolios with rigid covers provide extra protection to delicate artwork. Look for portfolios made from acid-free and lignin-free materials, as these prevent the transfer of harmful chemicals to the artwork.
3. Archival boxes: Archival storage boxes are designed to protect artwork from dust, light, and environmental pollutants. These acid-free boxes provide a safe and secure storage solution, especially for three-dimensional or bulky artwork.
4. Portfolio binders: Portfolio binders with interchangeable acid-free sleeves allow you to easily add and remove artwork while keeping it protected. Look for binders with rings that won’t damage the artwork, and opt for archival sleeves to ensure maximum preservation.
5. Acid-free tissue paper: Use acid-free tissue paper to layer between artwork pieces, especially if they are stacked for storage. This tissue paper acts as a protective barrier, preventing any potential smudging or scratching between the artwork.
6. Mounting materials: If you choose to display the artwork, opt for acid-free mounting materials such as mounting corners or acid-free tape. Avoid using adhesives like glue or regular tape, as they can damage the artwork over time.
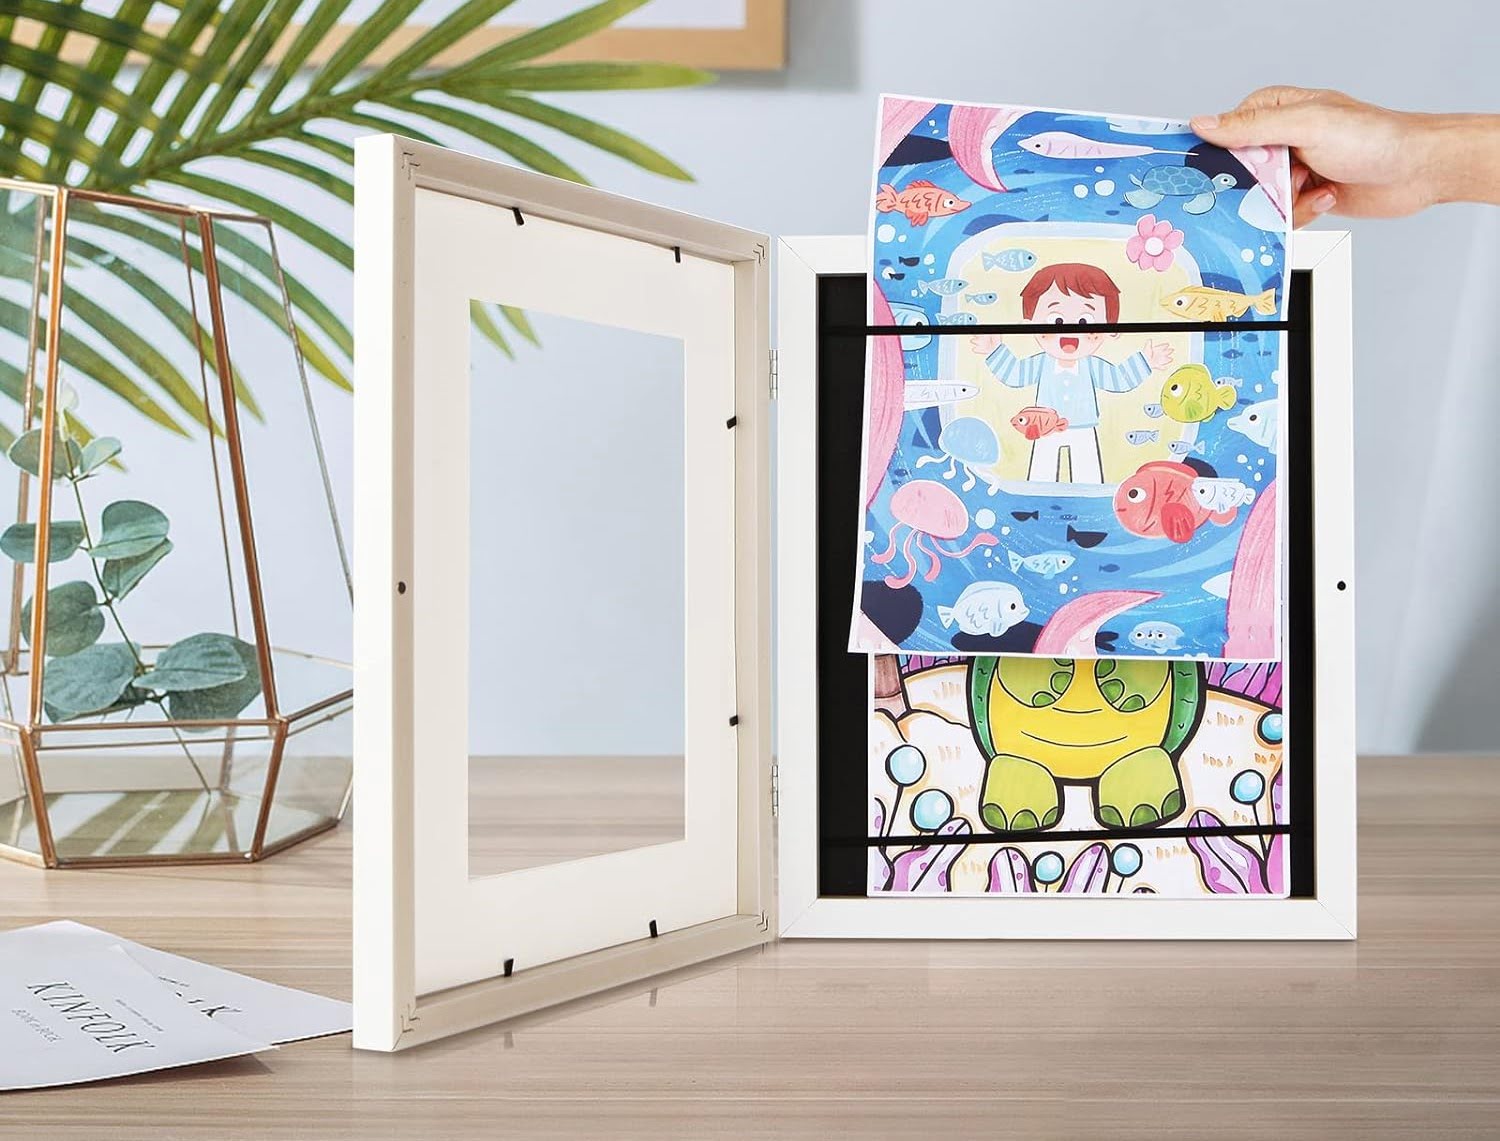
7. Glass or acrylic frames: When framing artwork, consider using UV-protected glass or acrylic to shield the artwork from harmful light and reduce fading. Make sure the frame is the appropriate size and depth to accommodate the artwork and any additional matting or mounting.
8. Labeling materials: Use acid-free labels or tags to identify artwork with relevant information such as date, title, or the name of the artist. This makes it easier to organize and locate specific pieces when needed.
Remember, the primary goal is to protect the artwork from any potential damage or deterioration. Opting for acid-free and archival-grade materials ensures that the storage materials themselves do not contribute to the degradation of the artwork over time.
By investing in the right art storage materials, you can rest assured that your child’s artwork will be well-preserved and ready to be cherished for years to come.
Sorting and organizing artwork
As your collection of children’s artwork grows, it’s important to have a system in place for sorting and organizing the pieces. This not only helps you keep track of their artistic progress but also makes it easier to locate specific pieces when you want to revisit or showcase them. Here are some tips for sorting and organizing artwork:
1. Date-based organization: Sort the artwork by date to create a chronological record of your child’s creative journey. This allows you to see their progress and development over time. You can use labeled folders, envelopes, or sleeves with the date clearly marked on each piece of artwork.
2. Theme-based organization: If your child frequently creates artwork around specific themes, consider organizing the pieces accordingly. For example, you can have separate folders or portfolios for nature-inspired artwork, animal-themed creations, or holiday-related pieces. This makes it easier to revisit specific themes or find suitable artwork for specific occasions.
3. Age-based organization: Group the artwork based on your child’s age when they created it. This allows you to see how their artistic skills and style have evolved over the years. You can also create subcategories within each age group based on themes or specific projects.
4. Size-based organization: If your child creates artwork of varying sizes, consider organizing them by size. You can store smaller pieces in folders or envelopes and larger pieces in portfolios or boxes. This ensures that the artwork remains protected and reduces the risk of damage or creasing.
5. Digital organization: If you choose to digitize your child’s artwork, create a digital filing system on your computer or cloud storage. You can use folders and subfolders to organize the art based on themes, dates, or ages. Don’t forget to include high-quality digital photographs or scans of each artwork piece for easy reference.
6. Display area organization: If you have a designated display area for your child’s artwork, consider rotating the pieces periodically to keep it fresh and organized. Regularly update and curate the display with their latest creations or their most meaningful or cherished artwork.
7. Involve your child: Encourage your child to participate in the sorting and organizing process. Let them have a say in how their artwork is categorized and displayed. This involvement not only fosters their sense of ownership but also teaches them valuable organizational skills.
8. Maintain a catalog or inventory: Consider keeping a catalog or inventory of your child’s artwork. It can be a simple spreadsheet or a digital document that includes details such as the date, title, medium, and any special memories or stories associated with each piece. This helps you keep track of the artwork, especially if you have a large collection.
Remember, the purpose of sorting and organizing artwork is to ensure that it remains easily accessible, well-protected, and a joy to revisit. By implementing a system that works for you and your child, you can appreciate their creativity while keeping everything in order.
Read more: How To Store Artwork
Properly preserving and maintaining artwork
Properly preserving and maintaining children’s artwork is crucial for its long-term protection and enjoyment. By implementing a few simple practices, you can ensure that the artwork remains in excellent condition for years to come. Here are some important tips for preserving and maintaining children’s artwork:
1. Handle artwork with care: Always handle artwork with clean hands to avoid transferring dirt, oil, or moisture onto the pieces. Hold the artwork by the edges or use gloves if necessary, especially for delicate or valuable artwork.
2. Store artwork in a controlled environment: Keep the storage area for artwork free from excessive moisture, direct sunlight, and extreme temperature fluctuations. These environmental conditions can cause damage such as fading, yellowing, and deterioration of the artwork. Aim for a cool, dry, and dark storage space.
3. Protect artwork from light: If you choose to display artwork, be cautious about placing it in direct sunlight or under harsh artificial lighting. Prolonged exposure to light can cause fading and damage the pigments. Use UV-protected glass or acrylic frames to reduce the impact of UV rays.
4. Avoid displaying artwork in humid areas: High levels of humidity can lead to mold, mildew, and warping of the artwork. Avoid displaying or storing artwork in areas like basements, bathrooms, or damp attics. Consider using dehumidifiers or humidity control packs in the storage area to maintain optimal humidity levels.
5. Regularly clean the storage area: Keep the storage area clean and free from dust, as accumulated dust can damage the artwork over time. Regularly dust the shelves, boxes, or frames holding the artwork using a soft, lint-free cloth or a gentle duster.
6. Use proper framing techniques: If you choose to frame artwork, make sure to use acid-free mat boards and mounting materials. Ensure that the artwork is mounted securely and that the frame provides adequate protection. Avoid using tapes or adhesives directly on the artwork, as they can cause irreversible damage.
7. Monitor and address damage promptly: Regularly inspect your child’s artwork for any signs of damage, such as tears, rips, or discoloration. Address any damage promptly by seeking professional assistance. Do not attempt to repair the artwork yourself, as improper techniques can cause further harm.
8. Preserve the artwork digitally: Consider digitizing your child’s artwork as an additional preservation method. Use high-resolution photography or scanning to create digital copies. Store the digital files on your computer or in cloud storage, ensuring backup and easy access to the artwork even if the physical copies are damaged.
9. Preserve documentation and context: Keep any accompanying documentation, such as titles, dates, and descriptions of the artwork. This information adds value and context to the artwork and helps preserve the story behind each piece.
By following these preservation and maintenance tips, you can ensure that your child’s artwork is protected and preserved for future enjoyment. Remember, each piece of artwork holds special memories and is a testament to your child’s creativity, imagination, and growth.
Consider using large portfolio folders or bins to store children’s artwork. Label each piece with the child’s name and date to easily track their progress. This will keep the artwork organized and protected.
Displaying and showcasing artwork
Displaying and showcasing your child’s artwork is a wonderful way to celebrate their creativity and provide them with a sense of pride and accomplishment. Whether you choose to showcase their artwork at home, in school settings, or in other public spaces, here are some tips to help you display and showcase children’s artwork in a memorable and impactful way:
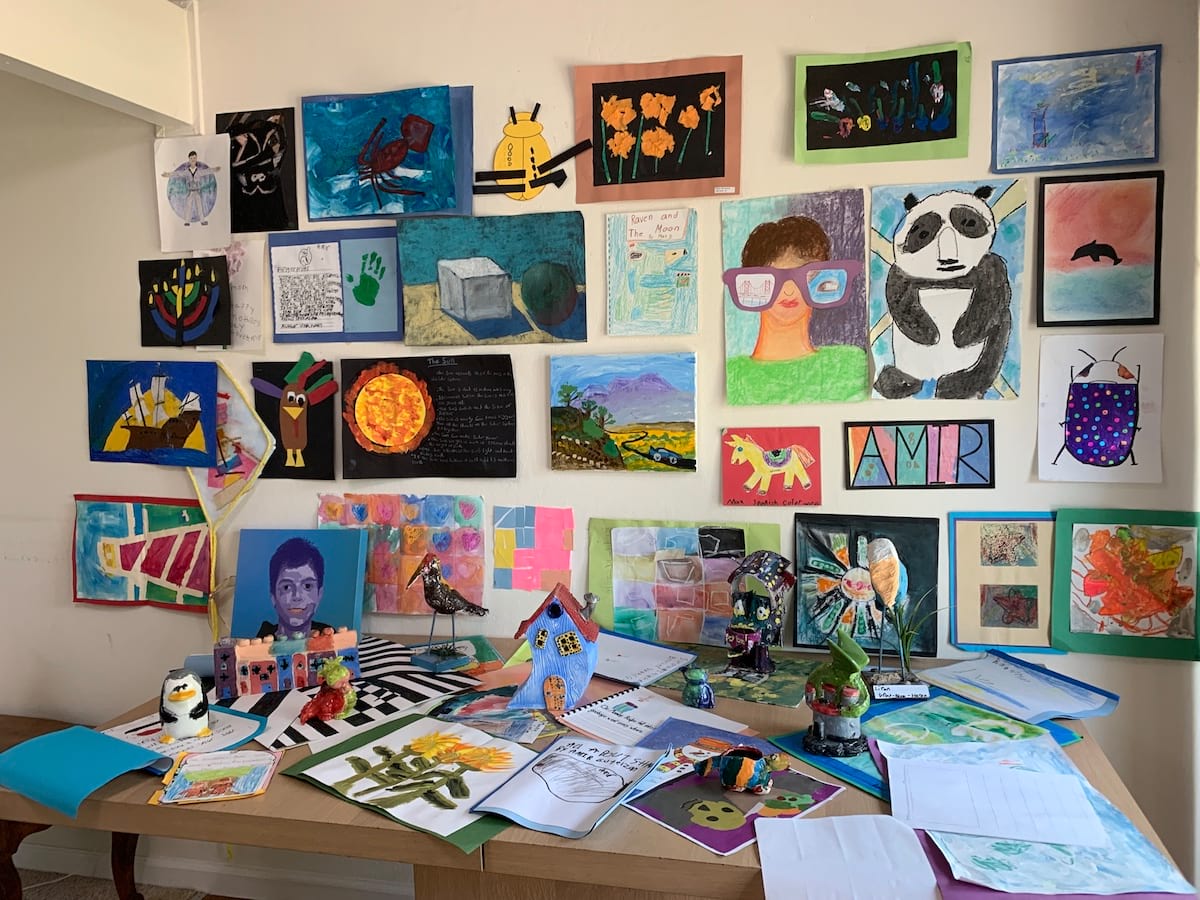
1. Create a gallery wall: Dedicate a wall in your home to create a gallery of your child’s artwork. Display a curated selection of their best and most meaningful pieces. Consider using frames of different sizes and styles to add visual interest and variety to the display.
2. Use clipboards or hanging rails: Clipboards or hanging rails are a versatile and easy way to display children’s artwork. Simply attach the artwork to the clipboards or hang them from rails with hooks. This allows you to easily rotate and replace the pieces as new artwork is created.
3. Utilize a clothesline or wire system: Install a clothesline or wire system where you can hang artwork with mini clothespins or clips. This creates a playful and interactive display that can be easily modified to showcase new artwork or different themes.
4. Display in dedicated frames or shadow boxes: Select a few standout pieces of your child’s artwork and display them in dedicated frames or shadow boxes. This creates a more formal and permanent display that can be showcased prominently in your home.
5. Create an art corner or area: Designate a specific area in your home as an art corner. Set up a small table or easel, along with art supplies, where your child can create and display their artwork. This encourages ongoing creativity and provides a dedicated space for their artistic endeavors.
6. Share artwork digitally: Use technology to showcase your child’s artwork digitally. Take high-quality photographs or scan their artwork and create an online gallery or social media platform to share with friends and family. This allows for widespread appreciation and recognition of your child’s talent.
7. Organize art exhibitions or showcases: Collaborate with your child’s school or community organizations to organize art exhibitions or showcases where children’s artwork can be displayed and celebrated. This provides a platform for your child to proudly exhibit their artwork to a wider audience.
8. Rotate and refresh the display: As your child continues to create new artwork, regularly rotate and refresh the display. This ensures that their recent creations receive recognition and allows you to showcase a variety of themes and styles over time.
9. Encourage interaction and feedback: Invite family members and friends to visit your child’s art display and encourage them to provide feedback and praise. This boosts your child’s confidence and fosters a sense of appreciation for their artistic achievements.
10. Celebrate special occasions with art: Use your child’s artwork to add a personal touch to special occasions and events. Display their artwork as decorations for birthdays, holidays, or family gatherings. This not only showcases their talent but also adds a unique and sentimental element to the celebrations.
Remember, displaying and showcasing children’s artwork not only honors and celebrates their creativity but also provides them with a sense of accomplishment and pride. By incorporating some of these ideas, you can create a visually appealing and meaningful display that highlights the beauty of your child’s artistic journey.
Digital storage and backup options
In the digital age, storing and backing up children’s artwork digitally provides an additional layer of preservation and accessibility. By leveraging technology, you can ensure that your child’s creations are protected from physical damage and easily accessible for future enjoyment. Here are some digital storage and backup options to consider:
1. High-quality digital photographs: Take high-resolution photographs of your child’s artwork using a digital camera or smartphone. Make sure the lighting is appropriate and that the entire artwork is captured within the frame. This allows you to create a digital archive of the artwork that can be easily accessed and shared.
2. Scanning: Use a scanner to create high-quality digital scans of your child’s artwork. Scanning provides excellent clarity and detail, allowing you to capture the nuances of colors, textures, and brushstrokes. Save the scanned files in a high-resolution format such as JPEG or TIFF for optimal quality.
3. Cloud storage: Store the digital files of your child’s artwork in cloud storage platforms such as Google Drive, Dropbox, or Microsoft OneDrive. Cloud storage provides a secure and convenient way to store and access the files from any device with an internet connection. It also serves as a backup in case of device malfunctions or loss.
4. External hard drives or USB drives: Save copies of the digital files onto external hard drives or USB drives. These physical devices serve as an offline backup and allow you to keep the artwork files stored locally. Make sure to periodically update the backups to include new artwork.
5. Digital galleries and portfolios: Create a digital gallery or portfolio to showcase your child’s artwork online. Platforms like Behance, Instagram, or personal websites allow you to curate and share the artwork with a wider audience. This enables your child to receive recognition and feedback for their creations.
6. Online art platforms: Consider uploading your child’s artwork to specialized online art platforms for children. These platforms are designed to showcase and promote children’s artwork, providing an opportunity for your child to connect with other young artists and receive feedback from a supportive community.
7. Digital scrapbooks or albums: Create digital scrapbooks or albums using photo editing software or online platforms. Arrange the digital images of the artwork along with captions, dates, and descriptions to create a multimedia presentation of your child’s artistic journey. This provides a visually appealing way to document and chronicle their progress.
8. Organized file naming and labeling: Maintain a systematic approach when saving the digital files of your child’s artwork. Use descriptive file names and folders to easily locate specific pieces. Include relevant details such as the date, title, medium, and any special notes or memories associated with each artwork.
When utilizing digital storage and backup options, it is important to maintain multiple copies of your child’s artwork files in different locations and formats. This ensures redundancy and safeguards against any potential data loss or corruption.
By embracing digital storage and backup options, you can not only protect your child’s artwork from physical damage but also ensure its long-term preservation and easy accessibility. It provides a convenient way to revisit, share, and celebrate your child’s artistic creations for years to come.
Creating a sentimental keepsake portfolio
A sentimental keepsake portfolio is a meaningful and cherished way to preserve and showcase your child’s artwork in a single, organized collection. By creating a dedicated portfolio, you can select and curate the most significant and memorable pieces, creating a tangible keepsake that captures the essence of your child’s artistic journey. Here are some steps to create a sentimental keepsake portfolio:
1. Select the artwork: Begin by carefully selecting the artwork that holds the most sentimental value to you and your child. Choose a mix of their favorite pieces, milestone creations, or those that represent significant moments or themes in their artistic journey.
2. Choose a portfolio: Select a portfolio that suits your preference and the size of the artwork. Consider a portfolio with acid-free and lignin-free sleeves or pockets to ensure the artwork is well-protected. Choose a design and material that resonates with the sentimental aspect of the collection.
3. Organize the artwork: Arrange the artwork in a specific order that tells a narrative or reflects your child’s artistic progression. You can organize it chronologically, by theme, or any other meaningful arrangement that best captures the story behind the pieces.
4. Add context and personalization: Enhance the sentimental value of the portfolio by adding context and personalization to each piece of artwork. Include labels, captions, or notes that provide details about the artwork, such as the date it was created, its significance, or any special memories associated with it.
5. Include special mementos: To further enhance the sentimental aspect, consider including special mementos related to the artwork. This can be photographs of your child creating the artwork, their handwritten notes or artist statements, or any other items that provide deeper insight into their artistic journey.
6. Decorate and customize: Add a personal touch to the portfolio by decorating and customizing it. Use markers, stickers, or even your child’s own artwork to create unique designs on the portfolio cover or dividers. This adds an extra layer of personalization and reflects your child’s individual style and creativity.
7. Regularly update the portfolio: As your child continues to create new artwork, periodically update the portfolio to include their latest creations. This ensures that the portfolio remains a living, evolving document of their artistic growth and journey.
8. Preserve and protect: Store the portfolio in a cool, dry place away from direct sunlight and excessive moisture. Make sure the artwork is secure and does not get damaged or bent when storing the portfolio. Consider using acid-free and lignin-free storage boxes or sleeves for additional protection.
9. Share and celebrate: Share the sentimental keepsake portfolio with family and friends. Allow others to appreciate and celebrate your child’s artistic talent and the sentimental value behind each piece. This creates an opportunity for your child to receive affirmation and recognition for their creativity and hard work.
A sentimental keepsake portfolio is not only a beautiful and tangible tribute to your child’s artwork, but it also holds immense sentimental value for your family. It creates a lasting memory of their artistic journey and preserves a treasured collection of their creative expressions.
By following these steps, you can create a heartfelt and cherished keepsake that beautifully captures the essence of your child’s artistic growth and accomplishments.
Read more: How To Store Artwork
Donating or repurposing artwork
As your child’s artwork collection continues to grow, you may eventually find that it’s time to consider donating or repurposing some of the pieces. Donating or repurposing artwork allows you to give new life to the creations while also sharing their beauty with others. Here are some options for donating or repurposing children’s artwork:
1. Donate to schools or community organizations: Consider donating your child’s artwork to local schools, community centers, or art programs. Artwork can brighten up classrooms, hallways, or community spaces, providing inspiration and creative energy to others. Contact schools or organizations to inquire about their acceptance of artwork donations.
2. Gift to family and friends: Share the joy of your child’s artwork with family and friends by gifting them a piece. This allows you to spread happiness, celebrate your child’s creativity, and create meaningful connections through art. Consider choosing artwork that holds a special significance for the recipient.
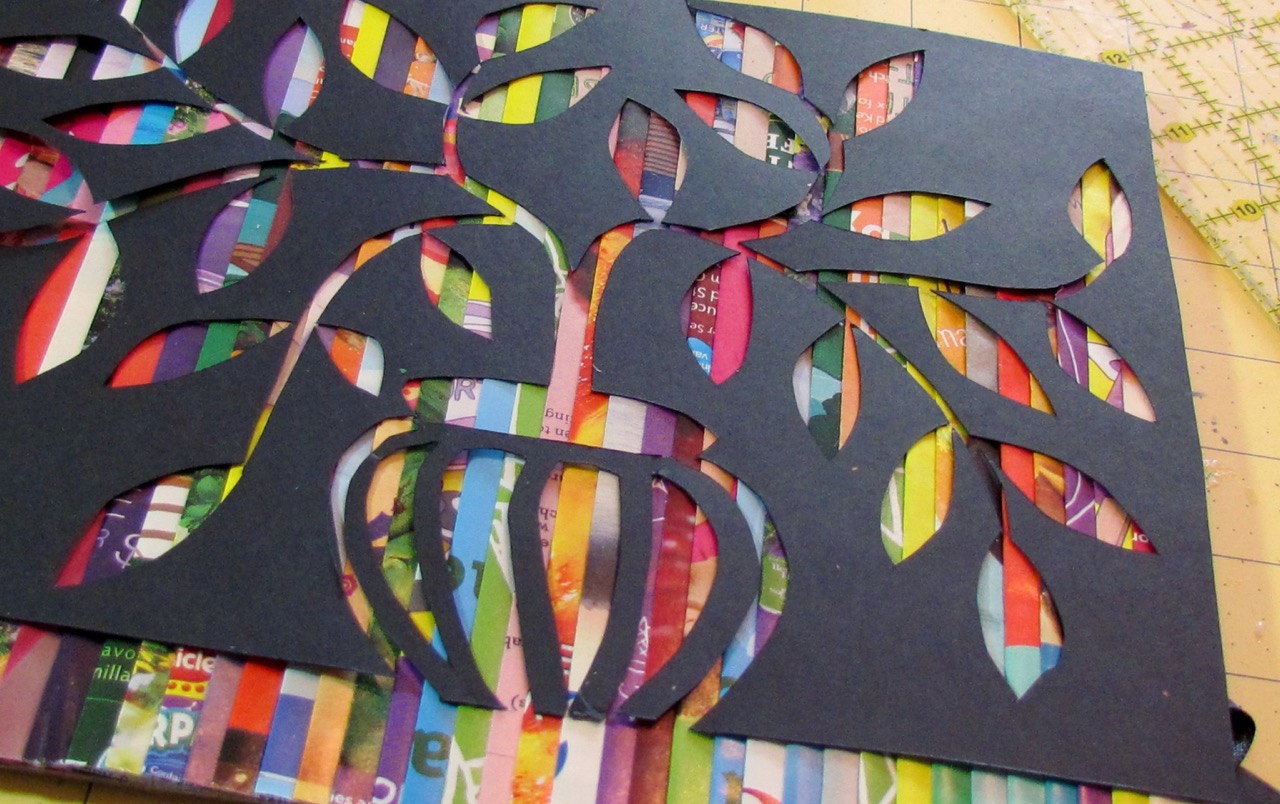
3. Create personalized greeting cards or stationery: Repurpose smaller artwork into personalized greeting cards or stationery. Cut out select portions of the artwork and adhere them to blank cards or stationery. This creates unique, one-of-a-kind pieces that can be used for special occasions or everyday correspondence.
4. Transform into home decor: Repurpose larger artwork into home decor items, such as framed pieces, wall hangings, or even decoupage projects. Use sections of the artwork to create decorative elements for lampshades, trays, or decorative boxes. This way, you can enjoy the beauty of the artwork in a new form.
5. Create a collage or mosaic: Combine smaller pieces of artwork to create a collage or mosaic. Cut or tear the artwork into various shapes and arrange them on a canvas, wooden board, or other surfaces to form a visually striking composition. This unique artwork can be displayed as a beautiful centerpiece in your home.
6. Participate in art-related fundraisers: Explore local art-related fundraisers and events where children’s artwork is featured. These events could be auctions, exhibitions, or charity events. By participating, you not only contribute to a good cause but also give your child’s artwork wider exposure and an opportunity to be appreciated by a larger audience.
7. Create a digital portfolio or online gallery: Digitize your child’s artwork and create a digital portfolio or online gallery to showcase their creations. Share the artwork with a wider audience through social media, personal websites, or online art platforms. This allows others to enjoy and appreciate the artwork while preserving it for future reference.
8. Keep a select few as sentimental keepsakes: While donating or repurposing artwork is valuable, make sure to keep a select few pieces as sentimental keepsakes. These cherished pieces hold personal and emotional significance and can be treasured for years to come. Store them in a dedicated keepsake portfolio or display them prominently in your home.
Whether you choose to donate or repurpose your child’s artwork, the goal is to give new life and purpose to these creations. By sharing their artwork with others, you not only bring joy and inspiration to different spaces, but you also encourage your child’s creativity and allow their talent to make a positive impact on the world.
Remember, as you consider donating or repurposing artwork, involve your child in the decision-making process. Discuss the options together, explaining the importance and impact of sharing their artwork with others. This fosters a sense of generosity and empathy in your child as they learn the value of giving back through their artistic creations.
Conclusion
Storing, preserving, and showcasing your child’s artwork is a journey that holds immense value and significance. It’s about more than just organizing and preserving physical pieces—it’s a celebration of their creativity, growth, and self-expression. By implementing the tips and strategies outlined in this article, you can create a loving and supportive environment for your child’s artistic journey, while also ensuring that their creations are properly stored, protected, and appreciated for years to come.
From setting up a designated storage area to choosing the right storage materials, sorting and organizing artwork, properly preserving and maintaining it, and even considering digital storage options, there are numerous methods you can employ to effectively care for your child’s artwork collection. Additionally, displaying and showcasing their creations, creating a sentimental keepsake portfolio, and exploring options for donating or repurposing artwork can bring a new level of joy and meaning to their artistic efforts.
Remember, involve your child in the process. Let them have a say in how their artwork is stored, displayed, or repurposed. This not only fosters their sense of ownership and pride in their creations, but it also encourages their ongoing creativity and self-expression.
As you embark on this journey, keep in mind that preserving and celebrating your child’s artwork is about cherishing the memories, milestones, and joy that each piece represents. Whether it’s through physical storage, digital preservation, or sharing with others, the ultimate goal is to ensure that these beautiful creations are passed down as treasured keepsakes and a lasting legacy of your child’s artistic journey.
So, take the time to appreciate and honor your child’s artwork—it is a testament to their unique perspective and creative abilities. Create an environment that values their creativity, encourages their artistic growth, and allows their talent to shine. Together, you can create a treasure trove of memories and a vibrant tapestry of artistic expression that will be cherished for a lifetime.
Frequently Asked Questions about How To Store Children'S Artwork
Was this page helpful?
At Storables.com, we guarantee accurate and reliable information. Our content, validated by Expert Board Contributors, is crafted following stringent Editorial Policies. We're committed to providing you with well-researched, expert-backed insights for all your informational needs.

0 thoughts on “How To Store Children’S Artwork”