
Articles
How To Store Cooked Oatmeal
Modified: August 16, 2024
Learn the best methods for storing cooked oatmeal to keep it fresh and delicious. Check out our articles for helpful tips on how to store oatmeal properly.
(Many of the links in this article redirect to a specific reviewed product. Your purchase of these products through affiliate links helps to generate commission for Storables.com, at no extra cost. Learn more)
Introduction
Storing cooked oatmeal is a convenient and practical way to have a nutritious and delicious breakfast option ready to enjoy throughout the week. Whether you have a busy schedule or simply want to save time in the morning, having pre-cooked oatmeal on hand can be a game-changer. Not only does it save you from having to prepare a fresh batch every day, but it also allows you to experiment with different flavors and toppings to keep your breakfast interesting.
In this article, we will explore the benefits of storing cooked oatmeal, discuss the various storage options available, and provide tips for properly reheating your stored oatmeal. By the end, you’ll have all the information you need to make the most of this convenient breakfast hack.
Key Takeaways:
- Conveniently store cooked oatmeal for a week, saving time and ensuring a nutritious breakfast. Experiment with flavors and toppings to keep breakfast interesting.
- Choose the right container and method to store oatmeal in the fridge or freezer. Reheat properly for a delicious, hassle-free breakfast every day.
Read more: How To Store Oatmeal Cookies
Why Store Cooked Oatmeal?
There are several reasons why storing cooked oatmeal can be a game-changer in your breakfast routine.
- Time-saving: By cooking a big batch of oatmeal and storing it, you eliminate the need to prepare breakfast from scratch every day. This can be especially beneficial for those with busy schedules or tight morning routines.
- Consistency and convenience: Storing cooked oatmeal ensures that you have a consistent and reliable breakfast option available whenever you need it. It eliminates the need to rely on instant oatmeal packets or processed breakfast options.
- Cost-effective: Buying oatmeal in bulk and cooking it yourself is often more cost-effective compared to purchasing pre-packaged oatmeal cups or breakfast options.
- Customization: When you store cooked oatmeal, you have the flexibility to customize it according to your preferences. You can add your favorite flavors, fruits, nuts, and sweeteners to make each bowl of oatmeal unique and enjoyable.
- Nutritional benefits: Oatmeal is packed with fiber, vitamins, and minerals, making it a nutritious breakfast choice. By storing cooked oatmeal, you’re more likely to incorporate this healthy option into your diet regularly.
Now that you understand the benefits of storing cooked oatmeal, let’s dive into the different options for containers and methods of storage.
Choosing the Right Container
When it comes to storing cooked oatmeal, choosing the right container is essential to maintain freshness and prevent spoilage. Here are a few factors to consider when selecting a container:
- Airtightness: Opt for containers that have airtight seals to keep your oatmeal fresh and prevent any unwanted odors from seeping into the oats.
- Size: Consider the amount of oatmeal you plan to store and choose containers that are appropriately sized. It’s better to have containers that can hold individual servings to avoid any waste or the need to thaw and reheat a large batch at once.
- Freezer-safe: If you plan to store oatmeal in the freezer, ensure that your containers are freezer-safe to prevent any damage due to rapid temperature changes.
- Microwave-safe: If you intend to reheat your oatmeal directly in the container, make sure the containers are microwave-safe to avoid any accidents or damage.
- Dishwasher-safe: Look for containers that are dishwasher-safe to make the cleaning process quick and convenient.
There are various container options available, such as glass jars, BPA-free plastic containers, or even silicone freezer bags. Choose the option that best fits your needs and preferences. Additionally, consider labeling your containers with the date of preparation to keep track of freshness and ensure you consume them within a reasonable timeframe.
Now that you have the right container, let’s move on to the different methods of storing oatmeal in both the refrigerator and the freezer.
Storing Cooked Oatmeal in the Refrigerator
If you plan to consume your cooked oatmeal within the next few days, storing it in the refrigerator is the most convenient option. Follow these steps to store your oatmeal properly:
- Allow the cooked oatmeal to cool down to room temperature before transferring it to a container. This helps prevent condensation and the formation of ice crystals.
- Select an airtight container that is suitable for refrigeration. Glass jars with lids, BPA-free plastic containers, or even reusable silicone bags are all good options.
- Divide the oatmeal into individual serving portions or store it as a larger batch, depending on your preference. Remember to leave some headspace in the container to accommodate any expansion.
- Seal the container tightly and place it in the refrigerator. Make sure to label the container with the date of preparation for easy reference.
Properly stored cooked oatmeal can last in the refrigerator for 3-5 days. When you’re ready to enjoy a serving, simply take out the desired portion and heat it in the microwave or on the stovetop. You can add a splash of milk or water to adjust the consistency, and feel free to dress it up with your favorite toppings like fruits, nuts, or a drizzle of honey.
Storing oatmeal in the refrigerator is ideal when you want your breakfast to be readily available for a few days. If you want to store it for a longer period or prepare a larger batch, freezing is the way to go. Let’s explore the process of storing cooked oatmeal in the freezer next.
Storing Cooked Oatmeal in the Freezer
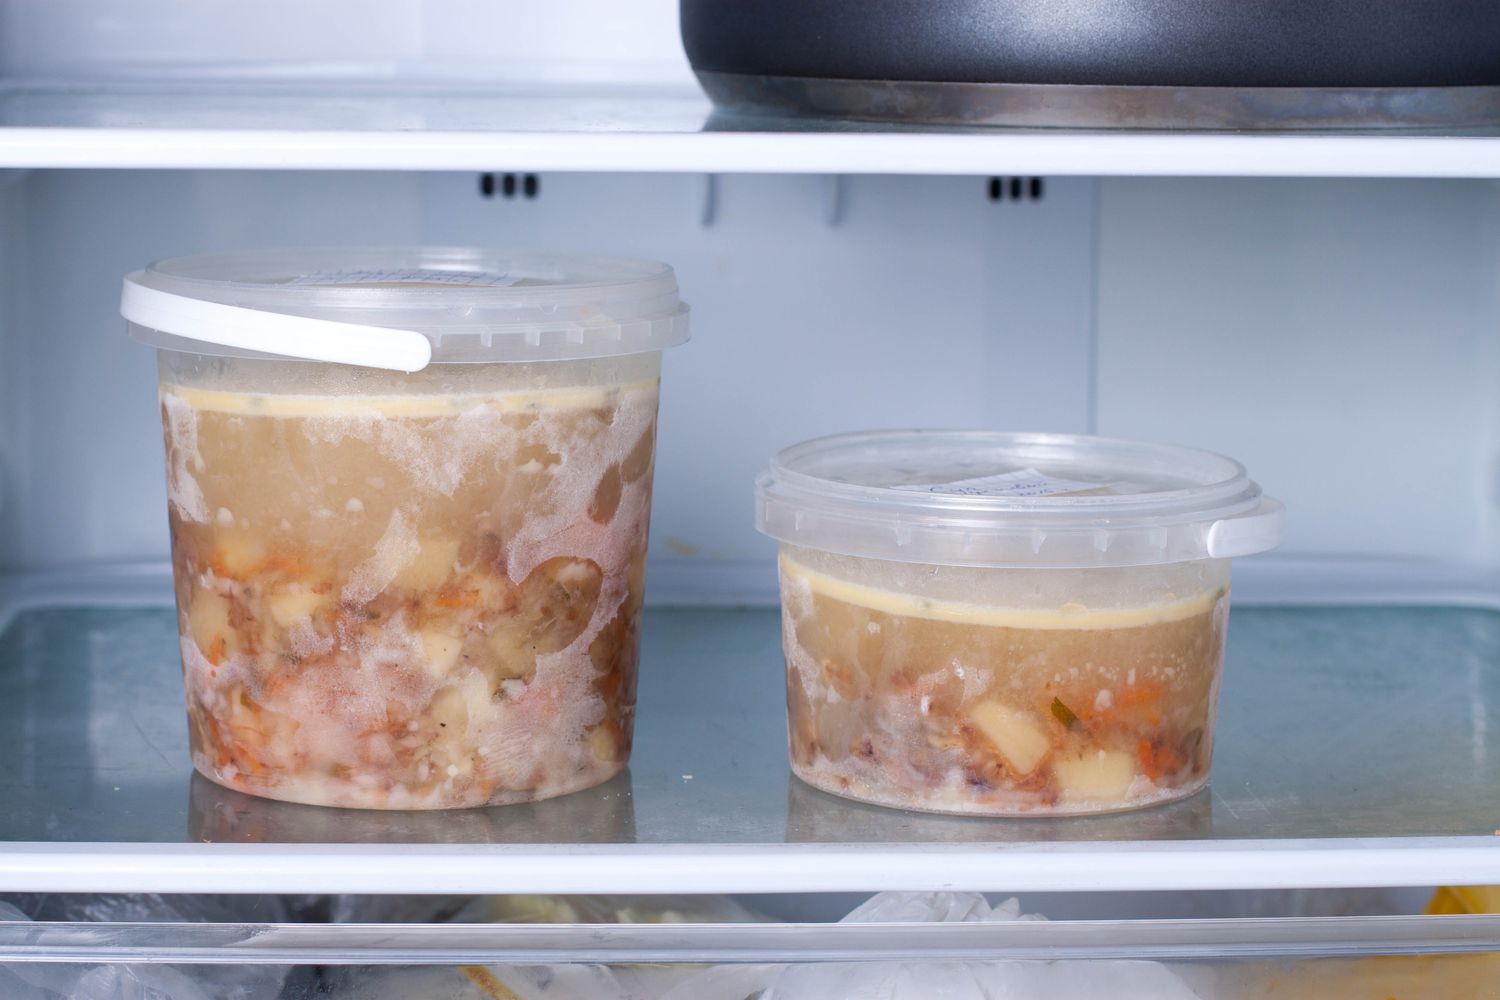
If you want to store cooked oatmeal for an extended period or prepare a larger batch, freezing is an excellent option. Follow these steps to freeze your oatmeal:
- Allow the cooked oatmeal to cool down to room temperature before transferring it to a freezer-safe container. This helps prevent condensation and ice crystals from forming.
- Choose a container that is suitable for freezing, such as freezer-safe glass containers, plastic containers, or silicone freezer bags. Make sure the container has an airtight seal to preserve freshness.
- Divide the oatmeal into individual servings or store it as a larger batch, depending on your preference. Leave some headspace in the container to allow for expansion during freezing.
- Seal the container tightly and label it with the date of preparation.
- Place the containers in the freezer, making sure they are placed flat to allow for easy stacking and to save space.
Frozen oatmeal can typically be stored for up to 3 months without compromising texture or taste. When you’re ready to enjoy a serving, simply remove the desired portion from the freezer and thaw it in the refrigerator overnight. Alternatively, you can reheat it directly from frozen by microwaving it in short intervals, stirring in between, until it reaches your desired temperature.
Once the oatmeal is thawed or heated, you can add your favorite toppings, such as fresh berries, nuts, or a drizzle of maple syrup, to enhance the flavor and texture.
Now that you know the process of storing oatmeal in both the refrigerator and the freezer, let’s explore how to properly reheat your stored oatmeal.
Read more: How To Make Oatmeal In Rice Cooker
Reheating Stored Oatmeal
When it’s time to enjoy your stored oatmeal, proper reheating is key to maintaining its flavor and texture. Here are a few methods to consider:
1. Microwave:
- Transfer the desired portion of oatmeal to a microwave-safe bowl.
- Add a splash of milk or water to help loosen the consistency if needed.
- Cover the bowl with a microwave-safe lid or microwave-safe plastic wrap, leaving a small vent to allow steam to escape.
- Heat the oatmeal in the microwave on medium power for about 1 minute. Stir well.
- Continue microwaving in 30-second intervals, stirring in between, until the oatmeal is heated to your desired temperature.
2. Stovetop:
- Transfer the desired portion of oatmeal to a saucepan.
- Add a splash of milk or water to help loosen the consistency if needed.
- Heat the oatmeal over low to medium heat, stirring constantly to prevent sticking.
- Continue heating and stirring until the oatmeal is heated through.
3. Oven:
- Preheat your oven to 350°F (175°C).
- Transfer the desired portion of oatmeal to an oven-safe dish.
- Add a splash of milk or water to help loosen the consistency if needed.
- Cover the dish with foil to prevent drying out.
- Bake the oatmeal for about 15-20 minutes, or until heated through.
No matter which method you choose, be sure to stir the oatmeal well after reheating to distribute the heat evenly and ensure a consistent texture.
Now that you know how to reheat your stored oatmeal, let’s explore some tips to help you maximize the freshness and quality of your stored oatmeal.
Tips for Storing Cooked Oatmeal
To make the most out of your stored oatmeal and ensure its freshness and quality, consider these helpful tips:
1. Portion Control:
Divide your cooked oatmeal into individual serving portions before storing. This way, you can easily thaw and heat up only the amount you need, reducing waste and ensuring each serving remains fresh.
2. Label and Date:
Always label your containers with the date of preparation. This helps you keep track of how long the oatmeal has been stored and ensures you consume it within a reasonable timeframe.
3. Use Freezer-Safe Containers:
If you plan to store oatmeal in the freezer, make sure to use freezer-safe containers or bags. This prevents freezer burn and helps maintain the quality of the oatmeal for a longer period.
Read more: How To Make Oatmeal In Slow Cooker
4. Quick Thawing:
If you need to thaw frozen oatmeal quickly, you can use the defrost setting of your microwave. Be sure to monitor it closely to prevent overheating and stir occasionally to ensure even thawing.
5. Add Fresh Toppings:
While reheating your oatmeal, consider adding fresh toppings like sliced fruits, nuts, or a drizzle of honey. This will enhance the flavor and add some texture to your dish.
6. Experiment with Flavor Combinations:
Don’t be afraid to get creative with flavors. Try incorporating different spices, extracts, or even nut butter into your oatmeal before storing. This way, you can have a variety of flavored options to choose from throughout the week.
7. Avoid Overheating:
When reheating oatmeal, avoid overheating it as it can lead to a mushy texture. Heat it in short intervals and stir in between to evenly distribute the heat.
Read more: How To Get Oatmeal Out Of Bathtub
8. Store in Small Batches:
Instead of storing a large batch of oatmeal, consider storing it in smaller individual servings. This makes it easier to thaw and heat only what you need, preventing any unnecessary waste.
By following these tips, you can ensure that your stored oatmeal remains flavorful and enjoyable for an extended period.
With all these helpful guidelines, you are now equipped with the knowledge to store and enjoy your cooked oatmeal conveniently. So, go ahead and give it a try, and enjoy a delicious and nutritious breakfast every day!
Conclusion
Storing cooked oatmeal is a fantastic way to save time and ensure you always have a nutritious and delicious breakfast option on hand. Whether you store it in the refrigerator for a few days or freeze it for longer-term storage, proper storage techniques are essential to maintain its freshness and flavor.
By choosing the right containers, such as airtight and freezer-safe options, you can keep your oatmeal at its best. Additionally, reheating your stored oatmeal properly ensures that it retains its texture and taste. Whether you prefer using the microwave, stovetop, or oven, follow the recommended methods to enjoy a steaming bowl of oatmeal.
Remember to experiment with different flavors and toppings to keep your breakfast interesting. From fresh fruits to nuts, honey to spices, the possibilities are endless when it comes to customizing your oatmeal to suit your taste.
Finally, incorporating these tips like portion control, labeling containers, and quick thawing techniques will elevate your oatmeal storage game and help you enjoy your breakfast hassle-free.
So, whether you’re a busy professional, a student on the go, or simply seeking a convenient breakfast option, storing cooked oatmeal is a game-changer. With a little planning and preparation, you can have a satisfying and nutritious breakfast ready to fuel your day.
Don’t hesitate to give this method a try and discover the convenience and versatility of stored cooked oatmeal. From saving time to enjoying a customizable breakfast option, you’ll appreciate the benefits it brings to your morning routine. So, stock up on your favorite oats, prepare a batch of oatmeal, and start enjoying the convenience and deliciousness of stored cooked oatmeal today!
Frequently Asked Questions about How To Store Cooked Oatmeal
Was this page helpful?
At Storables.com, we guarantee accurate and reliable information. Our content, validated by Expert Board Contributors, is crafted following stringent Editorial Policies. We're committed to providing you with well-researched, expert-backed insights for all your informational needs.






0 thoughts on “How To Store Cooked Oatmeal”