Home>Articles>How To Make Oatmeal In Electric Pressure Cooker
Articles
How To Make Oatmeal In Electric Pressure Cooker
Modified: April 22, 2024
Learn how to make oatmeal in an electric pressure cooker with this helpful article. Discover step-by-step instructions and tips for the perfect breakfast dish.
(Many of the links in this article redirect to a specific reviewed product. Your purchase of these products through affiliate links helps to generate commission for Storables.com, at no extra cost. Learn more)
Introduction
Welcome to the world of electric pressure cookers and the convenience they bring to our lives. If you’re a fan of oatmeal, you’re in luck! In this article, we’ll show you how to make delicious, fluffy oatmeal using an electric pressure cooker. This kitchen appliance is a game-changer when it comes to whipping up a quick and healthy breakfast.
Electric pressure cookers have gained immense popularity in recent years due to their ability to cook food faster than traditional stove-top methods. The pressurized environment created inside the cooker allows for quicker cooking times and more flavorsome results. In the case of oatmeal, the pressure cooker helps to soften the oats, resulting in a creamy and perfectly cooked bowl of goodness.
Whether you’re a busy professional, a student on the go, or simply someone who loves a warm and comforting breakfast, making oatmeal in an electric pressure cooker is a time-saving and stress-free option. No more standing over a boiling pot of water, stirring constantly to prevent sticking. The pressure cooker takes care of all the hard work for you.
In this article, we’ll guide you through the step-by-step process of making oatmeal in an electric pressure cooker. We’ll provide tips on choosing the right type of oats, measuring and adding the ingredients, setting the cooking time and pressure level, and serving the finished oatmeal. By the end, you’ll be armed with all the knowledge you need to become a master of pressure cooker oatmeal.
So, grab your electric pressure cooker and let’s dive into the world of oatmeal-making. Get ready to enjoy a warm and comforting bowl of deliciousness without any hassle!
Key Takeaways:
- Making oatmeal in an electric pressure cooker offers time-saving benefits, consistent results, nutrient retention, and the freedom from constant stirring. It’s a versatile and convenient way to enjoy a warm and comforting breakfast without the hassle.
- Choosing the right oats, measuring and adding the ingredients, setting the cooking time and pressure level, and serving the finished oatmeal are essential steps in mastering the art of making oatmeal in an electric pressure cooker. Experimenting with different variations and toppings can elevate the oatmeal-making experience to suit individual preferences.
Read more: How To Make Oatmeal In Slow Cooker
Benefits of Using an Electric Pressure Cooker for Making Oatmeal
When it comes to making oatmeal, using an electric pressure cooker offers several advantages over traditional cooking methods. Here are some of the benefits:
- Time-saving: One of the biggest advantages of using an electric pressure cooker to make oatmeal is the time-saving aspect. With traditional stovetop cooking, oatmeal can take up to 15-20 minutes to cook. However, with an electric pressure cooker, the cooking time can be reduced to just a few minutes. This is a game-changer for those busy mornings when you need a quick and healthy breakfast option.
- Consistent results: The pressure cooker creates a controlled and pressurized cooking environment, ensuring even heat distribution. This means that your oatmeal will be cooked evenly throughout, resulting in a consistent and perfectly cooked texture every time. No more undercooked or overcooked oats!
- Retains nutrients: The pressure cooking process helps to retain more nutrients in the oatmeal compared to traditional cooking methods. The sealed environment of the pressure cooker traps the steam, preventing the loss of water-soluble vitamins and minerals. This means that you can enjoy a nutrient-rich bowl of oatmeal that is both delicious and nourishing.
- No stirring required: Unlike stovetop oatmeal that requires constant stirring to prevent sticking and burning, making oatmeal in an electric pressure cooker eliminates the need for continuous monitoring. Once you’ve added the ingredients and set the cooking time, you can simply walk away and let the pressure cooker do its magic. This frees up your time to tackle other tasks or simply relax and enjoy a few extra minutes of peace.
- Versatility: Electric pressure cookers are incredibly versatile appliances. In addition to making oatmeal, you can also use them to cook a wide range of other dishes, from soups and stews to rice and risotto. This means that investing in an electric pressure cooker provides you with a multi-functional cooking tool that can simplify your kitchen routine and expand your culinary options.
With all these benefits, it’s no wonder that electric pressure cookers have become a must-have kitchen appliance for many households. Their ease of use, time-saving capabilities, and ability to deliver delicious, perfectly cooked oatmeal make them a winner in the breakfast department.
Choosing the Right Oats
When it comes to making oatmeal in an electric pressure cooker, choosing the right type of oats is essential for achieving the desired texture and flavor. Here are the different types of oats available and which ones are best suited for pressure cooker oatmeal:
- Old-Fashioned Rolled Oats: These oats are the most common variety used for making oatmeal. They are steamed and then flattened with large rollers. Old-fashioned rolled oats retain a good texture and have a slightly chewy consistency. They are perfect for pressure cooker oatmeal as they cook well and hold their shape while becoming creamy.
- Quick-Cooking Oats: Quick-cooking oats are similar to old-fashioned rolled oats but are rolled more thinly. This allows them to cook faster than traditional rolled oats. While quick-cooking oats can be used in the pressure cooker, they tend to become mushy quicker, resulting in a smoother and less textured oatmeal. If you prefer a creamier consistency, quick-cooking oats are a good option.
- Steel-Cut Oats: Steel-cut oats are whole oat groats that have been chopped into pieces but are otherwise unprocessed. They have a dense and chewy texture, and their cooking time is longer compared to rolled oats. While steel-cut oats can be cooked in an electric pressure cooker, they require a longer cooking time and may result in a thicker and heartier oatmeal.
- Instant Oats: Instant oats are pre-cooked and then dried, making them the quickest-cooking type of oats. However, they are typically already flavored and contain added sugars. They are not recommended for making oatmeal in an electric pressure cooker as they tend to turn mushy and lose their texture.
When choosing oats for pressure cooker oatmeal, it ultimately comes down to personal preference. If you enjoy a softer and smoother oatmeal, quick-cooking oats are a great choice. For those who prefer a heartier and chewier texture, steel-cut oats can be used, but keep in mind that they will require a longer cooking time.
Experiment with different types of oats to find the one that suits your taste and texture preferences. You can also mix different types of oats together to create a unique blend. Whichever type you choose, make sure to follow the recommended cooking times and measurements to achieve the best results.
Ingredients Needed
Now that you have an electric pressure cooker and have chosen the right type of oats for your oatmeal, it’s time to gather the necessary ingredients. Here’s what you’ll need:
- Oats: Depending on your preference, choose either old-fashioned rolled oats or quick-cooking oats. You’ll need around 1 cup of oats for a single serving.
- Liquid: The liquid is essential for cooking the oats and achieving the desired consistency. You can use water, milk (dairy or plant-based), or a combination of both. For a creamy and indulgent oatmeal, using milk or a milk-water combination is recommended. Plan on using around 1.5-2 cups of liquid per cup of oats.
- Sweeteners: If you like your oatmeal on the sweeter side, you can add sweeteners such as honey, maple syrup, brown sugar, or granulated sugar. The amount of sweetener will vary based on your taste preferences. Start with 1-2 tablespoons and adjust accordingly.
- Flavorings: Enhance the taste of your oatmeal with flavorings such as vanilla extract, cinnamon, nutmeg, or any other spices and extracts that you enjoy. These additions can elevate the overall flavor profile of your oatmeal.
- Toppings: Customize your oatmeal with a variety of toppings. Some popular options include fresh or dried fruits, nuts, seeds, coconut flakes, chocolate chips, or a drizzle of nut butter. Get creative and experiment with different combinations to add texture and flavor to your oatmeal.
These basic ingredients serve as a foundation for your oatmeal. Feel free to personalize your recipe by adding extras like chia seeds, protein powder, or even a scoop of your favorite flavored yogurt. The beauty of making oatmeal in an electric pressure cooker is that you have the flexibility to make it just the way you like it.
Once you have gathered all the ingredients, you’re ready to move on to the step-by-step process of making oatmeal in your electric pressure cooker. Get your taste buds ready for a hot and satisfying breakfast that will keep you fueled and energized throughout the day!
Step 1: Preparing the Electric Pressure Cooker
Before you can start making oatmeal in your electric pressure cooker, it’s important to prepare the cooker properly. Follow these steps to ensure a safe and successful cooking experience:
- Clean the pressure cooker: Make sure your pressure cooker is clean and free from any residue or food particles. Refer to the manufacturer’s instructions on how to properly clean your specific model.
- Inspect the sealing ring: Check the sealing ring (also known as the rubber gasket) to ensure it’s in good condition. It should be flexible, without any tears or cracks. If necessary, replace the sealing ring to ensure a proper seal during cooking.
- Check the pressure release valve: The pressure release valve is a crucial component of the pressure cooker. Ensure it moves freely and is not clogged or obstructed. This valve helps to regulate the pressure inside the cooker during the cooking process.
- Add liquid to the cooker: Depending on the recipe and desired consistency, add the appropriate amount of liquid (water, milk, or a combination) to the pressure cooker. This will create the necessary steam to cook the oatmeal.
- Place the inner pot: Insert the inner pot into the electric pressure cooker. The pot should be clean and securely positioned in the cooker.
- Close and secure the lid: Close the lid of the pressure cooker and ensure it is locked securely in place. Different pressure cookers have different locking mechanisms, so refer to your specific model’s instructions for proper closure.
- Check the pressure release valve position: Depending on the type of oatmeal you’re making, you may need to set the pressure release valve to either the sealing or venting position. Refer to your pressure cooker’s manual to understand the appropriate position for cooking oatmeal.
By properly preparing your electric pressure cooker, you ensure a safe and efficient cooking process. Take the time to clean and inspect the various components, add the necessary liquid, and securely close the lid. These essential steps set the foundation for successfully making oatmeal in your pressure cooker.
Once you have prepared your pressure cooker, it’s time to move on to the next step: measuring and adding the ingredients. Get ready to create a delicious bowl of oatmeal that will warm both your heart and your taste buds!
Step 2: Measuring and Adding the Ingredients
Now that your electric pressure cooker is prepared, it’s time to measure and add the ingredients for your oatmeal. Follow these simple steps:
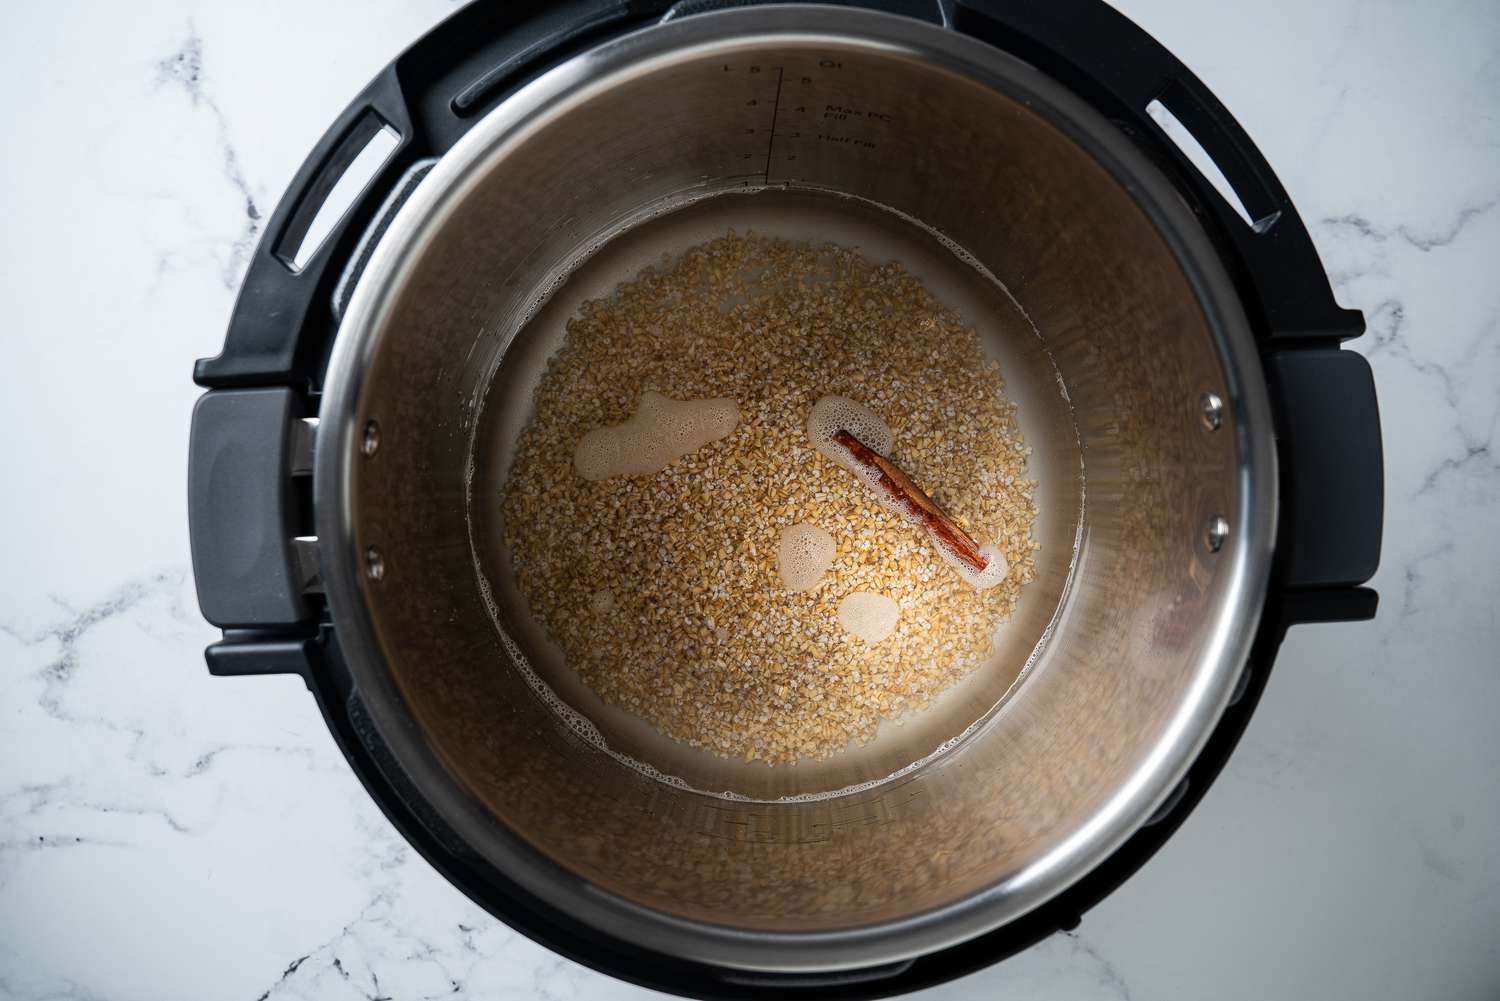
- Measure the oats: Depending on your desired serving size, measure out your oats using a measuring cup. For a single serving, 1 cup of oats is typically sufficient. Adjust the quantity as needed for more servings.
- Add the liquid: Pour the desired liquid (water, milk, or a combination) into the inner pot of the pressure cooker. The ideal liquid-to-oat ratio is around 1.5-2 cups of liquid per cup of oats. Adjust the amount to achieve your desired consistency.
- Add sweeteners and flavorings: If you prefer your oatmeal sweetened, add your desired sweeteners such as honey, maple syrup, or sugar directly into the pot. Start with 1-2 tablespoons and adjust to taste. Additionally, add any flavorings or spices such as vanilla extract, cinnamon, or nutmeg to enhance the flavor of your oatmeal.
- Stir everything together: Using a spoon or spatula, gently stir the oats, liquid, sweeteners, and flavorings in the pressure cooker until well combined. Make sure all the ingredients are evenly distributed.
Measuring and adding the ingredients correctly is crucial for achieving the perfect consistency and flavor in your oatmeal. Be mindful of the liquid-to-oat ratio to ensure the oats cook properly and absorb the flavors. Adding sweeteners and flavorings at this stage ensures they are thoroughly incorporated into the oatmeal.
Once you have mixed everything together, it’s time to move on to the next step: setting the cooking time and pressure level. Get ready to let your electric pressure cooker work its magic in creating a warm and satisfying bowl of oatmeal!
Add a splash of milk or water to the oatmeal in the electric pressure cooker to prevent it from sticking to the bottom and ensure a creamy texture.
Step 3: Setting the Cooking Time and Pressure Level
Setting the cooking time and pressure level on your electric pressure cooker is crucial to ensure that your oatmeal is cooked to perfection. Follow these steps:
- Refer to the oatmeal cooking time: Depending on the type of oats you’re using, refer to the recommended cooking time for oatmeal in your pressure cooker’s manual. This will give you a guideline for the amount of time needed to cook the oats.
- Select the appropriate cooking function: Most electric pressure cookers come with preset cooking functions, and some even have a specific function for oatmeal. If there’s an oatmeal setting available, select it. Otherwise, choose the manual or pressure cook function.
- Adjust the cooking time: Use the “+” or “-” button on your pressure cooker to adjust the cooking time based on the recommended time for oatmeal. This will ensure that the oats are cooked through but not overdone.
- Select the pressure level: Electric pressure cookers typically offer different pressure levels, such as low or high. For oatmeal, it’s recommended to use high pressure to achieve the best results. Check your pressure cooker’s manual for guidance on selecting the appropriate pressure level.
Setting the cooking time and pressure level correctly is essential for achieving the desired texture and consistency of your oatmeal. Following the recommended cooking times and using the appropriate pressure level will ensure that the oats are fully cooked and tender.
Once you have selected the cooking time and pressure level, it’s time to move on to the next step: cooking the oatmeal. Get ready to savor the delightful aroma of freshly cooked oatmeal as it fills your kitchen!
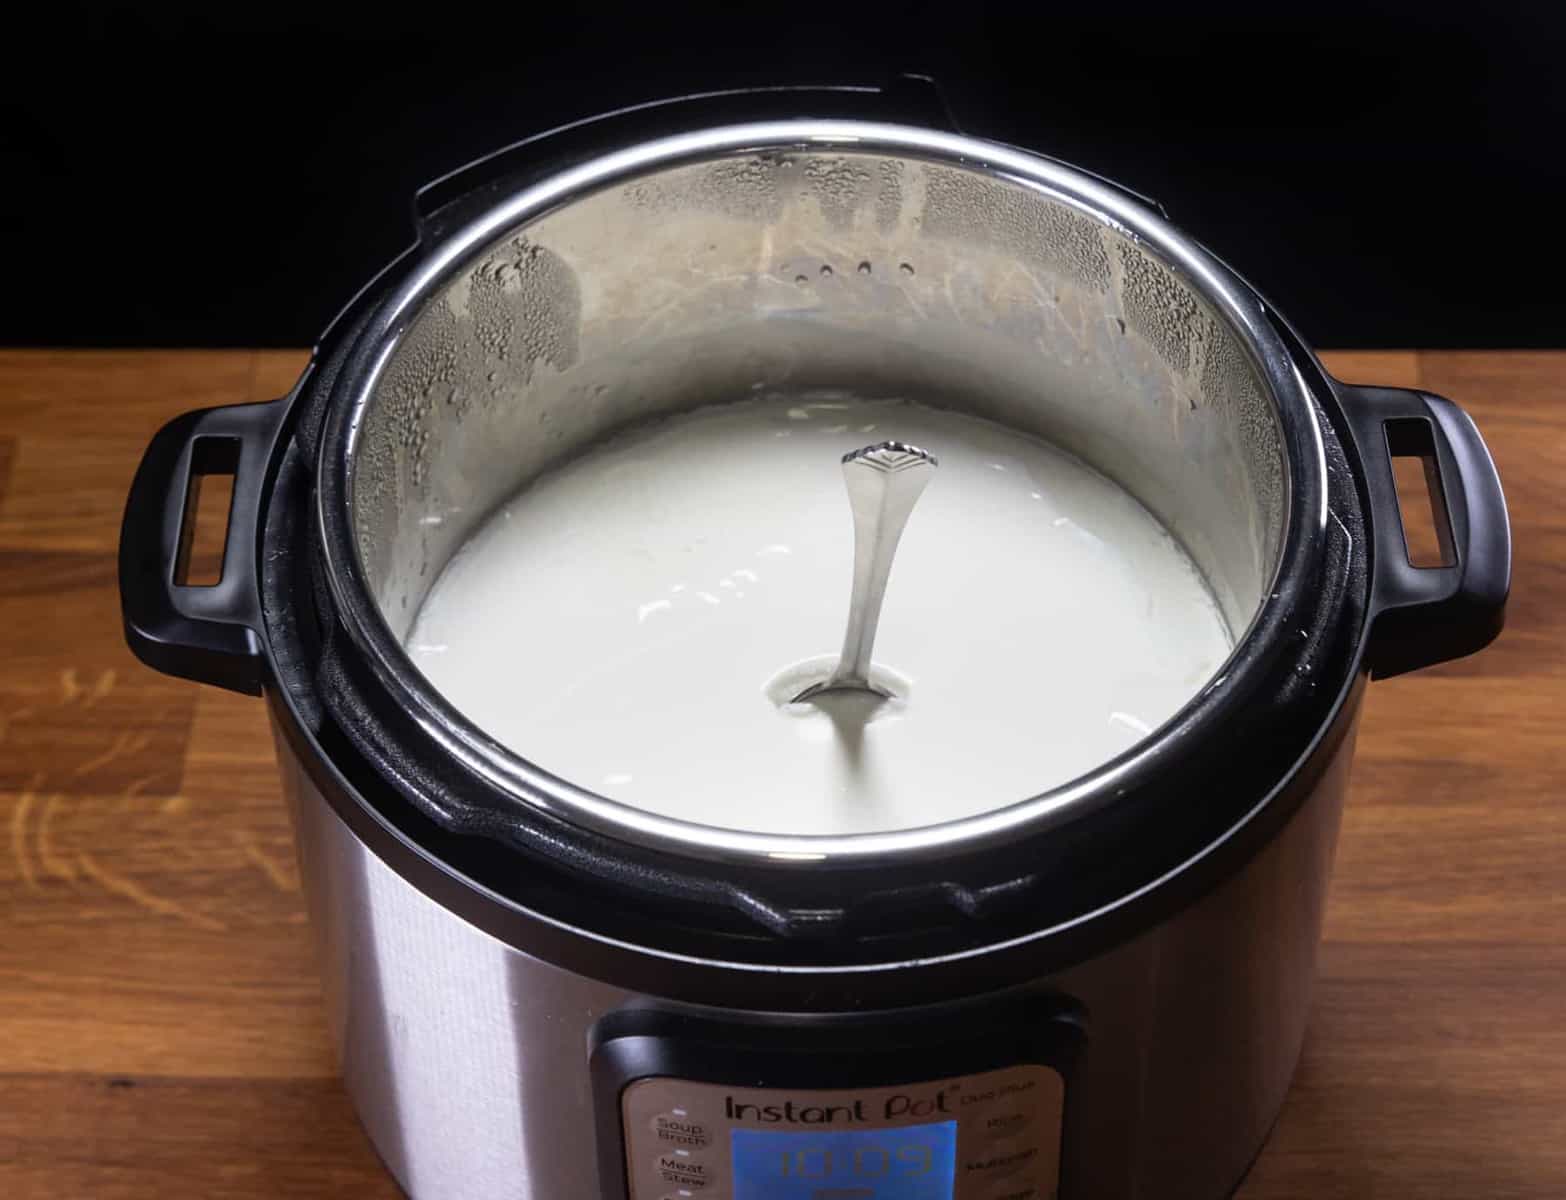
Step 4: Cooking the Oatmeal
With the settings in place, it’s time to start the cooking process and let your electric pressure cooker work its magic. Follow these steps to cook the oatmeal:
- Close and lock the lid: Ensure that the lid is securely closed and locked in place. This will create a sealed environment inside the pressure cooker, allowing the oats to cook evenly.
- Start the cooking process: Depending on your pressure cooker model, you may need to press a “Start” or “Cook” button to begin the cooking process. Once you initiate the cooking cycle, the pressure cooker will start building up pressure.
- Wait for the pressure to build: It takes some time for the pressure cooker to build up pressure. This is indicated by the pressure indicator on the cooker. Once the cooker has reached the desired pressure level, the cooking time will begin.
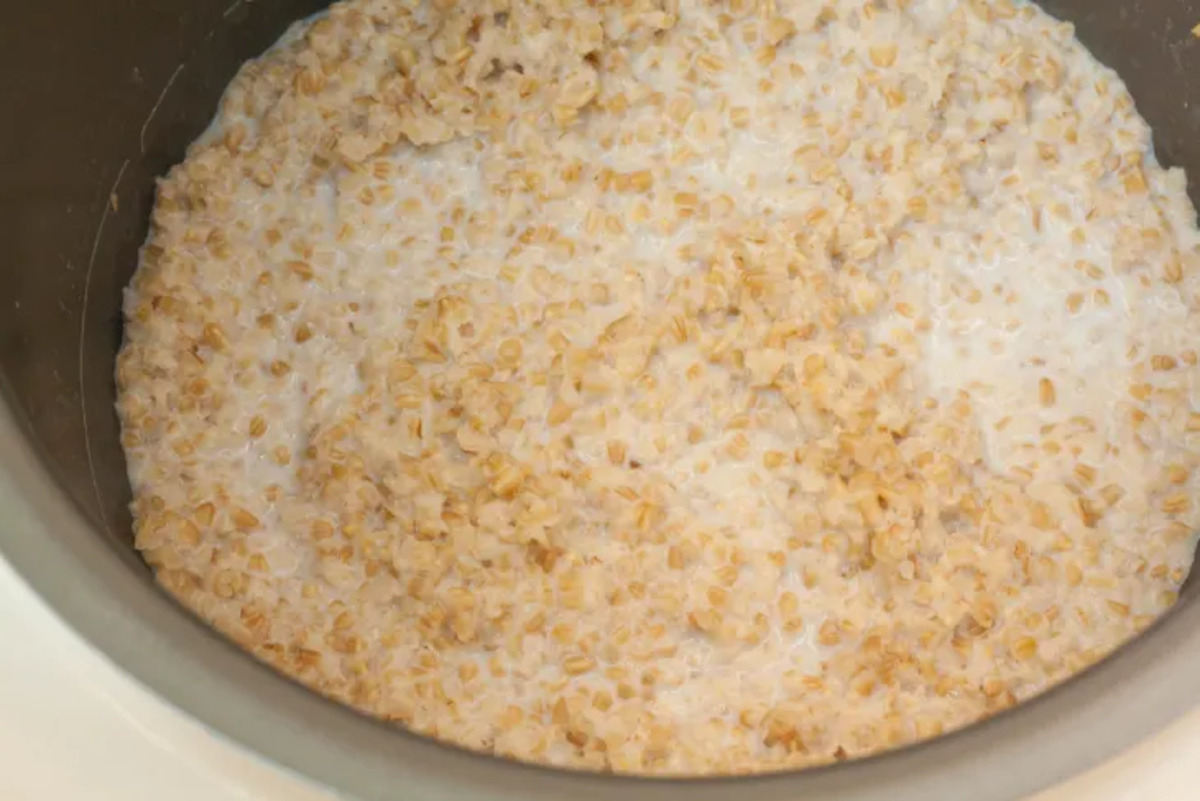
- Allow the oatmeal to cook: Let the oatmeal cook for the designated cooking time. During this time, the oats will absorb the liquid and become tender and creamy. Avoid opening the pressure cooker lid while the oatmeal is cooking, as it will release the pressure and disrupt the cooking process.
As the oatmeal cooks, the pressure cooker will build up pressure, allowing the heat and steam to work their magic on the oats. The sealed environment ensures even cooking and maximizes the flavor and texture development.
Once the cooking time is complete, it’s time to move on to the next step: releasing the pressure and opening the cooker. Get ready to unveil the delicious oatmeal that awaits within!
Step 5: Releasing the Pressure and Opening the Cooker
After the oatmeal has finished cooking, it’s important to release the pressure from the electric pressure cooker before opening it. Follow these steps to safely release the pressure and open the cooker:
- Natural Pressure Release (NPR): One method of releasing the pressure is to allow it to naturally release on its own. In this method, you simply let the pressure cooker sit for a specified amount of time until the pressure subsides. Consult your pressure cooker’s manual for the recommended time for a natural pressure release for oatmeal.
- Quick Pressure Release (QPR): If you’re in a hurry, you can use the quick pressure release method. To do this, carefully move the pressure release valve to the venting position, allowing the steam to be released rapidly. Ensure you follow the instructions in your pressure cooker’s manual to avoid any accidents or burns.
- Open the cooker: Once the pressure has been fully released, it’s safe to open the pressure cooker. Unlock and remove the lid, being cautious of any remaining steam. Open the lid away from you to prevent any steam from coming into contact with your face or hands.
Releasing the pressure is an important step to ensure your safety and prevent any accidents. The natural pressure release allows the oatmeal to continue cooking gently, while the quick pressure release method provides a faster way to open the cooker.
Once you’ve released the pressure and opened the cooker, you’re almost ready to enjoy your delicious oatmeal. But first, we’ll move on to the final step: fluffing and serving the oatmeal. Get ready for a warm and comforting breakfast that’s just moments away!
Step 6: Fluffing and Serving the Oatmeal
Now that your oatmeal is cooked to perfection, it’s time to give it a final touch and serve it up. Follow these steps to fluff and serve your delicious bowl of oatmeal:
- Fluff the oatmeal: Using a fork or a spoon, gently fluff the cooked oatmeal in the pressure cooker. This will help to separate the grains and create a lighter and more airy texture.
- Give it a taste test: Before serving, take a small spoonful of the oatmeal and give it a taste. Adjust the sweetness or flavorings if desired, adding more sweetener or spices to meet your preference.
- Serve it up: Ladle the cooked oatmeal into bowls, ensuring you get an even distribution of oats and liquid. Top it off with your favorite toppings such as fresh or dried fruits, nuts, or a sprinkle of cinnamon. Get creative and personalize it with your favorite combination of flavors.
- Enjoy your oatmeal: Sit down, get comfortable, and savor each spoonful of your warm and comforting oatmeal. Enjoy the nourishing and satisfying breakfast that you’ve created using your trusty electric pressure cooker.
Fluffing the oatmeal helps to separate the grains, ensuring a soft and fluffy texture. Giving it a taste test allows you to make any last-minute adjustments to the sweetness or flavors to suit your preferences. Serving the oatmeal with your favorite toppings adds an extra layer of deliciousness and personalization.
With your bowl of oatmeal ready, take a moment to savor the aroma and enjoy a nourishing and satisfying breakfast. Your electric pressure cooker has produced a creamy and perfectly cooked oatmeal that will fuel you for the day ahead. So sit back, relax, and indulge in a wholesome and delicious start to your morning!
Tips and Variations for Making Oatmeal in an Electric Pressure Cooker
Now that you’ve mastered the basic steps of making oatmeal in an electric pressure cooker, let’s explore some helpful tips and variations to enhance your oatmeal-making experience:
- Experiment with liquid ratios: The amount of liquid you use will affect the texture of your oatmeal. If you prefer a thicker consistency, reduce the amount of liquid. For a creamier oatmeal, increase the liquid. Play around with different ratios to find your perfect balance.
- Add mix-ins before cooking: For extra flavor and texture, consider adding mix-ins such as chopped nuts, dried fruits, or shredded coconut before cooking the oatmeal. These ingredients will cook along with the oats, infusing the dish with additional deliciousness.
- Try overnight oats: If you prefer a grab-and-go breakfast option, consider making overnight oats in your electric pressure cooker. Simply combine oats, liquid, and any desired flavorings in the inner pot, refrigerate overnight, and cook in the morning. This allows the oats to absorb the flavors while saving you time in the morning.
- Use the sauté function for added flavor: Some electric pressure cookers have a sauté function that can be used to toast the oats slightly before pressure cooking. This step adds a nutty flavor to the oatmeal and enhances its overall taste. Follow your pressure cooker’s instructions for using the sauté function.
- Ensure a proper seal: Before cooking, double-check that the pressure cooker lid is properly sealed to prevent any steam from escaping. A good seal is crucial for the pressure cooker to function correctly and cook the oatmeal effectively.
- Use natural release for better texture: For a creamier and more consistent texture, allow the pressure cooker to naturally release the pressure after cooking. This gradual release prevents the oats from becoming overly mushy and results in a better overall texture.
- Make a big batch: Electric pressure cookers are great for batch cooking. Consider making a larger quantity of oatmeal and storing the leftovers in the refrigerator. Reheat single servings throughout the week for quick and easy breakfasts on busy mornings.
- Get creative with toppings: Don’t be afraid to get creative with your oatmeal toppings. From fresh fruits to yogurt, nut butters, granola, or even a sprinkle of cocoa powder, the possibilities are endless. Adding different toppings will add variety, texture, and additional nutrients to your oatmeal.
By incorporating these tips and variations, you can take your oatmeal-making to the next level. Customizing the liquid ratios, adding mix-ins, and exploring different cooking techniques will allow you to create a personalized bowl of oatmeal that suits your taste preferences and dietary needs.
So go ahead, get creative, and enjoy the endless possibilities that making oatmeal in an electric pressure cooker brings. Bon appétit!
Conclusion
Making oatmeal in an electric pressure cooker is a convenient and efficient way to enjoy a delicious and nutritious breakfast. With its time-saving capabilities and ability to produce perfectly cooked oats, the electric pressure cooker has revolutionized the way we prepare this comforting morning meal.
Throughout this article, we’ve covered the step-by-step process of making oatmeal in an electric pressure cooker. From preparing the cooker and choosing the right ingredients to setting the cooking time and pressure level, each step plays a crucial role in achieving the desired texture and flavor.
By following the tips and variations provided, you can further enhance your oatmeal-making experience. Whether it’s experimenting with different liquid ratios, adding mix-ins for extra flavor and texture, or exploring the sauté function, the opportunities for customization are endless.
With your electric pressure cooker, you can create creamy, fluffy oatmeal that is packed with nutrients and full of flavor. The convenience and versatility of this kitchen appliance make it a valuable addition to any breakfast routine.
So, grab your oats, select your toppings, and let your electric pressure cooker take you on a culinary journey of warm and satisfying oatmeal. Whether you enjoy it plain and simple or loaded with a variety of flavors and textures, you can count on your pressure cooker to deliver a bowl of oatmeal that will fuel you for the day ahead.
So, what are you waiting for? Dive into the world of oatmeal-making with your electric pressure cooker and start enjoying the comfort and nourishment that a bowl of homemade oatmeal brings. Bon appétit!
Frequently Asked Questions about How To Make Oatmeal In Electric Pressure Cooker
Was this page helpful?
At Storables.com, we guarantee accurate and reliable information. Our content, validated by Expert Board Contributors, is crafted following stringent Editorial Policies. We're committed to providing you with well-researched, expert-backed insights for all your informational needs.


0 thoughts on “How To Make Oatmeal In Electric Pressure Cooker”