
Articles
How To Store False Lashes
Modified: February 23, 2024
Learn the best method to properly store false lashes and keep them in perfect condition. Our informative articles provide expert tips and tricks for long-lasting lashes.
(Many of the links in this article redirect to a specific reviewed product. Your purchase of these products through affiliate links helps to generate commission for Storables.com, at no extra cost. Learn more)
Introduction
False lashes have become a popular beauty accessory, allowing individuals to achieve glamorous and fuller-looking lashes instantly. Whether you wear false lashes on a daily basis or for special occasions, it is important to know how to properly store them to ensure their longevity and hygiene. By following the right steps, you can keep your false lashes in pristine condition, making them reusable and cost-effective.
In this article, we will guide you through the process of storing false lashes effectively. We will provide you with step-by-step instructions on removing, cleaning, drying, and storing your false lashes. Additionally, we will share some valuable tips to help prolong the lifespan of your false lashes. So, let’s dive in!
Key Takeaways:
- Properly storing false lashes is crucial for maintaining their quality and longevity. By following the steps outlined in this article, you can ensure that your false lashes stay in excellent condition, allowing for multiple uses.
- Remember to remove, clean, dry, and store your false lashes properly to prolong their lifespan. By following the tips provided, you can maintain the shape and integrity of your false lashes, saving money and enhancing your overall makeup look.
Read more: How To Store Lashify Lashes
Step 1: Removing False Lashes
Before you begin the process of storing your false lashes, you need to properly remove them without causing any damage. Follow these steps to remove your false lashes safely:
- Start by gently loosening the adhesive at the inner corner of your eye. You can use a cotton swab or your fingertips to carefully lift the lash band from your natural lash line.
- Avoid pulling or tugging on the lashes, as this can cause them to tear or lose their shape.
- If you have been using lash glue, soften it by soaking a cotton pad with an oil-based makeup remover and holding it against the lash band for a few seconds. This will help dissolve the adhesive, making it easier to remove the lashes without any discomfort.
- Once the lash band is free from the adhesive, slowly peel the false lashes away from your natural lashes. Take your time and be gentle to prevent any damage.
- Place the removed false lashes on a clean surface, such as a tissue or a cotton pad, to ensure they stay clean and protected.
By following these steps, you can remove your false lashes without causing any harm to them or your natural lashes. Now that you have successfully removed your false lashes, it’s time to move on to the next step: cleaning.
Step 2: Cleaning False Lashes
After removing your false lashes, it’s important to clean them thoroughly to remove any traces of makeup, adhesive, or dirt. Here’s how you can clean your false lashes effectively:
- Gently peel off any remaining adhesive from the lash band using your fingertips. If there is any stubborn residue, you can use a tweezer to carefully remove it.
- Prepare a small bowl of warm water and add a few drops of gentle, oil-free makeup remover or baby shampoo.
- Place your false lashes in the bowl and gently swirl them around for a few seconds. This will help loosen any leftover makeup or dirt.
- Use a clean, soft-bristled brush, such as a clean mascara wand or a disposable spoolie, to gently brush through the lashes. This will help remove any remaining debris.
- Rinse the false lashes under running water to remove the cleanser and any residue.
- Inspect the lashes for any leftover makeup or adhesive. If necessary, repeat the cleaning process until the lashes are completely clean.
Keep in mind that it’s important to be gentle while cleaning your false lashes to avoid damaging the delicate strands. Avoid using harsh cleansers or rubbing the lashes vigorously, as this can cause them to lose their shape or become tangled.
Once your false lashes are clean, it’s time to move on to the next step: drying them properly.
Step 3: Drying False Lashes
Properly drying your false lashes is crucial to maintain their shape and prevent any potential damage. Follow these steps to ensure your false lashes dry effectively:
- Pat the clean false lashes gently with a clean towel or a tissue to remove excess water. Avoid rubbing or squeezing the lashes, as this can cause them to lose their shape.
- Place the false lashes on a clean and dry surface, such as a paper towel or a clean towel, with the lash band facing down.
- Let the lashes air dry naturally. Avoid using a blow dryer or any other heat source, as this can damage the lashes or cause them to lose their curl.
- While the lashes are drying, gently reshape them by lightly pinching the lash band between your fingers. This will help the lashes maintain their intended shape.
- Allow the lashes to dry completely before moving on to the next step. Depending on the humidity level, it can take a few hours for the lashes to dry completely.
It’s important to ensure that your false lashes are completely dry before storing them. Moisture can lead to mold or bacterial growth, which can affect the quality and lifespan of the lashes. Once your false lashes are dry, you can proceed to the next step: storing them properly.
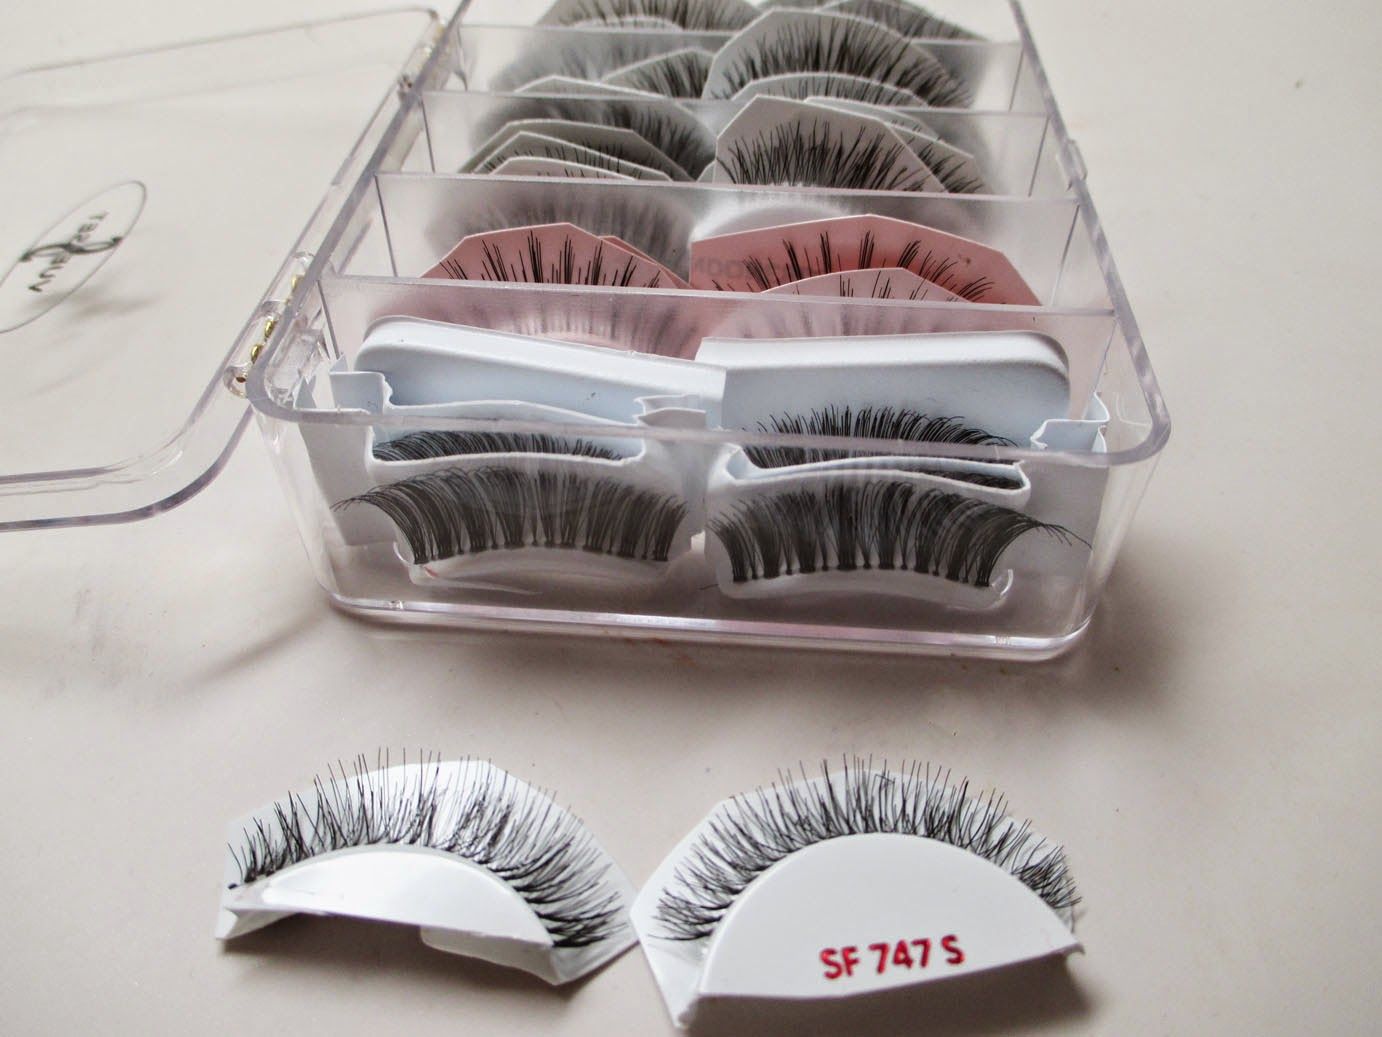
Store false lashes in their original packaging or a clean, dry container to prevent damage and maintain their shape. Keep them away from moisture and direct sunlight to prolong their lifespan.
Step 4: Storing False Lashes
Properly storing your false lashes is essential to maintain their shape and longevity. Follow these steps to store your false lashes effectively:
- Choose a clean and dry container for storing your false lashes. You can use a dedicated lash case, a clean contact lens case, or a small box lined with tissue paper.
- Before placing your false lashes in the storage container, consider trimming them if necessary. Use a clean pair of scissors to carefully trim any excess length from the outer edges. This will ensure a better fit and comfort when you wear them in the future.
- Take the dried false lashes and gently place them in the storage container, making sure the lash band is facing downwards.
- If your false lashes came with a plastic tray or holder, you can use it to keep the lashes in place and prevent them from getting tangled.
- Close the storage container tightly to protect the lashes from dust, dirt, and moisture. Ideally, store the container in a cool and dry place away from direct sunlight.
By properly storing your false lashes, you can prevent them from getting damaged and extend their lifespan. Now that your false lashes are safely stored, let’s move on to the final step: tips for maintaining long-lasting false lashes.
Read more: How Often Is A Burglar Alarm False
Step 5: Tips for Long-Lasting False Lashes
To ensure the longevity and quality of your false lashes, follow these helpful tips:
- Avoid using waterproof mascara on your false lashes. Waterproof formulas can be difficult to remove and may cause the lashes to become clumpy or damaged.
- Remove your false lashes gently and with care after each use. Avoid pulling or tugging on them, as this can cause the lash band to stretch or break.
- Clean your false lashes after each use to remove any residue and maintain their hygiene. This will also help them retain their shape and prevent any build-up of bacteria or makeup.
- When applying adhesive to your false lashes for the next use, apply a thin and even layer along the lash band. Excess adhesive can make the lashes difficult to remove and may cause damage when you try to take them off.
- Avoid sleeping with your false lashes on. Removing them before bed will help prevent any accidental damage and will allow your natural lashes to breathe and regenerate overnight.
- Store your false lashes in a dedicated container to protect them from dust, dirt, and moisture. Keeping them in a dry and clean environment will help maintain their shape and prevent any damage.
By following these tips, you can ensure that your false lashes stay in excellent condition and provide you with multiple uses. Now that you have learned all the necessary steps and tips, you can enjoy wearing your false lashes with confidence and prolong their lifespan.
Conclusion
Properly storing your false lashes is essential for maintaining their quality, hygiene, and longevity. By following the steps outlined in this article, you can ensure that your false lashes stay in excellent condition, allowing you to reuse them multiple times.
Remember to remove your false lashes gently, clean them thoroughly, and allow them to dry properly before storing them. Choose a suitable storage container and keep your lashes protected from dust, dirt, and moisture. Additionally, following the tips for maintaining long-lasting false lashes will help preserve their shape and integrity.
By taking care of your false lashes, not only will you save money by reusing them, but you will also enjoy the convenience and beauty they provide. So, by implementing these techniques, you can effortlessly enhance your lashes and elevate your overall makeup look.
Now that you have all the knowledge needed to store your false lashes properly, get ready to make the most out of every pair. With the right care and storage, your false lashes will continue to enhance your eyes, boost your confidence, and make you feel fabulous!
Frequently Asked Questions about How To Store False Lashes
Was this page helpful?
At Storables.com, we guarantee accurate and reliable information. Our content, validated by Expert Board Contributors, is crafted following stringent Editorial Policies. We're committed to providing you with well-researched, expert-backed insights for all your informational needs.









0 thoughts on “How To Store False Lashes”