
Articles
How To Store Spring Mix In Fridge
Modified: December 7, 2023
Need tips on how to store spring mix in the fridge? Check out our informative articles for expert advice on keeping your greens fresh and crisp!
(Many of the links in this article redirect to a specific reviewed product. Your purchase of these products through affiliate links helps to generate commission for Storables.com, at no extra cost. Learn more)
Introduction
Storing spring mix properly is essential for keeping it fresh and maintaining its flavor and nutritional value. Whether you grow your own spring mix or buy it from the grocery store, ensuring proper storage techniques will help prolong its shelf life and prevent it from wilting or spoiling prematurely.
Why is storing spring mix properly important?
Spring mix, also known as mesclun, is a delightful combination of tender baby greens, such as arugula, spinach, lettuce, and other flavorful herbs. This mix offers a variety of textures and flavors, making it a popular choice for salads, sandwiches, or as a side dish.
However, spring mix is highly perishable and can wilt or become slimy if not stored correctly. The delicate nature of these greens requires extra care to maintain their freshness, crispness, and nutritional quality.
By following a few simple steps, you can ensure that your spring mix stays fresh for as long as possible. In this article, we will guide you through the process of storing spring mix in the fridge to maintain its flavor and texture.
Key Takeaways:
- Properly storing spring mix is crucial to extend its shelf life, maintain its texture and flavor, and retain its nutritional value, reducing food waste and maximizing its freshness for delightful meals.
- From preparing and drying the spring mix to choosing the right container and checking for freshness, following these storage steps ensures you enjoy vibrant, high-quality spring mix in your dishes while minimizing waste and maximizing its health benefits.
Read more: How To Store A Box Spring
Why is storing spring mix properly important?
Properly storing spring mix is crucial for preserving its freshness, taste, and nutritional value. Here are a few reasons why storing spring mix properly is important:
- Extend shelf life: Spring mix has a relatively short shelf life due to its delicate nature. By storing it properly, you can extend its freshness and prevent it from spoiling too quickly. This allows you to enjoy your spring mix for a longer period.
- Maintain texture: Spring mix is known for its tender, crisp texture. When stored improperly, it can become wilted or mushy, losing its appealing texture. By following the right storage techniques, you can help maintain the freshness and crunchiness of your spring mix.
- Preserve flavor: Spring mix is packed with aromatic and flavorful greens. However, improper storage can cause the leaves to lose their taste and become bland. By storing spring mix properly, you can preserve its natural flavors and enjoy its vibrant taste in your meals.
- Retain nutritional value: Spring mix is a nutritious blend of greens, rich in vitamins, minerals, and antioxidants. However, exposure to air, light, and moisture can lead to the degradation of these nutrients. Proper storage methods help retain the nutritional value of the spring mix, ensuring you get the most out of its health benefits.
- Reduce food waste: By properly storing spring mix, you can minimize food waste. When spring mix spoils too quickly, you might end up throwing away a significant portion of it. Storing spring mix properly reduces the chances of waste and allows you to maximize the use of your greens.
By understanding the importance of storing spring mix properly, you can ensure that you get the most out of this delightful blend of greens. Now, let’s dive into the step-by-step process of storing spring mix in the fridge to maintain its freshness and quality.
Step 1: Preparing the spring mix for storage
Before you store your spring mix, it’s important to prepare it properly. This step ensures that you remove any dirt, debris, or damaged leaves, which can shorten the shelf life of the greens. Follow these steps to prepare your spring mix for storage:
- Rinse the spring mix: Start by giving your spring mix a gentle rinse under cool running water. This helps remove any residual dirt or contaminants that may be present on the leaves.
- Inspect for damaged leaves: As you rinse the spring mix, take a moment to inspect the leaves. Discard any damaged or wilted leaves to prevent them from affecting the rest of the greens during storage.
- Trim the stems: If you notice any long or tough stems on your spring mix, consider trimming them. This will help the greens stay fresher for longer and make them more enjoyable to eat.
- Remove excess moisture: After rinsing, gently pat the spring mix dry using a clean kitchen towel or paper towels. Excess moisture can accelerate spoilage, so ensure that the leaves are relatively dry before moving on to the next step.
By following these steps, you’ll ensure that your spring mix is clean, free from damaged leaves, and properly dried. This will set the stage for successful storage and keep your greens in the best possible condition.
Step 2: Choosing the right container
Choosing the right container for storing your spring mix is essential to maintain its freshness and prevent it from getting crushed or bruised. Here are some factors to consider when selecting a container:
- Airtightness: Opt for an airtight container that can seal tightly. This helps to keep out excess air and moisture, which can contribute to wilting and spoilage.
- Size: Choose a container that is spacious enough to accommodate the volume of your spring mix without overcrowding it. Overcrowding can lead to compression and bruising of the delicate leaves.
- Material: Look for containers made of food-grade plastic, glass, or stainless steel. These materials are non-reactive and won’t impart any unwanted flavors or chemicals to your greens.
- Transparent: Opt for a transparent container that allows you to see the contents without opening it. This helps to minimize unnecessary exposure to air and light when checking on the freshness of the spring mix.
- Stackability: If you have limited fridge space, consider choosing a container that is stackable. This allows you to maximize the use of available space without risking damage to the spring mix.
Keep in mind that the container you choose should be clean and dry before placing the spring mix inside. Avoid using containers that have previously held strong-smelling foods, as they can leave odors on the greens.
By selecting the right container, you’ll ensure that your spring mix is stored in a suitable environment that promotes freshness and protects the delicate leaves from unnecessary damage.
Step 3: Properly cleaning the container
Before storing your spring mix in a container, it’s important to ensure that the container is clean and free from any potential contaminants. Here’s how to properly clean the container:
- Wash with warm, soapy water: Begin by washing the container with warm water and a mild dish soap. This helps remove any dirt, grease, or lingering food particles from previous use.
- Rinse thoroughly: After washing, rinse the container thoroughly to remove any soap residue. Make sure no soapy water remains, as it can affect the taste and quality of your spring mix.
- Sanitize if necessary: If you want an extra level of cleanliness, you can sanitize the container using a food-safe sanitizer or a mixture of water and white vinegar. This step helps eliminate any lingering bacteria or germs.
- Air dry completely: After cleaning and sanitizing, allow the container to air dry completely. Avoid using a towel or cloth to dry it, as it may introduce unwanted particles or moisture into the container.
Remember to clean the lid or cover of the container as well, following the same cleaning process. Ensuring that the container is clean and dry is important to maintain the freshness and quality of your stored spring mix.
It’s worth mentioning that it’s a good practice to clean the container each time before storing fresh produce in it. This helps prevent cross-contamination and ensures a safe and hygienic storage environment for your spring mix.
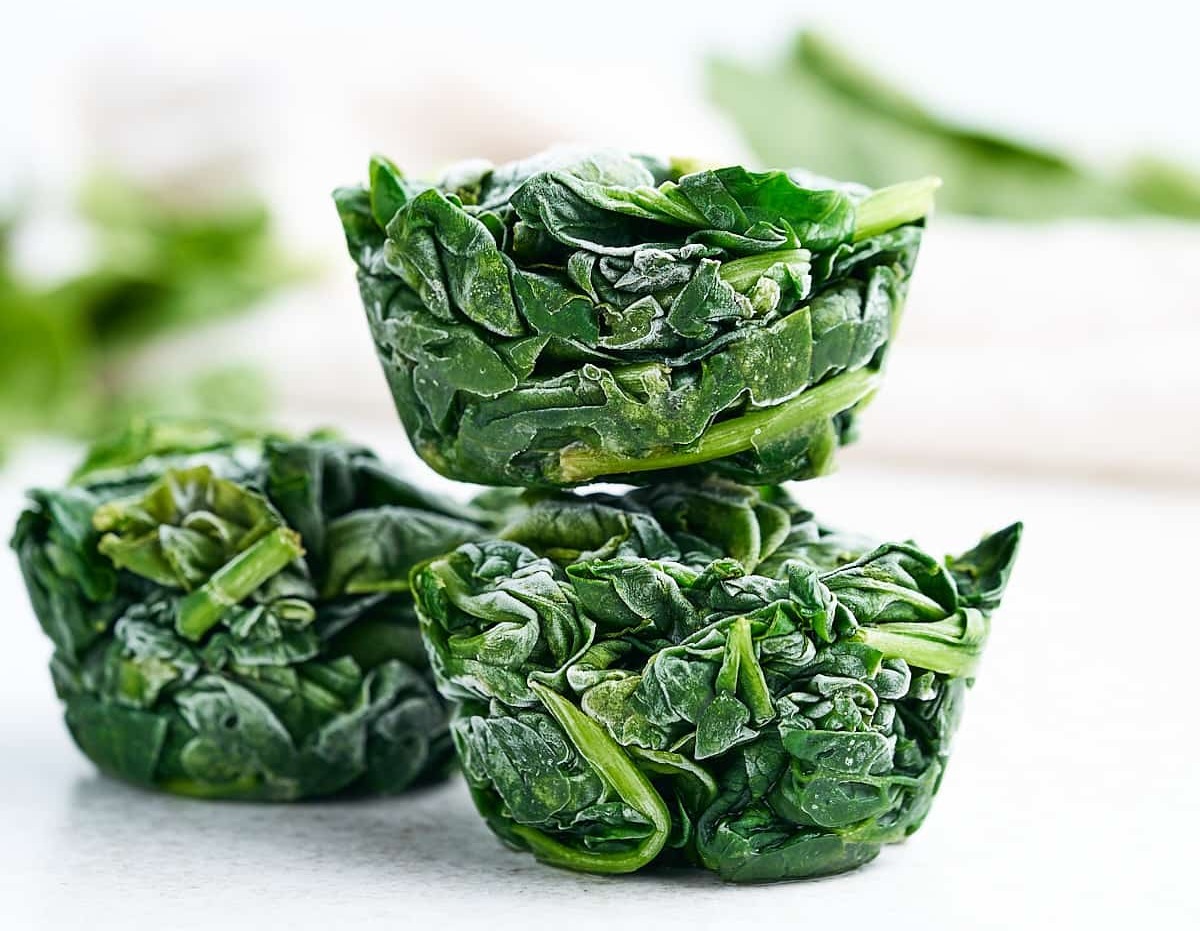
Store spring mix in the fridge in a resealable plastic bag with a paper towel to absorb excess moisture. Press out any air before sealing to keep it fresh longer.
Read more: How To Store Mixed Greens
Step 4: Drying the spring mix
Properly drying the spring mix before storage is crucial to prevent excess moisture and avoid premature wilting or bacterial growth. Follow these steps to ensure your spring mix is adequately dried:
- Use a salad spinner: After rinsing the spring mix, place it in a salad spinner. Spin the greens gently to remove excess water from the leaves. If you don’t have a salad spinner, you can blot the leaves with clean kitchen towels or paper towels.
- Air dry: Once you’ve removed as much moisture as possible, spread out the spring mix on a clean, dry kitchen towel or paper towel. Let it air dry for a few minutes until the leaves are mostly dry. Avoid leaving them exposed for too long, as prolonged exposure to air can cause wilting.
- Avoid crushing: Be gentle when handling the spring mix to avoid crushing or bruising the delicate leaves. Handle the greens by the stems, if possible, to minimize damage.
It’s important to note that the goal is to remove excess moisture without dehydrating the spring mix completely. The leaves should still retain some moisture to maintain their crispness and freshness.
By ensuring that your spring mix is properly dried, you’ll help prevent excess moisture that can lead to wilting and spoilage. This step is crucial for maintaining the quality and texture of your greens during storage.
Step 5: Storing the spring mix in the fridge
Now that your spring mix is prepared and properly dried, it’s time to store it in the fridge. Follow these steps to ensure optimal storage conditions:
- Line the container: Before placing the spring mix in the container, consider lining it with a clean kitchen towel or paper towel. This helps absorb any excess moisture and provides a protective layer for the greens.
- Add the spring mix: Gently transfer the dried spring mix into the container. Avoid overcrowding the container, as this can lead to compression and bruising of the leaves. Leave a bit of space at the top to allow for proper air circulation.
- Seal the container: Once the spring mix is in the container, seal it tightly with the lid or cover. Ensure that the container is airtight to prevent the entry of excess air and moisture.
- Store in the refrigerator: Place the sealed container in the refrigerator, preferably in the crisper drawer. The crisper drawer provides a slightly higher humidity level, which helps to maintain the freshness of the spring mix.
- Avoid stacking heavy items: When storing the container in the fridge, avoid placing heavy items on top of it. The weight can crush the spring mix and accelerate wilting.
It’s important to note that the optimal temperature for storing spring mix is between 35°F (2°C) and 40°F (4°C). Keeping the spring mix at this temperature range helps slow down the rate of spoilage and maintains its quality.
Remember to place the container away from the back of the fridge, where temperatures can fluctuate due to the cooling system. Also, try to use the spring mix within a week for the best taste and texture.
By following these steps, you’ll ensure that your spring mix stays fresh and flavorful in the refrigerator, ready to be enjoyed whenever you need it.
Step 6: Checking for freshness before using
Before using your stored spring mix, it’s important to check for freshness to ensure that it is still safe and enjoyable to consume. Follow these guidelines to assess the freshness of the spring mix:
- Visual inspection: Take a look at the spring mix leaves. They should be vibrant, crisp, and free from any discoloration, sliminess, or signs of wilting. If you notice any wilting or spoiled leaves, remove them before using the remaining greens.
- Smell test: Give the spring mix a gentle sniff. It should have a fresh, earthy scent. If it smells off, overly pungent, or unpleasant, it may indicate the presence of spoilage.
- Taste test: If the visual inspection and smell test seem fine, you can perform a small taste test. Take a bite of a few leaves to ensure that they have a mild, crisp flavor. If the taste is bitter, off-putting, or bland, it may indicate that the greens have started to deteriorate.
If the spring mix passes all these tests and looks and tastes fresh, you can proceed to use it in your favorite salads, sandwiches, or other dishes.
However, if you notice any signs of spoilage, such as a foul smell, sliminess or mushiness, or an unpleasant taste, it’s best to discard the spring mix to avoid any health risks.
Remember that even when stored correctly, spring mix is still a perishable item. Its shelf life can vary depending on various factors, including its initial freshness, storage conditions, and handling. It’s always better to err on the side of caution and prioritize your safety when it comes to consuming fresh produce.
By following these guidelines, you can ensure that you use fresh and high-quality spring mix for your meals, maximizing its flavor and nutritional benefits.
Conclusion
Properly storing spring mix is essential for maintaining its freshness, crispness, and nutritional value. By following the steps outlined in this article, you can ensure that your spring mix stays vibrant and delicious for as long as possible.
From preparing the spring mix by rinsing and inspecting it for any damaged leaves to choosing the right container and properly cleaning it, each step plays a crucial role in preserving the quality of your greens.
Drying the spring mix before storage helps prevent excess moisture, while storing it in an airtight container in the refrigerator maintains its freshness and extends its shelf life. Checking for freshness before using ensures that your spring mix is still in its prime state and safe to consume.
By applying these storage techniques, you can reduce food waste, enjoy fresh and flavorful spring mix in your meals, and make the most of its nutritional benefits.
Remember, while these guidelines provide general recommendations, individual factors such as the quality of the spring mix, storage conditions, and shelf life can vary. It’s always important to use your best judgment and prioritize your safety when consuming fresh produce.
So, the next time you bring home a bundle of spring mix, don’t forget to give it the care it deserves by storing it properly. Your salads, sandwiches, and side dishes will thank you for it with their crispness and bursts of delicious flavor!
Frequently Asked Questions about How To Store Spring Mix In Fridge
Was this page helpful?
At Storables.com, we guarantee accurate and reliable information. Our content, validated by Expert Board Contributors, is crafted following stringent Editorial Policies. We're committed to providing you with well-researched, expert-backed insights for all your informational needs.


0 thoughts on “How To Store Spring Mix In Fridge”