
Articles
How To Store Yeast After Opening
Modified: February 24, 2024
Learn how to properly store yeast after opening in this informative article. Keep your yeast fresh and potent for all your baking needs.
(Many of the links in this article redirect to a specific reviewed product. Your purchase of these products through affiliate links helps to generate commission for Storables.com, at no extra cost. Learn more)
Introduction
Welcome to the world of baking and brewing! Whether you are a professional baker, home cook, or craft beer enthusiast, yeast is a crucial ingredient in many recipes. It’s a living organism that helps dough rise and gives beer its carbonation. But what happens once you open that packet or jar of yeast? How do you ensure it stays fresh and active for future use? In this article, we will explore the importance of properly storing yeast after opening and provide you with a step-by-step guide to maximize its shelf life.
Before we dive into the details of storing yeast, let’s take a moment to understand what yeast is and why it’s so important in the culinary world. Yeast is a type of single-celled fungus that belongs to the Saccharomyces cerevisiae family. It plays a vital role in the fermentation process, releasing carbon dioxide gas that causes dough to rise by expanding air pockets. In addition to baking, yeast is also used in brewing to convert sugars into alcohol during the fermentation process.
Properly storing yeast is crucial to maintaining its quality and effectiveness. When exposed to air, moisture, and heat, yeast can lose its potency and become less effective in leavening dough or fermenting beer. By following the right storage practices, you can ensure that your yeast remains active and ready to work its magic in your recipes.
There are several factors that can affect the quality of yeast, including temperature, humidity, exposure to air, and time since opening. By paying attention to these factors and taking necessary precautions, you can extend the shelf life of yeast and get the most out of every package or jar you open.
In the following sections, we will guide you through the step-by-step process of storing yeast after opening, highlight common mistakes to avoid, and explore alternative storage methods. By implementing these tips and techniques, you will be able to keep your yeast fresh, potent, and ready for all your baking and brewing adventures.
Key Takeaways:
- Properly storing yeast after opening is crucial to maintain its quality and effectiveness. By following the right storage practices, you can extend the shelf life of yeast and ensure reliable results in your baking and brewing endeavors.
- Understanding the nature of yeast and its sensitivity to factors such as temperature, moisture, air exposure, and time since opening is essential. By minimizing these factors and creating the best possible storage conditions, you can maximize the longevity and potency of your yeast.
Read more: How To Store Bourbon After Opening
Understanding Yeast
Before diving into the intricacies of storing yeast after opening, it’s important to have a basic understanding of this remarkable ingredient. Yeast is a living organism, a type of single-celled fungus, that has been used for centuries in baking and brewing. It belongs to the Saccharomyces cerevisiae family and is commonly available in various forms, including active dry yeast and instant yeast.
Yeast is a key player in the fermentation process, acting as a leavening agent in baking and a catalyst for the production of alcohol in brewing. When yeast comes into contact with sugar, it feeds on it, producing carbon dioxide gas as a byproduct. This gas is what causes dough to rise and gives beer its characteristic bubbles.
There are two main types of yeast used in culinary applications: active dry yeast and instant yeast. Active dry yeast is the most common and widely available form. It consists of dehydrated yeast particles that are dormant until rehydrated in warm water, which activates them. On the other hand, instant yeast is a more finely ground form of yeast that can be mixed directly into dry ingredients without needing to be rehydrated beforehand.
Yeast is highly perishable and sensitive to environmental conditions. If not properly stored, its viability and effectiveness can be compromised, resulting in flat breads or failed fermentation. Understanding the importance of proper storage can help maintain the quality and potency of yeast, ensuring reliable results in your recipes.
Now that we have a better understanding of yeast and its role in the culinary world, let’s explore the crucial role that proper storage plays in maintaining its freshness and efficacy. By following the right storage practices, we can extend the shelf life of yeast and maximize its potential in our baking and brewing endeavors.
Importance of Proper Storage
Proper storage of yeast is essential to maintain its quality, potency, and effectiveness. Without proper care, yeast can lose its vitality and become less reliable in leavening dough or fermenting beer. Here are a few reasons why proper storage should not be overlooked:
- Prolongs Shelf Life: By storing yeast correctly, you can extend its shelf life and maximize its usability. Fresh yeast is more active and potent, resulting in better and more consistent baking or brewing outcomes.
- Maintains Activity: Yeast depends on its living microorganisms to perform its leavening or fermenting functions. Proper storage conditions ensure that these microorganisms remain alive and active, allowing yeast to function optimally.
- Prevents Contamination: Airtight and sanitary storage methods prevent harmful bacteria or molds from contaminating the yeast. Contamination can lead to undesirable flavors, spoiled dough, or unusable brewing batches.
- Cost-saving: By extending the shelf life of yeast, proper storage practices can save you money in the long run as you can use the yeast to its fullest extent, reducing waste and the need for frequent repurchasing.
It’s important to note that the effectiveness of yeast can gradually diminish over time, even with proper storage. The key is to create the best possible conditions for yeast to thrive, allowing it to maintain its quality for as long as possible.
In the following sections, we will outline a step-by-step guide on how to store yeast after opening to ensure its longevity and effectiveness. By following these guidelines, you can maximize the lifespan of your yeast supply and continue creating delicious baked goods and flavorful brews.
Factors Affecting Yeast Quality
Several factors can impact the quality and efficacy of yeast, even if it is stored properly. Being aware of these factors can help you understand how to best preserve the quality of your yeast. Here are some key factors that can affect yeast quality:
- Temperature: Yeast is sensitive to temperature extremes. High temperatures can accelerate yeast activity, causing it to consume its food source (sugar) quickly and exhaust itself. On the other hand, low temperatures can slow down yeast activity, making it sluggish or dormant. Both scenarios can lead to less effective yeast and undesirable baking or brewing outcomes.
- Moisture: Moisture is another factor that can impact yeast quality. Excessive moisture can lead to yeast clumping or becoming inactive. It is important to store yeast in a dry environment to prevent moisture absorption, which can affect its viability.
- Air Exposure: Yeast is sensitive to oxygen exposure. Exposure to air can cause the yeast to oxidize, losing its potency and effectiveness. It is crucial to seal yeast containers tightly to minimize air contact.
- Light: While yeast is not overly sensitive to light, prolonged exposure to direct sunlight can affect its viability. Storing yeast in a dark and cool place is recommended to maintain its quality.
- Time Since Opening: Even with proper storage, yeast will gradually lose its potency over time. The longer it sits unused, the less effective it becomes. It’s best to use yeast within its recommended expiry date or within a reasonable period after opening.
By understanding these factors, you can take appropriate measures to mitigate their effects. Creating optimal storage conditions and using yeast within a reasonable timeframe can help you maintain high-quality yeast that performs reliably in your baking and brewing endeavors.
Now that we have a deeper understanding of the factors that can impact yeast quality, let’s delve into the step-by-step guide on how to store yeast after opening to maximize its longevity and effectiveness.
Step-by-Step Guide on Storing Yeast After Opening
Properly storing yeast after opening is essential to maintain its freshness and effectiveness. Follow this step-by-step guide to ensure that your yeast remains potent and ready for future use:
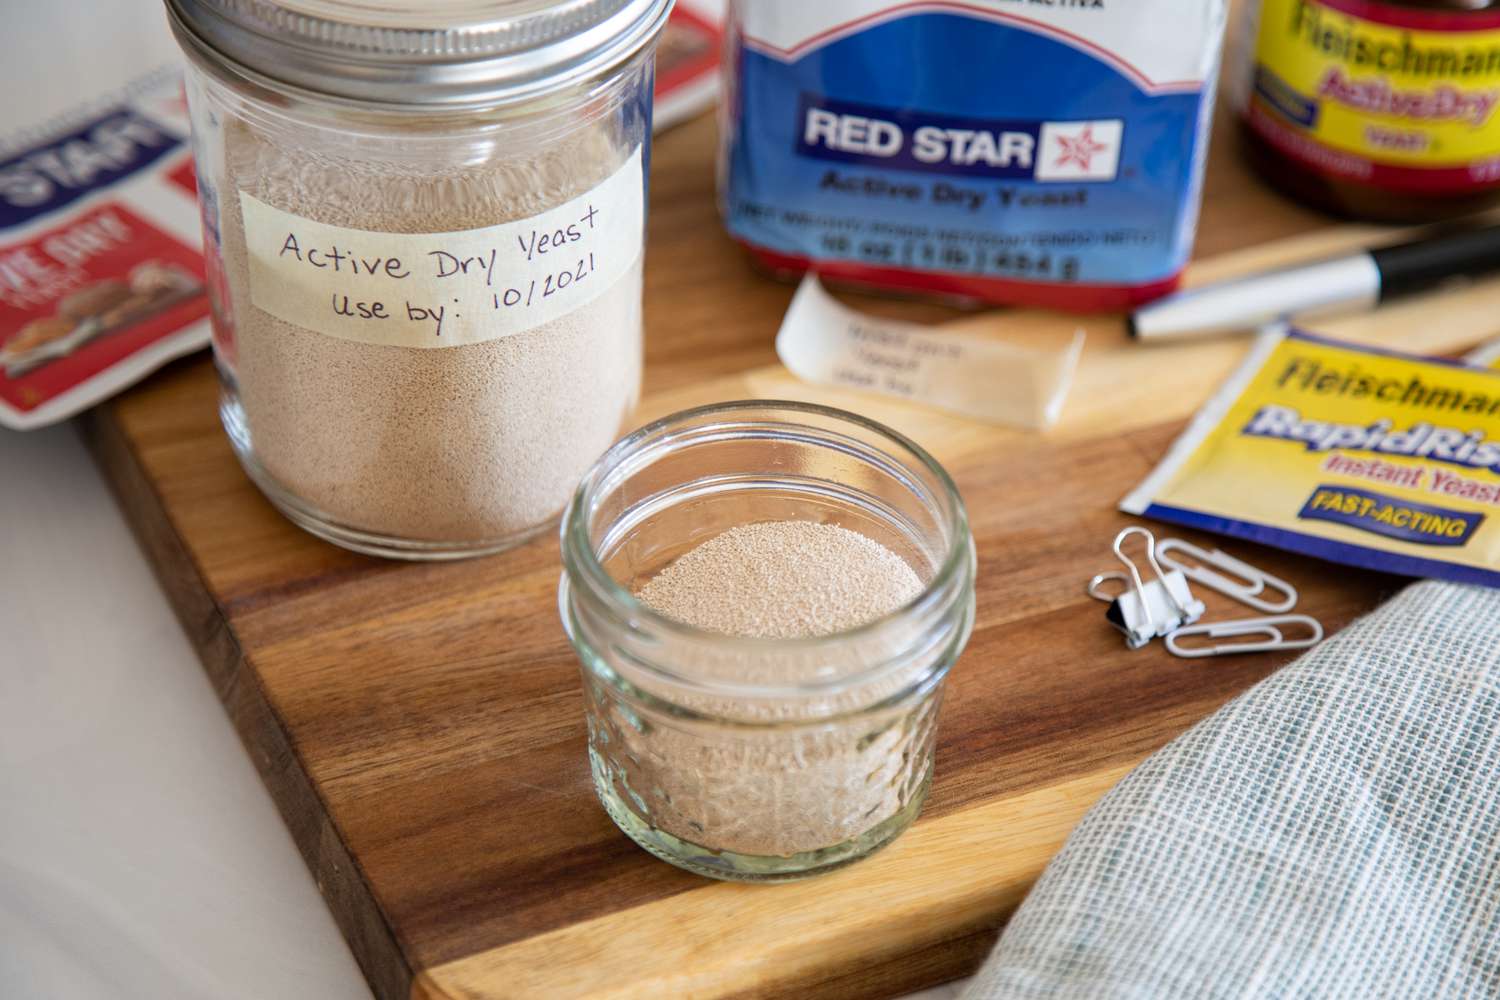
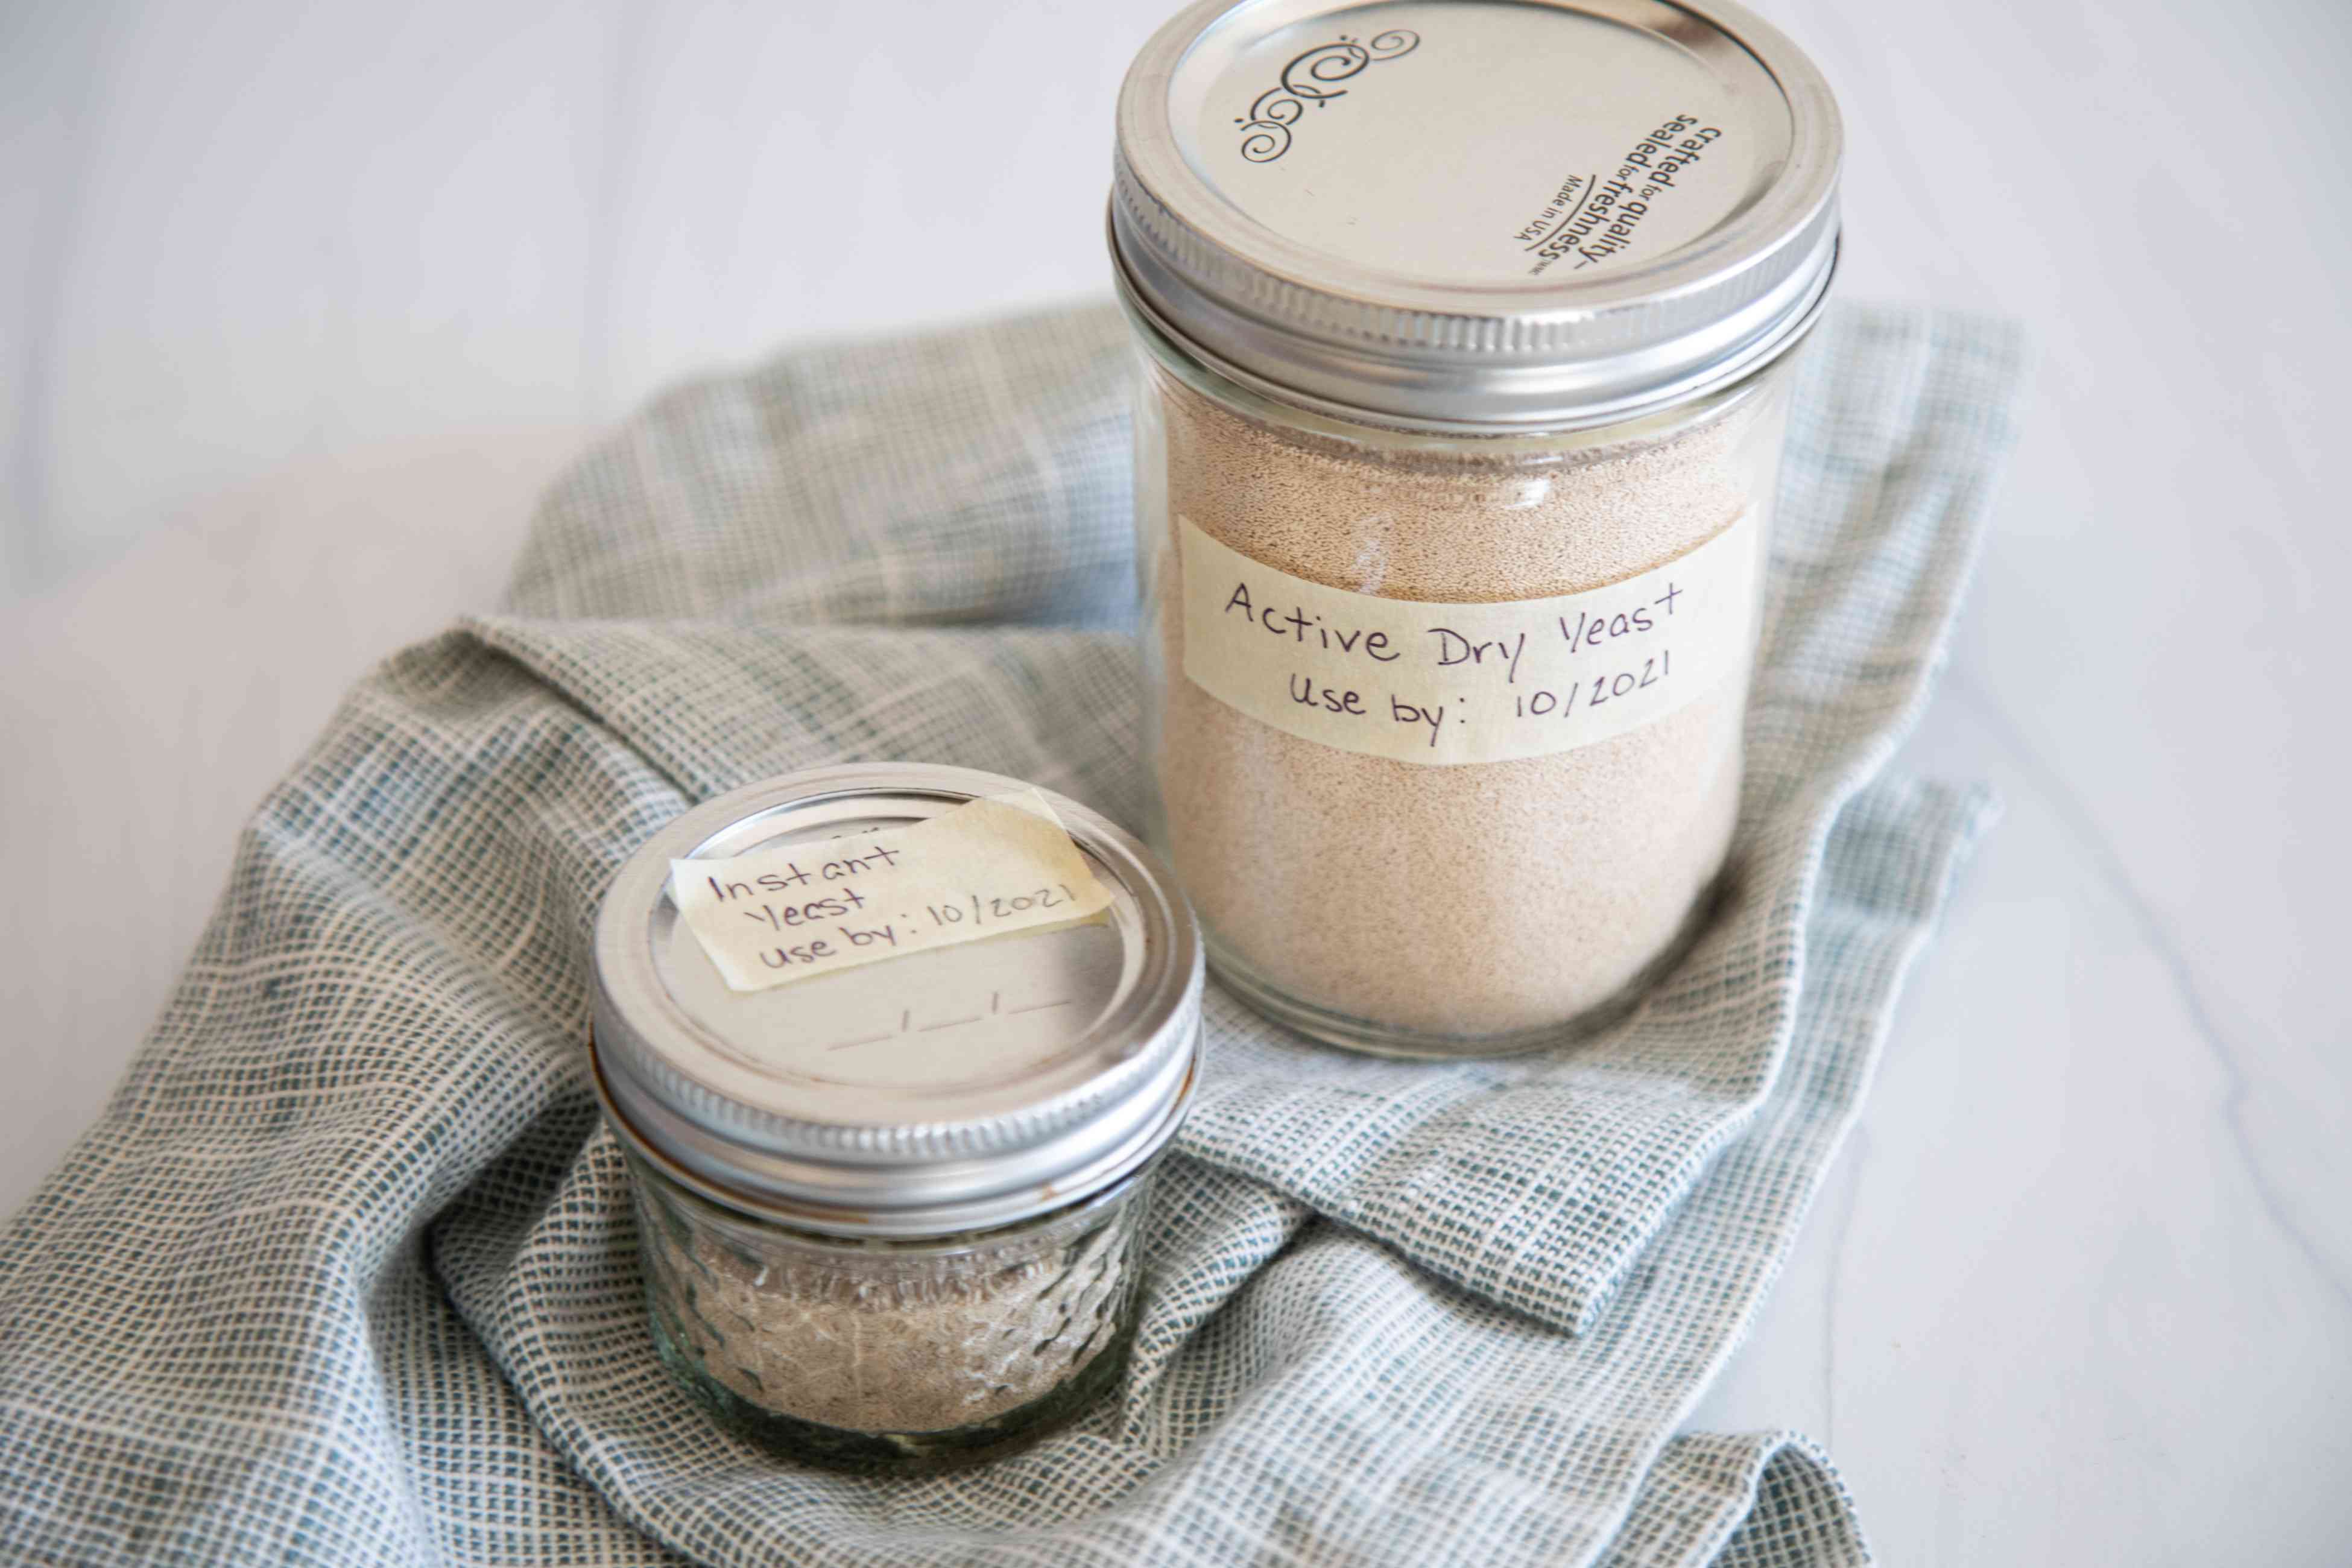
- Transfer to a Sealed Container: If your yeast comes in a package that is not resealable, transfer the remaining yeast to an airtight container. This will prevent air exposure and maintain the freshness of the yeast.
- Label and Date: Label the container with the type of yeast and the date it was opened. This will help you keep track of the yeast’s shelf life and ensure that you use it within a reasonable timeframe.
- Store in a Cool, Dry Place: Find a cool and dry spot in your kitchen or pantry to store the yeast. Avoid areas that are exposed to direct sunlight or heat sources, as high temperatures can jeopardize the quality of the yeast.
- Keep Away from Moisture: Moisture can degrade the quality of yeast. Avoid storing yeast containers near the sink or other areas prone to moisture. It’s best to keep yeast in a dry environment to maintain its viability.
- Refrigerate or Freeze (optional): While not always necessary, refrigeration or freezing can help extend the shelf life of yeast. If you choose to refrigerate or freeze the yeast, make sure it is in an airtight container to prevent moisture absorption and potential condensation upon thawing.
- Allow to Warm to Room Temperature: If you refrigerated or froze the yeast, bring it to room temperature before using it. Allowing the yeast to warm up will reactivate its microorganisms and ensure it functions optimally in your recipes.
Following these steps will help you maintain the quality and potency of your yeast, ensuring that it remains fresh and effective for future baking or brewing endeavors. Remember to check the expiration date and use the yeast within a reasonable timeframe to achieve the best results.
Now that you have learned the step-by-step process of storing yeast after opening, let’s explore some common mistakes to avoid to ensure optimal yeast storage.
Store opened yeast in an airtight container or resealable bag in the refrigerator. Make sure to use it within 4 months for best results.
Read more: How To Store Sauerkraut After Opening
Common Mistakes to Avoid
Properly storing yeast after opening is crucial to maintain its freshness and effectiveness. Avoiding these common mistakes can help ensure that your yeast remains potent and ready for future use:
- Not Transferring to an Airtight Container: Leaving yeast in its original packaging, especially if it is not resealable, exposes it to air and can lead to a loss of effectiveness. Always transfer the yeast to an airtight container to minimize air exposure.
- Exposing to Moisture: Moisture can degrade the quality of yeast, making it ineffective. Avoid storing yeast in areas prone to moisture, such as near the sink or in a humid pantry. Keep the yeast in a dry environment to maintain its viability.
- Storing in a Warm Environment: Yeast is sensitive to high temperatures, which can diminish its potency. Avoid storing yeast in areas exposed to direct sunlight or near heat sources like the stove or oven. Find a cool and dry spot in your kitchen or pantry to store the yeast.
- Not Labeling or Dating: Forgetting to label and date your yeast container can lead to confusion about its freshness. Always label the container with the type of yeast and the date it was opened. This will help you keep track of its shelf life.
- Using Expired Yeast: Using yeast past its expiration date can result in poor baking or brewing outcomes. Check the expiration date and use the yeast within a reasonable timeframe for optimal results.
- Refrigerating without an Airtight Container: If you choose to refrigerate or freeze your yeast, make sure it is in an airtight container to prevent moisture absorption and potential condensation upon thawing. Improper storage can compromise the quality of the yeast.
Avoiding these common mistakes will help you maintain the quality and potency of your yeast, ensuring that it remains fresh and effective for your baking and brewing adventures. By following the proper storage techniques and taking necessary precautions, you can maximize the lifespan of your yeast and achieve great results in all your culinary creations.
Now, let’s explore some alternative storage methods you can consider for your yeast.
Alternative Storage Methods
While the most common method of storing yeast after opening is transferring it to an airtight container and keeping it in a cool, dry place, there are a few alternative storage methods you can consider depending on your preferences and available resources:
- Vacuum Sealing: Vacuum sealing is an effective method to remove air and moisture from the storage container. By using a vacuum sealer, you can create a tightly sealed package that protects the yeast from oxidation and keeps it fresh for a longer period.
- Small Portion Storage: If you frequently use small amounts of yeast, consider dividing your yeast supply into smaller portions. Store each portion separately in airtight containers, allowing you to open and use only what you need while keeping the rest of the yeast unexposed to air.
- Freezing: Freezing yeast can significantly extend its shelf life. Before freezing, transfer the yeast to an airtight container to prevent moisture absorption. When you’re ready to use the yeast, thaw it in the refrigerator or at room temperature, being careful to avoid condensation.
- Dry Ice Storage: For long-term yeast storage, some baking and brewing enthusiasts opt for dry ice storage. Dry ice, a solid form of carbon dioxide, can create an environment with extremely low temperatures, preserving the yeast’s quality. However, proper handling and safety precautions must be followed when dealing with dry ice.
- Rehydration and Refrigeration: Instead of storing dry yeast, some prefer to keep it in a liquid form by rehydrating it with water and placing it in the refrigerator. This method may require regular feeding of the yeast with sugar to keep it active and alive. However, it is essential to maintain proper hygiene and cleanliness to prevent contamination.
Remember that while these alternative storage methods can be effective, it’s important to evaluate your specific needs and resources. The most important aspect is to create an environment that protects the yeast from air, moisture, and extreme temperatures.
By exploring and implementing these alternative storage methods, you can find the approach that best suits your needs and helps maximize the longevity and effectiveness of your yeast supply.
Now that we have covered various storage methods, let’s address some commonly asked questions about yeast storage.
Frequently Asked Questions
Here are some frequently asked questions about storing yeast after opening:
- Can you store yeast in the freezer?
Yes, you can store yeast in the freezer to extend its shelf life. Transfer the yeast to an airtight container, and place it in the freezer. When you’re ready to use it, thaw the yeast in the refrigerator or at room temperature. - How long can you store yeast?
The shelf life of yeast varies depending on the type and storage conditions. Generally, unopened dry yeast can last for a year or more past its expiration date if stored in a cool, dry place. However, it is best to check the packaging for specific guidelines. Once opened, yeast should be used within a few months for optimal results. - Can I store yeast in the fridge?
Storing yeast in the refrigerator is a popular option to prolong its freshness. Transfer the yeast to an airtight container and place it in the refrigerator. However, make sure to bring the refrigerated yeast to room temperature before using it in your recipes. - What should I do if my yeast has expired?
Expired yeast may not be as effective in leavening or fermenting. It’s best to purchase fresh yeast to ensure the best results in your baking or brewing. Using expired yeast can lead to disappointment in the final outcome of your recipes. - Can I use yeast that has been frozen?
Yes, you can use yeast that has been frozen. Thaw it in the refrigerator or at room temperature, being careful to avoid any condensation. However, keep in mind that freezing yeast may slightly diminish its effectiveness, so it may be prudent to use a slightly larger amount than you would with fresh yeast.
If you have further questions or concerns about storing yeast, it’s always best to refer to the specific recommendations provided by the manufacturer or consult a trusted baking or brewing resource.
Now that we have addressed some common questions, let’s wrap up the article.
Conclusion
Properly storing yeast after opening is crucial to maintain its quality and effectiveness. By following the right storage practices, you can extend the shelf life of yeast and ensure reliable results in your baking and brewing endeavors.
Understanding the nature of yeast and its sensitivity to factors such as temperature, moisture, air exposure, and time since opening is essential. By minimizing these factors and creating the best possible storage conditions, you can maximize the longevity and potency of your yeast.
Remember to transfer yeast to an airtight container, label and date it, and store it in a cool, dry place away from moisture, heat, and direct sunlight. Avoid common mistakes such as neglecting to transfer yeast to an airtight container, exposing it to moisture, or using expired yeast.
Consider alternative storage methods such as vacuum sealing, dividing into smaller portions, freezing (with proper precautions), dry ice storage, or rehydration and refrigeration. These methods can help you further extend the shelf life of yeast based on your specific needs and available resources.
By implementing these storage practices and avoiding common mistakes, you can ensure that your yeast remains potent and ready to enhance your baking and brewing creations. Whether you’re making bread, pizza dough, or brewing your favorite beer, fresh and active yeast will play a critical role in achieving delicious and satisfying results.
Remember to always check the expiration date and use yeast within a reasonable timeframe. If in doubt, trust your instincts and consider purchasing fresh yeast for optimal performance.
Now that you’re equipped with the knowledge of proper yeast storage, go ahead and stock up on this versatile ingredient, knowing that you can confidently store it and continue creating delightful culinary masterpieces in your kitchen.
Frequently Asked Questions about How To Store Yeast After Opening
Was this page helpful?
At Storables.com, we guarantee accurate and reliable information. Our content, validated by Expert Board Contributors, is crafted following stringent Editorial Policies. We're committed to providing you with well-researched, expert-backed insights for all your informational needs.





0 thoughts on “How To Store Yeast After Opening”