
Articles
How To Turn Off Fireplace Pilot Light
Modified: January 6, 2024
Learn how to safely and easily turn off your fireplace pilot light with our informative articles. Keep your home secure and save energy with our step-by-step guides.
(Many of the links in this article redirect to a specific reviewed product. Your purchase of these products through affiliate links helps to generate commission for Storables.com, at no extra cost. Learn more)
Introduction
Welcome to our comprehensive guide on how to turn off the pilot light on your fireplace. Whether you’re looking to conserve energy during the warmer months or making repairs, knowing how to safely and properly shut off the pilot light is essential.
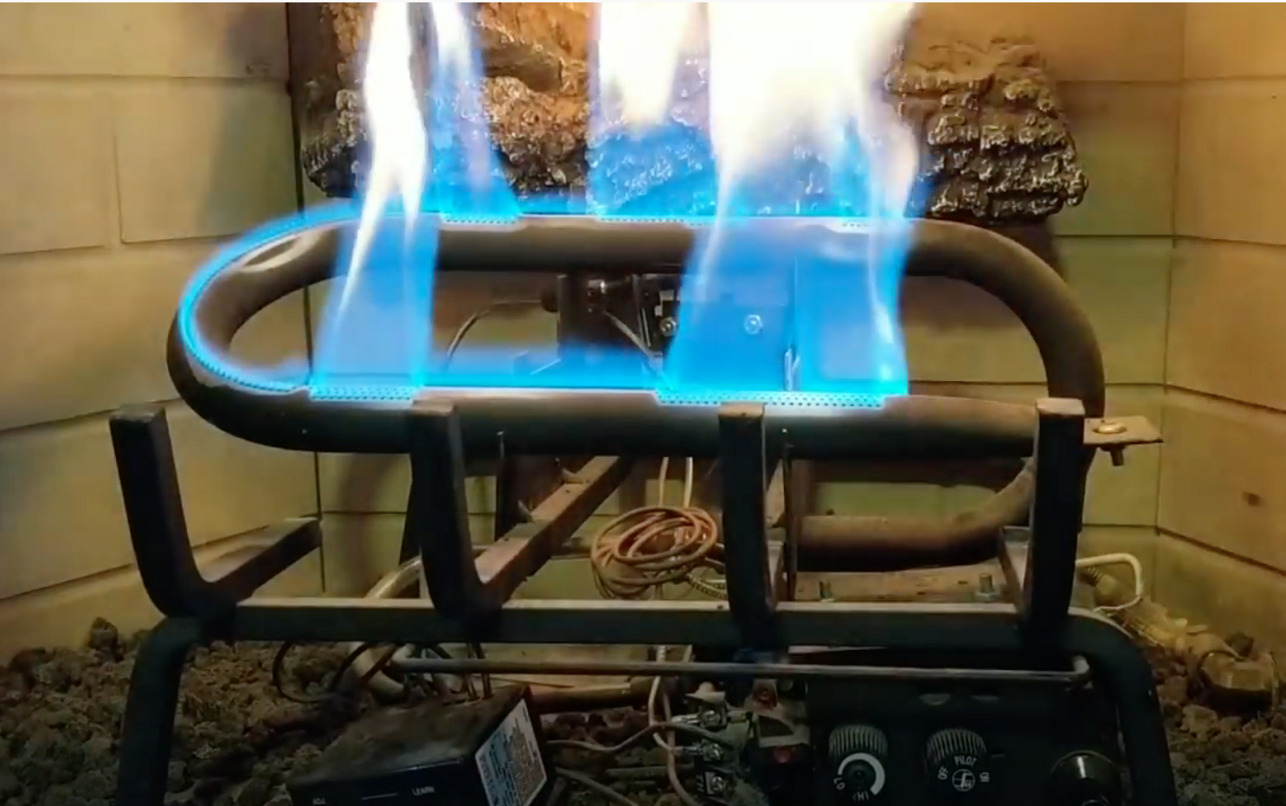
Many gas fireplaces and heating systems have a pilot light, which is a small flame that continuously burns to ignite the main burner. Turning off the pilot light not only helps save on energy costs but also ensures safety by preventing accidental gas leaks and fires.
Before we dive into the step-by-step process of turning off the pilot light, it’s crucial to emphasize that safety should always be the top priority. If you’re unsure or uncomfortable performing these tasks, it’s recommended to seek professional assistance from a licensed technician.
Now, let’s gather the necessary tools and materials and proceed to the next section to learn how to safely turn off your fireplace pilot light.
Key Takeaways:
- Safely turning off your fireplace pilot light involves locating the shut-off valve, using the right tools, and following manufacturer guidelines. Prioritize safety and maintenance for a more energy-efficient and secure home.
- Regularly turning off your fireplace pilot light not only saves energy but also reduces the risk of gas leaks and fires. Follow the step-by-step process and prioritize safety for a well-maintained and sustainable fireplace.
Read more: How To Clean A Pilot Light On Gas Fireplace
Safety Precautions
Before attempting to turn off the pilot light on your fireplace, it’s important to take the following safety precautions:
- Read the manufacturer’s manual: Familiarize yourself with the specific instructions and safety guidelines provided by the manufacturer for your fireplace model. Different fireplaces may have slightly different procedures, so it’s essential to follow the recommended guidelines.
- Use proper protective gear: Wear safety glasses and gloves to protect your eyes and hands from potential debris or accidental burns.
- Ensure proper ventilation: Make sure the area around your fireplace is well-ventilated to prevent the accumulation of gas fumes.
- Keep flammable materials away: Clear the surrounding area of any flammable materials, such as paper, curtains, or furniture, to reduce the risk of accidental fires.
- Have a fire extinguisher nearby: As an additional safety measure, have a fire extinguisher readily available in case of emergencies.
- Turn off the main gas supply: Before attempting any work on your fireplace, shut off the main gas supply to prevent the flow of gas to the pilot light and the main burner.
- Wait for the fireplace to cool down: Allow your fireplace to cool down completely before attempting any maintenance tasks. This will prevent accidental burns or injuries.
- Use caution with tools: If you need to use any tools during the process, ensure you handle them carefully and follow safety guidelines to avoid injuries.
- Follow local building codes: Be aware of and adhere to any local building codes or regulations regarding fireplace maintenance and repairs.
By taking these safety precautions, you can minimize the risk of accidents and ensure a safe environment while working with your fireplace pilot light. Now that you’re aware of the necessary precautions, let’s move on to the next section to gather the tools and materials needed for the task.
Tools and Materials Needed
Before you begin the process of turning off the pilot light on your fireplace, gather the following tools and materials:
- Safety glasses and gloves: These will help protect your eyes and hands during the process.
- Flashlight: A flashlight will come in handy for illuminating hard-to-reach areas and providing better visibility.
- Long-nose pliers: Pliers will be needed to loosen and tighten any connections during the process.
- Flathead screwdriver: A flathead screwdriver is useful for removing any panels or covers that may be blocking access to the pilot light.
- Owner’s manual: Keep the manufacturer’s manual nearby for reference during the process.
Additionally, you may need the following materials:
- Dry cloth: A dry cloth will help in cleaning any dirt or debris around the pilot light area.
- Gas shut-off key or wrench: Depending on your fireplace model, you may need a gas shut-off key or wrench to turn off the main gas supply.
Ensure that you have all the necessary tools and materials ready before proceeding to turn off the pilot light. Being prepared will make the process smoother and more efficient.
Now that you have gathered the required tools and materials, it’s time to proceed to the step-by-step process of turning off the pilot light on your fireplace.
Step 1: Locate the Gas Supply Shut-Off Valve
The first step in turning off the pilot light on your fireplace is to locate the gas supply shut-off valve. The shut-off valve is usually located near the fireplace or in the vicinity of the gas meter, depending on your home’s layout.
Take a moment to familiarize yourself with the shut-off valve’s location before proceeding. In some cases, the shut-off valve may be labeled or have a red or yellow handle for easy identification.
If you are unable to locate the shut-off valve, consult your fireplace’s manual or contact a licensed technician for assistance. It’s important not to proceed further until you have located the shut-off valve.
Once you have located the shut-off valve, ensure that it is easily accessible and not obstructed by any objects. Clear the area around the valve for easy operation.
Now that you have successfully located the gas supply shut-off valve, you are ready to move on to the next step, which is turning off the gas supply to the fireplace.
Step 2: Turn Off the Gas Supply to the Fireplace
With the gas supply shut-off valve located and easily accessible, it’s time to proceed with turning off the gas supply to the fireplace. By doing so, you will prevent the flow of gas to the pilot light and the main burner.
Follow these steps to turn off the gas supply:
- Locate the shut-off valve handle or knob. It may be a lever or a wheel-type handle.
- Turn the handle or knob clockwise (to the right) to close or shut off the gas supply.
- Continue turning until you feel resistance or the handle stops moving. This indicates that the valve is fully closed.
Take a moment to ensure that the gas supply is indeed turned off by verifying that the pilot light and main burner are no longer lit. Double-check by trying to ignite the fireplace. If it fails to ignite, you have successfully turned off the gas supply.
It’s important to note that in some cases, the shut-off valve may require a gas shut-off key or wrench for operation. If this is the case, insert the key or attach the wrench to the valve and turn clockwise to shut off the gas supply.
Now that the gas supply to the fireplace has been turned off, you can proceed to the next step of accessing the pilot light.
Before attempting to turn off the fireplace pilot light, make sure to consult the manufacturer’s instructions for your specific model. In general, you can usually turn off the pilot light by locating the gas supply valve and turning it to the “off” position. Always exercise caution when working with gas appliances.
Read more: How To Turn Off The Gas To Fireplace
Step 3: Accessing the Pilot Light
After successfully turning off the gas supply to the fireplace, the next step is to access the pilot light. This will allow you to safely turn off the pilot light control valve.
Follow these steps to access the pilot light:
- Refer to your fireplace’s manual or visually inspect the fireplace to locate the access panel or cover that conceals the pilot light and control valve.
- Use the appropriate tool, such as a screwdriver, to remove any screws or fasteners that secure the panel or cover in place.
- Gently lift or remove the panel or cover to reveal the pilot light and control valve.
- Take a moment to inspect the area around the pilot light for any dust, debris, or obstructions. Use a dry cloth to clean the area if necessary.
Once you have accessed the pilot light and ensured the area is clean, you are now ready to move on to the next step of turning off the pilot light control valve.
Continue reading to learn how to safely turn off the pilot light control valve in Step 4.
Step 4: Turn Off the Pilot Light Control Valve
Now that you have accessed the pilot light, it’s time to turn off the pilot light control valve. This valve controls the flow of gas to the pilot light, and shutting it off will extinguish the flame.
Follow these steps to turn off the pilot light control valve:
- Locate the pilot light control valve, which is usually located near the pilot light itself. It may be a small knob or a lever.
- Turn the control valve clockwise (to the right) to shut off the gas flow to the pilot light. This will extinguish the flame.
- Turn the control valve until you feel resistance or it stops moving. This indicates that the valve is fully closed.
It’s important to note that some fireplace models may have a separate control knob labeled specifically for the pilot light. In this case, locate the pilot light control knob and follow the same steps to turn it off.
After turning off the pilot light control valve, double-check that the flame is no longer lit by inspecting the pilot light. The flame should be completely extinguished.
Now that the pilot light has been successfully turned off, let’s move on to the next step of ensuring the pilot light is indeed off.
Step 5: Ensure the Pilot Light is Off
After turning off the pilot light control valve, it’s important to verify and ensure that the pilot light is indeed off. This step is crucial to prevent any potential gas leaks or hazards.
Follow these steps to ensure the pilot light is off:
- Observe the pilot light area carefully. Look for any signs of a flame, such as a flickering light or a small blue flame.
- If you see a flame, try turning the pilot light control valve clockwise again to ensure it is fully closed. Sometimes, the valve may not have been completely shut off during the previous step.
- If the flame persists or you are unable to turn off the pilot light, do not attempt further troubleshooting. Instead, contact a licensed technician for assistance.
- Once you are confident that the pilot light is extinguished, visually inspect the area around the pilot light for any signs of gas odor or leaks. If you detect a strong gas smell or suspect a leak, evacuate the area immediately and contact your gas utility provider or emergency services.
Remember, if you have any doubts or concerns about the status of the pilot light or suspect a gas leak, it’s always best to err on the side of caution and seek professional assistance.
Now that you have verified the pilot light is off and ensured the safety of your fireplace, we can move on to the next step of reassembling and cleaning the area.
Step 6: Reassemble and Clean
After ensuring the pilot light is off and confirming the safety of your fireplace, it’s time to reassemble any panels or covers that were removed and clean the area around the pilot light.
Follow these steps to reassemble and clean:
- Take the panel or cover that was removed in Step 3 and carefully position it back into place.
- Use the appropriate tool, such as a screwdriver, to reattach any screws or fasteners that secure the panel or cover.
- Ensure that everything is properly aligned and securely fastened.
- Once the reassembly is complete, take a dry cloth and gently wipe down the area around the pilot light and control valve. Remove any dust, debris, or dirt that may have accumulated.
- Pay close attention to any ventilation openings to ensure they are clear and free from obstruction.
By reassembling the panels and cleaning the area, you will maintain the proper functioning and appearance of your fireplace.
With the reassembly and cleaning completed, you have successfully turned off the pilot light on your fireplace. Congratulations!
Always remember to refer to your manufacturer’s manual for specific instructions and recommendations regarding maintenance and troubleshooting of your fireplace. If you encounter any difficulties or have any concerns, it’s best to consult a licensed technician for assistance.
Thank you for following this step-by-step guide. Stay safe and enjoy your fireplace in a way that suits your needs!
Read more: How To Turn Off An Electric Fireplace
Conclusion
Turning off the pilot light on your fireplace is a straightforward process that helps conserve energy and ensure safety. By following the step-by-step guide provided in this article, you have learned how to safely and properly turn off the pilot light on your fireplace.
Remember to always prioritize safety by adhering to the recommended safety precautions, such as wearing protective gear, keeping the area well-ventilated, and following local building codes. If you are unsure or uncomfortable performing the tasks, it is advisable to seek assistance from a licensed technician.
Throughout the process, we emphasized the importance of using the appropriate tools, locating the gas supply shut-off valve, accessing the pilot light, turning off the pilot light control valve, and verifying that the pilot light is indeed off. These steps ensure proper operation and minimize the risk of accidents or gas leaks.
Furthermore, after completing the necessary steps, you learned how to reassemble the panels and clean the area surrounding the pilot light. This helps maintain the aesthetics and functionality of your fireplace.
By regularly turning off the pilot light when it’s not in use, you can save on energy costs and contribute to a more sustainable lifestyle. Additionally, it allows for a safer environment, reducing the risk of accidental fires and gas leaks.
As always, refer to your fireplace’s manual for specific instructions and recommendations. If you encounter any difficulties or have any concerns, do not hesitate to seek professional assistance.
We hope this guide has been helpful in teaching you how to turn off the pilot light on your fireplace. Stay safe, and enjoy the benefits of an efficiently and safely operated fireplace.
Frequently Asked Questions about How To Turn Off Fireplace Pilot Light
Was this page helpful?
At Storables.com, we guarantee accurate and reliable information. Our content, validated by Expert Board Contributors, is crafted following stringent Editorial Policies. We're committed to providing you with well-researched, expert-backed insights for all your informational needs.



0 thoughts on “How To Turn Off Fireplace Pilot Light”