
Articles
How To Clean Fence Before Staining
Modified: February 26, 2024
Looking for articles on how to clean your fence before staining it? Get expert tips and advice for the best techniques to prepare your fence for staining.
(Many of the links in this article redirect to a specific reviewed product. Your purchase of these products through affiliate links helps to generate commission for Storables.com, at no extra cost. Learn more)
Introduction
Cleaning your fence before staining is an essential step to ensure a beautiful and long-lasting finish. Over time, fences can accumulate dirt, grime, mildew, and other stains that can detract from their appearance and compromise their integrity. By properly cleaning your fence, you can remove these impurities, allowing the stain to penetrate and adhere evenly to the surface.
In this article, we will guide you through the process of cleaning your fence before staining. From the materials you will need to the step-by-step instructions, we will cover everything you need to know to achieve professional-looking results.
Before we begin, it’s important to note that different types of fences may require specific cleaning methods or products. Always refer to the manufacturer’s instructions or consult with a professional who can provide guidance tailored to your specific fence material.
Now, let’s gather our materials and get started!
Key Takeaways:
- Properly cleaning your fence before staining is crucial for achieving a professional finish and long-lasting results. From clearing debris to applying the stain, each step contributes to a beautifully transformed and protected fence.
- Choosing the right cleaning materials, effectively removing stubborn stains, and ensuring thorough drying are key to preparing your fence for staining. This process not only enhances the appearance of your fence but also provides essential protection against the elements.
Read more: How To Spray Stain A Fence
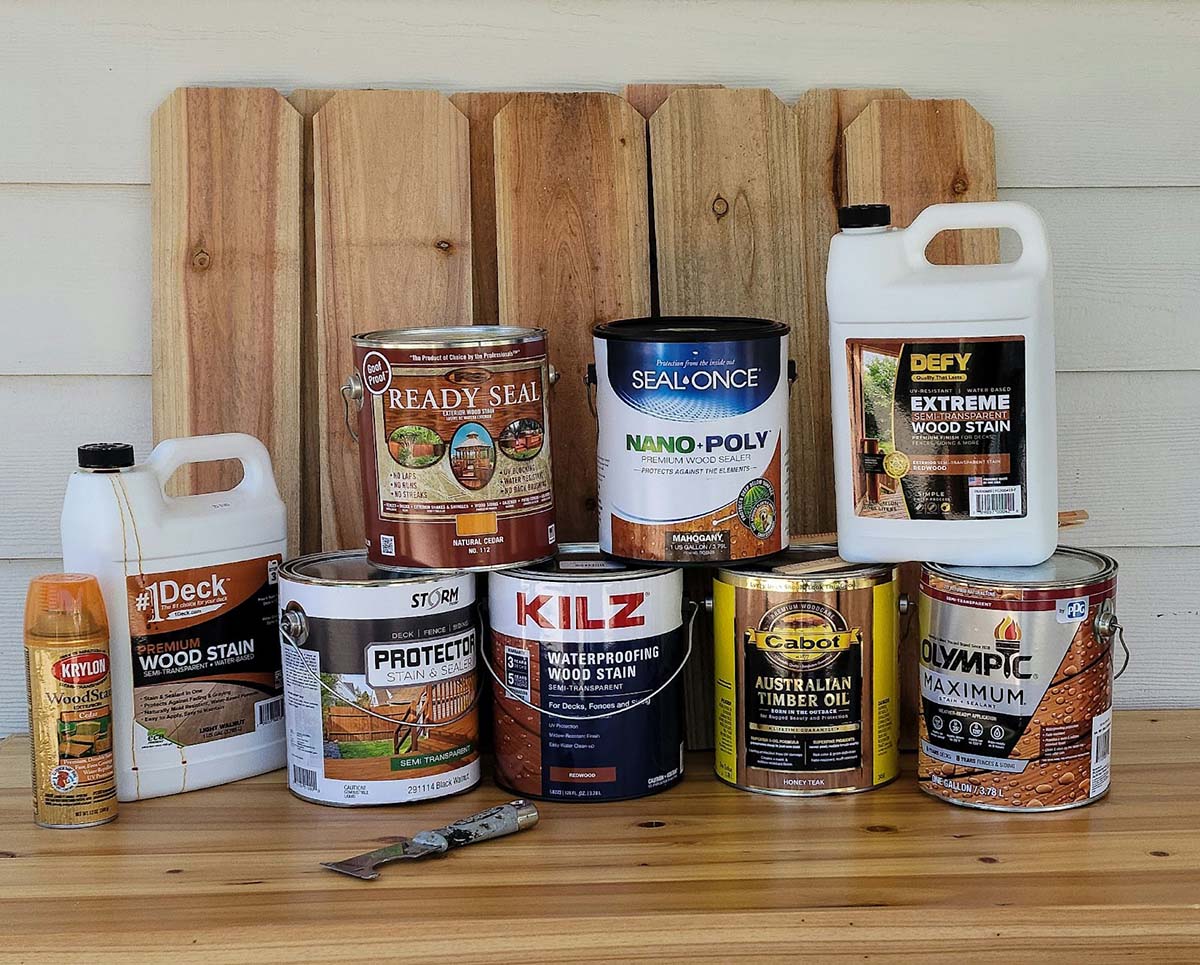
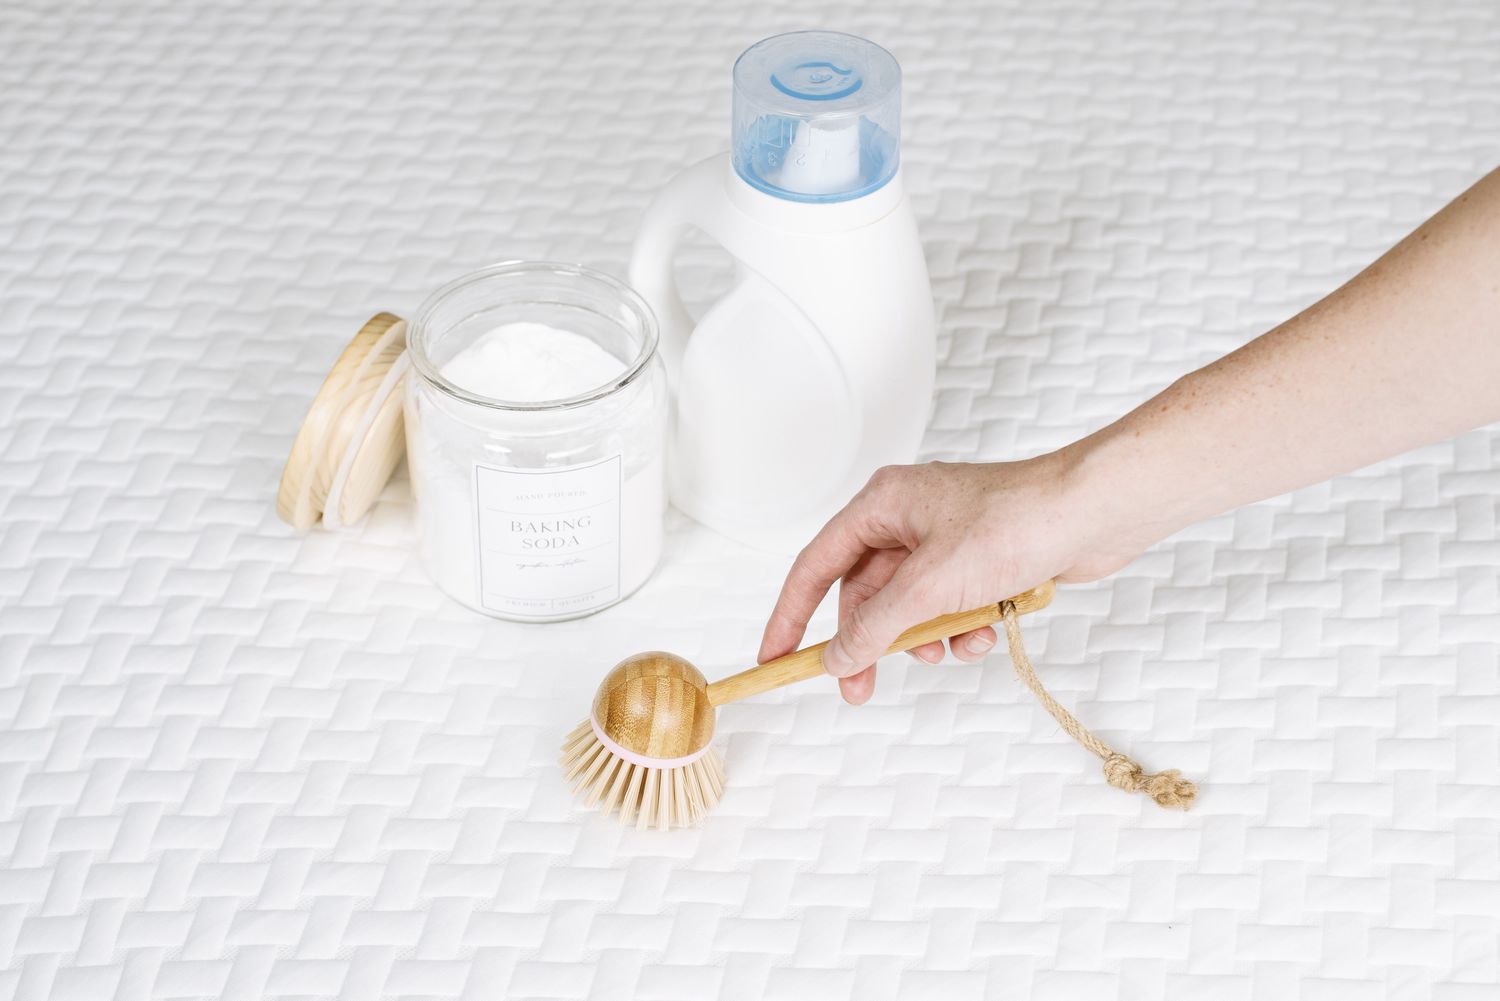
Materials Needed
Before you begin the fence cleaning process, make sure you have the following materials on hand:
- A pressure washer or garden hose with a spray nozzle
- A scrub brush or sponge
- Mild detergent or fence cleaner
- Bleach (optional, for stubborn stains or mildew)
- Gloves
- Protective eyewear
- Drop cloths or plastic sheets to protect surrounding areas
- Sanding block or sandpaper (if necessary)
- Fence stain or sealant
- Paintbrush or sprayer (depending on your preference)
It’s important to mention that if you’re using a pressure washer, make sure it has an adjustable nozzle to control the water pressure. This will prevent any damage to the wood or other fence materials.
Once you have gathered all the necessary materials, you’re ready to proceed with the fence cleaning process.
Preparing the Fence
Before you start cleaning your fence, it’s important to take a few preparatory steps to ensure the process goes smoothly:
- Clear the area: Remove any obstacles, such as furniture or plants, from around the fence. This will make it easier to access all areas and avoid damaging any items during the cleaning process.
- Protect nearby surfaces: Cover any nearby surfaces, such as siding or landscaping, with drop cloths or plastic sheets. This will prevent them from getting damaged or stained by cleaning solutions or water runoff.
- Read the manufacturer’s instructions: If your fence has specific cleaning requirements or restrictions, refer to the manufacturer’s instructions. This will help you avoid any potential damage or issues.
- Put on protective gear: Wear gloves and protective eyewear to keep yourself safe throughout the cleaning process. This will protect your hands from harsh detergents and prevent any debris or cleaning solutions from getting into your eyes.
Once you have completed these preparatory steps, you’re ready to move on to the next phase: clearing debris from the fence.
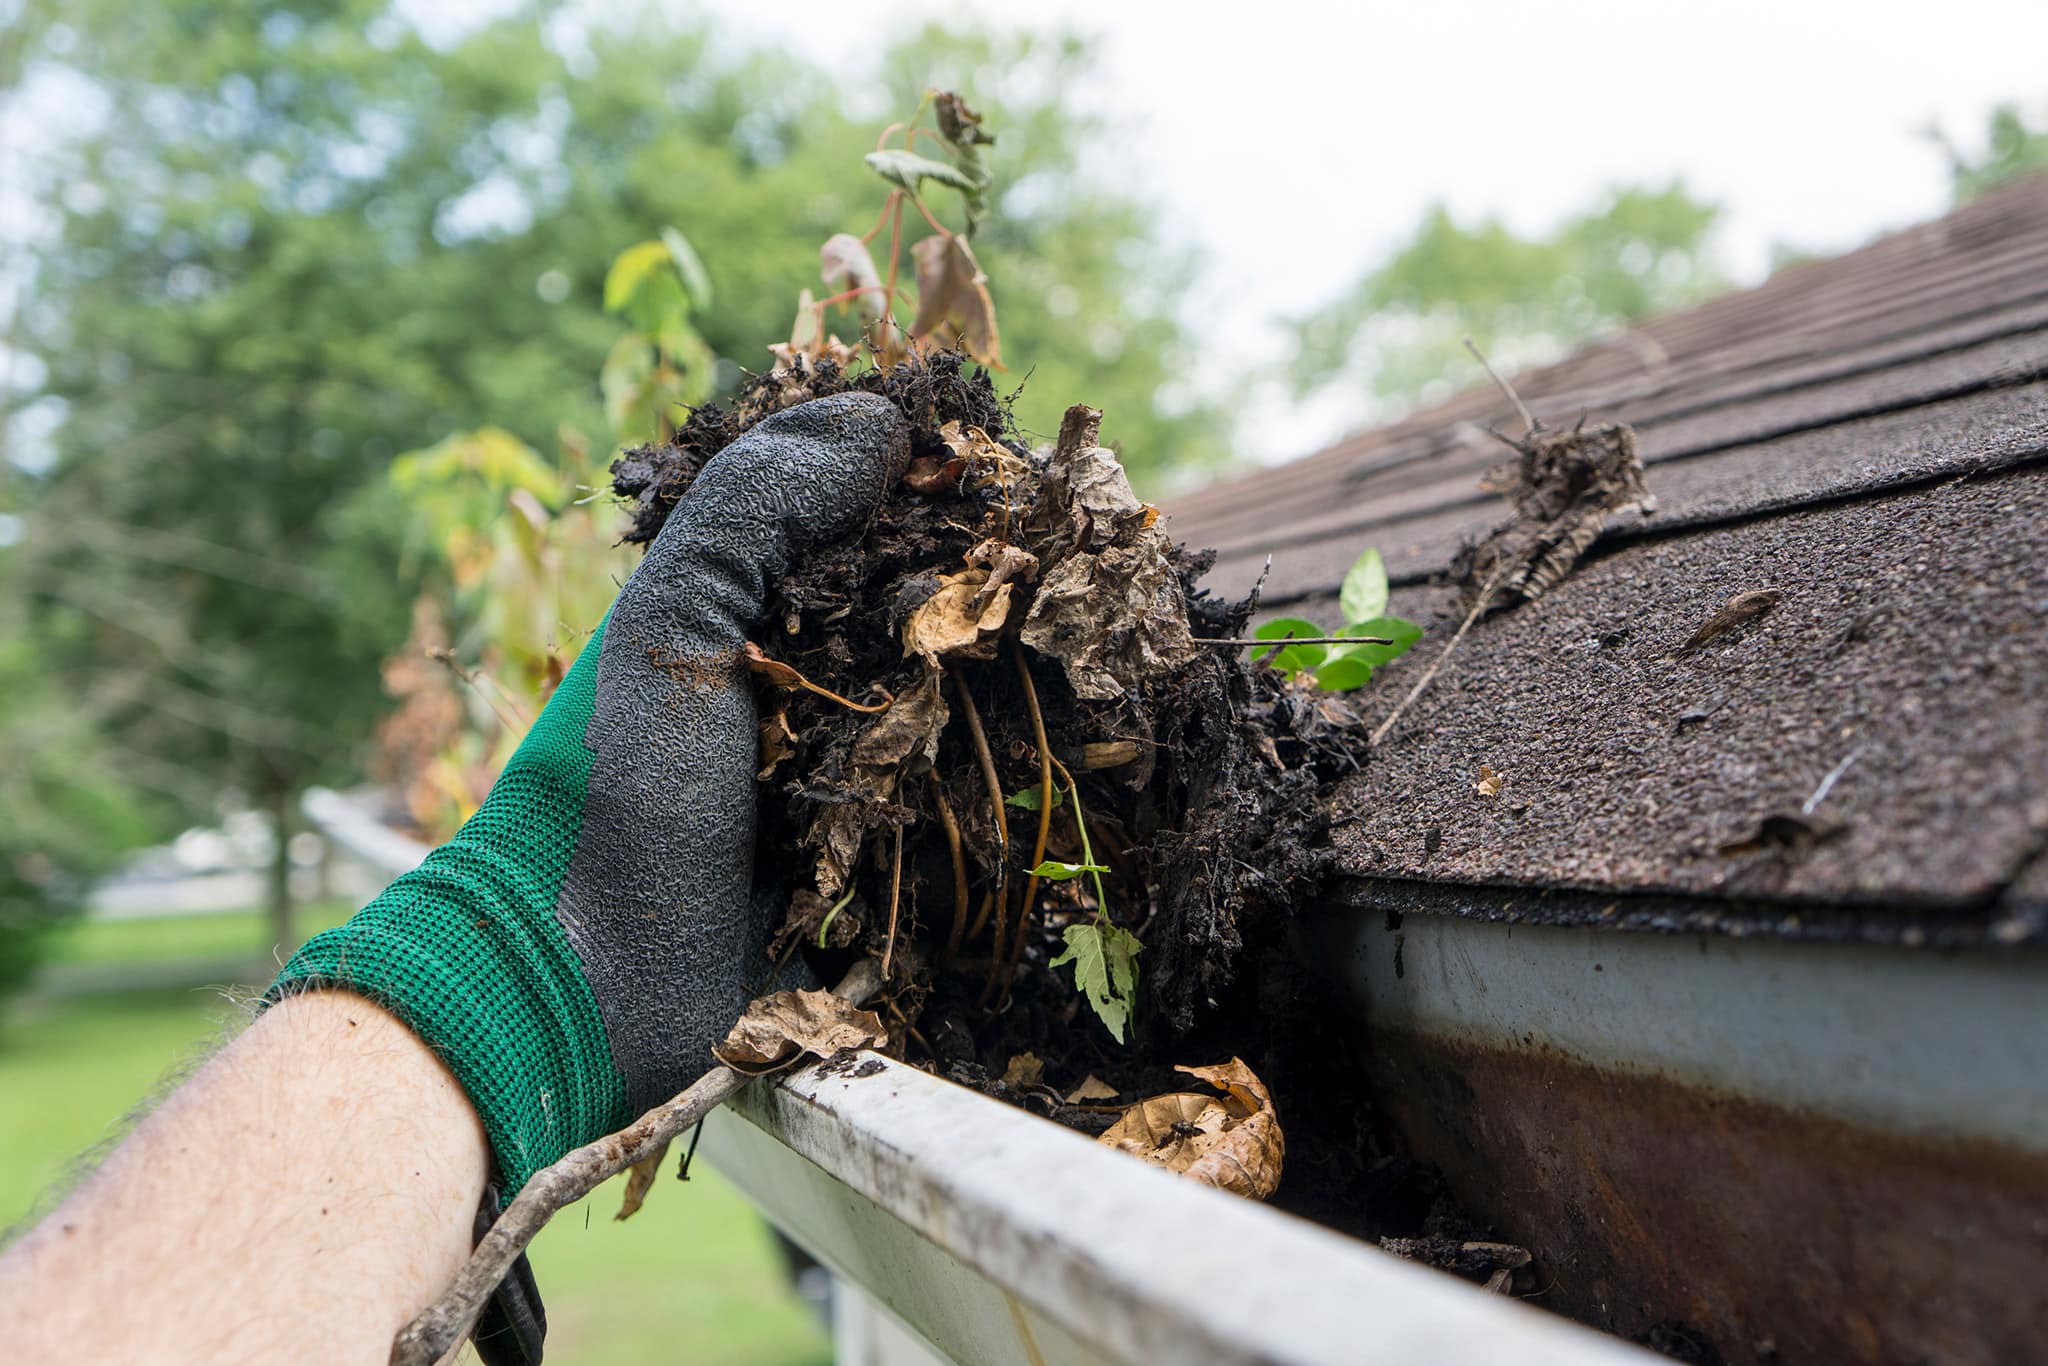
Clearing Debris
Before you can effectively clean your fence, it’s important to remove any debris or loose dirt that may have accumulated on the surface. This will allow for a more thorough and effective cleaning process. Here are the steps to clear debris from your fence:
- Inspect the fence: Take a close look at your fence and identify any branches, leaves, or other debris that may be attached to it. Pay special attention to areas where debris tends to accumulate, such as corners or gaps between boards.
- Use a broom or brush: If there is loose debris on the fence, use a broom or brush to gently sweep away as much as possible. This will make the cleaning process easier and prevent the debris from becoming trapped in the cleaning solution.
- Remove stubborn debris: For any stubborn debris that is stuck to the fence, use a putty knife or a plastic scraper to carefully scrape it off. Be gentle to avoid damaging the surface of the fence.
- Dispose of the debris: Once you have cleared the debris from your fence, collect it in a bag or container and dispose of it properly.
By clearing away debris, you create a clean surface to work with and ensure that the cleaning solutions can penetrate the fence effectively. Now that your fence is free from loose debris, it’s time to move on to the next step: washing the fence.
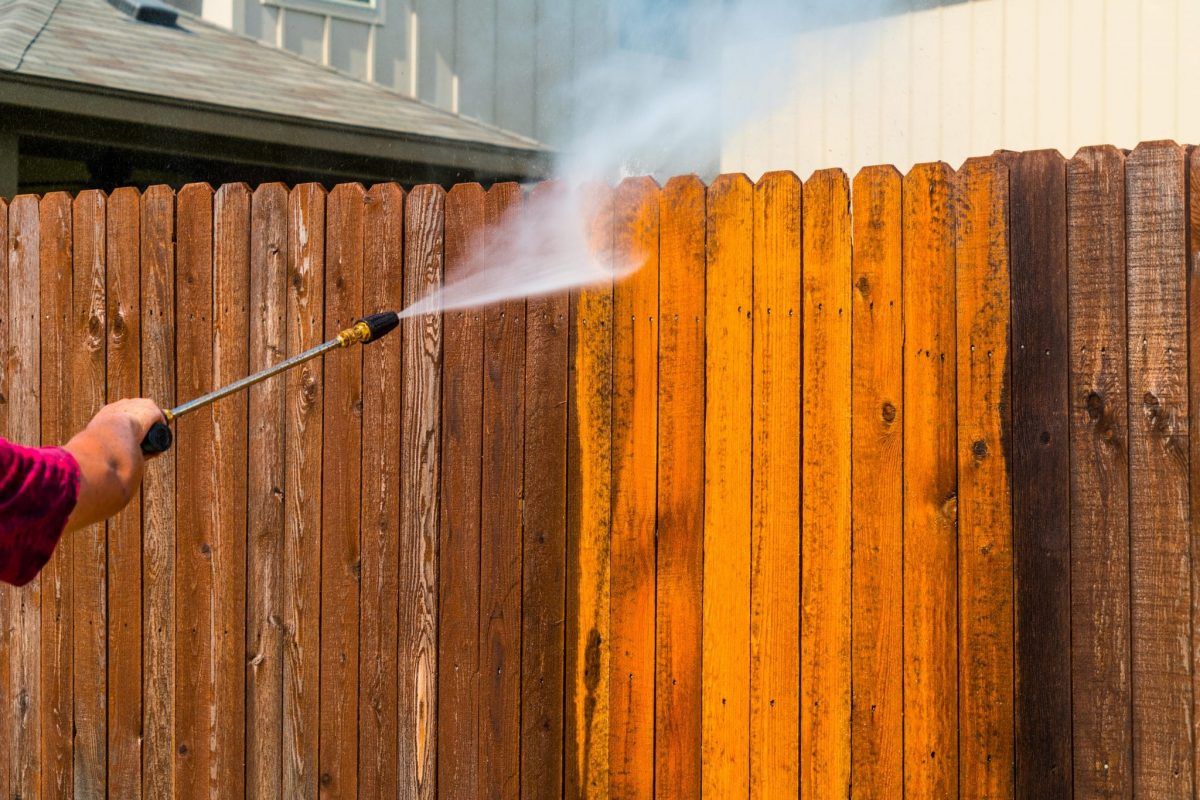
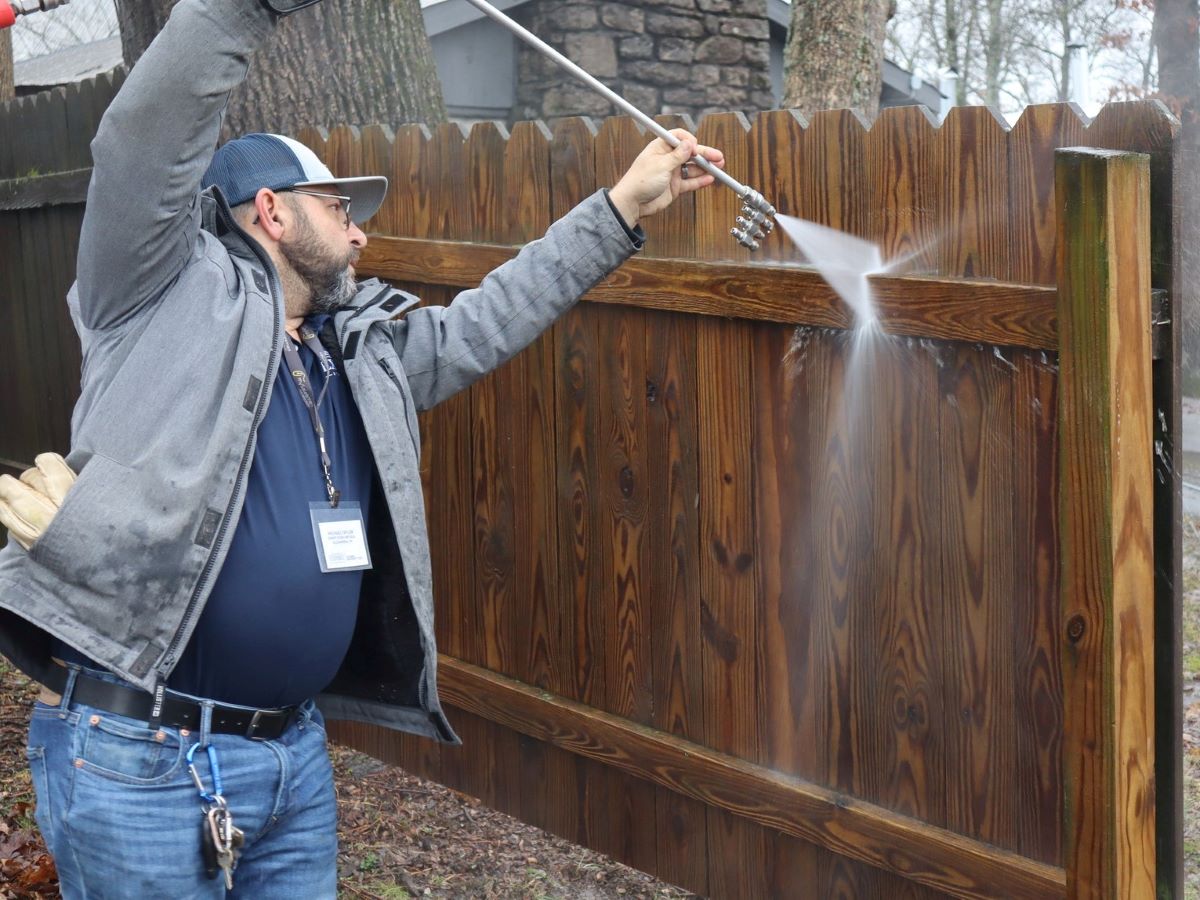
Washing the Fence
Washing the fence is a crucial step in the cleaning process as it helps to remove dirt, grime, and other contaminants from the surface. There are a few different methods you can use to wash your fence, depending on the materials and level of dirtiness. Here’s a step-by-step guide:
- Prepare the cleaning solution: Mix a mild detergent or fence cleaner with water according to the manufacturer’s instructions. Alternatively, you can create a homemade cleaning solution by mixing equal parts water and vinegar.
- Apply the cleaning solution: Using a garden sprayer, spray the cleaning solution onto the fence. Start from the top and work your way down, ensuring that the entire surface is covered. Allow the solution to sit for a few minutes to break down any dirt or grime.
- Scrub the fence: Use a scrub brush or sponge to scrub the fence, focusing on areas with stains or buildup. Apply gentle pressure and use circular motions to effectively remove the dirt. For hard-to-reach areas or intricate details, you can use a toothbrush or small brush to ensure thorough cleaning.
- Rinse the fence: Once you have scrubbed the entire fence, rinse it thoroughly with a garden hose or a pressure washer. Start from the top and work your way down, ensuring that all the cleaning solution is rinsed off. Pay special attention to remove any soap residue, as it can affect the stain’s adherence.
- Inspect the fence: After rinsing, inspect the fence to ensure that all dirt and grime have been removed. If necessary, repeat the cleaning process to achieve satisfactory results.
Once you have finished washing the fence, it’s time to address any stubborn stains that may still be present. We’ll discuss this in the next section.
Use a pressure washer to remove dirt, grime, and old stain from the fence before staining. Make sure to use a low-pressure setting to avoid damaging the wood.
Read more: How Long For Fence Stain To Dry
Removing Stubborn Stains
While washing the fence can remove most dirt and grime, there may be stubborn stains that require extra attention. Depending on the type of stain and the material of your fence, you can try different methods to remove them. Here are some techniques you can use to tackle stubborn stains:
- Bleach solution: For tough stains or mildew, you can create a bleach solution by mixing one part bleach with three parts water. Apply the solution to the stained areas using a sponge or brush, and let it sit for a few minutes. Then, rinse thoroughly with water to neutralize the bleach.
- Oxygen bleach cleaner: Oxygen bleach cleaners are a gentler alternative to chlorine bleach. Follow the instructions on the product for proper usage. Apply the cleaner to the stained areas, scrub with a brush, and rinse thoroughly.
- Baking soda paste: Make a paste of baking soda and water and apply it to the stained areas. Let it sit for a few minutes, then scrub with a brush and rinse off. Baking soda is effective for removing grease, oil, and rust stains.
- Vinegar solution: Mix equal parts of vinegar and water to create a cleaning solution. Apply it to the stained areas, scrub with a brush, and rinse off. Vinegar is effective for removing mildew and other organic stains.
- Sanding: If the stain doesn’t come off with cleaning methods, you may need to sand the affected area. Use a sanding block or sandpaper with a fine grit to gently sand the stained spot. Be careful not to damage the surrounding wood or material.
Remember to always test any cleaning solution or method on a small, inconspicuous area of your fence before applying it to the entire surface. This will help you ensure that it doesn’t cause any damage or discoloration.
After successfully removing stubborn stains, proceed to the next step: drying the fence.
Drying the Fence
Once you have completed the cleaning process and removed any stubborn stains, it’s important to allow the fence to dry thoroughly before proceeding with staining. Proper drying ensures that the stain will adhere properly and provide long-lasting results. Follow these steps to effectively dry your fence:
- Remove excess water: Use a squeegee or a clean cloth to remove any excess water from the fence. Start from the top and work your way down, ensuring that you remove as much moisture as possible.
- Air drying: Allow the fence to air dry naturally for at least 24 hours, or until it feels completely dry to the touch. Depending on weather conditions, such as humidity or temperature, the drying time may vary.
- Avoid direct sunlight: If possible, try to position the fence in a shaded area during the drying process. Direct sunlight can cause the wood to dry too quickly and may lead to cracking or warping.
- Check for moisture: Before proceeding with staining, thoroughly inspect the fence for any signs of moisture. Pay close attention to areas that tend to retain moisture, such as joints or crevices.
It’s crucial to ensure that the fence is completely dry before applying the stain. If the wood is still damp, the stain may not adhere properly, resulting in an uneven finish or reduced durability.
Once you are confident that the fence is dry, it’s time to move on to the next step: sanding the surface (if necessary).
Sanding the Surface
Sanding the surface of your fence is an optional step that can help to smooth out rough or uneven areas and create a clean, smooth surface for the stain to adhere to. While not all fences may require sanding, it is beneficial for fences with splintered wood or visible signs of wear and tear. Follow these steps to sand the surface of your fence:
- Gather the necessary materials: You will need a sanding block or sandpaper with a medium grit (around 80-120), gloves to protect your hands, and a dust mask to prevent inhaling any dust particles.
- Start with a test area: Begin by testing the sandpaper on a small, inconspicuous area of the fence to determine the right level of abrasiveness and evaluate the impact on the wood surface.
- Sand the surface: Working in small sections, apply gentle pressure and sand the surface of the fence using smooth, even strokes. Follow the natural grain of the wood, going in one direction to achieve a uniform finish.
- Pay attention to rough spots and splinters: Focus on areas that have rough spots or splintered wood. Sand them carefully, removing any loose or jagged edges, until the surface feels smooth to the touch.
- Remove dust: Once you have finished sanding, use a brush or a clean cloth to remove any dust or debris from the surface of the fence. This will ensure a clean and smooth surface for applying the stain.
Remember to be cautious while sanding to avoid damaging the fence. Use light pressure and take your time to ensure that you achieve the desired result without compromising the integrity of the wood.
Once you have completed the sanding process, you’re ready to move on to the final step: applying the stain.
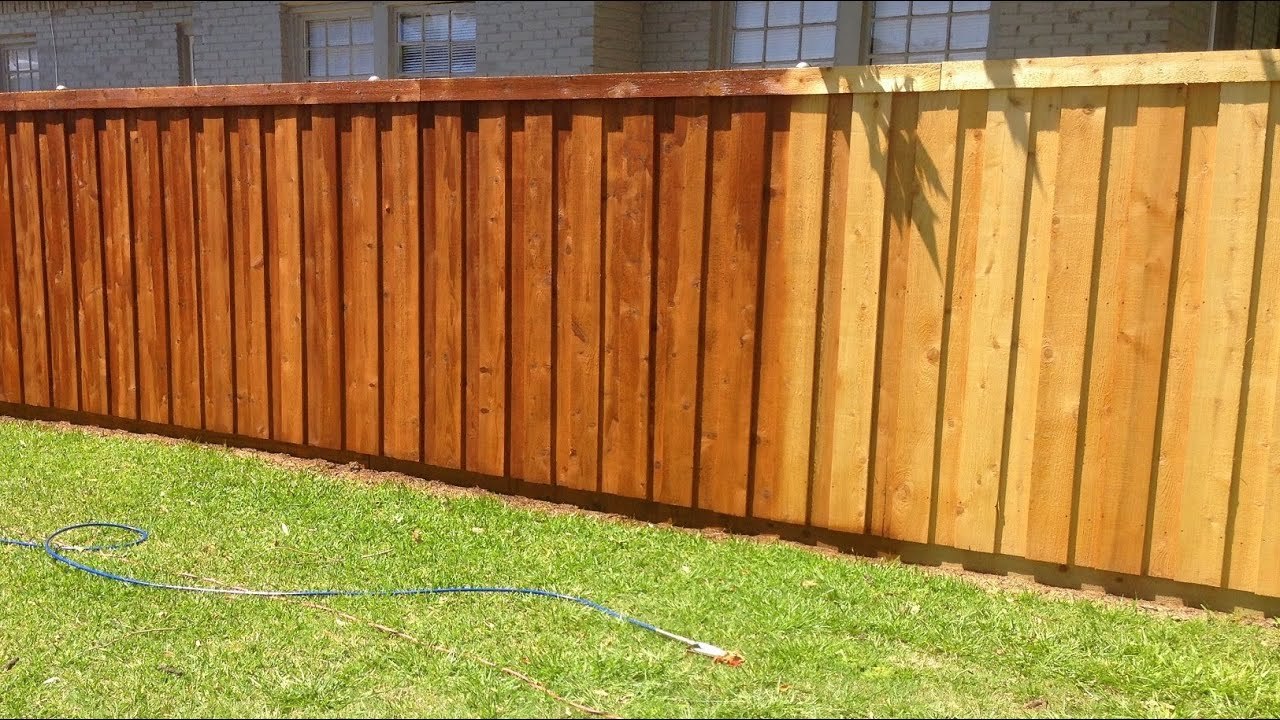
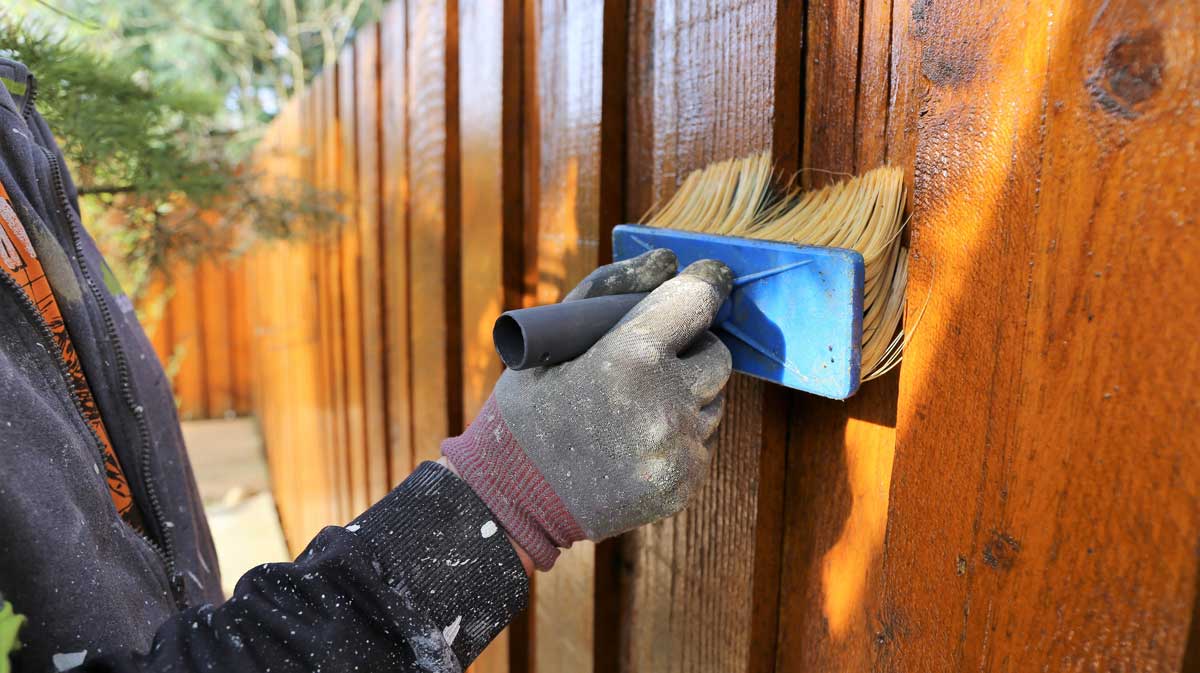
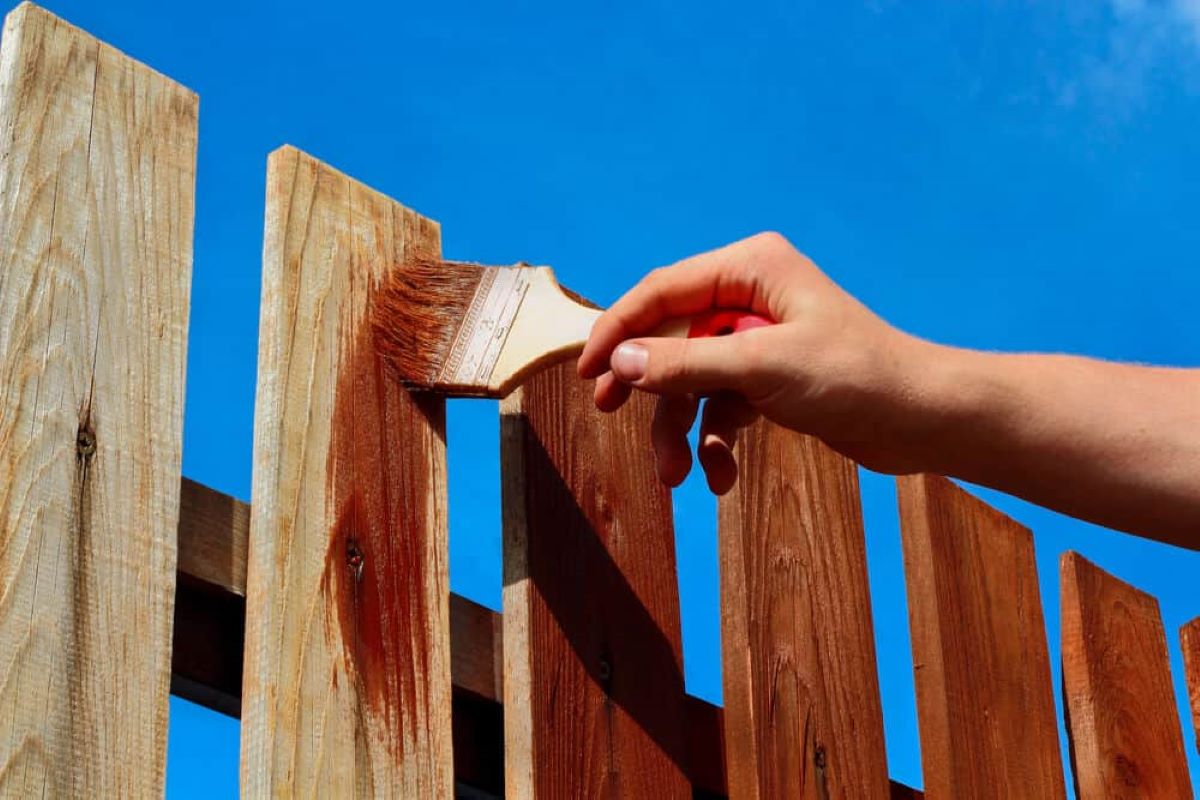
Applying Stain
Applying stain is the final step in the fence cleaning process. It not only enhances the appearance of the fence but also provides protection against the elements. When applying stain, follow these steps to achieve professional-looking results:
- Choose the right stain: Select a stain that is suitable for your fence material and desired look. There are various types of stains available, such as transparent, semi-transparent, and solid stains. Consider factors such as color, opacity, and UV protection when making your choice.
- Prepare the stain: If using a brush or roller, pour the stain into a paint tray. If using a sprayer, follow the manufacturer’s instructions for proper setup and pouring of the stain.
- Start from the top: Begin applying the stain from the top of the fence, working your way down. This prevents any drips or streaks from staining the areas below.
- Apply the stain: Use a paintbrush, roller, or sprayer to apply a thin and even layer of stain to the fence. Follow the wood grain and apply the stain in long, smooth strokes for optimal coverage. Take care to reach all the nooks, corners, and crevices.
- Work in sections: Divide your fence into manageable sections and work on one section at a time. This helps to ensure an even application of stain and prevents it from drying too quickly.
- Overlap strokes: When applying the stain, slightly overlap each stroke to achieve a seamless and uniform finish.
- Allow the stain to dry: Follow the stain manufacturer’s instructions for the recommended drying time. It typically takes a few hours to dry, but it may vary depending on the type of stain and weather conditions.
- Apply multiple coats (if necessary): If you desire a deeper or darker color, apply a second or even third coat of stain after the initial coat has dried. Allow each coat to dry completely before applying the next one.
After applying the final coat of stain, allow it to dry completely before allowing contact or exposure to moisture. This will ensure that the stain properly bonds with the wood and provides long-lasting protection.
By following these steps, you can achieve a beautifully stained fence that enhances its appearance and extends its lifespan.
With the fence now cleaned and stained, you can step back and admire the transformation. Not only does it look great, but it is also better protected against the elements. Regular maintenance, such as cleaning and re-staining as needed, will help preserve the beauty and integrity of your fence for years to come.
Frequently Asked Questions about How To Clean Fence Before Staining
Was this page helpful?
At Storables.com, we guarantee accurate and reliable information. Our content, validated by Expert Board Contributors, is crafted following stringent Editorial Policies. We're committed to providing you with well-researched, expert-backed insights for all your informational needs.


0 thoughts on “How To Clean Fence Before Staining”