Home>Fans, Heaters & Lighting>How To Clean A Space Heater?

Fans, Heaters & Lighting
How To Clean A Space Heater?
Modified: December 7, 2023
Discover effective articles on how to clean space heaters and maintain optimum functionality. Learn essential tips for safe and efficient maintenance.
(Many of the links in this article redirect to a specific reviewed product. Your purchase of these products through affiliate links helps to generate commission for Storables.com, at no extra cost. Learn more)
Introduction
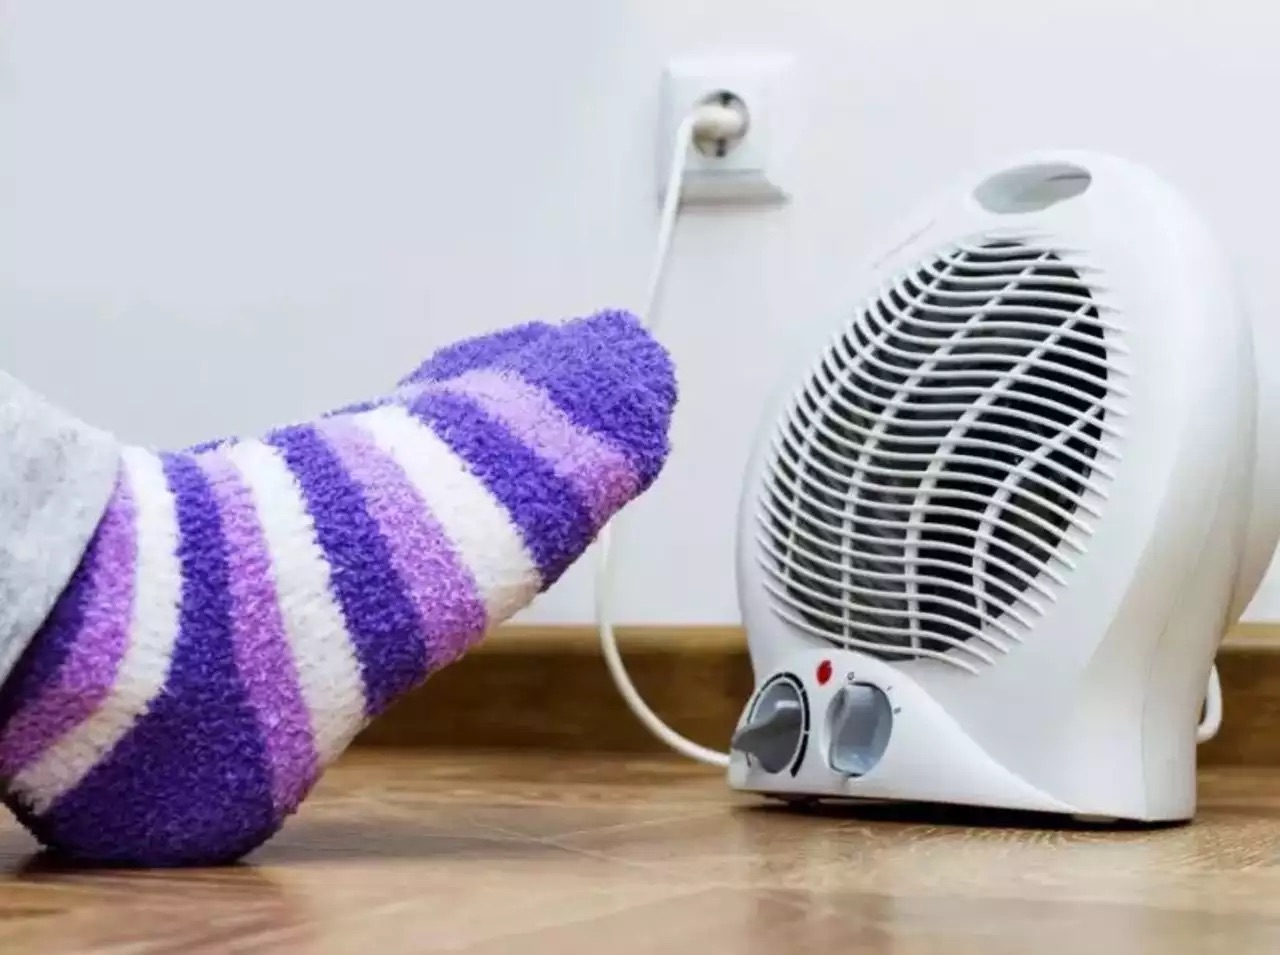
Space heaters are a popular choice for keeping rooms warm and cozy during the colder months. However, regular use of these heaters can lead to a buildup of dust, dirt, and other debris, which can affect their performance and even pose a fire hazard. Therefore, it is essential to know how to properly clean your space heater to ensure its efficiency and safety.
In this article, we will guide you through the step-by-step process of cleaning a space heater. We will cover the necessary safety precautions, the supplies you will need, and the proper techniques to clean both the exterior and interior components of the heater. By following these instructions, you can maintain the longevity of your space heater and ensure that it operates at optimal performance.
Please note that before you begin cleaning your space heater, it is important to read the manufacturer’s instructions for your specific model. Each heater may have different guidelines and recommendations for cleaning.
Now, let’s dive into the necessary safety precautions you should take before starting the cleaning process.
Key Takeaways:
- Regularly cleaning and maintaining your space heater is crucial for its efficiency, longevity, and safety. Follow the step-by-step guide to ensure optimal performance and minimize fire hazards.
- Prioritize safety by unplugging the heater, using the right supplies, and following manufacturer’s instructions. Keep your space heater clean, safe, and ready for cozy warmth.
Read more: How To Dispose A Space Heater?
Safety Precautions
Before you start cleaning your space heater, it is crucial to prioritize safety. Space heaters can be potential fire hazards if not handled properly. Follow these safety precautions to ensure a safe cleaning process:
- Turn off and unplug the space heater: Before you start cleaning, make sure the space heater is turned off and unplugged from the power source. This will prevent any potential electrical accidents during the cleaning process.
- Allow the space heater to cool down: Give the heater enough time to cool down completely before starting the cleaning process. Touching hot components can cause burns or injuries.
- Work in a well-ventilated area: To avoid inhaling dust particles and fumes from cleaning products, make sure you are in a well-ventilated area. Open windows or doors to ensure proper air circulation.
- Use protective gear: Wear gloves and a mask to protect your hands and respiratory system from potential allergens and irritants while cleaning. Safety goggles may also be necessary to protect your eyes from any debris.
- Stay away from water sources: Do not expose your space heater or any of its components to water. This can cause electrical shorts, damage the heater, and pose a significant safety risk.
- Do not use abrasive materials: Avoid using rough or abrasive materials, such as steel wool, to clean your space heater. These materials can scratch the surface and damage the heater’s functionality.
- Read and follow the manufacturer’s instructions: Always refer to the manufacturer’s instructions for your specific space heater. They may provide additional safety guidelines and tips that are specific to your model.
By following these safety precautions, you can ensure a safe and efficient cleaning process for your space heater. Now let’s move on to gather the supplies you will need for the cleaning process.
Gathering the Supplies
Before you start cleaning your space heater, it is essential to gather all the necessary supplies. Having these items prepared beforehand will make the cleaning process smoother and more efficient. Here are the supplies you will need:
- Clean, dry cloth: Prepare a soft, lint-free cloth to wipe down the exterior and interior surfaces of the space heater. Avoid using abrasive materials that could scratch the heater.
- Canned air or compressed air: A can of compressed air is useful for blowing away dust and debris from hard-to-reach areas, such as the vents and fan blades. Make sure to use a can specifically designed for electronics to avoid any damage.
- Mild detergent or cleaning solution: If your space heater has stubborn stains or dirt buildup, you may need a mild detergent or cleaning solution. Ensure that it is safe to use on the materials and surfaces of your specific heater.
- Small brush or toothbrush: A small brush or toothbrush can be handy for cleaning hard-to-reach nooks and crannies, such as the grill and vents. Ensure the bristles are soft, as harsh bristles can cause damage.
- Bucket or sink: You will need a bucket or sink filled with warm water to clean certain removable parts of the space heater. Ensure the water is not too hot to prevent any accidental burns.
- Microfiber cloth or paper towels: These can be used to dry off the cleaned surfaces and components of the space heater after washing.
- Screwdriver (if necessary): Depending on your space heater’s design, you may need a screwdriver to disassemble certain parts for thorough cleaning. Check the manufacturer’s instructions to determine if a screwdriver is required.
Once you have gathered all the necessary supplies, you are ready to proceed with the cleaning process. But before you start disassembling the space heater, ensure it is turned off and unplugged. Let’s move on to the next step of the cleaning process: unplugging and disassembling the space heater.
Unplugging and Disassembling the Space Heater
Before you begin cleaning your space heater, it is crucial to unplug it from the power source. This will ensure your safety and prevent any electrical accidents during the cleaning process. Once unplugged, follow these steps to disassemble the space heater:
- Refer to the manufacturer’s instructions: Different space heaters have varying designs, so it is important to consult the manufacturer’s instructions for your specific model. These instructions will guide you on how to safely disassemble the heater.
- Remove the front grill: In most space heaters, the front grill can be removed by gently pulling it away from the heater. Some models may have screws that need to be loosened before the grill can be taken off. Use a screwdriver if necessary.
- Take out the filter (if applicable): If your space heater has a filter, remove it according to the manufacturer’s instructions. Filters can usually be easily taken out and cleaned separately.
- Check for additional removable parts: Depending on your space heater’s design, there may be other removable parts, such as the back panel or side panels. If necessary, carefully detach them following the manufacturer’s instructions.
- Keep screws and small parts safely: As you remove screws or small parts during the disassembly process, be sure to keep them organized and in a safe place. You will need them later when reassembling the space heater.
Once you have successfully disassembled your space heater, you are ready to move on to the next step: cleaning the exterior. Ensure that the heater is still turned off and unplugged throughout the cleaning process. Let’s proceed to the next section.
Cleaning the Exterior
Now that you have disassembled your space heater, it’s time to focus on cleaning the exterior surfaces. Follow these steps to effectively clean the outside of your space heater:
- Wipe down the surfaces: Begin by using a clean, dry cloth to wipe down the exterior surfaces of the space heater. This will help remove any loose dust or debris. Pay attention to areas that are prone to collecting dust, such as the top, sides, and control panel.
- Spot clean any stains: If there are any visible stains or marks on the exterior of the heater, dampen a cloth with a mild detergent or cleaning solution. Gently rub the stained area until the stain is removed. Be careful not to saturate the cloth or allow any liquid to enter the heater.
- Dry the surfaces: After cleaning, use a microfiber cloth or paper towels to thoroughly dry the exterior surfaces of the space heater. This will prevent any water damage and ensure that the heater is ready for reassembly.
Once you have completed cleaning the exterior of the space heater, it’s time to move on to the next step: cleaning the heating elements. This is an important part of the cleaning process to ensure optimal performance. Let’s proceed to the next section.
To clean a space heater, start by unplugging it and allowing it to cool. Use a vacuum with a brush attachment to remove dust and debris from the exterior and vents. Wipe down the surface with a damp cloth and mild detergent. Be sure to follow the manufacturer’s instructions for cleaning to ensure safety.
Read more: How To Plug In A Space Heater
Cleaning the Heating Elements
The heating elements of your space heater are crucial for providing warmth and efficient operation. Over time, these elements can accumulate dust and dirt, which can affect their performance. Follow these steps to clean the heating elements of your space heater:
- Ensure the heater is completely cooled down: Before cleaning the heating elements, make sure the space heater is completely cooled down. This will prevent any burns or injuries.
- Use compressed air on the heating elements: Take a can of compressed air and carefully aim it at the heating elements. Use short bursts of air to blow away any dust and debris that have accumulated on the elements. Be thorough in targeting all sides of the elements.
- Brush away remaining residue: For any remaining residue, use a soft brush or toothbrush to gently brush the heating elements. This will help dislodge any stubborn dirt or debris. Be careful not to apply too much pressure or damage the delicate heating elements.
- Blow away loose particles: Once you have brushed the heating elements, use compressed air again to blow away any loose particles that may have been dislodged. This will help ensure that the elements are thoroughly clean and free from debris.
After cleaning the heating elements, it’s important to move on to the next step: cleaning the fan and air vents. Dust and dirt can accumulate in these areas and affect the air circulation of your space heater. Let’s proceed to the next section.
Cleaning the Fan and Air Vents
The fan and air vents of your space heater play a critical role in circulating warm air and maintaining proper airflow. Over time, these components can become clogged with dust and debris, hindering their performance. Follow these steps to clean the fan and air vents of your space heater:
- Refer to the manufacturer’s instructions: Before cleaning the fan and air vents, consult the manufacturer’s instructions for your specific space heater. They may provide specific guidance on how to access and clean these components.
- Use compressed air on the vents: Take a can of compressed air and direct it at the air vents. Use short bursts of air to dislodge any dust or debris that may have accumulated in the vent openings. Start from one side and work your way across, ensuring you cover the entire surface of the vents.
- Brush the fan blades: Gently brush the fan blades using a soft brush or toothbrush. This will help remove any dust or dirt that may have built up on the blades. Be thorough in brushing all sides of the blades.
- Blow away loose particles: Once you have brushed the fan blades, use compressed air again to blow away any loose particles that may have been dislodged. Aim the air at the fan blades and vent openings to ensure a thorough cleaning.
- Check for additional filters: Some space heaters may have additional filters that can be removed and cleaned separately. Check the manufacturer’s instructions to see if your heater has any additional filters that need attention.
- Clean the filters (if applicable): If your space heater has removable filters, follow the manufacturer’s instructions on how to clean them. Typically, these filters can be washed with warm, soapy water, rinsed thoroughly, and left to air dry before reinserting them into the heater.
After cleaning the fan and air vents, it’s time to reassemble the space heater and prepare it for use. Let’s proceed to the next section: reassembling and plugging in the space heater.
Reassembling and Plugging in the Space Heater
Now that you have completed the cleaning process for your space heater, it’s time to reassemble it and prepare it for use. Follow these steps to safely reassemble your space heater:
- Refer to the manufacturer’s instructions: Consult the manufacturer’s instructions for your specific space heater to ensure you are correctly reassembling the components. This will help you avoid any potential damage or errors.
- Replace all removed parts: Start by placing all the parts that were removed during the disassembly process back into their respective positions. Be careful to align them correctly and ensure a secure fit.
- Tighten any screws: If there were screws involved in the disassembly process, make sure to tighten them securely. This will help prevent any loose parts that can affect the heater’s performance.
- Reinsert the filter (if applicable): If your space heater has a removable filter, make sure it is thoroughly dry before reinserting it back into the heater. Ensure it is securely in place.
- Connect the power cord: Plug the power cord back into a grounded electrical outlet. Make sure the cord is not tangled or stretched, and ensure it is securely connected.
- Position the space heater: Place the space heater in a well-ventilated area, away from flammable materials and objects. Ensure there is ample space around the heater for proper airflow.
- Turn on the heater and monitor it: Once the space heater is reassembled and plugged in, turn it on and monitor its operation. Listen for any unusual noises or smells, and check that the heater is producing warm air as expected.
By following these steps, you have successfully reassembled and prepared your space heater for use. It is now ready to provide you with efficient heating in a clean and safe manner. However, it’s important to perform regular maintenance and cleaning to ensure its optimal performance. We recommend cleaning your space heater at least once a season or as necessary.
Now that you have learned how to clean and maintain your space heater, you can enjoy its warmth and coziness with peace of mind. Stay warm and safe!
Testing the Cleaned Space Heater
After cleaning and reassembling your space heater, it’s essential to test its functionality to ensure that it is working efficiently and safely. Follow these steps to properly test your cleaned space heater:
- Ensure proper power supply: Make sure that the space heater is securely plugged into a grounded electrical outlet. Ensure that the power cord is not damaged and there are no loose connections.
- Set the desired temperature: Adjust the thermostat or temperature settings on your space heater to the desired level. It’s important to check if the thermostat is responding accurately.
- Switch on the heater: Turn on the space heater using the power button or switch. Listen for any unusual sounds during the startup.
- Test the heating functionality: Monitor the space heater as it operates. Ensure that it is producing a steady stream of warm air within a reasonable amount of time.
- Check for any unusual smells or noises: While the space heater is running, pay attention to any unusual odors or noises. These could be signs of potential issues.
- Monitor for a consistent temperature: Keep an eye on the temperature output of the space heater. Ensure that it stays consistent and doesn’t fluctuate excessively.
- Ensure proper airflow: Verify that the airflow from the vents is strong and consistent. Observe if the fan is operating smoothly and effectively.
- Perform additional tests: If your space heater has additional features such as oscillation or timers, make sure to test these functionalities as well.
- Observe for a reasonable energy consumption: Take note of the space heater’s energy consumption. If it seems unusually high, it may be worth considering getting it serviced or checked.
By following these testing steps, you can ensure that your cleaned space heater is functioning properly. It is important to keep an eye on the heater during the initial usage after cleaning to make sure there are no issues or signs of malfunction. If you notice any concerns during the testing process, it is recommended to contact a professional for further assistance or guidance.
With a clean and well-maintained space heater, you can now enjoy a comfortable and warm environment while minimizing potential safety risks. Stay cozy and safe!
Read more: How To Use A Space Heater
Conclusion
Cleaning your space heater is essential for maintaining its efficiency, performance, and safety. By following the step-by-step process outlined in this article, you can effectively clean and maintain your space heater to ensure its optimal operation year after year.
We started by emphasizing the importance of safety precautions, such as unplugging the heater and working in a well-ventilated area. We then discussed the supplies you will need for the cleaning process, including a clean cloth, compressed air, mild detergent, and a brush.
Next, we guided you through the process of unplugging and disassembling the space heater, ensuring you refer to the manufacturer’s instructions. Taking apart the grill, removing the filter (if applicable), and checking for additional removable parts were key steps in this process.
We then moved on to cleaning the exterior surfaces of the space heater using a clean cloth and mild detergent for any stubborn stains. Cleaning the heating elements involved using compressed air to blow away dust and dirt, along with a brush to remove any remaining residue. The fan and air vents were cleaned using compressed air and a brush, while also checking for additional filters that may need cleaning.
After completing the cleaning process, we discussed the importance of reassembling the space heater correctly and plugging it back in. We emphasized the need to tighten screws, reinstall filters, and ensure a secure power connection. Testing the cleaned space heater involved setting the desired temperature, switching it on, and monitoring its heating functionality, airflow, and energy consumption.
Regularly cleaning and maintaining your space heater not only improves its efficiency but also extends its lifespan. It also reduces the risk of fire hazards and ensures your safety while enjoying the warmth it provides.
Remember, while cleaning your space heater is important, it is equally crucial to refer to the manufacturer’s instructions and seek professional help if needed. Safety should always be a priority when working with any electrical appliance.
By following the guidelines outlined in this article, you can keep your space heater clean, safe, and ready to provide you with reliable warmth during the colder months. Stay cozy and enjoy the comfort your space heater brings!
Frequently Asked Questions about How To Clean A Space Heater?
Was this page helpful?
At Storables.com, we guarantee accurate and reliable information. Our content, validated by Expert Board Contributors, is crafted following stringent Editorial Policies. We're committed to providing you with well-researched, expert-backed insights for all your informational needs.

0 thoughts on “How To Clean A Space Heater?”