Home>Ideas and Tips>DIY Guide To Installing A Bathroom Shower Niche
Ideas and Tips
DIY Guide To Installing A Bathroom Shower Niche
Modified: October 28, 2024
Learn how to install a bathroom shower niche with our step-by-step DIY guide. Enhance functionality and aesthetics in your bathroom effortlessly!
(Many of the links in this article redirect to a specific reviewed product. Your purchase of these products through affiliate links helps to generate commission for Storables.com, at no extra cost. Learn more)
Introduction
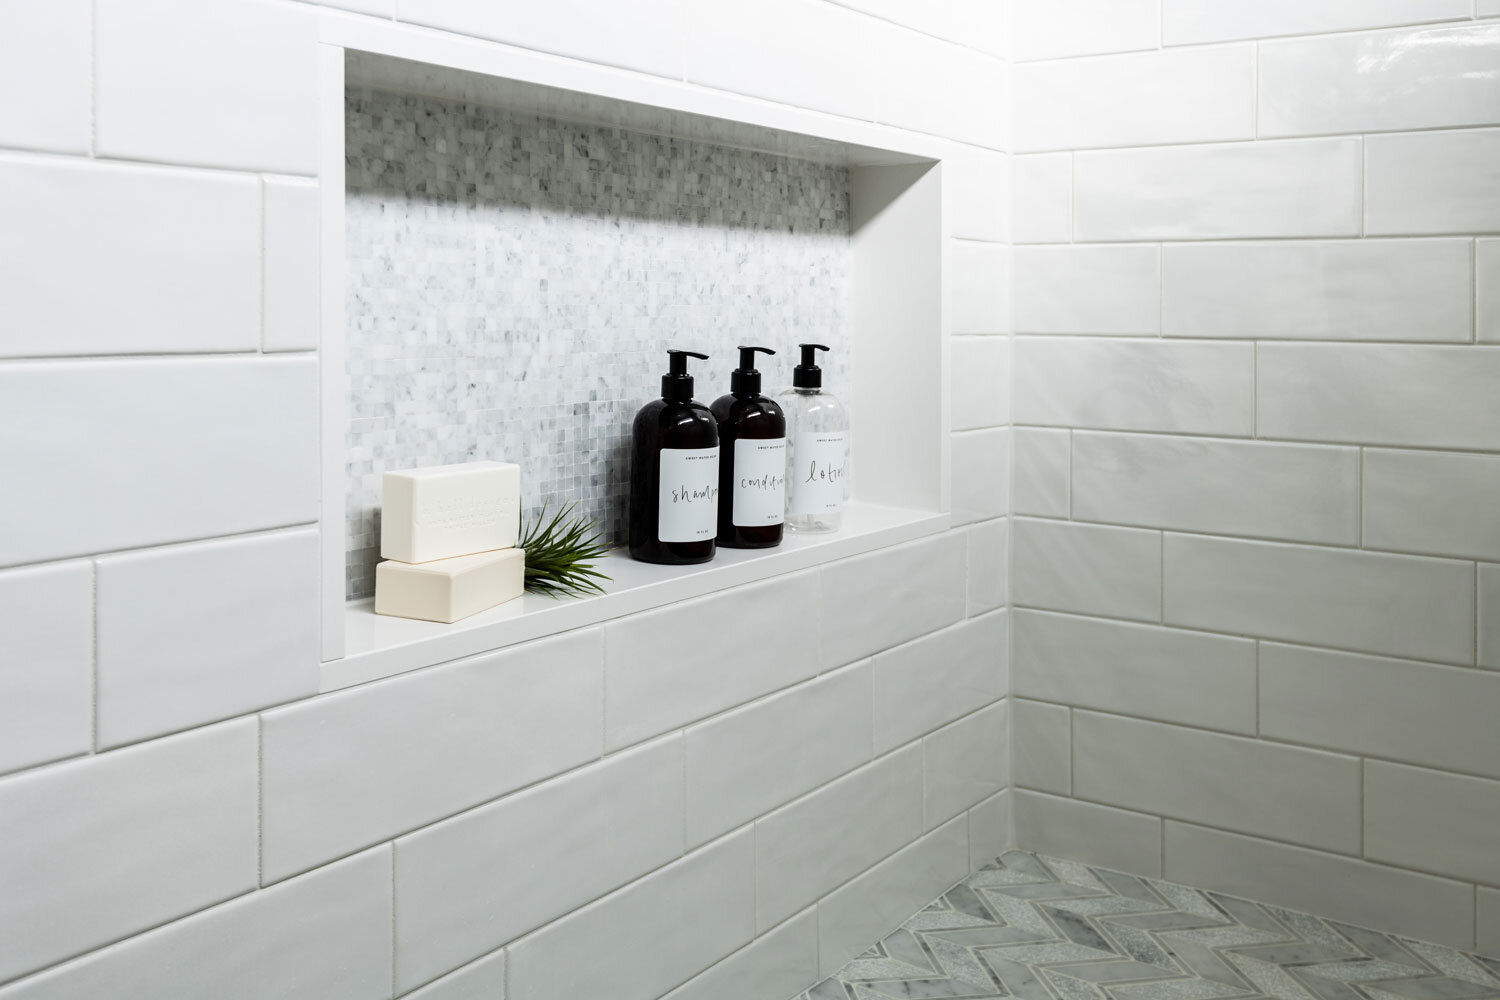
Installing a shower niche in your bathroom is a great way to enhance both functionality and aesthetics. These recessed spaces provide convenient storage for toiletries, reducing clutter and making your shower area more organized. In this comprehensive guide, we will walk you through the steps to install a custom shower niche, ensuring it is properly framed, waterproofed, and tiled.
Why Install a Shower Niche?
Before diving into the installation process, let's discuss why a shower niche is such an essential feature in modern bathrooms. Here are a few reasons:
- Convenience: A shower niche keeps your toiletries within easy reach, eliminating the need to bend down or stretch for soap, shampoo, or razors.
- Aesthetics: A well-designed niche can add a touch of elegance to your bathroom, making it look more modern and sleek.
- Safety: By keeping essential items close at hand, you reduce the risk of slipping on the floor while trying to retrieve something from the edge of the tub.
- Organization: A niche helps keep your shower area tidy by providing a designated space for storing toiletries.
Step 1: Planning and Designing Your Shower Niche
Before you start the installation process, it's crucial to plan and design your shower niche carefully. Here are some key considerations:
-
Size and Location:
- Determine the size of your niche based on the space available and the items you plan to store. Common sizes range from 12 inches by 12 inches to 14 inches by 14 inches.
- Consider the location of the niche. It should be placed in an area where it is easily accessible and doesn’t obstruct the flow of water in the shower.
-
Type of Niche:
- You can choose between a custom-built niche or a prefabricated one. Custom-built niches offer more flexibility in terms of size and design, while prefabricated ones are quicker to install but may not fit perfectly into your space.
-
Materials Needed:
- Cement backerboard (also known as tile backerboard)
- Waterproofing materials (flexible flashing, vapor retarder, caulk)
- Tile (ceramic, porcelain, or marble)
- Grout
- Silicone sealant
- Mesh tape
- Thinset mortar
Step 2: Framing Your DIY Shower Niche
Framing is a critical step in building a custom shower niche. Here’s how you can do it:
-
Locate the Niche:
- Decide on the exact location of your niche on the wall. Use a level to ensure it is straight and level.
-
Cut Blocking:
- Use a stud finder to locate the studs behind the drywall. Cut blocking pieces (usually 2x4s) to fit between the studs where you want to create your niche.
-
Install Blocking:
- Secure the blocking pieces with screws into the studs. This will create a solid frame for your niche.
-
Check for Load-Bearing Walls:
- If you're cutting into an exterior or load-bearing wall, it's best to consult a professional or seek advice from a local building authority. Cutting into these walls can compromise structural integrity.
Step 3: Installing Cement Backerboard
Cement backerboard provides a solid substrate for tiling and ensures that your niche remains waterproof.
-
Cut Backerboard:
- Measure and cut the cement backerboard to fit inside your framed niche. Ensure it extends slightly beyond the edges of the frame.
-
Secure Backerboard:
- Apply silicone sealant around the edges of the backerboard where it meets the surrounding wall. This prevents water from seeping behind it.
-
Cover Joints:
- Use mesh tape buried in thinset to cover all joints between pieces of backerboard.
-
Finish Bottom Layer:
- Apply a 1/2 inch layer of mortar at the bottom of the niche, sloping it slightly towards the outside edge so water can drain out instead of pooling inside it.
Read more: DIY Guide To Installing A Tile Shower
Step 4: Waterproofing Your Niche
Waterproofing is essential to prevent water from seeping into the wall behind your niche.
-
Apply Flexible Flashing:
- Place flexible flashing around the edges of your framed niche before installing backerboard. This ensures that any water that enters the niche will be directed away from the wall.
-
Use Vapor Retarder:
- Apply vapor retarder material behind the backerboard to prevent moisture from entering through the backerboard itself.
-
Seal Joints with Caulk:
- Use caulk to seal all joints where different materials meet (e.g., backerboard and surrounding wall).
Step 5: Tiling Your Shower Niche
Tiling is where you bring your design vision to life.
-
Lay Bottom Tiles First:
- Start by laying tiles on the bottom of your niche first, ensuring they are level and securely attached with thinset mortar.
-
Install Back Tiles:
- Place tiles in the back of your niche, ensuring they are flush with the top of the bottom tiles.
-
Add Side Tiles & Edge Treatment:
- Install side tiles and any edge treatment required (such as bullnose tiles or polished marble edges).
-
Optional: Marble Lining
- For an elegant look, consider lining your niche with marble pieces or tiles. This adds visual interest and makes caulking or grouting easier.
-
Set Tiles Slightly Towards Front
- To avoid water pooling inside shelves, set tiles slightly towards the front so water will run off instead of collecting inside them.
Step 6: Grouting & Sealing
Grouting and sealing are crucial steps in completing your shower niche installation.
-
Apply Grout Between Tiles
- Use grout between tiles to fill gaps and ensure a watertight seal.
-
Seal Grout Lines
- Apply grout sealer over grout lines to protect them from stains and water damage.
-
Seal Edges & Corners
- Apply silicone sealant around edges and corners where different materials meet.
Step 7: Final Touches
Once you've completed all steps above, here are some final touches you might want to consider:
-
Arrange Essentials
- Place your toiletries neatly inside the niche for easy access.
-
Decorate & Enhance
- Add decorative elements like LED lighting or a soap dispenser if desired.
-
Maintenance Tips
- Regularly clean grout lines with a grout brush to prevent buildup.
- Check for any signs of water damage or leaks periodically.
Read more: DIY Guide To Installing A Glass Shower Door
Conclusion
Installing a custom shower niche is a rewarding DIY project that enhances both functionality and aesthetics in your bathroom. By following these steps carefully—framing, waterproofing, tiling—you can create a beautiful and functional space that keeps your toiletries organized while adding a touch of elegance to your bathroom design.
Remember always to follow safety guidelines when working with power tools or handling materials like cement backerboard and tile adhesive. If unsure about any part of the process, consider consulting professional advice or seeking help from an experienced contractor.
With patience and attention to detail, you'll be able to transform your bathroom into a more organized and luxurious space with a custom-built shower niche tailored specifically for your needs
Was this page helpful?
At Storables.com, we guarantee accurate and reliable information. Our content, validated by Expert Board Contributors, is crafted following stringent Editorial Policies. We're committed to providing you with well-researched, expert-backed insights for all your informational needs.


0 thoughts on “DIY Guide To Installing A Bathroom Shower Niche”