Home>Storage Ideas>Bathroom Storage>How To Clean Grout For A Perfect Tile Lines
Bathroom Storage
How To Clean Grout For A Perfect Tile Lines
Modified: August 16, 2024
Learn how to clean grout for flawless tile lines in your bathroom. Discover effective methods and products for maintaining perfect bathroom storage.
(Many of the links in this article redirect to a specific reviewed product. Your purchase of these products through affiliate links helps to generate commission for Storables.com, at no extra cost. Learn more)
Introduction
Welcome to the ultimate guide on how to clean grout for perfect tile lines! Grout, the material used to fill the gaps between tiles, can accumulate dirt, grime, and stains over time, diminishing the overall appearance of your bathroom space. Regular cleaning and maintenance of grout are essential to keep your tiles looking fresh and beautiful.
In this comprehensive article, we will walk you through the step-by-step process of cleaning grout effectively. We will cover both homemade solutions and commercial cleaners, as well as provide tips for removing stubborn stains. Additionally, we will discuss the importance of applying a grout sealer and offer maintenance tips to keep your grout looking pristine for years to come.
To get started, let’s gather the tools and materials you will need for this grout-cleaning project:
- Toothbrush or grout brush
- Baking soda
- Vinegar
- Lemon juice
- Hydrogen peroxide
- Commercial grout cleaner
- Water
- Clean sponge or cloth
- Grout sealer
Now that you have everything ready, it’s time to dive into the step-by-step process of cleaning grout. Whether you prefer using a homemade solution or a commercial cleaner, we have you covered!
Key Takeaways:
- Keep your grout looking fresh and beautiful by using natural ingredients like baking soda, vinegar, and lemon juice to effectively clean and maintain your grout lines.
- Regularly applying a grout sealer and implementing maintenance tips will extend the life and appearance of your grout, keeping it clean and pristine for years to come.
Read more: How To Clean Floor Tile Grout
Tools and Materials Needed
Before we begin the grout-cleaning process, it’s important to gather the necessary tools and materials. Having these items on hand will make the task much easier and more efficient. Here’s what you’ll need:
- Toothbrush or grout brush: Choose a brush with firm bristles that can effectively scrub the grout lines.
- Baking soda: This versatile household ingredient is a powerhouse when it comes to cleaning. Its mild abrasive properties help lift dirt and stains from the grout.
- Vinegar: Vinegar is a natural cleaning agent that can effectively dissolve grease and grime. It’s an excellent alternative to harsh chemicals.
- Lemon juice: Similar to vinegar, lemon juice is a natural acid that can help break down stains and discoloration on the grout.
- Hydrogen peroxide: Hydrogen peroxide is a powerful oxidizing agent that can tackle tough stains and kill bacteria on the grout.
- Commercial grout cleaner: If you prefer using a specific grout cleaner, choose one that is suitable for your type of grout and follows the manufacturer’s instructions.
- Water: Clean water is essential for rinsing and removing cleaning solutions from the grout lines.
- Clean sponge or cloth: Use a sponge or cloth to apply the cleaning solution and wipe away the dirt and grime from the grout.
- Grout sealer: After cleaning the grout, it’s important to apply a grout sealer to protect it from future stains and discoloration. Choose a sealer appropriate for your type of grout and follow the manufacturer’s instructions.
Now that you have all the necessary tools and materials ready, you’re prepared to tackle the task of cleaning your grout. In the following sections, we will guide you through the process step by step, whether you choose to use a homemade solution or a commercial cleaner. Let’s get started!
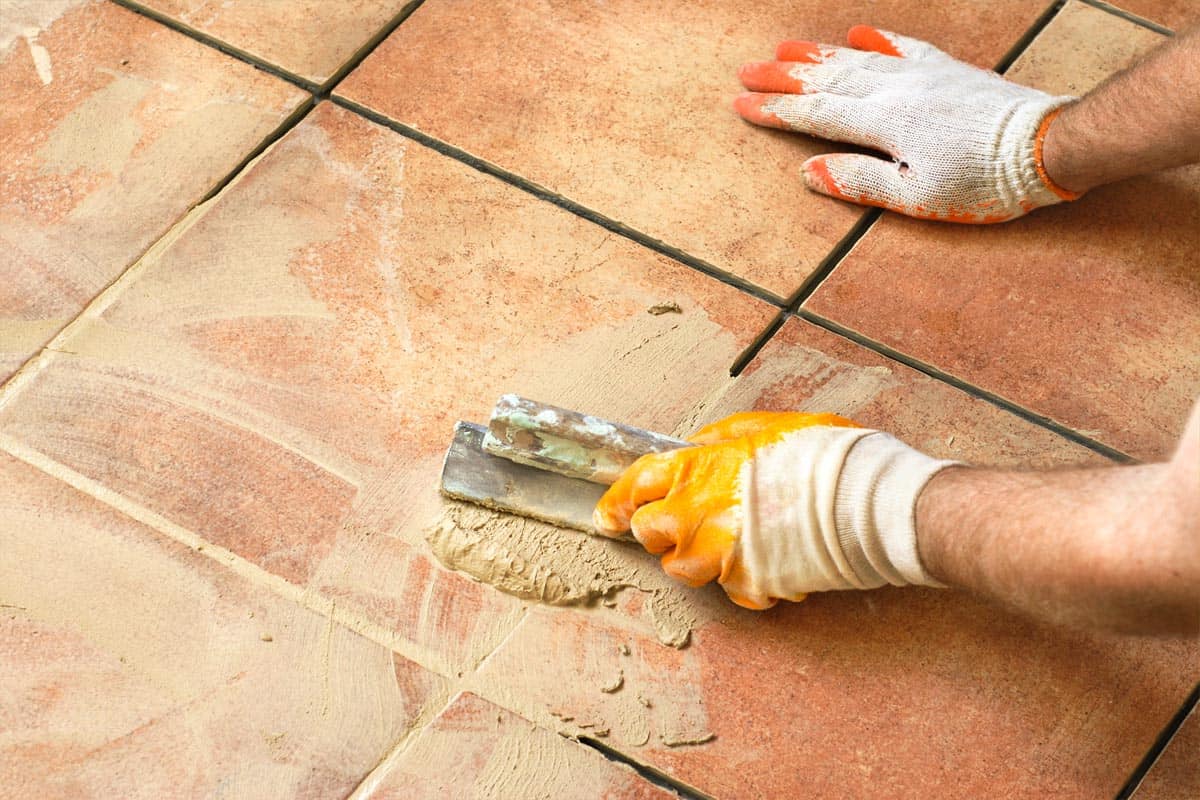
Preparing the Grout
Before diving into the grout-cleaning process, it’s important to prepare the grout and the surrounding tiles to ensure optimal results. Here are a few essential steps to follow:
- Clear the area: Remove any objects or obstacles from the area you’ll be working on. This will make it easier to access the grout lines and prevent any damage to surrounding surfaces.
- Sweep or vacuum: Start by sweeping or vacuuming the tiled area to remove loose dirt and debris. This will prevent them from getting trapped in the grout lines during the cleaning process.
- Pre-treat stains: If you notice any stubborn stains on the grout, it’s a good idea to pre-treat them before proceeding with the cleaning. Apply a small amount of the chosen cleaning solution or a paste made of baking soda and water directly onto the stain, and let it sit for a few minutes to penetrate and loosen the stain.
- Test the cleaning solution: Before applying any cleaning solution to the entire grout area, it’s wise to test it on a small, inconspicuous area first. This will ensure that the solution doesn’t cause any discoloration or damage to the grout or the tiles.
By taking these preparatory steps, you’ll create a clean and suitable surface for effective grout cleaning. Now that you’ve prepared the grout, it’s time to move on to the actual cleaning process. In the following sections, we’ll guide you through the steps of cleaning grout using both homemade solutions and commercial cleaners. Let’s get those grout lines looking fresh and clean!
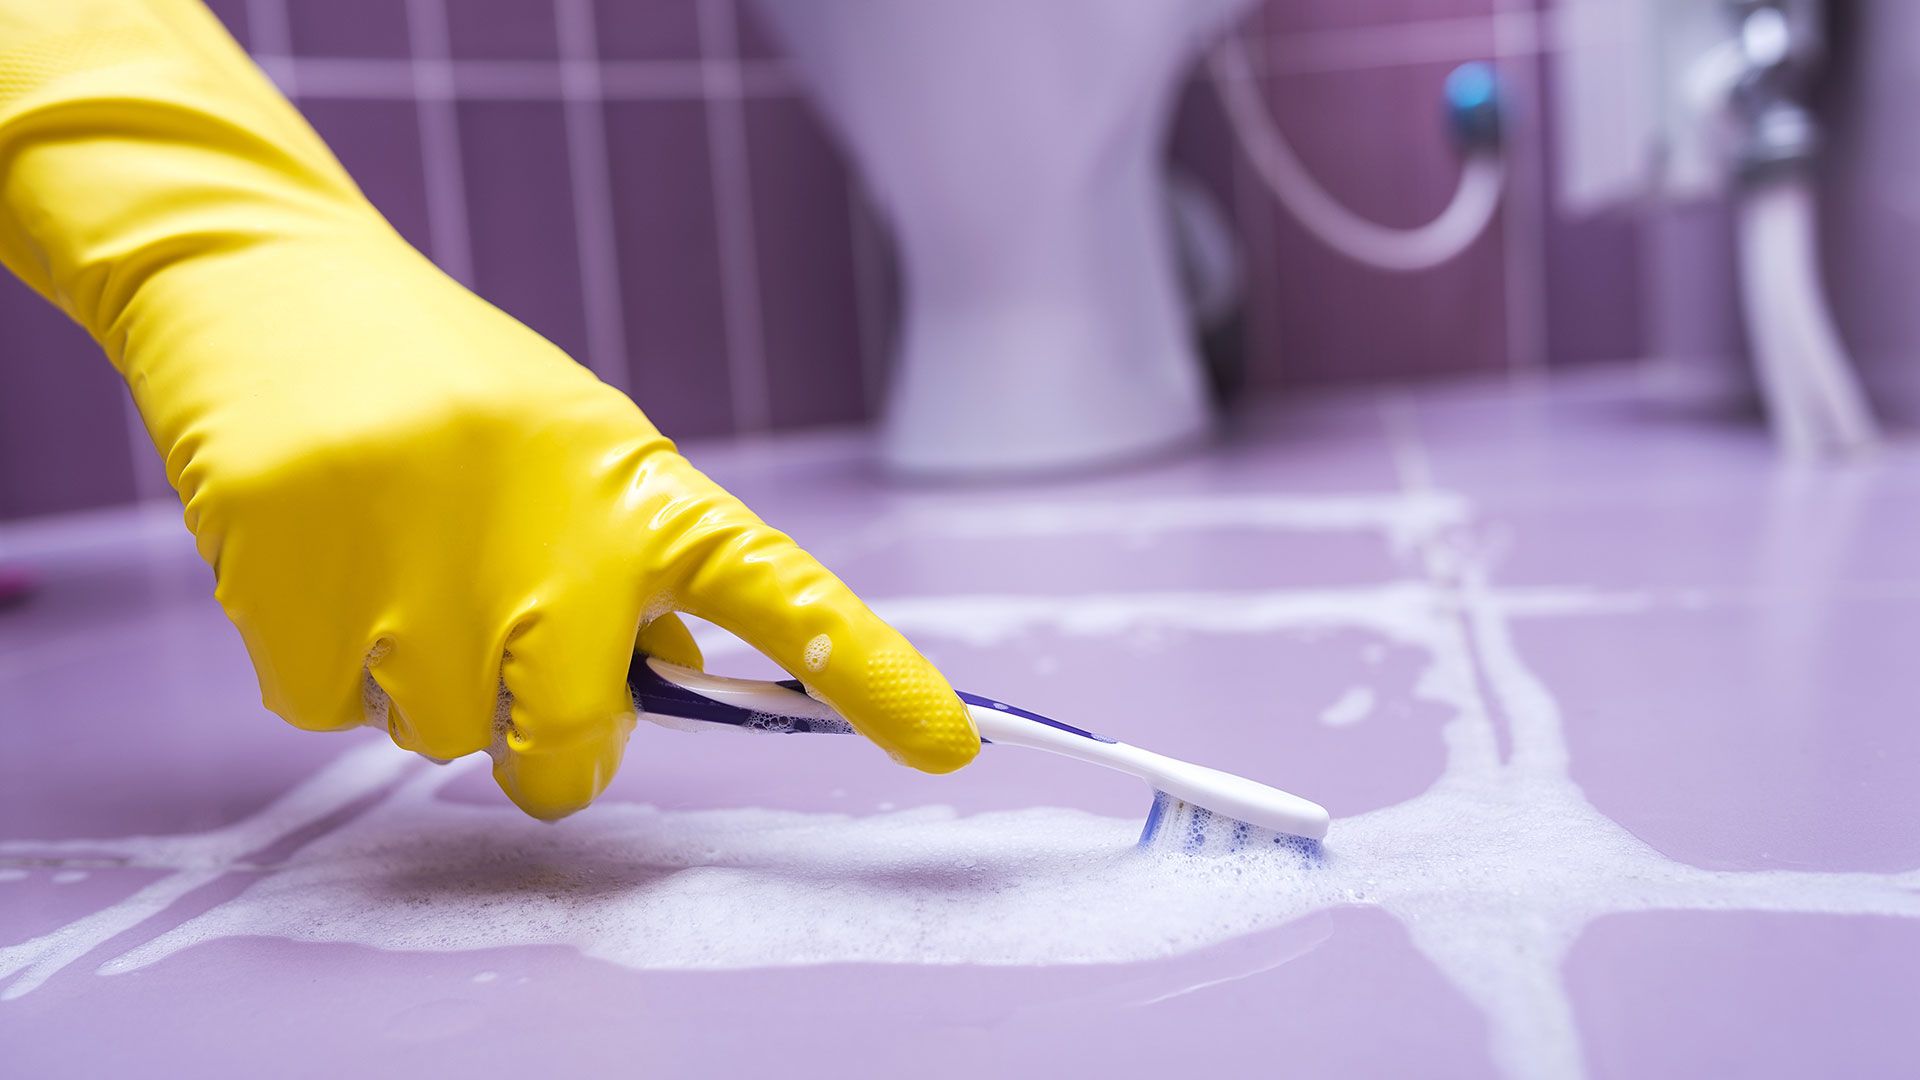
Cleaning the Grout with a Homemade Solution
If you prefer using natural and eco-friendly cleaning solutions, you’ll be pleased to know that you can effectively clean grout using a homemade solution. Here’s a step-by-step guide:
- Mix a paste: In a small bowl, combine equal parts baking soda and water to create a thick paste. The baking soda’s mild abrasive properties will help lift dirt and stains from the grout.
- Apply the paste: Using a toothbrush or grout brush, apply the baking soda paste directly onto the grout lines. Make sure to cover the entire area you wish to clean.
- Scrub the grout: Gently scrub the grout lines in a circular motion using the toothbrush or grout brush. Focus on areas with visible dirt or stains, applying a bit more pressure if necessary. The baking soda paste will help loosen and lift the grime.
- Prepare the cleaning solution: In a spray bottle, mix equal parts vinegar and water. The vinegar’s acidity will help break down any remaining dirt and stains.
- Mist the grout: Spray the vinegar and water solution directly onto the grout lines that you’ve just scrubbed with the baking soda paste. The mixture will react with the baking soda, causing a mild foam to form.
- Let it sit: Allow the solution to sit on the grout for about 10-15 minutes. This will give it time to break down any stubborn stains or grime.
- Scrub again: After the solution has had time to work, use the toothbrush or grout brush to give the grout lines a final scrub. The vinegar solution will help loosen any remaining dirt.
- Rinse with water: Rinse the grout thoroughly with clean water. You can use a damp cloth or sponge to wipe away any residue.
By using this homemade solution and following these steps, you can effectively clean your grout using natural ingredients. However, if you prefer using a commercial cleaner, the next section will guide you through that process. Let’s keep those grout lines sparkling clean!
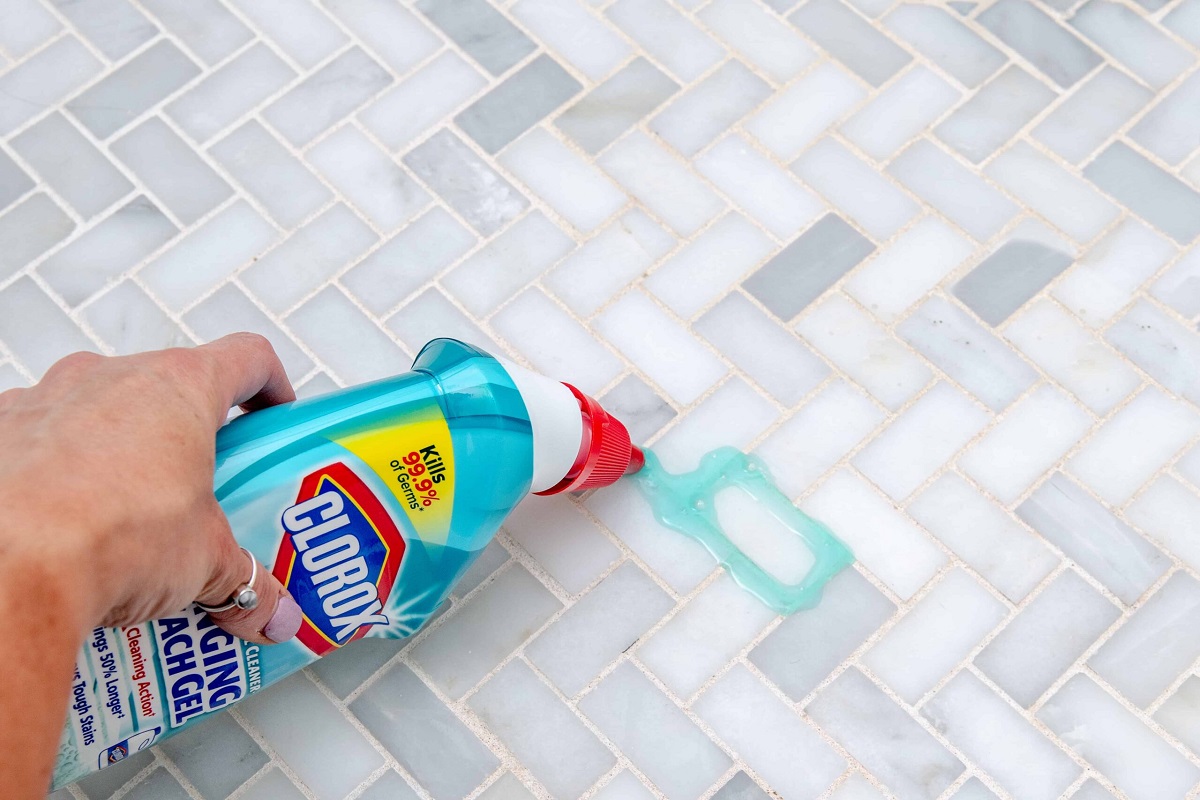
Cleaning the Grout with a Commercial Cleaner
If you prefer using a specific grout cleaner, there are many excellent commercial options available on the market. These cleaners are formulated to target dirt, stains, and grime on grout and are often more powerful than homemade solutions. Here’s how to clean grout using a commercial cleaner:
- Read the instructions: Start by carefully reading the instructions provided on the commercial cleaner. Different cleaners may have specific application methods or dilution ratios, so it’s important to follow the manufacturer’s guidelines.
- Prepare the cleaner: Mix the commercial cleaner with water to the recommended dilution ratio, if necessary. Some cleaners come ready to use, while others require dilution.
- Apply the cleaner: Using a spray bottle or a sponge, apply the commercial cleaner directly onto the grout lines. Make sure to cover the entire area you wish to clean.
- Let it sit: Allow the cleaner to penetrate the grout lines for the recommended amount of time mentioned in the instructions. This will give it time to break down dirt and stains.
- Scrub the grout: After the cleaner has had time to work, use a toothbrush or grout brush to scrub the grout lines. Focus on areas with visible dirt or stains, applying a bit more pressure if needed.
- Rinse with water: Rinse the grout thoroughly with clean water to remove any residue. You can use a damp cloth or sponge to wipe away the cleaner.
Cleaning grout with a commercial cleaner can be a quicker and more convenient option, especially for heavily stained or soiled grout. Just remember to follow the manufacturer’s instructions for the best results. In the next section, we’ll discuss how to tackle stubborn stains on grout. Let’s make that grout shine!
Use a mixture of baking soda and water to create a paste, then scrub the grout lines with a toothbrush. Rinse with water and repeat if necessary.
Read more: How To Clean Tile Grout In A Swimming Pool
Scrubbing and Removing Stubborn Stains
While regular cleaning can effectively remove most dirt and stains from grout, there may be instances when you encounter stubborn stains that require a bit more effort. Here’s how to scrub and remove stubborn stains from grout:
- Identify the stain: Before proceeding with any cleaning method, it’s important to identify the type of stain you’re dealing with. Different stains may require different treatments, so it’s helpful to know what you’re working with.
- Spot treatment: For small, localized stains, you can apply a small amount of the chosen cleaning solution or a paste made of baking soda and water directly onto the stain. Let it sit for a few minutes to penetrate and loosen the stain.
- Use a grout brush: Scrub the stained areas using a toothbrush or grout brush. Apply firm pressure and use circular or back-and-forth motions to agitate the stain. This will help loosen and lift the stubborn dirt or discoloration.
- Try hydrogen peroxide: For tougher stains or mildew, you can try using hydrogen peroxide. Apply it directly to the stained area and let it sit for a few minutes. Then, scrub the grout with a toothbrush or grout brush. Be sure to wear gloves and work in a well-ventilated area when using hydrogen peroxide.
- Apply a baking soda paste: Another option for stubborn stains is to create a paste using baking soda and water. Apply the paste to the stained grout and let it sit for several hours or overnight. Then, scrub the grout with a toothbrush or grout brush and rinse with water.
- Consider a steam cleaner: If you have a steam cleaner, it can be a highly effective tool for removing stubborn stains from grout. Follow the manufacturer’s instructions for using the steam cleaner on grout surfaces.
- Repeat if necessary: For particularly stubborn stains, you may need to repeat the cleaning process multiple times or try a combination of different methods until the stain is fully removed.
Remember, patience and persistence are key when dealing with stubborn stains. Keep trying different methods and be cautious with harsh chemicals, ensuring your safety and following the instructions carefully. In the next section, we’ll discuss how to rinse and dry the grout effectively. Let’s keep working towards that perfectly clean grout!
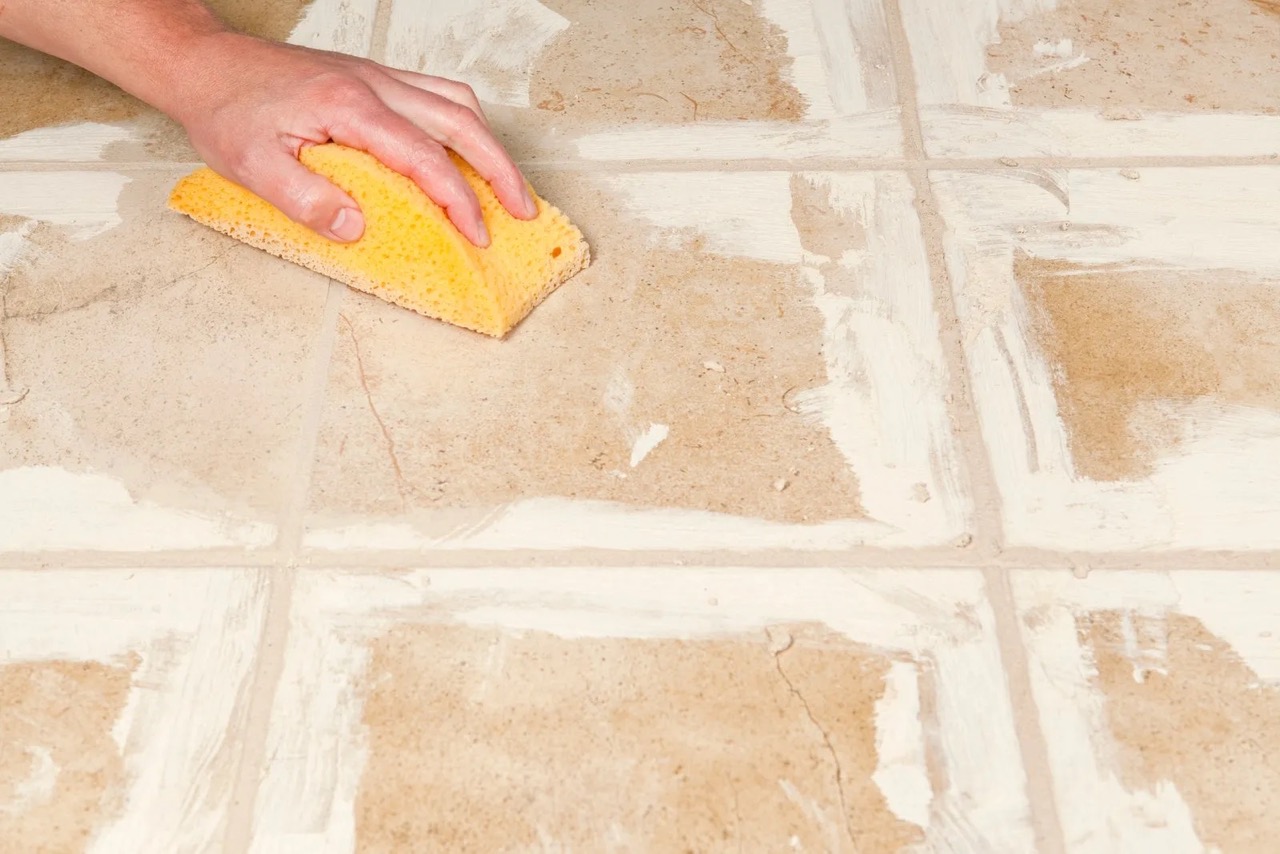
Rinsing and Drying the Grout
After you have cleaned the grout and removed stains, it’s crucial to properly rinse and dry the grout to ensure a clean and polished finish. Follow these steps to rinse and dry the grout effectively:
- Prepare clean water: Fill a bucket or container with clean water. This will be used to rinse away any remaining cleaning solution or residue from the grout.
- Wet a sponge or cloth: Dip a clean sponge or cloth into the bucket of water. Squeeze out any excess water, ensuring that the sponge or cloth is damp but not dripping.
- Wipe the grout: Use the damp sponge or cloth to wipe over the grout lines, removing any remaining cleaning solution or residue. Rinse the sponge or cloth frequently in the clean water to ensure optimal rinsing.
- Inspect for residue: After rinsing, inspect the grout lines for any signs of residual cleaning solution. If you notice any residue, continue wiping the grout with the damp sponge or cloth until it is completely clean.
- Allow to air dry: Once the grout is thoroughly rinsed, allow it to air dry completely. Avoid walking on the wet grout to prevent any dirt or debris from re-contaminating the freshly cleaned surfaces.
- Speed up the drying process: If you prefer to expedite the drying process, you can use a fan or open windows to improve air circulation in the room. Just ensure that the grout is completely dry before proceeding with the next step.
Rinsing and drying the grout properly is essential to prevent residues and water spots, ensuring a clean and polished finish. Once the grout is dry, it’s time to take the additional step of applying a grout sealer for long-lasting protection. We will discuss this in the next section. Let’s keep going on our quest for perfectly clean grout!
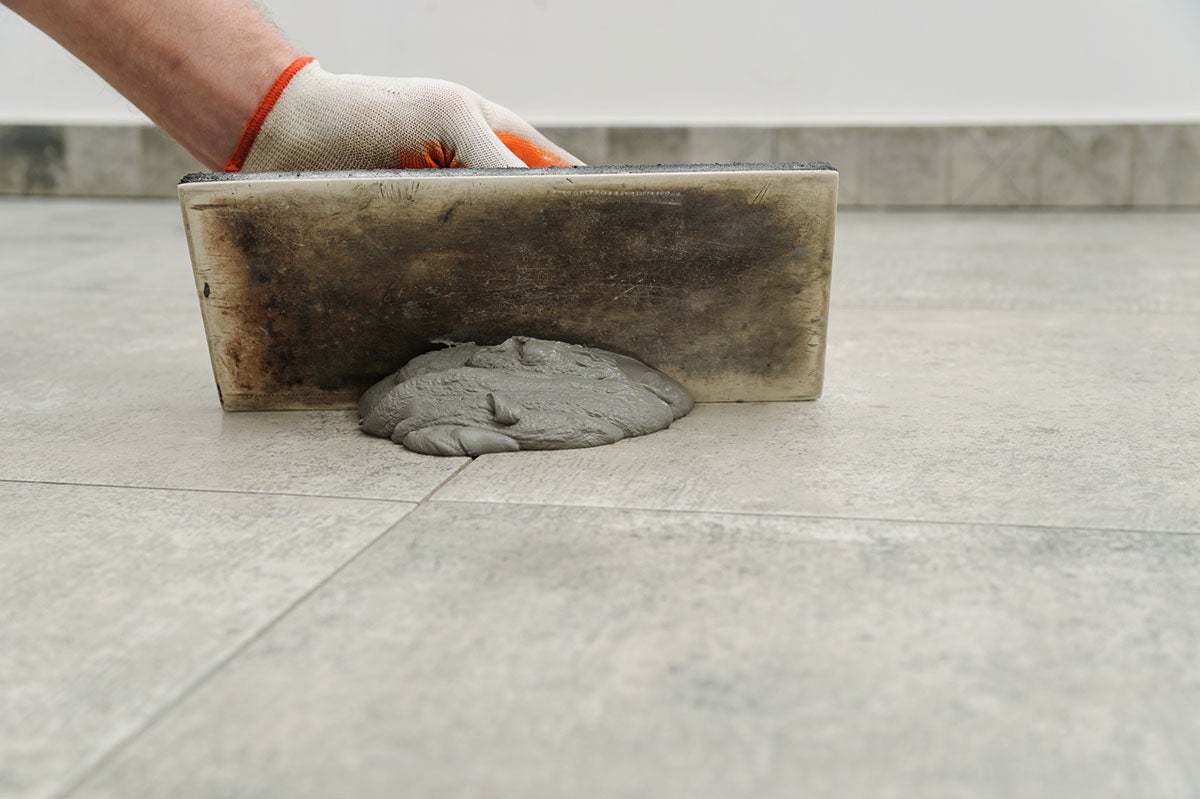
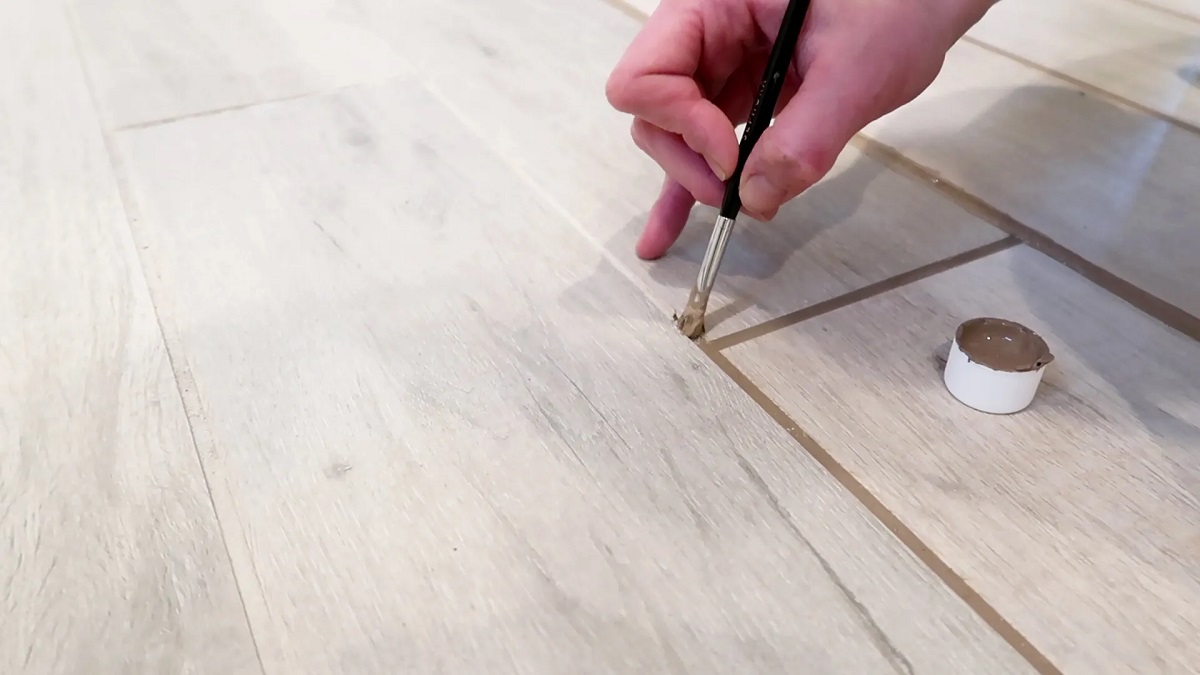
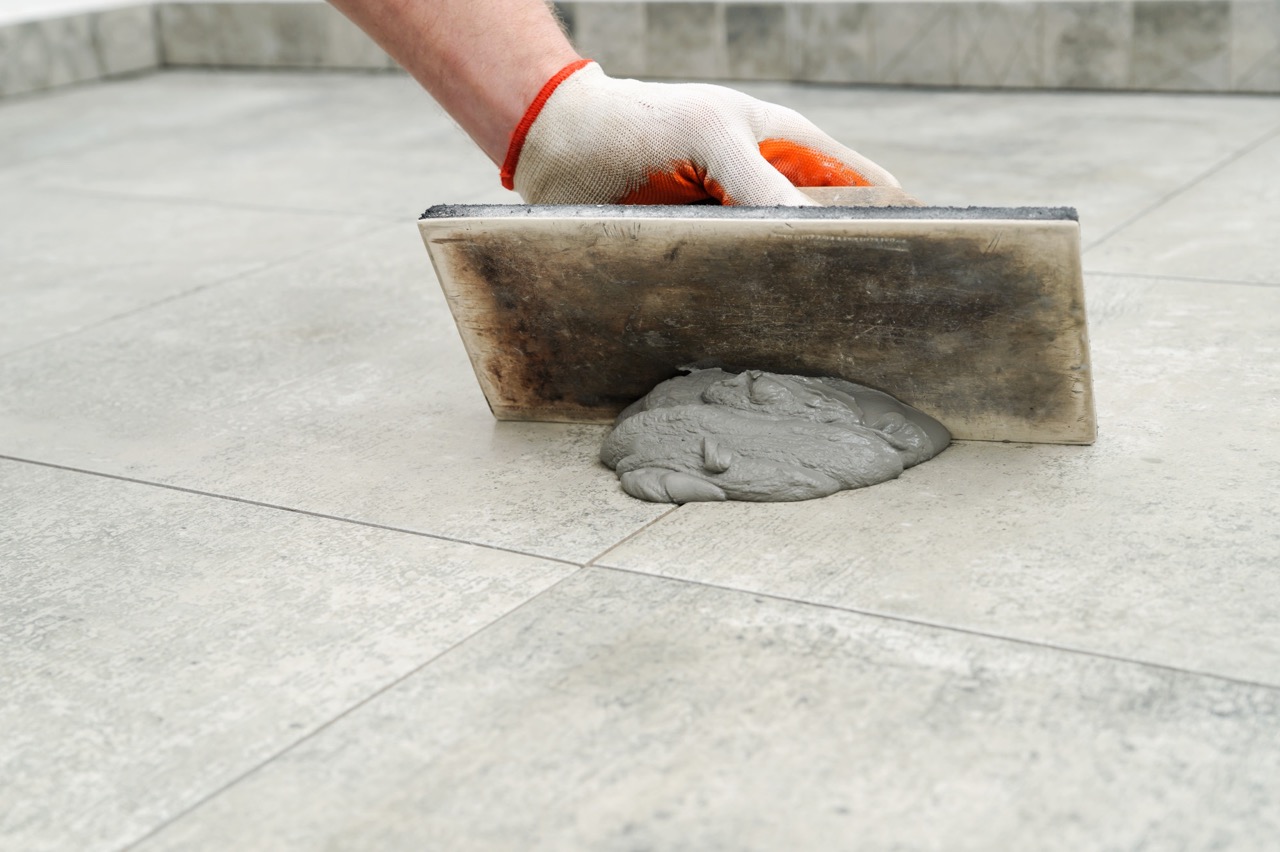
Applying a Grout Sealer
One of the crucial steps in maintaining clean grout is applying a grout sealer. A grout sealer acts as a protective barrier, preventing stains, dirt, and moisture from penetrating the grout and maintaining its appearance over time. Here’s a guide on how to apply a grout sealer:
- Choose the right sealer: There are different types of grout sealers available, including penetrating sealers and topical sealers. Consider the type of grout you have and choose a sealer that is compatible with it.
- Clean and dry the grout: Before applying the sealer, ensure that the grout is clean and completely dry. Refer back to the previous sections to properly clean and dry the grout before moving forward.
- Protect surrounding surfaces: Use painter’s tape or a plastic sheet to cover and protect surrounding surfaces, such as tiles or countertops, from accidental sealer overspray.
- Apply the sealer: Follow the manufacturer’s instructions for the specific grout sealer you are using. Typically, you will pour a small amount of sealer onto a clean cloth or sponge and apply it directly to the grout lines. It’s important to work in small sections at a time.
- Allow it to penetrate: Allow the sealer to penetrate the grout for the recommended amount of time specified by the manufacturer. This will vary depending on the type of sealer used.
- Remove excess sealer: After the sealer has had time to penetrate, carefully wipe away any excess sealer from the tile surfaces using a clean cloth. Be thorough to avoid leaving a hazy or sticky residue.
- Let it cure: Allow the freshly applied sealer to cure according to the manufacturer’s instructions. This can take a few hours to a couple of days, depending on the brand and type of sealer used.
- Avoid moisture and traffic: During the curing period, it’s important to avoid exposing the grout to moisture or heavy foot traffic. This will allow the sealer to properly bond and provide maximum protection.
Applying a grout sealer is a crucial step in preserving the cleanliness and longevity of your grout. By following these steps, your newly cleaned and sealed grout will have enhanced protection against stains, dirt, and moisture. In the final section, we’ll provide maintenance tips to keep your grout looking pristine. Let’s protect that grout!
Maintenance Tips for Keeping Grout Clean
Now that you’ve successfully cleaned and sealed your grout, it’s important to implement regular maintenance practices to keep it looking clean and fresh. Here are some tips to help you maintain your grout:
- Wipe up spills quickly: Accidental spills, especially those containing acidic or staining substances, can seep into the grout and cause staining or discoloration. Promptly wiping up spills will prevent them from penetrating the grout.
- Regularly sweep or vacuum: Keeping the tiled area free of dust, dirt, and debris will prevent them from accumulating in the grout lines. Use a broom or vacuum with a brush attachment to remove loose particles.
- Use a mild cleaning solution: For routine cleaning, use a mild cleaner or a mixture of dish soap and water to wipe down the grout lines regularly. Avoid using harsh chemicals that can damage or degrade the grout over time.
- Avoid abrasive tools: When cleaning grout, choose soft-bristle brushes or non-abrasive tools to prevent scratching or damaging the grout surface. Avoid using steel wool or harsh scouring pads.
- Prevent mold and mildew: Keep your bathroom well-ventilated to reduce moisture levels and prevent the growth of mold and mildew. Run the exhaust fan or open windows during and after showering to reduce humidity in the room.
- Regularly inspect for damage: Periodically inspect the grout for any signs of damage, such as cracks or crumbling. Repair any damaged areas promptly to prevent further deterioration.
- Reapply grout sealer: Grout sealers wear off over time, especially in high-use areas. Check the manufacturer’s recommendations for reapplying the grout sealer and follow their guidelines to maintain optimal protection.
- Be cautious with colored agents: If you’re considering using colored agents or dyes on your grout, conduct a small test in an inconspicuous area to ensure it doesn’t cause discoloration or damage.
By following these maintenance tips, you can extend the life and appearance of your grout, keeping it looking clean and fresh for years to come. Regular care and attention will go a long way in preserving its beauty. Now that you’re equipped with the knowledge and tools for grout maintenance, you can enjoy your sparkling clean bathroom space. Congratulations on your newly cleaned grout!
Remember, if you’re ever in need of a deep cleaning or grout restoration, it’s always best to consult professionals for expert assistance. They have the specialized tools and knowledge to tackle more challenging grout issues.
We hope this comprehensive guide has helped you learn how to clean grout effectively and maintain its cleanliness. Now go forth and enjoy your beautifully clean grout lines!
Conclusion
Congratulations on completing this comprehensive guide on how to clean grout for perfect tile lines! We’ve covered everything you need to know to maintain clean and beautiful grout in your bathroom. By following the step-by-step process, using either a homemade solution or a commercial cleaner, you can effectively remove dirt, grime, and stains from your grout lines.
Remember, the key to maintaining clean grout is regular care and attention. Implementing the maintenance tips we’ve discussed, such as wiping up spills promptly, regular sweeping or vacuuming, and using mild cleaning solutions, will help prevent dirt and stains from accumulating in the grout lines.
Additionally, applying a grout sealer will provide a protective barrier, ensuring your grout stays stain-resistant and looking its best. Regularly reapplying the sealer as recommended by the manufacturer will help extend its effectiveness and keep your grout protected.
Don’t forget to be cautious with abrasive tools, prevent mold and mildew growth by maintaining proper ventilation, and address any damage to the grout promptly to prevent further deterioration.
By implementing these practices, you’ll be able to enjoy clean and pristine grout lines that enhance the overall appearance of your bathroom. Not only will your tiles look beautiful, but your entire bathroom space will feel fresh and inviting.
Thank you for joining us on this grout-cleaning journey. We hope this guide has equipped you with the knowledge and tools to successfully clean and maintain your grout. Remember, a little effort and care go a long way in keeping your grout looking its best. Cheers to a sparkling bathroom!
Frequently Asked Questions about How To Clean Grout For A Perfect Tile Lines
Was this page helpful?
At Storables.com, we guarantee accurate and reliable information. Our content, validated by Expert Board Contributors, is crafted following stringent Editorial Policies. We're committed to providing you with well-researched, expert-backed insights for all your informational needs.


0 thoughts on “How To Clean Grout For A Perfect Tile Lines”