Home>Ideas and Tips>How To Choose And Install The Right Outdoor Faucet

Ideas and Tips
How To Choose And Install The Right Outdoor Faucet
Published: September 18, 2024
Learn how to choose a durable outdoor faucet and follow our step-by-step guide for a successful installation. Perfect for DIY enthusiasts!
(Many of the links in this article redirect to a specific reviewed product. Your purchase of these products through affiliate links helps to generate commission for Storables.com, at no extra cost. Learn more)
Installing an outdoor faucet can be a straightforward DIY project if you have the right tools and follow the proper steps. However, choosing the right faucet for your needs is crucial to ensure it lasts long and functions efficiently. In this article, we will guide you through the process of selecting the perfect outdoor faucet and provide a detailed step-by-step guide on how to install it.
Choosing the Right Outdoor Faucet
Before you start the installation process, it is essential to choose an outdoor faucet that meets your specific needs. Here are some key factors to consider:
1. Durability
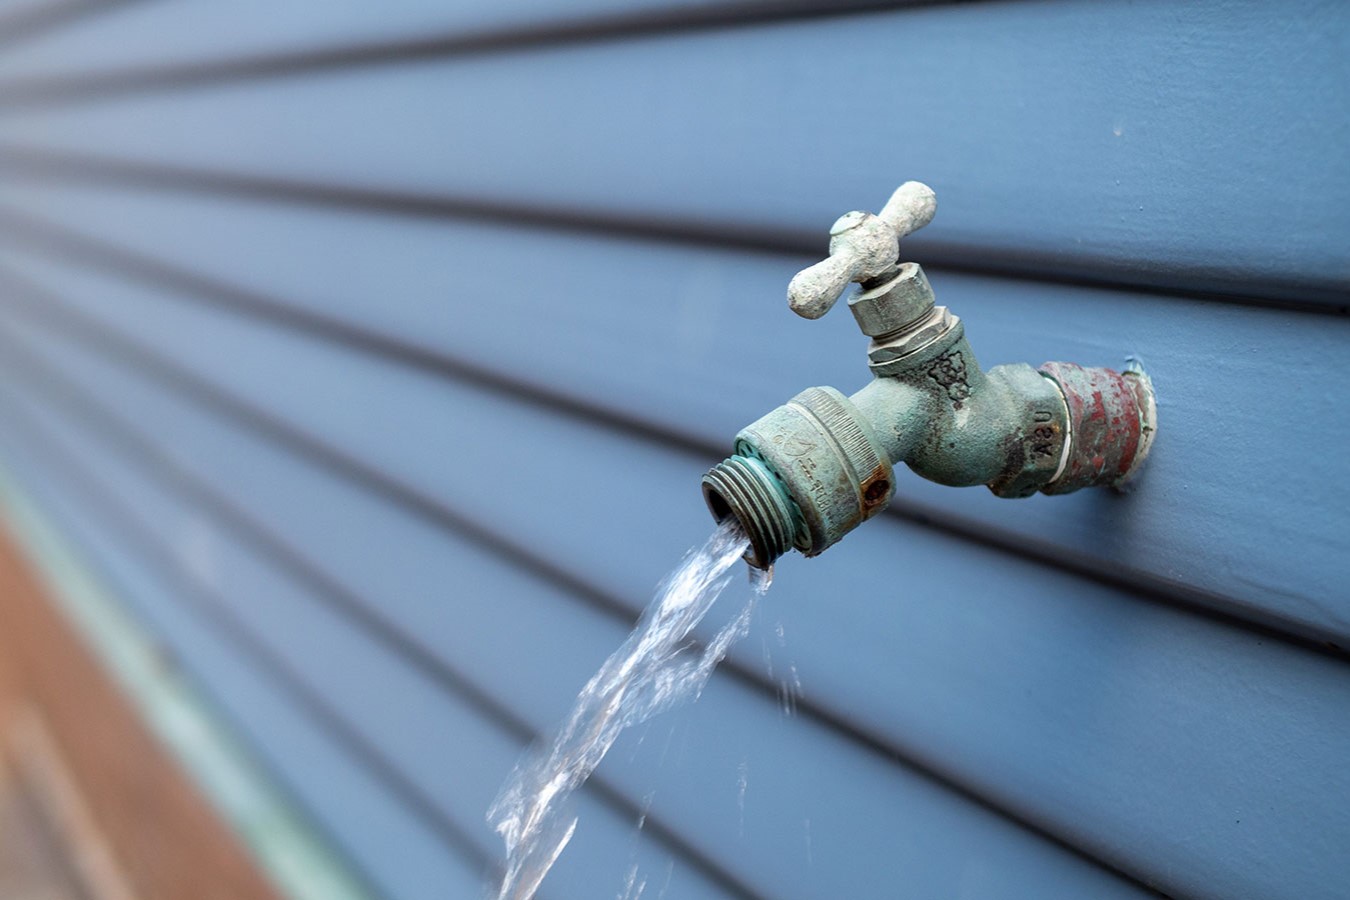
Outdoor faucets are exposed to harsh weather conditions, including extreme temperatures, heavy rain, and potential damage from lawnmowers or foot traffic. Therefore, durability is a critical factor when selecting an outdoor faucet. Look for faucets made from materials like brass, bronze, or stainless steel, as these are more resistant to corrosion and can withstand extreme weather conditions better than plastic faucets.
2. Frost-Proof Design
If you live in an area that experiences freezing temperatures, a frost-proof or anti-siphon faucet is a must. These faucets are designed with a downward angle that allows water to drain out, preventing it from collecting and potentially freezing solid. This feature ensures that your faucet remains functional even during the coldest months.
3. Ease of Maintenance
An outdoor faucet should be easy to operate and maintain. Look for models with stems that can be accessed quickly with simple tools. This feature will save you time and effort when performing routine maintenance tasks.
4. Water Supply Compatibility
Ensure that the faucet you choose is compatible with your home's plumbing system. Most outdoor faucets come in standard sizes such as ½-inch or ¾-inch in diameter, which typically match the plumbing inside your home.
Read more: How To Choose And Install The Right Toilet
5. Additional Features
Consider additional features such as vacuum breakers (anti-siphon devices) which prevent backflow and contamination. These features provide peace of mind and ensure that your water supply remains safe.
Preparing for Installation
Once you have chosen the right outdoor faucet, it's time to prepare for the installation process. Here are the steps you need to take:
1. Gather Tools and Materials
To install an outdoor faucet, you'll need the following tools and materials:
- Drill with a 1/4-inch twist bit and a 1 3/8-inch self-feeding wood bit: These are used to create the access hole through the siding and rim joist.
- Tubing cutter: This is used to cut the copper pipe accurately.
- Propane torch: This is necessary for soldering the copper pipe connections.
- Copper pipe and fittings: These are used to connect the new faucet to the existing water supply line.
- Frost-proof sillcock (outdoor faucet): This is the main component of your outdoor faucet installation.
- Plumber’s putty: This creates a watertight seal around the faucet flange.
- Emery cloth: This is used to clean the pipe ends before soldering.
- Copper bell hangers: These secure the pipe to the house framing for stability.
- Exterior-grade screws: These are used to secure the faucet to the house.
- Bucket: This is used to catch any residual water in the pipes during soldering.
2. Assess Your Plumbing Skills
Installing an outdoor faucet requires moderate plumbing skills. If you're uncomfortable with tasks like soldering copper pipes or working with your home's water supply, it's best to consult a professional plumber. Make sure you understand local plumbing codes and regulations, as these often dictate the types of materials you can use and how the installation should be performed.
3. Locate the Water Supply
Identify a suitable water supply line to tap into. Look for a nearby water supply pipe that's easy to access and modify. In many cases, this will involve locating a water supply line in your basement or near an exterior wall.
Drilling the Access Hole
Once you've determined the faucet's location, create the access hole by following these steps:
- Mark the Spot: From inside, mark the spot where the faucet will be installed.
- Drill a Pilot Hole: Drill a 1/4-inch pilot hole through the siding and rim joist.
- Enlarge the Hole: From the outside, use a 1-and-3/8-inch self-feeding bit to enlarge the hole. Make sure this hole falls between two floor joists in the basement to avoid structural issues.
Installing the Water Supply Line
With the access hole in place, you can focus on installing the water supply line for your new outdoor faucet. Here are the steps:
- Cut and Prepare the Pipe: Turn off the water before cutting into the existing water supply. Clean the pipe with an emery cloth before cutting. Use a tubing cutter to make a precise cut in the supply pipe.
- Run New Copper Tubing: Run new copper tubing from the cut water supply pipe to the newly drilled faucet hole. Secure this pipe to the house framing using copper bell hangers for stability.
- Solder Connections: To solder your connections, clean and flux all pipe ends and fittings. Apply heat to one side of the fitting until the flux bubbles, then apply lead-free solder to the opposite side. Avoid overheating the fitting. Wipe joints clean after soldering.
Installing the Outdoor Faucet
With the water supply line in place, you're ready to install the actual faucet.
- Prepare the Faucet: Remove the handle from the frost-proof sillcock to make installation easier. Apply a small amount of plumber’s putty around the back of the faucet flange to create a watertight seal.
- Secure the Faucet: Insert the faucet into the pre-drilled hole and press it firmly against the house. Secure it by driving two exterior-grade screws through the flange and into the house. Remove any excess plumber’s putty that squeezes out from behind the flange.
- Make Final Connections: From inside, make the final plumbing connection by soldering the faucet to the new water supply pipe. Ensure all connections are secure and leak-free. Providing additional support for the pipe near this connection can help maintain the integrity of the installation.
Post-Installation Checks
After completing the installation, it's crucial to perform several post-installation checks:
- Test Thoroughly: Test the faucet thoroughly after installation to ensure there are no leaks.
- Check for Leaks: Check both inside and outside the house for any signs of leaks.
- Monitor Moisture: Monitor the area around the new installation for any signs of moisture or pest activity in the following weeks.
Maintenance Considerations
Regular checks and maintenance of your outdoor faucet can prevent issues like leaks or freezing:
- Regular Checks: Regularly inspect your outdoor faucet for signs of wear or damage.
- Drainage Management: Proper drainage management around the faucet can deter pests from making homes near your foundation.
- Winterization: When winterizing pipes, don't forget outdoor faucets. Before the first freeze, turn off the water valve inside the home for the exterior water faucet and open it to let remaining water drain out.
Conclusion
Choosing and installing the right outdoor faucet requires careful consideration of several factors including durability, frost-proof design, ease of maintenance, water supply compatibility, and additional features like vacuum breakers. By following these steps and tips outlined in this article, you can ensure that your outdoor faucet installation is successful and provides years of reliable service.
Remember always to turn off the main water supply before starting any plumbing work and use appropriate protective equipment when operating power tools or soldering equipment. With patience and attention to detail, you can enjoy the convenience of having an easily accessible outdoor faucet for all your gardening and household needs.
Was this page helpful?
At Storables.com, we guarantee accurate and reliable information. Our content, validated by Expert Board Contributors, is crafted following stringent Editorial Policies. We're committed to providing you with well-researched, expert-backed insights for all your informational needs.








0 thoughts on “How To Choose And Install The Right Outdoor Faucet”