Home>Articles>How Do I Troubleshoot A Non Working HVAC System
Articles
How Do I Troubleshoot A Non Working HVAC System
Modified: August 26, 2024
Having trouble with your HVAC system? Read our informative articles on troubleshooting HVAC issues and get your system back up and running in no time.
(Many of the links in this article redirect to a specific reviewed product. Your purchase of these products through affiliate links helps to generate commission for Storables.com, at no extra cost. Learn more)
Introduction
When your HVAC system stops working, it can be a frustrating experience, especially during extreme weather conditions. Whether it’s a hot summer day or a cold winter night, the last thing you want is for your HVAC system to fail. However, before calling a professional technician, there are a few troubleshooting steps you can take to identify and potentially fix the issue.
In this article, we will guide you through a step-by-step process to troubleshoot a non-working HVAC system. By following these steps, you may be able to resolve the problem on your own and save both time and money.
Before we delve into the troubleshooting process, it’s important to remember that HVAC systems are complex and require technical expertise. If you’re uncomfortable or unsure about handling any part of the troubleshooting process, it’s best to consult a professional HVAC technician.
Now, let’s get started with the troubleshooting steps to get your HVAC system back up and running.
Key Takeaways:
- Regular maintenance, from cleaning air filters to inspecting the condensate drain, can prevent common HVAC issues. Prioritize safety and consult a professional technician if needed for a hassle-free troubleshooting experience.
- Troubleshooting your HVAC system can save time and money. From checking the thermostat to testing the compressor, following the step-by-step guide can help restore comfort and efficiency to your home or office.
Read more: How Do Commercial HVAC Systems Work
Common Issues with HVAC Systems
HVAC systems are intricate and consist of various components that work together to provide heating, ventilation, and cooling in your home or office. However, these systems can experience several common issues that can cause them to malfunction. Before diving into the troubleshooting steps, it’s essential to be familiar with these common issues:
- Lack of maintenance: One of the most prevalent causes of HVAC system problems is a lack of regular maintenance. Over time, dust and debris can accumulate in the system, leading to clogged air filters, reduced airflow, and strain on the system.
- Faulty thermostat: A malfunctioning thermostat can cause your HVAC system to behave erratically or not work at all. This can be due to issues with the wiring, incorrect temperature readings, or a worn-out thermostat.
- Power supply problems: In some cases, HVAC systems may not turn on due to power supply issues. This can be caused by a tripped circuit breaker, a blown fuse, or a problem with the electrical connection.
- Blocked air vents: If the air vents are obstructed or closed, it can limit the flow of air throughout your home or office. This can lead to inadequate cooling or heating and cause your HVAC system to work harder than necessary.
- Refrigerant leaks: Refrigerant is a vital component of the cooling process in HVAC systems. If there is a refrigerant leak, it can lead to a decrease in cooling capacity and put strain on the system.
- Condensate drain issues: HVAC systems produce condensation, which is usually drained away through a condensate drain. If the drain becomes clogged or blocked, it can cause water to accumulate and potentially damage the system.
- Malfunctioning fan motor or belt: The fan motor and belt are responsible for circulating air through the system. If either component malfunctions or becomes worn out, it can result in decreased airflow and inefficient cooling or heating.
- Ignition system problems: For HVAC systems that use gas as a fuel source, an issue with the ignition system can prevent the system from turning on or providing heat.
- Faulty compressor: The compressor is a crucial component of the HVAC system responsible for compressing the refrigerant to cool the air. If the compressor is faulty, it can lead to a lack of cooling or heating.
By understanding these common issues, you’ll be better equipped to troubleshoot your HVAC system effectively. Now, let’s move on to the step-by-step troubleshooting process.
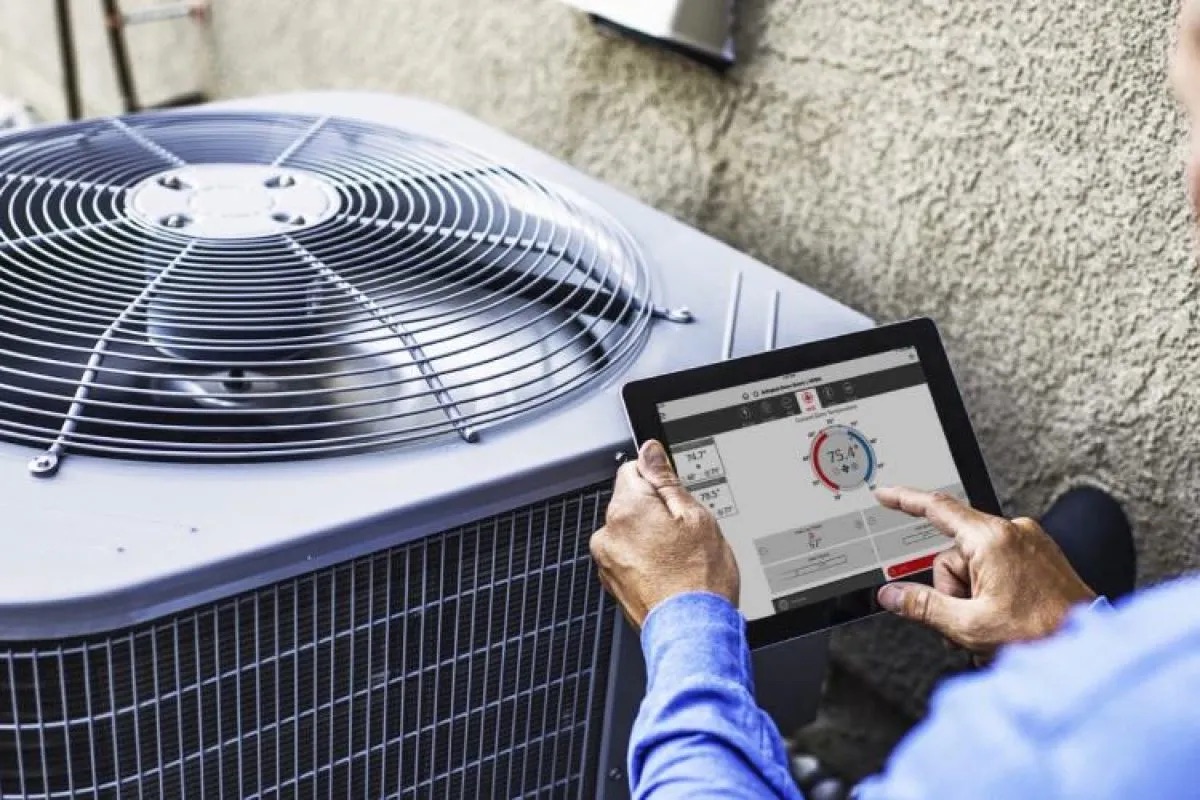
Step 1: Check the Thermostat
The thermostat acts as the control center of your HVAC system, allowing you to set the desired temperature. A faulty thermostat can cause your HVAC system to malfunction or not turn on at all. Here’s how to troubleshoot the thermostat:
- Check the power: Ensure that the thermostat has power. If it’s battery-operated, replace the batteries and see if that resolves the issue.
- Verify the settings: Double-check the thermostat settings to ensure that it’s set to the appropriate temperature and mode (cooling or heating).
- Clean the thermostat: Dust and debris can accumulate on the thermostat, affecting its functionality. Gently clean the thermostat with a soft cloth or brush to remove any dirt or debris.
- Inspect the wiring: If you’re comfortable doing so, turn off the power to the HVAC system and remove the thermostat cover. Carefully inspect the wiring for any loose connections or signs of damage. If you notice any issues, it’s best to call a professional technician to handle the repairs.
- Calibrate the thermostat: In some cases, a thermostat may need recalibration. Refer to the manufacturer’s instructions for guidance on how to calibrate your specific thermostat model.
- Consider upgrading: If your thermostat is outdated or repeatedly causing issues, you might want to consider upgrading to a newer, programmable thermostat. These thermostats offer advanced features and better energy efficiency.
If the above steps don’t resolve the issue, it’s recommended to move on to the next troubleshooting step. Remember, if you’re unsure about handling any part of the troubleshooting process, don’t hesitate to contact a qualified HVAC technician for assistance.
Step 2: Inspect the Air Filters
Dirty or clogged air filters can significantly impact the performance and efficiency of your HVAC system. They can restrict airflow, reduce cooling or heating capacity, and even cause the system to overheat. Follow these steps to inspect and clean or replace the air filters:
- Locate the air filters: Depending on your HVAC system, the air filters may be located in the furnace or air handler, in the air conditioning unit, or in return air vents throughout your home.
- Turn off the HVAC system: Before inspecting or handling the air filters, make sure to turn off the HVAC system to prevent any potential damage or injury.
- Remove the air filters: Carefully remove the air filters from their housing or vents. Be cautious not to damage the filters or the surrounding components.
- Inspect the air filters: Examine the air filters for dirt, dust, and debris buildup. If the filters appear gray or clogged, it’s a sign that they need cleaning or replacement.
- Clean or replace the air filters: If the air filters are washable, gently rinse them with water until the dirt and debris are removed. Allow them to dry completely before reinstalling. If the filters are disposable, replace them with new ones of the same size and type.
- Reinstall the air filters: Once the filters are clean or replaced, carefully reinsert them back into their respective housing or vents. Make sure they fit snugly and are oriented correctly.
- Regularly maintain the air filters: To ensure optimal performance, it’s essential to regularly clean or replace the air filters every 1-3 months, or as recommended by the manufacturer. This will help prolong the lifespan of your HVAC system and improve indoor air quality.
By inspecting and maintaining the air filters, you can improve the airflow and efficiency of your HVAC system, as well as avoid potential issues caused by dirty or clogged filters. If you’ve followed these steps and the HVAC system still isn’t functioning correctly, proceed to the next troubleshooting step or consider consulting a professional technician.
Step 3: Verify Power Supply
A common reason for an HVAC system not working is a problem with the power supply. To ensure that your system is receiving power properly, follow these troubleshooting steps:
- Check the electrical panel: Locate the electrical panel in your home or property. Open the panel door and inspect it for any tripped circuit breakers or blown fuses. If you find a tripped breaker or blown fuse, reset or replace it accordingly.
- Reset the system: After resetting the circuit breaker or replacing the fuse, go to your HVAC system and reset it. This can usually be done by turning off the power to the system and then turning it back on. Refer to your system’s manual for specific instructions on how to reset the unit.
- Check the switch: Ensure that the power switch for your HVAC system is in the “on” position. It’s common for the switch to accidentally be turned off, so double-check to make sure it’s in the correct position.
- Inspect the wiring: If you’re comfortable working with electrical components, visually inspect the wiring connections in your HVAC system. Look for any loose or disconnected wires that may be causing a power supply issue. If you notice any problems, turn off the power to the system and call a professional technician for further inspection and repairs.
- Call an electrician: If you’ve gone through the above steps and your HVAC system still isn’t receiving power, it’s possible that there is an electrical issue in your home’s wiring. Contact a licensed electrician to diagnose and resolve any electrical problems that may be affecting your HVAC system.
Verifying the power supply is crucial in troubleshooting a non-working HVAC system. By ensuring that the system is receiving proper electrical power, you can eliminate power-related issues as the cause of the problem. If the system still isn’t functioning after completing this step, continue with the next troubleshooting step or seek assistance from a professional HVAC technician.
Read more: How A Chiller Works In HVAC
Step 4: Examine the Circuit Breakers
Circuit breakers play a vital role in protecting your HVAC system from electrical overloads. If your system is not working, a tripped circuit breaker could be the culprit. Follow these steps to examine the circuit breakers:
- Locate the electrical panel: The electrical panel, also known as the breaker box, is usually found in the basement, utility room, garage, or an accessible area in your home or property.
- Identify the HVAC circuit breaker: Look for the circuit breaker that corresponds to your HVAC system. Typically, it will be labeled “HVAC” or “Furnace/Air Conditioner.”
- Check for a tripped breaker: Examine the circuit breakers to see if any of them are in the “tripped” position. A tripped breaker is usually indicated by the switch pointing to the middle or in a different position than the others.
- Reset the breaker: If you find a tripped breaker, carefully turn it off by flipping the switch to the “off” position, and then back on by flipping it to the “on” position. This should reset the breaker.
- Observe the breaker: After resetting the breaker, monitor it for a few seconds. If it trips again immediately or shortly after resetting, it could indicate a larger electrical issue. In such cases, it’s recommended to consult a professional electrician to investigate and resolve the problem.
- Repeat the process: If the breaker doesn’t trip after resetting it, go back to the HVAC system and see if it turns on and functions correctly.
It’s worth noting that if the breaker trips repeatedly, it’s a sign of an underlying problem, such as a short circuit or excessive electrical load. In such situations, it’s best to seek assistance from a qualified electrician to address the issue.
By examining the circuit breakers and resetting any tripped breakers, you can potentially restore power to your HVAC system and resolve the non-working issue. If the system still doesn’t work, move on to the next troubleshooting step or consider contacting an HVAC technician for professional assistance.
Step 5: Inspect the Air Vents
The air vents in your home play a crucial role in distributing conditioned air from your HVAC system. If there are issues with the air vents, it can affect the airflow and the overall performance of your HVAC system. Follow these steps to inspect the air vents:
- Check all air vents: Walk through your home or property and inspect each air vent to ensure they are not obstructed or closed. Be sure to check vents in all rooms, including bedrooms, living areas, and basements.
- Remove any obstructions: If you find any objects, furniture, or debris blocking the air vents, clear them away to allow unrestricted airflow.
- Adjust the registers: If the air vents have adjustable registers, make sure they are in the open position for maximum airflow. It’s common for registers to be accidentally closed or partially closed, reducing the airflow.
- Clean the air vents: Over time, air vents can accumulate dust and debris, leading to restricted airflow. Use a vacuum cleaner or a brush to clean the vents and remove any buildup. If the vents are particularly dirty, you may consider hiring a professional duct cleaning service.
- Inspect ductwork for damage: While inspecting the air vents, visually examine the exposed ductwork for any signs of damage, such as disconnected joints or holes. If you notice any issues, it’s recommended to contact a professional HVAC technician to address and repair the ductwork.
- Consider air balancing: If certain rooms in your home are warmer or colder than others, you might consider air balancing. This process involves adjusting the airflow to different rooms to achieve more even temperatures. An HVAC professional can assist you with air balancing techniques.
By inspecting and maintaining the air vents, you can ensure proper airflow throughout your home and enhance the efficiency of your HVAC system. If the system still isn’t functioning correctly, proceed to the next troubleshooting step or consult an HVAC technician for further assistance.
Check the thermostat to ensure it’s set to the correct temperature and mode. Also, inspect the air filter for dirt and debris, as a clogged filter can restrict airflow and cause the system to malfunction.
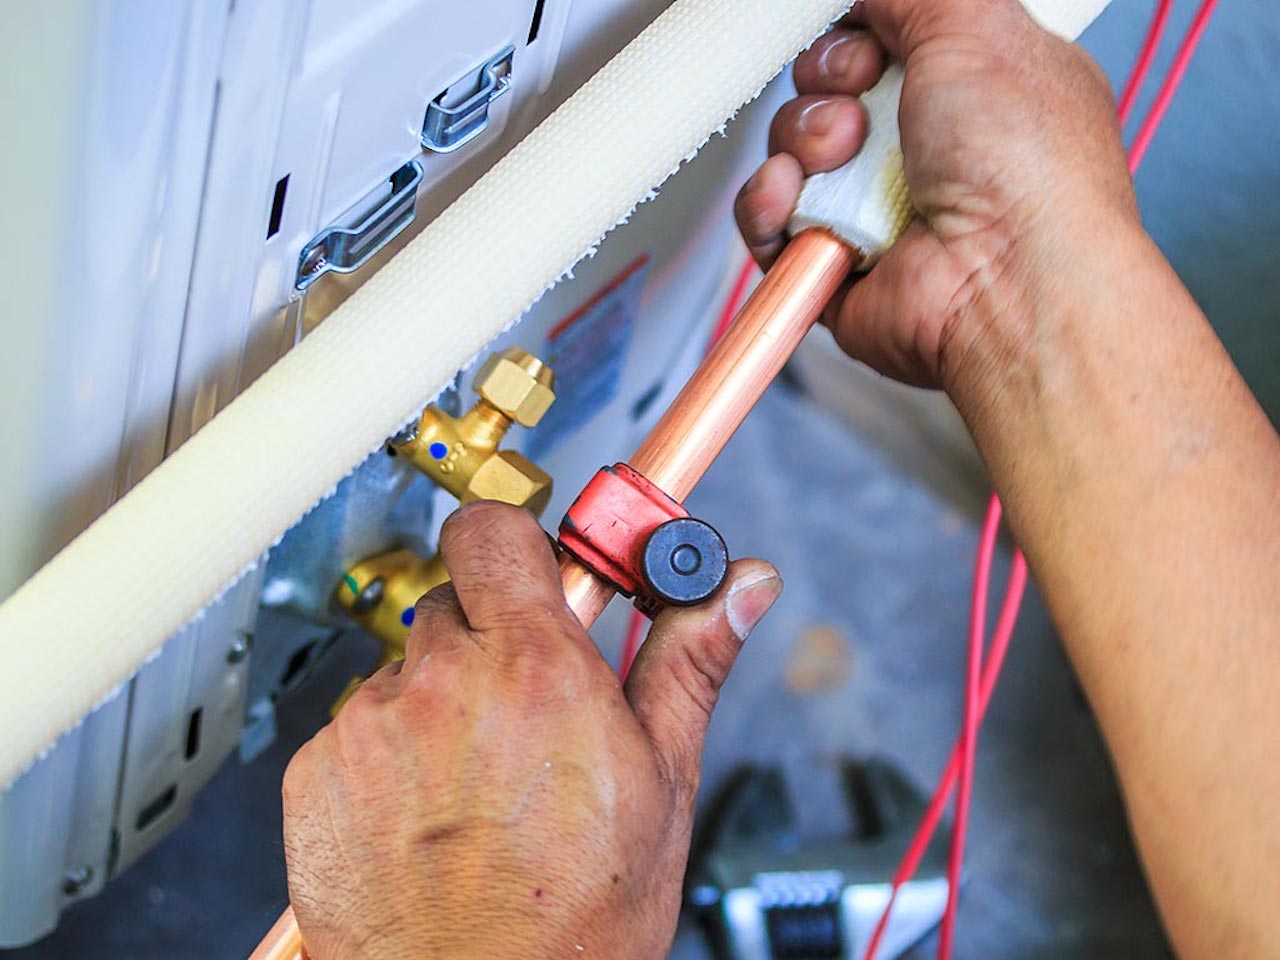
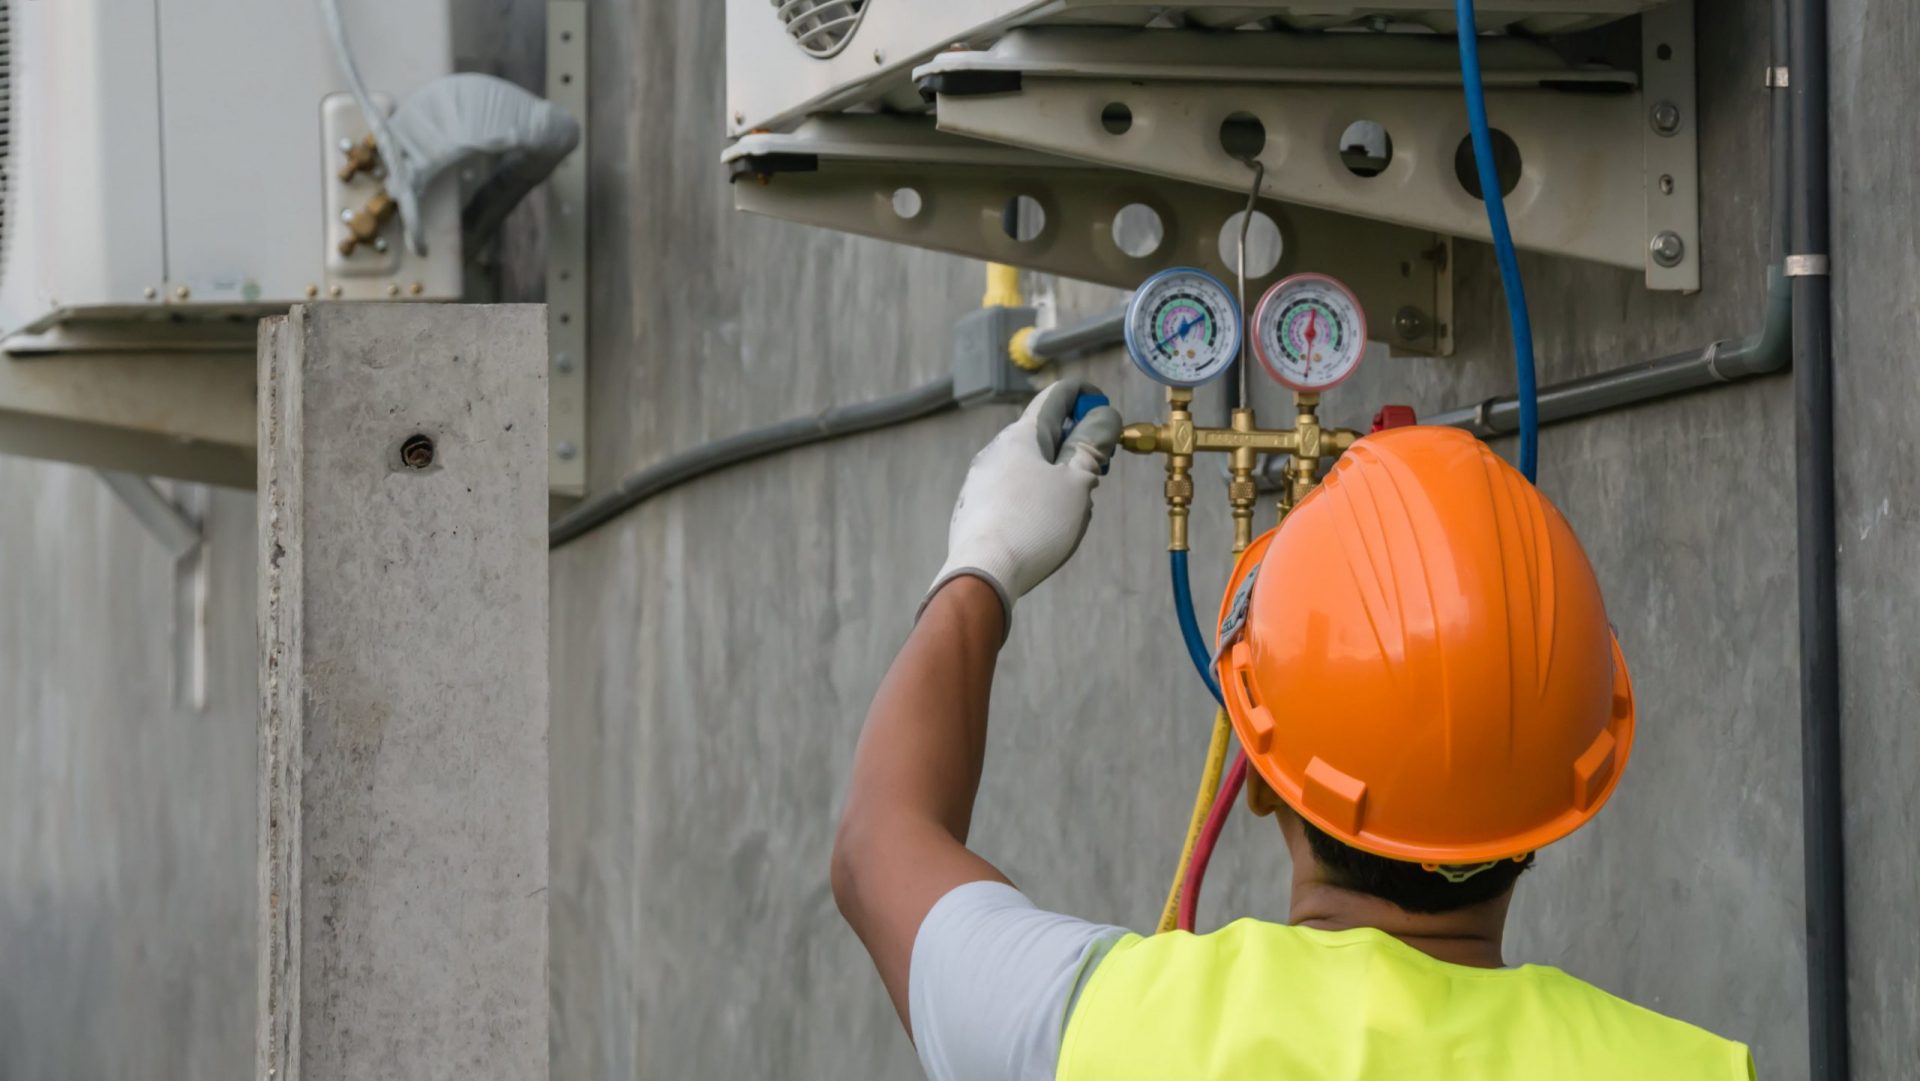
Step 6: Check for Refrigerant Leaks
Refrigerant is a crucial component in the cooling process of your HVAC system. If there is a refrigerant leak, it can lead to decreased cooling capacity and put strain on the system. Follow these steps to check for refrigerant leaks:
- Turn off the system: Before checking for refrigerant leaks, ensure that the HVAC system is turned off to prevent any potential hazards.
- Locate the refrigerant lines: The refrigerant lines are typically copper tubes that connect the indoor and outdoor units of the HVAC system. Inspect these lines for any signs of leakage, such as oil stains or frost accumulation.
- Check the condenser unit: Examine the condenser unit, located outside, for any visible signs of refrigerant leakage. Look for oil stains or pools of liquid around the unit.
- Use a leak detector: If you suspect a refrigerant leak but can’t visually identify it, you can use a refrigerant leak detector. These detectors can sense refrigerant leaks by detecting the chemicals emitted by the leaking refrigerant.
- Contact an HVAC technician: If you detect or suspect a refrigerant leak, it’s best to contact a professional HVAC technician. They have the expertise and equipment to accurately diagnose and repair refrigerant leaks.
- Do not attempt to repair the leak yourself: Refrigerant leaks require specialized knowledge and equipment to repair. It’s important not to attempt repairing a refrigerant leak yourself, as it can be dangerous and may cause further damage to the system.
Refrigerant leaks should be addressed promptly by a professional technician to prevent damage to your HVAC system. If you suspect a refrigerant leak, it’s best to contact a licensed HVAC technician to conduct a thorough inspection and make the necessary repairs.
If there are no refrigerant leaks or if the issue persists after addressing any leaks, proceed to the next troubleshooting step.
Step 7: Examine the Condensate Drain
The condensate drain is an essential component of your HVAC system that is responsible for removing excess moisture that accumulates during the cooling process. If the condensate drain becomes clogged or blocked, it can cause water to back up and potentially damage the system. Follow these steps to examine the condensate drain:
- Locate the condensate drain: The condensate drain is typically located near the indoor unit of your HVAC system. It may be a PVC pipe or a drain pan.
- Inspect for visible blockages: Check the condensate drain for any visible blockages, such as debris, algae, or sludge. If you notice any blockages, it’s important to remove them to restore proper drainage.
- Clean the condensate drain: To clean the condensate drain, you can use a wet/dry vacuum to suction out any debris or obstructions. Alternatively, you can mix a solution of equal parts water and vinegar and pour it into the drain line to help dissolve any buildup. Allow the solution to sit for about 30 minutes before flushing it out with clean water. Repeat the process if necessary.
- Check the condensate drain pan: If your HVAC system has a condensate drain pan, inspect it for any standing water or signs of leaks. If you notice excessive water accumulation or leaks, it may indicate a problem with the drainage system that should be addressed by a professional technician.
- Consider preventive maintenance: To prevent future condensate drain issues, it’s advisable to schedule regular preventive maintenance for your HVAC system. This will include cleaning and inspecting the condensate drain to ensure it remains free from blockages.
By examining the condensate drain and addressing any blockages or clogs, you can help prevent water damage and ensure the proper functioning of your HVAC system. If the drain appears to be clear, but the system still isn’t working, proceed to the next troubleshooting step or consult an HVAC technician for further assistance.
Read more: What Type Of HVAC System Do I Have
Step 8: Inspect the Fan Motor and Belt
The fan motor and belt in your HVAC system are responsible for circulating air throughout the system. If either of these components malfunctions or becomes worn out, it can lead to decreased airflow and inefficient cooling or heating. Follow these steps to inspect the fan motor and belt:
- Turn off the power: Before inspecting the fan motor and belt, ensure that the power to the HVAC system is turned off to prevent any accidents or injuries.
- Locate the fan motor and belt: The fan motor is usually located in the outdoor unit, while the fan belt can be found in the blower compartment of the indoor unit. Refer to your HVAC system manual or consult a professional if you are unsure of their locations.
- Visually inspect the fan motor: Examine the fan motor for any signs of damage, such as loose or frayed wires, excessive dirt or debris accumulation, or overheating. If you notice any issues, call a professional technician to handle the repairs or replacements.
- Check the fan belt: Inspect the fan belt for any signs of wear and tear, such as cracks, fraying, or looseness. If the belt appears to be worn out or damaged, it’s essential to replace it with a new one to ensure proper airflow.
- Tighten or adjust the belt: If the fan belt is loose but still in good condition, you can tighten or adjust it. Refer to your HVAC system manual for instructions on how to properly adjust the tension of the fan belt. Alternatively, you can contact an HVAC technician to handle the adjustment for you.
- Perform regular maintenance: To keep the fan motor and belt in good condition, it’s vital to perform regular maintenance. This includes cleaning the fan blades, lubricating the motor bearings if necessary, and scheduling routine professional HVAC maintenance.
By inspecting and maintaining the fan motor and belt, you can ensure optimal airflow and improve the efficiency of your HVAC system. If you notice any issues that require professional expertise or if the system still isn’t functioning correctly, proceed to the next troubleshooting step or contact an HVAC technician for assistance.
Step 9: Verify the Ignition System
For HVAC systems that use gas as a fuel source, the ignition system is crucial for igniting the gas and providing heat. If there is an issue with the ignition system, it can prevent the system from turning on or providing heat. Follow these steps to verify the ignition system:
- Turn off the power: Before inspecting the ignition system, ensure that the power to the HVAC system is turned off for safety.
- Locate the ignition system: The ignition system can typically be found near the burner assembly or combustion chamber of the HVAC system. Refer to your system’s manual or consult an HVAC technician if you’re unsure about its location.
- Inspect the ignition components: Visually examine the ignition components, such as the pilot light, electronic ignition module, or hot surface igniter. Look for any signs of damage, such as corrosion, loose connections, or worn-out parts.
- Check the pilot light: If your HVAC system has a pilot light, make sure it is lit. If the pilot light is out, follow the manufacturer’s instructions to relight it. If you’re unsure about relighting the pilot light or encounter any issues, contact an HVAC technician for assistance.
- Test the electronic ignition: If your system has an electronic ignition module or a hot surface igniter, you may be able to test it using a multimeter. Refer to your system’s manual for instructions on how to perform the test properly. If you’re not comfortable with this step or don’t have the necessary knowledge and tools, it’s best to leave it to a professional technician.
- Contact an HVAC technician: If you suspect an issue with the ignition system or if you’re unable to verify its proper functioning, it’s essential to contact a professional HVAC technician. They have the expertise and experience to diagnose and repair ignition system problems safely.
Verifying the ignition system is crucial for ensuring that your HVAC system can ignite properly and provide the necessary heat. If the ignition system appears to be functioning correctly and the system still isn’t working, proceed to the next troubleshooting step or seek assistance from a professional technician.
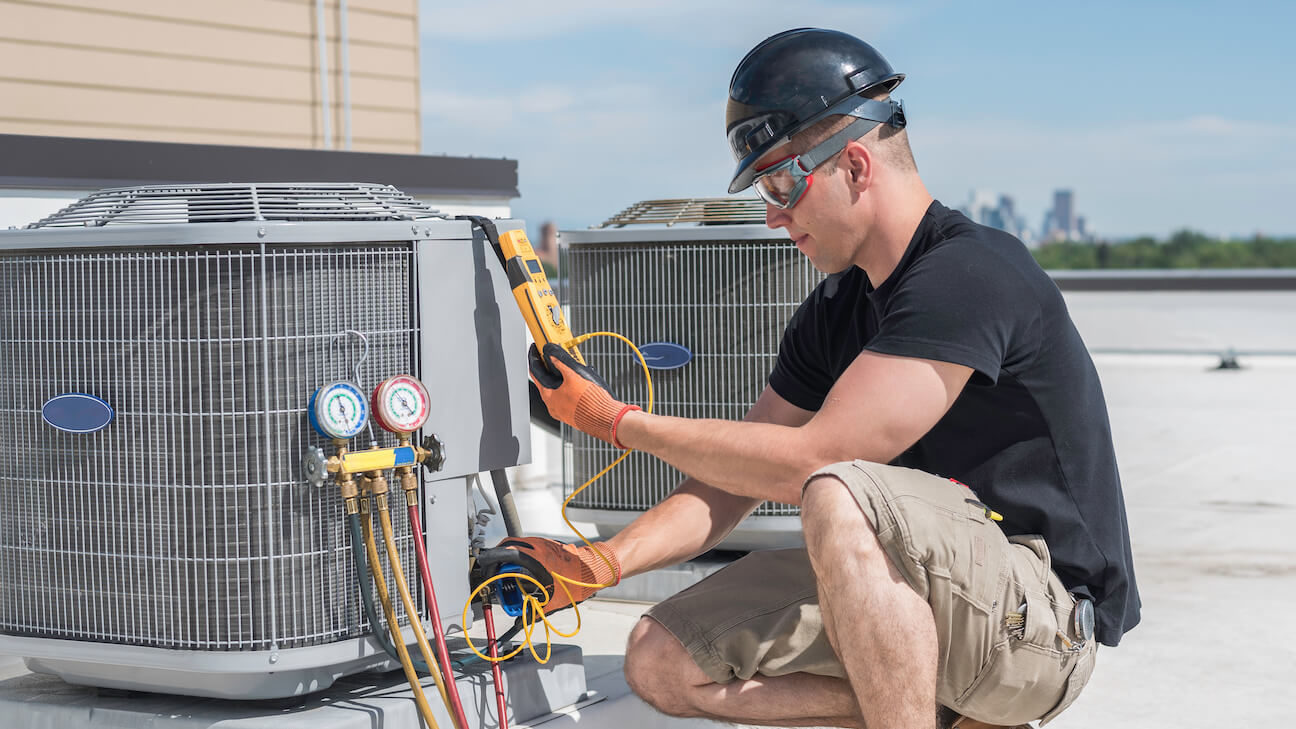
Step 10: Test the Compressor
The compressor plays a vital role in the cooling process of your HVAC system. If the compressor is not working properly, it can affect the system’s ability to cool your space effectively. Follow these steps to test the compressor:
- Turn off the power: Before testing the compressor, ensure that the power to the HVAC system is turned off for safety.
- Locate the compressor: The compressor is typically located in the outdoor unit of your HVAC system. It is usually a large metal unit with fans and refrigerant lines connected to it.
- Inspect the compressor: Visually examine the compressor for any signs of damage, such as dents, leaks, or loose electrical connections. If you notice any issues, it’s best to contact a professional HVAC technician for further inspection and repairs.
- Turn on the power: After inspecting the compressor, turn on the power to the HVAC system. You will need to follow any specific instructions provided by the manufacturer in the system’s manual.
- Listen for abnormal noises: When the HVAC system turns on, listen for any strange noises coming from the compressor, such as grinding, screeching, or banging sounds. Unusual noises could indicate a problem with the compressor and may require professional attention.
- Observe the compressor fan: Watch the compressor fan while the system is running. Ensure that it spins smoothly and consistently. If the fan is not rotating or appears to be struggling, it could signify a problem with the compressor motor or fan motor and should be checked by an HVAC technician.
- Check the refrigerant lines: Inspect the refrigerant lines connected to the compressor for any signs of leakage, such as oil stains or frost formation. Refrigerant leaks can negatively impact the performance of the compressor and should be addressed by a professional technician.
- Monitor the cooling: While the system is running, pay attention to the cooling output. If the temperature is not dropping or if the cooling seems insufficient, it could indicate an issue with the compressor or another component of the HVAC system.
- Consult an HVAC technician: If you notice any abnormalities during the compressor test or if the system is not cooling effectively, it’s recommended to contact a professional HVAC technician. They have the expertise to diagnose and repair compressor-related problems.
Testing the compressor is crucial to ensure that your HVAC system is functioning optimally. If you encounter any issues or are unsure about the testing process, it’s best to consult a professional technician for further evaluation and assistance.
Remember to exercise caution when working with electrical components and always follow proper safety procedures.
Conclusion
Troubleshooting a non-working HVAC system can be a challenging task, but by following the steps outlined in this guide, you can potentially identify and resolve the issue on your own. From checking the thermostat to inspecting the compressor, each step in the troubleshooting process plays a vital role in restoring your HVAC system’s functionality.
Throughout the troubleshooting process, it is crucial to prioritize safety. Always turn off the power before inspecting or working on any components of your HVAC system, and if you’re unsure or uncomfortable with any step, it’s best to seek the assistance of a professional HVAC technician.
Remember, regular maintenance is key to preventing many common HVAC system issues. This includes cleaning or replacing air filters regularly, scheduling professional maintenance, and keeping the system’s components free from debris and blockages.
If you’ve completed the troubleshooting steps and your HVAC system is still not working, it’s time to consult a professional technician. They have the skills, knowledge, and tools to diagnose and resolve more complex issues that may require specialized expertise.
Don’t let a non-working HVAC system leave you in discomfort. Take the necessary steps to troubleshoot the problem and restore the comfort of your home or office. Whether it’s a simple fix or a more complex repair, addressing the issue promptly can save you time, money, and inconvenience in the long run.
Remember, proper maintenance and care can help prolong the lifespan of your HVAC system, enhance its efficiency, and ensure comfortable indoor temperatures year-round. So, stay proactive, be diligent, and enjoy the benefits of a properly functioning HVAC system.
Frequently Asked Questions about How Do I Troubleshoot A Non Working HVAC System
Was this page helpful?
At Storables.com, we guarantee accurate and reliable information. Our content, validated by Expert Board Contributors, is crafted following stringent Editorial Policies. We're committed to providing you with well-researched, expert-backed insights for all your informational needs.


0 thoughts on “How Do I Troubleshoot A Non Working HVAC System”