Home>Storage Ideas>Kitchen Storage>Why Is My Refrigerator Leaking Water Inside? Experts Advise

Kitchen Storage
Why Is My Refrigerator Leaking Water Inside? Experts Advise
Modified: August 27, 2024
Seeking advice on why your refrigerator is leaking water inside? Our experts share valuable insights. Discover practical kitchen storage ideas.
(Many of the links in this article redirect to a specific reviewed product. Your purchase of these products through affiliate links helps to generate commission for Storables.com, at no extra cost. Learn more)
Introduction
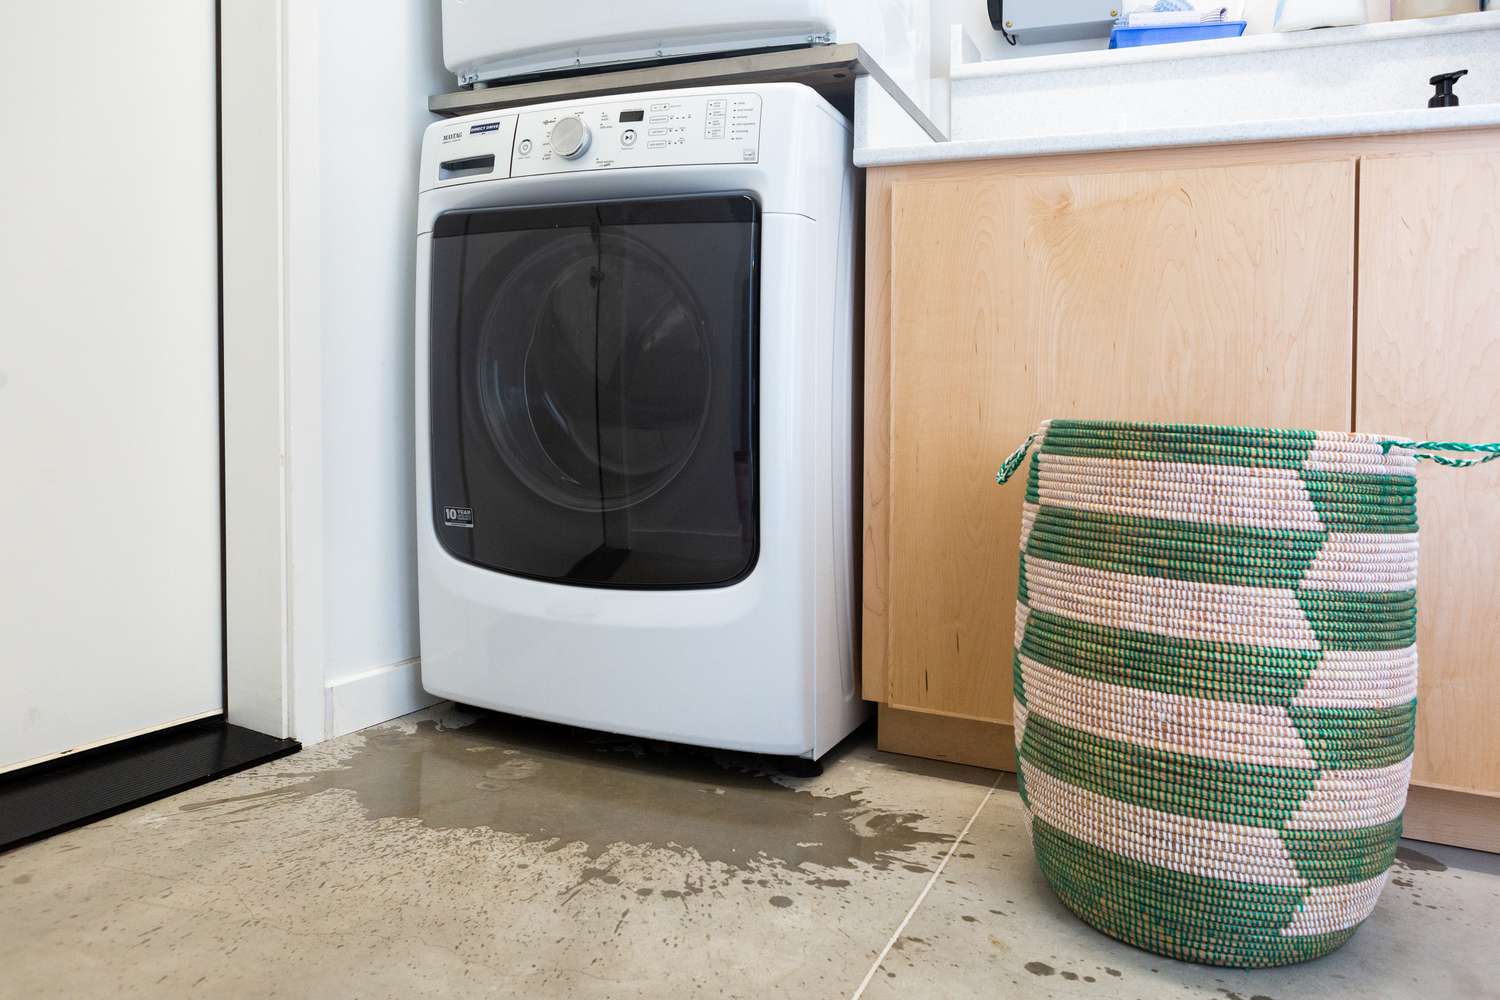
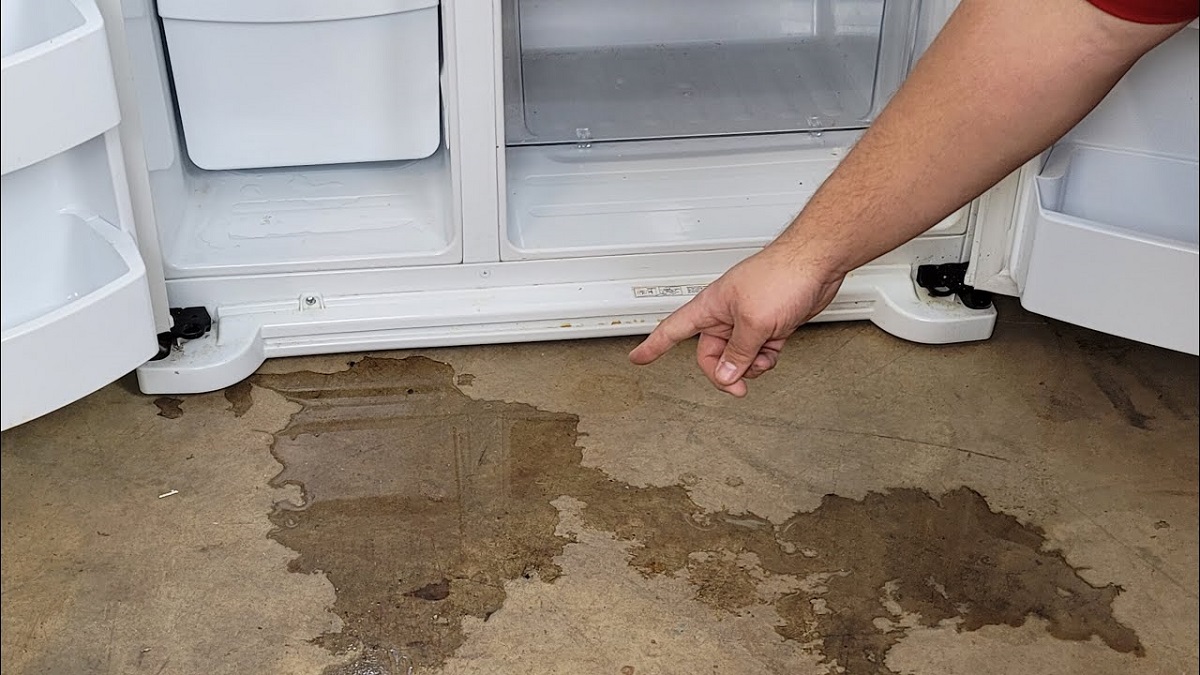
Having a leaking refrigerator can be a frustrating and inconvenient issue to deal with. Not only does it create a mess in your kitchen, but it can also lead to potential water damage to your home and appliances. If you find water pooling inside your refrigerator, it is important to address the issue promptly to prevent further damage and restore the proper functioning of your appliance. In this article, we will explore some common causes of refrigerator leakage and provide expert advice on how to troubleshoot and fix the problem.
There are several potential reasons why your refrigerator may be leaking water inside. Identifying the underlying cause is crucial to effectively resolving the issue. In many cases, the problem can be resolved with some simple troubleshooting steps or minor repairs. However, if you are uncertain about how to proceed or if the problem persists after attempting to fix it, it is advisable to seek professional assistance to ensure a proper repair and prevent any further damage.
Let’s dive into the various causes of refrigerator leakage and explore the steps you can take to address each issue.
Key Takeaways:
- Don’t let refrigerator leakage ruin your kitchen experience. Troubleshoot common causes like blocked defrost drains and faulty water inlet valves to prevent water damage and restore optimal appliance performance.
- Keep your refrigerator leakage-free by addressing issues with door seals, water filters, and condensation. Regular maintenance and professional assistance can ensure a hassle-free kitchen experience.
Read more: Why Is My Water Pump Leaking
Causes of refrigerator leakage
When it comes to refrigerator leaks, there are several potential culprits. Let’s take a closer look at some of the most common causes:
- Blocked defrost drain: One of the primary causes of refrigerator leakage is a blocked defrost drain. Over time, debris, food particles, and ice can accumulate in the drain and obstruct the flow of water during the defrosting process. As a result, the water can back up and leak into the refrigerator. Cleaning the drain with a mixture of hot water and mild soap can often resolve this issue.
- Clogged or frozen water supply line: If your refrigerator has an ice maker or a water dispenser, a clogged or frozen water supply line could be the source of the leak. A blocked water supply line prevents water from flowing properly, causing leaks. To address this, you can try thawing the line with a hairdryer or replacing it if necessary.
- …
These are just a few of the potential causes of refrigerator leakage. Identifying the exact reason for the leak may require a closer inspection of your appliance. Remember, it’s always best to consult the manufacturer’s manual or seek professional assistance if you’re unsure about troubleshooting or fixing the issue yourself.
Blocked defrost drain
A blocked defrost drain is one of the most common causes of refrigerator leakage. During the normal operation of your refrigerator, frost and ice can accumulate on the evaporator coil. The defrost system is designed to melt this ice and drain the water through a small drain hole into a pan located at the bottom of the unit. However, if the drain becomes blocked, the water has nowhere to go and ends up leaking into the refrigerator.
To determine if a blocked defrost drain is the cause of your refrigerator leakage, here’s what you can do:
- Locate the defrost drain: The defrost drain is typically located at the back of the freezer compartment. You may need to remove the freezer drawers or shelves to access it.
- Clean the drain: Use a mixture of hot water and mild soap to clean the drain. You can also use a pipe cleaner or a small brush to remove any stubborn blockages. Be gentle to avoid damaging the drain tube.
- Flush the drain with hot water: Once the drain is clear of any debris, flush it with hot water to ensure proper flow. You can use a turkey baster or a funnel to pour the hot water into the drain.
- Check the drain pan: Locate the drain pan at the bottom of your refrigerator. Ensure that it is clean and properly positioned. If the drain pan is damaged or misaligned, it can cause water to leak onto the floor.
By cleaning and clearing the defrost drain, you can often resolve the issue of refrigerator leakage. However, if the problem persists or if you are unsure about how to proceed, it is recommended to consult the manufacturer’s manual or seek professional assistance to avoid causing further damage to your appliance.
Clogged or frozen water supply line
If your refrigerator is equipped with a water dispenser or an ice maker, a clogged or frozen water supply line could be the culprit behind the leakage. The water supply line is responsible for delivering water to these features, and any blockage or freezing can cause water to leak inside the refrigerator.
To troubleshoot and address a clogged or frozen water supply line, follow these steps:
- Locate the water supply line: The water supply line is typically located at the back of the refrigerator. Trace the line from the wall or floor connection to the refrigerator to identify any visible issues.
- Check for clogs: Inspect the water supply line for any visible clogs, such as ice or debris. If you notice any blockages, you can try carefully removing them using a thin, flexible brush or by thawing the ice with a hairdryer set on low heat.
- Thaw the line: If the supply line is frozen, it can impede the flow of water and lead to leaks. Use a hairdryer set on low heat, or wrap a warm towel around the line to gently thaw it. Avoid using excessive heat or sharp objects to avoid damaging the line.
- Inspect the water filter: If your refrigerator has a water filter, check if it needs to be replaced or if it is causing any obstruction in the flow of water. A clogged or old filter can hinder water flow and result in leaks.
Once you have cleared any clogs and thawed the water supply line, check for leaks by dispensing water or running the ice maker. Monitor the area for any signs of leakage and make sure that water is flowing properly through the supply line.
If the issue persists or if you are unsure about troubleshooting the water supply line yourself, it is advisable to consult the manufacturer’s manual or seek professional assistance. They can provide specific guidance based on your refrigerator model and ensure that the problem is resolved correctly.
Damaged water inlet valve
The water inlet valve in your refrigerator is responsible for controlling the flow of water to the ice maker and water dispenser. If the valve becomes damaged or faulty, it can cause water leakage inside your refrigerator. This is because the valve may not fully shut off the water supply, leading to constant dripping or a slow leak.
To address a damaged water inlet valve, follow these steps:
- Access the water inlet valve: The location of the water inlet valve may vary depending on the specific refrigerator model. It is typically located at the back of the refrigerator, near the bottom. Locate the valve and observe it for any signs of damage or leakage.
- Shut off the water supply: Before attempting any repairs, it is important to turn off the water supply to the refrigerator. Locate the water shut-off valve connected to the main water line and close it to prevent any further water flow.
- Inspect and replace the valve: Carefully examine the water inlet valve for any visible damage, such as cracks or signs of leakage. If the valve is damaged or malfunctioning, it will need to be replaced. Consult your refrigerator’s user manual or contact the manufacturer for the correct replacement part and installation instructions.
- Installation and testing: Once you have obtained the replacement valve, carefully install it following the manufacturer’s instructions. Ensure that all connections are secure and properly sealed. Once the new valve is in place, turn on the water supply and check for any signs of leakage. Monitor the refrigerator for a period of time to ensure that the issue has been resolved.
If you are unsure about replacing the water inlet valve yourself or if the leakage continues after replacing the valve, it is recommended to seek professional assistance. They can accurately diagnose the issue and ensure proper repair, minimizing the risk of further damage to your refrigerator.
Read more: Why Is My Freezer Leaking Water
Faulty water filter
If your refrigerator has a water filter, a faulty filter can be a common cause of water leakage inside the refrigerator. The water filter is responsible for filtering out impurities from the water supply before it is dispensed or used for ice making. Over time, the filter can become clogged or damaged, leading to leaks.
Here’s how to address a faulty water filter:
- Locate the water filter: Depending on your refrigerator model, the water filter can be found either inside the refrigerator compartment or at the back of the appliance. Consult your refrigerator’s user manual to locate the filter.
- Inspect the filter for damage or clogs: Remove the water filter from its housing and carefully inspect it for any visible damage or clogs. Look for cracks, tears, or signs of blockage that could be causing water to leak inside the refrigerator.
- Replace the water filter: If the filter is damaged or clogged, it will need to be replaced. Refer to your refrigerator’s user manual or contact the manufacturer to obtain the correct replacement filter. Install the new filter according to the manufacturer’s instructions, ensuring a proper seal and connection.
- Flush the system: After replacing the filter, it is essential to flush the water system to remove any air or impurities. Follow the manufacturer’s guidelines for flushing the system, which usually involves running water through the dispenser for a certain amount of time or discarding the first few batches of ice.
Once the new filter is in place and the system is flushed, monitor your refrigerator for any signs of leakage. If the problem persists or if you are unsure about replacing the water filter yourself, it is recommended to consult the manufacturer or seek professional assistance to ensure that the issue is properly resolved.
Check the defrost drain to make sure it’s not clogged with debris. If it is, clear the blockage to allow the water to properly drain and prevent leakage inside the refrigerator.
Improperly installed drain pan
An improperly installed or misaligned drain pan can also be a cause of refrigerator leakage. The drain pan, located at the bottom of the refrigerator, is designed to collect condensation and water from the appliance. If the drain pan is not properly installed or secured, it can lead to leaks.
To address an improperly installed drain pan, follow these steps:
- Locate the drain pan: The drain pan is typically located at the bottom of the refrigerator, behind the kickplate or grille. Carefully remove the kickplate or grille to access the drain pan.
- Check for proper placement: Ensure that the drain pan is properly positioned and aligned. It should sit securely in its designated spot, allowing water to flow directly into it.
- Inspect for cracks or damage: Examine the drain pan for any cracks, damage, or holes. If there are any issues with the drain pan’s integrity, it may not effectively collect the water, resulting in leakage. In such cases, the drain pan may need to be replaced.
- Clean and clear any blockages: Remove the drain pan and clean it thoroughly. Check for any debris or blockages that may be obstructing the flow of water into the pan. Use a mild soap and warm water solution to clean the pan, ensuring that it is free from any residue or buildup.
- Reinstall the drain pan: Once cleaned and inspected, carefully reposition the drain pan back into its designated spot. Ensure that it fits securely and is aligned properly.
After making sure the drain pan is properly installed and clear of any obstructions, monitor your refrigerator for any signs of leakage. If the leaking issue persists, it is advisable to consult the manufacturer’s manual or seek professional assistance to address the problem effectively.
Excessive condensation
If you’re experiencing excessive condensation inside your refrigerator, it can lead to water pooling and leakage. Condensation occurs naturally as a result of temperature differences and humidity inside the appliance. However, when condensation becomes excessive, it can be a sign of an underlying issue that needs to be addressed.
To troubleshoot and reduce excessive condensation in your refrigerator, follow these steps:
- Check the door seal: Inspect the gasket or door seal of your refrigerator to ensure it is clean, intact, and sealing properly. A damaged or worn-out door seal can allow warm air to enter the refrigerator, leading to increased condensation. Clean the door seal regularly with mild soapy water and ensure a tight seal by adjusting or replacing the gasket if needed.
- Monitor humidity levels: High humidity levels in your kitchen can contribute to excessive condensation. Use a hygrometer to monitor the humidity, and consider using a dehumidifier if necessary to reduce moisture in the air.
- Avoid overpacking the refrigerator: Overfilling your refrigerator can restrict airflow and contribute to increased moisture buildup. Ensure proper air circulation by not overpacking the shelves or blocking air vents.
- Check temperature settings: Incorrect temperature settings can lead to excessive condensation. Ensure that your refrigerator is set to the recommended temperature for optimal performance. Typically, the refrigerator compartment should be set between 35°F and 38°F (2°C and 3°C).
- Regularly defrost and clean: Excessive frost buildup can contribute to condensation issues. Regularly defrost your refrigerator, as per the manufacturer’s instructions, to remove built-up ice. Additionally, clean the interior of the appliance regularly to prevent any residue or mold growth that can exacerbate condensation.
Keep in mind that a certain amount of condensation is normal. However, if you continue to experience excessive condensation and water pooling inside your refrigerator, it may indicate a more significant issue. In such cases, it is advisable to consult the manufacturer or seek professional assistance to diagnose and address the problem properly.
Issues with refrigerator door seal
A faulty or damaged door seal can contribute to refrigerator leakage. The door seal, also known as the gasket, is responsible for creating an airtight seal when the refrigerator door is closed. If the seal is compromised, warm air can enter the refrigerator, causing condensation and water leakage.
To address issues with the refrigerator door seal, follow these steps:
- Inspect the door seal: Carefully examine the entire door seal for any visible signs of damage, such as cracks, tears, or looseness. Ensure that the seal is clean and free from any debris or residue that can prevent a proper seal.
- Clean the seal: Use a mild soapy water solution and a clean cloth to clean the door seal. Pay attention to any areas that may have accumulated dirt or grime. Avoid using harsh chemicals or abrasive cleaners that may damage the seal.
- Check alignment: Close the refrigerator door and observe the alignment of the door seal. It should make consistent contact with the refrigerator cabinet all around the door. If you notice any gaps or uneven contact, the door may need to be adjusted. Consult the user manual or contact the manufacturer for guidance on adjusting the door alignment.
- Test the seal: To determine if the door seal is sealing properly, perform a dollar bill test. Place a dollar bill between the refrigerator door and the cabinet, and close the door. Gently pull the bill out. If you can easily remove the bill without any resistance, it indicates that the door seal may need to be replaced.
- Replace the door seal: If the door seal is damaged, worn out, or fails the dollar bill test, it is recommended to replace it. Contact the manufacturer or a professional technician to obtain the correct replacement seal and follow the provided instructions for installation.
Ensuring a tight and proper seal with the door gasket is crucial for preventing leakage and maintaining the efficiency of your refrigerator. If you continue to experience water leakage despite addressing the door seal, it is advisable to seek professional assistance to diagnose and resolve any underlying issues with the appliance.
Read more: Why Is My Kettle Leaking Water
Steps to troubleshoot and fix refrigerator leakage
Experiencing refrigerator leakage can be a frustrating and inconvenient issue, but there are steps you can take to troubleshoot and fix the problem. Follow these steps to address refrigerator leakage:
- Identify the source of the leakage: Before taking any action, determine the exact location of the leakage. Is it coming from inside the refrigerator or from underneath? This will help narrow down the potential causes.
- Inspect the defrost drain: A blocked defrost drain is a common cause of refrigerator leakage. Remove any debris or ice buildup from the drain using hot water and mild soap. Ensure that the drain pan is clean and properly installed.
- Check the water supply line: If your refrigerator has an ice maker or water dispenser, a clogged or frozen water supply line could be the issue. Thaw any ice buildup or clear any clogs in the line using a hairdryer or warm water. Inspect the water filter for any blockages and replace if necessary.
- Examine the water inlet valve: A damaged water inlet valve can cause water to continuously drip into the refrigerator. Inspect the valve for any signs of damage or leakage. If necessary, replace the valve following the manufacturer’s instructions.
- Inspect the water filter: A faulty water filter can lead to leakage. Check the filter for any damage or blockages. Replace it if necessary and flush the system to remove any air or impurities.
- Check the drain pan installation: Ensure that the drain pan is properly installed and aligned. Clean it and remove any blockages that may be preventing water from flowing into the pan.
- Address excessive condensation: Excessive condensation can cause water to pool and leak inside the refrigerator. Check the door seal for any damage or gaps and clean it regularly. Monitor humidity levels in your kitchen and avoid overpacking the refrigerator.
- Monitor temperature settings: Incorrect temperature settings can contribute to condensation and leakage. Adjust the refrigerator temperature within the recommended range to prevent excessive moisture buildup.
- Seek professional assistance if needed: If the leakage persists or if you’re uncertain about how to proceed, it’s advisable to seek professional assistance. They can accurately diagnose the issue and provide appropriate repairs to resolve the problem.
By following these troubleshooting steps, you can often identify and fix the cause of refrigerator leakage. However, if the problem persists or if you’re unsure about any repairs, consulting the manufacturer or contacting a professional technician is recommended to avoid further damage to your refrigerator.
Conclusion
Refrigerator leakage can be a frustrating and potentially damaging issue, but with the right troubleshooting steps, you can identify and resolve the problem. By understanding the common causes of refrigerator leakage, such as blocked defrost drains, clogged water supply lines, damaged water inlet valves, faulty water filters, improperly installed drain pans, excessive condensation, and issues with door seals, you can take the necessary steps to fix the issue.
Remember to always start by identifying the source of the leakage and then proceed with the appropriate troubleshooting steps. Clean and clear any blockages, thaw frozen lines, inspect and replace damaged parts as needed, and ensure proper installation of components. Regular maintenance, such as cleaning the drain pan and door seals, monitoring humidity levels, and checking temperature settings, can also help prevent future leakage issues.
If you’re unsure about any repairs or if the leakage persists despite your efforts, it is recommended to consult the manufacturer’s manual or seek professional assistance. They have the expertise and knowledge to accurately diagnose the problem and provide the necessary repairs, ensuring the optimal functioning of your refrigerator.
By addressing refrigerator leakage promptly, you can prevent water damage to your home and appliances, save energy by maintaining proper cooling efficiency, and enjoy a hassle-free experience in your kitchen. So, don’t let refrigerator leakage dampen your spirits – take action and restore your appliance to its optimal condition.
Frequently Asked Questions about Why Is My Refrigerator Leaking Water Inside? Experts Advise
Was this page helpful?
At Storables.com, we guarantee accurate and reliable information. Our content, validated by Expert Board Contributors, is crafted following stringent Editorial Policies. We're committed to providing you with well-researched, expert-backed insights for all your informational needs.


0 thoughts on “Why Is My Refrigerator Leaking Water Inside? Experts Advise”