Home>Articles>How Do You Cook A Roast In An Electric Skillet

Articles
How Do You Cook A Roast In An Electric Skillet
Modified: October 20, 2024
Learn how to cook a delicious roast in an electric skillet with these informative articles. Discover tips, tricks, and flavorful recipes for your next meal.
(Many of the links in this article redirect to a specific reviewed product. Your purchase of these products through affiliate links helps to generate commission for Storables.com, at no extra cost. Learn more)
Introduction
Cooking a roast in an electric skillet is a convenient and efficient way to prepare a delicious and tender meal. Whether you’re a seasoned kitchen experimenter or a novice home cook, mastering the art of cooking a roast in an electric skillet will elevate your culinary skills to new heights.
Electric skillets offer several advantages over traditional ovens or stovetop cooking methods. They provide even heat distribution, ensuring that your roast cooks evenly on all sides. The temperature controls allow you to easily adjust the heat to achieve the desired level of doneness. Additionally, the compact size of electric skillets makes them perfect for small kitchens or for those who prefer not to use a large oven.
In this article, we will discuss the step-by-step process of cooking a roast in an electric skillet. We will cover everything from choosing the right roast to serving it up in style. So, let’s dive in and learn how to cook a mouthwatering roast in an electric skillet!
Key Takeaways:
- Master the art of cooking a mouthwatering roast in an electric skillet by choosing the right cut, seasoning it to perfection, and mastering the cooking process for a tender and flavorful dining experience.
- Elevate your culinary skills and create unforgettable dining experiences by mastering the art of resting the roast, testing for doneness, and serving it with complementary side dishes and savory sauces.
Read more: How To Cook Pot Roast In An Electric Skillet
Choosing the Right Roast
When it comes to cooking a roast in an electric skillet, selecting the right cut of meat is crucial. Different cuts of beef offer different levels of tenderness and flavors, so it’s important to choose one that suits your preferences.
The most popular cuts for roasting are the prime rib, chuck roast, and beef tenderloin. Prime rib is known for its rich marbling, which makes it incredibly tender and flavorful. Chuck roast, on the other hand, is a more economical option and is perfect for slow cooking. Beef tenderloin is the most tender cut, but it can be quite expensive.
Consider the size of your electric skillet when choosing a roast. You want to ensure that the roast fits comfortably in the skillet without overcrowding it. This allows for proper heat circulation and even cooking.
Lastly, take note of the desired level of doneness you prefer. Different cuts of beef have a recommended internal temperature for achieving rare, medium, or well-done results. This information can be found in cooking guides or by consulting with a butcher.
Choosing the right roast will contribute significantly to the success of your dish. So, take your time, and select a cut that suits your taste and cooking preferences.
Preparing the Roast
Before you start cooking the roast in the electric skillet, it’s essential to properly prepare the meat. This involves a few simple steps that will enhance the flavor and tenderness of the roast.
The first step is to trim any excess fat from the roast. While fat can add flavor, too much can result in a greasy finished dish. Use a sharp knife to carefully remove any visible fat on the surface of the meat.
Next, you’ll want to season the roast with salt and pepper. This simple seasoning combo helps to enhance the natural flavors of the meat. Sprinkle a generous amount of salt and pepper all over the roast, making sure to coat it evenly.
If you like, you can also add additional seasonings to the roast. This can include garlic powder, onion powder, dried herbs like thyme or rosemary, or even a dry rub of your choice. Feel free to get creative with your seasoning choices, but remember not to overpower the natural flavor of the meat.
Once the roast is seasoned, let it sit at room temperature for about 30 minutes. This allows the flavors to penetrate the meat and results in a more flavorful roast.
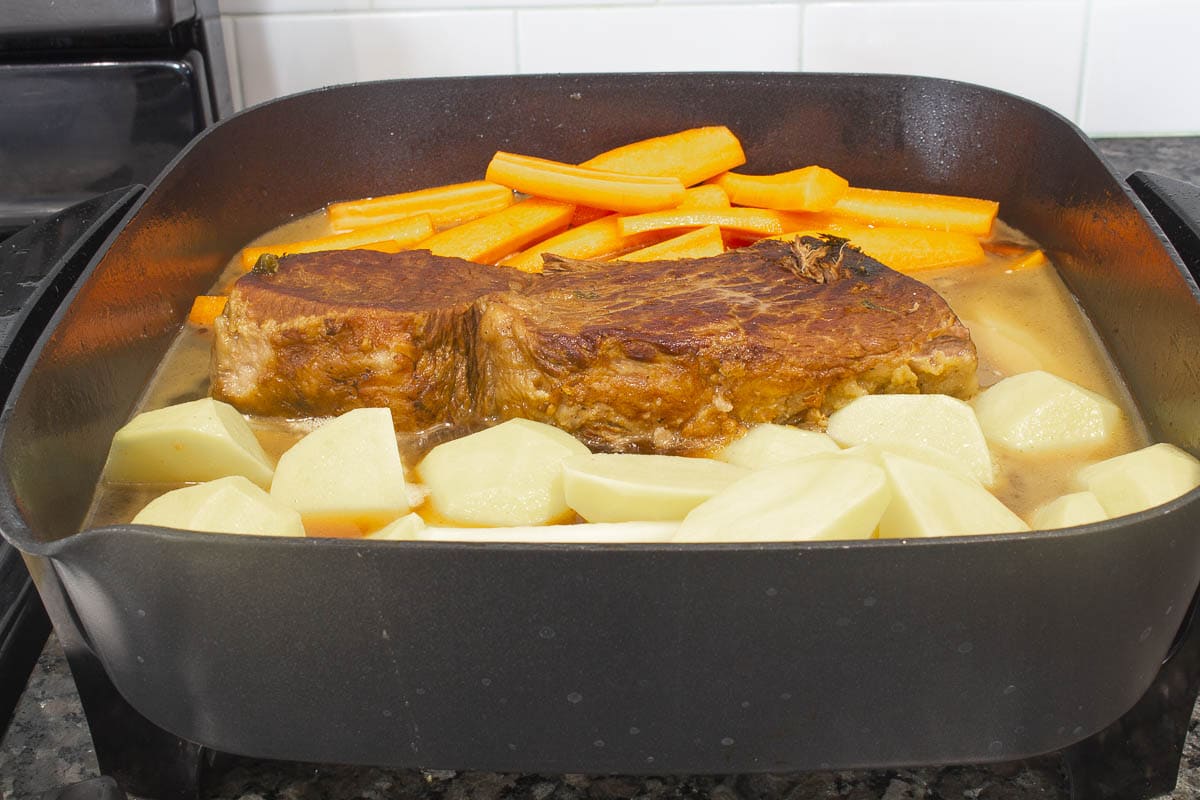
While the roast is resting, you can take this time to prepare any vegetables or side dishes you plan to serve with it. This could be as simple as chopping up potatoes and carrots or preparing a salad.
By properly preparing the roast, you’re setting the stage for a delicious and well-seasoned dish that will impress your family and friends.
Seasoning the Roast
Seasoning the roast is a crucial step in adding flavor and enhancing the taste of your cooked meat. While a well-prepared roast will already have some basic seasoning, adding additional spices and herbs can take it to the next level.
One of the simplest ways to season a roast is with salt and pepper. These two basic ingredients can enhance the natural flavors of the meat without overpowering it. Start by generously sprinkling salt and pepper on all sides of the roast, ensuring complete coverage.
In addition to salt and pepper, you can incorporate other seasonings to create a more complex and flavorful roast. Some popular choices include garlic powder, onion powder, paprika, dried herbs like rosemary, thyme, or oregano, and even a hint of cayenne pepper for a little heat.
If you prefer a more hands-on approach, you can create a dry rub by combining various spices and herbs. This can be as simple as mixing together salt, pepper, garlic powder, and paprika, or you can experiment with different combinations to suit your taste preferences. Massage the dry rub onto the surface of the roast, making sure to cover it evenly on all sides.
Another option for seasoning the roast is to marinate it overnight. This involves soaking the roast in a mixture of oil, acid (such as vinegar or citrus juice), and various spices and herbs. The marinade penetrates the meat, infusing it with flavor and tenderizing it at the same time. Be sure to refrigerate the roast while it marinates and discard the marinade before cooking.
Remember, seasoning is a personal preference, so feel free to experiment and adjust the flavors to your liking. The key is to find a balance between enhancing the natural flavors of the meat and adding your favorite seasonings.
By taking the time to season your roast properly, you’ll create a mouthwatering dish that will leave your guests wanting more.
Preheating the Electric Skillet
Before you start cooking the roast, it’s important to preheat the electric skillet. Preheating ensures that the skillet reaches the optimal temperature for cooking the meat, resulting in even and consistent heat distribution.
To preheat the electric skillet, first, make sure it is clean and dry. Remove any excess oil or residue from previous use. This will help prevent any unwanted flavors or smoke during the cooking process.
Next, plug in the electric skillet and set the temperature control to the desired cooking temperature. It’s recommended to preheat the skillet to a medium-high heat setting for searing the roast and then reduce it to a medium or medium-low heat for the remainder of the cooking time.
Allow the skillet to heat up for several minutes, usually around 5-10 minutes, or until you start to see wisps of heat rising from the surface of the skillet. This indicates that the skillet is at the desired temperature.
During the preheating process, you can add a small amount of oil to the skillet to prevent the meat from sticking. Use a high smoke point oil like vegetable, canola, or grapeseed oil. Coat the surface of the skillet, ensuring even coverage.
Once the electric skillet is preheated and the oil is heated, it’s time to start cooking the roast. Carefully place the seasoned roast into the hot skillet, making sure it’s in full contact with the surface of the skillet.
Remember, preheating the electric skillet is essential for achieving optimal cooking results. It ensures that the roast is cooked evenly, resulting in a juicy and flavorful final dish.
When cooking a roast in an electric skillet, make sure to sear the meat on all sides before lowering the heat to cook it through. This will help to lock in the juices and create a delicious crust on the outside of the roast.
Cooking the Roast
With the preheated electric skillet ready, it’s time to start cooking the roast. The key to a perfectly cooked roast is to sear it initially to seal in the juices, followed by slow and steady cooking to achieve the desired doneness.
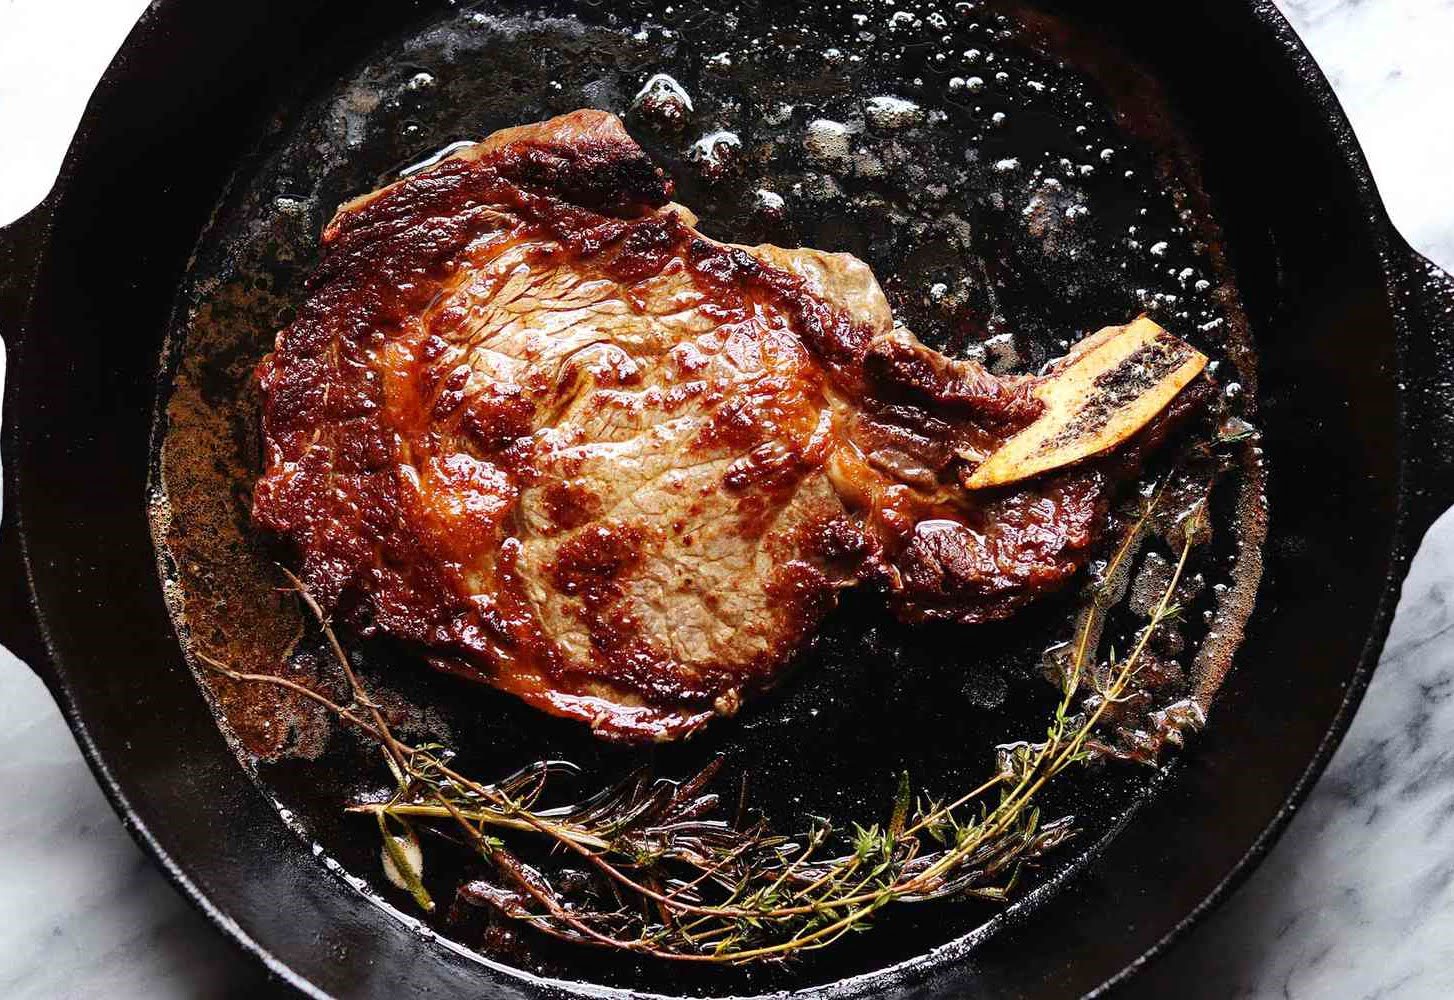
Begin by searing the roast on all sides. This step not only enhances the flavor but also helps to create a beautiful crust on the outside of the meat. Carefully place the roast in the hot skillet and let it sear for a few minutes on each side, or until a caramelized and brown crust forms.
Once the roast is nicely seared, reduce the heat on the electric skillet to a medium or medium-low setting. This lower heat will ensure gentle and even cooking throughout the roast.
Cover the skillet with a lid to help retain the moisture and create a moist cooking environment. This will help prevent the roast from drying out during the cooking process.
Allow the roast to cook for the recommended amount of time based on the size and cut of the meat. As a general guideline, cook the roast for about 20-25 minutes per pound for medium-rare, or adjust the cooking time according to your preferred level of doneness.
During the cooking process, feel free to baste the roast occasionally with the pan juices. This will add extra flavor and moisture to the meat.
It’s essential to keep an eye on the temperature inside the skillet using a meat thermometer. Insert the thermometer into the thickest part of the roast to get an accurate reading. The internal temperature should reach around 135°F (57°C) for medium-rare, 145°F (63°C) for medium, and 160°F (71°C) for well-done.
Remember, cooking times may vary depending on the size and cut of the roast, so it’s always a good idea to use a meat thermometer to ensure it reaches the desired level of doneness.
Once the roast reaches the desired internal temperature, carefully remove it from the electric skillet and transfer it to a cutting board. Cover it loosely with foil and let it rest for 10-15 minutes. This resting period allows the juices to redistribute, resulting in a tender and succulent roast.
Now that you’ve mastered the art of cooking a roast in an electric skillet, it’s time to savor the fruits of your labor. Serve the roast with your favorite sides and enjoy a delicious and satisfying meal.
Testing for Doneness
Testing for doneness is a crucial step in ensuring that your roast is cooked to perfection. While cooking times can provide a rough estimate, relying solely on time may not always guarantee the desired level of doneness. That’s where testing for doneness comes in.
The most accurate way to determine the doneness of the roast is by using a meat thermometer. Insert the thermometer into the thickest part of the roast, away from any bones or fat. Be careful not to touch the bottom of the skillet, as it can give a false reading.
For beef roasts, the recommended internal temperatures for different levels of doneness are as follows:
- Rare: 125°F (52°C) – The center of the roast will be bright red.
- Medium-rare: 135°F (57°C) – The center of the roast will be pink with a hint of red.
- Medium: 145°F (63°C) – The center of the roast will be pink.
- Medium-well: 150°F (66°C) – The center of the roast will have a slight pink color.
- Well-done: 160°F (71°C) – The center of the roast will be brown.
Once the meat thermometer reaches the recommended temperature for your desired level of doneness, you can be confident that the roast is cooked to perfection.
If you don’t have a meat thermometer, you can also perform a visual and tactile test to determine the doneness of the roast. For example, gently press the center of the roast with a fork or your finger. If it feels soft and springs back slightly, it’s likely to be rare. As the meat cooks, it will become firmer to the touch.
Remember to remove the roast from the heat source a few degrees below the desired doneness temperature, as it will continue to cook as it rests.
By testing for doneness using a meat thermometer or other methods, you can ensure that your roast is cooked perfectly every time, resulting in a tender and flavorful dining experience.
Resting the Roast
Resting the roast is a crucial step that should not be overlooked. Allow the roast to rest for 10-15 minutes after cooking before carving into it. Resting allows the meat to relax and the juices to redistribute throughout the roast, resulting in a more tender and flavorful final dish.
During the cooking process, the heat causes the juices in the meat to move towards the center. Resting the roast allows these juices to redistribute evenly throughout the entire roast, ensuring that each slice is moist and succulent.
To rest the roast, carefully remove it from the electric skillet and transfer it to a cutting board. Loosely cover the roast with a piece of aluminum foil to keep it warm while it rests.
While the roast is resting, take this time to prepare any accompanying sauces or side dishes. This ensures that everything is ready when it’s time to serve the roast.
The resting time can vary depending on the size of the roast. In general, a smaller roast may only need 10 minutes of resting, while a larger roast may benefit from 15 minutes or more.
Resist the temptation to cut into the roast immediately after cooking. Cutting into the roast too soon can cause the flavorful juices to spill out, resulting in a drier final product.
Patience is key during this resting period. Use the time to set the table, gather your guests, or simply take a moment to savor the delicious aroma filling the kitchen.
After the resting period, you can confidently carve the roast into thin slices and serve it up, knowing that every bite will be tender and full of flavor.
Resting the roast is a simple yet crucial step that can make all the difference in the quality of your final dish. So, remember to allow the roast to rest before diving in!
Serving the Roast
Now that the roast has been cooked to perfection, it’s time to serve it up and enjoy the fruits of your labor. The presentation and accompaniments can elevate the dining experience, making it a meal to remember.
To begin, transfer the rested roast onto a clean cutting board. Using a sharp carving knife, slice the roast against the grain into thin, even slices. This ensures tenderness and makes it easier for everyone to enjoy.
Arrange the sliced roast on a platter or individual plates, taking care to maintain their shape and presentation. Adding a sprig of fresh herbs, such as rosemary or thyme, on top of the sliced roast can enhance the visual appeal and complement the flavors.
Roasted meats often pair well with a variety of savory sauces or gravies. You can serve the roast with a classic flavorful pan sauce made from the drippings in the electric skillet, or opt for a creamy horseradish or mushroom sauce. The choice of sauce will depend on personal preference and the flavors you wish to highlight with the roast.
In addition to the roast, consider serving a variety of side dishes to complement the flavors and showcase your culinary skills. Classic options include roasted vegetables, mashed potatoes, steamed green beans, or a fresh salad. These side dishes not only add color and texture to the meal but also provide a balanced and well-rounded dining experience.
Don’t forget about the bread! A warm and crusty baguette or dinner rolls make the perfect accompaniment to a roast, allowing guests to make delicious sandwiches with the tender meat and savory sauces.
Finally, invite your guests to the table and present the roast with pride. Share the story behind the cooking process, the cut of meat used, and the flavorful seasonings. Encourage everyone to savor each bite and celebrate the delightful flavors that have been brought to life.
Serving the roast is not just about the act of placing food on a plate. It’s about creating an experience, sharing a meal, and making memories with loved ones. So, take the time to present the roast with care and enjoy the wonderful feast that awaits you.
Frequently Asked Questions about How Do You Cook A Roast In An Electric Skillet
Was this page helpful?
At Storables.com, we guarantee accurate and reliable information. Our content, validated by Expert Board Contributors, is crafted following stringent Editorial Policies. We're committed to providing you with well-researched, expert-backed insights for all your informational needs.






0 thoughts on “How Do You Cook A Roast In An Electric Skillet”