
Articles
How To Cook Wings In Electric Skillet
Modified: October 20, 2024
Learn how to cook delicious wings using an electric skillet with our informative articles. Discover the best techniques and recipes for perfect wings every time.
(Many of the links in this article redirect to a specific reviewed product. Your purchase of these products through affiliate links helps to generate commission for Storables.com, at no extra cost. Learn more)
Introduction
Cooking chicken wings in an electric skillet is a fantastic way to achieve crispy, flavorful results without the need for a deep fryer or a lot of oil. Electric skillets offer precise temperature control and even heating, making them an ideal tool for preparing delicious wings in the comfort of your own kitchen.
Whether you’re hosting a game night, a backyard barbecue, or simply craving some finger-licking chicken wings, this article will guide you through the process of cooking wings in an electric skillet. We’ll cover everything from preparing the wings to seasoning them, cooking to perfection, and serving them up with your favorite dipping sauce. So, let’s get started!
Key Takeaways:
- Master the art of cooking crispy and flavorful wings in an electric skillet by preparing, seasoning, and cooking them to perfection. Get creative with sauces and enjoy the mouthwatering results with friends and family.
- Elevate your wing game with a variety of seasoning options, from classic buffalo to tangy teriyaki, and serve them with your favorite dips and sides for a crowd-pleasing feast. Enjoy the crispy, succulent joy of perfectly cooked wings.
Read more: How To Cook On Electric Skillet
Step 1: Preparing the Wings
Before you can start cooking your wings in the electric skillet, it’s essential to properly prepare them. Start by rinsing the wings under cold water to remove any ice crystals or excess blood. Pat them dry with paper towels to ensure that they will crisp up nicely during cooking.
Next, grab a sharp knife and trim any excess fat from the wings. This will prevent the wings from becoming too greasy and help them cook more evenly. You can also separate the wings into drumettes and flats if desired, though this step is optional.
Once trimmed, place the wings in a large bowl and season them with salt and pepper. You can also add other spices or herbs of your choice to give the wings some extra flavor. Toss the wings gently to ensure they are evenly coated with the seasoning.
If you want to take the extra step of marinating the wings, you can do so at this point. Simply place the seasoned wings in a zip-top bag or a covered container and let them marinate in the refrigerator for at least 30 minutes or up to several hours.
Preparing the wings is an essential step that helps deliver mouthwatering results. By taking the time to properly clean, trim, and season the wings, you’re setting the stage for a delicious and flavorful cooking process.
Step 2: Seasoning the Wings
Seasoning the wings is a crucial step in the cooking process, as it adds depth and flavor to the meat. While a simple salt and pepper combination can work wonders, don’t be afraid to get creative with your seasoning choices to suit your taste preferences. Here’s how you can season your wings for maximum flavor:
- Classic Buffalo: For those who love a spicy kick, toss the wings in a mixture of melted butter and hot sauce, such as Frank’s RedHot. Add garlic powder, paprika, and a pinch of cayenne pepper to enhance the heat.
- Teriyaki: Create an irresistible sweet and tangy flavor by using a teriyaki sauce as the base for your seasoning. You can also add a hint of ginger and garlic for an extra punch of flavor.
- Lemon Pepper: Achieve a bright and zesty flavor by combining lemon zest, black pepper, garlic powder, and a touch of salt. This combination is perfect for those who prefer a lighter and refreshing taste.
- Honey Mustard: Mix together honey, Dijon mustard, a splash of apple cider vinegar, and a pinch of garlic powder for a tangy and slightly sweet flavor profile.
- Barbecue: Slather the wings in your favorite barbecue sauce, or whip up a homemade version using a mix of tomato sauce, brown sugar, Worcestershire sauce, and spices like smoked paprika and chili powder.
Once you’ve decided on your seasoning blend, place the wings in a bowl and drizzle the seasoning over them. Toss the wings thoroughly to ensure they are evenly coated. You can let the wings marinate in the seasoning for a few minutes to allow the flavors to infuse before cooking.
Remember, seasoning is subjective, so feel free to experiment and adjust the amounts of each ingredient to suit your taste preferences. The key is to have a well-balanced combination of saltiness, spiciness, sweetness, and acidity to enhance the flavor of your wings.
Step 3: Preheating the Electric Skillet
Before you start cooking your seasoned wings, it’s important to preheat your electric skillet. This step ensures that the skillet reaches the optimal temperature for achieving crispy and evenly cooked wings. Here’s how you can preheat your electric skillet:
- Plug in and set the temperature: Plug in your electric skillet and set the temperature to about 375°F (190°C). This temperature is ideal for cooking chicken wings, as it allows them to cook through without burning the outside.
- Add oil: Drizzle a tablespoon or two of oil into the skillet and spread it evenly across the cooking surface. You can use vegetable oil, canola oil, or any other high-heat oil with a neutral flavor to prevent the wings from sticking to the skillet.
- Allow time to heat up: Close the lid of the skillet and allow it to heat up for a few minutes. Electric skillets typically heat up quickly, but it’s a good practice to let it preheat for at least 5 minutes, ensuring that the oil is hot and ready for cooking.
Preheating the skillet is crucial because it helps create a sear on the surface of the wings, locking in the moisture and ensuring a crispy exterior. Additionally, the hot oil prevents the wings from sticking to the skillet, making it easier to flip and handle them during the cooking process.
Once your electric skillet is preheated and the oil is hot, you’re all set to start cooking the wings. Just be sure to handle the skillet and hot oil with caution, using oven mitts or heat-resistant gloves to protect yourself from any potential splatters or burns.
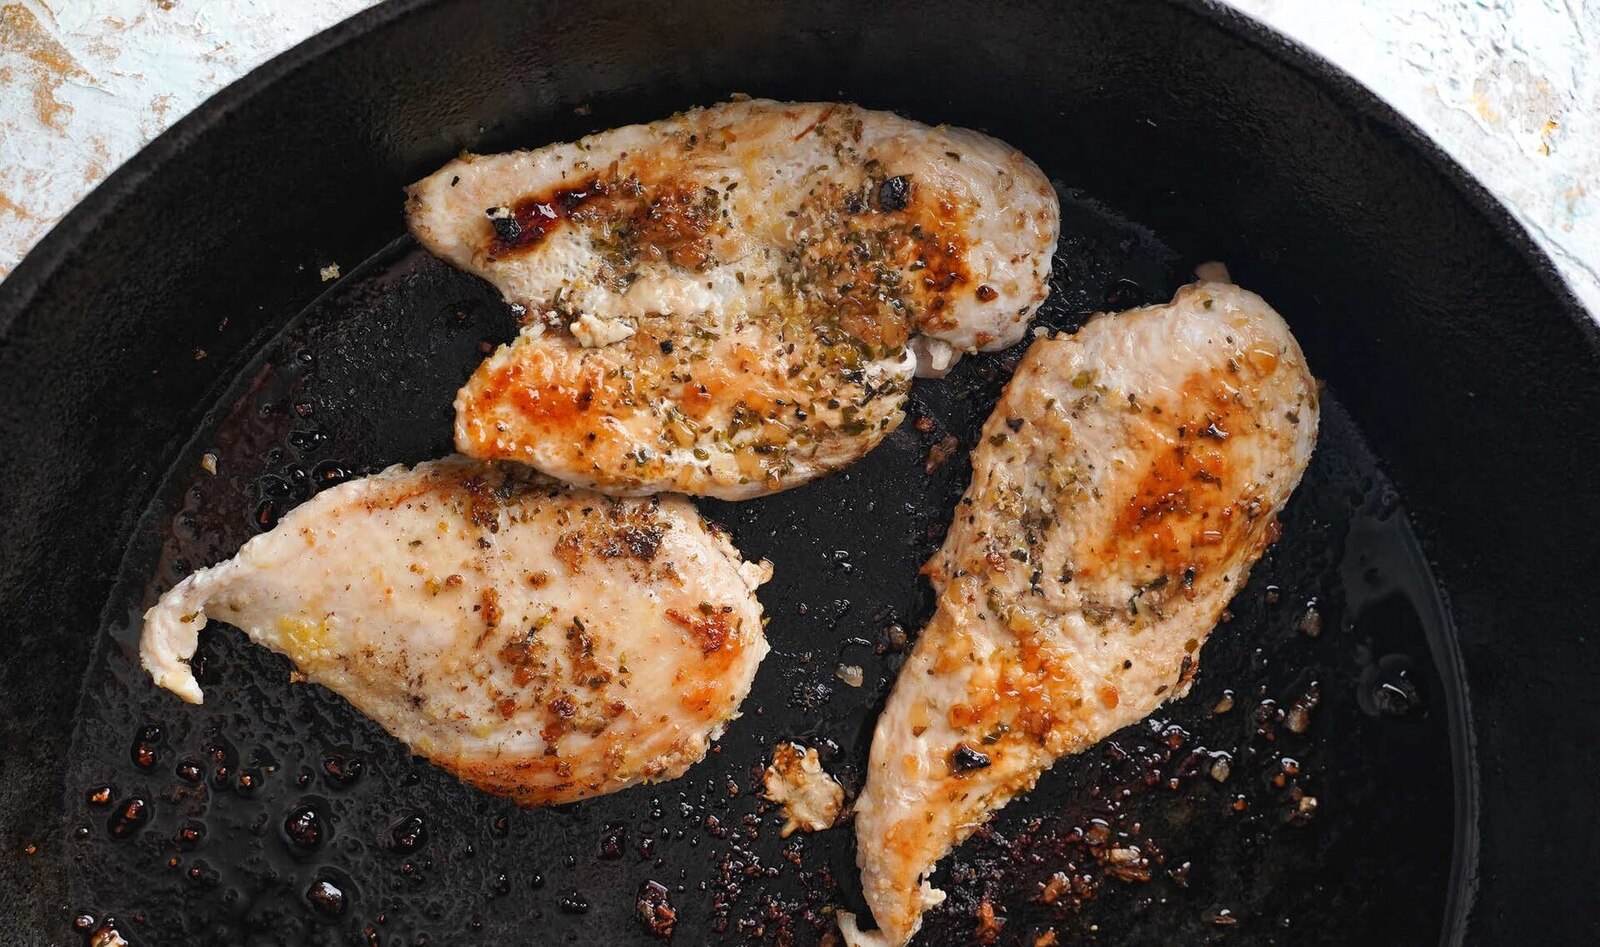
Step 4: Cooking the Wings
Now that the electric skillet is preheated and ready, it’s time to start cooking the wings. Here’s a step-by-step guide on how to cook your wings to perfection:
- Arrange the wings in a single layer: Carefully place the seasoned wings in a single layer in the preheated electric skillet. Make sure not to overcrowd the skillet, as this can prevent the wings from cooking evenly and getting crispy.
- Cook one side: Allow the wings to cook undisturbed for about 4-5 minutes on one side. This will create a nice golden crust and help seal in the juices.
- Flip the wings: Using tongs or a spatula, flip the wings to the other side. Cook for an additional 4-5 minutes. Flipping the wings ensures that both sides cook evenly and become crispy.
- Repeat if necessary: Depending on the size and thickness of the wings, you may need to cook them for an additional 2-3 minutes on each side. Keep an eye on them and adjust the cooking time as needed. The wings should be golden brown and cooked through with no pink meat.
During the cooking process, you may notice that some of the wings begin to release juices. This is normal and helps to keep the meat moist. However, to achieve maximum crispiness, you can increase the heat slightly or prop the lid of the electric skillet open slightly to allow excess moisture to escape.
Remember, cooking times may vary depending on the size of the wings and the specific model of your electric skillet. It’s always a good idea to check the internal temperature of the wings with a meat thermometer. The recommended internal temperature for fully cooked chicken wings is 165°F (74°C).
Once the wings are cooked to your desired level of crispiness and doneness, it’s time to move on to the next step: flipping the wings.
Read more: How To Cook Pasta In Electric Skillet
Step 5: Flipping the Wings
Flipping the wings during the cooking process is an important step to ensure that both sides are evenly cooked and crispy. Here’s how you can flip the wings in the electric skillet:
- Use tongs or a spatula: Carefully lift each wing with a pair of tongs or a spatula, taking care not to damage the crust or allow any juices to escape.
- Flip them gently: Slowly turn the wings over to the other side. If the wings stick to the bottom of the skillet, use a little extra caution to lift them gently and ensure they remain intact.
- Arrange them in a single layer again: Once flipped, arrange the wings in a single layer in the skillet, making sure there is enough space between them for even cooking and crispiness.
Flipping the wings allows the other side to brown and crisp up, providing a delightful texture and flavor. Remember to be gentle when flipping to avoid breaking the wings and losing the tasty seasoning and juices.
Once the wings are flipped, you can continue cooking them for the remaining time specified in the recipe or until they reach the desired level of crispiness and doneness. Keep a close eye on them to prevent burning or overcooking.
Next, we’ll move on to the next step: checking for doneness.
To cook wings in an electric skillet, make sure to preheat the skillet before adding the wings. This will help ensure even cooking and a crispy exterior.
Step 6: Checking for Doneness
Checking the doneness of the wings is a crucial step to ensure they are cooked to perfection. Here’s how you can check if your wings are done:
- Visual cues: Look for visual cues that indicate the wings are cooked. They should have a golden brown color and a crispy texture on the outside.
- Internal temperature: Use a meat thermometer to check the internal temperature of the wings. Fully cooked chicken wings should have an internal temperature of 165°F (74°C).
- Cutting into a wing: If you’re still unsure, you can cut into one of the wings to check the meat’s color and ensure there are no pink or raw parts. The juices should run clear, indicating that the wings are cooked through.
- Texture and tenderness: Take a bite of one of the wings to check the texture and tenderness. The meat should be tender and moist, without any raw or chewy parts.
It’s important to note that cooking times can vary depending on the size of the wings, the specific model of your electric skillet, and personal preference for crispiness. Adjust the cooking time accordingly to achieve your desired level of doneness and don’t be afraid to experiment with different cooking times and temperatures.
Once the wings are deemed to be fully cooked and safe to eat, it’s time to move on to the next step: draining excess oil.
Step 7: Draining Excess Oil
After cooking the wings in the electric skillet, it’s common for them to have a bit of excess oil. Draining this excess oil can help reduce greasiness and ensure that your wings have a deliciously crispy texture. Here’s how you can drain the excess oil from the wings:
- Use a slotted spoon or tongs: Carefully lift the wings out of the electric skillet using a slotted spoon or tongs. Hold each wing briefly over the skillet to allow any excess oil to drip back into the pan.
- Place the wings on a paper towel-lined plate: Transfer the drained wings onto a plate lined with paper towels. The paper towels will absorb any remaining oil and help to further reduce the greasiness.
- Gently pat the wings with additional paper towels: Use another layer of paper towels to gently pat the wings, absorbing any additional oil on the surface.
Draining excess oil not only helps to improve the texture of the wings but also makes them healthier and more enjoyable to eat. It’s worth taking this extra step to achieve the perfect balance of flavor and crispiness for your wings.
Once you’ve drained the excess oil, you can move on to the next step: adding sauce to the wings (optional).
Step 8: Adding Sauce (Optional)
Adding sauce to your cooked wings is an optional step that can take them to the next level of flavor. Whether you prefer a tangy barbecue sauce, a spicy buffalo sauce, or a sweet and savory glaze, here’s how you can add sauce to your wings:
- Choose your sauce: Select your favorite wing sauce or prepare a homemade sauce of your choice. There are endless options available, including barbecue sauce, buffalo sauce, honey mustard, teriyaki sauce, or even a combination of different sauces.
- Toss the wings: Place the cooked wings in a large bowl and pour the desired amount of sauce over them. Use tongs or a spatula to gently toss the wings, ensuring they are evenly coated in the sauce.
- Coat the wings thoroughly: Continue tossing the wings until they are thoroughly coated in the sauce. This ensures that every bite is packed with flavor.
- Let the flavors meld: If time allows, cover the bowl and let the wings sit for a few minutes to allow the flavors of the sauce to meld with the wings.
Adding sauce to your wings can enhance their taste, add a layer of moisture, and introduce a variety of flavor profiles. Whether you prefer a classic buffalo wing sauce, a sticky sweet glaze, or a bold and tangy barbecue sauce, the choice of sauce is entirely up to you and your personal preferences.
Once the wings are coated with sauce, you’re ready for the final step: serving the wings and enjoying them with your favorite dips and sides.
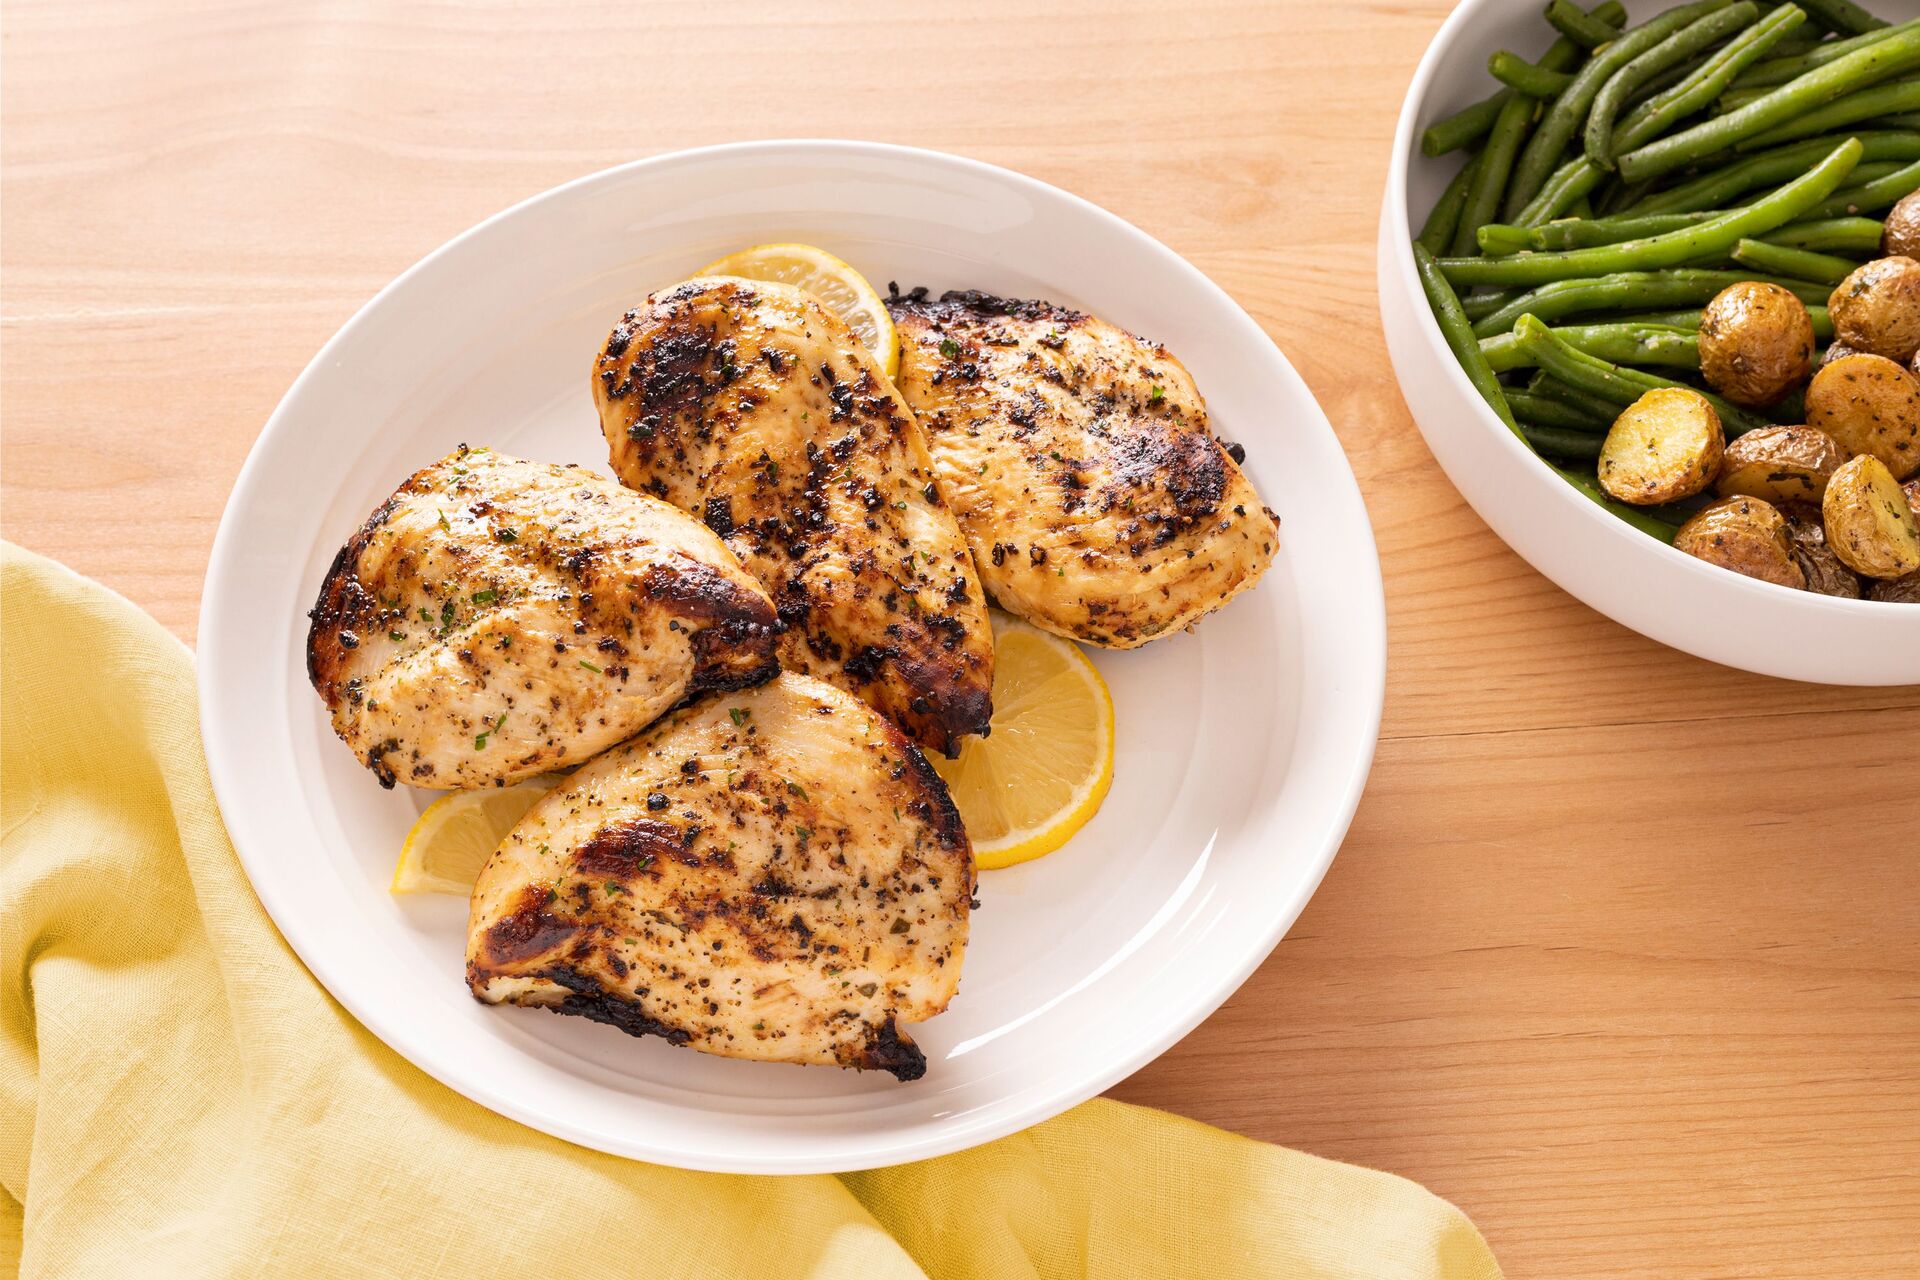
Step 9: Serving the Wings
After all the hard work, it’s time to savor the deliciousness of your cooked and sauced wings. Here’s how you can serve your wings for a mouthwatering presentation:
- Arrange on a platter: Transfer the sauced wings onto a serving platter or a large plate. Arrange them neatly to showcase their appetizing appearance.
- Garnish (optional): If desired, you can garnish the wings with some fresh chopped herbs, such as parsley or cilantro, or sprinkle some sesame seeds or crumbled blue cheese on top to add an extra pop of flavor and visual appeal.
- Serve with dipping sauces: Accompany your wings with an array of dipping sauces to cater to different taste preferences. Classic choices include ranch dressing, blue cheese dressing, barbecue sauce, honey mustard, or even a spicy sriracha mayo.
- Add sides: Complete your wing feast by serving them with some delicious side dishes. Consider options like celery and carrot sticks, coleslaw, potato wedges, or a refreshing green salad to balance the flavors and textures.
- Enjoy immediately: Wings are best enjoyed when they are hot and fresh out of the skillet. Serve them to your guests or dig in right away, ensuring everyone experiences their mouthwatering goodness.
Remember, the beauty of serving wings is their versatility. Whether you’re hosting a game day gathering, a backyard cookout, or simply indulging in a delicious meal, wings are always a crowd-pleaser.
Now that you have followed each step from preparation to serving, it’s time to grab a wing, dip it into your favorite sauce, and enjoy the delectable flavor and crispy texture that you’ve worked hard to achieve.
Congratulations! You have successfully learned how to cook wings in an electric skillet with all the necessary steps to make them scrumptious and satisfying. Happy cooking and happy eating!
Conclusion
Cooking wings in an electric skillet is a convenient and delicious way to enjoy this popular finger food. By following the steps outlined in this guide, you can achieve perfectly crispy and flavorful wings that will impress your family and friends. From preparing and seasoning the wings to preheating the skillet, cooking, flipping, and checking for doneness, each step plays a crucial role in creating wings that are both mouthwatering and satisfying.
Remember to get creative with your seasoning choices, experimenting with different flavors to suit your personal preferences. Whether you prefer tangy and spicy buffalo wings, sweet and savory glazed wings, or a classic barbecue flavor, the possibilities are endless. Adding sauce is optional but can elevate the taste and add depth to the wings, making them even more irresistible.
Serving the wings is all about presentation and accompaniments. Arrange them on a platter, garnish if desired, and provide a variety of dipping sauces and side dishes for a well-rounded wing experience. Celery and carrot sticks, coleslaw, or potato wedges are excellent choices to complement the wings and make your meal complete.
Now that you have mastered the art of cooking wings in an electric skillet, it’s time to put your skills to the test. Whether it’s a game night, a family gathering, or a simple weeknight treat, these wings are sure to be a hit. So, fire up your electric skillet, grab your favorite sauce, and get ready to indulge in the succulent and crispy joy of perfectly cooked wings.
Enjoy the mouthwatering flavors, the satisfying crunch, and the joy of sharing these delectable wings with your loved ones. Happy cooking!
Now that you've mastered cooking wings in an electric skillet, why not expand your culinary skills further? If you're keen on exploring more versatile cooking techniques, our next article on various cooking methods using electric skillets should not be missed. Whether you're looking to sauté, fry, or even bake, electric skillets offer a plethora of possibilities for any home chef. Don't miss out on discovering all these exciting cooking opportunities!
Frequently Asked Questions about How To Cook Wings In Electric Skillet
Was this page helpful?
At Storables.com, we guarantee accurate and reliable information. Our content, validated by Expert Board Contributors, is crafted following stringent Editorial Policies. We're committed to providing you with well-researched, expert-backed insights for all your informational needs.


0 thoughts on “How To Cook Wings In Electric Skillet”