
Articles
How Long Does It Take To Pave A Driveway
Modified: November 1, 2024
Discover the average time it takes to pave a driveway in this informative article. Get expert tips and insights on completing the project efficiently and effectively.
(Many of the links in this article redirect to a specific reviewed product. Your purchase of these products through affiliate links helps to generate commission for Storables.com, at no extra cost. Learn more)
Introduction
Paving a driveway is an essential component of enhancing the curb appeal and functionality of your property. Whether you are looking to upgrade an existing driveway or install a new one, understanding the time it takes to complete the paving process is crucial for proper planning and budgeting. In this article, we will explore the factors that influence the time it takes to pave a driveway and the steps involved in the installation process.
When it comes to paving a driveway, there are several factors that can affect the time it takes to complete the project. These factors range from the size and complexity of the driveway to the type of pavement material used. It is important to consider these factors before embarking on the paving project to ensure that you have a realistic timeline in mind.
Before delving into the details, it is important to note that the time taken to pave a driveway can vary significantly depending on various factors. While some driveways may take only a few days to complete, others may require several weeks. It is advisable to consult with a professional paving contractor who can assess the specific requirements of your project and provide you with a more accurate timeline.
Now, let’s take a closer look at the factors that influence the time it takes to pave a driveway.
Key Takeaways:
- Proper planning and budgeting are crucial for paving a driveway, considering factors like size, pavement material, weather, site accessibility, and contractor experience. Each step, from preparation to finishing touches, contributes to a successful installation.
- The choice of pavement material, thorough preparation, precise installation, and proper curing time are essential for a durable and visually appealing driveway. Consulting with a professional paving contractor ensures a seamless and efficient process.
Read more: How Much Does It Cost To Pave A Driveway
Factors Affecting the Time Taken to Pave a Driveway
Several factors can have an impact on the duration of paving a driveway project. Understanding these factors will help you plan accordingly and set realistic expectations. Here are the key factors that can influence the time taken to pave a driveway:
- Driveway Size and Complexity: The size and complexity of the driveway play a significant role in determining the time it takes to complete the project. Larger driveways will naturally require more time and resources to properly pave. In addition, driveways with unique shapes, slopes, or intricate designs may need additional time for precise installation.
- Pavement Material: The type of pavement material chosen for the driveway also affects the time it takes to pave. Common materials include asphalt, concrete, gravel, and pavers. Each material has its own installation process and curing time, which can impact the overall timeline.
- Weather Conditions: Weather conditions can significantly impact the paving process. Extreme heat, rain, or freezing temperatures can delay or even halt the project. It is important to plan the paving project during a favorable season to minimize weather-related delays.
- Site Accessibility: The accessibility of the site where the driveway is being installed can also affect the time it takes to pave. If the site is challenging to access due to narrow pathways, steep inclines, or obstacles, it may require additional time and effort to transport equipment and materials.
- Site Preparation: Proper site preparation is essential for a successful driveway installation. This includes clearing the area of any vegetation, removing old pavement or debris, and ensuring a smooth and level surface. The time required for site preparation can depend on the condition of the existing driveway and the extent of the work needed.
- Contractor Experience and Availability: The experience and availability of the paving contractor can also impact the timeline. A reputable and experienced contractor will have the necessary skills and resources to efficiently complete the project. However, it is important to consider their availability as in-demand contractors may have a longer waitlist.
It is important to keep in mind that these factors are interconnected, and the time taken can vary based on the specific circumstances of each project. Consulting with a professional paving contractor will provide you with a more accurate estimate based on your unique requirements.
Now that we have explored the key factors that affect the time taken to pave a driveway, let’s delve into the different types of driveway pavement materials and their respective installation processes.
Types of Driveway Pavement Materials
When it comes to selecting the pavement material for your driveway, there are several options to choose from. Each material has its own unique characteristics, aesthetic appeal, and installation process. Here are the most common types of driveway pavement materials:
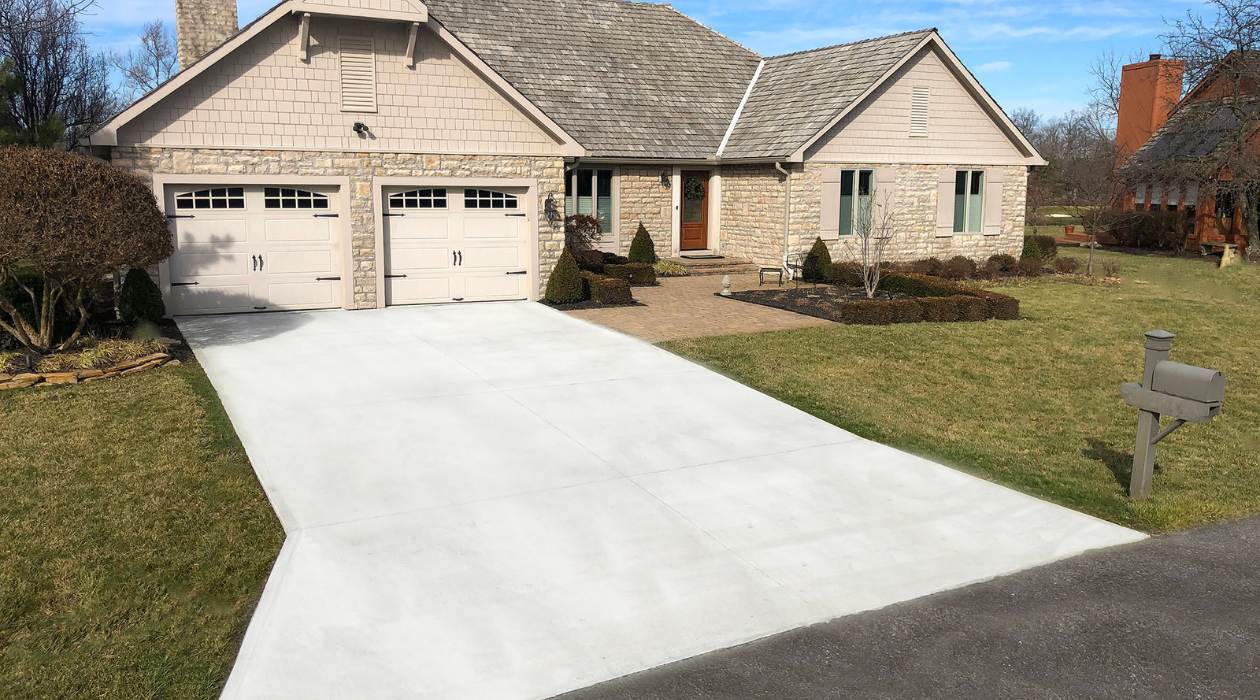
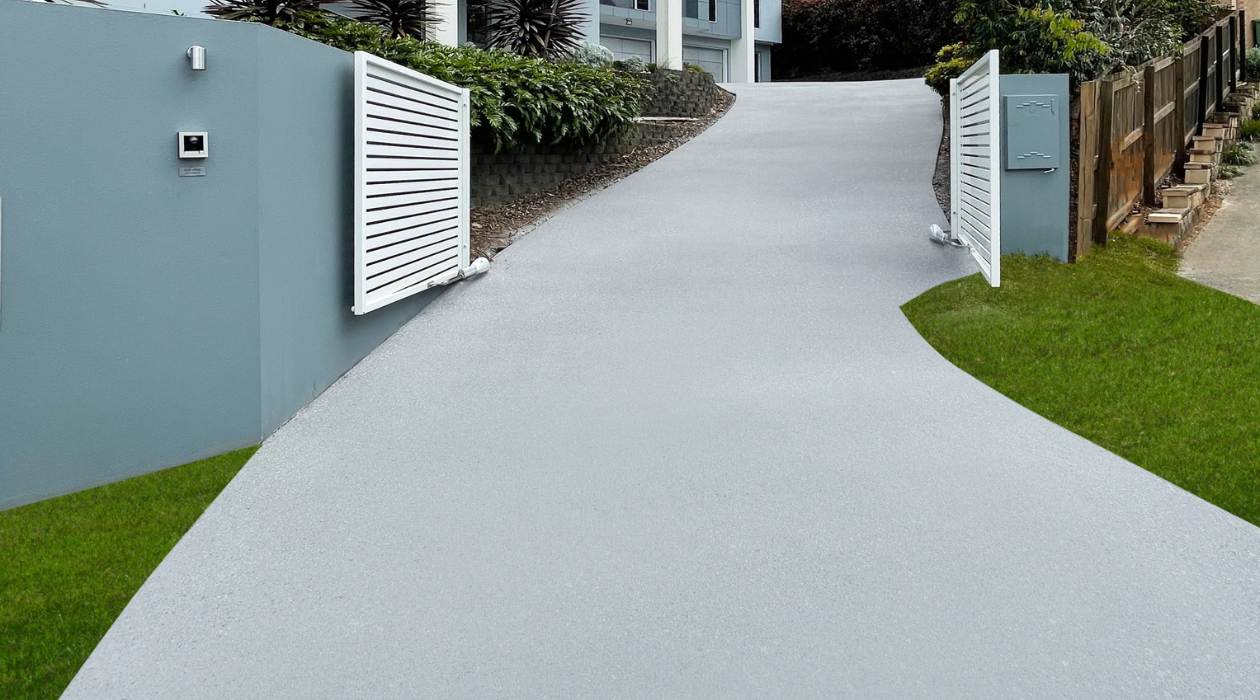
- Asphalt: Asphalt is one of the most popular and widely-used driveway pavement materials. It is known for its durability, cost-effectiveness, and ease of installation. Asphalt driveways are constructed by compacting a mixture of aggregate (such as sand, gravel, and crushed stone) and asphalt binder. It offers a smooth and sleek appearance and can withstand heavy loads and harsh weather conditions. The installation process involves preparing the base, applying the asphalt mixture, and compacting it with a roller.
- Concrete: Concrete driveways are another popular choice due to their longevity and versatility. They are created by pouring a mixture of cement, aggregate, and water into a prepared formwork and allowing it to cure and harden. Concrete driveways offer a clean and modern look and are highly resistant to stains and deterioration. The installation process involves site preparation, pouring the concrete mixture, and finishing it with a trowel to achieve the desired texture and appearance.
- Gravel: Gravel driveways are a more rustic and budget-friendly option. They consist of a layer of crushed stones or gravel that is compacted to provide stability and drainage. Gravel driveways require regular maintenance, as the stones can shift and create uneven surfaces. However, they offer excellent drainage and can withstand heavy usage. The installation process involves clearing the site, leveling the area, and spreading the gravel evenly.
- Pavers: Pavers are individual units made from various materials such as stone, concrete, or clay. They come in a wide range of shapes, sizes, and colors, allowing for endless design possibilities. Pavers are installed by placing them tightly together on a prepared base and securing them with sand or mortar joints. Paver driveways offer a visually appealing and durable surface but require more labor-intensive installation compared to other materials.
Each driveway pavement material has its own advantages and considerations. The choice of material depends on factors such as budget, aesthetic preferences, durability requirements, and maintenance capabilities. It is recommended to consult with a paving professional who can assess your specific needs and guide you in selecting the most suitable material for your driveway.
Now that we have explored the different types of driveway pavement materials, let’s move on to the preparation and planning phase of the paving process.
Preparation and Planning
Before beginning any driveway paving project, thorough preparation and planning are essential for a successful and efficient installation. This phase involves assessing the site, determining project requirements, obtaining permits if necessary, and creating a detailed plan. Here are the key steps involved in the preparation and planning phase:
- Site Assessment: The first step is to assess the site where the driveway will be installed. This includes measuring the area, examining the existing conditions, and identifying any potential obstacles or drainage issues that need to be addressed.
- Project Requirements: Determine the specific requirements of the project, such as the desired size, shape, and slope of the driveway. Consider factors like the number and size of vehicles that will use the driveway and any additional features like walkways or landscaping elements that need to be incorporated.
- Permits and Regulations: Check with the local authorities to determine if any permits or approvals are required for the driveway installation. Familiarize yourself with any zoning regulations, setback requirements, or design guidelines that need to be followed.
- Budgeting and Cost Estimation: Develop a budget for the project, taking into account the costs of materials, labor, equipment rental, and any additional expenses. Obtain quotes from reputable paving contractors to estimate the overall cost of the project.
- Hiring a Paving Contractor: If you decide to hire a professional paving contractor, conduct thorough research to find experienced and reliable professionals in your area. Consider their expertise, past projects, and customer reviews to make an informed decision.
- Timeline and Scheduling: Work with the paving contractor to establish a realistic timeline for the project. Consider factors like weather conditions and the contractor’s availability to ensure a smooth and timely installation.
- Material Selection: Based on your preferences, budget, and durability requirements, select the most suitable driveway pavement material. Consult with the paving contractor for recommendations and to ensure that the chosen material aligns with the project specifications.
- Communication and Coordination: Maintain open communication with the paving contractor throughout the preparation and planning phase. Discuss any concerns or questions you may have and provide them with all the necessary information to properly plan and execute the project.
By investing time and effort in the preparation and planning phase, you can ensure a seamless and successful driveway paving project. Once all the necessary steps have been taken, you can move on to the next phase of the installation process: excavation and site clearing.
Excavation and Site Clearing
Excavation and site clearing are crucial steps in the driveway paving process. This phase involves removing any existing materials, vegetation, or debris from the site to create a clean and level surface for the installation. Here is an overview of the excavation and site clearing process:
- Marking and Surveying: Before excavation begins, mark the boundaries of the driveway area using stakes, flags, or spray paint. Consider the dimensions of the driveway and any desired design elements.
- Clearing Vegetation and Debris: Remove any plants, shrubs, or trees within the marked area that may interfere with the driveway installation. Clear away rocks, roots, and other debris to ensure a smooth and even surface.
- Demolition (if needed): If there is an existing driveway or pavement that needs to be demolished, this is the stage where it is removed. Use appropriate machinery, such as excavators or jackhammers, to break up and remove the old material.
- Earthwork: Prepare the ground by adjusting the grade and slope according to the planned design of the driveway. This may involve cutting into the ground or adding fill material to achieve the desired elevation and drainage. Use appropriate compaction techniques to ensure a stable and solid base.
- Trenching: Install any necessary drainage systems or utility lines by digging trenches along the sides of the driveway. This helps prevent water accumulation or damage to underground infrastructure.
- Site Cleanup: Once the excavation and site clearing processes are complete, remove any remaining debris and excess soil from the site. Dispose of the materials properly and restore the surrounding area to its original condition.
It is important to note that the depth and extent of excavation will vary depending on the specific project requirements and the type of driveway pavement material being installed. Consulting with a paving contractor is essential to ensure that the excavation and site clearing are carried out correctly and accurately.
Once the site is cleared and prepped, the next step is to move on to grading and compaction, which will create a solid foundation for the driveway.
Read more: How Long Does It Take For A Driveway To Dry
Grading and Compaction
Grading and compaction are crucial steps in the driveway paving process as they establish a stable and level foundation for the pavement material. These steps ensure proper water drainage, prevent future settlement issues, and increase the longevity of the driveway. Here is an overview of the grading and compaction process:
- Initial Grading: The first step is to establish the general slope and grade of the driveway. This involves using grading equipment, such as a bulldozer or a motor grader, to distribute and shape the soil according to the desired slope. The slope should provide adequate drainage away from the structure and prevent standing water on the driveway surface.
- Subgrading: Subgrading involves further leveling and shaping the soil to create a smooth surface for the base material. The subgrade ensures uniform support for the driveway and helps distribute the load evenly. It is important to compact the subgrade properly to avoid settling and structural issues in the future.
- Base Material: After the subgrade is prepared, a base material is added to enhance stability and support. Common base materials include crushed stone, gravel, or recycled asphalt. The thickness of the base material depends on the specific requirements of the project and the type of driveway pavement material being used.
- Compaction: Compaction is a crucial step in ensuring a solid and durable driveway. Once the base material is in place, it is compacted using heavy machinery, such as a vibratory roller or a plate compactor. Compaction removes air voids and increases the density, preventing future settlement and maintaining a strong foundation. Multiple passes may be required to achieve the desired level of compaction.
- Testing: In some cases, compaction tests may be conducted to ensure that the base material meets the required compaction standards. These tests involve measuring the density and moisture content of the compacted material to ensure it meets the specified requirements.
- Final Grading: After compaction, the final grading is performed to ensure a smooth and level surface for the driveway. This involves additional shaping and fine-tuning to eliminate any low or high spots and ensure a visually appealing appearance.
Proper grading and thorough compaction are critical for a stable and long-lasting driveway. It is important to hire a professional paving contractor experienced in grading and compaction techniques to ensure that these steps are carried out accurately and according to industry standards. Once the grading and compaction are completed, the next step is to install the edging and base material for the driveway.
The time it takes to pave a driveway depends on the size and complexity of the project. Generally, it can take anywhere from a few days to a couple of weeks to complete the process. Factors such as weather, materials, and the skill of the contractor can also affect the timeline.
Installation of Edging and Base
The installation of edging and base material is a crucial step in the driveway paving process. Edging provides a clean, defined border to the driveway, while the base material serves as a foundation for the pavement. The proper installation of these components ensures stability, durability, and a professional finish. Here is an overview of the process:
- Edging: Edging is installed along the perimeter of the driveway to create a clear boundary and prevent the spreading or shifting of the pavement material. Common materials used for edging include landscape timbers, bricks, or pre-formed concrete edging. The edging should be securely anchored into the ground and leveled to the desired height.
- Base Material: The base material is then laid on top of the compacted subgrade. The base material provides a solid foundation for the driveway pavement and helps with load distribution. Common base materials include crushed stone, gravel, or recycled asphalt. The thickness of the base material depends on the specific project requirements and the type of pavement material being used.
- Installation: The base material is spread evenly over the entire driveway area. It is then graded and compacted using heavy machinery, such as a vibratory roller or a plate compactor, to achieve proper compaction and stability. Multiple passes may be required to ensure a uniformly compacted base. It is essential to follow the recommended thickness and compaction requirements specified by the paving material manufacturer or the contractor.
- Drainage Considerations: During the installation of the base material, it is important to consider proper drainage. The base should be sloped slightly to ensure water flows away from the driveway and does not pool or cause erosion. This helps to prevent water damage and prolong the lifespan of the driveway.
- Quality Control: Throughout the installation of the edging and base material, quality control measures should be implemented. This can include conducting regular inspections, checking the thickness and compaction of the base material, and addressing any potential issues or inconsistencies as they arise.
- Coordination with the Next Step: The installation of the edging and base material should be coordinated with the paving material contractor. This ensures a smooth transition between the base installation and the application of the final pavement material.
Proper installation of edging and base material is essential for a well-built and long-lasting driveway. It is highly recommended to hire an experienced paving contractor who can accurately execute these steps according to industry standards. With the edging and base material in place, the next phase involves applying the final surface material, whether it be asphalt or concrete.
Applying the Asphalt or Concrete Surface
The process of applying the final surface material, whether it be asphalt or concrete, is a significant step in the driveway paving process. This phase involves carefully pouring and spreading the chosen material, ensuring a smooth and level surface. Here is a step-by-step overview of applying the asphalt or concrete surface:
- Preparation: Before applying the surface material, it is essential to prepare the area. This includes thoroughly cleaning the base and removing any debris or loose particles that may interfere with the adhesion of the surface material.
- Asphalt Application: If asphalt is chosen as the surface material, it is typically delivered to the site in a heated liquid form. The asphalt mix is poured onto the prepared base using specialized equipment, such as a paver machine. It is then spread evenly across the surface and compacted using heavy rollers. This compaction ensures proper density, smoothness, and stability of the asphalt surface. The thickness of the asphalt layer will depend on the specific requirements and recommendations of the project.
- Concrete Application: For concrete surfaces, the process begins by pouring the prepared concrete mix onto the base. The concrete is spread and leveled using tools like a screed or a bull float. Control joints or decorative patterns can be added as desired. After the desired shape and texture are achieved, the concrete is left to cure and harden. The curing time will depend on various factors, such as weather conditions and the type of concrete mix used.
- Finishing Touches: Once the asphalt or concrete surface is in place, the finishing touches can be applied. For asphalt driveways, a final rolling or compaction may be done to ensure a smooth and seamless finish. For concrete driveways, additional finishing techniques like brooming or stamping can be applied to enhance the appearance and texture of the surface.
- Curing and Drying Time: After the surface material is applied, it is important to allow it sufficient time to cure and dry. This period can range from a few days to several weeks, depending on the specific material and weather conditions. During this time, it is essential to avoid heavy traffic and keep the surface protected from excessive moisture or damage.
- Sealing (optional): For asphalt driveways, sealing can be performed after the surface has fully cured. The sealant helps protect the asphalt from oxidation, UV rays, and water penetration, enhancing its longevity and appearance.
It is crucial to engage the services of a professional paving contractor to ensure the proper application of the asphalt or concrete surface. Their expertise and equipment will help ensure a high-quality, durable, and aesthetically pleasing final surface for your driveway.
With the surface material applied, the driveway is now ready for use. However, some additional time may be needed for the surface to fully cure and harden before subjecting it to heavy traffic.
Curing and Drying Time
After the application of the surface material, whether it’s asphalt or concrete, the curing and drying process is a crucial stage in the driveway paving process. This phase allows the material to fully set and harden, ensuring its durability and strength. Here is an overview of the curing and drying time for asphalt and concrete driveways:
For Asphalt:
Asphalt driveways typically have a relatively short drying time compared to concrete. However, it is important to allow sufficient time for the asphalt to cure and harden before subjecting it to heavy traffic. Here are some key points to consider:
- Initial Drying: After the asphalt surface is compacted and smoothed, it begins to cool and harden. During this initial drying phase, it is important to keep the driveway clear of any objects or vehicles that may leave indentations or damage the surface.
- Cooling Time: Asphalt continues to cure and harden as it cools down. It is recommended to avoid parking heavy vehicles, placing objects, or walking on the driveway during this cooling period, which typically lasts for a few days. Excessive weight or movement can cause marks or indentations on the surface.
- Full Curing: The full curing time for an asphalt driveway is typically around 6 to 12 months. During this period, the asphalt undergoes a chemical process known as oxidation, which helps it attain its maximum strength and durability. It is important to avoid applying any sealants or coatings until the asphalt has fully cured.
For Concrete:
Concrete driveways have a longer curing time compared to asphalt. This is due to the chemical reaction between cement and water, which gradually transforms the mixture into a solid mass. Here are some essential points to consider for concrete curing:
- Initial Setting: After the concrete is poured and leveled, it begins to set and harden. This initial setting time is relatively short and typically takes a few hours. During this period, it is crucial to keep the concrete moist by lightly spraying it with water or covering it with a curing compound. This moisture helps prevent cracking and promotes proper curing.
- Continued Curing: Concrete goes through a process called hydration, which continues for an extended period. While the concrete may appear solid after the initial setting, it can take several days for it to reach its full strength. During this time, it is important to continue the curing process by keeping the concrete moist and protected from extreme temperatures and rapid drying. This is typically achieved through frequent watering or by using curing blankets or membranes.
- Final Curing: The final curing time for a concrete driveway is approximately 28 days. During this period, the concrete reaches its maximum strength and durability. It is important to avoid heavy traffic or activities that could damage the surface during this curing period. Sealants or coatings can be applied after the concrete has fully cured.
It is important to follow the manufacturer’s instructions and consult with a professional paving contractor regarding the specific curing and drying times for your asphalt or concrete driveway. By allowing sufficient time for the surface to cure and harden, you can ensure a strong and long-lasting driveway that will withstand the test of time.
With the curing and drying process complete, the final finishing touches can be applied to complete the driveway installation process, giving your driveway a polished and professional appearance.
Read more: How To Pave Your Own Driveway
Final Finishing Touches
Once the driveway surface has fully cured and hardened, it is time to add the final finishing touches. These touches not only enhance the overall appearance of the driveway but also provide functional and practical elements. Here are some important finishing touches to consider:
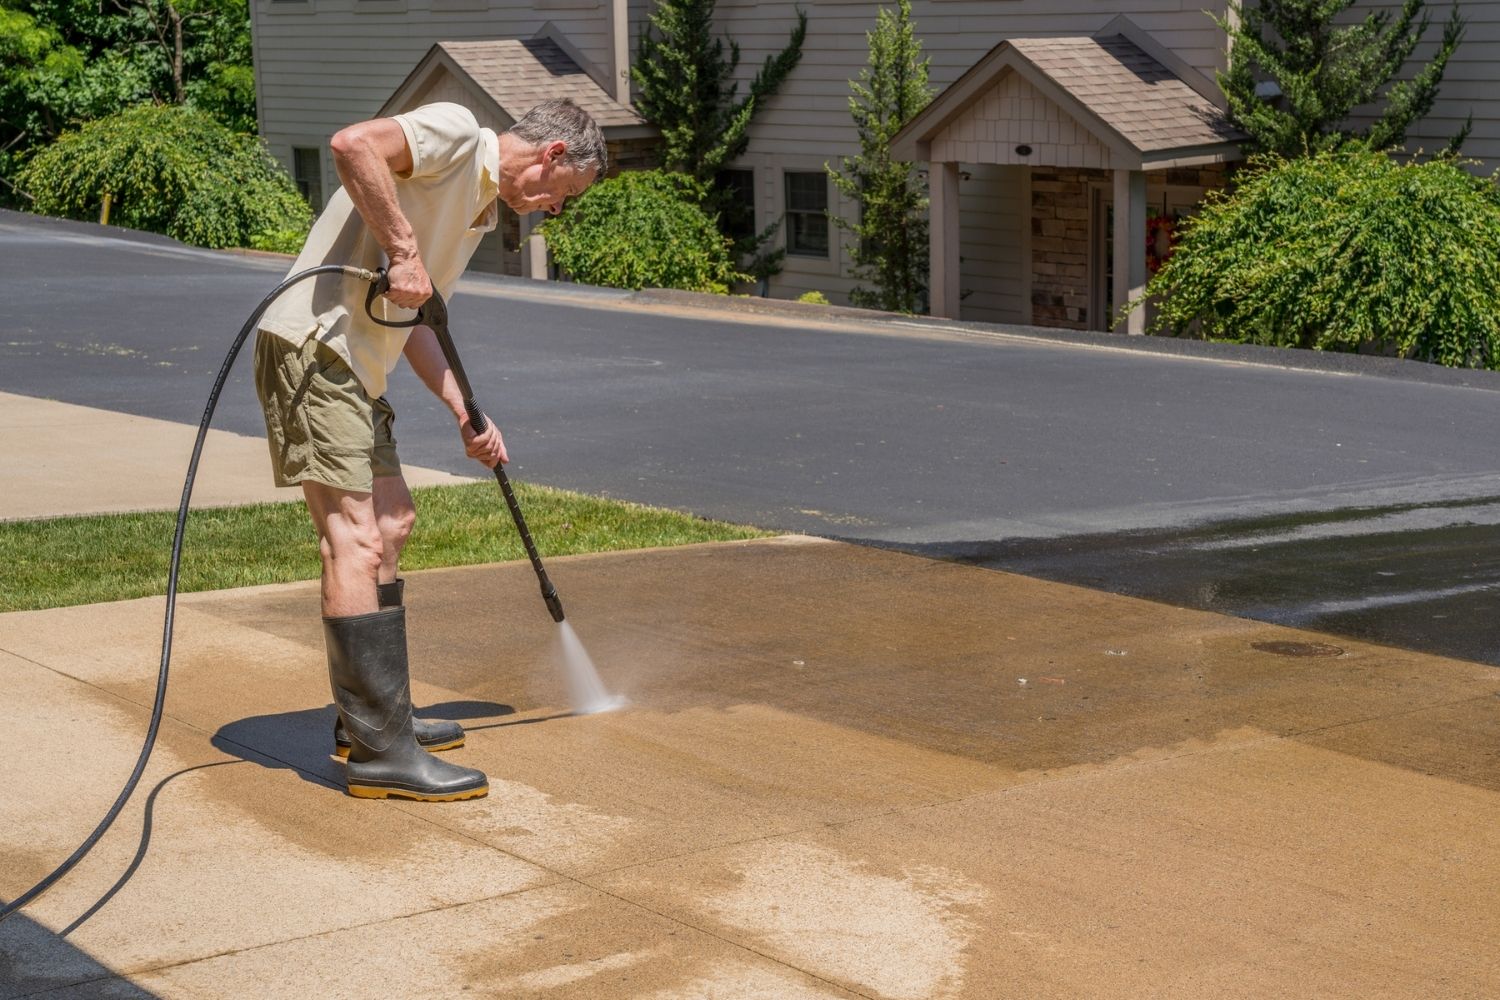
- Sealcoating: Applying a sealcoat is an optional but highly recommended step for asphalt driveways. Sealcoating provides an extra layer of protection against UV rays, moisture, oil spills, and other elements that can cause damage or deterioration. It helps extend the lifespan of the asphalt and keeps it looking fresh and new. Sealcoating is typically done once the driveway has fully cured, usually after several months.
- Line Striping: For asphalt driveways that are used for parking or have multiple lanes, line striping is essential. Line striping involves the application of paint to create clearly marked parking spaces, driving lanes, and other necessary markings. This not only improves safety by directing traffic flow but also enhances the overall aesthetics of the driveway.
- Edge Treatment: Installing an edge treatment can provide a neat and polished look to the driveway. This involves adding a border material, such as pavers, bricks, or concrete curbs, along the edges. Not only does it enhance the visual appeal, but it also helps prevent the spreading or shifting of the pavement material over time.
- Landscaping and Softscape: Consider adding some landscaping elements around the driveway to complement its appearance. This can include planting flowers, shrubs, or small trees, or installing decorative lighting fixtures along the borders. Landscaping not only enhances the aesthetic appeal of the driveway but also adds value to your property.
- Lighting: Installing proper lighting along the driveway enhances safety and visibility, especially during nighttime. You can choose from various options, such as solar-powered lights, low-voltage LED lights, or decorative fixtures that add both functionality and beauty to your driveway.
- Signage: If your driveway connects to a public road or requires specific instructions or warnings, consider installing signage. This can include a street name sign, speed limit signs, or any other necessary signage to ensure compliance and safety.
By paying attention to these final finishing touches, you can create a visually appealing and functional driveway that adds value to your property. Consulting with a professional paving contractor can help you make informed decisions about the best options for your specific needs and ensure that the finishing touches are installed with precision and expertise.
With the completion of the final finishing touches, your driveway installation project is now fully finished. Enjoy the benefits of a well-crafted and durable driveway for years to come.
Summary and Conclusion
Paving a driveway involves several steps and considerations to ensure a successful and durable installation. Understanding the factors that affect the time it takes to pave a driveway is crucial for proper planning and budgeting. The size and complexity of the driveway, the pavement material chosen, weather conditions, site accessibility, site preparation, contractor experience, and project requirements all play a role in determining the timeline.
There are various types of driveway pavement materials to choose from, including asphalt, concrete, gravel, and pavers. Each material has its own advantages, aesthetics, installation process, and maintenance requirements. It is important to select the material that best suits your needs, budget, and preferences.
The preparation and planning phase is crucial for the success of the project. This includes site assessment, determining project requirements, obtaining permits, budgeting, hiring a paving contractor, and creating a detailed timeline and plan. Proper preparation ensures that the project progresses smoothly and stays within budget.
The next steps in the driveway paving process include excavation and site clearing, grading and compaction, installation of edging and base material, and finally, the application of the asphalt or concrete surface. Each step requires careful attention to detail and professional craftsmanship to ensure a stable, level, and long-lasting driveway.
After the surface material is applied, curing and drying time is necessary to allow the material to fully set and harden. This helps to ensure its strength and durability. The curing time for asphalt and concrete driveways can vary, and it is important to allow sufficient time for the material to fully cure before subjecting it to heavy traffic or applying sealants.
Lastly, the final finishing touches, such as sealcoating, line striping, edge treatments, landscaping, lighting, and signage, add the perfect touches to complete the driveway installation project. These finishing touches not only enhance the appearance of the driveway but also provide functional benefits and improve safety.
In conclusion, paving a driveway requires careful planning, attention to detail, and professional expertise. By understanding the factors involved and following the proper steps, you can achieve a beautiful, functional, and durable driveway that adds value to your property and enhances your curb appeal. Consulting with a reputable paving contractor is highly recommended to ensure a successful and efficient driveway installation process.
Frequently Asked Questions about How Long Does It Take To Pave A Driveway
Was this page helpful?
At Storables.com, we guarantee accurate and reliable information. Our content, validated by Expert Board Contributors, is crafted following stringent Editorial Policies. We're committed to providing you with well-researched, expert-backed insights for all your informational needs.


0 thoughts on “How Long Does It Take To Pave A Driveway”