
Articles
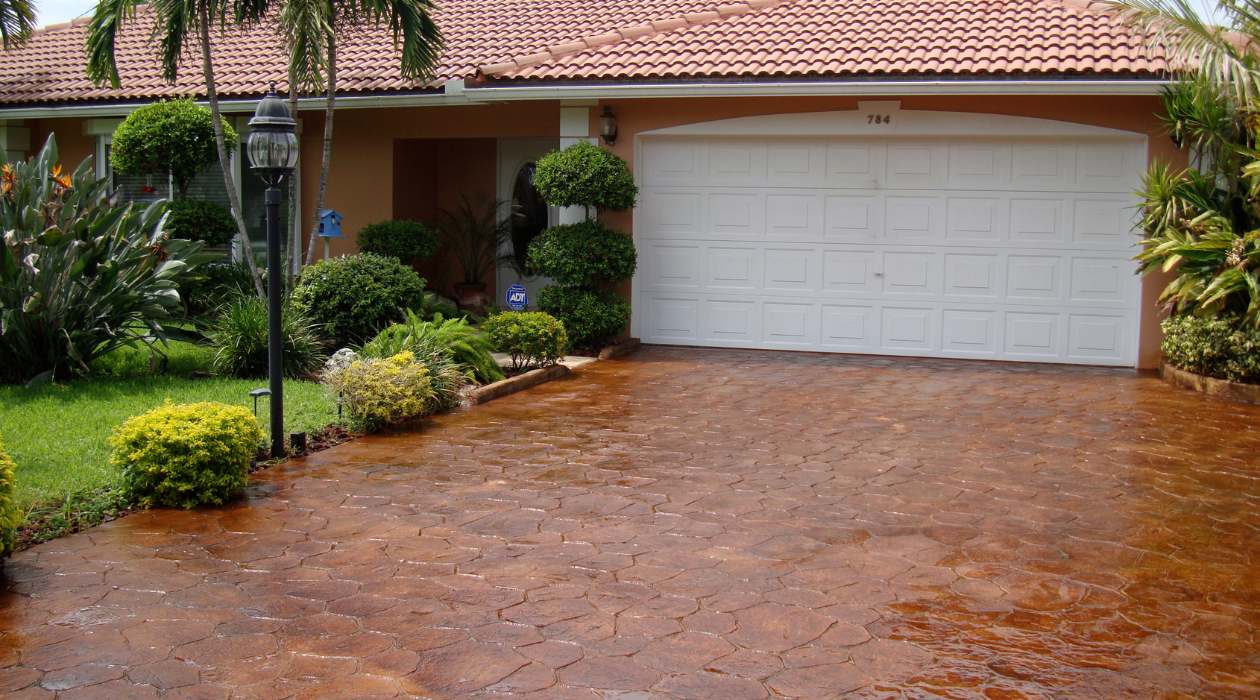
How To Seal A Driveway
Modified: August 28, 2024
Learn how to seal your driveway with our informative articles. Protect and maintain your driveway for years to come with our expert tips and advice.
(Many of the links in this article redirect to a specific reviewed product. Your purchase of these products through affiliate links helps to generate commission for Storables.com, at no extra cost. Learn more)
Introduction
Welcome to the complete guide on how to seal a driveway. If you own a property with a driveway, it is essential to protect and maintain it to ensure its longevity and curb appeal. One of the most effective ways to do this is by sealing your driveway regularly.
A sealed driveway not only enhances the overall appearance of your property but also prevents damage from harsh weather conditions, UV rays, oil stains, and other contaminants. By sealing your driveway, you create a protective barrier that helps to extend its lifespan and reduce the need for costly repairs or replacements.
In this article, we will provide you with a step-by-step process on how to seal your driveway successfully. We will cover everything from the necessary preparation and materials to choosing the right sealer and application techniques. Additionally, we will discuss the benefits of regular driveway sealing and address some commonly asked questions.
Whether you are a DIY enthusiast or have never attempted driveway sealing before, this comprehensive guide will equip you with the knowledge and confidence to tackle this important maintenance task. So, let’s get started on transforming and preserving your driveway with a professional sealing job!
Key Takeaways:
- Regular driveway sealing protects against weather, water damage, and stains, enhancing curb appeal and preventing costly repairs.
- Proper maintenance and regular sealing ensure a durable, attractive driveway, adding value to your property and providing long-lasting protection.
Read more: How To Seal A Gravel Driveway
Understanding the need for driveway sealing
Before diving into the process of sealing your driveway, it is important to understand why it is necessary. Over time, driveways are exposed to various elements that can cause damage and deterioration. By sealing your driveway, you can prevent or minimize these issues. Here are some key reasons why driveway sealing is essential:
- Protection against weather and UV rays: Exposure to sunlight, rain, snow, and extreme temperatures can cause the asphalt or concrete of your driveway to crack and deteriorate. Sealing provides a protective layer that acts as a barrier against these elements.
- Prevention of water damage: Water is one of the most significant culprits behind driveway damage. When water seeps into the cracks and pores of your driveway, it can lead to freeze-thaw cycles, weakening the structure over time. Sealing fills and seals these cracks, preventing water penetration and minimizing potential long-term damage.
- Resistance to oil and chemical stains: Vehicles often leak oil and other chemicals that can seep into the driveway’s surface, causing stains and deterioration. Sealing forms a protective shield that resists these substances, making it easier to clean and maintain your driveway.
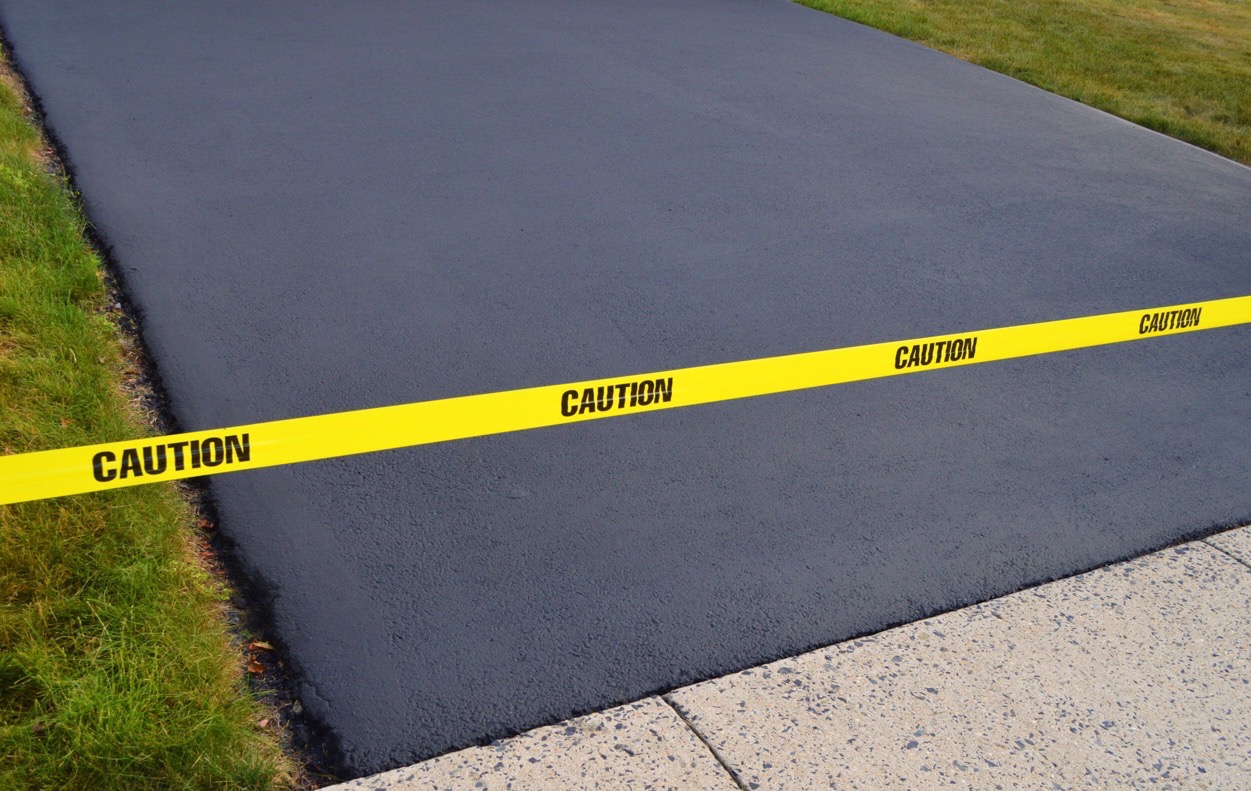
- Enhancement of curb appeal: A well-maintained driveway enhances the overall aesthetics of your property. Sealing adds a fresh, dark finish that restores the original look of your driveway, giving it a polished and attractive appearance.
- Prevention of cracks and potholes: Sealing helps to reduce the formation and expansion of cracks. By sealing the surface, you can prevent small cracks from becoming larger and avoid the formation of potholes, saving you from costly repairs in the future.
Understanding these reasons highlights the importance of regularly sealing your driveway. It not only protects your investment but also improves the overall functionality and curb appeal of your property. Now that we have a clear understanding of why driveway sealing is vital, let’s move on to the next step: gathering the necessary materials.
Gathering the necessary materials
Before you begin the driveway sealing process, it’s crucial to gather all the necessary materials. Having everything in place ensures a smooth and efficient sealing job. Here is a list of the materials you will need:
- Cleaner/degreaser: To prepare the driveway for sealing, you will need a suitable cleaner or degreaser to remove any dirt, oil stains, or other contaminants. Choose a cleaner specifically designed for asphalt or concrete surfaces.
- Pressure washer or garden hose: A pressure washer is the most effective way to thoroughly clean your driveway. If you don’t have one, a garden hose with a high-pressure nozzle can also do the job, although it may require a bit more effort and time.
- Driveway repair material: If you have any cracks, potholes, or damaged areas on your driveway, it’s important to repair them before sealing. Depending on the severity of the damage, you may need patching material, a crack filler, or a sealant designed for repairing asphalt or concrete surfaces.
- Sealer: The main component of driveway sealing is the sealer itself. There are different types of sealers available, such as asphalt-based or acrylic-based sealers. Choose one that is suitable for your driveway material and the climate in your area.
- Applicators: You will need specific tools to apply the sealer onto your driveway. Common options include a squeegee, a brush, or a roller. The choice of applicator depends on personal preference and the size of the driveway.
- Protective gear: It’s essential to protect yourself during the sealing process. Wear protective gear such as gloves, safety goggles, and clothing that covers your arms and legs to prevent any chemical exposure or injuries.
Before purchasing these materials, assess the size and condition of your driveway to determine the quantities required. Additionally, check the manufacturer’s instructions on the sealer to ensure compatibility with your driveway material and optimal application guidelines.
Once you have gathered all the necessary materials for the job, you are ready to move on to the next step: preparing the driveway for sealing.
Preparing the driveway for sealing
Properly preparing your driveway is essential to ensure a successful sealing job. The preparation process involves cleaning the surface, repairing any damage, and making sure the driveway is in the best condition for sealing. Here are the steps to follow:
- Clean the driveway: Start by removing any debris, dirt, or loose material from the surface of the driveway. Use a broom or leaf blower to sweep away loose particles. Then, use a pressure washer or garden hose with a high-pressure nozzle to thoroughly clean the entire driveway. Pay close attention to areas with oil stains or stubborn dirt, using a cleaner or degreaser if necessary.
- Repair cracks and potholes: Inspect your driveway for any cracks, potholes, or damaged areas. Fill small cracks with a crack filler and larger cracks or potholes with a patching material. Follow the manufacturer’s instructions on how to properly apply these repair materials and allow them to dry completely before proceeding.
- Remove stubborn stains: If there are any stubborn stains or discoloration on your driveway that cannot be removed by the cleaning process alone, consider using a specialty stain remover. These products are designed to target specific types of stains, such as oil or rust.
- Allow sufficient drying time: After cleaning and repairing, it’s crucial to allow your driveway enough time to dry completely. This ensures that the sealer will adhere properly and provide effective protection. Check the manufacturer’s instructions for the recommended drying time.
By thoroughly cleaning and repairing your driveway before sealing, you create a clean and smooth surface that allows the sealer to adhere properly and provide maximum protection. This step is essential to ensure the longevity of the seal and maintain the overall integrity of your driveway.
Now that your driveway is clean and in optimal condition, it’s time to move on to the next step: choosing the right sealer.
Choosing the right sealer
Choosing the right sealer for your driveway is crucial to achieve optimal results. There are various types of sealers available, each suited for different driveway materials and environments. Here are some factors to consider when selecting a sealer:
- Driveway material: Determine whether your driveway is made of asphalt or concrete. Different sealers are formulated specifically for each material, as they have different properties and requirements. Using the appropriate sealer for your driveway material will provide the best protection and longevity.
- Type of sealer: There are primarily two types of sealers: asphalt-based and acrylic-based. Asphalt-based sealers are commonly used for asphalt driveways and provide a glossy black finish. Acrylic-based sealers can be used for both asphalt and concrete driveways and offer a range of finishes, from matte to high gloss.
- Climatic conditions: Consider the climate in your area. If you live in an area with harsh winters or frequent freeze-thaw cycles, it’s important to choose a sealer that has good resistance to these conditions. Make sure the sealer is designed to withstand temperature fluctuations, moisture, and UV rays.
- Application method: Different sealers may have specific application requirements. Some can be applied using a brush, roller, or squeegee, while others may require spraying equipment. Consider your comfort level with the application method and ensure you have the necessary tools for a smooth and even application.
- Drying and curing time: Check the manufacturer’s instructions for the drying and curing time of the sealer. Drying time refers to when the surface is safe to walk on, while curing time refers to when the sealer reaches its full protective properties. Ensure you have enough time for the sealer to fully dry and cure before exposing it to heavy traffic.
- Product reviews and recommendations: Research different brands and read reviews from other homeowners who have used the sealer you are considering. Look for positive feedback regarding durability, ease of application, and long-lasting results.
By considering these factors, you can make an informed decision and choose the right sealer that suits your driveway material, climate, and personal preferences. This will ensure that your driveway receives the necessary protection and maintains its appearance for years to come.
Now that you have selected the appropriate sealer, the next step is to apply it onto your driveway. We will discuss the application process in detail in the next section.
Read more: How To Chip And Seal A Driveway
Applying the sealer on the driveway
Now that you have chosen the right sealer for your driveway, it’s time to apply it and protect your pavement from the elements. Follow these step-by-step instructions to ensure a smooth and successful application:
- Read the manufacturer’s instructions: Before starting the application process, carefully read and understand the instructions provided by the sealer manufacturer. This will give you specific guidelines for optimal application and ensure the best results.
- Prepare the sealer: If the sealer needs to be mixed or diluted, follow the instructions provided. Use a clean bucket or container to prepare the sealer according to the manufacturer’s recommendations.
- Start from the top: Begin the application at the highest point of your driveway, such as near the garage or street entrance. This will allow you to work your way down without stepping on the freshly applied sealer.
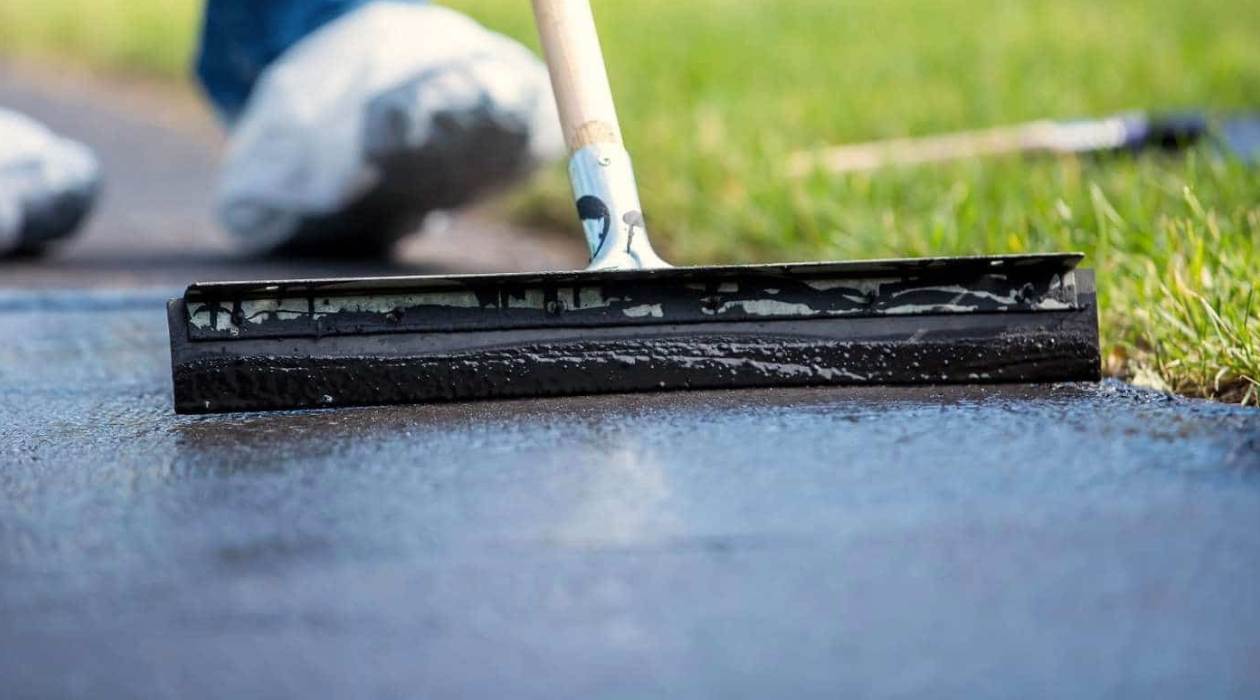
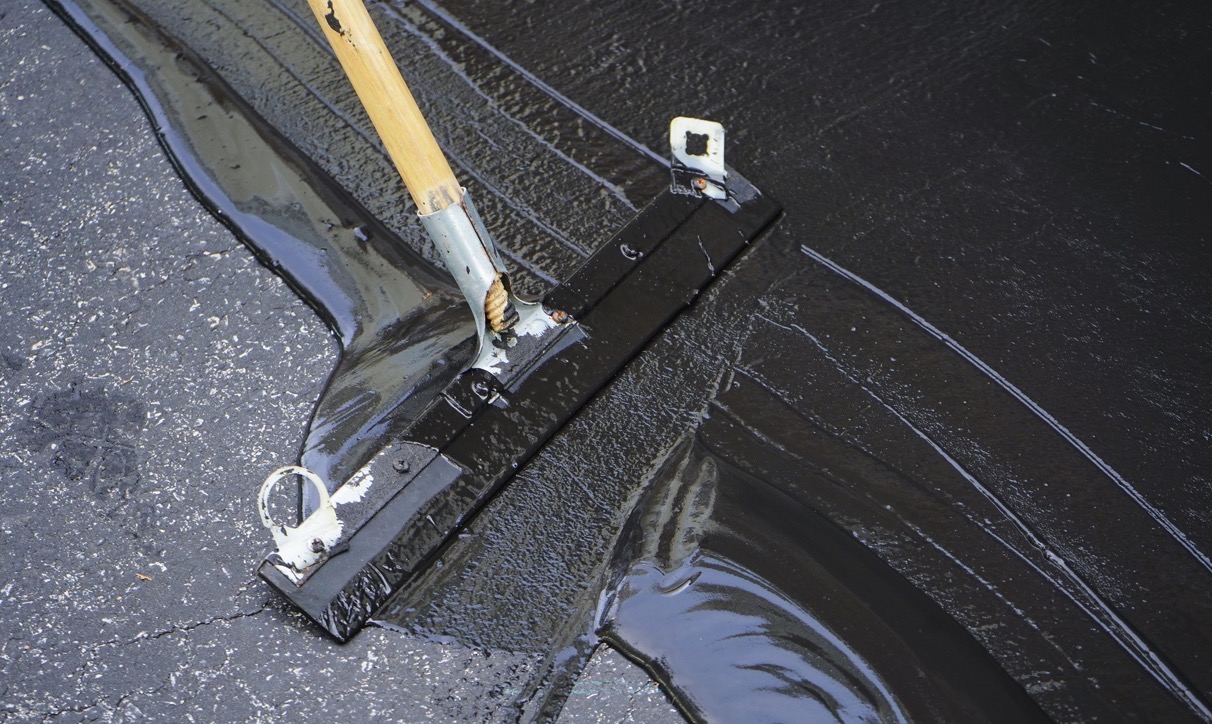
- Use the chosen applicator: Whether you have chosen a squeegee, roller, or brush, use the appropriate applicator to apply the sealer evenly across the surface of the driveway. Work in small sections to ensure consistent coverage.
- Apply a thin coat: It’s important to apply a thin coat of sealer to the driveway. Avoid spreading it too thick, as this can lead to an uneven finish and longer drying times. Follow the manufacturer’s recommended coverage rate for guidance.
- Work in a back-and-forth motion: Use a back-and-forth motion while applying the sealer to ensure even distribution and prevent any streaks or lines. Overlap each pass slightly to create a seamless and uniform finish.
- Pay attention to edges: Be careful when applying sealer along the edges of the driveway, such as against the garage or sidewalks. Use a brush or smaller applicator to ensure precise coverage and avoid sealer spilling onto surrounding surfaces.
- Allow the sealer to dry: After applying the sealer, allow it to dry according to the manufacturer’s instructions. This usually takes anywhere from 24 to 48 hours, depending on the weather conditions and type of sealer used.
It’s important to note that the drying time may vary, especially in humid or cooler climates. Avoid walking or driving on the freshly sealed driveway until it is fully dry to prevent any damage or marks.
By following these steps and applying the sealer with care and precision, you can achieve a professional-looking finish and ensure the longevity of your driveway. Once the sealer has dried, it’s essential to take proper maintenance measures to keep your driveway in optimal condition.
Next, we will discuss the proper drying and curing time for your sealed driveway.
Clean the driveway thoroughly before applying sealer to ensure proper adhesion. Use a pressure washer or stiff brush to remove dirt and debris. Let the driveway dry completely before sealing.
Proper drying and curing time
After applying the sealer to your driveway, it’s crucial to allow enough time for it to dry and cure properly. This ensures that the sealer forms a strong and protective barrier, maximizing its longevity and effectiveness. Here are some important considerations regarding drying and curing time:
- Drying time: The drying time refers to the period it takes for the sealer to become dry to the touch. This typically ranges from 24 to 48 hours, but it can vary depending on factors such as weather conditions, temperature, humidity, and the type of sealer used. Follow the manufacturer’s instructions for the specific drying time of the sealer you’ve chosen.
- Curing time: Curing time refers to the period required for the sealer to reach its full protective properties and durability. While the sealer may feel dry to the touch after the initial drying period, it still needs more time to cure before it can withstand heavier traffic and potential damage. The curing time can range from several days to a couple of weeks, depending on the sealer and environmental conditions.
- Weather conditions: The weather conditions play a crucial role in the drying and curing process. Warm and dry weather with low humidity promotes faster drying and curing of the sealer. Conversely, cooler temperatures, high humidity, or rain can prolong the drying and curing time. Avoid applying the sealer if there is a chance of rain within 24 hours, as the water can compromise the adhesion and effectiveness of the sealer.
- Traffic restrictions: During the drying and curing process, it’s important to restrict traffic on the freshly sealed driveway. Avoid walking, driving, or parking vehicles on the sealed surface until it has fully dried and cured. Heavy or constant traffic can damage the sealer and leave marks on the surface.
- Regular maintenance activities: While the sealer is drying and curing, it’s essential to refrain from routine maintenance activities such as sweeping or power washing. These activities can disturb the sealer and affect its effectiveness. Wait until the recommended drying and curing time has passed before performing any maintenance tasks.
Patience is key when it comes to the drying and curing process of the sealer. By allowing sufficient time for the sealer to dry and cure, you ensure that it can withstand the daily wear and tear, protect your driveway from damage, and provide long-lasting benefits.
Once the sealer has fully dried and cured, you can resume normal use of your driveway. However, it’s important to implement regular maintenance tips to prolong the life of the sealer and keep your driveway in top condition.
In the next section, we will discuss some maintenance tips for a sealed driveway.
Maintenance tips for a sealed driveway
After sealing your driveway, it’s important to implement proper maintenance practices to ensure its longevity and keep it looking its best. Here are some essential maintenance tips for a sealed driveway:
- Regular sweeping: Sweep your driveway regularly to remove dirt, leaves, and debris. This prevents them from accumulating and potentially staining or damaging the surface of the driveway.
- Avoiding heavy objects: Refrain from placing heavy objects, such as dumpsters or construction equipment, directly on the sealed driveway. These objects can cause indentations or even damage the sealer.
- Protect from chemicals: Avoid using harsh chemicals or deicers on your sealed driveway, as they can erode the sealer. Instead, opt for driveway-safe products and use them sparingly.
- Address spills immediately: If there are any oil or chemical spills on the driveway, clean them up as soon as possible. Use an absorbent material, such as kitty litter or baking soda, to soak up the spill and then clean it thoroughly with a mild detergent and water.
- Repair cracks promptly: Inspect your driveway regularly for any new cracks or damage. Repair them promptly using appropriate patching materials to prevent further deterioration.
- Seal regularly: It’s recommended to seal your driveway every 2-3 years, or as per the manufacturer’s recommendations. Regularly sealing the driveway ensures ongoing protection against the elements and maintains its appearance.
- Avoid sharp objects: Be cautious when using snow shovels or other tools on your sealed driveway. Avoid scraping or using sharp objects that can scratch or chip the sealer.
- Minimize heavy traffic: While sealed driveways are designed to withstand regular vehicle traffic, minimizing heavy or constant traffic can help extend the life of the sealer. Consider alternate parking areas for heavy vehicles whenever possible.
- Inspect drainage: Ensure that the drainage around your driveway is functioning properly. Poor drainage can lead to water pooling or damage to the integrity of the driveway. Clear any blocked drainage channels as necessary.
- Monitor for signs of wear: Keep a close eye on your sealed driveway for any signs of wear, such as fading, cracking, or areas of incomplete coverage. If you notice any issues, consider resealing those areas or consulting a professional for assessment.
By following these maintenance tips, you can extend the life of your sealed driveway and keep it looking its best. Regular care and attention will help maintain its protective properties and ensure that you get the most out of your investment.
In the next section, let’s explore the benefits of regularly sealing your driveway.
Benefits of regularly sealing your driveway
Regularly sealing your driveway offers numerous benefits that go beyond just enhancing its appearance. By investing in routine driveway maintenance, you can enjoy the following advantages:
- Protection against the elements: Sealing creates a barrier that protects your driveway from sunlight, rain, snow, and other harsh weather conditions. This helps prevent cracking, fading, and deterioration over time, ensuring the longevity of your driveway.
- Prevention of damage: Sealing fills in small cracks and prevents them from expanding, which reduces the risk of larger cracks and potholes forming. This proactive measure saves you from costly repairs and extends the lifespan of your driveway.
- Resistance to stains: A sealed driveway is more resistant to oil, grease, and other stains. The protective layer of the sealer prevents these substances from penetrating the surface, making it easier to clean and maintain your driveway.
- Enhanced curb appeal: A freshly sealed driveway rejuvenates the appearance of your property. The dark, rich finish of the sealer instantly enhances the curb appeal and adds value to your home.
- Improved durability: The sealer strengthens the surface of your driveway, making it more durable and resistant to everyday wear and tear. It can withstand the weight of vehicles, foot traffic, and other activities, reducing the risk of cracking or crumbling.
- Smoother surface: Sealing fills in small imperfections and creates a smoother surface for vehicles and pedestrians. This not only enhances safety but also provides a smoother driving and walking experience.
- Easier maintenance: Sealed driveways are easier to clean and maintain. Regular sweeping and occasional gentle washing are usually sufficient to keep your driveway looking its best, thanks to the protective layer provided by the sealer.
- Cost-effective solution: While sealing your driveway requires an initial investment, it is a cost-effective solution in the long run. The protection and prevention it offers can save you significant expenses that would otherwise be incurred for repairs or replacement.
- Increased property value: A well-maintained driveway adds value to your property. It creates a positive impression on potential buyers and can contribute to a higher resale value when it comes time to sell your home.
- Peace of mind: Regularly sealing your driveway provides peace of mind, knowing that you have taken proactive steps to preserve and protect your driveway investment. It eliminates worries about damage, cracks, or unsightly stains.
By taking the time and effort to seal your driveway regularly, you can enjoy these benefits and ensure that your driveway remains in excellent condition for years to come.
Now let’s address some commonly asked questions about driveway sealing.
Read more: How Often To Seal Concrete Driveway
Frequently Asked Questions about Driveway Sealing
When it comes to driveway sealing, it’s common to have questions. Here are answers to some frequently asked questions that can help you better understand the process:
- How often should I seal my driveway? It is generally recommended to seal your driveway every 2-3 years, or as per the manufacturer’s instructions. However, the frequency may vary depending on factors such as climate, use, and the type of sealer used.
- Can I seal my driveway myself, or should I hire a professional? While driveway sealing can be a DIY project, hiring a professional can ensure a more efficient and effective application. Professionals have the necessary equipment and expertise to achieve a high-quality seal and can address any specific issues your driveway may have.
- What is the best time of year to seal a driveway? It is best to seal your driveway during dry and warm weather conditions. Spring and fall are usually ideal, as the weather is moderate and allows for optimal drying and curing of the sealer.
- Can I apply sealer on a newly constructed driveway? Newly constructed driveways should cure for at least 30 days before applying a sealer. This allows enough time for the driveway to settle and ensures proper adhesion of the sealer.
- What do I do if the sealer leaves streaks or blotches? If you notice streaks or blotches after applying the sealer, it may indicate an uneven application. In such cases, you may need to reapply the sealer or consult a professional for guidance on how to fix the issue.
- Is it normal for the sealer to appear glossy or wet at first? Yes, it is normal for the sealer to appear glossy or wet during the initial application. As the sealer dries and cures, it will lose its wet appearance and transform into a smooth matte or glossy finish.
- Can I park my car on a newly sealed driveway? It is best to avoid parking vehicles on a newly sealed driveway until it has completely dried and cured. This usually takes 24 to 48 hours, but the specific drying time may vary depending on weather conditions and the type of sealer used.
- How long does a sealed driveway usually last? The lifespan of a sealed driveway depends on various factors, including the quality of the sealer, the level of maintenance, and the amount of wear and tear it experiences. With proper care and regular sealing, a driveway can last for 10 to 15 years or more.
- Can I seal a previously sealed driveway? Yes, you can seal a previously sealed driveway. Before applying a new coat of sealer, it’s important to clean the surface thoroughly and address any necessary repairs to ensure an even and long-lasting seal.
- What should I do if my driveway has multiple cracks and damage? If your driveway has extensive cracks or damage, it may require professional repair or resurfacing before sealing. Consult with a driveway specialist to address any significant issues and ensure a proper sealing job.
These answers should provide you with a better understanding of driveway sealing and help you make informed decisions throughout the process. Remember, if you have any specific concerns or uncertainties, it’s always advisable to consult with a professional.
Now that we have covered the frequently asked questions, let’s conclude this guide.
Conclusion
Sealing your driveway is an important task that offers a range of benefits, from protection against the elements to enhancing the overall curb appeal of your property. By following the step-by-step process outlined in this guide, you can successfully seal your driveway and ensure its longevity.
We started by understanding the need for driveway sealing, highlighting the importance of protection against weather, water damage, stains, and cracks. We then discussed the necessary materials to gather, including cleaners, repair materials, sealers, and applicators.
Next, we explored the crucial steps of driveway preparation, including cleaning the surface, repairing any damage, and allowing sufficient drying time. We emphasized the importance of choosing the right sealer based on driveway material, climate, and application method.
In the application process, we discussed the importance of reading manufacturer instructions, preparing the sealer, using the appropriate applicator, and ensuring a thin and even coat. We also emphasized the need to allow proper drying and curing time before resuming regular use of the driveway.
To maintain your sealed driveway, we provided maintenance tips such as regular sweeping, addressing spills promptly, avoiding heavy objects, and monitoring for signs of wear. We also highlighted the benefits of regularly sealing your driveway, including protection, prevention of damage, enhanced curb appeal, and increased property value.
Additionally, we answered common questions about driveway sealing, covering topics such as frequency of sealing, DIY versus professional application, best time of year to seal, and troubleshooting common issues.
Remember, while this guide provides a comprehensive overview of driveway sealing, it’s always recommended to consult with professionals or manufacturer guidelines for specific recommendations and instructions.
By following the steps outlined in this guide and implementing proper maintenance practices, you can enjoy a sealed driveway that not only adds value to your property but also provides long-lasting protection and a beautiful entrance to your home.
So, go ahead and start sealing your driveway, ensuring its durability, enhancing its appearance, and preserving your investment for years to come!
Frequently Asked Questions about How To Seal A Driveway
Was this page helpful?
At Storables.com, we guarantee accurate and reliable information. Our content, validated by Expert Board Contributors, is crafted following stringent Editorial Policies. We're committed to providing you with well-researched, expert-backed insights for all your informational needs.


0 thoughts on “How To Seal A Driveway”