Home>Articles>How To Braise Pork For Sauce In Electric Skillet

Articles
How To Braise Pork For Sauce In Electric Skillet
Modified: October 20, 2024
Learn how to braise pork for a flavorful sauce using an electric skillet with these informative articles. Discover the secrets to tender and succulent pork dishes.
(Many of the links in this article redirect to a specific reviewed product. Your purchase of these products through affiliate links helps to generate commission for Storables.com, at no extra cost. Learn more)
Introduction
Braising is a cooking technique that involves searing meat and then slowly simmering it in a flavorful liquid until it becomes tender and succulent. It is a popular method for cooking tougher cuts of meat, as it breaks down the connective tissues and transforms them into melt-in-your-mouth perfection. One of the most delicious meats to braise is pork, which lends itself well to a variety of flavors and sauces.
In this article, we will explore the art of braising pork for sauce using an electric skillet. The electric skillet provides even heat distribution and precise temperature control, making it an ideal tool for achieving tender and flavorful braised pork. Whether you are a seasoned cook or a beginner, this article will guide you through the process, ensuring that you achieve a mouthwatering dish every time.
Before we jump into the specifics, let’s take a moment to understand the technique of braising and why it is the perfect method for cooking pork. Braising combines the dry heat of searing with the moist heat of simmering, resulting in a dish that is both tender and full of flavor. The caramelization that occurs during the searing process adds depth and richness to the meat, while the slow simmering in liquid helps to break down the tough muscle fibers, resulting in a tender and juicy texture.
Now that we have a basic understanding of braising, let’s move on to selecting the right cut of pork for this cooking technique.”>
Key Takeaways:
- Master the art of braising pork in an electric skillet to create succulent, flavorful dishes. Select the right cut, season generously, and monitor the temperature for tender, melt-in-your-mouth results.
- Elevate your cooking skills by braising pork in an electric skillet. From searing to adding the sauce, enjoy the process of creating tender, juicy, and flavorful braised pork dishes.
Understanding Braising
Braising is a cooking method that dates back centuries and has been used in various cuisines around the world. It involves searing meat in a hot pan to develop a flavorful crust, and then simmering it slowly in a liquid, often a combination of broth, wine, or sauce, to create a tender and succulent dish.
One of the key benefits of braising is its ability to transform tougher cuts of meat into tender and delicious meals. Cuts such as pork shoulder, pork butt, or pork ribs contain a higher amount of connective tissue, which can be tough if not cooked properly. However, through the slow and gentle cooking process of braising, these tough cuts are broken down, resulting in meat that is fall-off-the-bone tender.
Braising also allows for a wide range of flavors to be infused into the meat. The liquid used for braising serves as a vehicle for flavor, as it penetrates the meat and imparts its own delicious tastes. This opens up a world of possibilities for experimenting with different spices, herbs, and aromatics to create a unique and flavorful dish.
Another advantage of braising is its versatility. While traditionally done on the stovetop or in the oven, the use of an electric skillet makes the process even more convenient. The electric skillet provides consistent heat and temperature control, ensuring that the meat cooks evenly and at the desired temperature. This makes it a great option for those who want to braise pork without the need to constantly monitor the heat source.
Overall, braising is a cooking technique that brings out the best in pork, resulting in tender, flavorful, and satisfying dishes. Whether you’re looking to make a traditional braised pork roast or experiment with different sauces and flavors, mastering the art of braising will elevate your cooking skills and delight your taste buds.
Selecting the Right Cut of Pork
Choosing the right cut of pork is essential for successful braising. Certain cuts are more suitable for this cooking method as they contain a higher amount of connective tissue, which becomes tender and flavorful when slow-cooked in liquid. Here are some pork cuts that are commonly used for braising:
- Pork Shoulder: Also known as pork butt or Boston butt, this cut is marbled with fat and contains a good amount of connective tissue. It is ideal for long and slow braising, resulting in tender, juicy, and flavorful meat.
- Pork Ribs: Spare ribs or baby back ribs are excellent choices for braising. The meat between the bones can become incredibly tender and easily pull away, making them perfect for saucy, fall-off-the-bone dishes.
- Pork Shank: This cut comes from the lower leg of the pig and is rich in flavor and connective tissue. Braising pork shanks produces melt-in-your-mouth meat that is full of gelatin for a silky texture.
- Pork Belly: While often used for crispy pork belly, it can also be braised to create a succulent and flavorful result. The fattiness of pork belly adds richness to the dish, making it a popular choice for braised pork belly recipes.
When selecting your pork, look for cuts that have a good amount of marbling and visible connective tissue. These characteristics indicate that the meat will become tender and moist through the braising process.
In addition to the cut of pork, consider the size and thickness of the meat. Thicker cuts, such as a thick pork shoulder roast, will require longer cooking times to ensure they become tender. Thinner cuts, like pork chops, may not be ideal for braising as they can easily become overcooked and dry.
Lastly, it’s important to choose ethically sourced and high-quality pork. Look for pasture-raised or organic options to ensure the best flavor and texture in your braised pork.
Now that you know the importance of selecting the right cut of pork for braising, it’s time to move on to the next step: preparing the pork for braising.
Preparing the Pork for Braising
Before you start braising your pork, it’s essential to properly prepare the meat to ensure optimal flavor and texture. Here are some steps to follow when preparing the pork for braising:
- Trim Excess Fat: While some fat is desirable for flavor and tenderness, excessive amounts of fat can make the dish greasy. Trim off any excess fat, leaving a thin layer to add flavor and moisture to the meat.
- Pat Dry: Use paper towels to pat the pork dry. Moisture on the surface of the meat can prevent proper browning during the searing process.
- Season Generously: Season the pork liberally with salt and pepper. This helps to enhance the natural flavors of the meat.
- Optional Marinade: If desired, marinate the pork in your favorite marinade for added flavor. Let the pork marinate in the refrigerator for at least a few hours, or overnight, before proceeding with the braising process.
Once you have prepared the pork, it’s time to move on to seasoning the meat. Seasoning is a crucial step in adding depth and flavor to your braised pork.
Seasoning the Pork
Seasoning the pork is a vital step in enhancing the flavor of your braised dish. The right combination of herbs, spices, and aromatics can elevate the taste profile and make your pork truly exceptional. Here are some tips on how to season your pork for braising:
- Salt and Pepper: Start by generously seasoning all sides of the pork with salt and freshly ground black pepper. This basic seasoning brings out the natural flavors of the meat and provides a solid foundation for additional seasonings.
- Aromatics: Add depth and complexity to your braised pork by incorporating aromatic ingredients such as garlic, onions, shallots, or leeks. Finely chop or mince these aromatic ingredients and sprinkle them over the seasoned meat.
- Herbs and Spices: Select herbs and spices that complement the flavors you want to achieve. Common choices include rosemary, thyme, oregano, sage, bay leaves, paprika, or cumin. Sprinkle these seasonings over the pork, ensuring that they evenly coat the surface. Optionally, you can tie herbs together with kitchen twine and place them in the braising liquid to infuse even more flavor.
- Liquid Seasonings: Consider incorporating liquid seasonings such as soy sauce, Worcestershire sauce, balsamic vinegar, or apple cider vinegar. These add depth and complexity to the braising liquid, which will penetrate the meat during the cooking process.
- Sugar or Sweeteners: Depending on the flavor profile you desire, you may want to add a hint of sweetness to balance the savory flavors. Brown sugar, honey, maple syrup, or fruit juices like apple or orange can provide a touch of sweetness to your braised pork.
Remember to adjust the seasonings to suit your personal taste preferences. The seasoning process is an opportunity to be creative and experiment with flavors that you enjoy. Feel free to adapt and add additional ingredients to customize the flavors of your braised pork.
Once your pork is seasoned, the next step is preheating the electric skillet to ensure even cooking and proper browning of the meat.
Read more: How To Cook Pork Ribs In Electric Skillet
Preheating the Electric Skillet
Preheating the electric skillet is a critical step in achieving successful braised pork. Properly preheating the skillet ensures even cooking and optimal browning of the meat. Here’s how to preheat your electric skillet:
- Clean the Skillet: Ensure that your electric skillet is clean and free from any food residue. Clean it with warm, soapy water and dry thoroughly before use.
- Plug in and Set the Temperature: Plug in the electric skillet and set the temperature according to your recipe’s instructions. Usually, a medium to medium-high heat setting is suitable for preheating.
- Allow Sufficient Preheating Time: Let the electric skillet heat up for a few minutes to reach the desired temperature. Refer to the manufacturer’s instructions for the recommended preheating time.
- Test with Water Droplets: To check if the skillet is hot enough, sprinkle a few droplets of water onto the surface. If the water droplets sizzle and evaporate immediately, the skillet is adequately preheated.
It’s essential to preheat the electric skillet to ensure that the pork sears properly on all sides, creating a flavorful crust and locking in the juices. Properly preheating the skillet also helps to prevent the meat from sticking to the surface and promotes even heat distribution.
Once your electric skillet is preheated, you’re ready to move on to the next step: cooking the pork in the skillet.
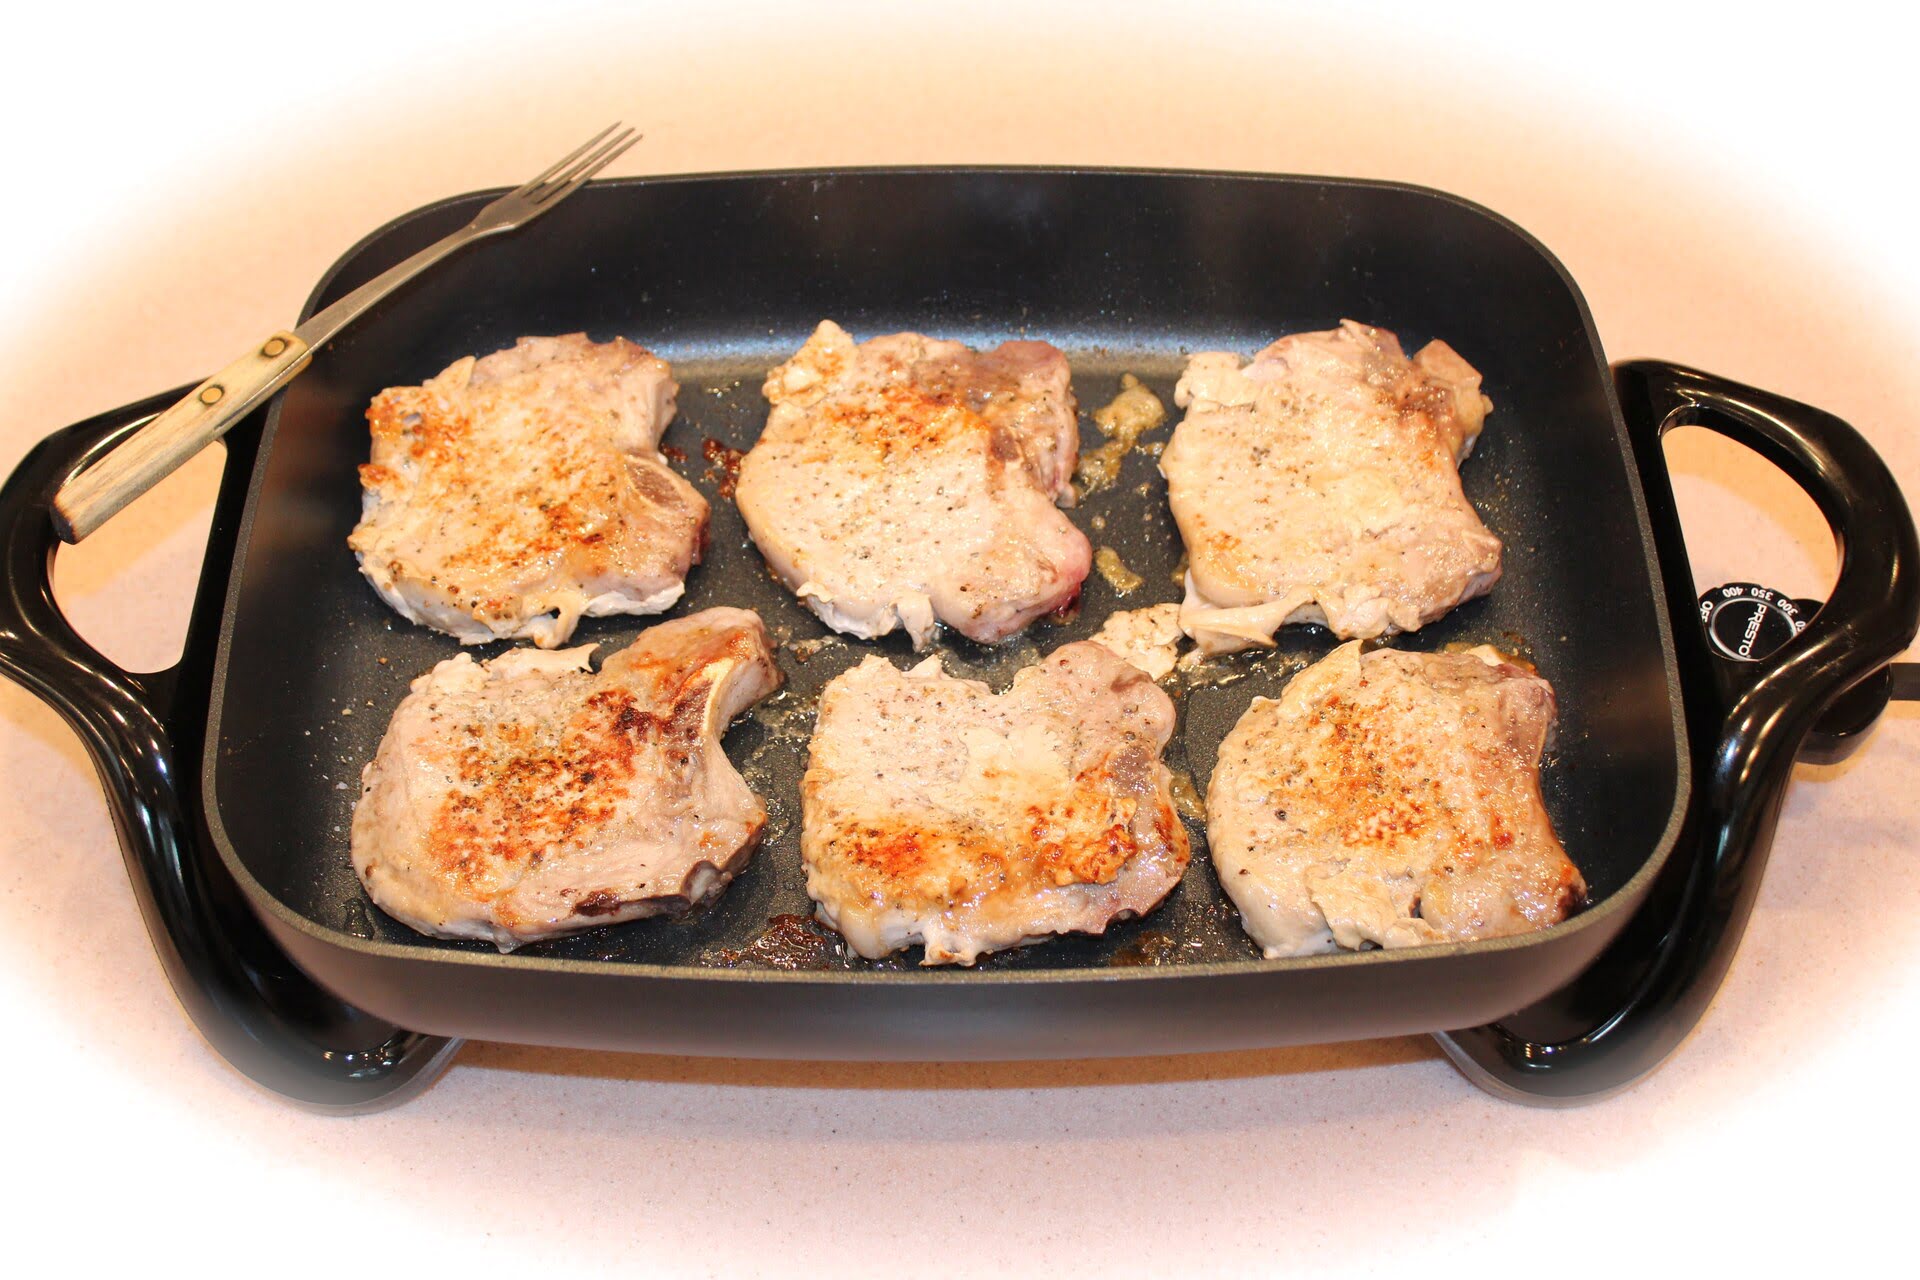
Cooking the Pork in the Electric Skillet
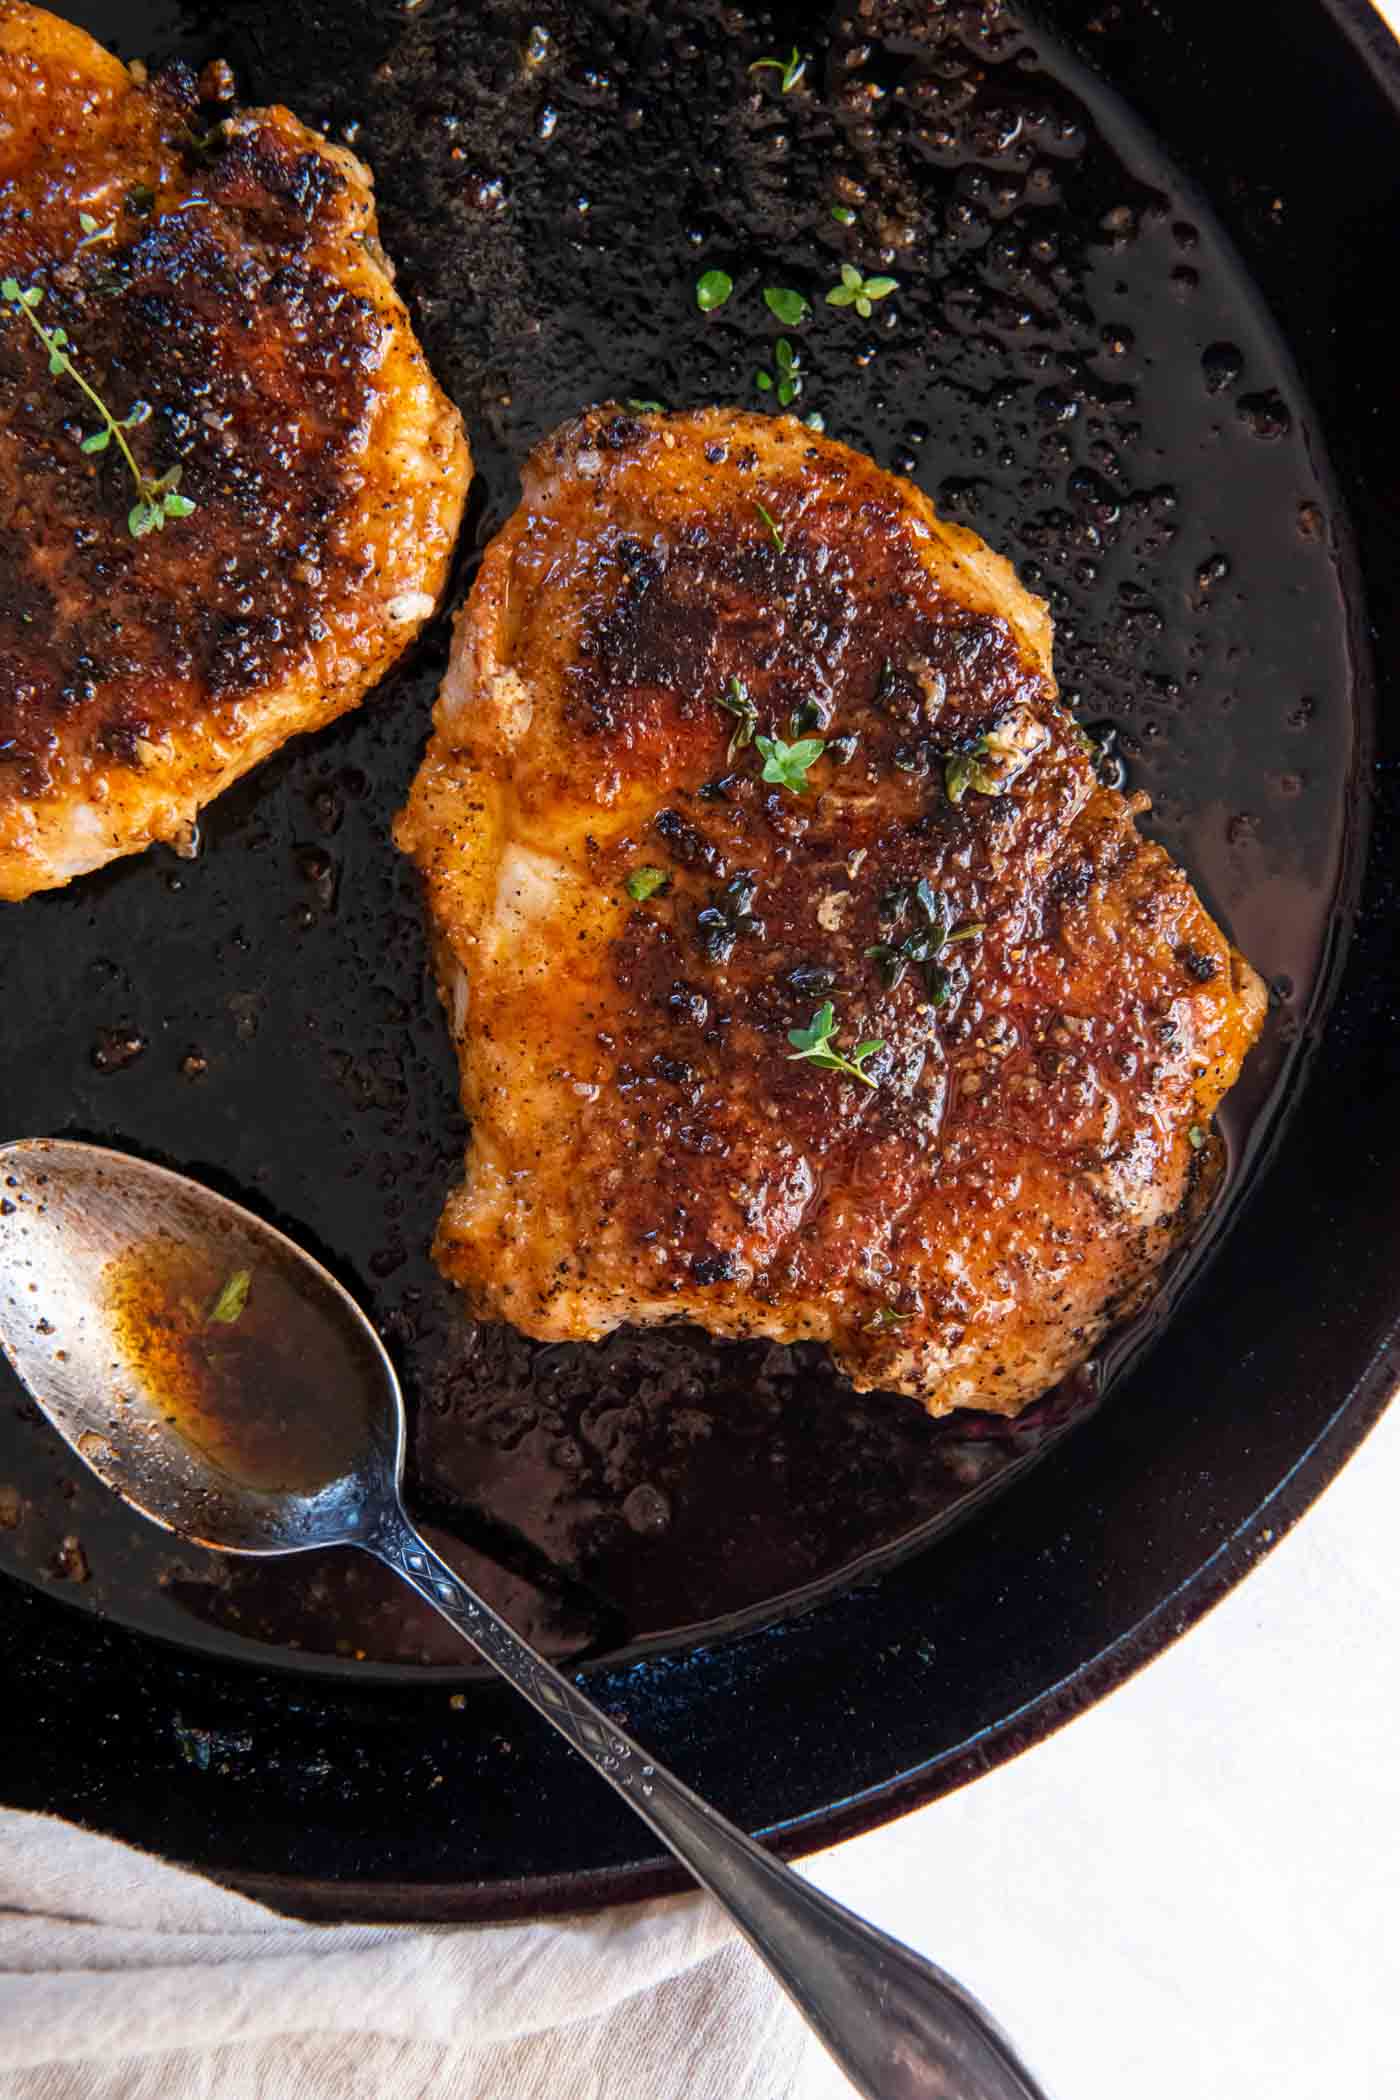
Now that your electric skillet is preheated, it’s time to start cooking the pork. The goal here is to achieve a rich, golden-brown sear on all sides of the meat before proceeding with the braising process. Follow these steps to cook the pork in the electric skillet:
- Add Cooking Oil: Add a small amount of cooking oil, such as vegetable or canola oil, to the preheated electric skillet. Swirl the oil around to coat the bottom of the skillet evenly. The oil helps to prevent sticking and promotes browning.
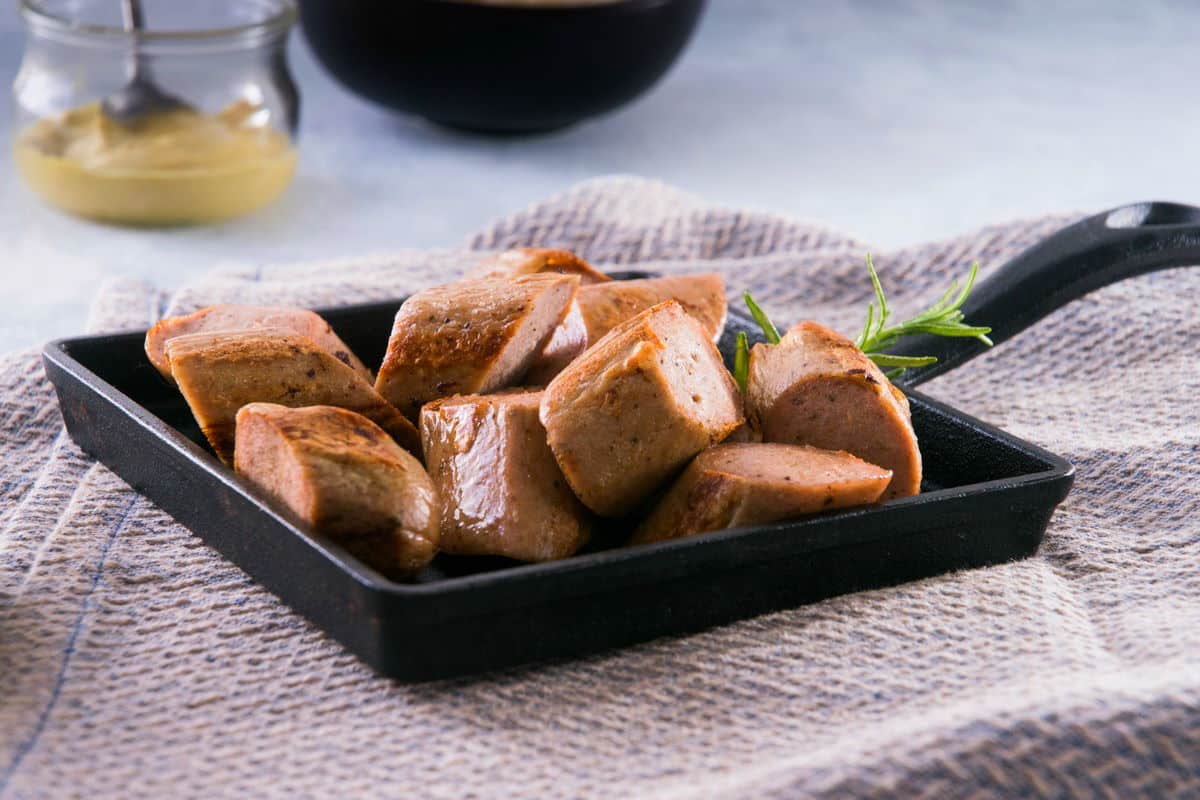
- Sear the Pork: Carefully place the pork in the hot skillet, making sure not to overcrowd the pan. Allow each side of the pork to sear for a few minutes until it develops a deep golden-brown crust. Use tongs to flip the meat and sear all sides evenly.
- Remove the Pork: Once the pork is seared on all sides, remove it from the electric skillet and set it aside temporarily. The searing process enhances the flavor and texture of the meat by creating a caramelized crust.
Cooking the pork in the electric skillet not only adds flavor but also helps to lock in the juices, resulting in a moist and tender final dish. By achieving a beautifully seared exterior, you ensure that each bite of the braised pork is packed with savory goodness.
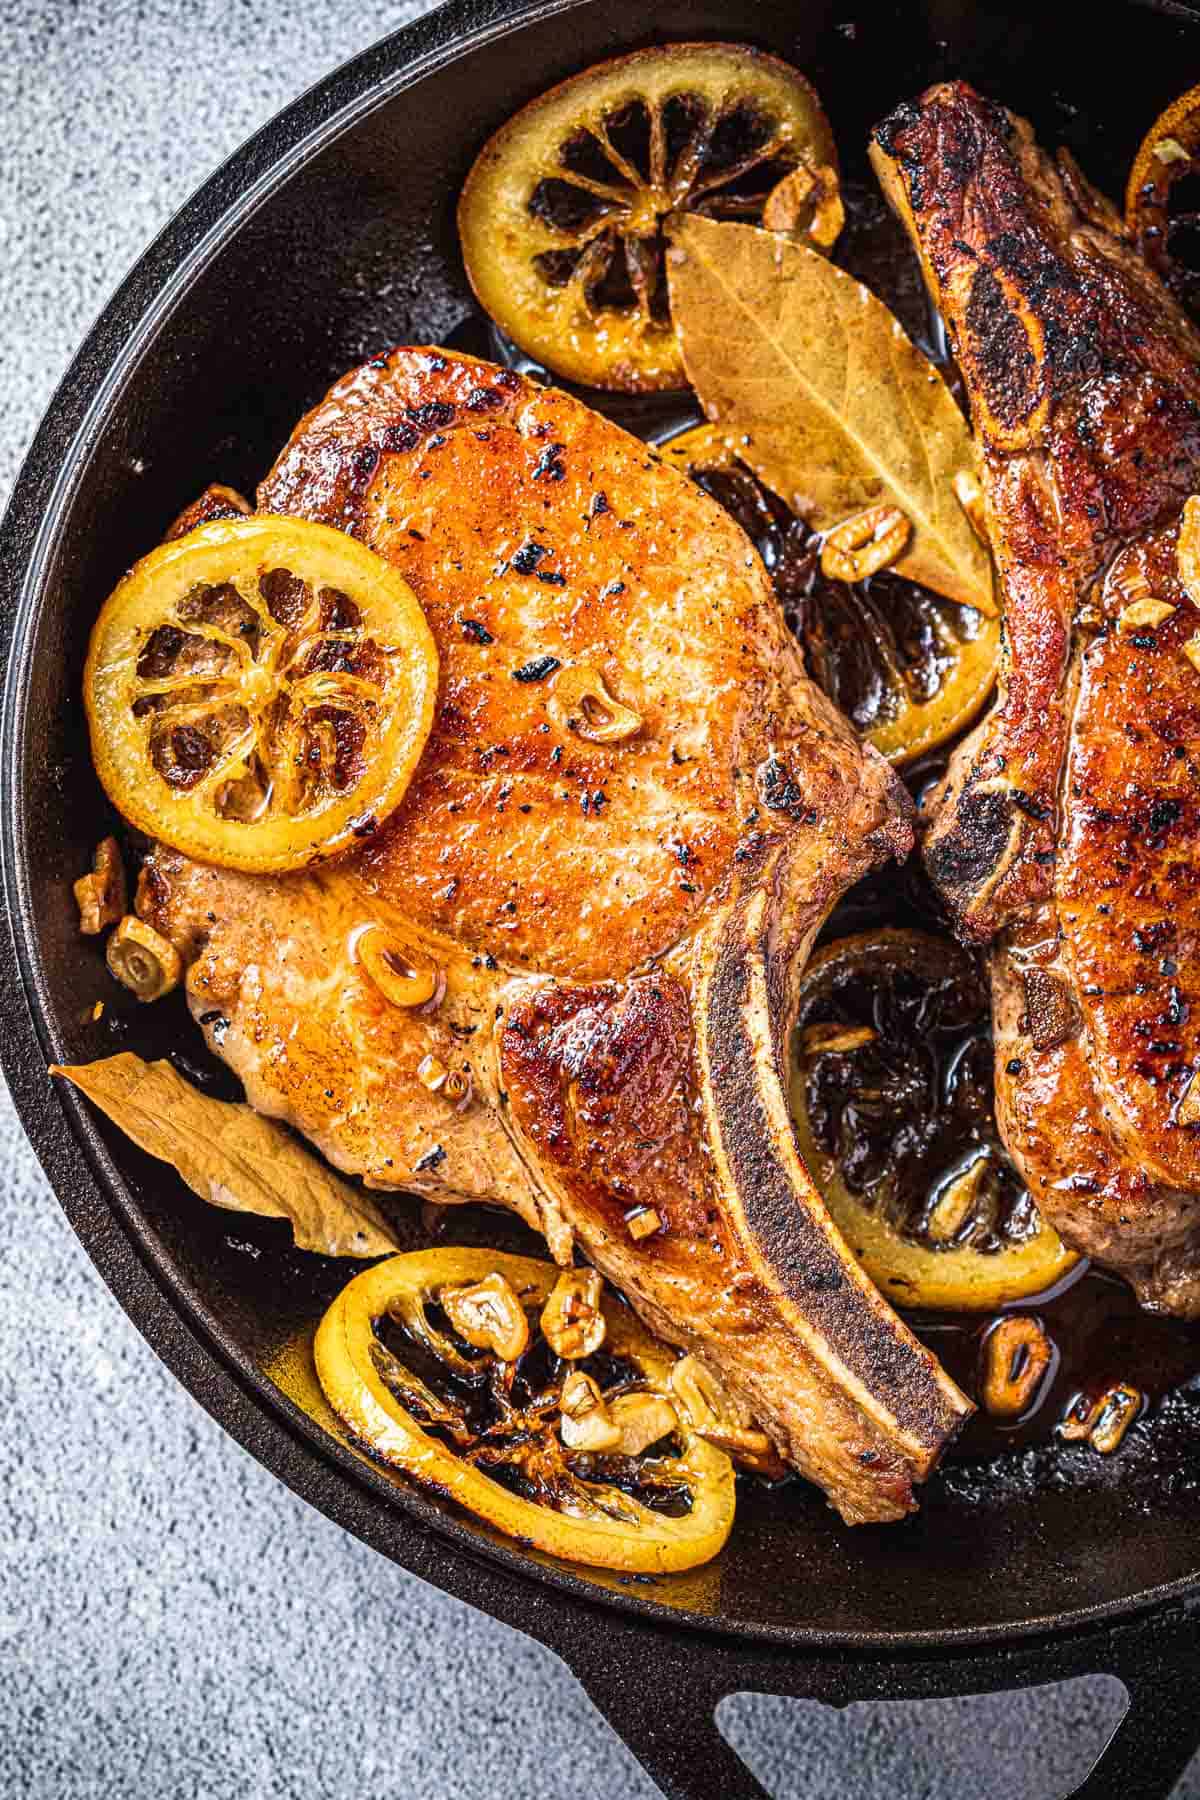
After searing the pork, it’s time to prepare the sauce for braising. The sauce will infuse the meat with additional flavors and contribute to the overall richness of the dish.
After searing the pork, deglaze the electric skillet with wine or broth to scrape up the flavorful browned bits. This will add depth to the sauce.
Preparing the Sauce for Braising
The sauce is a crucial component of braised pork, as it adds depth and flavor to the meat. Creating a well-balanced and flavorful sauce will enhance the overall taste of your braised dish. Follow these steps to prepare the sauce for braising:
- Assess the Cooking Liquid: Depending on your recipe, you may use a combination of broth, wine, or a specific sauce as the base for your braising liquid. Assess the recipe instructions carefully and gather the necessary ingredients.
- Enhance the Flavor: If desired, add additional flavorings to the cooking liquid. For example, you can incorporate aromatic ingredients like onions, garlic, carrots, or celery to lend depth and complexity to the sauce. Consider adding herbs and spices that complement the flavor profile, such as rosemary, thyme, bay leaves, or paprika. These ingredients will infuse the sauce with their enticing aromas and flavors.
- Balance with Sweetness: Depending on your preference, you may want to balance the savory flavors of the sauce with a touch of sweetness. Sweeteners like brown sugar, honey, or maple syrup can add a delightful contrast to the rich flavors of the braised pork.
- Adjust Salt and Seasonings: Taste the sauce and adjust the seasoning as needed. Add salt and pepper to taste, ensuring the seasoning complements the flavors of the other ingredients.
Remember, the sauce will infuse the meat as it simmers, so be mindful of the flavors you want to achieve. Experiment with different ingredients and seasonings to find the perfect balance that suits your taste.
Once the sauce is prepared, it’s time to add it to the electric skillet and continue with the braising process.
Adding the Sauce to the Skillet
With the pork seared and the sauce prepared, it’s time to combine the two in the electric skillet to commence the braising process. Adding the sauce to the skillet will infuse the pork with flavors and ensure a moist and delicious final result. Follow these steps to add the sauce to the skillet:
- Return the Pork to the Skillet: Carefully place the seared pork back into the electric skillet, ensuring it fits comfortably in a single layer. This allows the sauce to evenly envelop the meat and promote even cooking.
- Pour in the Sauce: Slowly pour the prepared sauce over the pork, making sure it covers the meat entirely. The liquid should come about halfway up the sides of the pork, ensuring it has enough liquid to braise properly.
- Cover the Skillet: Place the lid on the electric skillet to trap the moisture and heat inside. This creates a gentle cooking environment that allows the pork to become tender and flavorful through slow simmering.
By adding the sauce to the skillet, you are providing moisture and additional flavors, which will transform the pork into a succulent and delicious dish. The simmering process will allow the flavors to meld together, resulting in a delectable braised pork that is tender, juicy, and bursting with flavor.
Once the sauce is added, it’s time to monitor and adjust the temperature to ensure the pork braises to perfection. Let’s explore this step in more detail.
Monitoring and Adjusting the Temperature
When braising pork in an electric skillet, it’s important to monitor and adjust the temperature throughout the cooking process to ensure optimal results. Maintaining a consistent and controlled temperature will help prevent overcooking or undercooking the pork. Here are some tips for monitoring and adjusting the temperature:
- Stovetop Temperature Adjustments: Most electric skillets have adjustable temperature settings. Refer to your specific model’s instructions on how to adjust the temperature. It’s recommended to braise pork at a low to medium-low heat setting, allowing for gentle simmering.
- Keep the Lid On: To maintain a steady temperature, it’s important to keep the lid on the electric skillet throughout the braising process. This allows the steam and heat to circulate, tenderizing the pork and creating a flavorful sauce.
- Check Liquid Levels: Periodically check the liquid levels as the pork braises. If the liquid evaporates too quickly, add additional liquid, such as broth or water, to ensure the pork remains submerged at least halfway. This helps prevent the meat from drying out during the braising process.
- Rotate the Meat: Occasionally rotate the pork within the electric skillet to ensure even cooking. This helps the meat to braise uniformly and absorbs flavors from the sauce evenly.
- Use an Instant-Read Thermometer: To ensure the pork is cooked to the desired level of tenderness, use an instant-read thermometer to check the internal temperature. Pork should be cooked to an internal temperature of 145°F (63°C) for medium, but for braising, it is recommended to cook until the pork reaches an internal temperature of 160°F (71°C) for a more tender texture.
Throughout the braising process, it’s essential to keep a close eye on the temperature and make adjustments as necessary. This will ensure that the pork cooks to perfection and results in tender, succulent meat that is infused with the flavors of the braising sauce.
Once the pork has braised to your desired level of tenderness, it’s time to remove it from the skillet and move on to the final steps of serving and enjoying the braised pork.
Braising the Pork to Perfection
Braising pork requires patience and attention to detail to achieve tender and flavorful results. Follow these steps to braise the pork to perfection in the electric skillet:
- Simmer Slowly: Once the pork is in the skillet and the sauce has been added, lower the heat to a gentle simmer. Avoid rapid boiling, as this can toughen the meat. Allow the pork to simmer slowly, absorbing the flavors from the sauce as it becomes tender and succulent.
- Cooking Time: The cooking time will vary depending on the size and thickness of the pork cut. Generally, pork shoulder or ribs require around 2-3 hours of braising time. However, it’s important to rely on the desired tenderness and the internal temperature using an instant-read thermometer for precision.
- Baste Occasionally: As the pork braises, baste the meat with the sauce occasionally. This helps to keep the meat moist and allows the flavors to penetrate even more deeply into the meat.
- Check for Doneness: Test the pork for doneness by using an instant-read thermometer. Insert the thermometer into the thickest part of the meat to ensure it reaches the recommended internal temperature of 160°F (71°C).
- Rest Before Serving: Once the pork has reached the desired temperature, remove it from the skillet and let it rest for a few minutes before slicing or shredding. This allows the juices to redistribute and ensures a moist and flavorful final result.
Keep in mind that braised pork can be served as whole cuts, sliced, or shredded, depending on your preference or the recipe you’re following. The mouthwatering aroma and tender texture will have everyone eagerly anticipating the final dish.
Now that the pork is braised to perfection, it’s time to move on to the final step: serving and enjoying the delicious braised pork.
Serving and Enjoying the Braised Pork
After patiently braising the pork to perfection, it’s time to plate up and savor the delicious flavors you’ve created. Here are some tips on serving and enjoying your braised pork:
- Slice or Shred: Depending on the cut of pork and your desired presentation, you can either slice the braised pork into thick, juicy slices or shred it into tender, succulent strands. Consider the texture and presentation that will best showcase your dish.
- Arrange on a Platter: Carefully arrange the sliced or shredded pork on a serving platter, allowing the natural colors and textures to shine. This creates an inviting visual appeal.
- Drizzle with Sauce: Pour some of the flavorful braising sauce over the pork to enhance its moisture and flavor. The sauce will add an extra layer of richness and complement the hearty taste of the meat.
- Garnish: Consider adding a fresh and vibrant touch to your dish with garnishes. Sprinkle some chopped herbs, such as parsley or chives, over the top for a burst of color and freshness. Alternatively, a squeeze of lemon juice or a sprinkle of citrus zest can provide a zingy and aromatic note.
- Serve with Accompaniments: Complete the meal by serving the braised pork with suitable accompaniments. Creamy mashed potatoes, buttered rice, roasted vegetables, or crusty bread are all great choices to complement the flavors and textures of the dish.
As you sit down to indulge in the tantalizing aroma and flavors of the braised pork, take the time to appreciate the tender and succulent result you’ve achieved through slow and careful cooking. The combination of rich flavors, tender meat, and a rich sauce will make every bite a delight.
Don’t forget to savor the experience with loved ones and relish in the satisfaction of creating a memorable, homemade meal. Bon appétit!
Conclusion
Braising pork for sauce in an electric skillet is a wonderful way to transform tough cuts of meat into delectable, melt-in-your-mouth dishes. Understanding the braising technique, selecting the right cut of pork, and properly preparing and seasoning the meat are essential steps to achieve outstanding results.
The electric skillet provides a convenient and efficient cooking tool, ensuring even heat distribution and precise temperature control throughout the braising process. From preheating the skillet to searing the pork, adding the sauce, and monitoring the temperature, each step plays a crucial role in creating a flavorful and tender braised pork dish.
To braise the pork to perfection, it’s important to simmer the meat slowly, allowing it to absorb the flavors from the sauce and tenderize over time. By basting occasionally and checking for doneness with an instant-read thermometer, you can ensure that the pork is cooked to your desired level of tenderness.
When it’s time to serve and enjoy the braised pork, remember to slice or shred the meat to your liking and arrange it on a platter. Drizzle the pork with the flavorful braising sauce and garnish with fresh herbs or citrus zest for that final touch of brightness and aroma. Serve it alongside complementary accompaniments to create a satisfying and well-rounded meal.
Braising pork for sauce in an electric skillet not only yields delicious results but also allows you to explore a variety of flavors and experiment with different seasonings. With practice and creativity, you can elevate this cooking technique to create your signature braised pork dishes that will impress family and friends.
So, grab your electric skillet, select a flavorful cut of pork, and let the slow and gentle process of braising transform it into a mouthwatering dish. With each tender bite, you’ll savor the results of your efforts and discover a new appreciation for the art of cooking.
Frequently Asked Questions about How To Braise Pork For Sauce In Electric Skillet
Was this page helpful?
At Storables.com, we guarantee accurate and reliable information. Our content, validated by Expert Board Contributors, is crafted following stringent Editorial Policies. We're committed to providing you with well-researched, expert-backed insights for all your informational needs.


0 thoughts on “How To Braise Pork For Sauce In Electric Skillet”