Articles
How To Can Flour For Long Term Storage
Modified: September 1, 2024
Learn how to pantry store flour for long-term storage to keep it fresh and ready to use whenever you need it. Don't let your flour go to waste - follow these simple steps for effective pantry storage.
(Many of the links in this article redirect to a specific reviewed product. Your purchase of these products through affiliate links helps to generate commission for Storables.com, at no extra cost. Learn more)
Introduction:
Welcome to the world of long-term food storage! When it comes to being prepared for emergencies or simply wanting to extend the shelf life of your pantry staples, canning flour is an effective and convenient option. By properly sealing and storing flour, you can ensure its freshness and usability for an extended period of time.
In this article, we will explore the benefits of canning flour, the supplies you’ll need, and a step-by-step guide to help you successfully can flour for long-term storage. With a little preparation and the right techniques, you can have peace of mind knowing that your flour will stay fresh and ready to use whenever you need it.
Canning flour offers several advantages, including:
- Extended shelf life: By properly sealing flour in canning jars, you can significantly extend its shelf life. This means you can buy flour in bulk or take advantage of sales without worrying about it spoiling.
- Protection against pests: One of the biggest challenges when it comes to storing flour is keeping pests, such as bugs and rodents, at bay. Canning flour provides an airtight seal that helps prevent infestations and keeps your flour safe to consume.
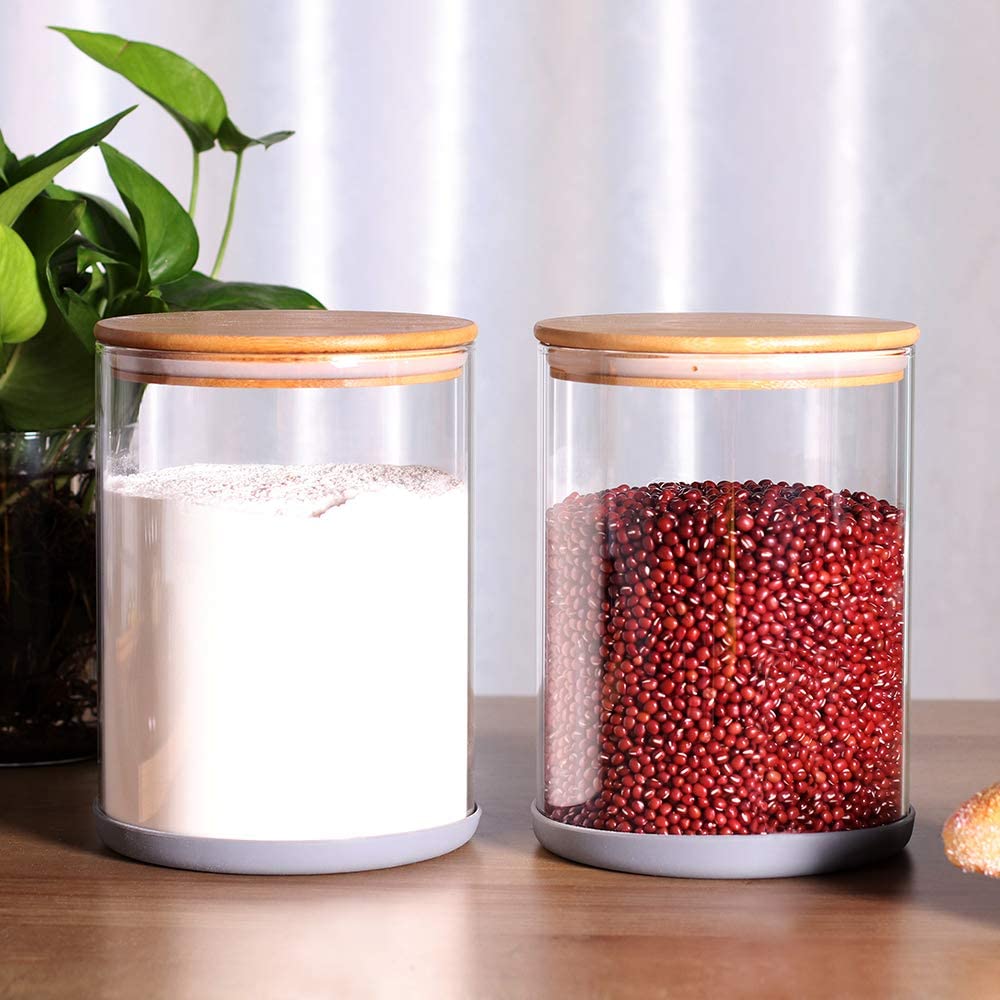
- Convenient storage: Canned flour is easy to store and organize. You can stack the jars neatly on shelves or in pantry spaces, making it a space-efficient solution for long-term storage.
- Preservation of quality: Properly canned flour retains its flavor, texture, and nutritional value. Unlike flour stored in bags or open containers, canned flour remains protected from moisture, light, and air, ensuring it stays fresh and usable for longer.
Now that you understand the benefits of canning flour, let’s move on to the supplies you’ll need to get started!
Key Takeaways:
- Canning flour extends shelf life, protects against pests, and ensures convenient, organized storage. It’s a cost-effective, quality-preserving solution for emergency preparedness and bulk purchasing.
- Properly prepared jars, accurate flour measurement, and careful sealing are essential for successful long-term flour storage. Follow recommended canning methods and storage practices for optimal results.
Read more: How To Store Flour Long Term In Buckets
Benefits of Canning Flour:
Canning flour provides numerous advantages when it comes to long-term food storage. Let’s take a closer look at some of the key benefits:
- Extended Shelf Life: The primary advantage of canning flour is the ability to extend its shelf life. While flour typically has a relatively short shelf life when stored in its original packaging, canning flour can greatly prolong its usability. By sealing it in airtight containers, you create an environment that keeps out moisture, air, and pests, which are the main factors that can cause flour to spoil.
- Cost-effective: Buying flour in bulk is often more cost-effective than purchasing smaller quantities. However, buying in bulk can be a challenge if you are worried about the flour going bad before you have a chance to use it. By canning flour, you can take advantage of bulk purchasing without the fear of waste. This allows you to save money in the long run.
- Protection Against Pests: One of the biggest concerns when storing flour is pest infestation. Insects, mice, and rats are attracted to the smell and taste of flour, which can lead to contamination. Canning flour provides a barrier against pests, as the airtight seal prevents them from accessing the flour.
- Easy Organization: Canning flour allows for easy organization and space utilization. By storing flour in jars, you can stack them neatly on shelves or in pantries, maximizing your storage space. This makes it easier to keep track of inventory and quickly access the flour you need.
- Preserves Freshness and Quality: When flour is exposed to air, moisture, and light, it can quickly deteriorate in quality. By canning flour, you protect it from these elements, preserving its freshness, flavor, and nutritional value. This means that when you open a jar of canned flour, you can expect it to be just as fresh as the day it was canned.
- Emergency Preparedness: Canning flour is an excellent option for emergency preparedness. In case of power outages, natural disasters, or other emergencies, having a stockpile of canned flour ensures you have a reliable food source. It provides peace of mind, knowing that you can still prepare meals even during challenging times.
Now that you understand the benefits of canning flour, let’s move on to the supplies you will need to get started!
Supplies Needed for Canning Flour:
Before you begin the process of canning flour, it’s essential to gather all the necessary supplies. Having these items on hand will ensure a smooth and successful canning process. Here is a list of the supplies you will need:
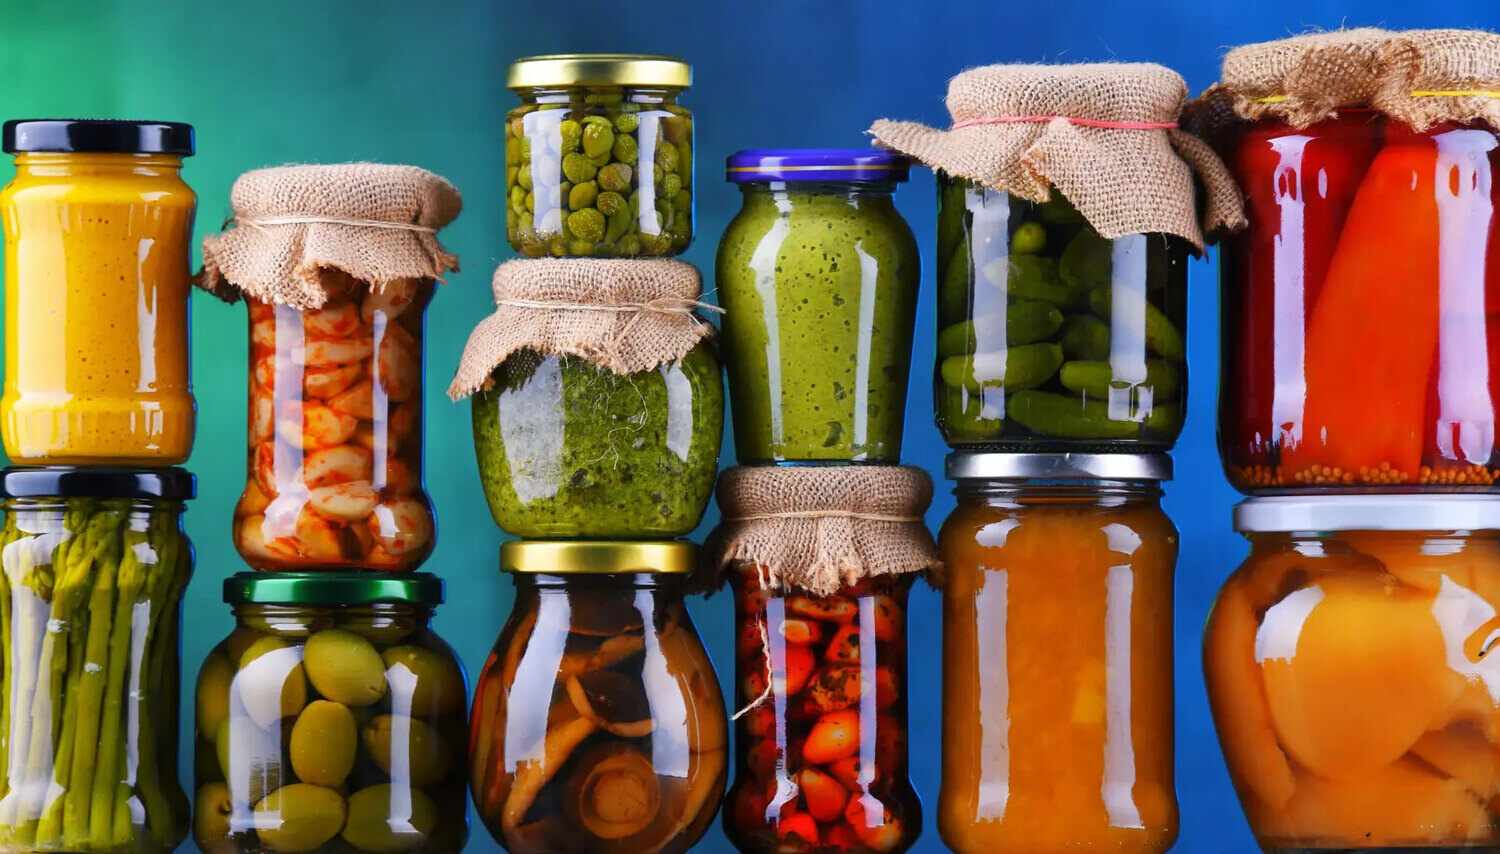
- Canning Jars: Choose jars specifically designed for canning. Mason jars with two-piece lids are commonly used for canning and are readily available. Ensure that the jars are clean and free of cracks or chips before use.
- Lids and Bands: The two-piece metal lids consist of a flat metal disk and a band that screws onto the jar. The flat disk has a sealing compound that creates an airtight seal when the band is tightened.
- Jar Lifter: A jar lifter is a specialized tool designed to safely lift hot jars in and out of boiling water. It makes the canning process easier and reduces the risk of burns.
- Canning Funnel: A canning funnel is a wide-mouthed funnel that fits perfectly into the mouth of a canning jar. It facilitates filling the jars with flour without any mess or spills.
- Measuring Tools: Accurate measurements are crucial when canning flour. Use measuring cups and spoons to ensure you add the correct amount of flour to each jar.
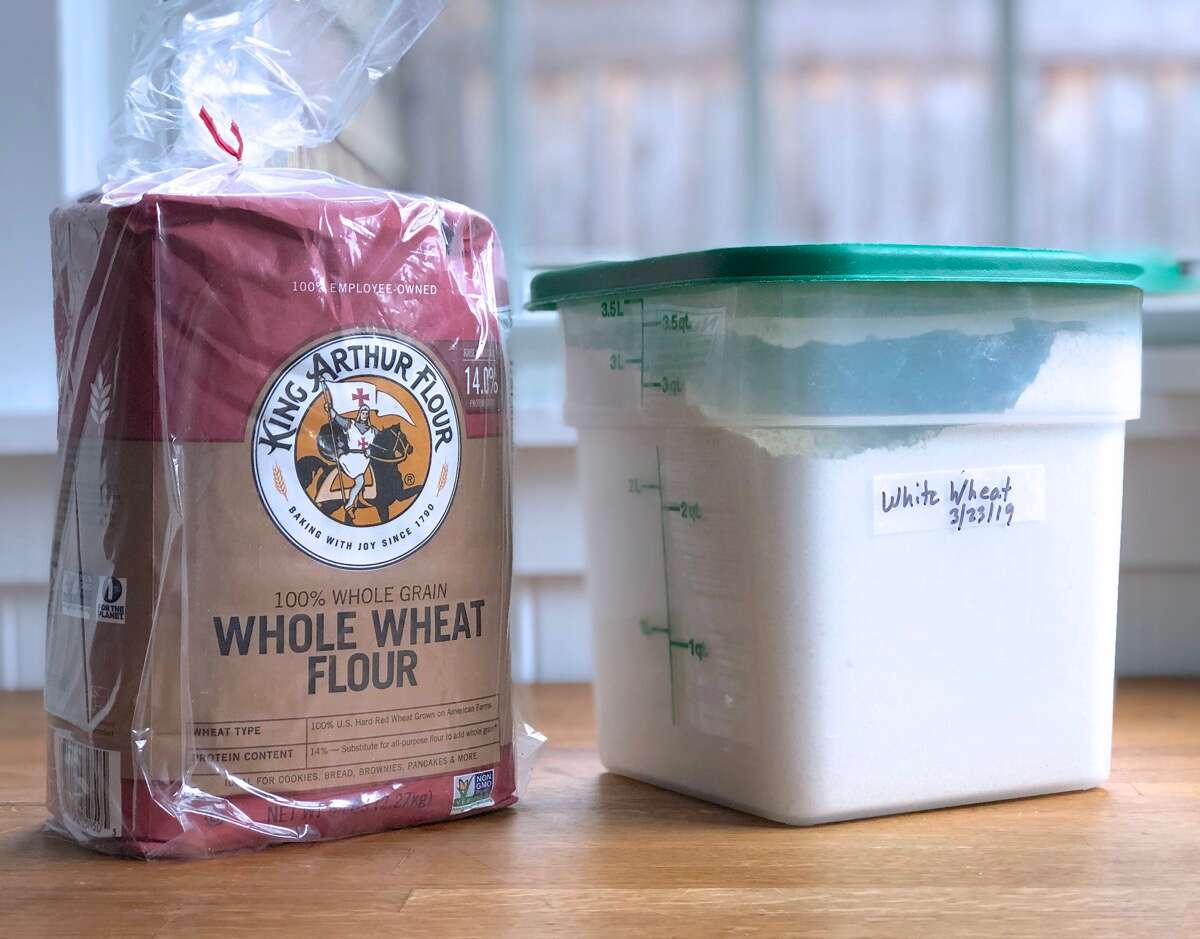
- Air-tight Storage Containers: Once you open a jar of canned flour, you’ll need containers to store any unused portion. Choose air-tight containers that will keep the flour fresh and free from moisture.
- Labels: Labeling your canned flour is essential for easy identification and organization. Use sticky labels or marker pens to mark the name of the flour and the date it was canned.
- Water Bath Canner or Pressure Canner: Depending on the processing method you choose, you’ll need either a water bath canner or a pressure canner. The water bath canner is suitable for high-acid foods, while the pressure canner is used for low-acid foods like flour.
- Other Miscellaneous Supplies: You may also find the following tools helpful: a ladle or scoop for transferring the flour, a clean cloth for wiping the jar rims, and a boiling water source.
By gathering and preparing these supplies beforehand, you’ll be well-prepared to begin the process of canning flour. Let’s move on to the step-by-step guide on how to can flour for long-term storage.
Step 1: Preparing the Jars and Lids:
Properly preparing the jars and lids is crucial to ensure the safety and longevity of your canned flour. Follow these steps to prepare the jars and lids before starting the canning process:
- Inspect the Jars and Lids: Before use, carefully inspect each jar and lid for any cracks, chips, or damage. Discard any jars or lids that are damaged, as they may affect the sealing process.
- Wash the Jars and Lids: Thoroughly clean the jars and lids with hot, soapy water to remove any dirt or debris. Rinse them well to ensure there is no soap residue left behind.
- Sterilize the Jars and Lids: Sterilization is essential to eliminate any microorganisms that may spoil your canned flour. There are several options for sterilizing the jars and lids:
- Option 1: Place the jars and lids in a large pot filled with water. Bring the water to a boil and let them simmer for 10 minutes. Turn off the heat, but leave the jars and lids in the hot water until ready to use.
- Option 2: Place the jars and lids on a baking sheet and place them in a preheated oven at 225°F (107°C) for 20 minutes. Keep them in the oven until ready to use.
- Option 3: Use a dishwasher with a sterilization cycle to clean and sanitize the jars and lids.
- Keep the Jars Hot: While preparing the flour and filling the jars, it’s important to keep the jars hot to prevent thermal shock. You can either leave them in the hot water or place them upside down on a clean kitchen towel to keep them warm.
- Prepare the Lids: In a separate pot, add water and bring it to a simmer. Place the lids in the simmering water for a few minutes to soften the sealing compound. This will ensure a better seal on the jars.
- Remove Air Bubbles: Before filling the jars with flour, use a non-metallic utensil, such as a small spatula or plastic knife, to remove any air bubbles trapped in the jars. Gently run the utensil along the inside edges of the jar to release the air bubbles.
By following these steps, you will have properly prepared jars and lids, ready for the next stage of the canning process. Now, let’s move on to Step 2: Preparing the Flour for Canning.
Step 2: Preparing the Flour for Canning:
Before filling the jars with flour, it’s important to take a few preparatory steps to ensure that the flour is ready for canning. Follow these guidelines to properly prepare the flour:
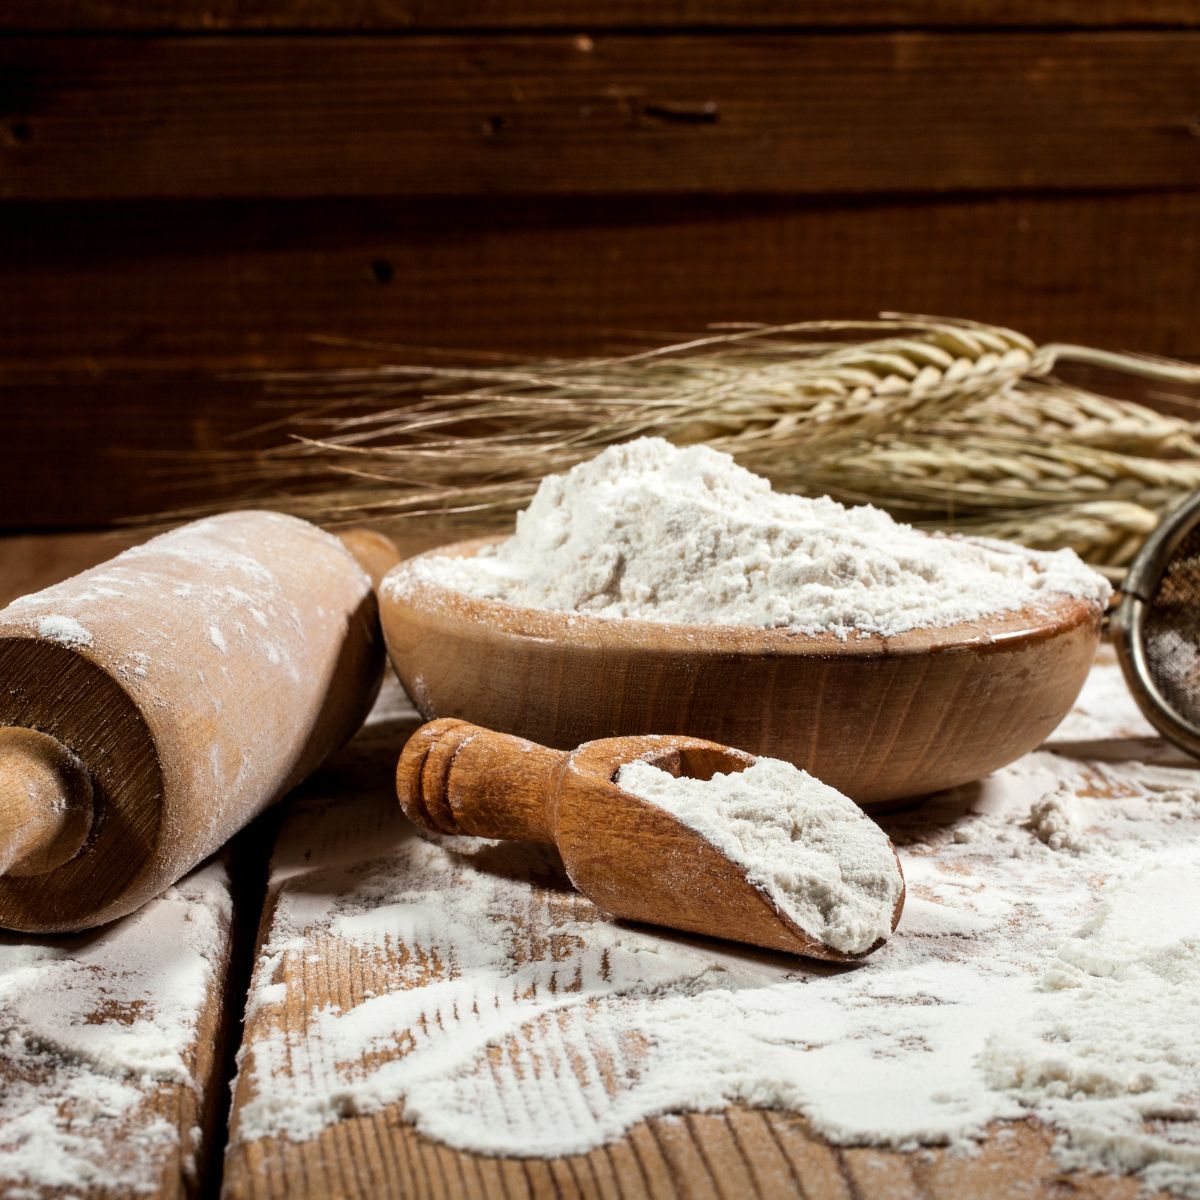
- Select High-Quality Flour: Choose fresh, high-quality flour for canning. It is recommended to use all-purpose flour, as it has a longer shelf life compared to other types of flour.
- Sift the Flour: Sifting the flour helps break up any clumps and creates a smoother texture. Use a fine-mesh sieve or a flour sifter to sift the flour into a large bowl. This step will also help remove any impurities or foreign objects that may be present in the flour.
- Measure the Flour: Accurate measurement is crucial when canning flour. Use a measuring cup or a kitchen scale to measure the desired amount of flour for each jar. This will ensure consistency and proper filling of the jars.
- Do Not Pack the Flour: When filling the jars, avoid packing the flour tightly. Simply spoon the flour into the jars, leaving a small amount of headspace (around 1 inch or 2.5 cm) at the top. Packing the flour tightly can affect the air circulation inside the jar and may lead to spoilage.
- Level the Flour: After adding the flour to each jar, use a clean, flat utensil, such as the back of a spoon, to level the flour and remove any excess. This will ensure that the flour is evenly distributed and provides a proper seal when the lids are applied.
- Keep the Flour Dry: Moisture is the enemy when it comes to storing flour. Make sure the flour is completely dry before canning. If the flour feels damp or clumpy, spread it out on a baking sheet and allow it to air dry for a few hours before proceeding.
By following these steps, you will have properly prepared the flour for canning. With the jars and lids ready, and the flour prepared, you’re now ready to move on to Step 3: Filling the Jars with Flour.
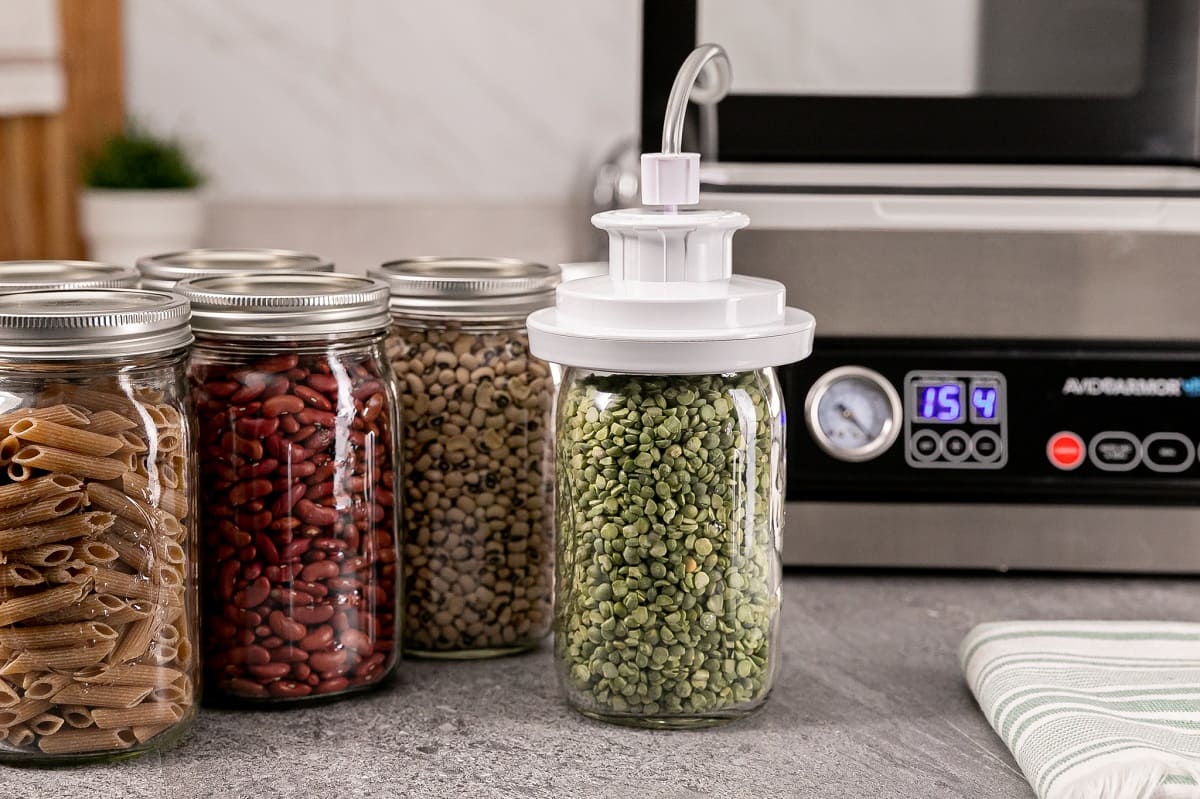
To can flour for long term storage, use a dry pack canning method. Place the flour in clean, dry canning jars and use oxygen absorbers to remove air. Seal the jars with new lids and rings, then process in a pressure canner according to the recommended time and pressure for your altitude.
Read more: How To Store Flour And Sugar Long Term
Step 3: Filling the Jars with Flour:
Filling the jars with flour is an important step in the canning process. Follow these instructions to ensure that the jars are filled properly:
- Use a Canning Funnel: Place a canning funnel on top of the jar to prevent any spillage or mess. This will help you pour the flour into the jars with ease, ensuring accurate filling.
- Spoon the Flour into the Jars: Take the prepared flour and spoon it into the jars, filling them up to the recommended headspace. It’s important not to overfill the jars, as this can affect the sealing process. Leave about 1 inch (2.5 cm) of headspace at the top of each jar.
- Tap the Jars: Gently tap the jars on a flat surface to help settle the flour and remove any air bubbles. This step ensures that the jars are evenly filled and that there are no pockets of air trapped inside.
- Level the Flour: Use a clean utensil, such as a small spatula or the back of a spoon, to level the flour in each jar. This will help to create a flat surface and ensure consistency across all the jars.
- Clean the Jar Rims: After filling each jar, use a clean, damp cloth to wipe the rims of the jars. This will remove any flour residue or debris, ensuring a clean and proper seal.
- Inspect the Filled Jars: Take a final look at the filled jars to ensure that they are filled adequately and no flour is stuck on the rim. This will help guarantee a successful sealing process and maintain the freshness of the flour.
By following these steps, you will have successfully filled the jars with flour, ensuring that they are properly filled and ready for the next stage of the canning process. Now, let’s move on to Step 4: Sealing the Jars.
Step 4: Sealing the Jars:
Sealing the jars is an important step in the canning process to ensure the long-term storage of the flour. Follow these instructions to properly seal the jars:
- Remove the Lids from the Hot Water: Carefully remove the lids from the pot of simmering water using sterilized tongs or a magnetic lid lifter. Place each lid on a clean surface, such as a kitchen towel or a paper towel.
- Apply the Lids: Take a lid and place it on top of a jar. Ensure that the sealing compound is facing down, in contact with the jar rim. Center the lid on the jar and press it firmly in place. Repeat this step for each jar.
- Secure the Bands: Take a metal band and screw it onto the jar, securing the lid in place. Be careful not to overtighten the band, as this can interfere with the sealing process. The band should be tightened just until resistance is met.
- Check for Proper Sealing: After securing the bands, gently press the center of each lid to check for a proper seal. The lid should not move or pop when pressed down. If a lid doesn’t seal properly, remove the band, replace the lid with a new one, and reseal the jar.
- Wipe the Jars: Use a clean, damp cloth to wipe any excess flour or residue from the jar exteriors. This step will help prevent any potential issues with the jars’ sealing or storage.
- Label the Jars: Once the lids are securely in place, label each jar with the name of the flour and the date of canning. This will help you keep track of the contents and ensure proper rotation of your canned flour supply.
By following these steps, you will have successfully sealed the jars, ensuring the integrity and long-term storage of your canned flour. Now, let’s move on to Step 5: Processing the Jars.
Step 5: Processing the Jars:
Processing the jars is a critical step in canning flour to ensure their safety and longevity. Follow these instructions to properly process the jars:
- Choose the Processing Method: There are two common methods for processing the jars: water bath canning and pressure canning. The method you choose depends on the acidity level of the flour. As flour is considered a low-acid food, pressure canning is typically recommended.
- Water Bath Canning: If you choose to use the water bath canning method, fill a large pot with enough water to cover the jars by at least one inch. Place the jars in the pot, ensuring they are fully submerged. Bring the water to a rolling boil and process the jars according to the recommended processing time.
- Pressure Canning: For pressure canning, follow the manufacturer’s instructions of your canner to determine the appropriate pressure and processing time. Place the filled jars on the canner rack and lock the canner lid securely. Process the jars at the recommended pressure and time for your altitude.
- Monitor the Processing Time: It is crucial to monitor the processing time accurately. Use a timer to ensure that the jars are processed for the correct duration. Processing for too short a time may not effectively kill harmful microorganisms, while processing for too long may result in overcooked flour.
- Allow the Jars to Cool: Once the processing time is complete, turn off the heat and carefully remove the jars from the canner using a jar lifter. Place the jars on a clean towel or a wire rack to cool completely. Do not disturb or tighten the bands during the cooling process.
- Check for Sealed Jars: After the jars have cooled, check for proper sealing. Gently press the center of each lid to ensure it is concave and does not move or make a popping sound. Sealed jars will have no give when pressed. Any unsealed jars should be refrigerated and used promptly.
- Label the Sealed Jars: Once the jars have cooled and been confirmed as sealed, label them with the name of the flour and the date of canning. This will help you keep track of the contents and ensure proper rotation.
By following these steps, you will have successfully processed the jars, ensuring the safety and longevity of your canned flour. Now, let’s move on to Step 6: Storing the Canned Flour.
Step 6: Storing the Canned Flour:
Proper storage is crucial to maintain the quality and longevity of your canned flour. Follow these guidelines to ensure that your canned flour stays fresh and ready to use:
- Check the Seals: Before storing the jars, double-check that the lids are securely sealed. Press the center of each lid to ensure it is concave and does not move or make a popping sound. Any unsealed jars should be refrigerated and used promptly.
- Remove the Bands: Once the jars are confirmed to be properly sealed, it is recommended to remove the metal bands. Removing the bands allows you to easily identify any jars that lose their seal, as the lid will no longer be held in place by the band.
- Wipe the Jars: Use a clean, damp cloth to wipe any residue or spills from the outside of the jars. This will help prevent any potential issues with mold or pests and keep your storage area clean and organized.
- Choose an Ideal Storage Location: Store the canned flour in a cool, dry, and dark place. Exposure to heat, moisture, and light can deteriorate the quality of the flour. A pantry or a dedicated storage area is ideal for long-term storage.
- Avoid Temperature Fluctuations: Fluctuating temperatures can lead to condensation inside the jars, potentially spoiling the flour. It is important to choose a storage location that maintains a consistent temperature to prevent any damage to the canned flour.
- Rotate the Stock: To ensure freshness, practice proper stock rotation. Place the newly canned flour at the back of the storage area and use the older jars first. This will ensure that you always have a fresh supply of canned flour.
- Monitor for Spoilage: Regularly inspect your canned flour for any signs of spoilage, such as mold growth, off smells, or unusual discoloration. If you encounter any of these signs, discard the affected jar to prevent contamination of the remaining flour.
- Use within Recommended Timeframe: While properly canned flour can last for a long time, it is recommended to use it within one to two years for optimal freshness and quality. Over time, the flour may lose some of its nutritional value and flavor.
By following these storage guidelines, you can ensure that your canned flour remains in excellent condition and ready to use whenever needed. Proper storage practices will help you enjoy the benefits of your canned flour for a prolonged period. With these steps completed, you have successfully canned and stored your flour for long-term use!
Remember, always use your best judgment and follow recommended guidelines for canning and food safety. Enjoy the convenience of having a fresh supply of flour at your fingertips for all your culinary creations!
Thank you for reading this guide. Happy canning and happy cooking!
Read more: How To Store Bread Flour Long Term
Conclusion:
Canning flour for long-term storage is a practical and effective way to ensure you have a reliable supply of flour that stays fresh and ready to use for an extended period. By following the step-by-step process outlined in this guide, you can confidently preserve your flour and enjoy the benefits of long-lasting storage.
We explored the many benefits of canning flour, including the extended shelf life, protection against pests, convenient storage, and preservation of quality. Canning flour allows you to buy in bulk, save money, and be prepared for emergencies or situations where access to fresh flour may be limited.
Throughout the canning process, we discussed the supplies needed, the importance of properly preparing the jars and lids, and how to fill the jars with flour. We covered the crucial steps of sealing the jars, processing them using either water bath canning or pressure canning techniques, and provided tips for storing the canned flour to maintain its freshness.
Remember, always inspect the jars and lids, sterilize them properly, sift the flour, and measure accurately to ensure the best results. Maintaining a clean and controlled environment, using reputable canning methods, and monitoring the jars for proper sealing are essential for successful long-term storage.
By canning flour, you not only gain peace of mind knowing that you have a reliable food supply, but you also save money by taking advantage of bulk purchases and reducing waste. Just ensure you rotate your stock and use the older jars first to maintain freshness.
Now armed with the knowledge of canning flour, you can confidently stock your pantry with this versatile ingredient. Whether you are an avid baker, a prepper, or simply someone who wants to be self-sufficient, canning flour opens up a world of possibilities when it comes to your culinary endeavors.
So go ahead, immerse yourself in the art of canning, and enjoy the convenience and satisfaction of having your carefully preserved flour ready whenever you need it. Happy canning and happy cooking!
Now that you've mastered canning flour for safekeeping, why not broaden your horizons with more food storage strategies? Dive into our guide on the best long term food storage for 2024. Whether you're prepping for unforeseen circumstances or simply aiming to reduce waste, this article offers invaluable insights. Extend your food's shelf life and ensure your pantry is well-stocked year-round.
Frequently Asked Questions about How To Can Flour For Long Term Storage
Was this page helpful?
At Storables.com, we guarantee accurate and reliable information. Our content, validated by Expert Board Contributors, is crafted following stringent Editorial Policies. We're committed to providing you with well-researched, expert-backed insights for all your informational needs.


0 thoughts on “How To Can Flour For Long Term Storage”