Articles
How To Store Flour Long Term In Buckets
Modified: August 27, 2024
Learn how to store flour long term in buckets with our informative articles. Find tips and tricks to keep your flour fresh and safe.
(Many of the links in this article redirect to a specific reviewed product. Your purchase of these products through affiliate links helps to generate commission for Storables.com, at no extra cost. Learn more)
Introduction
Storing flour long term can be a wise decision, whether you are a frequent baker or simply want to have a backup supply for emergencies. Flour is a staple ingredient in many recipes, and having a stockpile of it ensures that you always have the necessary ingredient on hand.
In this article, we will guide you through the process of storing flour long term in buckets. We will discuss the reasons for storing flour, the importance of choosing the right containers, how to properly prepare the flour for storage, steps for storing it in buckets, and tips for maintaining its quality over time.
When it comes to storing flour long term, it is essential to protect it from moisture, pests, and oxygen. By taking the necessary precautions and following the proper storage techniques, you can ensure the longevity of your flour supply and keep it fresh for an extended period.
So, if you are ready to learn how to store flour in buckets and have a reliable source of this essential ingredient whenever you need it, let’s dive into the details.
Key Takeaways:
- Storing flour long term in buckets offers benefits such as emergency preparedness, cost savings, and convenience. Choosing the right containers, preparing the flour properly, and sealing the buckets tightly are crucial for maintaining its quality.
- To effectively store and use flour long term, it’s important to check for spoilage, maintain proper seals, and store in the right conditions. Experimenting with new recipes and adapting to the flour’s shelf life can help maximize its usability.
Read more: How To Store Rice Long-Term In Buckets
Reasons for Storing Flour Long Term
There are several compelling reasons why you may want to consider storing flour long term. Let’s explore some of these reasons:
- Emergency Preparedness: One of the primary motivations for storing flour long term is to be prepared for emergencies. Disruptions in the food supply chain, natural disasters, or unforeseen circumstances can occur at any time. Having a reliable source of flour can help ensure that you and your family have access to this essential ingredient even in challenging situations.
- Cost Savings: Buying flour in bulk can often be more cost-effective compared to purchasing smaller quantities. By storing flour long term, you can take advantage of bulk purchasing opportunities and potentially save money in the long run.
- Convenience: Having a stockpile of flour means you don’t have to run to the store every time you need it. It offers convenience and saves you time and effort in the long term.
- Sustainability: Storing flour long term allows you to reduce food waste. Rather than buying small packages of flour that may go unused and eventually expire, you can buy larger quantities and store them properly to ensure they remain usable for an extended period.
- Self-Sufficiency: For those who enjoy baking or cooking from scratch, having a long-term supply of flour can contribute to a sense of self-sufficiency. It allows you to rely less on external sources and gives you the freedom to create meals and baked goods whenever you desire.
By understanding the reasons for storing flour long term, you can see the numerous benefits it offers. Whether it’s for emergency preparedness, saving money, convenience, sustainability, or self-sufficiency, having a stockpile of flour can be a practical and advantageous choice.
Choosing the Right Containers
When it comes to storing flour long term, selecting the appropriate containers is crucial. The right containers will help protect the flour from moisture, pests, and oxygen, ensuring its freshness and quality over time. Here are some factors to consider when choosing containers for storing flour:
- Airtightness: The containers you choose should be airtight to prevent moisture and air from entering. Look for containers with a secure and tight-sealing lid to maintain the freshness of the flour.
- Durability: Opt for containers that are made of sturdy and durable materials, such as food-grade plastics or stainless steel. This will help ensure that the containers can withstand the test of time and protect the flour effectively.
- Size: Consider the amount of flour you plan to store and choose containers that can accommodate the quantity comfortably. It is better to have a few larger containers than several small ones, as it will be easier to manage and maintain the integrity of the stored flour.
- Stackability: If you have limited storage space, look for containers that are stackable. This feature will allow you to maximize space efficiency and keep your storage area organized.
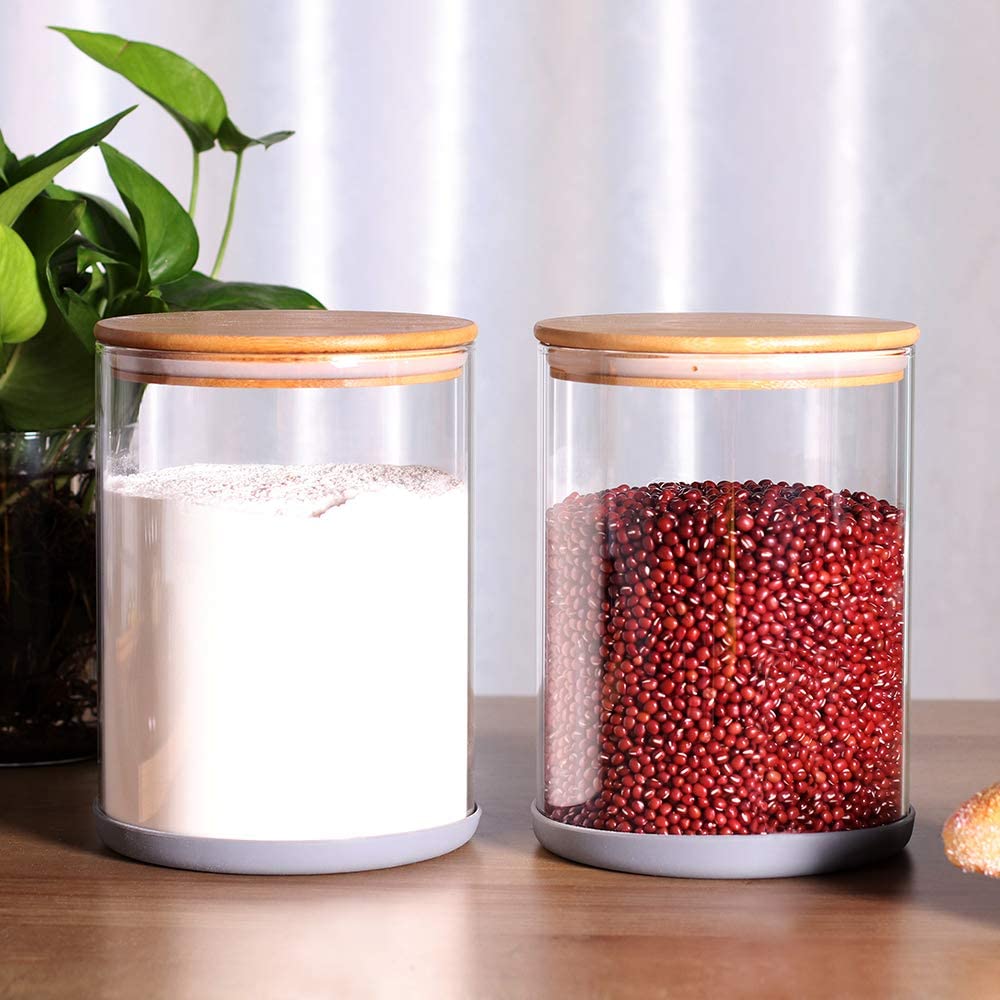
- Transparency: Opt for containers that are transparent or have a clear window to allow for easy visibility of the flour inside. This will help you quickly identify the type and quantity of flour without needing to open the container.
- Pest Resistance: Ensure that the containers you choose are resistant to pests, such as rodents and insects. Avoid containers with openings or gaps that may allow pests to infiltrate and contaminate the flour.
It is important to note that metal containers can also be used for storing flour, but they should be lined with food-grade plastic bags or Mylar bags to create a barrier between the flour and the metal. This helps prevent any potential interaction between the flour and the metal.
By considering these factors when choosing containers for storing flour, you can ensure that the flour remains well-protected and maintains its quality throughout its long-term storage.
Preparing the Flour for Storage
Before storing flour long term, it is essential to properly prepare it to ensure its longevity and quality. Taking a few extra steps can make a significant difference in maintaining the freshness of the flour over an extended period. Here are the key steps for preparing flour for storage:
- Sift the flour: Sifting the flour helps remove any lumps and ensures that it is evenly distributed. Use a fine-mesh sieve or a flour sifter to sift the flour into a clean, dry bowl or container.
- Eliminate moisture: Moisture is the enemy when it comes to storing flour long term. Ensure that the flour is completely dry before storage. If you live in a humid environment, consider placing the flour in a low-temperature oven for a short period to remove any excess moisture. Be careful not to overheat the flour, as it can affect its quality.
- Optional: Freezing or heating: For added protection against pests, you can freeze the flour for a few days or heat it in the oven at a low temperature (around 140°F/60°C) for 30 minutes. These methods can help kill any potential pests or eggs that may be present in the flour.
- Cool the flour: Allow the flour to cool completely before storing it. This prevents condensation from forming inside the storage container, which can lead to moisture and spoilage.
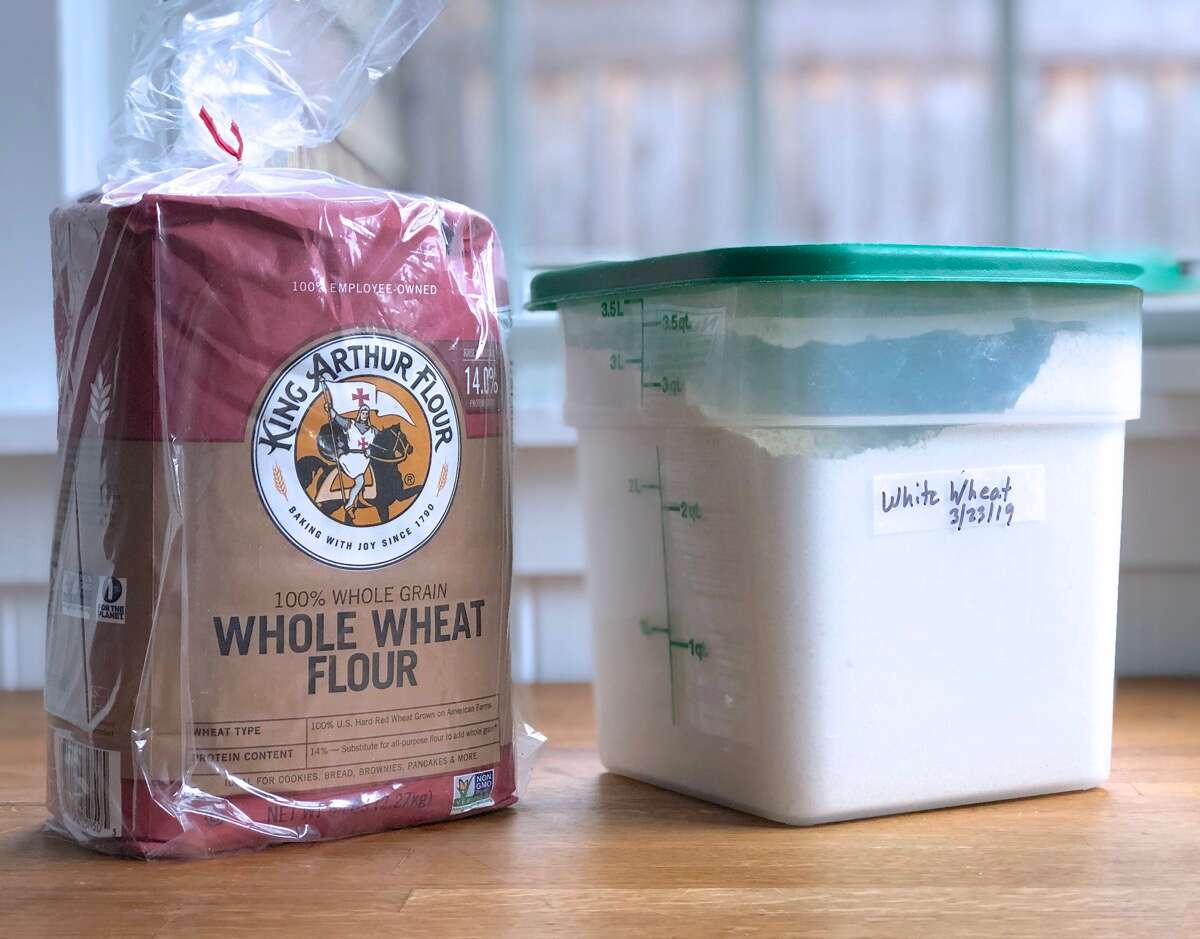
- Label the containers: Use labels or markers to clearly indicate the type of flour and the date of storage on the containers. This will help you identify and use the oldest flour first, ensuring that none of it goes to waste.
By following these steps, you can prepare the flour for long-term storage and minimize the risk of spoilage or degradation. Taking the time to properly prepare the flour will help preserve its quality and ensure that it remains fresh and usable for an extended period.
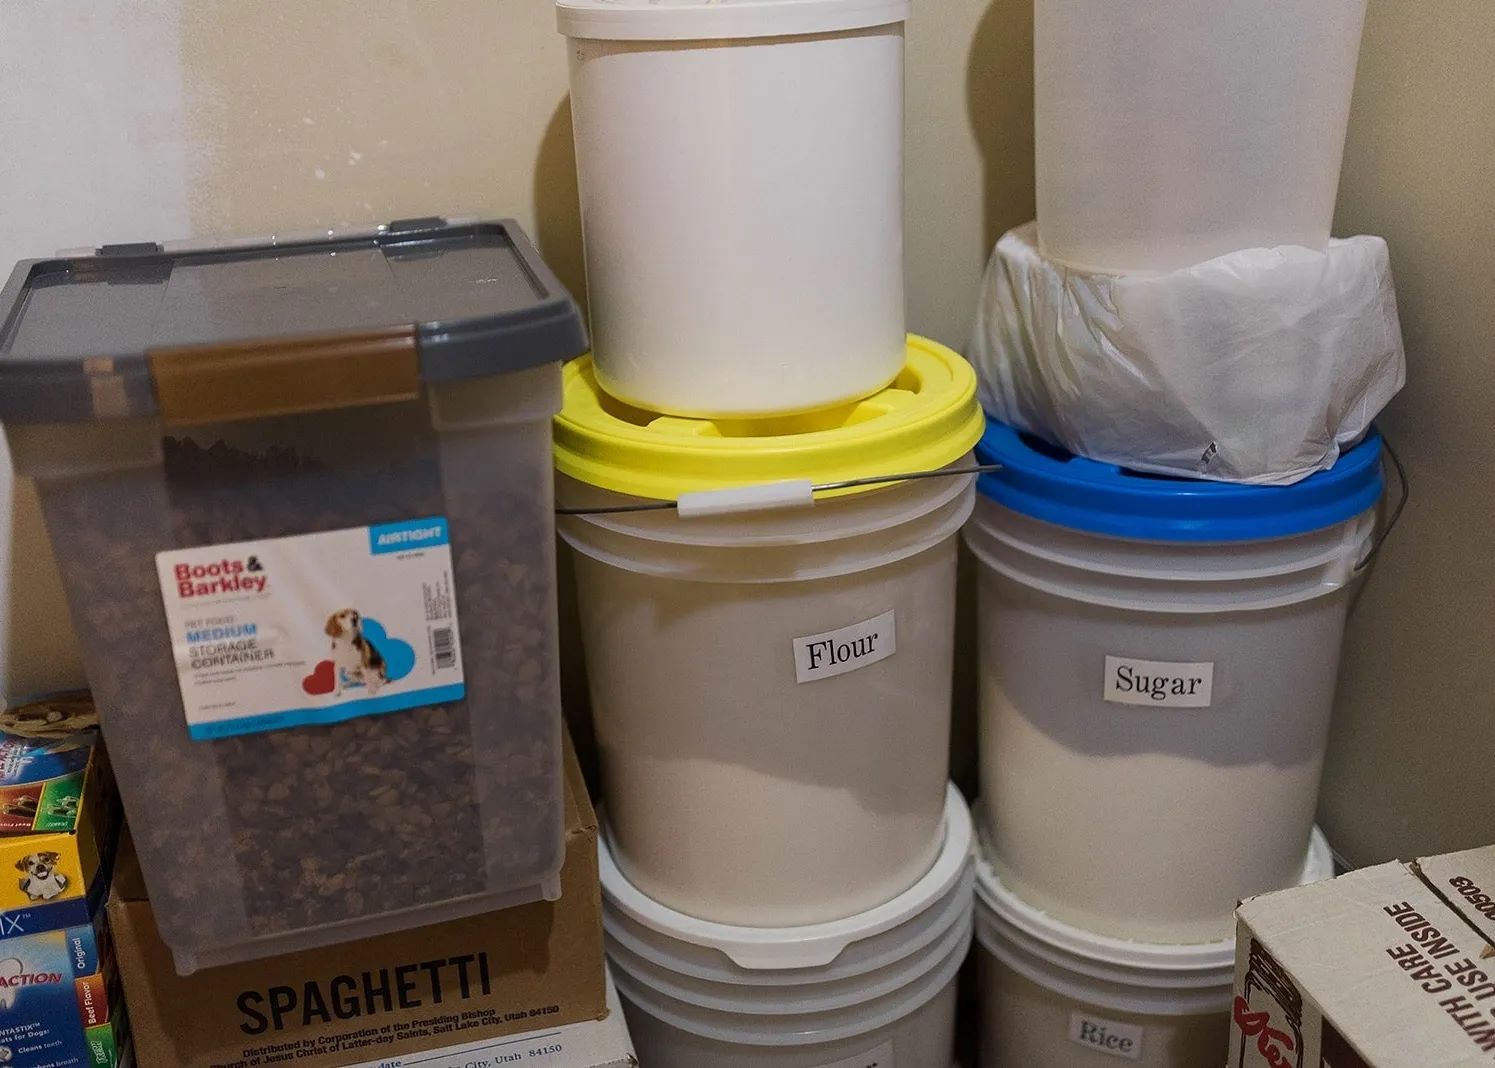
Steps for Storing Flour in Buckets
Storing flour in buckets is an effective method to keep it fresh and protected for long-term storage. Follow these steps to store your flour properly:
- Choose food-grade buckets: Select food-grade plastic buckets that are specifically designed for storing food. These buckets are made from safe materials and are free from any potential contaminants.
- Clean the buckets: Thoroughly clean the buckets before use. Wash them with warm, soapy water, and rinse them well to remove any residues. Ensure that the buckets are completely dry before proceeding.
- Add a liner: Consider using food-grade plastic bags or Mylar bags as liners inside the buckets. These additional layers will provide an extra barrier against moisture and pests.
- Fill the buckets: Fill the buckets with the prepared and cooled flour. Use a funnel or scoop to ensure neat and even distribution of the flour. Leave some headspace at the top to allow for proper sealing.
- Remove air: Before sealing the buckets, it is important to remove as much air as possible. This can be done by using a vacuum sealer or by pressing down on the flour to release any trapped air. Removing air helps prevent the flour from becoming stale and extends its shelf life.
- Seal the buckets: Place the lid tightly on the bucket and ensure a secure and airtight seal. Consider using rubber mallets or mallet lids to ensure a tight fit and to prevent any air or moisture from entering the buckets.
- Label the buckets: Use waterproof labels or permanent markers to label the buckets with the type of flour and the date of storage. This will help you easily identify and access the flour when needed.
By following these steps, you can properly store your flour in buckets, protecting it from moisture, pests, and air. This method ensures that the flour remains fresh and usable for an extended period of time, allowing you to have a reliable supply of flour whenever you need it.
Store flour long term in buckets by using food-grade, airtight containers with tight-fitting lids. Add oxygen absorbers to prevent spoilage and store in a cool, dark place to maintain freshness.
Read more: How To Store Flour And Sugar Long Term
Sealing the Buckets Properly
Properly sealing the buckets is crucial to ensure the long-term freshness and quality of the stored flour. Taking the necessary steps to create a tight and secure seal will prevent the entry of moisture, air, and pests. Here are some tips to help you seal the buckets properly:
- Inspect the lid: Before sealing the buckets, carefully inspect the lid to ensure it is in good condition. Look for any signs of cracks, damage, or improper fit. If the lid is damaged, replace it with a new one to ensure a proper seal.
- Use rubber gaskets or seals: Consider using rubber gaskets or seals to enhance the sealing capability of the buckets. These gaskets create an additional barrier against moisture and air and help maintain the freshness of the stored flour.
- Secure the lid tightly: When placing the lid on the bucket, make sure it is aligned properly and pushed down firmly. Use a rubber mallet or a mallet lid to secure the lid tightly. This will ensure a snug fit and prevent any gaps that may allow moisture or pests to enter.
- Apply silicone or caulking: For an extra layer of protection against moisture and pests, you can seal the edges of the lid with silicone or caulking. This creates a watertight and airtight seal, further safeguarding the stored flour.
- Perform a seal test: After sealing the bucket, perform a seal test to ensure its effectiveness. Gently press on the lid to check for any movement or give. If the lid remains firmly in place, it indicates a properly sealed container. If there is any movement, reseal the bucket or consider using a new lid.
- Store the buckets properly: Once sealed, store the buckets in a cool, dry, and dark location. Avoid areas that are exposed to direct sunlight or fluctuating temperatures, as these conditions can compromise the seal and quality of the stored flour.
By following these steps and taking the necessary precautions, you can ensure that your buckets are sealed properly to maintain the freshness and quality of the stored flour. A tight seal will significantly extend the shelf life of the flour and provide you with a reliable source of this essential ingredient for an extended period.
Storing the Buckets in the Right Conditions
Storing the buckets in the proper conditions is essential to maintain the freshness and quality of the flour over an extended period. By ensuring the right environment, you can prevent spoilage, preserve the flavor, and extend the shelf life of the stored flour. Here are some key factors to consider when storing the buckets:
- Temperature: It is important to store the buckets in a cool environment. Ideally, the temperature should be between 50°F (10°C) and 70°F (21°C). Fluctuations in temperature can affect the quality of the flour, so it is best to avoid areas that experience extreme heat or cold.
- Humidity: Moisture is the enemy when it comes to storing flour. Ensure that the storage area has low humidity levels, ideally below 50%. High humidity can cause the flour to clump, spoil, or become a breeding ground for mold and pests.
- Avoid sunlight: Protect the buckets from direct sunlight. UV rays can degrade the quality of the stored flour and affect its flavor. Store the buckets in a dark area or use opaque containers to block out the light.
- Avoid strong odors: Flour easily absorbs odors, so it is crucial to keep the buckets away from strong-smelling items, such as cleaning products, chemicals, or spices. These odors can transfer to the flour and affect its taste and quality.
- Store off the ground: Elevate the buckets from the floor to prevent moisture absorption. Use pallets or shelves to keep them off the ground. This will help maintain a dry environment and reduce the risk of pests reaching the buckets.
- Check the storage area regularly: Regularly inspect the storage area for any signs of moisture, pests, or damage. Ensure that the buckets remain sealed and intact. If any issues are identified, address them promptly to prevent further damage to the stored flour.
By storing the buckets in the appropriate conditions, you can maximize the shelf life and quality of the stored flour. A cool, dry, and dark environment, free from strong odors and pests, will help preserve the freshness of the flour and ensure that it remains usable for an extended period.
Tips for Maintaining the Quality of Stored Flour
To ensure the long-term quality and freshness of stored flour, it is important to follow proper storage techniques and take necessary precautions. Here are some helpful tips to help you maintain the quality of your stored flour:
- Rotate your stock: Implement a “first-in, first-out” system when using your stored flour. Use the oldest flour first and replenish your stock with fresh flour. This helps prevent the flour from sitting unused for extended periods and ensures that you always have a fresh supply.
- Check for signs of spoilage: Regularly inspect the stored flour for any signs of spoilage, such as off odors, discoloration, or the presence of mold or pests. If you notice any of these signs, discard the affected portion and thoroughly clean the storage containers before refilling them.
- Avoid contamination: Keep your flour storage area clean and free from potential sources of contamination. Store it away from cleaning products, chemicals, and strong-smelling items that can transfer odors or contaminants to the flour.
- Maintain proper seals: Periodically check the seals on your storage containers to ensure they are still tight and secure. If you notice any compromised seals, reseal the containers or consider using new ones to maintain optimal freshness.
- Avoid moisture: Moisture is one of the biggest threats to stored flour. Keep the storage area dry and avoid exposing the flour to moisture. If any moisture enters the containers, discard the affected portion and dry the containers thoroughly before refilling them.
- Protect against pests: Take measures to protect your stored flour from pests such as insects or rodents. Consider placing bay leaves or sachets of dried lavender, cloves, or cinnamon inside the containers to repel pests. Alternatively, you can use oxygen absorbers or desiccant packets to deter pests and help maintain the quality of the flour.
- Store in small quantities: It is generally recommended to store flour in smaller quantities rather than large bulk containers. By doing this, you minimize the exposure of unused flour to air and moisture each time you access it, ensuring that the remaining flour remains fresh and uncontaminated.
By implementing these tips, you can effectively maintain the quality and freshness of your stored flour. Regular inspections, proper sealing, protection against moisture and pests, and sensible stocking practices will help you enjoy the full potential of your stored flour for an extended period of time.
Checking and Using Stored Flour Effectively
When it comes to using the stored flour, it’s important to periodically check its condition and employ effective strategies to ensure its optimal usability. Here are some tips for checking and using your stored flour effectively:
- Perform visual and odor checks: Before using the stored flour, visually inspect it for any signs of spoilage, such as discoloration, clumps, or mold. Additionally, check for any off odors that may indicate rancidity or contamination.
- Sift the flour: Even if the stored flour appears to be in good condition, it’s always a good practice to sift it before use. Sifting helps remove any lumps, ensure a smooth texture, and eliminate any potential contaminants that may have entered the container over time.
- Consider freshness tests: If you are unsure about the quality of the stored flour, you can perform a freshness test. This involves taking a small amount of the flour and mixing it with water. If it has a sour or off smell, or if it develops a slimy or moldy texture, it is best to discard it.
- Adapt recipes if needed: Over time, stored flour may lose some of its potency. If you find that your baked goods aren’t rising as expected, consider adding a bit more leavening agent, such as baking powder or yeast, to achieve the desired results.
- Use within the recommended storage period: Different types of flour have varying storage recommendations. It’s important to be aware of the shelf life of the specific type of flour you have stored, and use it within that timeframe for optimal freshness and quality.
- Label and organize your stored flour: Properly label each container of stored flour with the type and date of storage. This helps you keep track of the age of the flour and ensures that you use the oldest stock first to prevent waste.
- Experiment with new recipes: Don’t limit your use of stored flour to conventional recipes. Get creative and experiment with new recipes or variations of your favorite dishes. This not only helps you utilize your stored flour effectively but also adds a fun and innovative touch to your cooking or baking endeavors.
By following these tips, you can confidently check the condition of your stored flour and utilize it effectively in your cooking and baking. Regular inspections, proper sifting, awareness of shelf life, and adaptation of recipes will ensure that you make the most out of your stored flour and continue to enjoy delicious results.
Read more: How To Store Bread Flour Long Term
Conclusion
Storing flour long term in buckets is a practical and beneficial way to ensure a reliable supply of this essential ingredient. By following the proper storage techniques and taking necessary precautions, you can maintain the freshness and quality of the flour over an extended period.
In this article, we explored the reasons for storing flour long term, including emergency preparedness, cost savings, convenience, sustainability, and self-sufficiency. We discussed the importance of choosing the right containers, such as food-grade buckets, and provided tips for properly preparing the flour before storage.
We also provided a step-by-step guide for storing flour in buckets, emphasizing the significance of sealing the buckets tightly and storing them in the right conditions. Furthermore, we shared tips for maintaining the quality of stored flour, including rotating the stock, checking for spoilage, and protecting against moisture and pests.
Lastly, we discussed how to effectively check and utilize the stored flour, including performing visual and freshness tests, sifting the flour, and adapting recipes if needed. We also encouraged experimenting with new recipes to make the most out of your stored flour and add variety to your culinary creations.
By following these guidelines and being diligent in maintaining the quality of your stored flour, you can have a reliable and fresh supply of this vital ingredient for all your cooking and baking needs. Whether you’re preparing for emergencies, saving money, or simply seeking convenience, storing flour long term in buckets is a wise decision that will ensure a constant and high-quality source of this versatile and essential pantry staple.
Frequently Asked Questions about How To Store Flour Long Term In Buckets
Was this page helpful?
At Storables.com, we guarantee accurate and reliable information. Our content, validated by Expert Board Contributors, is crafted following stringent Editorial Policies. We're committed to providing you with well-researched, expert-backed insights for all your informational needs.


0 thoughts on “How To Store Flour Long Term In Buckets”