
Articles
How To Clean Air Cooler
Modified: December 6, 2023
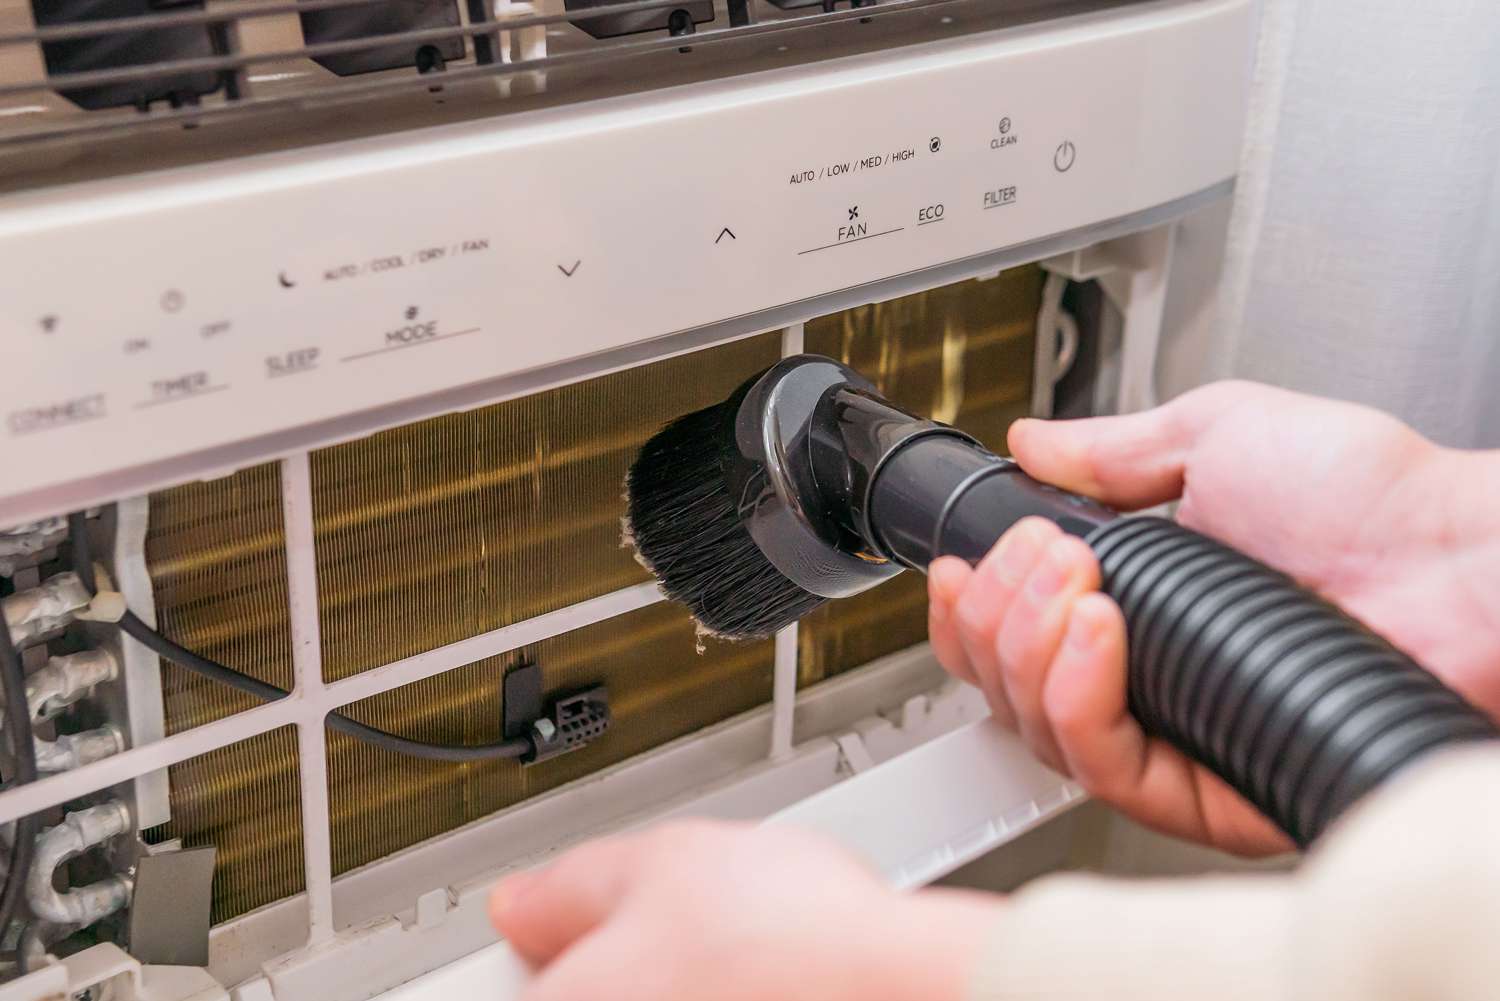
Looking for articles on how to clean your air cooler? Discover effective cleaning methods and maintenance tips to keep your air cooler running efficiently.
(Many of the links in this article redirect to a specific reviewed product. Your purchase of these products through affiliate links helps to generate commission for Storables.com, at no extra cost. Learn more)
Introduction
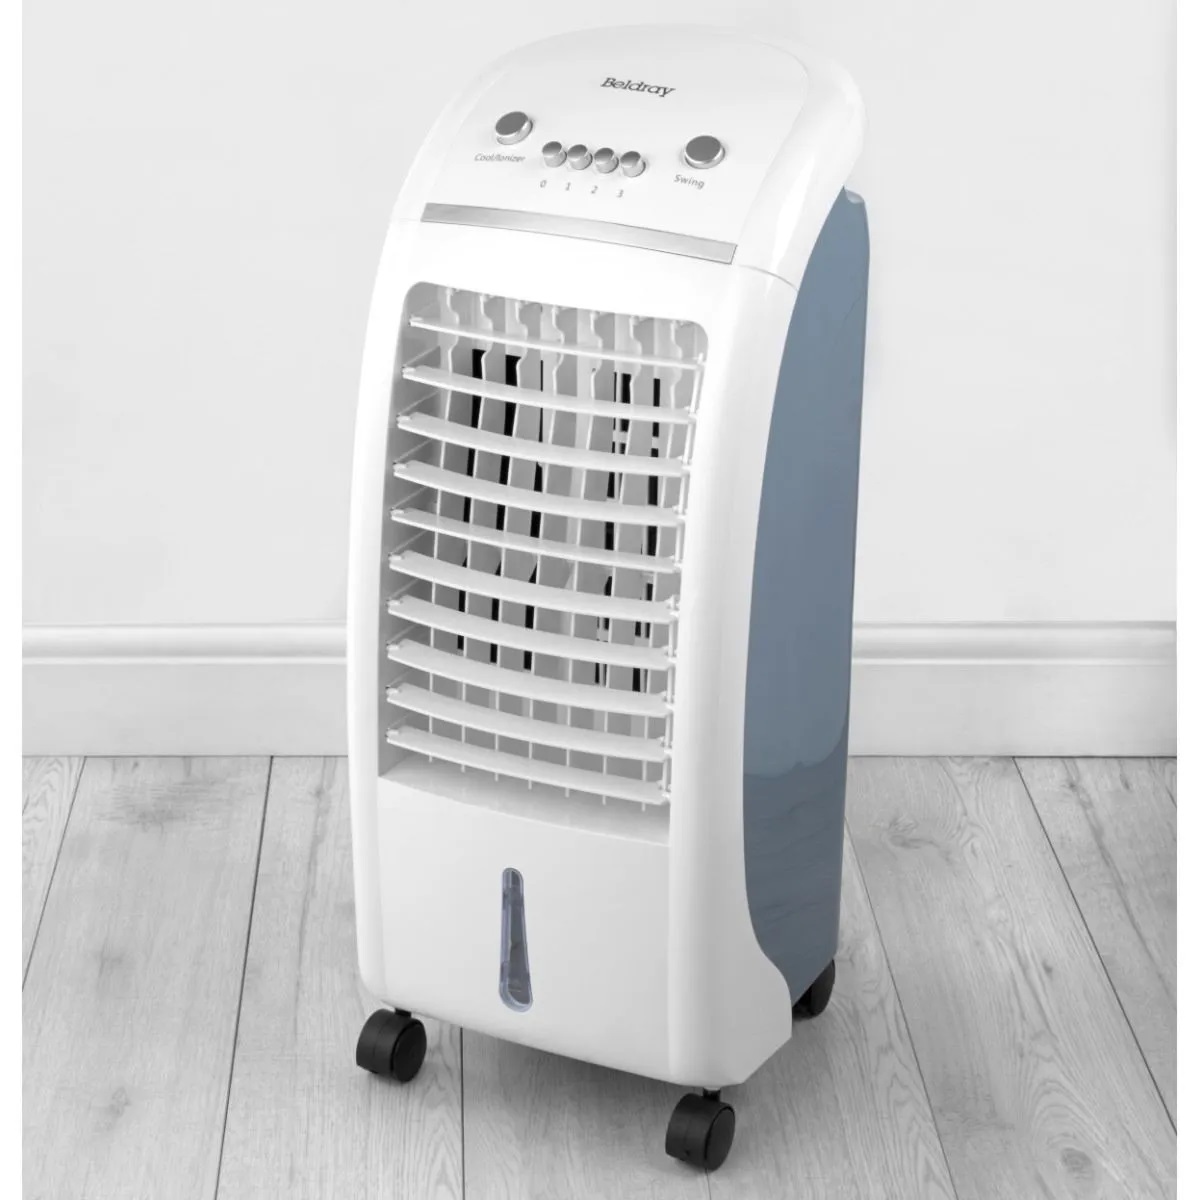
Welcome to our comprehensive guide on how to clean an air cooler. Air coolers are a fantastic way to stay cool during hot summer months, but like any appliance, they require regular maintenance to ensure optimal performance. Cleaning your air cooler not only prolongs its lifespan but also ensures that it continues to provide you with fresh and clean air.
Over time, dust, pollen, and other particles can accumulate in the air cooler, reducing its efficiency and negatively impacting the quality of the air it circulates. By following the steps outlined in this guide, you’ll be able to effectively clean your air cooler, ensuring that you’re breathing in clean and cool air all summer long.
Before we delve into the cleaning process, it’s important to note that safety should always be a priority. Make sure to unplug the air cooler before cleaning and handle all components with care to avoid any injuries. Now, let’s get started on the step-by-step process of cleaning your air cooler.
Key Takeaways:
- Regularly cleaning your air cooler is crucial for maintaining optimal performance and prolonging its lifespan. Follow the step-by-step guide to ensure clean, fresh air all summer long.
- Gather the necessary supplies, turn off and unplug the air cooler, and follow the detailed steps to clean the filter, water tank, fan blades, and exterior. Reassemble and enjoy cool, fresh air.
Read more: How To Clean Air Cooler Honeycomb
Step 1: Gather necessary supplies
Before you embark on cleaning your air cooler, it’s important to gather all the necessary supplies. Having everything ready will make the process more efficient and ensure that you have everything you need on hand. Here are the supplies you’ll need:
- Clean, soft cloth or sponge: This will be used to wipe down the exterior of the air cooler.
- Mild detergent or cleaning solution: You’ll need this to clean the water tank and filter of the air cooler. Make sure to use a cleaning solution that is safe to use with plastic.
- Old toothbrush or soft-bristled brush: This will come in handy for cleaning hard-to-reach areas and removing stubborn dirt or dust particles.
- Vinegar or lemon juice: These natural cleaning agents can be used to remove mineral deposits or scale buildup in the water tank.
- Warm water: This will be used to rinse and clean various components of the air cooler.
Once you have gathered all the necessary supplies, you’re ready to move on to the next step of the cleaning process.
Step 2: Turn off and unplug the air cooler
Before you begin cleaning your air cooler, it’s crucial to turn off and unplug the appliance. This step is essential to ensure your safety while handling the unit and to prevent any potential electrical hazards.
Locate the power switch or button on your air cooler and switch it off. Once the unit is powered off, unplug it from the electrical outlet. This will ensure that there is no power running to the air cooler and minimize any risk of electrical shock.
Allow the air cooler to cool down if it has been recently in use. It’s important to work with a cool unit to avoid any burns or injuries during the cleaning process.
By turning off and unplugging the air cooler, you can have peace of mind knowing that you can safely clean all its components without any electrical dangers. Now, let’s move on to the next step and start disassembling the air cooler for thorough cleaning.
Step 3: Remove the filter and clean it
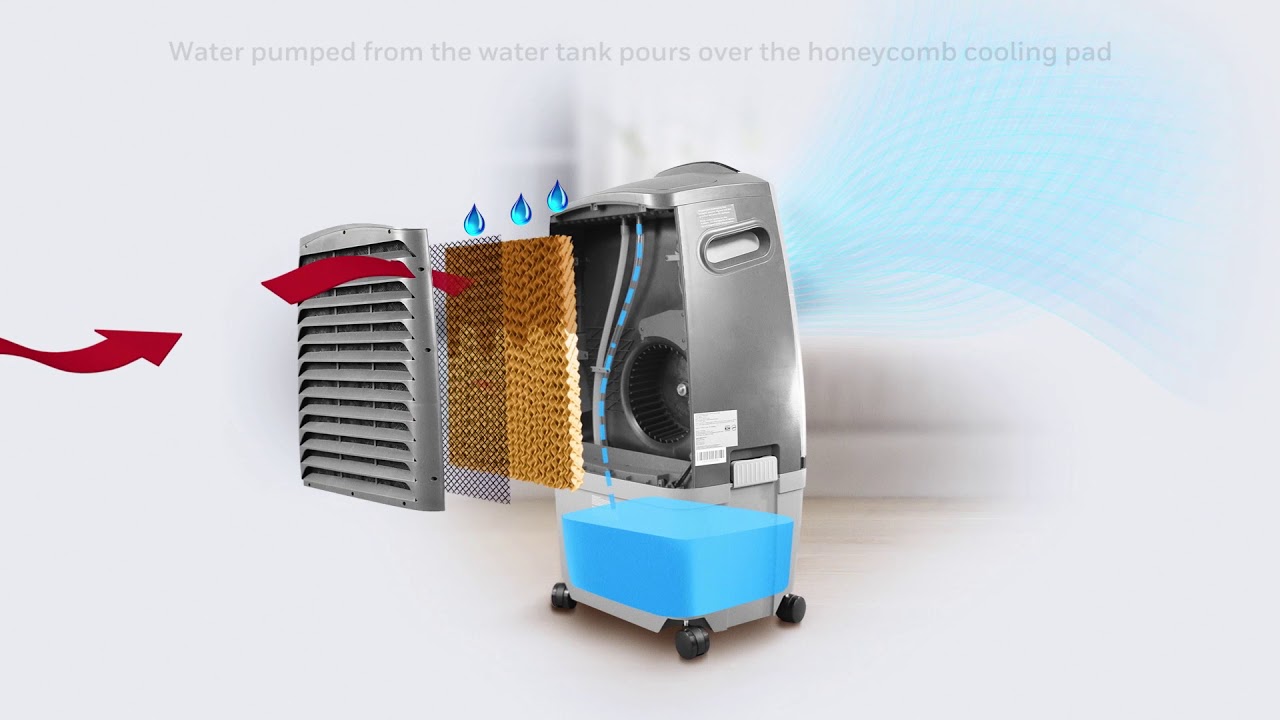
One of the key components of an air cooler is its filter which helps to trap dust, pollen, and other airborne particles. Over time, the filter can become dirty and clogged, reducing the efficiency of the air cooler and compromising the quality of the air it circulates. Therefore, it’s important to regularly clean and maintain the filter. Here’s how you can do it:
- Carefully locate the filter in your air cooler. It is usually found at the back or on the side of the unit.
- Gently remove the filter from the air cooler. If it has a cover or casing, open it to access the filter.
- Inspect the filter for any visible dirt or debris. If it is heavily soiled, you might need to replace it with a new one.
- If the filter is reusable, rinse it under running water to remove loose dirt and dust particles. Be gentle while rinsing to avoid damaging the filter.
- If the filter has stubborn stains or buildup, you can soak it in a mixture of mild detergent or cleaning solution and warm water. Follow the manufacturer’s instructions on the cleaning solution or use a gentle household cleaner.
- After soaking, gently scrub the filter with an old toothbrush or soft-bristled brush to remove any remaining dirt or stains. Be thorough but careful not to damage the filter.
- Rinse the filter thoroughly with clean water to remove any residual cleaning solution.
- Allow the filter to air dry completely before reassembling it back into the air cooler.
Cleaning the filter regularly will not only ensure the proper functioning of your air cooler but also improve the air quality in your space. Once the filter is clean and dry, you can proceed to the next step of cleaning the water tank.
Step 4: Clean the water tank
The water tank in your air cooler holds the water that is used for evaporation, helping to create a cooling effect. Over time, mineral deposits, mold, and bacteria can accumulate in the water tank, affecting the performance and hygiene of the unit. Therefore, it’s important to regularly clean the water tank to maintain its efficiency and ensure clean and fresh air. Here’s how you can do it:
- Start by emptying the water tank completely. Carefully pour out any remaining water and dispose of it properly.
- Using a mixture of warm water and mild detergent or vinegar, thoroughly clean the inside of the water tank. If you’re using vinegar, mix equal parts vinegar and water.
- Use a soft cloth or sponge to scrub the inner walls of the water tank, paying close attention to any areas with mineral deposits or mold growth.
- If there are stubborn stains or scale buildup, you can use a mixture of lemon juice and water or a descaling solution recommended by the manufacturer. Follow the instructions provided for the specific descaling solution.
- Rinse the water tank with clean water multiple times to ensure that all cleaning residue is removed.
- Once the water tank is clean, wipe it dry with a clean, dry cloth. Make sure there is no moisture left as it can promote the growth of mold or bacteria.
Regularly cleaning the water tank will not only prevent mineral deposits and bacteria from affecting the performance of your air cooler but also ensure that you’re breathing in clean and fresh air. Now that the water tank is cleaned, let’s move on to the next step and clean the fan blades.
Regularly clean the air cooler by removing and washing the filter with mild soap and water. Wipe down the exterior with a damp cloth and ensure the water tank is free of any buildup. This will help maintain the efficiency and air quality of the cooler.
Read more: What Is an Air Cooler
Step 5: Clean the fan blades
The fan blades in your air cooler are responsible for pushing the cooled air into the room. Over time, dust and debris can accumulate on the fan blades, reducing their efficiency and potentially causing the air cooler to work harder. It’s important to clean the fan blades regularly to maintain their performance and ensure optimal airflow. Here’s how you can do it:
- Ensure that the air cooler is still unplugged and turned off.
- Locate the fan blades. They are usually located at the back of the air cooler.
- Using a soft cloth or damp sponge, gently wipe down the fan blades to remove any dust or dirt. Start from the base of the blades and work your way towards the tips.
- For stubborn dirt or dust buildup, you can use an old toothbrush or soft-bristled brush to carefully scrub the fan blades. Be cautious not to apply too much pressure or bend the blades.
- Once the fan blades are clean, use a dry cloth to wipe away any moisture or residue.
Cleaning the fan blades regularly will help maintain the performance of your air cooler and ensure efficient cooling. With the fan blades clean, you’re one step closer to completing the cleaning process. Next, we’ll move on to cleaning the exterior of the air cooler.
Step 6: Wipe down the exterior of the air cooler
The exterior of your air cooler can accumulate dust, fingerprints, and other debris, affecting its overall appearance and cleanliness. Cleaning the exterior not only improves the aesthetic appeal of the unit but also prevents dust from entering the air cooler. Here’s how you can effectively wipe down the exterior of your air cooler:
- Ensure that the air cooler is still unplugged and turned off.
- Dampen a clean, soft cloth or sponge with water or a mixture of water and mild detergent.
- Gently wipe down the entire exterior of the air cooler, including the housing, control panel, and any other external surfaces. Pay special attention to areas that are prone to dust accumulation, such as ventilation grilles or decorative elements.
- If there are stubborn stains or marks, you can use a mild household cleaner or a specialized plastic-safe cleaning solution. Follow the instructions provided by the manufacturer for any specific cleaning recommendations.
- Rinse the cloth or sponge with clean water and wipe away any residue left from the cleaning solution.
- Once you have wiped down the exterior, use a dry cloth or towel to remove any moisture and ensure that the air cooler is completely dry before reassembling.
Cleaning the exterior of the air cooler not only improves its appearance but also helps to maintain a clean and dust-free environment. With the external surfaces clean, you’re ready to move on to the next step and reassemble the air cooler.
Step 7: Reassemble the air cooler
Now that you have thoroughly cleaned all the components of your air cooler, it’s time to reassemble them to get the unit ready for use again. Follow these steps to reassemble the air cooler:
- Ensure that all the cleaned components are completely dry before proceeding.
- Starting with the filter, carefully place it back into its designated slot. Make sure it is securely in place and properly aligned.
- If the filter has a cover or casing, reattach it and ensure it is properly secured.
- Next, take the cleaned water tank and position it back onto the air cooler. Ensure that it fits snugly and that any latches or locking mechanisms are properly engaged.
- Give the water tank a gentle shake to ensure it is securely in place.
- If you had any additional components or accessories that were removed during the cleaning process, such as ice packs or fragrance pads, now is the time to reattach or insert them.
- Lastly, refer to the manufacturer’s instructions or user manual to ensure that all the components are properly reassembled and no steps have been missed.
Once you have successfully reassembled the air cooler, you’re ready to move on to the final step of the cleaning process – plugging in and turning on the unit.
Step 8: Plug in and turn on the air cooler
After completing the cleaning process and reassembling the components of your air cooler, it’s time to plug it in and turn it on. Follow these steps to safely do so:
- Double-check that the air cooler is in a safe and stable position, with no obstructions around it.
- Locate the power cord and plug it into a grounded electrical outlet. Ensure that the outlet is in good condition and can handle the power requirements of the air cooler.
- Once the air cooler is plugged in, locate the power switch or button and turn it on. Refer to the manufacturer’s instructions for the specific air cooler model if you’re unsure of the location of the power switch.
- Allow the air cooler a few minutes to start up and begin circulating cool air.
- Monitor the air cooler for any unusual noises or malfunctions. If you notice any issues, refer to the troubleshooting section of the user manual or contact the manufacturer for assistance.
With the air cooler successfully plugged in and turned on, you can now enjoy the cool and fresh air that it provides. Remember to regularly clean and maintain your air cooler to ensure its optimal performance and longevity.
Congratulations! You’ve completed the step-by-step process of cleaning your air cooler. By following these steps, you’ll be able to keep your air cooler clean, efficient, and functioning optimally, providing you with cool and fresh air for a long time to come.
Happy cooling!
Read more: How To Make Air Cooler
Conclusion
Cleaning your air cooler is an important part of its maintenance and ensuring the circulation of clean and fresh air in your space. By following the step-by-step guide outlined in this article, you can effectively clean and maintain your air cooler, improve its performance, and prolong its lifespan.
Remember to gather all the necessary supplies before starting the cleaning process, including a soft cloth or sponge, mild detergent or cleaning solution, an old toothbrush or soft-bristled brush, vinegar or lemon juice, and warm water. These supplies will help you tackle different aspects of the cleaning process, from wiping down the exterior to cleaning the filter, water tank, and fan blades.
Be sure to turn off and unplug the air cooler first to ensure your safety. Then, remove the filter and clean it, making sure to rinse it thoroughly and allow it to dry completely before reassembling it. Next, clean the water tank, removing any mineral deposits or scale buildup. Clean the fan blades to ensure efficient airflow, and wipe down the exterior of the air cooler to maintain its appearance and prevent dust from entering the unit.
Once all the components are clean and dry, reassemble the air cooler following the manufacturer’s instructions. Finally, plug in and turn on the air cooler, monitoring it for any issues or malfunctions.
Remember to regularly clean your air cooler to keep it performing optimally. A clean air cooler not only provides you with cool and fresh air but also helps in maintaining a healthier environment. By incorporating these cleaning steps into your regular maintenance routine, you can enjoy the benefits of a clean and efficient air cooler for years to come.
Stay cool and breathe easy!
Frequently Asked Questions about How To Clean Air Cooler
Was this page helpful?
At Storables.com, we guarantee accurate and reliable information. Our content, validated by Expert Board Contributors, is crafted following stringent Editorial Policies. We're committed to providing you with well-researched, expert-backed insights for all your informational needs.





0 thoughts on “How To Clean Air Cooler”