Articles
How To Make Air Cooler
Modified: March 22, 2024
Discover expert articles on how to make an air cooler and stay cool during hot summer days. Explore step-by-step guides, tips, and DIY hacks.
(Many of the links in this article redirect to a specific reviewed product. Your purchase of these products through affiliate links helps to generate commission for Storables.com, at no extra cost. Learn more)
Introduction
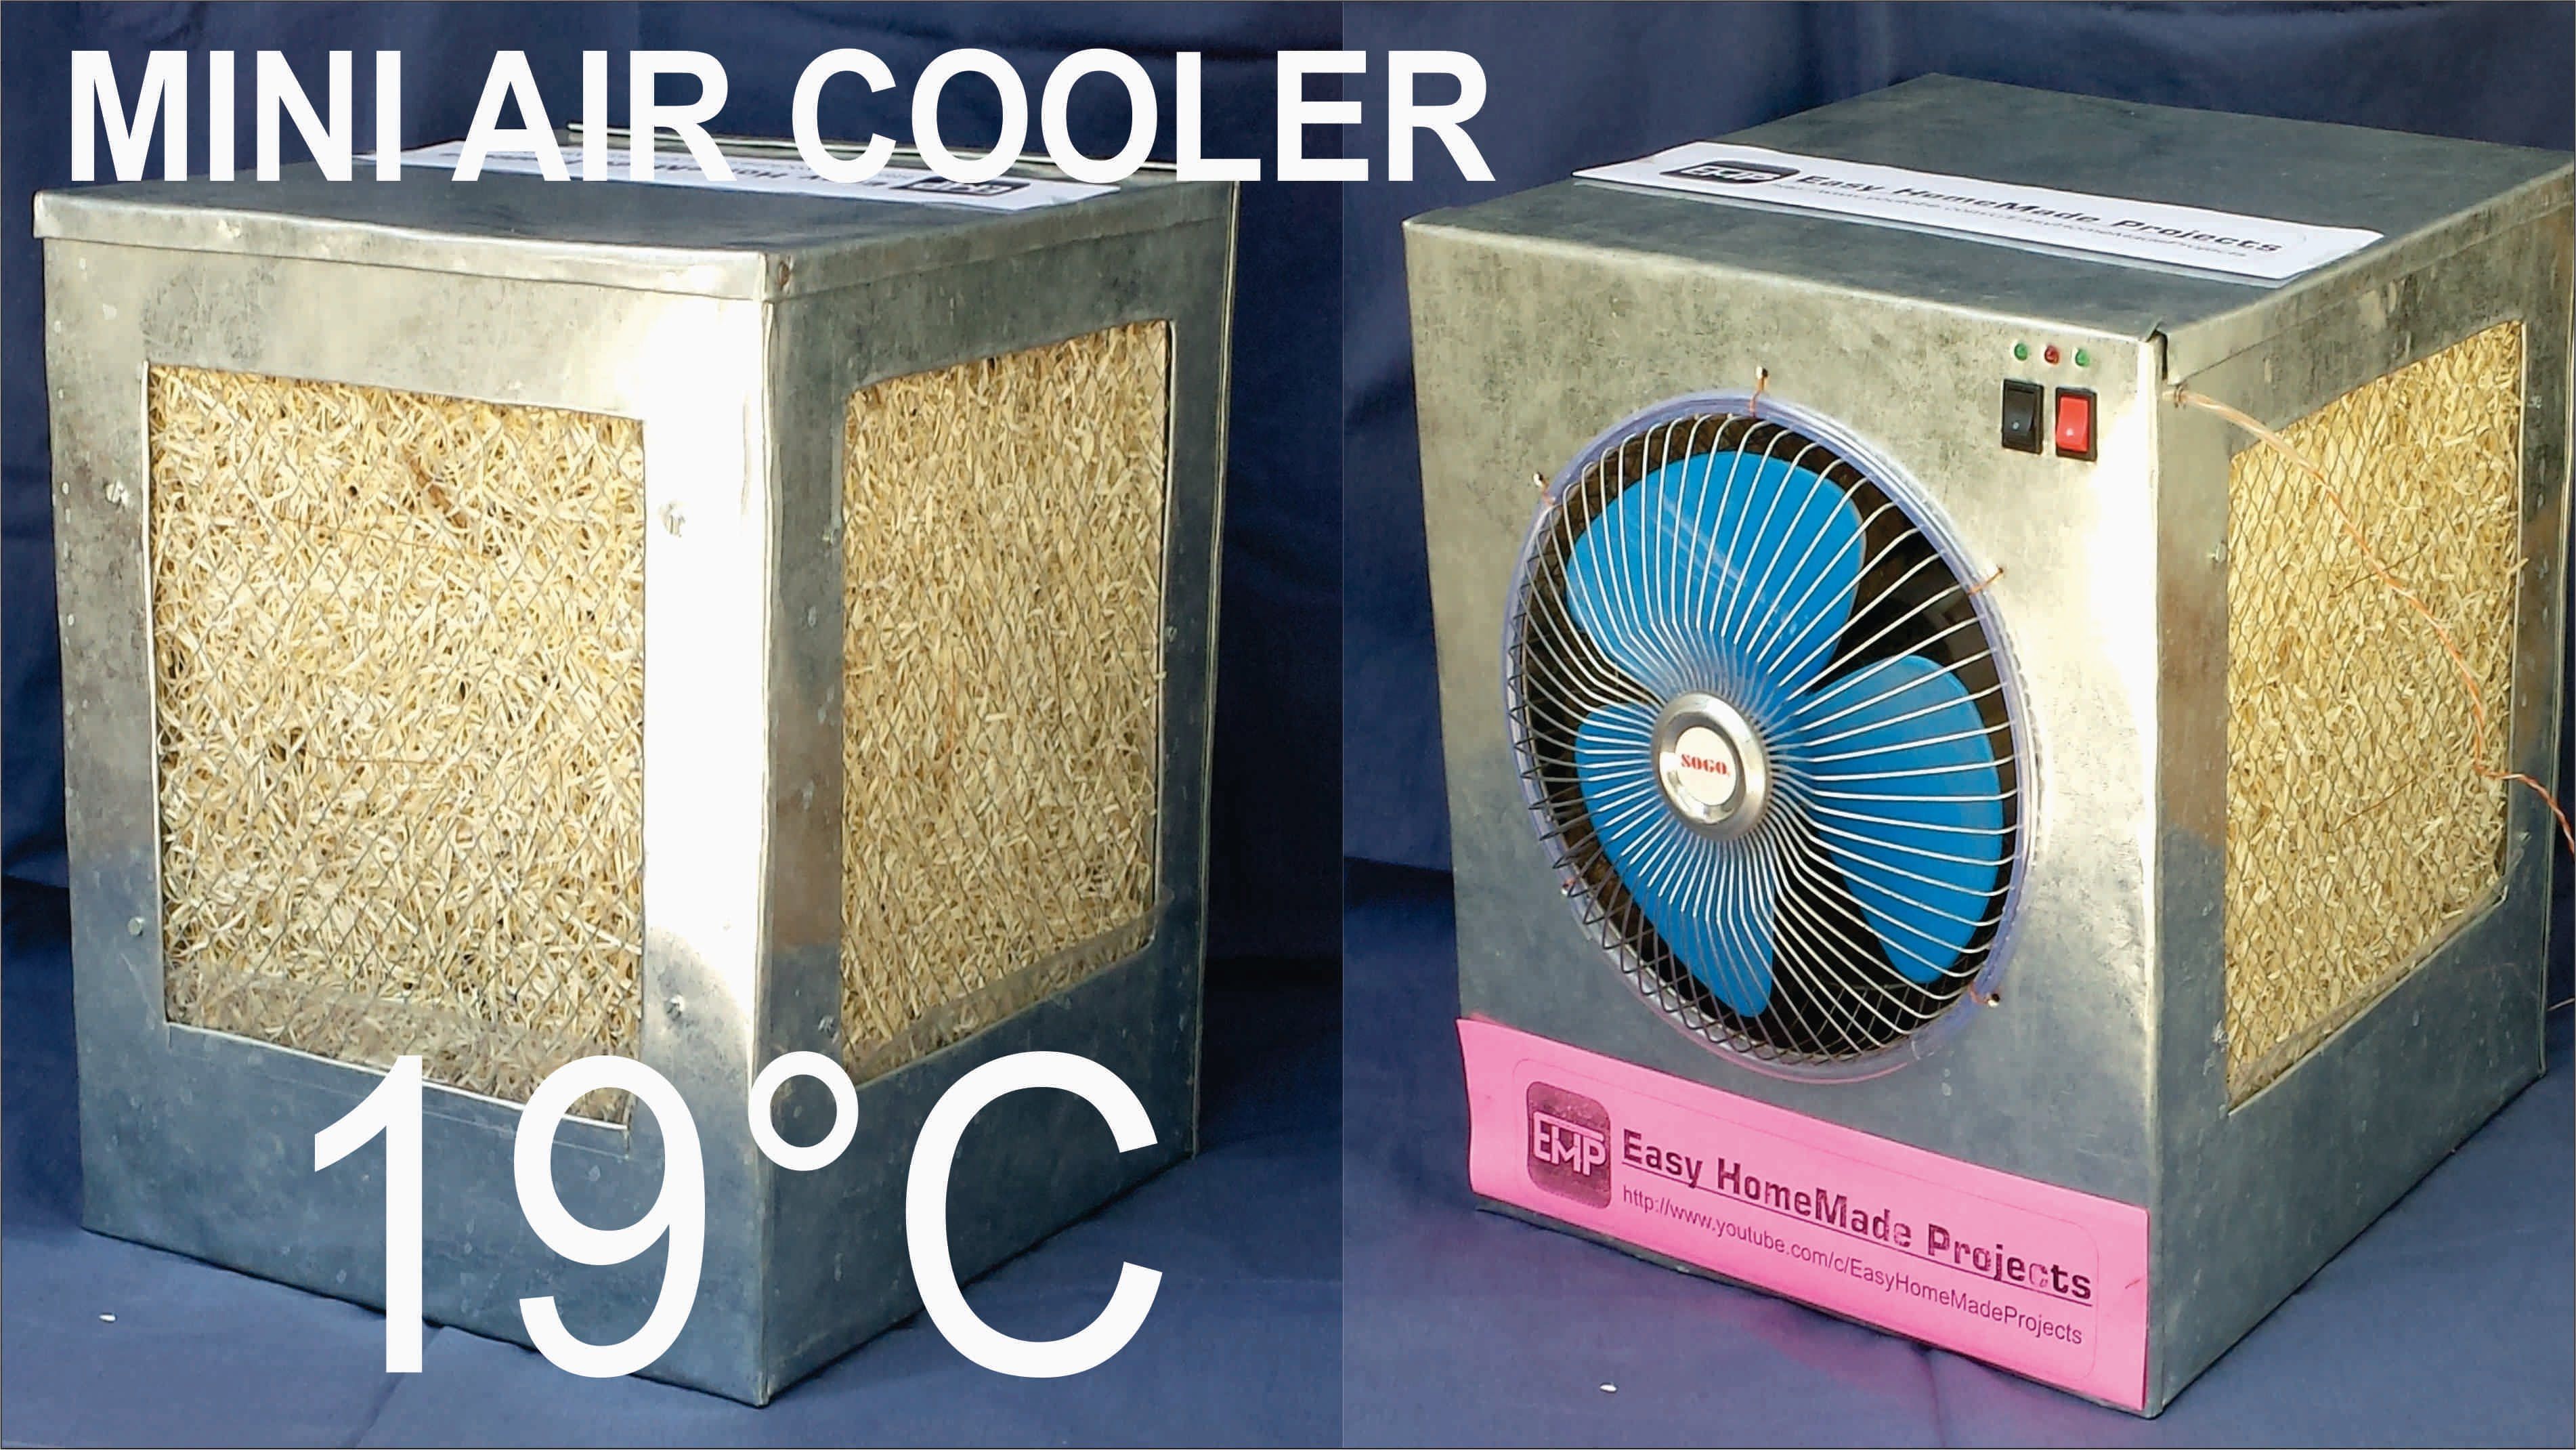
In hot summer months, staying cool can be a challenge. While air conditioning is a common solution, it can be expensive to run and not environmentally friendly. A cost-effective and energy-efficient alternative is to make your own air cooler. In this article, we will guide you through the process of creating your very own air cooler using simple materials that you may already have at home.
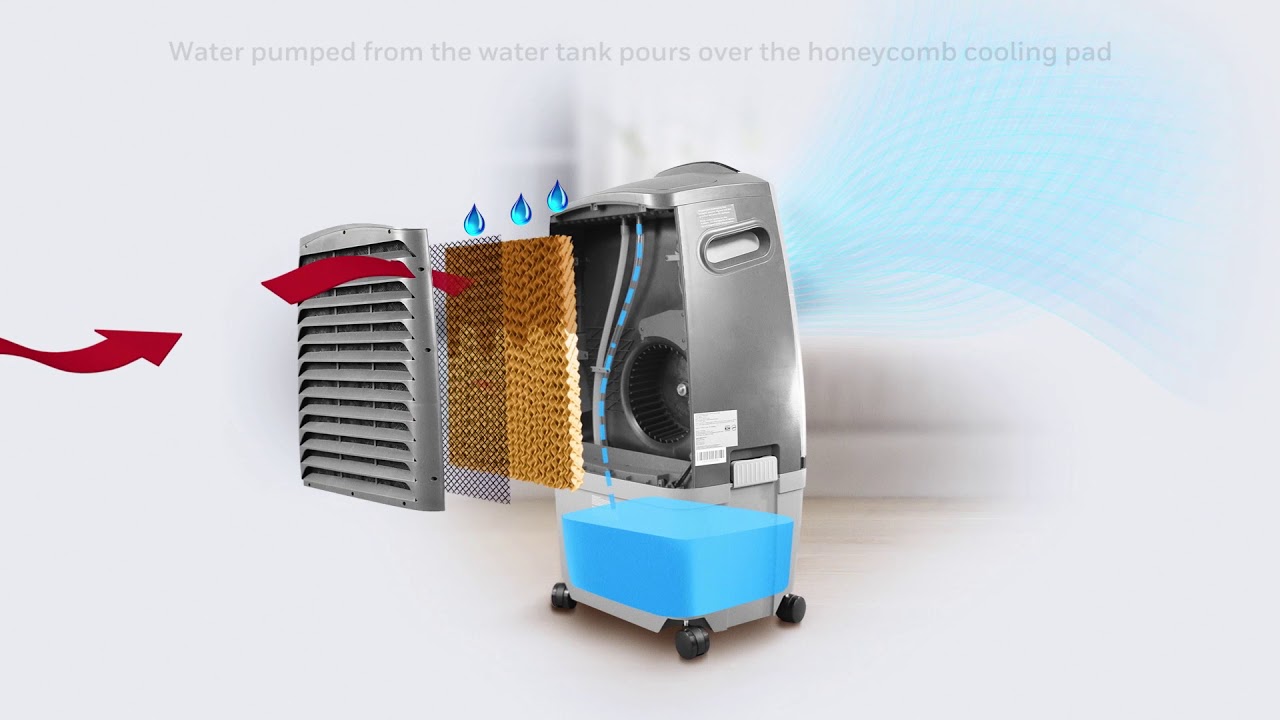
The DIY air cooler works by utilizing the principles of evaporative cooling. It uses water and air to lower the temperature in your immediate surroundings, providing you with a refreshing breeze. Not only does it help to keep you cool, but it also humidifies the air, which can alleviate dryness and discomfort caused by excessively dry conditions.
Creating your own homemade air cooler is not only a practical way to beat the heat but also a fun and rewarding project. So, let’s gather the materials needed and get started on building your DIY air cooler!
Key Takeaways:
- Beat the summer heat with a DIY air cooler that’s cost-effective, energy-efficient, and fun to create. Enjoy a refreshing breeze while humidifying the air, all without breaking the bank.
- Stay cool and environmentally friendly with a homemade air cooler. Tailor it to your needs, maintain it regularly, and enjoy a budget-friendly way to beat the heat during hot summer days.
Materials Needed
Before we dive into the step-by-step process of making your own air cooler, let’s gather the materials you’ll need:
- A pedestal or table fan
- A plastic storage container or cooler box
- Cooling pads or cellulose pads
- A submersible water pump
- A water reservoir or a water bottle
- Tubing or a hose
- A 12V power supply (such as a battery or a power adapter)
- Ice cubes or ice packs
- A drill with a hole saw attachment
- Zip ties or cable ties
- A marker or pen
- Pliers or scissors
These materials are readily available at most hardware stores or online retailers. You may also find some of them in your garage or storage room. Once you have gathered all the necessary materials, you’re ready to move on to the next step: preparing the fan.
Step 1: Gathering the Supplies
Before you begin assembling your DIY air cooler, it’s important to gather all the necessary supplies in one place. This will allow you to work efficiently and ensure that you have everything you need to complete the project.
First, locate a suitable pedestal or table fan. Ideally, you want a fan that is powerful enough to generate a decent airflow. If you don’t have a fan, you can purchase one from a hardware store or online retailer.
Next, find a plastic storage container or a cooler box that will serve as the housing for your air cooler. The size of the container will depend on the size of your fan and the area you want to cool. Make sure the container is clean and free of any cracks or damages.
Now, it’s time to gather the cooling pads or cellulose pads. These pads are essential in the evaporative cooling process. They absorb water and release it into the air as fine droplets, creating a cooling effect. You can find cooling pads at local hardware stores or order them online.
Additionally, you’ll need a submersible water pump to circulate the water from the reservoir to the cooling pads. Look for a water pump that is suitable for small-scale applications like this. You may also need to connect the pump to a power source, so have a power supply, such as a battery or a power adapter, ready.
Don’t forget to gather a water reservoir or a water bottle to hold the water for the air cooler. The size of the reservoir will depend on the duration you want the air cooler to operate without refilling. Make sure the reservoir is clean and can be easily attached to the water pump.
Lastly, gather tubing or a hose to connect the water pump to the cooling pads. You may also need zip ties or cable ties to secure the tubing and prevent any leakage. Have a marker or pen ready for marking the cutting points on the container, and keep pliers or scissors nearby for cutting the tubing or zip ties if necessary.
Once you have gathered all the necessary supplies, you’re ready to move on to the next step: preparing the fan.
Step 2: Preparing the Fan
Now that you have all your supplies ready, it’s time to prepare the fan for the air cooler assembly. Follow these steps:
- Ensure that the fan is clean and free of any dust or debris. Use a soft cloth or a brush to gently clean the blades, grille, and motor of the fan.
- If the fan has a detachable front grille, remove it by unscrewing or unclipping it. This will allow easier access to the fan blades and will make the installation of the cooling pads easier.
- Take the cooling pads and measure them against the fan. Mark the areas on the pads that need to be trimmed to fit the fan’s dimensions. Use scissors or a sharp knife to cut the pads to the appropriate size.
- Once the cooling pads are cut to size, dampen them with water. This will help with the evaporation process and enhance the cooling effect. Make sure not to saturate the pads; they should be moist but not dripping.
- Take the dampened cooling pads and insert them between the fan blades, making sure that they cover the entire front side of the fan. Some fans have clips or slots to hold the pads in place, while others may require you to use zip ties or adhesive to secure them.
- If the fan has a detachable front grille, reattach it, ensuring that the cooling pads are held securely in place between the blades and the grille.
Once you have prepared the fan with the cooling pads, it’s time to move on to the next step: installing the cooling pads in the container.
Step 3: Installing the Cooling Pads
With the fan prepared, it’s time to install the cooling pads into the plastic container or cooler box. Follow these steps:
- Take the plastic container or cooler box and mark the area where the fan will be placed. Use a marker or pen to outline the shape and size of the fan.
- Using a drill with a hole saw attachment, carefully cut a hole in the marked area of the container. Make sure the hole is just slightly larger than the fan to allow for easy placement and removal of the fan.
- Position the fan in the hole you have created, ensuring that the cooling pads are facing inside the container. The fan should fit snugly in the hole, with the cooling pads covering the opening.
- If necessary, use zip ties or cable ties to secure the fan in place. Thread the ties through the holes or slots in the fan and tighten them to hold the fan securely against the container.
- Check that the cooling pads are fitted properly around the fan and cover the entire opening. Adjust as necessary to ensure a tight fit.
- Make sure that the fan’s power cord is accessible and can easily be connected to the power source once the air cooler is fully assembled.
With the cooling pads securely installed in the container, you are now ready to move on to the next step: attaching the water pump.
Read more: What Is an Air Cooler
Step 4: Attaching the Water Pump
Attaching the water pump is a crucial step in the assembly of your DIY air cooler. Follow these steps to ensure it is done correctly:
- Locate a suitable spot inside the container to position the water pump. This spot should be near the bottom of the container and close to the side where the water reservoir will be attached.
- Using a marker or pen, mark the area where the water pump will be positioned.
- If necessary, use a drill with a hole saw attachment to create a hole for the water pump. Ensure that the hole is slightly larger than the diameter of the pump.
- Insert the water pump through the hole and position it securely inside the container. Make sure it is level and upright.
- If the water pump has adjustable intake and outlet nozzles, position them so that they are easily accessible for connecting the tubing later on.
- Depending on the type of water pump you have, you may need to connect it to a power source. If it requires an electrical connection, ensure that it is safe and follows proper electrical guidelines.
- Once the water pump is securely positioned and connected to a power source, you can move on to the next step: connecting the components.
With the water pump properly attached, your DIY air cooler is starting to take shape. In the next step, we will connect the necessary components to complete the assembly and ensure proper functionality.
To make an air cooler, you can use a fan and a container of ice or cold water. Position the fan to blow air over the ice or cold water, creating a cooling effect.
Step 5: Connecting the Components
Now that you have prepared the fan, installed the cooling pads, and attached the water pump, it’s time to connect the different components of your DIY air cooler. Follow these steps in order:
- Take the tubing or hose and cut it into two pieces. One piece will be used to connect the water pump to the water reservoir, and the other piece will be used to connect the water pump to the cooling pads.
- Attach one end of the tubing to the outlet nozzle of the water pump. Secure it tightly using zip ties or clamps to prevent any leaks.
- Route the tubing from the water pump to the water reservoir. If using a water bottle as the reservoir, create a small hole in the cap or lid and insert the tubing through it. Ensure a tight and secure fit to prevent any water leakage.
- If using a separate water reservoir, connect the tubing to the appropriate opening or outlet on the reservoir. Again, secure the connection to prevent any leaks.
- Attach the other piece of tubing to the inlet nozzle of the water pump. Make sure it is securely connected, using zip ties or clamps if necessary.
- Route the tubing from the water pump to the area where the cooling pads are located. Ensure that the tubing is long enough to reach the cooling pads without any tension or strain.
- Securely attach the tubing to the cooling pads, ensuring a proper fit and preventing any water leakage. Use zip ties or adhesive to hold it in place if needed.
With the components connected, you have successfully assembled the major parts of your air cooler. In the next step, we will learn how to add water and ice to help generate cool air.
Step 6: Adding Water and Ice
Now that the components of your DIY air cooler are connected, it’s time to add water and ice to maximize its cooling capability. Follow these steps:
- Fill the water reservoir with cool water. The water level should be sufficient to cover the intake of the water pump.
- If desired, add a few ice cubes or ice packs to the water reservoir. This will help to further cool the air being circulated by the fan.
- Ensure that the water level is maintained within the appropriate range to prevent the pump from running dry.
- Check that the cooling pads are adequately wet but not dripping. If needed, lightly spritz them with water using a spray bottle.
- Close the lid or cover of the container, ensuring that it is tightly sealed to prevent any water leakage.
Adding water and ice helps to create a more efficient cooling process. The water in the reservoir gets pumped to the cooling pads, saturating them and allowing for evaporation. The fan then blows air through the wet cooling pads, distributing the cooled and humidified air into the surroundings.
With water and ice added, your DIY air cooler is almost ready for use. In the next step, we will learn how to properly operate the air cooler.
Step 7: Operating the Air Cooler
Now that your DIY air cooler is fully assembled, it’s time to learn how to effectively operate it to cool down your space. Follow these steps to start enjoying the benefits of your homemade cooling system:
- Ensure that the power supply for the fan and water pump is turned off and disconnected.
- Place the air cooler in the desired location, keeping in mind that it should be near an electrical outlet.
- Connect the power cord of the fan and the water pump to a suitable power source.
- Turn on the power supply and switch on the fan. You should immediately feel a gentle breeze.
- Observe the cooling pads to ensure that they are adequately saturated and water is being evenly distributed across them.
- Adjust the fan speed and direction as desired to maximize the airflow and cooling effect.
- Enjoy the refreshing cool air provided by your DIY air cooler!
Remember to monitor the water level in the reservoir regularly to ensure that it doesn’t run dry, as this can damage the water pump. Refill the reservoir as needed, adding more cool water and ice cubes to maintain the cooling effect.
Operating your DIY air cooler can provide an energy-efficient and cost-effective way to beat the heat during hot summer days. However, keep in mind that the effectiveness of the cooler may vary depending on factors such as humidity levels and the size of the space being cooled.
In the next step, we will learn about maintenance and cleaning to keep your air cooler in optimal condition.
Read more: How To Use Air Cooler
Step 8: Maintenance and Cleaning
To ensure that your DIY air cooler continues to provide optimal performance and longevity, regular maintenance and cleaning are essential. Follow these steps to properly maintain and clean your air cooler:
- Regularly check the water level in the reservoir and refill as needed. It’s important to keep the water level within the recommended range to prevent the pump from running dry.
- Empty and clean the water reservoir at least once a week. Use a mild soap and warm water to clean the reservoir, and rinse thoroughly to remove any residue.
- Inspect the cooling pads regularly for any signs of wear or mineral buildup. If needed, gently clean the pads by rinsing them with water or soaking them in a vinegar solution to remove any mineral deposits.
- Check the tubing and connections for any signs of leakage or blockage. If you notice any issues, repair or replace the affected parts as necessary.
- Clean the exterior of the air cooler with a soft cloth or sponge to remove any dust or dirt buildup. Avoid using harsh chemicals that could damage the plastic or other components.
- Store your DIY air cooler in a clean and dry place when not in use to prevent damage and ensure its longevity.
Proper maintenance and cleaning of your air cooler will help to ensure its efficiency and prolong its lifespan. By keeping the components clean and in good condition, you can continue to enjoy the cooling benefits of your DIY creation.
Congratulations! You have successfully completed all the steps to create and maintain your own DIY air cooler. With this cost-effective and environmentally friendly solution, you can stay cool during the hot summer months without breaking the bank.
Remember to have fun with this project and get creative with customization options. Stay cool and enjoy the refreshed air provided by your homemade air cooler!
Disclaimer: This DIY air cooler is meant for personal use and may not provide the same level of cooling as commercial air conditioning units. Please use caution and ensure safety while operating the air cooler.
Thank you for following this guide, and we hope you found it helpful. Stay cool!
Conclusion
Congratulations on completing your DIY air cooler! By following the step-by-step instructions in this guide, you have successfully created a cost-effective and environmentally friendly solution to beat the heat. Not only does your air cooler provide a refreshing breeze, but it also humidifies the air to alleviate dryness and discomfort.
Creating your own air cooler allows you to tailor it to your specific needs and preferences. Whether you use it in your home, office, or outdoor space, you can enjoy the benefits of a cooler environment without the high energy costs associated with traditional air conditioning.
Remember to maintain and clean your air cooler regularly to ensure optimal performance and longevity. Regularly check the water level, clean the reservoir and cooling pads, and inspect the tubing and connections for any issues.
We hope this guide has been informative and inspiring. By using simple materials and following the steps outlined, you have proven that DIY projects can be both practical and rewarding.
Now, sit back, relax, and enjoy the refreshing cool air provided by your homemade air cooler. Stay cool and beat the summer heat in a budget-friendly way!
Thank you for embarking on this DIY adventure with us, and we wish you many comfortable and enjoyable moments with your new air cooler.
Frequently Asked Questions about How To Make Air Cooler
Was this page helpful?
At Storables.com, we guarantee accurate and reliable information. Our content, validated by Expert Board Contributors, is crafted following stringent Editorial Policies. We're committed to providing you with well-researched, expert-backed insights for all your informational needs.


0 thoughts on “How To Make Air Cooler”