Home>Storage Ideas>Kitchen Storage>The Best Way To Clean A Grill For Delicious Backyard BBQ
Kitchen Storage
The Best Way To Clean A Grill For Delicious Backyard BBQ
Modified: October 20, 2024
Looking for the best way to clean a grill? Discover effective kitchen storage ideas to ensure tasty and enjoyable backyard BBQs.
(Many of the links in this article redirect to a specific reviewed product. Your purchase of these products through affiliate links helps to generate commission for Storables.com, at no extra cost. Learn more)
Introduction
As the warm weather approaches, many of us look forward to firing up the grill and enjoying delicious meals in the great outdoors. But before you start cooking those mouthwatering burgers and juicy steaks, it’s essential to ensure that your grill is clean and ready for use. Cleaning your grill not only improves the flavor and quality of your food, but it also prolongs the lifespan of your grill and ensures safe cooking conditions.
In this article, we will discuss the best way to clean a grill to achieve excellent results for your backyard BBQs. From cleaning the grates to taking care of the interior and exterior of the grill, we will provide you with step-by-step instructions and useful tips to make the process efficient and effective.
So, whether you’re a seasoned griller or a beginner, let’s dive into the world of grill cleaning and discover how to achieve that perfect, spotless grill for all your outdoor cooking adventures.
Key Takeaways:
- Keep your grill clean for tastier, safer BBQs. Regular maintenance enhances food flavor, ensures safety, and extends the lifespan of your grill. Enjoy delicious outdoor meals with a spotless, well-maintained grill.
- Properly clean and season your grill grates. Thorough cleaning and seasoning prevent rust, improve heat distribution, and create a non-stick surface for better cooking results. Maintain your grill for optimal performance and longevity.
Importance of Cleaning a Grill
Regular cleaning of your grill is crucial for several reasons. Let’s explore the importance of keeping your grill clean:
- Improved Food Flavor: Over time, grease and food residue can build up on the grates of your grill, resulting in a layer of charred debris. This can detract from the flavor of your food and even cause flare-ups, resulting in unevenly cooked or burnt meals. By properly cleaning your grill, you can remove these remnants, ensuring that your food tastes delicious and retains its natural flavors.
- Health and Safety: A dirty grill can become a breeding ground for bacteria and other harmful pathogens. By regularly cleaning your grill, you can minimize the risk of foodborne illnesses and ensure that your meals are safe to consume. Additionally, cleaning your grill grates and removing leftover food particles can help prevent cross-contamination between different types of meat or allergens.
- Longevity of the Grill: Regular maintenance and cleaning can significantly extend the lifespan of your grill. Removing grease, carbon deposits, and food debris prevents corrosion and rust from forming on the grill’s surfaces. This helps maintain the structural integrity of your grill and ensures that it continues to function optimally for years to come.
- Efficient Heat Distribution: A clean grill allows for better heat distribution, which is essential for achieving consistent cooking results. When the grates are clogged with residue, heat cannot transfer evenly to your food, resulting in unevenly cooked meals. By keeping your grill clean, you can ensure that heat is distributed evenly, leading to better cooking performance.
- Aesthetic Appeal: Let’s not forget the visual aspect of having a clean grill. Regularly cleaning the exterior of your grill not only keeps it looking attractive but also helps prevent the buildup of dirt, grime, and discoloration. A well-maintained grill adds a touch of elegance to your outdoor cooking area and creates a welcoming atmosphere for your backyard gatherings.
Now that we understand the importance of keeping our grill clean, let’s move on to the materials you’ll need to effectively clean your grill.
Materials Needed
Before you embark on the journey of cleaning your grill, it’s important to gather the necessary materials. Having these items on hand will ensure that you have everything you need to make the cleaning process smooth and hassle-free. Here are the essential materials needed:
- Grill brush: A high-quality grill brush with sturdy bristles is a must-have for cleaning the grates of your grill. Choose a brush specifically designed for your grill type to ensure optimal cleaning.
- Heat-resistant gloves: Protect your hands from the heat and potential sharp edges while cleaning your grill with a pair of heat-resistant gloves.
- Mild dish soap: Use a gentle dish soap to remove grease and grime from the exterior and interior surfaces of your grill.
- Warm water: You’ll need warm water to dilute the dish soap and create a soapy solution for cleaning your grill.
- Bucket or basin: Use a bucket or basin to hold the soapy water mixture for soaking and cleaning various grill components.
- Sponge or cloth: A soft sponge or cloth is essential for wiping down the surfaces of your grill and removing dirt and residue.
- Scrubbing pad or aluminum foil: For stubborn, stuck-on grime, a scrubbing pad or crumpled aluminum foil can be used to scrub the grill grates.
- Paper towels or clean cloth: Use paper towels or a clean cloth to wipe down and dry the grill grates, interior, and exterior surfaces.
- Cooking oil: After cleaning, you’ll need cooking oil to season the grill grates and prevent them from rusting.
With these materials at your disposal, you’re well-equipped to embark on the journey of cleaning your grill. In the next section, we’ll discuss how to prepare your grill for cleaning.
Preparing the Grill
Before diving into the actual cleaning process, it’s important to prepare your grill to ensure a smooth and efficient cleaning experience. Follow these steps to properly prepare your grill:
- Turn off and disconnect the propane tank: If you have a gas grill, ensure that it is turned off and disconnected from the propane tank. Safety should always be a top priority when working with any type of grill.
- Remove debris: Start by removing any leftover food debris or ashes from the grill grates and interior chamber. Use a grill brush to scrape off any loose residue. Dispose of the debris in a trash bag or designated disposal container.
- Remove the grates: Depending on your grill model, you may need to remove the grates to access and clean the interior parts. Consult your grill’s manual for specific instructions on how to remove the grates safely.
- Soak the grates (optional): If your grates are particularly dirty or have stubborn buildup, consider soaking them in warm, soapy water for a few minutes. This will help loosen the residue, making it easier to clean later on.
- Protect the surrounding area: To prevent any mess or damage, it’s a good idea to place a tarp or newspaper underneath the grill, especially if you are cleaning it on a patio or deck. This will catch any debris or drippings for easy cleanup.
By taking these preparatory steps, you lay the foundation for a successful grill cleaning session. Now that your grill is prepped and ready, let’s move on to the next section, where we discuss how to clean the grill grates.
Cleaning the Grill Grates
The grill grates are a crucial part of your grill, as they come into direct contact with your food. Cleaning them thoroughly is essential for maintaining hygiene and achieving optimal cooking results. Follow these steps to clean your grill grates effectively:
- Remove the grates: If you haven’t already done so, carefully remove the grill grates from your grill.
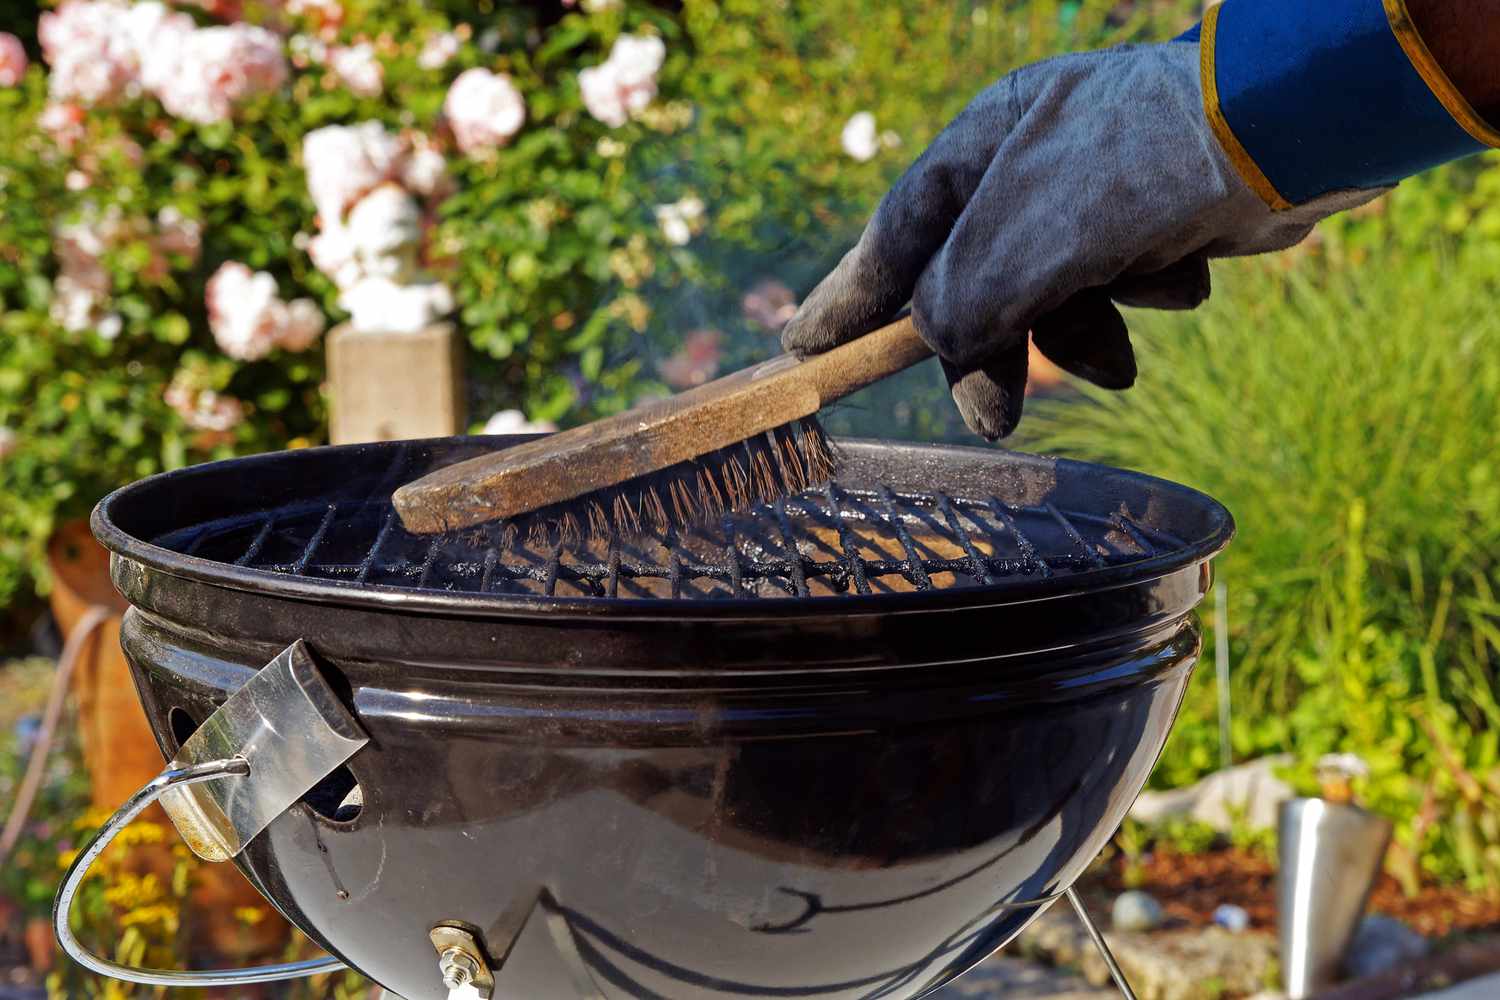
- Scrape off residue: Use a grill brush with sturdy bristles to scrape off any residue and stuck-on food particles from the grates. Make sure to brush both sides of the grates to ensure thorough cleaning.
- Soak the grates (if needed): If there is stubborn residue or grease buildup, you can soak the grates in warm, soapy water for a few minutes. This will help loosen the grime, making it easier to remove.
- Scrub the grates: Using a scrubbing pad or crumpled aluminum foil, scrub the grates to remove any remaining residue. Focus on areas with heavy buildup or stubborn grime. Rinse the grates with warm water to remove any soap or cleaning solution.
- Dry the grates: Pat the grates dry with paper towels or a clean cloth. Ensure that they are completely dry to prevent rusting.
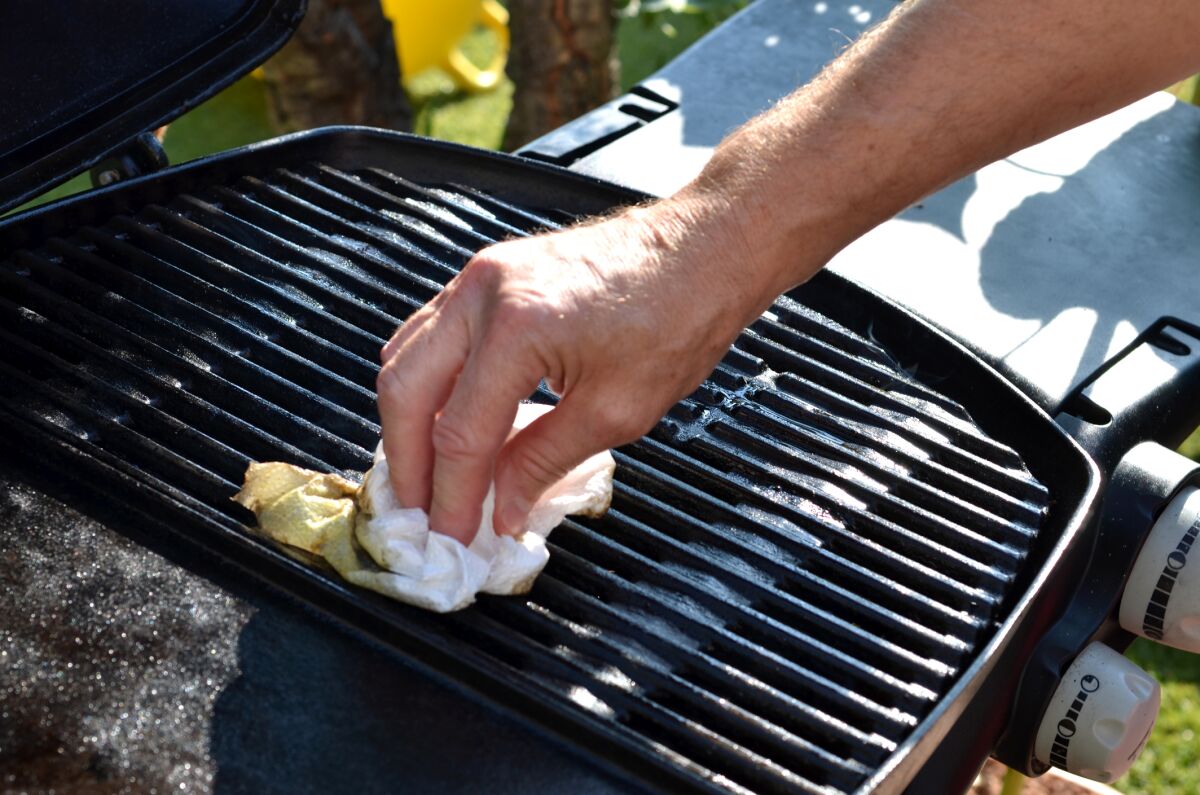
- Season the grates: After cleaning, it’s essential to season the grates to prevent rust and improve their non-stick properties. Apply a thin coat of cooking oil to the grates using a paper towel or brush. Heat the grill for a few minutes to allow the oil to penetrate and create a protective layer.
Once you’ve completed these steps, your grill grates will be clean, seasoned, and ready for your next grilling session. In the next section, we’ll discuss how to clean the interior of the grill.
After grilling, while the grill is still warm, use a wire brush to scrub off any stuck-on food residue. Then, wipe the grates with a damp cloth or paper towel to remove any remaining debris. Finally, season the grates with a light coating of oil to prevent rust and keep food from sticking.
Read more: How Much Are Grills
Cleaning the Grill Interior
The interior of your grill can accumulate grease, ash, and other debris over time, which can affect its performance and the taste of your food. Follow these steps to effectively clean the interior of your grill:
- Remove excess debris: Start by removing any loose debris, ashes, or leftover food from the interior of the grill. Use a brush or scraper to sweep it into a dustpan or onto a newspaper-lined area for easy disposal.
- Clean the burners: If your grill has burners, you’ll want to clean them to ensure proper gas flow and even heat distribution. Refer to your grill’s manual for specific instructions on how to clean the burners, as the process can vary depending on the grill model. Use a brush or a wire cleaner to remove any buildup or blockages.
- Wipe down the interior surfaces: Use a sponge or cloth dampened with warm, soapy water to wipe down the interior surfaces of the grill. Pay attention to areas with visible grease or residue. For stubborn stains or buildup, you can use a non-abrasive cleaner or a paste made from baking soda and water.
- Rinse and dry: After scrubbing, rinse the interior surfaces of the grill with clean water to remove any soapy residue. Use a cloth or paper towels to dry the surfaces thoroughly.
- Clean the drip tray or grease collection system: Many grills have a drip tray or grease collection system that needs regular cleaning. Remove the tray or collection container and dispose of any collected grease or debris. Wash the tray with warm, soapy water, rinse, and dry it thoroughly before placing it back in the grill.
By following these steps, you will ensure that the interior of your grill is clean and ready for your next grilling adventure. In the next section, we’ll discuss how to clean the exterior of the grill.
Cleaning the Burners (If Applicable)
If your grill has burners, taking the time to clean them will help maintain proper gas flow and ensure even heat distribution. Here’s how to clean the burners:
- Turn off the gas: Before cleaning the burners, ensure that the gas supply is turned off and the grill is completely cool. Safety should always be a top priority.
- Remove the burners: Depending on your grill model, you may need to remove the burners to clean them thoroughly. Refer to your grill’s manual for specific instructions on how to safely remove the burners.
- Inspect the burners: Check the burners for any visible signs of damage or blockages. Look for rust, debris, or insects that may be blocking the burner ports.
- Brush off debris: Use a soft-bristle grill brush or a wire brush to gently remove any visible debris, rust, or residue from the burner tubes and ports. Be careful not to damage or bend the burner components.
- Clean with soapy water: Fill a bucket or basin with warm, soapy water and submerge the burners. Use a sponge or cloth to scrub away any grease or grime. For stubborn buildup, you can use a vinegar and water solution or a specialized grill cleaner.
- Rinse and dry: After cleaning, rinse the burners with clean water to remove any soap or cleaning solution. Allow the burners to air dry completely before reinstalling them back into the grill.
Remember to consult your grill’s manual for specific instructions on cleaning the burners, as the process may vary depending on your grill model. With clean burners, your grill will function optimally, providing even heat distribution for your delicious grilled creations.
In the next section, we’ll explore how to clean the exterior surfaces of your grill to keep it looking clean and well-maintained.
Cleaning the Exterior of the Grill
The exterior of your grill not only affects its visual appeal but also plays a role in maintaining its overall cleanliness and longevity. Follow these steps to clean the exterior of your grill:
- Prepare a soapy solution: Fill a bucket or basin with warm water and add a few drops of mild dish soap. Mix the solution until it becomes soapy.
- Dip a sponge or cloth: Dip a sponge or cloth into the soapy solution, ensuring it is thoroughly soaked but not dripping excessively.
- Wipe down the exterior: Gently scrub the exterior surfaces of the grill using the sponge or cloth. Pay attention to areas with visible grease, dirt, or grime. Use light pressure to avoid damaging the grill’s finish.
- Rinse with clean water: Rinse the exterior of the grill with clean water to remove any soap residue or remaining dirt. Use a hose or a bucket of clean water to thoroughly rinse the surfaces.
- Dry the surfaces: Use a clean cloth or paper towels to dry the exterior surfaces of the grill. Make sure to dry all components, including handles, knobs, and any other metal or plastic parts.
- Polish (if desired): For a shiny finish, you can use a stainless steel or grill-specific polish. Follow the manufacturer’s instructions for applying and buffing the polish onto the exterior of your grill.
By regularly cleaning the exterior of your grill, you not only maintain its aesthetic appeal but also prevent dirt, grease, and other contaminants from accumulating and potentially affecting the grill’s performance. A clean grill will be the centerpiece of your outdoor cooking area and make you proud to showcase it to friends and family.
Now that you know how to clean the exterior of your grill, let’s move on to the final step – seasoning the grill grates to ensure their longevity and superior cooking performance.
Seasoning the Grill Grates
Seasoning the grill grates is an important step in maintaining their longevity and ensuring optimal cooking performance. Seasoning creates a non-stick surface and helps prevent rusting. Follow these steps to season your grill grates:
- Ensure the grates are clean and dry: Before seasoning, make sure the grates are clean and completely dry. Remove any debris or moisture from the grates.
- Preheat the grill: Preheat your grill on medium heat for about 15 minutes. This will open up the pores of the metal and prepare it for seasoning.
- Apply a cooking oil: Use a high smoke-point cooking oil like vegetable oil, canola oil, or grapeseed oil. Dip a folded paper towel in oil and use tongs to rub it onto the grates. Ensure that all the grates are evenly coated with a thin layer of oil.
- Let the oil bake: Close the grill lid and let the oil bake onto the grates. This process usually takes about 15-20 minutes. It will create a protective layer that prevents rust and helps the grates develop a non-stick surface.
- Cool down and repeat: Once the grates have cooled down, check if the coating is even. If needed, repeat the seasoning process for an additional layer of protection.
Regularly seasoning your grill grates will help maintain their condition and prevent food from sticking during cooking. Remember to repeat the seasoning process periodically or after cleaning the grates to ensure their longevity.
With your grill grates properly seasoned, you’re now ready to enjoy delicious meals cooked on your clean and well-maintained grill. In the final section, we’ll conclude our guide on the best way to clean a grill for your backyard BBQs.
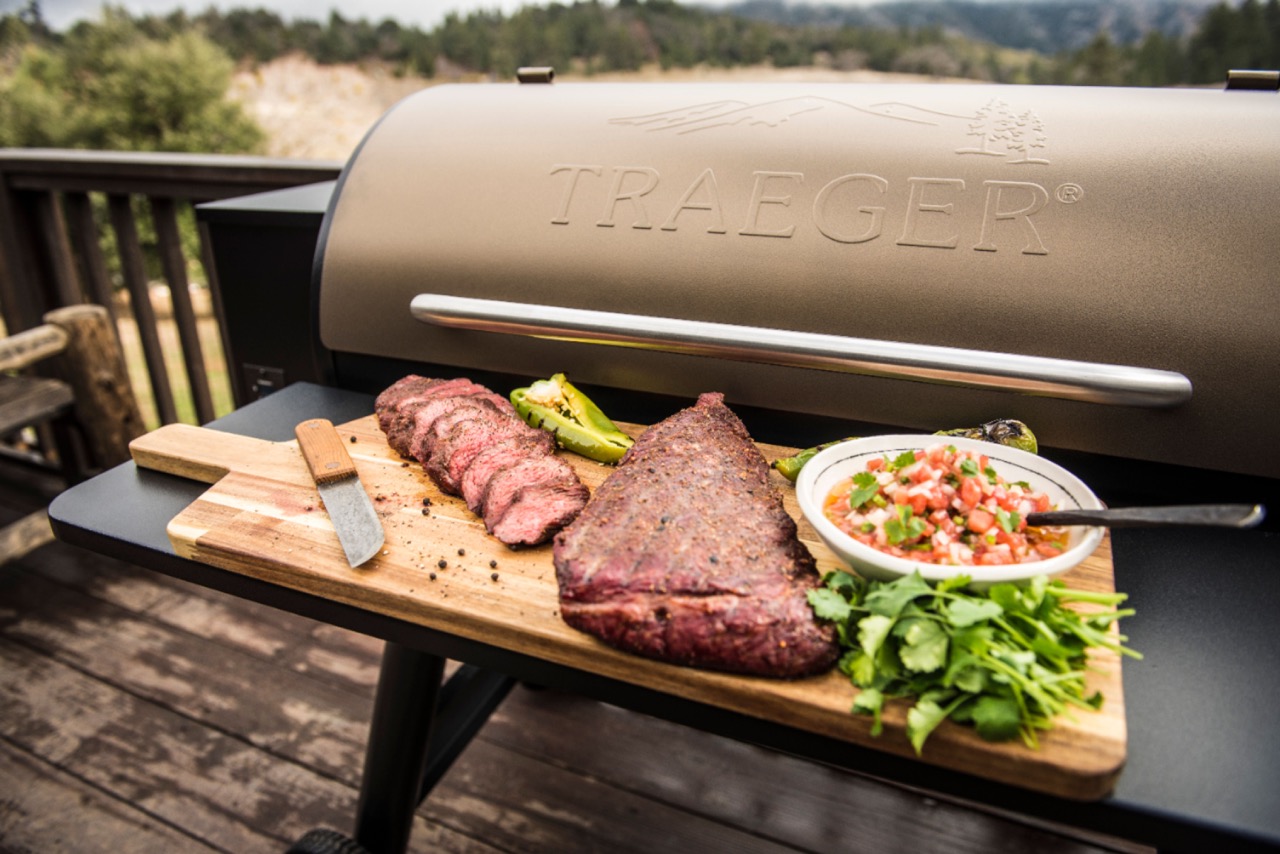
Read more: Where Are Traeger Grills Made
Conclusion
Cleaning your grill is an essential part of maintaining its performance, prolonging its lifespan, and ensuring delicious meals every time you cook. By following the steps outlined in this guide, you can achieve a spotless and well-maintained grill that is ready for your backyard BBQs. Let’s recap what we’ve covered:
We started by highlighting the importance of cleaning a grill, including improving food flavor, ensuring health and safety, prolonging the grill’s lifespan, promoting efficient heat distribution, and enhancing the aesthetic appeal of your outdoor cooking area.
Next, we discussed the materials needed for cleaning your grill, such as a grill brush, heat-resistant gloves, mild dish soap, warm water, a bucket or basin, a sponge or cloth, a scrubbing pad or aluminum foil, paper towels or a clean cloth, and cooking oil for seasoning.
We then walked through the step-by-step process of cleaning the grill, starting with preparing the grill by turning off the propane, removing debris, and ensuring the surrounding area is protected.
Next, we focused on cleaning the grill grates, removing residue, scouring stubborn grime, and seasoning them to ensure optimal cooking results.
We then moved on to cleaning the interior of the grill, removing excess debris, cleaning the burners (if applicable), wiping down the interior surfaces, and cleaning the drip tray or grease collection system.
Additionally, for grills with burners, we provided steps on how to clean them properly to maintain proper gas flow and even heat distribution.
Finally, we discussed cleaning the exterior of the grill, including preparing a soapy solution, wiping down the surfaces, rinsing, drying, and optionally polishing for a shiny finish.
To conclude, keeping your grill clean and well-maintained not only enhances your cooking experience but also ensures safe and delicious meals for you and your loved ones. By following these cleaning steps and periodically maintaining your grill, you’ll be able to enjoy many unforgettable moments and mouthwatering BBQs in your backyard.
Now, fire up that grill, create amazing dishes, and savor the flavors of outdoor grilling with confidence!
Frequently Asked Questions about The Best Way To Clean A Grill For Delicious Backyard BBQ
Was this page helpful?
At Storables.com, we guarantee accurate and reliable information. Our content, validated by Expert Board Contributors, is crafted following stringent Editorial Policies. We're committed to providing you with well-researched, expert-backed insights for all your informational needs.

0 thoughts on “The Best Way To Clean A Grill For Delicious Backyard BBQ”