Articles
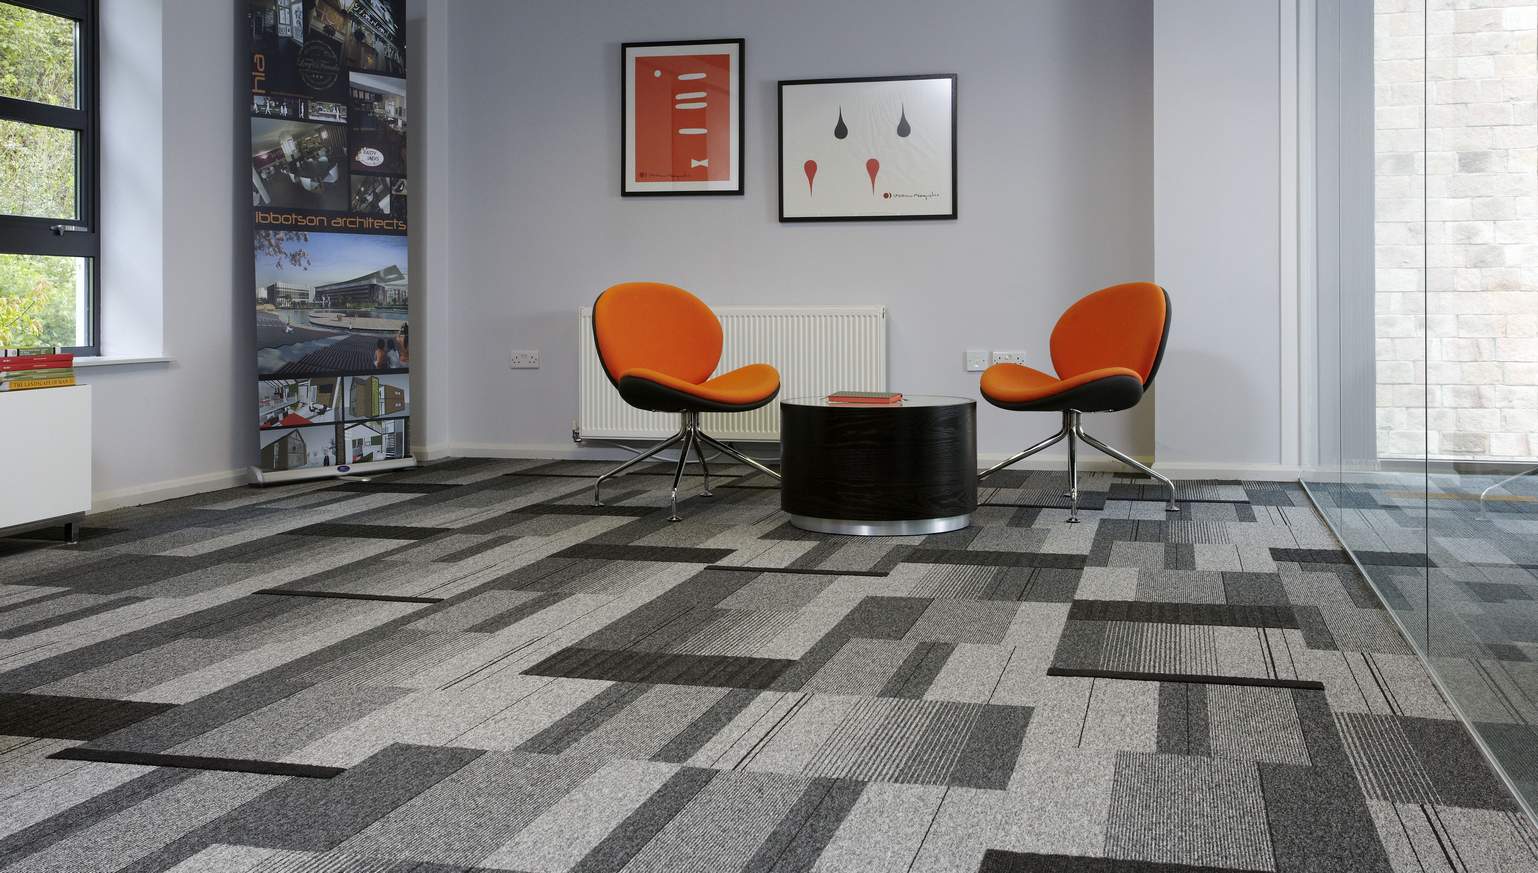
10 Incredible Carpet Squares for 2024
Modified: January 11, 2024
Discover the top 10 carpet squares for 2023, featuring stunning designs, durability, and easy installation. Transform your space with these incredible choices.
(Many of the links in this article redirect to a specific reviewed product. Your purchase of these products through affiliate links helps to generate commission for Storables.com, at no extra cost. Learn more)
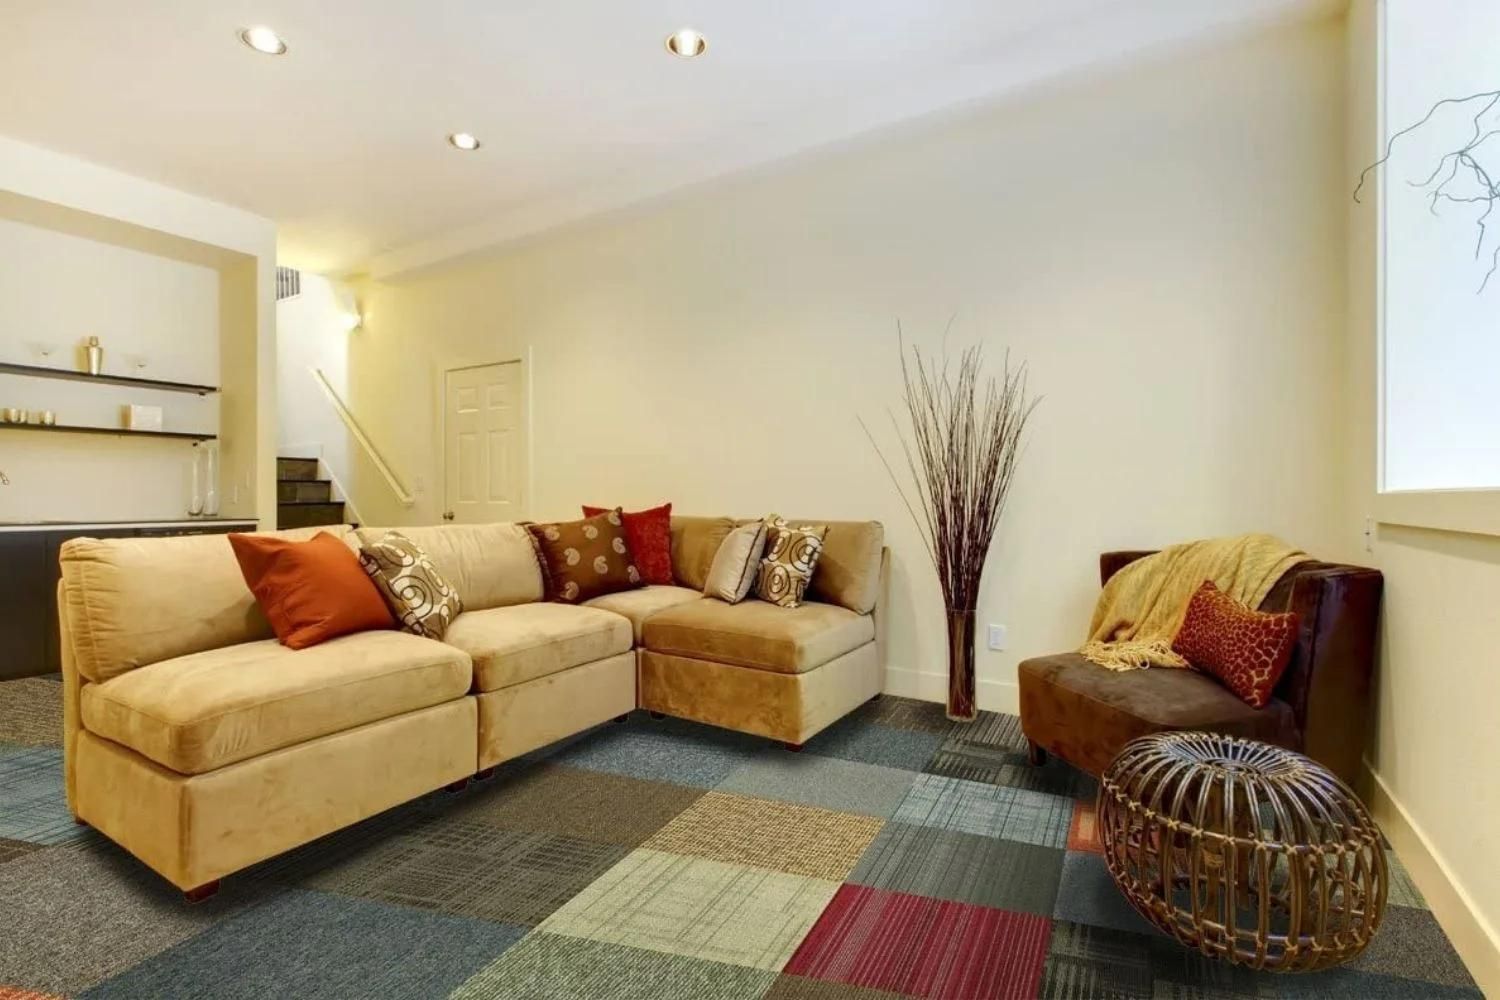
Introducing the future of carpeting: 10 Incredible Carpet Squares for 2023. These cutting-edge carpet squares are revolutionizing the way we think about flooring, combining style, functionality, and durability like never before. With advancements in technology and design, these carpet squares offer a stunning range of colors, patterns, and textures to suit any interior design scheme. Whether you're looking to create a cozy living room, a stylish office space, or a luxurious bedroom, these remarkable carpet squares are sure to elevate your space to new heights in 2023.

Overall Score: 8.5/10
Revamp your home with the Nexus Self Adhesive 12-Inch Carpet Floor Tiles. These peel and stick tiles are perfect for any room in your home, from the dining room to the bedrooms. With 12 tiles per box, you can cover up to 12 square feet of space. The tiles are made of high-quality polypropylene and feature a ribbed finish. Choose from 6 different colors to find the perfect match for your space. The installation is a breeze, with no messy glue or adhesives needed. Simply peel and stick to a flat and dry surface. The Nexus Carpet Floor Tiles are a cost-effective and hassle-free way to give your home a fresh new look.
Key Features
- Refresh your home with low cost and no hassle
- Perfect for any room, mix and match colors
- Peel and stick installation, no adhesives needed
- Made of high-quality polypropylene with ribbed finish
- Comes in 6 different colors
- Covers 12 square feet
Specifications
- Color: Smoke
- Dimension: 12.00Lx12.00Wx0.10H
- Size: 12 Count (Pack of 1)
Pros
- Easy DIY installation
- Versatile use in various rooms
- Affordable and low-cost solution
- Durable and high-quality material
- Multiple color options
Cons
- Inconsistent color
- Adhesive variations
- Not recommended for heavy-duty flooring
The Nexus Self Adhesive 12-Inch Carpet Floor Tiles are a convenient and budget-friendly way to upgrade the look of your home. With easy peel and stick installation, you can transform any room in no time. The high-quality polypropylene material ensures durability, while the ribbed finish adds a touch of texture. Though there may be some inconsistencies in color and adhesive strength, these tiles are perfect for utility uses or lining cabinets for noise reduction. Overall, if you’re looking for a quick and affordable flooring solution that offers versatility and style, the Nexus Carpet Floor Tiles are worth considering.

Overall Score: 9/10
The Self Adhesive Carpet Floor Tiles are a high-quality, easy-to-install solution for your flooring needs. Made of needle-punched non-woven, 100% Polyester, these carpet tiles are durable, wrinkle-resistant, and thick. The aluminum film backing adds warmth, waterproofing, and moisture-proofing properties. With its self-adhesive backing, you can easily peel and stick the tiles without the need for glue. These tiles can be laid on any flat, smooth, and non-dusty surface, including concrete floors. The carpet tiles also offer noise reduction, making them perfect for reducing noise impact in your living space. They can be used in various settings, such as hotel floors, business offices, pet areas, and homes. Overall, these tiles provide convenience, comfort, and protection. Available in a stylish Deep Blue color.
Key Features
- HIGH-QUALITY: Made of needle-punched non-woven, 100% Polyester, and aluminum film backing
- EASY INSTALLATION: Self-adhesive backing, easy to remove and replace single tiles
- PEEL AND STICK FLOOR TILE: No need for glue, can be laid on any flat surface
- NOISE REDUCE: Thickness of 0.2 inch for noise absorption and anti-slip comfort
- USAGE ANYWHERE: Suitable for hotel floors, business offices, pet areas, and homes
Specifications
- Color: Deep Blue
- Dimension: 12.00Lx12.00Wx0.18H
- Size: 12 Tile
Pros
- Durable and wrinkle-resistant material
- Easy to install and remove
- Can be used on various surfaces
- Offers noise reduction and comfort
- Suitable for multiple settings
Cons
The Self Adhesive Carpet Floor Tiles provide a convenient and stylish flooring solution for any space. With easy installation and removal, these durable and wrinkle-resistant carpet tiles can be used in various settings, including hotels, offices, homes, and pet areas. The self-adhesive backing eliminates the need for glue, making the installation process hassle-free. The tiles also offer noise reduction and comfortable underfoot feel. Available in a fashionable Deep Blue color, these tiles not only protect your floors but also add a touch of elegance to your space. Overall, the Self Adhesive Carpet Floor Tiles are a practical and versatile choice for anyone in need of a high-quality and aesthetically pleasing flooring option.

Overall Score: 7.5/10
The Smart Squares Walk in The Park Premium Residential Soft Padded Carpet Tiles are a convenient and easy DIY flooring solution. These 8×8 inch carpet tiles are made in the USA and feature a seamless appearance, giving your room a polished and professional look. The tiles are equipped with a high-density attached polyurethane memory cushion, providing unmatched comfort underfoot. With their peel and stick design, these carpet tiles are simple to install and can be easily replaced if damaged or worn. They are made with the environment in mind and offer excellent durability and resistance to stains, bleach, and fading. Transform any room with these premium quality carpet tiles.
Key Features
- Premium Quality
- Ultra Comfortable Feel
- Provide Seamless Appearance
- Easily Replaceable
- 100% DIY Easy Installation
Specifications
- Color: 444 Granite
- Size: Sample (8” x 8”)
Pros
- High-quality and durable
- Comfortable underfoot with attached memory cushion
- Seamless appearance like Wall-To-Wall carpet
- Easy to replace damaged or worn tiles
- Simple peel and stick installation
Cons
- Color variation might occur
- Some fuzzies may come apart from edging
- Glue could be stronger and require additional adhesive
- Not as plush as expected
The Smart Squares Walk in The Park Premium Residential Soft Padded Carpet Tiles are a great choice for any DIY flooring project. With their high-quality construction, comfortable feel, and easy installation, they offer convenience and durability. The virtually seamless appearance gives your room a polished look, and the ability to replace individual tiles is a handy feature. However, color matching and the strength of the adhesive could be improved. Overall, these carpet tiles provide a practical and stylish solution for transforming any living area.

Overall Score: 8/10
The Smart Squares in A Snap Premium Soft Padded Carpet Tiles are a high-quality carpet flooring solution that offers excellent durability and resistance to stains. These plush cut residential carpet squares come with attached padding, eliminating the need for an additional pad. The tiles are designed using proprietary technology to provide a seamless appearance, giving the impression of wall-to-wall carpeting. Installation is easy and DIY-friendly, with the peel and stick feature allowing for quick transformation of any room. Damaged or worn tiles can be replaced individually, making it a versatile option for all living areas. With its comfortable feel and stylish design, the Smart Squares carpet tiles are a practical and affordable choice for any home.
Key Features
- Premium Quality: Made with Pure Color fiber system for durability
- Ultra Comfortable: 6 LB high-density attached polyurethane memory cushion
- Seamless Appearance: Virtually seamless look of wall-to-wall carpet
- Easily Replaceable: Damaged or worn tiles can be individually replaced
- 100% DIY Easy Installation: Peel and stick without the need for carpet adhesive
Specifications
- Color: 388 Stonehenge
- Dimension: 18.00Lx18.00Wx6.00H
- Size: 10 Tiles – 22.5 Sq Ft
Pros
- High-quality and durable
- Comfortable underfoot without additional padding
- Seamless appearance like wall-to-wall carpet
- Easy to replace individual tiles
- Simple DIY installation without carpet adhesive
Cons
- Adhesion on edges is not as strong
- Some tiles may be uneven and require cutting
Overall, the Smart Squares in A Snap Premium Soft Padded Carpet Tiles offer a practical and affordable solution for residential carpet flooring. With their high-quality construction and resistance to stains, these carpet tiles are durable and long-lasting. The attached padding provides superior comfort underfoot, eliminating the need for an additional pad. The seamless appearance creates a seamless look of wall-to-wall carpeting, enhancing the overall aesthetics of any room. Installation is a breeze with the peel and stick feature, making it a DIY-friendly option for homeowners. While there may be some minor issues with adhesion and uneven tiles, the overall performance and value of these carpet tiles make them a great choice for updating any living space.

Overall Score: 9/10
Experience the ultimate comfort and quality with the Peak Performance Peel and Stick Carpet Tiles. These carpet tiles feature an attached memory foam cushion for extreme comfort, making them super comfortable to walk on. With the PureColor fiber technology, the tiles are durable, bleach, stain, and fade resistant. The soft fiber upgrade adds a luxurious touch to these top-of-the-line carpet tiles. The 40 oz. face weight ensures incredible durability and wear resistance, making them perfect for high-traffic areas. The carpet tiles are pet-friendly and resist staining from red wine, chocolate, and even pet stains. Installation is a breeze with the peel and stick adhesive backing, providing a virtually seamless appearance. The tiles can also be easily replaced if needed. Transform your space with these plush, easy-to-install carpet tiles.
Key Features
- Super comfortable with attached memory foam cushion
- Durable, bleach, stain, and fade resistant
- Soft fiber upgrade for a luxurious feel
- 40 oz. face weight for exceptional durability
- Pet-friendly and resistant to staining
- Peel and stick installation for easy DIY
- Seamless appearance with replaceable tiles
Specifications
- Color: Everest
- Dimension: 18.00Lx18.00Wx0.50H
- Size: 10 Tiles – 22.5 Square Feet
Pros
- Extreme comfort with attached memory foam cushion
- Durable and resistant to stains, bleach, and fading
- Luxurious soft fiber upgrade
- Perfect for high-traffic areas with exceptional durability
- Pet-friendly and easy to clean
- DIY-friendly installation with peel and stick adhesive
- Virtually seamless appearance with replaceable tiles
Cons
- Visible seams when tiles are butted together
- Inconsistent sizing of tiles
The Peak Performance Peel and Stick Carpet Tiles offer the ultimate comfort, durability, and style for any space. With their attached memory foam cushion, these tiles provide an unmatched level of comfort while the PureColor fiber technology ensures they stay looking like new for years to come. The soft fiber upgrade adds a touch of luxury to your floor, making it a joy to walk on. The peel and stick installation makes it a breeze to transform your space, and the seamless appearance gives the impression of wall-to-wall carpeting. Although there may be visible seams and some inconsistency in sizing, the overall quality and performance of these carpet tiles make them a top choice for any home or office.

Overall Score: 7/10
The Smart Squares Easy Street Premium Residential Soft Padded Carpet Tiles are the perfect solution for transforming any room with their seamless appearance and easy installation. These carpet tiles are made with premium quality craftsmanship, featuring a durable PureColor fiber system that resists stains, bleach, and fading. Each tile comes with an attached polyurethane memory cushion, providing unparalleled comfort underfoot. The tiles can be easily replaced if damaged or worn, making them ideal for all living areas. With their DIY-friendly peel and stick design, you can easily upgrade your space without the need for carpet adhesive. Bring style and comfort to your home with the Smart Squares Easy Street Carpet Tiles.
Key Features
- Premium Quality: Smart Squares are plush cut residential carpet squares with padding attached and each carpet tile is made with Pure Color fiber system, giving them excellent durability and resistance to stains, bleach, and fading
- Ultra Comfortable Feel: Each Smart Square carpet tiles with padding is equipped with a 6 LB high-density attached polyurethane memory cushion that offers unmatched comfort underfoot, so no additional pad is required
- Provide Seamless Appearance: Our proprietary technology is used to cut the tiles without touching the face fiber, resulting in a virtually seamless appearance that looks like Wall-To-Wall floor carpet
- Easily Replaceable: Damaged or worn tiles can be replaced, without replacing the entire room making it the perfect carpet square for all living areas
- 100% DIY Easy Installation: These peel and stick carpet tiles are the best residential soft-surface DIY carpet flooring solution available on the market. They allow you to easily transform any room by simply prepping, peeling, placing, and pressing the tile on the desired location without the need for any carpet adhesive
Specifications
- Color: 858 Acorn
- Dimension: 5.90Lx20.60Wx20.60H
- Size: Sample (8” x 8”)
Pros
- Premium quality and durability
- Ultra comfortable feel with attached memory cushion
- Seamless appearance for a wall-to-wall carpet look
- Easy replacement of damaged or worn tiles
- Simple DIY installation with peel and stick technology
Cons
- Size discrepancy in tiles
- Leaves residue when peeled up
- Varying tile sizes affect installation
- Misleading product description for sample size
- Sparse carpet wool and weak adhesive
Despite some issues with size discrepancies and adhesive strength, the Smart Squares Easy Street Premium Residential Soft Padded Carpet Tiles offer a convenient and high-quality solution for residential carpet flooring. With their seamless appearance, comfortable feel, and easy DIY installation, these carpet tiles are a great choice for anyone looking to upgrade their living space. While there may be some minor flaws, the overall performance and value of these carpet tiles make them a worthwhile investment for transforming any room. Just be sure to double-check the sizes and prepare for some sorting during installation. Overall, the Smart Squares Easy Street Carpet Tiles provide a stylish and comfortable flooring option for DIY enthusiasts and homeowners alike.

Overall Score: 8/10
The CISSLOR Self Adhesive Carpet Floor Peel Tile is a convenient and easy-to-install flooring solution. With its peel and stick feature, you can save both time and money. The heavy-duty polyester material makes it anti-slip and easy to maintain. These carpet tiles also provide noise reduction and protect hardwood floors and furniture from scratches. They are suitable for both indoor and outdoor use, making them a versatile option. The black color adds a sleek and modern touch to any space. Customers have praised their durability and adhesive strength. However, some have noted slight color variations between tiles. Overall, these carpet floor tiles offer a practical and stylish flooring solution for homes and offices.
Key Features
- Peel and stick floor tile for easy installation
- Anti-slip mat made of heavy-duty polyester
- Easy DIY installation with various configurations
- Noise reduction and protection for hardwood floors
- Suitable for indoor and outdoor use
Specifications
- Color: Black
Pros
- Convenient peel and stick installation
- Anti-slip and easy to maintain
- Reduces noise and protects floors
- Versatile for indoor and outdoor use
Cons
- Slight color variations between tiles
The CISSLOR Self Adhesive Carpet Floor Peel Tile offers a practical and cost-effective flooring solution. With its easy peel and stick installation, it saves you time and money. The tiles are durable and provide an anti-slip surface, making them suitable for both indoor and outdoor use. They also reduce noise and protect your floors from scratches. Although there may be slight color variations between tiles, this does not significantly affect their performance. Overall, these carpet floor tiles are a great choice for anyone looking for a convenient, stylish, and functional flooring option.

Overall Score: 8.2/10
The 10 Pcs Kids Carpet Square Seats are colorful and soft floor mats perfect for classroom activities and home play. Made from quality polyester materials and microfiber fabrics, these 18-inch square cushions provide a cozy and comfortable seating experience. The unique hemming design ensures durability and prevents deformation. The TPE rubber sole bottom offers waterproof and non-slip functionality. With 10 different colors, children can easily distinguish their own mat. These mats are suitable for daycare, preschool, kindergartens, play areas, and more.
Key Features
- 10 pieces of 18-inch carpet seats
- Soft and comfortable touch
- Waterproof and non-slip TPE rubber sole
- Unique hemming sewing design
- Wide application for various settings
Specifications
- Color: Cute Color
- Size: 18 Inch
Pros
- Provides sufficient quantity for classroom needs
- Vibrant rainbow-colored mats loved by children
- High-quality materials for longevity
- Comfortable seating for kids
- Easy to distinguish individual mats
Cons
- Limited to a single size and color option
The 10 Pcs Kids Carpet Square Seats are an excellent choice for creating a colorful and comfortable environment for children. With their unique hemming design and high-quality materials, these mats are durable and can withstand repeated use. The vibrant rainbow colors add a playful touch to any classroom or play area. The only drawback is the limited size and color options available. Overall, these floor mats provide a cozy seating experience while promoting engagement and organization among children. Perfect for daycare, classrooms, and home play areas.

Overall Score: 8/10
The 4URFloor 9 inch x 36 inch Assorted Carpet Tile Peel and Stick 16 Planks is the perfect solution for adding stylish and durable carpeting to your home or office. With easy peel and stick installation, you can transform your space in no time. The stain and fade-resistant planks provide long-lasting beauty, while the assortment of colors adds a unique touch to any room. Each box contains 16 planks, covering a total of 36 square feet. Whether you want to create a pattern or mix and match colors, these carpet tiles offer endless possibilities. Upgrade your floors with this versatile and high-quality carpet tile.
Key Features
- 16 carpet tile planks per box
- Covers 36 square feet
- Easy peel and stick installation
- Stain resistant
- Fade resistant
- Each box is an assorted mix
Specifications
- Color: Assorted
- Dimension: 36.00Lx9.00Wx0.20H
- Size: 9×36
Pros
- Easy installation
- Durable and easy to clean
- High-quality material
- Assorted mix adds unique touch
Cons
- Limited color variation
- May require additional glue for some pieces
The 4URFloor Carpet Tile Peel and Stick 16 Planks is a versatile and high-quality option for those wanting to upgrade their floors. With easy installation and durability, these carpet tiles offer a convenient and stylish solution. The assortment of colors allows for creative designs, and the ability to replace individual tiles makes it practical for high-traffic areas. While the color variation may be limited, the overall quality and performance of these carpet tiles make them a great choice for any home or office. Give your space a fresh new look with the 4URFloor Carpet Tile Peel and Stick 16 Planks.

Overall Score: 7.5/10
Create a cozy and safe play area for your kids with these soft and durable interlocking carpet tiles. Made of thick and plush foam material, these tiles provide a cushioning effect for added safety. The easy-to-install and machine washable design makes them a practical addition to any kids room. Available in a variety of colors, these tiles can be used to create a stylish and comfortable play area for your little ones.
Key Features
- Includes 16 pieces of carpet tiles
- Easy to install and connect seamlessly
- Made of thick and soft EVA foam material
- Ideal for kids room and play areas
- Machine washable for easy cleaning
Specifications
- Color: Green
- Dimension: 12.00Lx12.00Wx0.40H
- Size: 16 pcs
Pros
- Soft and fluffy texture
- Provides good cushioning
- Easy to clean and maintain
- Removable and stackable design
Cons
- Poor corner finishing
- May require additional tiles for larger areas
The 16 Pcs Baby Interlocking Carpet Square Tiles are a great addition to any kids room or play area. The soft and fluffy foam material provides a comfortable and safe surface for babies to play on. The tiles are easy to install and clean, making them a convenient choice for parents. However, the poor corner finishing may be a drawback for some customers. Overall, these carpet tiles are a practical and stylish solution for creating a cozy and safe play area for your little ones.
Buyer's Guide: Carpet Squares
So, you've decided that carpet squares are the way to go for your flooring needs. Great choice! Carpet squares, also known as carpet tiles, offer versatility, ease of installation, and a wide range of style options. To help you make an informed decision, here's a comprehensive buyer's guide:
Read also: 10 Incredible Carpet Remnants for 2024
Benefits of Carpet Squares
- Versatility: Carpet squares come in various sizes, shapes, colors, and patterns, allowing you to mix and match to create unique flooring designs.
- Easy Installation: Forget about laying down an entire roll of carpet; carpet squares are easily installed by placing them individually. You can even rotate or replace individual tiles if they become damaged or stained.
- Budget-Friendly: Carpet squares are often more cost-effective than traditional carpet rolls, and their easy installation can save you money on professional installation costs.
- Durability: Many carpet squares are designed to be highly durable, making them suitable for high-traffic areas. They are often stain-resistant and easier to clean than traditional carpets.
- Sound Absorption: Carpet squares can help reduce noise levels in your home. The cushioning effect created by the carpet can provide a more peaceful living space.
Things to Consider
When purchasing carpet squares, there are a few factors to keep in mind:
- Quality: Ensure that the carpet squares you choose are of high quality. Look for reputable brands and consider the type of material used and the construction of the tiles.
- Usage: Determine the type of space where the carpet squares will be installed. Different areas may require different carpet qualities, such as low-pile options for heavy foot traffic or stain-resistant tiles for areas prone to spills.
- Style: Consider the overall aesthetic of your space and choose carpet squares that complement it. You can opt for bold patterns, solid colors, or even create a unique design by mixing different styles.
- Size and Shape: Carpet squares come in various sizes and shapes, including squares, rectangles, and even hexagons. Measure your space carefully and choose the tile size and shape that best fits your needs.
- Installation Method: Find out how the carpet squares should be installed. Some tiles have adhesive backing, while others require double-sided tape or adhesive glue. Ensure you have the necessary tools and materials for installation.
- Warranty: Check the warranty offered by the manufacturer. It's always wise to have some protection in case of defects or unforeseen issues.
Frequently Asked Questions about 10 Incredible Carpet Squares For 2024
Carpet squares can be installed on a variety of subfloors, including concrete, wood, and tile. However, it’s essential to follow the manufacturer’s guidelines to ensure proper installation and longevity.
Many carpet squares are designed for easy DIY installation. However, if you’re uncertain about your skills or have a large and complex area to cover, it’s recommended to seek professional assistance.
One of the advantages of carpet squares is their modularity. You can easily replace individual tiles without having to remove the entire flooring. Simply remove the damaged tile and replace it with a new one.
Regular vacuuming is essential to remove dust and debris. For spills or stains, follow the manufacturer’s instructions for cleaning. Some carpet squares may require professional cleaning periodically, so be sure to check the maintenance recommendations.
Absolutely! Many carpet squares are designed for commercial use. They are highly durable and can withstand heavy foot traffic, making them a popular choice for offices, retail spaces, and other commercial environments.
Was this page helpful?
Trust Storables.com for unbiased and honest product reviews. Our reviews are rigorously assessed by our Expert Board Contributors and adhere to strict Editorial Standards. We ensure that each review is transparent and trustworthy, helping you make informed purchasing decisions.
0 thoughts on “10 Incredible Carpet Squares for 2024”