Articles
How To Make Cookies In An Electric Skillet
Modified: August 16, 2024
Learn how to make delicious cookies in your electric skillet with these helpful articles. Discover tips, recipes, and techniques to create perfect cookies every time.
(Many of the links in this article redirect to a specific reviewed product. Your purchase of these products through affiliate links helps to generate commission for Storables.com, at no extra cost. Learn more)
Introduction
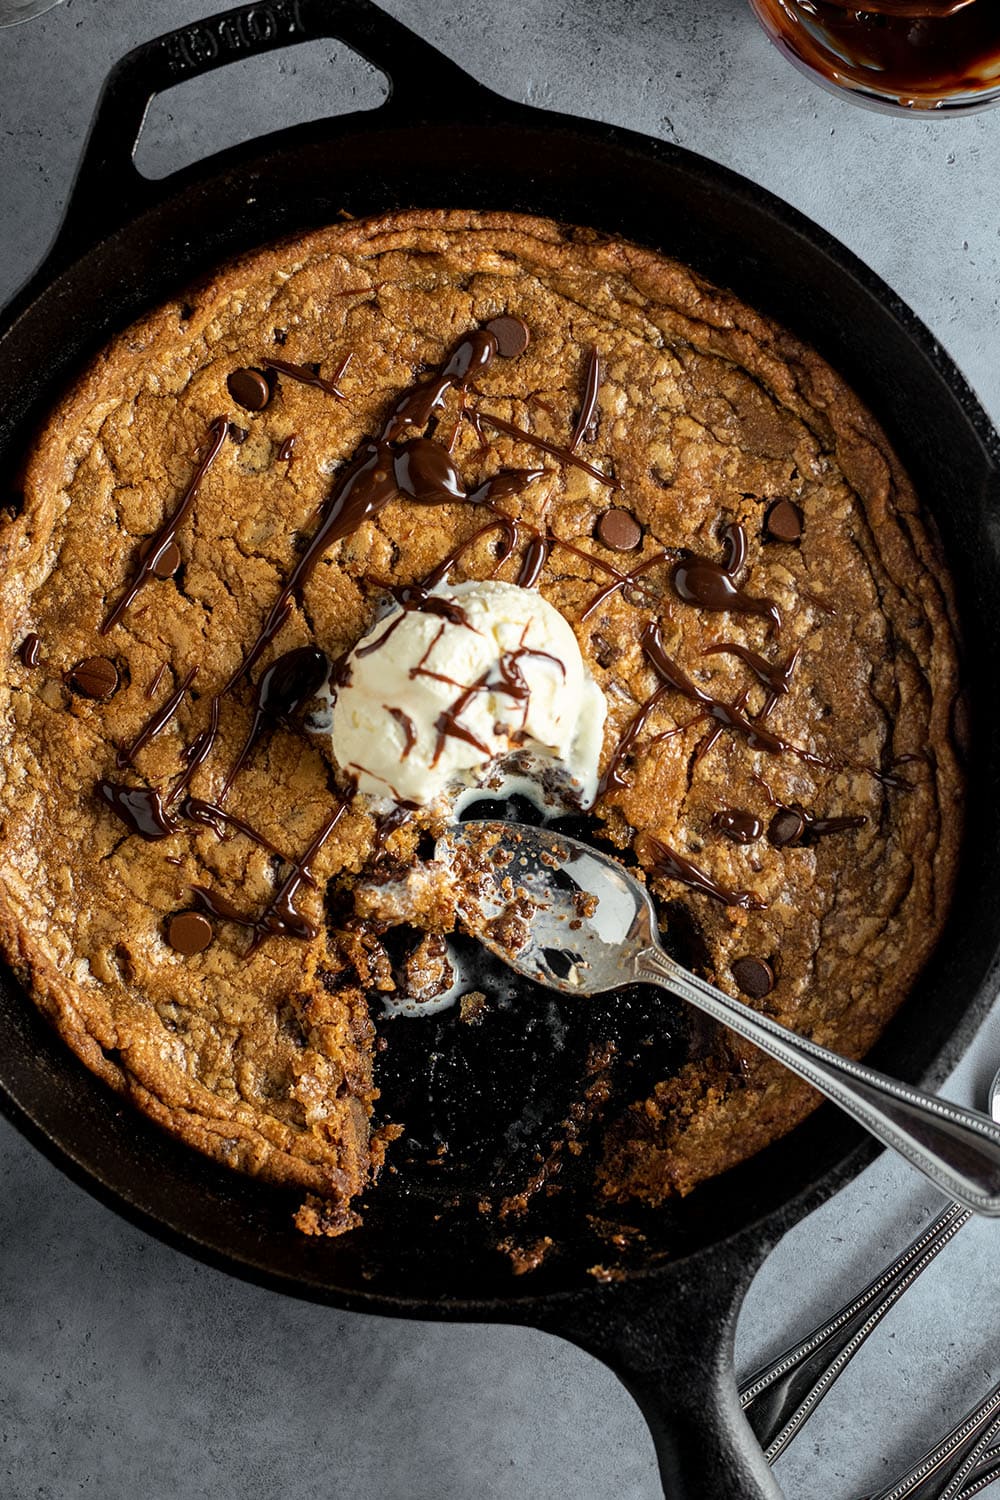
There’s nothing quite like the smell of freshly baked cookies wafting through your home. The delicious aroma, the warm and gooey texture, and that heavenly taste – it’s no wonder why cookies are a beloved treat for people of all ages. But did you know that you can make cookies using an electric skillet? Yes, you read that right! In this article, we will guide you through the process of making cookies in an electric skillet and share some tips and tricks to ensure your cookies turn out perfectly every time.
Using an electric skillet to make cookies may sound unconventional, but it offers several advantages. First, the electric skillet provides a consistent and even heat distribution, resulting in perfectly baked cookies. Second, it eliminates the need for an oven, making it a convenient option for those who don’t have access to one or prefer not to use it. Lastly, it can be a fun and unique way to experiment with different cookie recipes and flavors.
Before we dive into the process of making cookies in an electric skillet, let’s discuss the importance of choosing the right skillet for the job. Electric skillets come in various sizes and materials, so it’s important to select one that suits your needs and preferences. Look for a skillet with a nonstick surface, as it will prevent the cookies from sticking and make cleanup easier. Additionally, choose a skillet with a temperature control feature, as this will allow you to adjust the heat precisely.
Now that you have your skillet ready, it’s time to gather all the necessary ingredients and tools for making your cookies. Just like traditional cookie recipes, you will need ingredients such as flour, sugar, butter, eggs, baking powder, and any additional flavors or mix-ins you desire. Make sure to have measuring cups and spoons, a mixing bowl, a whisk or electric mixer, and a spatula or spoon for mixing the dough.
In the next section, we will walk you through the process of preparing the cookie dough and preheating the electric skillet. Get ready to experience the joy of baking cookies in a whole new way!
Key Takeaways:
- Unconventional Baking: Cookies in an Electric Skillet
Baking cookies in an electric skillet offers a unique and convenient alternative to traditional oven baking, providing even heat distribution and endless flavor experimentation. - Perfecting the Art of Electric Skillet Cookies
From choosing the right skillet to mastering temperature control and creative mix-ins, baking cookies in an electric skillet opens up a world of delicious possibilities for cookie enthusiasts.
Read more: How To Make Sukiyaki In Electric Skillet
Choosing the Right Electric Skillet for Making Cookies
When it comes to making cookies in an electric skillet, choosing the right skillet is crucial for baking success. The right skillet will provide even heat distribution, prevent cookies from sticking, and give you more control over the cooking process. Here are some factors to consider when selecting an electric skillet for making cookies:
- Size: Consider the size of the skillet based on your baking needs. If you plan to bake large batches of cookies, opt for a larger skillet. However, if you’re just baking for yourself or a small group, a smaller skillet will suffice. Keep in mind that a larger skillet may require more energy to heat up and maintain temperature, so choose accordingly.
- Nonstick surface: Look for an electric skillet with a nonstick surface. This feature will prevent the cookies from sticking to the skillet and make cleanup much easier. It will also ensure that your cookies come out intact and in perfect shape.
- Temperature control: Having a temperature control feature on the electric skillet is essential for baking cookies. Different cookie recipes require different temperature settings, so being able to adjust the heat precisely will ensure your cookies bake evenly and don’t burn. Look for a skillet with clear temperature markings and easy-to-use controls.
- Heat distribution: It’s important to ensure that the electric skillet provides even heat distribution. Uneven heat can result in cookies that are overcooked in some areas and undercooked in others. Look for skillets with heating elements that cover the entire cooking surface, providing uniform heat distribution throughout.
- Durability: Consider the durability of the electric skillet. Look for skillets made from high-quality materials that can withstand high temperatures and frequent use. Stainless steel or aluminum skillets are popular choices due to their durability and heat conductivity.
Once you’ve selected the right electric skillet, you’re ready to embark on your cookie-baking adventure. Before you start, gather all your ingredients and tools, and be prepared to indulge in the tantalizing aroma of freshly baked cookies filling your home. In the next section, we’ll guide you through the process of preparing the cookie dough and preheating the electric skillet. Get ready to elevate your cookie baking game with the electric skillet method!
Gathering the Ingredients and Tools
Before you can start making cookies in an electric skillet, it’s important to gather all the necessary ingredients and tools. Here’s a rundown of what you’ll need:
- Cookie Ingredients: The basic ingredients for most cookie recipes include flour, sugar, butter, eggs, baking powder, and salt. However, feel free to get creative and add in additional flavors like chocolate chips, nuts, or dried fruits. Make sure to check your chosen recipe for specific ingredient quantities and any additional ingredients you may need.
- Measuring Cups and Spoons: Accurate measurements are key to baking successful cookies. Have a set of measuring cups and spoons on hand to measure out your ingredients precisely. It’s especially important to measure the flour correctly, as using too much or too little can affect the texture of your cookies.
- Mixing Bowl: A sturdy mixing bowl is essential for combining your cookie ingredients. Choose a bowl that is spacious enough to accommodate all the ingredients comfortably and allows for thorough mixing without causing excessive splattering.
- Whisk or Electric Mixer: Depending on your preference and the recipe you’re using, you can either use a whisk or an electric mixer to combine the ingredients. A whisk works well for smaller batches and lends a more hands-on approach, while an electric mixer is ideal for larger batches or when you want to save time and effort.
- Spatula or Spoon: Once the cookie dough is mixed, you’ll need a spatula or spoon to form the cookies and place them in the electric skillet. Opt for a nonstick spatula or a spoon with a comfortable grip to make handling the dough easier.
- Cooking Utensils: You’ll require utensils like tongs or a wide spatula to flip the cookies in the skillet while baking. These utensils will help ensure that the cookies cook evenly on both sides and prevent any potential sticking.
- Wire Cooling Rack: After the cookies are baked, they need to cool before you can enjoy them. Having a wire cooling rack allows for proper airflow around the cookies, preventing them from becoming soggy. If you don’t have a cooling rack, you can also place the cookies on a clean, flat surface to cool.
With all your ingredients and tools gathered, you’re now ready to proceed to the next steps of making cookies in an electric skillet. In the following section, we’ll explore the process of preparing the cookie dough and preheating the electric skillet. Get your apron on and let’s dive into the sweet world of cookie baking!
Preparing the Cookie Dough
Now that you have gathered all the necessary ingredients and tools, it’s time to start preparing the cookie dough. Follow these steps to ensure your cookie dough is mixed to perfection:
- Measure and Sift Dry Ingredients: Start by measuring out the required amount of flour, sugar, baking powder, and salt as specified in your chosen recipe. To ensure a smooth and evenly textured dough, it’s recommended to sift these dry ingredients together into a mixing bowl. Sifting helps remove any lumps and aerates the flour for a lighter result.
- Cream Butter and Sugar: In a separate bowl, cream together the butter and sugar until light and fluffy. You can do this by hand using a whisk or with the help of an electric mixer. Creaming the butter and sugar incorporates air into the mixture, resulting in a softer and more tender cookie.
- Add Eggs and Vanilla: Once the butter and sugar are creamed, add the eggs one at a time, mixing well after each addition. This ensures that each egg is fully incorporated into the dough. Also, add in the vanilla extract or any other flavored extract that your recipe calls for, as this adds depth and complexity to the cookie flavor.
- Gradually Add Dry Ingredients: With the wet ingredients mixed, it’s time to slowly incorporate the dry ingredients. Add about a third of the dry mixture to the bowl and gently mix until just combined. Repeat this process twice more until all the dry ingredients are incorporated. Be careful not to overmix the dough, as this can result in tougher cookies.
- Optional: Fold in Mix-Ins: If your recipe calls for any additional mix-ins like chocolate chips, nuts, or dried fruits, now is the time to fold them into the dough. Gently fold in the mix-ins until they are evenly distributed throughout the dough.
- Chill the Dough: To prevent the cookies from spreading too much during baking, it’s recommended to chill the dough for at least 30 minutes or as specified in your recipe. Chilling allows the fats in the dough to solidify, resulting in a thicker and more evenly baked cookie.
With the cookie dough prepared, it’s time to move on to the next step of preheating the electric skillet. In the following section, we’ll guide you through the process of prepping the skillet and setting the right temperature. Get ready to bring your cookie dreams to life!
Preheating the Electric Skillet
Now that your cookie dough is ready, it’s time to preheat the electric skillet before you start baking. Preheating ensures that the skillet reaches the desired temperature and that your cookies bake evenly. Follow these steps to preheat your electric skillet:
- Clean and Dry the Skillet: Start by ensuring that your electric skillet is clean and dry. Remove any residue or food particles from previous use and wipe the surface with a clean cloth or paper towel.
- Place the Skillet on a Flat Surface: Find a flat and heat-resistant surface in your kitchen where you can safely place and operate the electric skillet. Make sure there is enough clearance from walls or other objects to prevent heat damage or accidents.
- Adjust Temperature Control: Most electric skillets have a temperature control dial or knob. Set the dial or knob to the temperature specified in your cookie recipe. Common cookie baking temperatures range from 325°F to 375°F (165°C to 190°C). The exact temperature will depend on the type of cookie and your personal preference.
- Preheating Time: Allow the electric skillet to preheat for at least 10 minutes or until it reaches the desired temperature. The preheating time may vary depending on the size and model of your skillet. Some skillets come with an indicator light that illuminates when the desired temperature is reached.
- Test the Temperature: To ensure that the skillet has reached the desired temperature, you can perform a quick test. Sprinkle a few drops of water onto the surface of the skillet. If the droplets sizzle and evaporate almost immediately, the skillet is hot enough for baking. If the water droplets just sit on the surface without sizzling, continue preheating for a few more minutes.
Once your electric skillet is preheated and at the desired temperature, you’re ready to move on to the next step – forming and baking the cookies. In the following section, we’ll guide you through the process of shaping your cookie dough and achieving perfectly baked cookies in the electric skillet. Get ready for some delicious treats!
When making cookies in an electric skillet, make sure to preheat the skillet before adding the cookie dough. This will help ensure even cooking and prevent the cookies from sticking to the skillet.
Read more: How To Make Popcorn In Electric Skillet
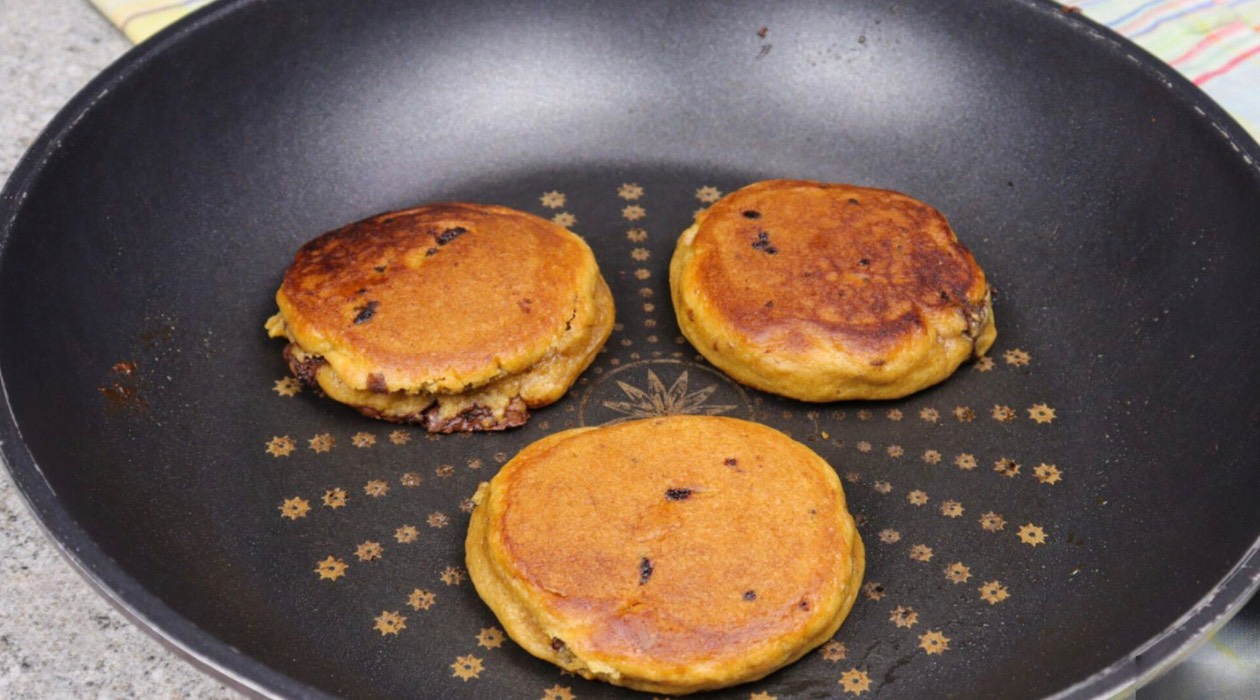
Forming and Baking the Cookies
With your preheated electric skillet ready, it’s time to form and bake your cookies. Follow these steps to ensure your cookies turn out perfectly in the electric skillet:
- Prepare the Skillet: Lightly grease the surface of the skillet with cooking spray, butter, or a small amount of oil. This will prevent the cookies from sticking to the skillet during baking.
- Portion the Dough: Using a spoon, scoop out portions of the cookie dough and roll them into small balls or shape them into your desired cookie shape. Space the dough portions evenly on the greased skillet, leaving enough room between them to spread while baking. Remember that the size and spacing will affect the baking time, so adjust accordingly.
- Flatten the Dough: Depending on your cookie preference, you may want to flatten the cookie dough balls slightly. This can be done with the back of a spoon or by using your fingers. Uniformly flattened cookies will ensure even cooking and a consistent texture.
- Baking Time and Flipping: Place the skillet with the formed cookie dough onto the preheated electric skillet. Bake the cookies according to your recipe’s recommended time and temperature. Keep an eye on them to prevent over-browning. After the first side has cooked for about half of the total baking time, use tongs or a wide spatula to carefully flip each cookie to ensure even browning on both sides.
- Cooking in Batches: Depending on the size of your electric skillet and the number of cookies being baked, you may need to bake the cookies in batches. Remove the finished cookies from the skillet, wipe the surface clean, and repeat the process with the remaining cookie dough.
- Check for Doneness: To determine if the cookies are done, look for a golden brown color around the edges and a slightly firm texture in the center. Different cookie recipes may have varying degrees of doneness, so refer to your specific recipe for visual cues or touch tests to ensure they are cooked to your liking.
Once the cookies are baked to perfection, transfer them to a wire cooling rack to cool completely. Allow them to cool for a few minutes before indulging in the deliciousness. In the next section, we’ll share some helpful tips and tricks to ensure your electric skillet cookies come out picture-perfect every time. Stay tuned!
Tips and Tricks for Perfect Electric Skillet Cookies
While making cookies in an electric skillet can be a unique and exciting experience, it’s helpful to keep a few tips and tricks in mind to ensure your cookies turn out perfect every time. Here are some valuable pointers to elevate your electric skillet cookie game:
- Temperature Control: Pay close attention to the temperature control on your electric skillet. Adjust it as needed to maintain a consistent baking temperature. Electric skillets can sometimes have hot spots, so periodically rotate the skillet during baking to ensure even cooking.
- Use Parchment Paper: To make clean-up easier and prevent sticking, consider using parchment paper to line the skillet. Simply cut the parchment paper to fit the skillet’s surface and place the formed cookie dough on top. This also helps with transferring the cookies once they are baked.
- Avoid Overcrowding: Give each cookie enough space to spread while baking. Overcrowding can result in cookies that blend together or cook unevenly. Depending on the size of your electric skillet and cookie dough portions, you may need to bake the cookies in separate batches.
- Adjust Baking Time: Electric skillet cookie baking times may differ from traditional oven baking times. Keep a close eye on the cookies and adjust the baking time as needed. Remember that the thickness and size of the cookies can affect the baking time, so be mindful of these variables.
- Experiment with Flavors and Mix-Ins: The electric skillet method offers a great opportunity to experiment with different flavors and mix-ins. From chocolate chips and nuts to dried fruits and sprinkles, feel free to get creative and add your favorite ingredients to the cookie dough.
- Test and Adjust: If it’s your first time baking cookies in an electric skillet, it may take a couple of tries to find the perfect temperature and cooking time for your desired cookie texture. Don’t be afraid to test a small batch of cookies and adjust the temperature or timing as needed for best results.
- Allow for Proper Cooling: After baking, transfer the cookies to a wire cooling rack to cool completely. This allows them to firm up and develop their final texture. Avoid stacking or packaging the cookies while they are still warm, as this can cause them to become soft and lose their crispness.
- Enjoy Freshly Baked Cookies: Electric skillet cookies are best enjoyed when fresh out of the skillet. Serve them warm with a tall glass of milk or enjoy them as a delightful treat on their own. Remember to store any remaining cookies in an airtight container once they have cooled completely.
By following these tips and tricks, you’ll be well on your way to baking perfect cookies in your electric skillet. Keep experimenting, adjusting, and enjoying the delicious results! In the final section of this article, we’ll talk about cleaning and maintaining your electric skillet to ensure its longevity and continued baking success.
Cleaning and Maintenance of the Electric Skillet
Once you’ve finished baking your delicious cookies in the electric skillet, it’s important to properly clean and maintain the skillet for future use. Here are some guidelines to keep your electric skillet in top condition:
- Cool Down: Before cleaning the electric skillet, allow it to cool completely to avoid the risk of burns. Never attempt to clean the skillet while it is still hot.
- Disconnect from Power: Ensure that the electric skillet is disconnected from the power source before you begin the cleaning process. This is vital for safety purposes.
- Remove Excess Food and Debris: Gently wipe away any excess food particles or debris from the cooking surface using a paper towel or a soft cloth. Be careful not to scrub or scratch the nonstick coating.
- Wash Nonstick Surface: To clean the nonstick surface of the electric skillet, use warm soapy water and a soft sponge or dishcloth. Avoid using abrasive scrubbers or harsh cleaning agents that can damage the nonstick coating.
- Dry Thoroughly: After washing, ensure that the electric skillet is thoroughly dried. Moisture can damage the electrical components of the skillet, and it may also cause the nonstick coating to deteriorate over time.
- Storage: To maintain the nonstick surface, it’s recommended to place a paper towel or a cloth between the cooking surface and the skillet’s lid when storing. This helps prevent the lid from sticking to the nonstick coating.
- Proper Storage: Store your electric skillet in a clean and dry location. Stack or store other items on top of it carefully to avoid scratching or damaging the nonstick surface.
- Regular Maintenance: As with any kitchen appliance, regular maintenance is crucial. Check the manufacturer’s instructions or user manual for any specific maintenance recommendations. Some skillets may require periodic seasoning or other maintenance procedures to keep the nonstick surface in optimal condition.
By following these cleaning and maintenance practices, you can ensure the longevity of your electric skillet and enjoy many more batches of delicious cookies in the future. Now that you have all the necessary information about making cookies in an electric skillet, it’s time to unleash your creativity and baking skills. Enjoy the process and savor the sweet rewards!
DISCLAIMER: Always refer to the manufacturer’s instructions and guidelines for your specific electric skillet model when cleaning and maintaining it.
Conclusion
Cookies baked in an electric skillet may be an unconventional method, but it opens up a world of possibilities for creating delicious treats. With the right skillet, proper ingredients, and a dash of creativity, you can enjoy perfectly baked cookies without the need for a traditional oven.
In this article, we discussed the importance of choosing the right electric skillet for making cookies. We explored the process of gathering the necessary ingredients and tools, preparing the cookie dough, preheating the skillet, and forming and baking the cookies. We also provided valuable tips and tricks to help you achieve the perfect batch of electric skillet cookies.
Remember, temperature control, proper spacing, and adjusting baking time are key factors to consider while baking cookies in an electric skillet. Experiment with different flavors, mix-ins, and baking techniques to create unique and delectable cookie variations.
After the baking is done, make sure to clean and maintain your electric skillet properly for continued baking success. Regular maintenance and proper storage will help prolong the lifespan of your skillet and keep it in optimal condition for future use.
Now it’s time to grab your electric skillet, gather your ingredients, and embark on a cookie-baking adventure. Let the tantalizing aroma of freshly baked cookies fill your kitchen as you embrace the joy of baking in a whole new way. Enjoy the process, savor the results, and share the love of homemade cookies with family and friends.
Happy baking!
Ready to expand your culinary creativity with your electric skillet? If you've mastered cookies, why not explore other baked delights? Our guide on how to bake using your skillet will show you how to whip up a variety of tasty treats, from cakes to bread. Or perhaps you're keen to experiment with different kitchen gadgets? Learn how to make carrots in your electric pressure cooker, ensuring they're cooked to perfection with minimal fuss and maximum flavor. Both articles offer useful tips that'll make cooking a breeze.
Frequently Asked Questions about How To Make Cookies In An Electric Skillet
Was this page helpful?
At Storables.com, we guarantee accurate and reliable information. Our content, validated by Expert Board Contributors, is crafted following stringent Editorial Policies. We're committed to providing you with well-researched, expert-backed insights for all your informational needs.

0 thoughts on “How To Make Cookies In An Electric Skillet”