Home>Articles>How To Operate A Instant Pot Electric Pressure Cooker
Articles
How To Operate A Instant Pot Electric Pressure Cooker
Modified: February 28, 2024
Learn how to effectively operate an Instant Pot electric pressure cooker with our informative articles. Master the art of pressure cooking and enjoy delicious meals with ease.
(Many of the links in this article redirect to a specific reviewed product. Your purchase of these products through affiliate links helps to generate commission for Storables.com, at no extra cost. Learn more)
Introduction
Welcome to the world of Instant Pot electric pressure cookers! If you’re new to this versatile kitchen appliance, you’re in for a treat. The Instant Pot combines the convenience of a pressure cooker with the functionality of a slow cooker, rice cooker, saute pan, steamer, and more. It’s a game-changer for busy home cooks who want to prepare delicious meals in a fraction of the time it would take using traditional cooking methods.
In this article, we’ll guide you through the process of operating your Instant Pot electric pressure cooker. Whether you’ve just unboxed your new appliance or are looking for more guidance on how to make the most of it, we’ve got you covered. By the end, you’ll have the knowledge and confidence to use your Instant Pot to its full potential.
Before we dive into the specifics of operating the Instant Pot, let’s take a moment to understand the basic principles of this remarkable kitchen appliance. The Instant Pot uses a combination of heat and pressure to cook food quickly and efficiently. The sealed cooking environment helps to lock in flavors and nutrients, resulting in tender and flavorful meals.
The Instant Pot comes with a variety of functions and settings, each designed to accommodate different cooking methods. From pressure cooking to sauteing, slow cooking to steaming, the Instant Pot can do it all. By familiarizing yourself with these essential functions, you’ll be able to adapt your cooking style and experiment with new recipes.
But first, let’s get started with the initial setup and familiarize ourselves with the control panel and accessories that come with the Instant Pot. Once you’ve set up the appliance, it’s time to dive into the world of cooking possibilities that await you!
Key Takeaways:
- Mastering the Instant Pot’s functions, from pressure cooking to sautéing, allows for convenient and flavorful meal preparation in a fraction of the time, making it a versatile kitchen companion for busy home cooks.
- Regular cleaning and maintenance of the Instant Pot are crucial for optimal performance and longevity, ensuring that it remains in top condition for years to come, ready to elevate your culinary creations.
Understanding Your Instant Pot Electric Pressure Cooker
Before you start using your Instant Pot electric pressure cooker, it’s important to have a good understanding of its components and features. This will help you navigate through the cooking process with ease and confidence.
The Instant Pot consists of a variety of parts, including the main unit, the inner pot, the lid, the sealing ring, the steam release valve, and various buttons and controls on the control panel.
The main unit houses the heating element and control panel. It’s the central hub of the Instant Pot, where all the magic happens. The inner pot is made of stainless steel and is where you place the ingredients for cooking. It’s important to ensure the inner pot is properly inserted into the main unit before starting any cooking process.
The lid of the Instant Pot is designed to seal tightly to create a pressurized environment. It’s equipped with a sealing ring, which helps to keep the steam from escaping. The sealing ring should be checked regularly for any wear or damage and replaced if necessary to maintain the effectiveness of the pressure cooking function.
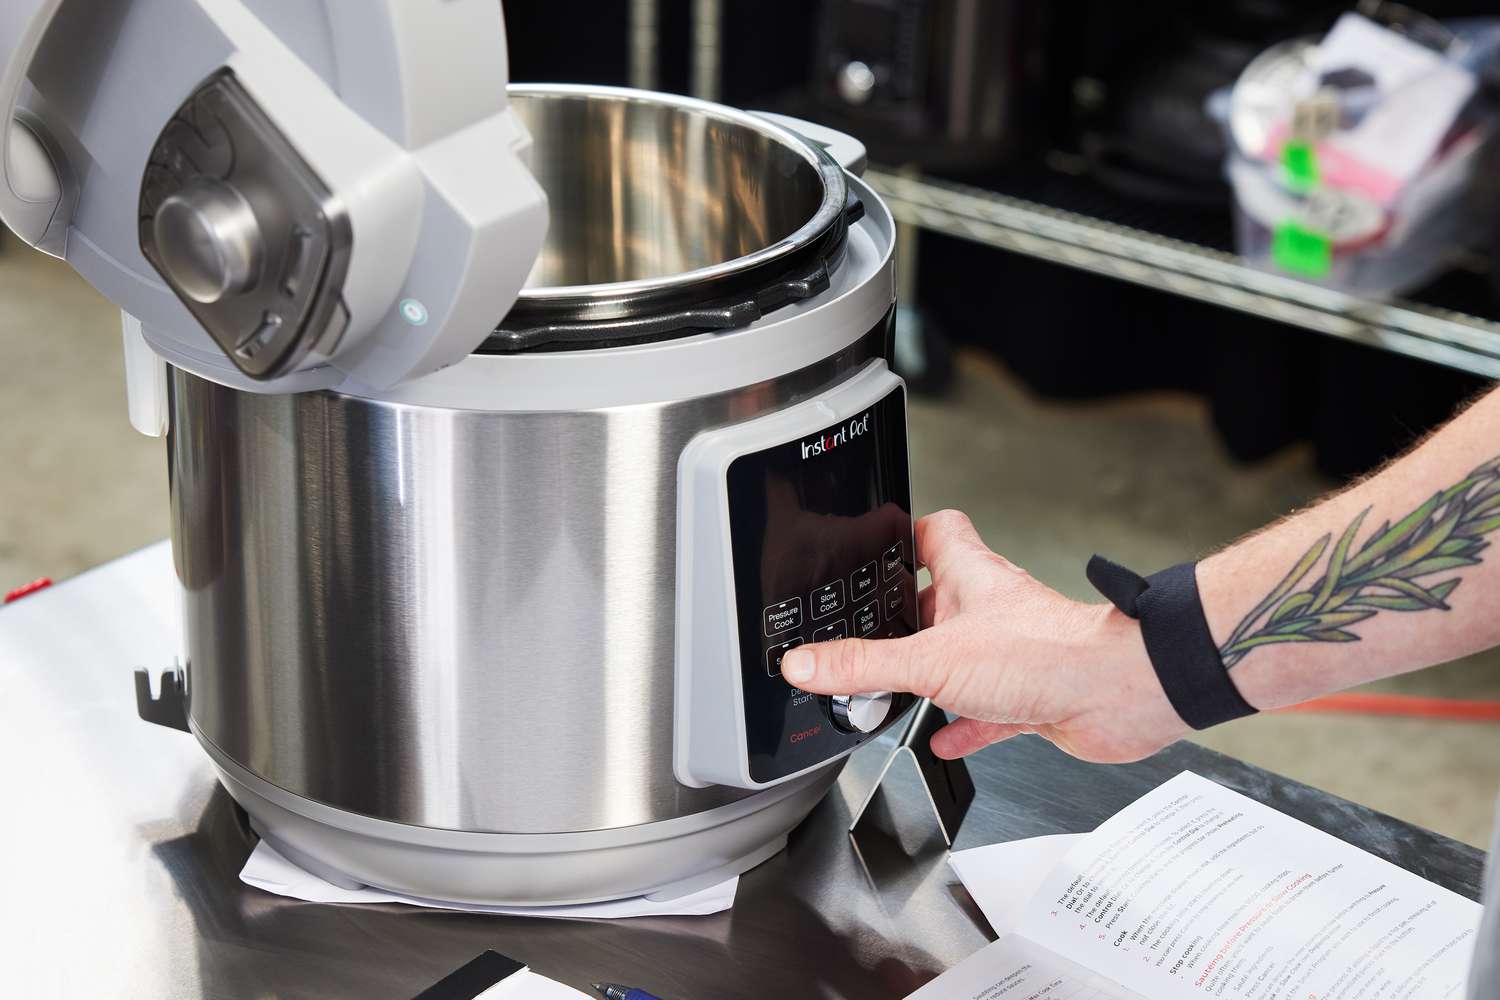
On the control panel, you’ll find a range of buttons and settings that allow you to choose the appropriate cooking method and adjust the cooking time and temperature. Familiarize yourself with these buttons and settings to make the most of your Instant Pot.
The steam release valve is a crucial component of the Instant Pot. It allows you to control the release of steam and pressure during the cooking process. The valve should always be in the sealed position when pressure cooking, and you can switch it to the venting position to release steam after cooking is complete.
Now that you have a better understanding of the different parts of your Instant Pot, it’s time to get started with using it. In the next section, we’ll walk you through the initial setup process and guide you on how to navigate the basic functions and settings of your Instant Pot electric pressure cooker. Get ready to unlock a world of culinary possibilities!
Getting Started with Your Instant Pot
Before you start experimenting with different recipes and cooking methods, it’s important to get familiar with the basic setup and usage of your Instant Pot electric pressure cooker. Follow these steps to ensure a smooth start to your Instant Pot journey:
1. Read the Manual
The first step is to thoroughly read the user manual that came with your Instant Pot. The manual provides important information about safety precautions, the various parts of the appliance, and specific instructions on how to use it. Take the time to understand the guidelines and recommendations provided by the manufacturer.
2. Perform the Initial Water Test
Performing an initial water test is an essential step to ensure that your Instant Pot is working properly. Fill the inner pot with water up to the recommended level and close the lid securely. Set the steam release valve to the sealed position and select the pressure cook function, setting the cooking time to 5 minutes. Once the cooking process is complete, allow the pressure to naturally release for 10 minutes, then carefully release any remaining pressure by switching the steam release valve to the venting position. This test will help you become familiar with the cooking process and validate the functionality of your Instant Pot.
3. Start with Simple Recipes
As a beginner, it’s best to start with simple recipes that require basic cooking techniques. Choose recipes that have clear instructions and relatively short cooking times. This will allow you to become comfortable with the Instant Pot and understand how it works. Gradually, you can move on to more complex recipes and experiment with different settings and functions.
4. Master the Sealing and Venting Process
Proper sealing and venting are crucial when using the Instant Pot. Ensure that the sealing ring is properly inserted into the lid and that the lid is closed securely before starting any cooking process. After the cooking time is complete, follow the recipe instructions for natural release or quick release of pressure. Natural release means allowing the pressure to decrease on its own, while quick release involves carefully venting the remaining pressure by switching the steam release valve to the venting position. Always exercise caution when handling hot steam.
5. Take Note of Cooking Times and Results
As you start cooking with your Instant Pot, take note of the cooking times and the results you achieve with different recipes. This will help you gauge the cooking time needed for certain ingredients and adjust future recipes accordingly. Pay attention to the texture and flavor of the food you cook to ensure optimal results.
By following these steps, you’ll be well on your way to becoming an Instant Pot expert. In the next sections, we’ll dive into the different functions and settings of the Instant Pot, allowing you to explore the full range of possibilities this versatile appliance offers.
Basic Functions and Settings of the Instant Pot
The Instant Pot offers a range of functions and settings that allow you to cook a wide variety of dishes with ease. Understanding how these functions and settings work will enable you to make the most of your Instant Pot. Let’s explore some of the key functions:
Pressure Cook
The pressure cook function is the hallmark feature of the Instant Pot. It allows you to cook food quickly and efficiently by creating a pressurized environment inside the pot. This function is ideal for cooking rice, beans, stews, soups, and meats. The cooking time and pressure level can be adjusted to suit different recipes.
Saute
The saute function allows you to brown or saute ingredients directly in the Instant Pot. This is a useful feature when you want to add depth of flavor to dishes before pressure cooking. The saute function has adjustable heat levels, giving you control over the intensity of the heat.
Slow Cook
The slow cook function allows you to simmer food at a low temperature over an extended period. This is similar to using a traditional slow cooker. The slow cook function is perfect for preparing dishes such as braised meats, chili, and stews that require a longer cooking time to develop rich flavors.
Rice Cook
The rice cook function simplifies the process of cooking rice. With just a push of a button, the Instant Pot will automatically adjust the cooking time and temperature to achieve perfectly cooked rice. This function is suitable for various types of rice, including white, brown, basmati, and jasmine.
Read more: How To Use Instant Pot As A Rice Cooker
Steam
The steam function allows you to cook food using steam, making it a healthy cooking method. This function is great for steaming vegetables, fish, dumplings, and even desserts. The Instant Pot comes with a steaming rack that can be used to elevate food above the water level, ensuring even and thorough cooking.
Keep Warm
The keep warm function keeps your cooked food warm until you’re ready to serve. This function is particularly useful when you have finished cooking but need to wait before serving the meal. The Instant Pot will automatically switch to the keep warm setting after the cooking time is complete, maintaining the food at a safe temperature.
These are just a few of the basic functions and settings offered by the Instant Pot. As you become more comfortable using your appliance, you can explore additional features such as yogurt making, sterilizing, and cake baking. Each function opens up new culinary possibilities and simplifies the cooking process.
Now that you have a good understanding of the basic functions and settings of your Instant Pot, you’re ready to dive into different cooking techniques. In the upcoming sections, we’ll guide you through the process of using each function in more detail and provide tips for successful results.
Using the Pressure Cook Function
The pressure cook function is the heart of the Instant Pot. It allows you to cook food quickly and efficiently, making it perfect for dishes that usually take a long time to cook, such as stews, soups, beans, and tougher meats. Here’s a step-by-step guide on how to use the pressure cook function:
1. Prepare the Ingredients
Start by preparing all the necessary ingredients for your recipe. This includes chopping vegetables, seasoning meat, and measuring liquids. Prepping ahead of time will make the cooking process smoother.
Read more: How To Use Instant Pot For Slow Cooker
2. Add Ingredients to the Inner Pot
Add the ingredients to the inner pot of the Instant Pot. Make sure not to exceed the maximum fill line indicated on the pot to avoid any spillover during cooking.
3. Secure the Lid
Close the lid of the Instant Pot and ensure it is properly sealed. The sealing ring should be properly inserted, and the lid should be locked in place. This will create the necessary pressure for cooking.
4. Select the Pressure Cook Setting
On the control panel of the Instant Pot, select the pressure cook function. The exact label may vary depending on the model of your Instant Pot, but it is usually indicated by a “Manual” or “Pressure Cook” button. Use the “+” and “-” buttons to adjust the cooking time as specified in your recipe.
5. Adjust Pressure Level (If Required)
Depending on your recipe, you may need to adjust the pressure level. The Instant Pot offers high and low-pressure settings. Most recipes call for the high-pressure setting, but if your recipe requires low pressure, use the “Pressure Level” button to make the adjustment.
Read more: How To Convert Slow Cooker To Instant Pot
6. Start the Cooking Process
Once you have set the cooking time and pressure level, press the “Start” button to begin the cooking process. The Instant Pot will take some time to come to pressure before the actual cooking time begins. You’ll notice the float valve on the lid rise, indicating that the pot is pressurizing. Once pressurized, the cooking time will start counting down.
7. Natural or Quick Release
When the cooking time is complete, you have two options for releasing the pressure: natural release or quick release. Natural release involves letting the pressure release on its own. This can take anywhere from 10 to 20 minutes or even longer depending on the recipe. Quick release involves manually venting the pressure by carefully switching the steam release valve to the venting position. Be cautious of the hot steam and use a long utensil or towel to avoid any burns.
8. Open the Lid
Once the pressure has been fully released and the float valve has dropped, it is safe to open the lid of the Instant Pot. Carefully remove the lid, tilting it away from you to avoid any steam that might still be inside.
By following these steps, you’ll be able to use the pressure cook function of your Instant Pot to create delicious meals in a fraction of the time. Experiment with different recipes and adjust the cooking time and pressure level to achieve your desired results. In the next section, we’ll explore the saute function and how it can enhance your cooking experience.
Using the Saute Function
The saute function of the Instant Pot adds a new dimension to your cooking experience. It allows you to brown, sear, or saute ingredients directly in the pot before pressure cooking. This function is perfect for developing flavors and creating layers of complexity in your dishes. Here’s a step-by-step guide on how to use the saute function:
1. Prep the Ingredients
Start by preparing your ingredients as needed for your recipe. Chop vegetables, dice meats, and have any spices or seasonings readily available. This preparation will make the sauteing process smoother.
2. Select the Saute Function
On your Instant Pot’s control panel, look for the “Saute” or “Saute/Browning” button. Press it to activate the saute function. The default setting is usually on “Normal,” but you can adjust it to “More” for higher heat or “Less” for lower heat using the “+” and “-” buttons.
3. Heat the Instant Pot
After selecting the saute function, the Instant Pot will begin to heat up. It may take a few minutes for the pot to reach the desired temperature. You’ll know it’s ready when the display panel shows “Hot.”
4. Add Oil or Fat
Once the Instant Pot is heated, add oil or fat to the inner pot. This will help prevent ingredients from sticking and aid in the browning process. Common oils to use include olive oil, vegetable oil, or butter, depending on your recipe.
Read more: How To Use The Instant Pot As A Slow Cooker
5. Add Ingredients
Add the ingredients that require sauteing to the pot. This can include onions, garlic, meat, or any other ingredients that benefit from the carmelization and flavor enhancement that sauteing provides. Stir and cook the ingredients until they are evenly browned and fragrant, stirring occasionally to prevent burning.
6. Deglaze (Optional)
If desired, you can deglaze the Instant Pot after sauteing. This involves adding a liquid, such as broth, wine, or water, to the pot to release any browned bits stuck to the bottom. This helps to infuse the dish with even more flavor.
7. Cancel the Saute Function
Once the sauteing process is complete, press the “Cancel” button on the control panel to turn off the saute function. This will stop the heating process and prevent any further cooking.
The saute function of the Instant Pot allows you to bring out the natural flavors of your ingredients and enhance the overall taste of your dishes. From searing meats to sauteing onions and garlic, this feature adds depth and complexity to your recipes. Mastering the saute function will give you more control over your cooking process and elevate your culinary creations.
In the next section, we’ll explore the slow cook function and how it can help you achieve tender and flavorful results in long-cooking dishes.
Using the Slow Cook Function
The slow cook function of the Instant Pot allows you to achieve tender and flavorful results in dishes that require longer cooking times. This function is perfect for making stews, braised meats, chili, and other slow-cooked recipes. Here’s a step-by-step guide on how to use the slow cook function:
1. Prep the Ingredients
Start by preparing the ingredients for your slow-cooked dish. This may include chopping vegetables, seasoning meats, and measuring out any liquids or spices. Prepping ahead of time will make the cooking process smoother and more efficient.
Read more: How To Use Instant Pot For Slow Cooker
2. Add Ingredients to the Inner Pot
Add the prepped ingredients to the inner pot of your Instant Pot. Make sure not to exceed the maximum fill line indicated on the pot to prevent any spillover during cooking. You can layer the ingredients as needed, placing larger and tougher ingredients at the bottom.
3. Select the Slow Cook Function
On the control panel, look for the “Slow Cook” button. Press it to activate the slow cook function. The default setting is usually on “Normal,” but you can adjust it to “More” or “Less” using the “+” and “-” buttons. Choose the setting that best suits the cooking time and preferences of your recipe.
4. Set the Cooking Time
Use the “+” and “-” buttons to set the desired cooking time for your slow-cooked dish. The cooking time can range from a few hours to several hours, depending on your recipe. Make sure to follow the cooking instructions provided in your recipe for the best results.
5. Start the Cooking Process
Once you have set the cooking time and adjusted the temperature as needed, press the “Start” button to begin the slow cook process. The Instant Pot will start heating up and gradually cook your ingredients over the specified time. The display panel will show the remaining cooking time.
6. Monitor and Stir (If Required)
During the slow cooking process, you may need to monitor and stir your dish, depending on the recipe. This helps to ensure even cooking and distribution of flavors. However, be mindful that each time you open the lid, you will release heat and extend the overall cooking time.
7. Adjust Seasonings (If Required)
Towards the end of the slow cooking process, you may want to taste your dish and adjust the seasonings as needed. This is the perfect time to add additional herbs, spices, salt, or other seasonings to achieve the desired flavor profile.
8. Serve and Enjoy
Once the slow cooking time is complete, carefully remove the inner pot from the Instant Pot, using heat-resistant mitts or silicone gloves, and give it a stir. Serve your delicious slow-cooked dish and enjoy the tender and flavorful results.
The slow cook function of the Instant Pot allows you to achieve the same delicious and comforting results as a traditional slow cooker, but with the added convenience and flexibility of the Instant Pot’s other functions. Experiment with different recipes and cooking times to create hearty and satisfying meals.
In the next section, we’ll explore the rice cook function and how it simplifies the process of cooking perfect rice in your Instant Pot.
Using the Rice Cook Function
The rice cook function of the Instant Pot simplifies the process of cooking perfect rice. Whether you’re making white rice, brown rice, basmati rice, or any other variety, this function ensures consistent and fluffy results. Here’s a step-by-step guide on how to use the rice cook function:
1. Measure the Rice
Start by measuring the desired amount of rice using the measuring cup provided with your Instant Pot. The measuring cup is usually smaller than a standard measuring cup, so make sure to use it for accurate rice-to-water ratio.
2. Rinse the Rice (Optional)
Rinsing the rice before cooking is optional but recommended. Rinse the measured rice with cold water until the water runs clear. This removes excess starch and helps achieve fluffier rice.
3. Add Rice and Water to the Inner Pot
Add the rinsed rice to the inner pot of your Instant Pot. For each cup of rice, add the corresponding amount of water specified in your recipe or the rice packaging. The general ratio is 1:1 for white rice and 1:1.25 or 1:1.5 for brown rice, but it may vary depending on the specific type of rice and personal preference. Make sure not to exceed the maximum fill line indicated on the pot.
4. Select the Rice Cook Function
On the control panel, look for the “Rice” or “Rice Cook” button. Press it to activate the rice cook function. The Instant Pot will automatically adjust the cooking time and temperature based on the selected rice setting.
5. Start the Cooking Process
Once you have selected the rice cook function, press the “Start” button to begin the cooking process. The Instant Pot will take some time to heat up and bring the rice to a boil. After that, it will automatically lower the temperature and cook the rice at the appropriate setting.
6. Natural or Quick Release
When the cooking time is complete, you have two options for releasing the pressure: natural release or quick release. Natural release involves letting the pressure release on its own, which allows the rice to continue steaming in the residual heat. Quick release involves manually venting the pressure by carefully switching the steam release valve to the venting position. Choose the option that best suits your preference and time constraints.
7. Fluff and Serve
Once the pressure has been fully released, carefully remove the lid of the Instant Pot. Fluff the cooked rice gently with a fork to separate the grains and release any excess steam. Serve immediately and enjoy perfectly cooked rice.
Whether you’re serving rice as a side dish or using it as the base for a flavorful stir-fry or curry, the rice cook function of the Instant Pot guarantees consistent results every time. Experiment with different types of rice and explore various recipes to diversify your culinary repertoire.
In the next section, we’ll explore the steam function and how it can help you prepare healthy and flavorful steamed dishes.
Read more: How To Do Hot Pot In Instant Pot
Using the Steam Function
The steam function of the Instant Pot is a versatile feature that opens up a world of possibilities for preparing healthy and flavorful steamed dishes. Whether you want to steam vegetables, fish, dumplings, or even desserts, this function ensures that your food retains its natural moisture and nutrients. Here’s how to use the steam function:
1. Prepare the Steaming Rack or Basket
Start by inserting the steaming rack or basket into the inner pot of your Instant Pot. The rack or basket allows you to elevate the food above the water level, ensuring even and thorough cooking. Make sure the rack or basket is properly placed and stable.
2. Add Water to the Inner Pot
Add the recommended amount of water to the inner pot. The specific water measurement will depend on the size and model of your Instant Pot, as well as the cooking time and the amount of food being steamed. Most recipes will provide guidance on the required water level.
3. Place the Food to be Steamed
Arrange the food you want to steam on the steaming rack or in the steaming basket. This can include vegetables, seafood, dumplings, or even desserts like steamed puddings. Make sure the food is evenly spaced to allow steam to circulate freely.
Read more: How To Store Instant Pot
4. Secure the Lid
Close the lid of the Instant Pot and ensure it is properly sealed. The sealing ring should be properly inserted, and the lid should be locked in place. This creates a sealed environment for steaming.
5. Select the Steam Function
On the control panel, look for the “Steam” or “Steam Cook” button. Press it to activate the steam function. Use the “+” and “-” buttons to adjust the cooking time as specified in your recipe. The default setting is usually on high pressure, which is suitable for most steaming recipes.
Read more: How To Convert Slow Cooker To Instant Pot
6. Start the Cooking Process
Once you have set the cooking time, press the “Start” button to begin the steaming process. The Instant Pot will start generating steam, and the cooking time will begin counting down. You’ll notice the float valve on the lid rise, indicating that the pot is pressurizing.
7. Natural or Quick Release
After the cooking time is complete, you have two options for releasing the pressure: natural release or quick release. Natural release involves letting the pressure release on its own, which allows the food to continue steaming in the residual heat. Quick release involves manually venting the pressure by carefully switching the steam release valve to the venting position. Select the option that best suits your recipe.
8. Carefully Remove the Lid and Food
Once the pressure has been fully released and the float valve drops, it is safe to open the lid of the Instant Pot. Carefully remove the lid, tilting it away from you to avoid any steam. Use oven mitts or tongs to remove the steaming rack or basket with the steamed food.
The steam function of the Instant Pot allows you to preserve the natural flavors, colors, and nutrients of your food. Steaming is a healthy cooking method that requires minimal oil, making it a great option for those looking to maintain a balanced diet.
In the next section, we’ll explore the keep warm function, which helps ensure your food stays at the perfect temperature until you’re ready to serve.
Using the Keep Warm Function
The keep warm function of the Instant Pot is a convenient feature that allows you to keep your cooked food warm until you’re ready to serve. This function maintains the temperature of your dish without further cooking or overcooking it, ensuring that it stays at its optimal state. Here’s how to use the keep warm function:
1. Cook Your Dish
Start by cooking your dish using one of the various cooking functions of the Instant Pot, such as pressure cooking, sautéing, slow cooking, or steaming. Follow the specific recipe instructions to prepare your meal.
2. Cooking Completion
After the cooking process is complete, the Instant Pot will automatically switch to the keep warm function. This feature helps to maintain the temperature of your dish, keeping it warm and ready to serve until you’re ready to eat.
Read also: 13 Amazing Rice Cooker Instant Pot For 2024
3. Adjust the Keep Warm Time
By default, the keep warm function will maintain the temperature for a set duration of time. However, you can adjust the keep warm time to suit your needs. The Instant Pot typically allows you to set the keep warm time for up to 10 hours. Use the “+” and “-” buttons on the control panel to adjust the time as desired.
4. Monitor and Stir Occasionally
While your dish is in the keep warm mode, it’s a good idea to periodically check and stir the food to ensure it remains evenly heated. This will help to distribute heat and flavors throughout the dish, maintaining its delicious taste and texture.
5. Serve When Ready
Once you’re ready to serve the dish, simply remove the lid of the Instant Pot and dish out the warm food onto plates or bowls. The keep warm function, combined with the sealing feature of the Instant Pot, helps to maintain the freshness and temperature of your cooked food.
Important Note:
While the keep warm function is convenient for keeping your food warm until serving, it’s important to note that food safety guidelines recommend not leaving cooked food in the keep warm mode for more than 2 hours. This is to prevent the growth of harmful bacteria. If you plan to keep your food warm for an extended period, consider transferring it to an insulated container or chafing dish to maintain a safe temperature.
The keep warm function is a valuable tool for busy households and dinner parties. It ensures that your culinary creations are kept at an ideal temperature for serving, allowing you to enjoy your meal at your own pace or accommodate various serving schedules.
In the next section, we’ll explore the cleaning and maintenance of your Instant Pot, ensuring that it stays in optimal condition for years to come.
Read also: 13 Amazing Rice Cooker Instant Pot For 2024
Cleaning and Maintenance of Your Instant Pot
Proper cleaning and maintenance are vital to keep your Instant Pot in optimal condition and ensure its longevity. Here are some guidelines to follow for cleaning and maintaining your Instant Pot:
1. Unplug and Cool Down
Before you start cleaning your Instant Pot, make sure it is unplugged from the power source and has cooled down completely. This will help prevent any accidents and ensure your safety while handling the appliance.
2. Detach and Clean the Lid
Start by detaching the lid from the Instant Pot. Carefully remove the sealing ring and steam release valve from the lid. Wash these components with warm soapy water, rinse thoroughly, and allow them to dry completely before reassembling.
3. Clean the Inner Pot
The inner pot of the Instant Pot is usually dishwasher safe. If you prefer to wash it by hand, use warm soapy water and a non-abrasive sponge or cloth to clean the pot thoroughly. Pay extra attention to any stuck-on food residue. Rinse the pot well and dry it completely before reassembling the Instant Pot.
Read also: 13 Amazing Rice Cooker Instant Pot For 2024
4. Wipe the Exterior
Using a damp cloth, wipe the exterior of the Instant Pot to remove any dirt or spills. Be careful around the control panel area and avoid getting it excessively wet. Make sure to dry the exterior with a clean towel to prevent any water spots or damage.
5. Clean the Steam Release Valve
The steam release valve can become clogged with food particles over time. To clean it, remove the valve and soak it in warm soapy water for a few minutes. Use a small brush or toothbrush to gently scrub away any residue. Rinse the valve thoroughly and let it dry completely before reattaching it to the lid.
6. Clean the Sealing Ring
The sealing ring is responsible for creating a tight seal during pressure cooking. It’s important to clean and inspect the sealing ring regularly. Wash it with warm soapy water, paying attention to any crevices or areas that may have accumulated debris. Rinse it thoroughly and ensure it is completely dry before placing it back in the lid.
7. Check and Clean the Float Valve
The float valve is located on the inside of the lid and helps to indicate the pressure status. Ensure that the float valve moves freely and is not obstructed by any food particles. Clean it using a damp cloth or a small brush, if necessary.
Read also: 13 Amazing Rice Cooker Instant Pot For 2024
8. Store Properly
When your Instant Pot is clean and completely dry, store it in a cool and dry place. It’s best to keep the lid and inner pot separate from the main unit to allow for proper ventilation and prevent the growth of any mildew or odors.
Regular cleaning and maintenance of your Instant Pot will not only ensure its cleanliness but also contribute to its overall performance and lifespan. By following these guidelines, you can enjoy your Instant Pot for many years to come and continue creating delicious meals effortlessly.
In case you encounter any issues or difficulties with your Instant Pot, refer to the troubleshooting section in the user manual or reach out to the manufacturer’s customer support for assistance.
Now that you have learned about cleaning and maintaining your Instant Pot, you’ll be able to keep it in top condition and ready for your next cooking adventure.
Happy cooking!
Troubleshooting Common Issues
While the Instant Pot is a reliable and versatile kitchen appliance, you may occasionally encounter some common issues. Here are some troubleshooting tips to help you overcome these challenges:
1. Lid Not Sealing Properly
If you find that the lid of your Instant Pot is not sealing properly, ensure that the sealing ring is properly inserted and that there are no food particles or debris obstructing the sealing surfaces. Make sure the float valve is clean and moves freely. Also, check if the lid is properly aligned and locked in place. Adjust and reposition the lid if necessary, and ensure it is locked securely before starting the cooking process.
2. Steam Leakage
If you notice steam leakage during the cooking process, check if the steam release valve is properly positioned and sealed. Make sure it is set to the sealed position for pressure cooking. Inspect the sealing ring and ensure it is not damaged or worn out. If needed, clean the sealing ring and reposition it correctly. In some cases, replacing the sealing ring may be necessary if it is too stretched or damaged.
Read also: 13 Amazing Rice Cooker Instant Pot For 2024
3. Burn Error Message
The burn error message usually indicates that the Instant Pot has detected overheating or a potential burn situation. This can occur if there is insufficient liquid in the pot, or if food is stuck to the bottom and causing the pot to overheat. To resolve this issue, cancel the cooking process, release the pressure, and open the lid. Check the dish for any burned or stuck-on food and clean the inner pot. If needed, add more liquid and adjust the cooking settings before resuming the cooking process.
4. Error Codes
If you encounter error codes on the display panel of your Instant Pot, consult the user manual for a list of error codes and their corresponding troubleshooting steps. Each error code indicates a specific issue, which may range from electrical malfunctions to temperature sensor errors. Follow the instructions provided in the manual or contact customer support for further assistance.
5. Electrical Issues
If you experience any electrical issues, such as the Instant Pot not turning on or unexpectedly shutting off, check the power cord and ensure it is properly plugged into a functioning outlet. Make sure the outlet itself is working by testing it with another device. If the problem persists, it may indicate a malfunction in the Instant Pot’s electrical components. In such cases, discontinue use and contact customer support for further guidance.
Remember, your Instant Pot comes with a comprehensive user manual that provides troubleshooting guidance for specific issues. Familiarize yourself with the manual and reach out to the manufacturer’s customer support if you need further assistance. They will be able to provide you with detailed troubleshooting steps or guide you through any repairs if necessary.
By addressing common issues and understanding how to troubleshoot them, you’ll be able to make the most of your Instant Pot and enjoy its benefits for years to come.
Happy cooking!
Conclusion
Congratulations! You have now become well-versed in operating your Instant Pot electric pressure cooker. By understanding its various functions and settings, you can confidently cook a wide range of delicious meals in a fraction of the time. Whether you’re using the pressure cook, sauté, slow cook, rice cook, steam, or keep warm function, your Instant Pot will become your go-to kitchen companion for convenient and flavorful cooking.
Remember to refer to the user manual for specific instructions and recipe guidelines, as every model may have slight variations in features and settings. Additionally, always prioritize safety by carefully following the guidelines provided by the manufacturer to ensure proper usage of the Instant Pot.
Cleaning and maintaining your Instant Pot is essential to keep it in top condition. Regularly clean the lid, sealing ring, inner pot, steam release valve, and other components to remove any food residue and ensure optimal performance. Storing your Instant Pot in a cool and dry place will help maintain its longevity.
If you encounter any issues or have questions about your Instant Pot, consult the troubleshooting section of the user manual or reach out to the manufacturer’s customer support team. They will provide guidance and assistance to help resolve any concerns you may have.
Now that you have acquired the knowledge and skills to efficiently operate your Instant Pot, it’s time to unleash the full potential of this remarkable kitchen appliance. Get creative, experiment with various recipes, and enjoy the convenience and delicious results of cooking with your Instant Pot.
So, embrace your inner chef, save time in the kitchen, and prepare mouthwatering meals that will impress your family and friends. Your Instant Pot is ready to take your cooking adventures to new heights!
Happy cooking and bon appétit!
Frequently Asked Questions about How To Operate A Instant Pot Electric Pressure Cooker
Was this page helpful?
At Storables.com, we guarantee accurate and reliable information. Our content, validated by Expert Board Contributors, is crafted following stringent Editorial Policies. We're committed to providing you with well-researched, expert-backed insights for all your informational needs.
0 thoughts on “How To Operate A Instant Pot Electric Pressure Cooker”