Articles
How To Repair A Dish Washer
Modified: October 20, 2024
Learn valuable tips and tricks for repairing a dishwasher with our comprehensive articles. Enhance your knowledge and become an expert in dishwasher repair.
(Many of the links in this article redirect to a specific reviewed product. Your purchase of these products through affiliate links helps to generate commission for Storables.com, at no extra cost. Learn more)
Introduction
A dishwasher is a convenient and efficient appliance that saves us valuable time and effort in the kitchen. It takes care of the tedious task of washing and sanitizing our dishes, allowing us to focus on other important things. However, like any other appliance, dishwashers can encounter problems from time to time. From a leaky door seal to a clogged spray arm, these issues can disrupt the smooth operation of our dishwasher.
While calling a professional technician is always an option, you can often save time and money by tackling some of the common dishwasher repairs yourself. In this article, we will guide you through the process of repairing a dishwasher, step by step.
Before we dive into the repair process, it is important to note that safety should always be a top priority. Make sure to disconnect the power supply and follow all safety precautions to avoid any accidents or injuries. Additionally, consult your dishwasher’s user manual for specific instructions or guidelines provided by the manufacturer.
Now, let’s gather the necessary tools and materials before we begin repairing your dishwasher.
Key Takeaways:
- Takeaway 1: DIY Dishwasher Repair
Save time and money by following safety precautions and step-by-step instructions to repair common dishwasher issues, from leaks to clogs, without the need for professional technicians. - Takeaway 2: Maintenance Matters
Regularly inspect and maintain your dishwasher’s components, such as the door seal, filter, and spray arm, to prevent breakdowns and ensure optimal performance, extending the appliance’s lifespan.
Read more: How To Clean A Dish Washer
Safety Precautions
When it comes to repairing a dishwasher, taking the necessary safety precautions is paramount. Here are some important safety measures to keep in mind:
- Disconnect the Power: Before starting any repairs, ensure that the dishwasher is unplugged or the power supply is turned off at the circuit breaker. This will prevent any electrical shocks or accidents.
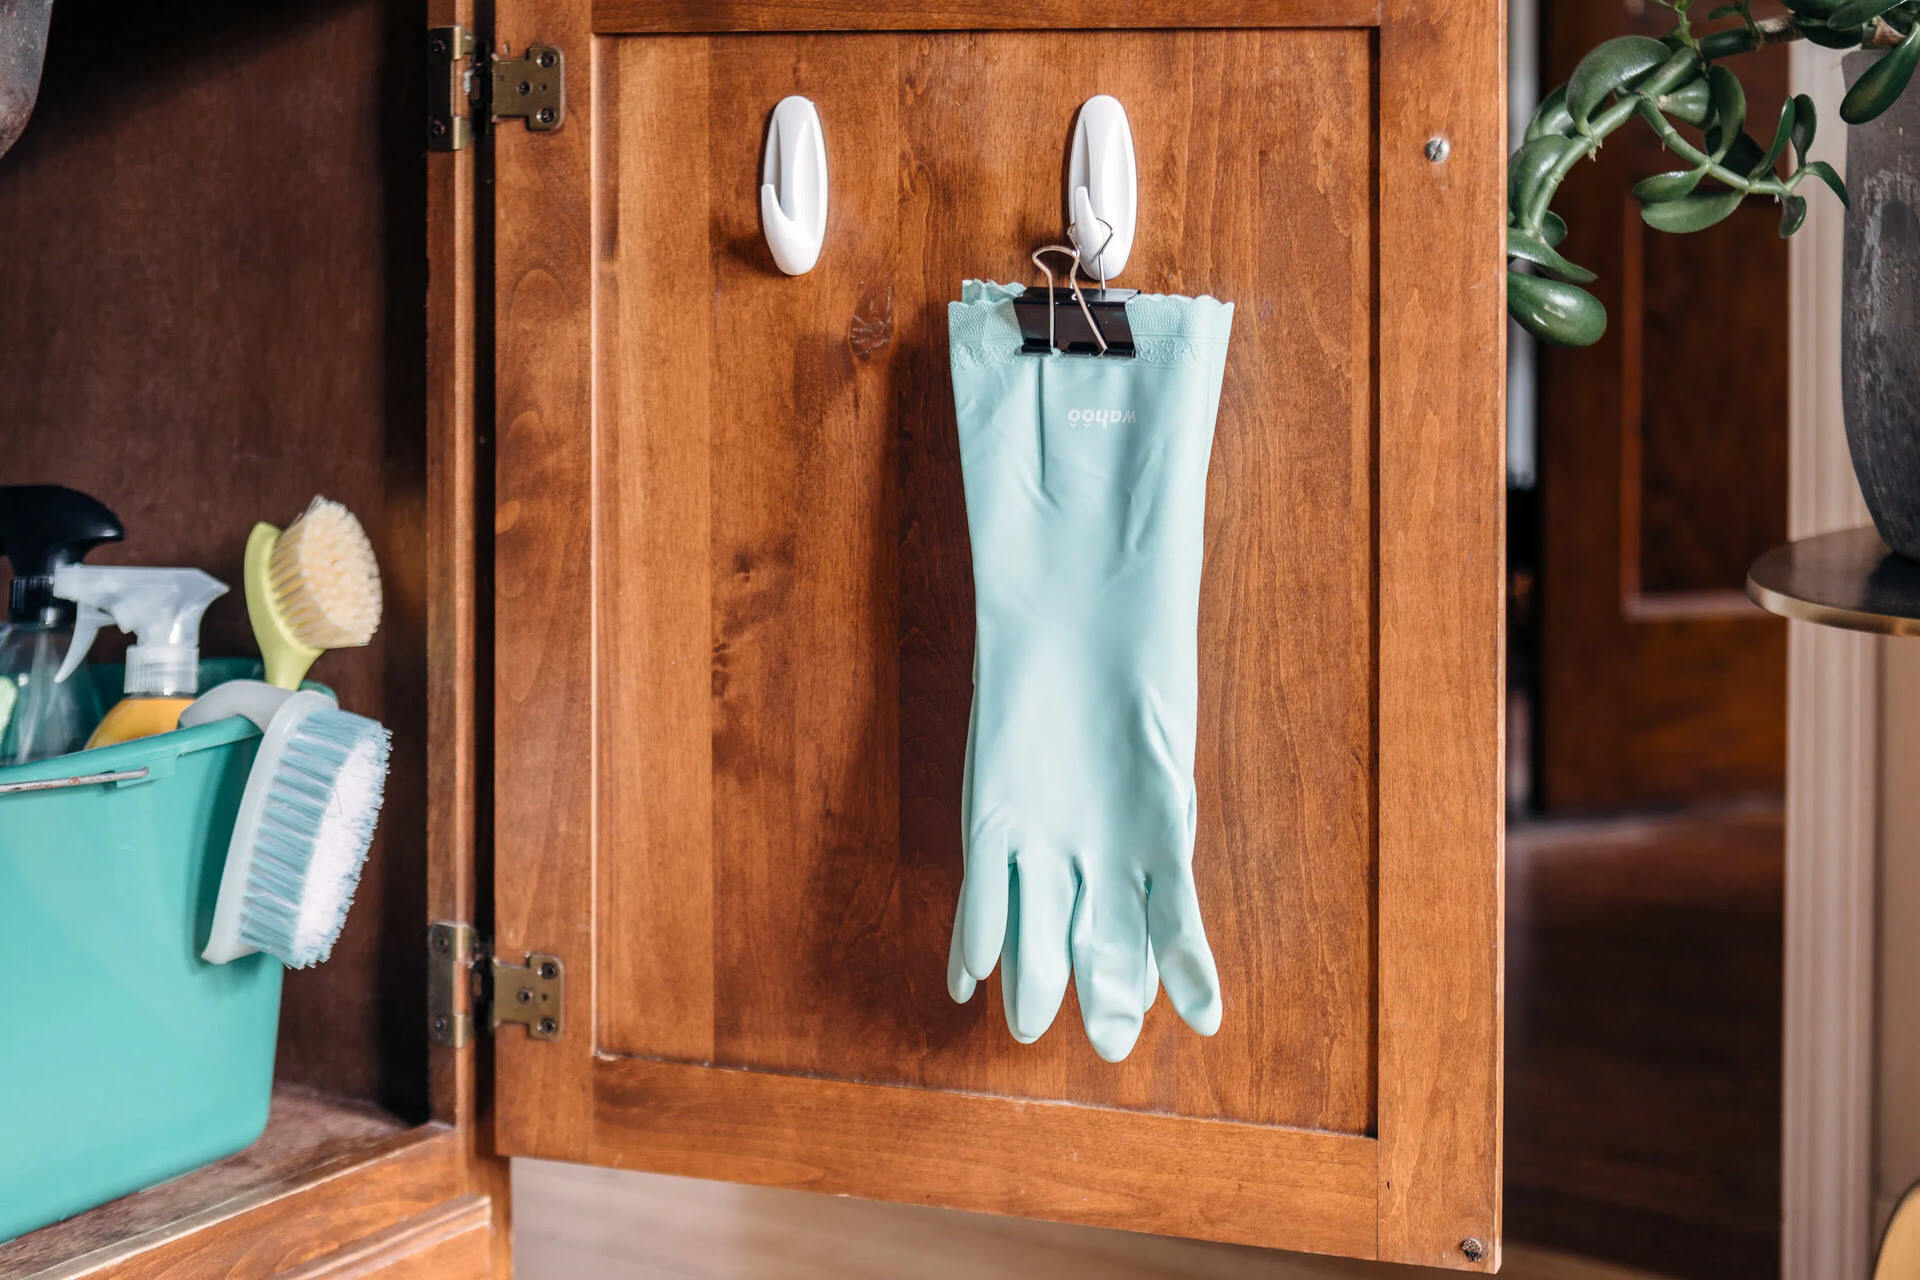
- Wear Protective Gear: It is advisable to wear safety gloves and protective eyewear to shield yourself from any potential hazards.
- Work in a Well-Ventilated Area: Repairing a dishwasher may involve the use of cleaning agents or chemicals. Make sure you are in a well-ventilated space to avoid inhaling any fumes or harmful substances.
- Use the Right Tools: Always use the appropriate tools for the job. Using improper tools can not only hinder the repair process but can also be dangerous.
- Refer to the User Manual: Consult your dishwasher’s user manual for specific safety instructions and guidelines provided by the manufacturer. This will ensure that you are following the correct procedures for your particular model.
- If Necessary, Seek Professional Help: If you feel uncomfortable or unsure about any step of the repair process, it is best to contact a professional technician. They have the knowledge and experience to handle the repairs safely and efficiently.
By adhering to these safety precautions, you can minimize the risk of accidents and protect yourself while repairing your dishwasher. Now that we have covered the safety aspects, let’s move on to the tools and materials you will need for the repair.
Tools and Materials Needed
Before you begin repairing your dishwasher, it is important to gather the necessary tools and materials. Having everything you need at hand will make the repair process more convenient and efficient. Here is a list of the commonly used tools and materials:
- Screwdriver: A set of screwdrivers, including both Phillips and flathead screwdrivers, will be essential for removing screws.
- Pliers: Pliers will come in handy for gripping and turning nuts, bolts, and hose clamps.
- Multimeter: A multimeter is an electrical testing tool that will help you diagnose and troubleshoot any electrical issues in your dishwasher.
- Adjustable Wrench: An adjustable wrench will be useful for tightening or loosening various connections.
- Cleaning Solution: Depending on the issue you are addressing, you may need a cleaning solution to remove grime, buildup, or debris from your dishwasher’s parts.
- Replacement Parts: If you have identified specific faulty parts in your dishwasher, make sure you have the replacement parts ready before you begin the repair.
- Towels or Rags: Have a supply of towels or rags on hand to clean up any spills or leaks that may occur during the repair process.
It is crucial to use the appropriate tools for each task to avoid any damage or injuries. Additionally, refer to your dishwasher’s user manual for any specific tools or materials recommended by the manufacturer.
Now that we have all the necessary tools and materials ready, let’s move on to the step-by-step process of repairing your dishwasher.
Step 1: Identify the Problem
The first step in repairing your dishwasher is to identify the specific problem or issue that needs to be addressed. By understanding the problem at hand, you can determine the appropriate course of action and select the necessary tools and materials.
Here are a few common issues that can occur with dishwashers:
- Leaking: If you notice water pooling around your dishwasher or a visible leak during operation, it is important to identify the source of the leak. It could be a faulty door seal, a damaged hose, or a loose connection.
- Not Draining: If your dishwasher is not draining properly, it can be caused by a clogged drainage hose or a malfunctioning pump. Identifying the specific cause will help you determine the appropriate solution.
- Not Cleaning Dishes: If your dishwasher is not cleaning dishes effectively, it could be due to a clogged spray arm, a faulty water inlet valve, or a buildup of food debris. Understanding the root cause will help in resolving the issue.
- Error Codes: Some dishwashers display error codes to indicate specific problems. Refer to your dishwasher’s user manual to understand the meaning of the error code and to determine the necessary steps for troubleshooting.
Take the time to observe and assess the symptoms exhibited by your dishwasher. Sometimes, the issue may lie in multiple components, so it is important to identify the main problem in order to prioritize the repair process.
Once you have identified the problem, you can proceed to the next steps of repairing your dishwasher. In the following steps, we will guide you through the process of resolving common issues and restoring your dishwasher’s functionality.
Step 2: Turn off Power Supply
Before you begin any repairs on your dishwasher, it is crucial to turn off the power supply to ensure your safety. This step will prevent any electrical accidents or shocks during the repair process.
Follow these steps to safely turn off the power supply:
- Unplug the Dishwasher: If your dishwasher is plugged into an electrical outlet, simply unplug it from the socket. This will disconnect the power supply and ensure that no electricity is running to the appliance.
- Switch Off the Circuit Breaker: If your dishwasher is hardwired into your home’s electrical system, locate the circuit breaker that controls the dishwasher. Flip the corresponding switch to the “Off” position to cut off the power supply completely.
It is important to verify that the power supply has been successfully turned off by attempting to turn on the dishwasher. If it does not power on, you can proceed confidently with the repair process.
Remember, safety should always be your priority when working with household appliances. Turning off the power supply will protect you from any potential electrical hazards during the repair process.
With the power supply disconnected, you can now safely move on to the next steps of repairing your dishwasher. In the following steps, we will guide you through the process of inspecting and addressing the specific issues with your dishwasher.
Read more: How to Use a Dish Washer
Step 3: Inspect the Door Seal
A faulty door seal can cause leaks and affect the performance of your dishwasher. Inspecting and maintaining the door seal is an important step in keeping your dishwasher functioning optimally. Here’s how you can inspect the door seal:
- Open the Dishwasher Door: Start by fully opening the dishwasher door and examining the seal around the edges. Look for any visible signs of damage, such as cracks, tears, or gaps.
- Clean the Door Seal: Use a mild detergent and a soft cloth or sponge to clean the door seal. This will help remove any dirt, debris, or food particles that may be affecting the seal’s effectiveness. Pay close attention to the grooves and crevices where buildup can occur.
- Check for Proper Alignment: Close the dishwasher door and ensure that it aligns evenly with the rest of the appliance. If the door is misaligned, it may not create a tight seal, leading to leaks. Adjust the door as needed to ensure proper alignment.
- Perform the Dollar Bill Test: To test the effectiveness of the door seal, place a dollar bill between the door seal and the dishwasher frame. Close the door and attempt to pull out the bill. If it slides out easily, it indicates that the door seal may need to be replaced.
If you notice any visible damage or the door seal fails the dollar bill test, it may be necessary to replace the seal. Refer to your dishwasher’s user manual or contact the manufacturer for guidance on obtaining a replacement door seal.
Inspecting and maintaining the door seal regularly can prevent water leaks and ensure that your dishwasher operates efficiently. If the door seal appears to be in good condition, you can move on to the next steps in the repair process.
Regularly clean the dishwasher filter to prevent clogs and ensure proper drainage. Remove any debris and rinse the filter under running water. This simple maintenance can help prevent costly repairs.
Step 4: Clean the Filter
The filter in your dishwasher plays a vital role in trapping food particles and debris to prevent them from clogging the spray arm and drain. Over time, the filter can become clogged with residue, affecting the dishwasher’s performance. Cleaning the filter regularly is important for maintaining optimal functionality. Here’s how you can clean the filter:
- Locate the Filter: The filter is typically located at the bottom of the dishwasher, near the spray arm. It may be round or rectangular, depending on the model of your dishwasher. Consult your dishwasher’s user manual if you are unsure about the location of the filter.
- Remove the Filter: Gently twist or lift the filter to remove it from the dishwasher. Be cautious not to force it, as excessive pressure can damage the filter or the surrounding components.
- Rinse the Filter: Rinse the filter under warm running water to remove any food particles or debris. Use a soft brush or toothbrush to gently scrub away stubborn residue. Take care not to use abrasive cleaners or brushes that could damage the filter.
- Clean the Filter Housing: While the filter is removed, wipe the filter housing area inside the dishwasher with a damp cloth to remove any dirt or grime. Ensure that there are no obstructions or blockages in the housing area.
- Reinstall the Filter: Once the filter and filter housing are clean and dry, carefully place the filter back into its designated position. Ensure that it is securely in place and properly aligned.
Cleaning the filter regularly, depending on your dishwasher’s usage, will help maintain optimal performance and prevent clogs. Refer to your dishwasher’s user manual for specific instructions on filter cleaning and maintenance.
With the filter cleaned and reinstalled, you can now proceed to the next steps in the repair process. In the following steps, we will address other common issues and guide you through resolving them.
Step 5: Check the Spray Arm
The spray arm in your dishwasher is responsible for distributing water and detergent evenly to clean your dishes. Over time, the spray arm can become clogged with debris and mineral deposits, affecting its performance. Checking and cleaning the spray arm is essential for maintaining efficient dishwasher operation. Here’s how you can check the spray arm:
- Locate the Spray Arm: The spray arm is typically located at the bottom or middle of the dishwasher, depending on the model. It is a rotating arm with small nozzles that spray water during the wash cycle.
- Inspect for Blockages: Check the spray arm for any visible debris, such as food particles or mineral buildup. Ensure that all the spray arm’s nozzles are clean and free of obstructions.
- Remove the Spray Arm: Depending on your dishwasher model, you may need to unscrew or unlock the spray arm to remove it. Follow the manufacturer’s instructions or consult your dishwasher’s user manual for guidance.
- Clean the Spray Arm: Rinse the spray arm with warm water to remove any food particles or residue. Use a soft brush or toothbrush to gently clean the nozzles and remove any stubborn debris or mineral buildup. Ensure that all the nozzles are clear and unobstructed.
- Check the Spinner Mechanism: Examine the spinner mechanism of the spray arm for any damage or wear. Ensure that it moves freely and rotates smoothly. If the spinner is damaged or not functioning properly, it may need to be replaced.
- Reinstall the Spray Arm: Once the spray arm is clean and dry, reattach it to the designated position in the dishwasher. Make sure it is securely fastened and properly aligned.
Regularly checking and cleaning the spray arm will help ensure that water is distributed effectively during the wash cycle, resulting in cleaner dishes. However, if you find that the spray arm is damaged or not working correctly, you may need to replace it. Refer to your dishwasher’s user manual or contact the manufacturer for guidance on obtaining a replacement spray arm.
With the spray arm checked and cleaned, you can now proceed to the next steps in the repair process. In the following steps, we will address other common issues and guide you through resolving them.
Step 6: Unclog the Drainage Hose
A clogged drainage hose can cause water to back up in your dishwasher and prevent it from draining properly. Removing any obstructions from the drainage hose is vital for maintaining the functionality of your dishwasher. Here’s how you can unclog the drainage hose:
- Locate the Drainage Hose: The drainage hose is usually located at the back of the dishwasher, connecting to the sink drain or garbage disposal. Refer to your dishwasher’s user manual if you are unsure about the location of the drainage hose.
- Disconnect the Drainage Hose: Start by turning off the water supply to the dishwasher. Next, carefully detach the drainage hose from the sink drain or garbage disposal. You may need to use pliers to loosen any hose clamps or connectors.
- Check for Obstructions: Inspect the drainage hose for any debris, such as food particles or small objects, that may be causing a blockage. Use a flashlight to get a clear view inside the hose.
- Remove the Obstruction: If you identify any blockage, use a long, flexible brush or a plumbing snake to gently push or pull out the obstruction. Alternatively, you can use a high-pressure stream of water or a wet/dry vacuum to dislodge and remove the clog.
- Clean the Drainage Hose: After removing the blockage, rinse the drainage hose thoroughly with warm water to remove any remaining debris. Check the hose for any signs of damage or leaks, and replace it if necessary.
- Reconnect the Drainage Hose: Once the drainage hose is clean and dry, reconnect it to the sink drain or garbage disposal. Ensure that the connection is secure and tight to prevent any leaks.
Regularly checking and unclogging the drainage hose will help ensure that your dishwasher can effectively drain water after each cycle. If you find that the drainage hose is damaged or continuously gets clogged, it may be necessary to replace it. Refer to your dishwasher’s user manual or contact the manufacturer for guidance on obtaining a replacement drainage hose.
With the drainage hose unclogged, you can now proceed to the next steps in the repair process. In the following steps, we will address other common issues and guide you through resolving them.
Read more: How To Unclog Windshield Washer Nozzle
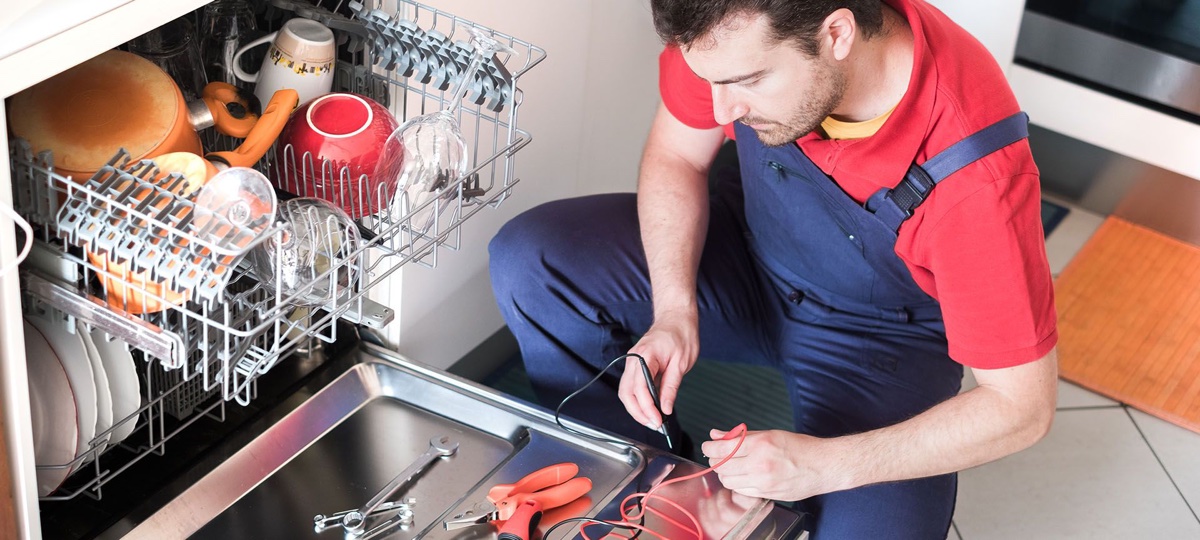
Step 7: Remove and Replace Faulty Parts
If you have identified specific faulty parts in your dishwasher during the inspection process, it may be necessary to remove and replace them. Faulty parts can impact the overall performance and functionality of your dishwasher. Here’s how you can remove and replace faulty parts:
- Identify the Faulty Part: Refer to your dishwasher’s user manual and the symptoms you have observed to determine which part is malfunctioning. Common faulty parts include the water inlet valve, pump, motor, heating element, or control panel.
- Order the Replacement Part: Once you have identified the faulty part, you will need to order a replacement. Contact the manufacturer, visit a local appliance parts store, or search online for the specific part needed for your dishwasher model.
- Turn off the Power Supply: Before you begin any work on your dishwasher, ensure that the power supply is turned off. Unplug the dishwasher or switch off the circuit breaker to prevent any potential accidents.
- Access the Faulty Part: Depending on the location of the faulty part, you may need to remove the dishwasher’s panels, control panel, or other components to access it. Refer to your dishwasher’s user manual for guidance on accessing specific parts.
- Remove the Faulty Part: Use the appropriate tools to disconnect the faulty part from its connections, such as screws, electrical wires, or hoses. Take note of how the part is connected to make reinstallation easier.
- Install the Replacement Part: Carefully install the replacement part by connecting it to the corresponding hoses, electrical wires, or screws. Ensure that it is securely fastened and properly aligned.
- Reassemble the Dishwasher: Once the replacement part is installed, reassemble the dishwasher by putting back any panels or components that were removed to access the faulty part.
If you are unsure about the process of removing and replacing a specific part, it is recommended to consult a professional technician or refer to your dishwasher’s user manual for detailed instructions and diagrams.
With the faulty part removed and replaced, you can now proceed to the final step in the repair process: testing your dishwasher.
Step 8: Test the Dishwasher
After completing the necessary repairs and replacing any faulty parts, it’s time to test your dishwasher to ensure that it is functioning properly. Here’s how you can test your dishwasher:
- Reconnect the Power Supply: If you had disconnected the power supply earlier, now is the time to plug the dishwasher back in or switch on the circuit breaker to restore power.
- Turn on the Water Supply: Ensure that the water supply to the dishwasher is turned on. Check for any leaks around the water inlet valve or hose connections.
- Load the Dishwasher: Place a few dishes, glasses, or utensils in the dishwasher’s racks as you normally would for a regular load. Make sure they are properly positioned and not blocking the spray arm or the path of water circulation.
- Select a Cycle: Set the dishwasher to the desired wash cycle and any additional settings, such as temperature or delay start if applicable.
- Start the Cycle: Close the dishwasher door securely and start the wash cycle. Listen for any unusual noises or vibrations during the operation.
- Monitor the Wash Cycle: Observe the dishwasher as it progresses through the wash cycle. Ensure that the spray arm is rotating, water is properly filling the dishwasher, and the detergent is dispensing as expected.
- Check for Proper Drainage: Once the wash cycle is complete, open the dishwasher door and inspect for any excess water. Ensure that the dishwasher has properly drained and that there are no leaks or pooling of water inside.
- Assess the Cleaning Results: Examine the dishes after the cycle to determine if they are clean and free from any debris or residue. Check for any spots or streaks on glassware.
If your dishwasher is operating smoothly, efficiently cleaning the dishes, and exhibiting no signs of leaks or other issues, then congratulations – your repair efforts have been successful! However, if you still encounter any problems or notice any abnormalities, it may be necessary to re-evaluate the troubleshooting steps or seek further assistance from a professional technician.
By testing your repaired dishwasher, you can ensure its functionality and enjoy the convenience it brings back to your kitchen. Remember to follow regular maintenance practices and keep an eye out for any potential issues to avoid future breakdowns.
With the testing complete, you have successfully repaired and tested your dishwasher. Take pride in your accomplishment and enjoy the restored performance of your appliance!
Conclusion
Repairing a dishwasher can seem like a daunting task, but with the right knowledge and guidance, it is a task that can be accomplished by many homeowners. By following the step-by-step process outlined in this article, you can address common issues that may arise with your dishwasher and restore its functionality without having to rely on professional technicians.
We began by stressing the importance of safety precautions, emphasizing the need to disconnect the power supply and wearing appropriate protective gear. We then gathered the necessary tools and materials needed for the repair process, ensuring that we had everything ready before starting.
We identified the problem by carefully inspecting the dishwasher, looking for leaks, drainage issues, or cleaning problems. Then, we turned off the power supply to ensure our safety throughout the repair process.
We inspected and maintained the door seal, cleaning it and checking for proper alignment to prevent leaks. We also cleaned the filter to prevent clogs and keep the dishwasher running efficiently. Additionally, we checked and cleaned the spray arm to ensure it could distribute water effectively.
If we encountered a clogged drainage hose, we learned how to unclog it to restore proper drainage. And if we identified faulty parts, we discovered how to remove and replace them, ensuring the dishwasher’s optimal performance.
Finally, we tested the dishwasher by reconnecting the power supply, turning on the water supply, and running a wash cycle. We monitored the cleaning results, assessed proper drainage, and overall functionality.
By following these steps and taking proper care of your dishwasher, you can extend its lifespan and avoid unnecessary repairs. However, if you encounter complex issues or are unsure about any step, it is always wise to seek professional assistance from a qualified technician.
In conclusion, repairing a dishwasher is a practical and economical solution to common problems that may arise. With a little time, effort, and knowledge, you can restore your dishwasher’s functionality and enjoy its convenience in your daily life.
Remember to always prioritize safety, refer to your dishwasher’s user manual for specific instructions, and conduct regular maintenance to keep your dishwasher running smoothly for years to come.
Frequently Asked Questions about How To Repair A Dish Washer
Was this page helpful?
At Storables.com, we guarantee accurate and reliable information. Our content, validated by Expert Board Contributors, is crafted following stringent Editorial Policies. We're committed to providing you with well-researched, expert-backed insights for all your informational needs.


0 thoughts on “How To Repair A Dish Washer”