Articles
How To Start A Ryobi Pressure Washer
Modified: October 25, 2024
Learn how to start a Ryobi pressure washer with our helpful articles. Find step-by-step guides and tips to get your pressure washer running smoothly.
(Many of the links in this article redirect to a specific reviewed product. Your purchase of these products through affiliate links helps to generate commission for Storables.com, at no extra cost. Learn more)
How to Start a Ryobi Pressure Washer
Starting a Ryobi pressure washer may seem like a daunting task, but with the right guidance, it can be a breeze. In this article, we will walk you through the step-by-step process of starting a Ryobi pressure washer, ensuring that you can tackle your cleaning tasks efficiently and effectively.
Key Takeaways:
- Proper starting procedures for a Ryobi pressure washer are crucial for safety, efficiency, and equipment longevity. Following manufacturer guidelines and best practices ensures smooth operation and optimal performance.
- Prioritizing safety, assembling components correctly, and performing post-starting checks are essential steps for starting and maintaining a Ryobi pressure washer. Adhering to manufacturer guidelines promotes safe and efficient operation.
Read more: How To Use Ryobi Pressure Washer
Step 1: Safety Precautions
Before you begin, it’s important to prioritize safety. Ensure that you are working in a well-ventilated area and wearing appropriate protective gear, such as safety goggles and gloves. Take the time to familiarize yourself with the pressure washer’s user manual, as it contains vital safety information specific to your model.
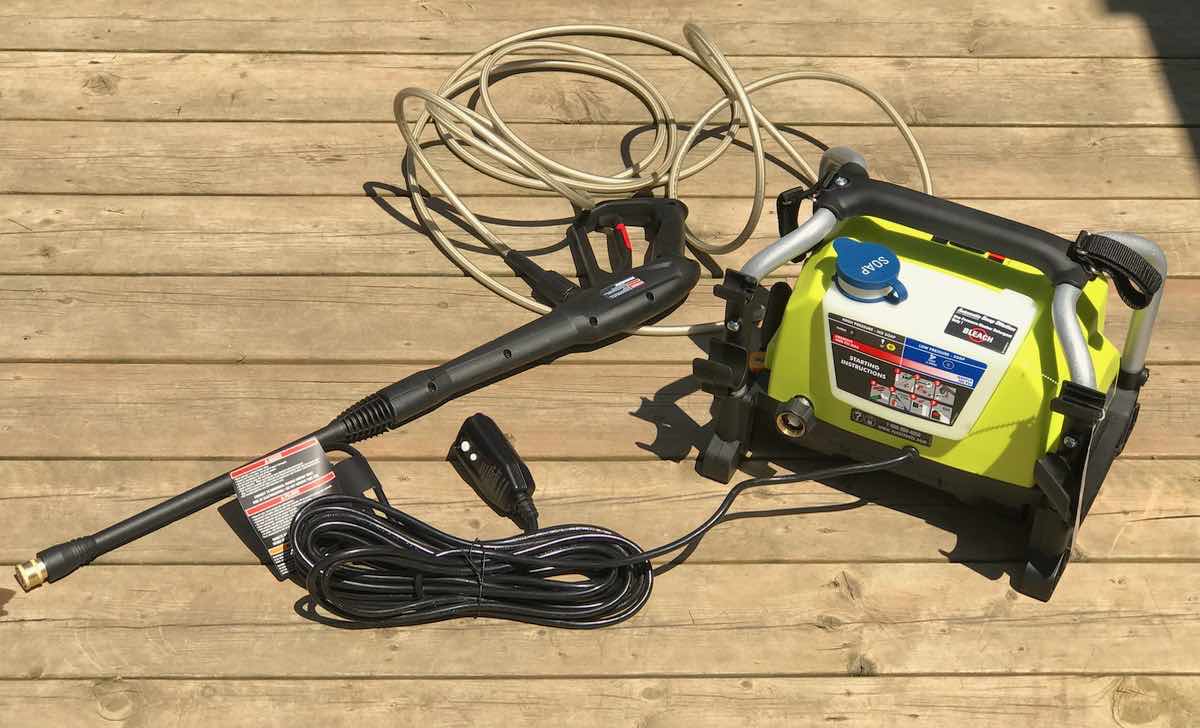
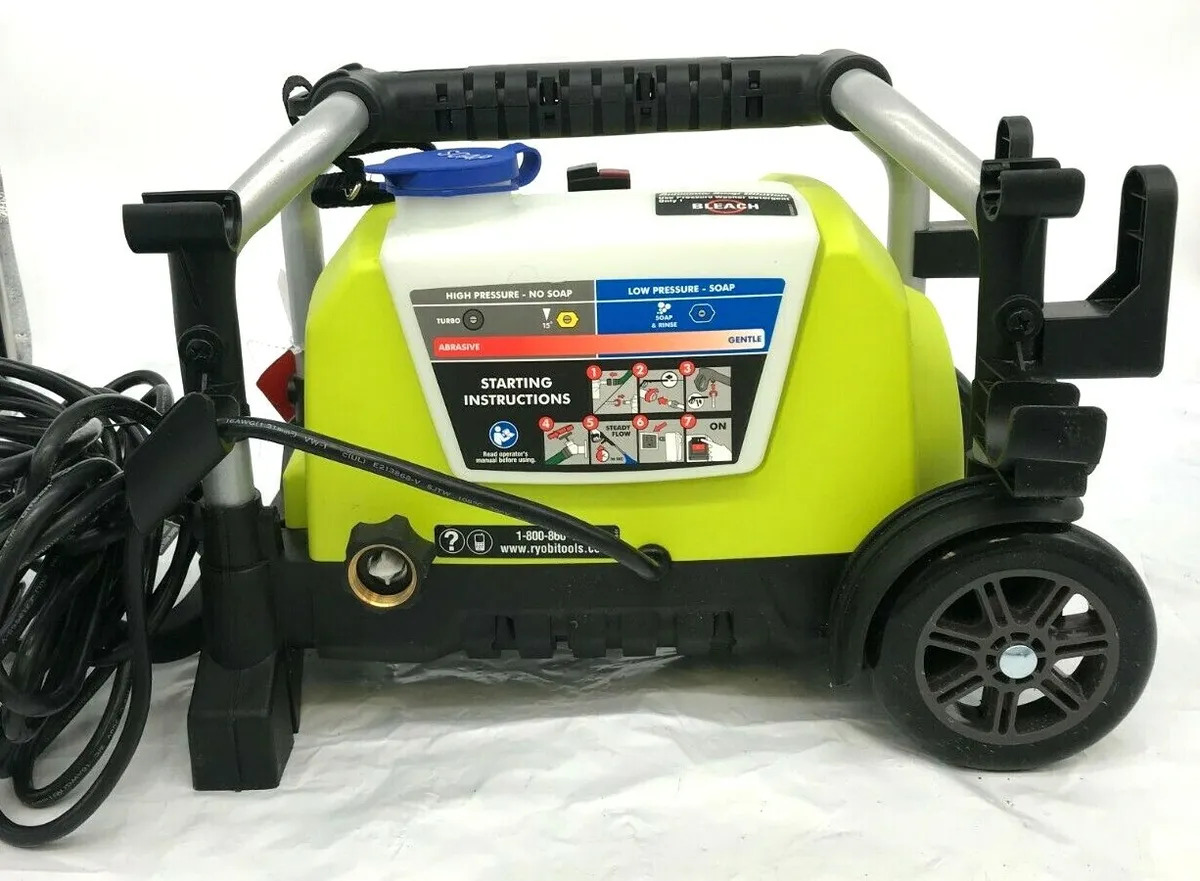
Step 2: Assembling the Pressure Washer
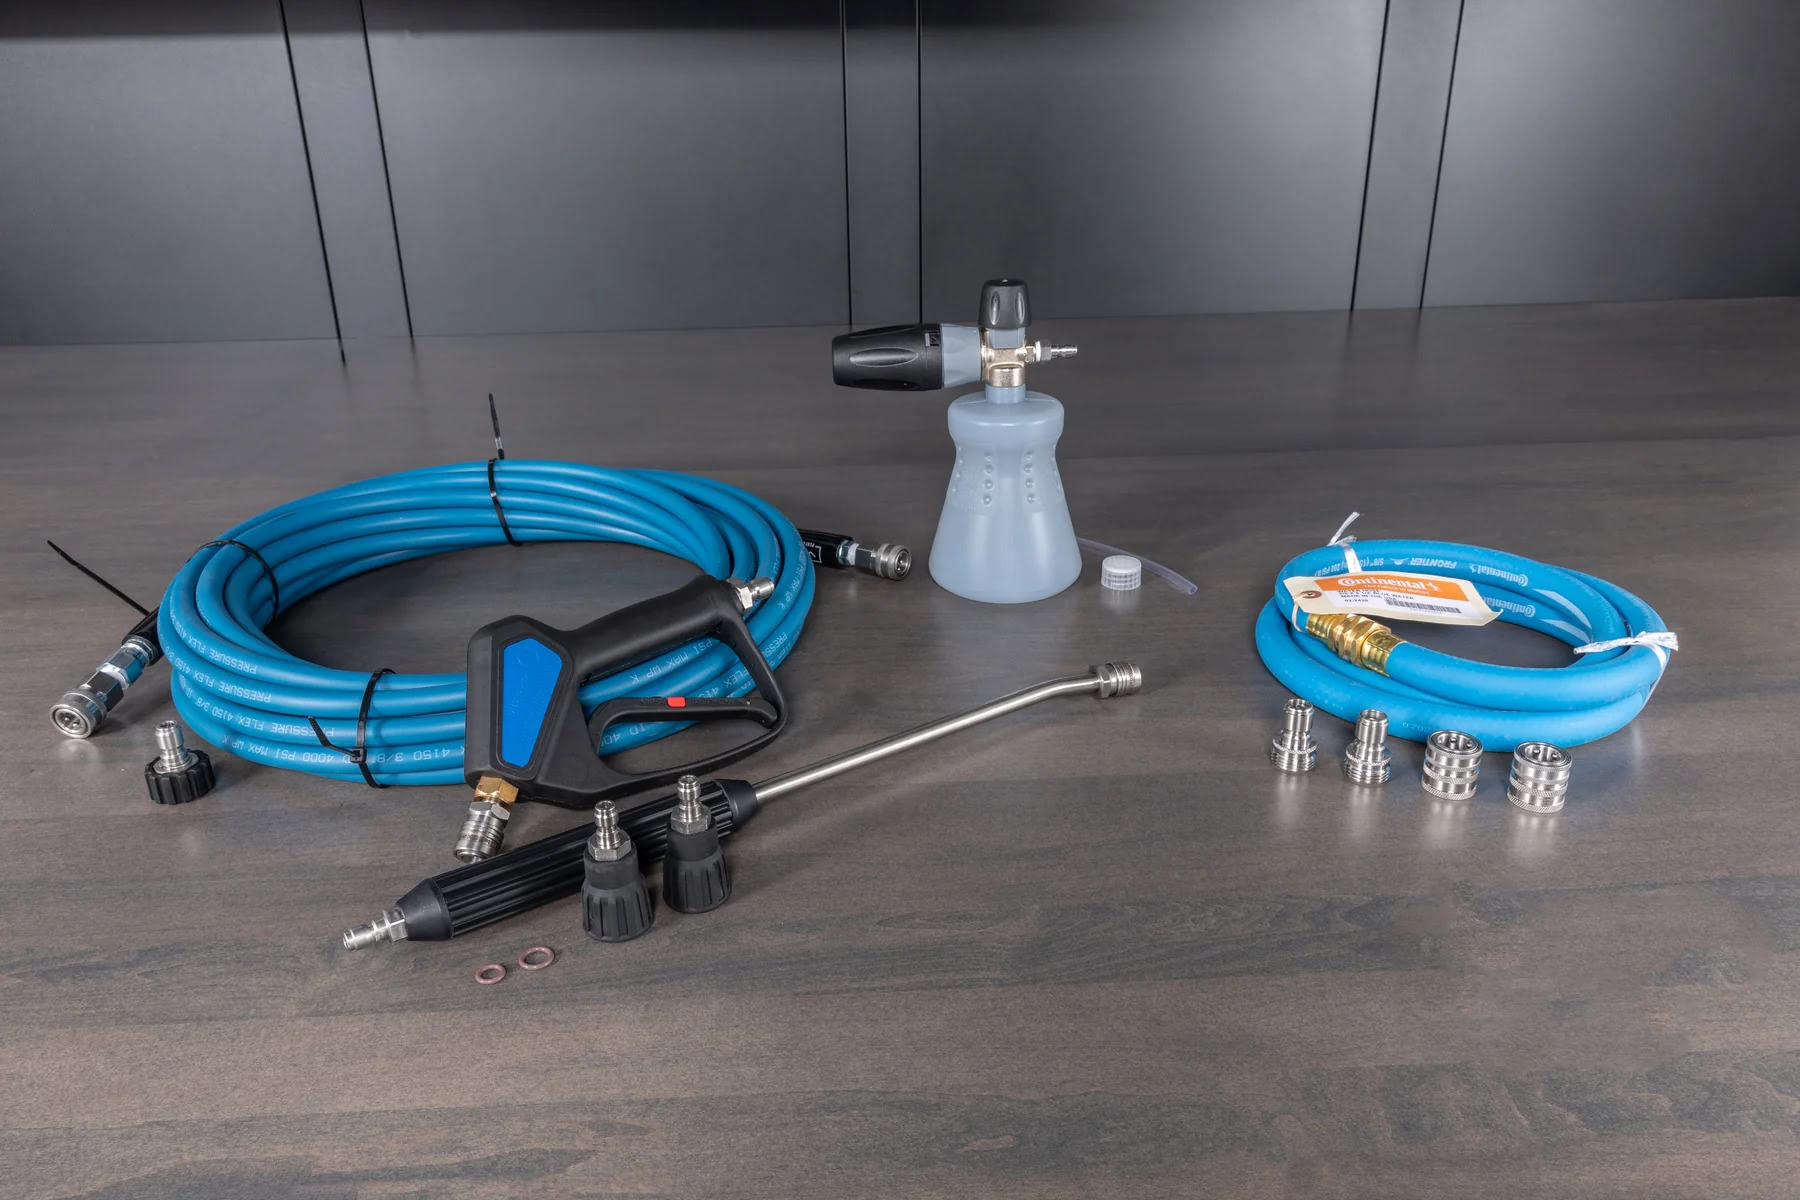
First, unpack and organize all the components of your Ryobi pressure washer. Attach the spray gun, hose, and nozzles according to the manufacturer’s instructions. Double-check that all connections are secure to prevent any potential leaks or malfunctions during operation.
Step 3: Preparing the Pressure Washer
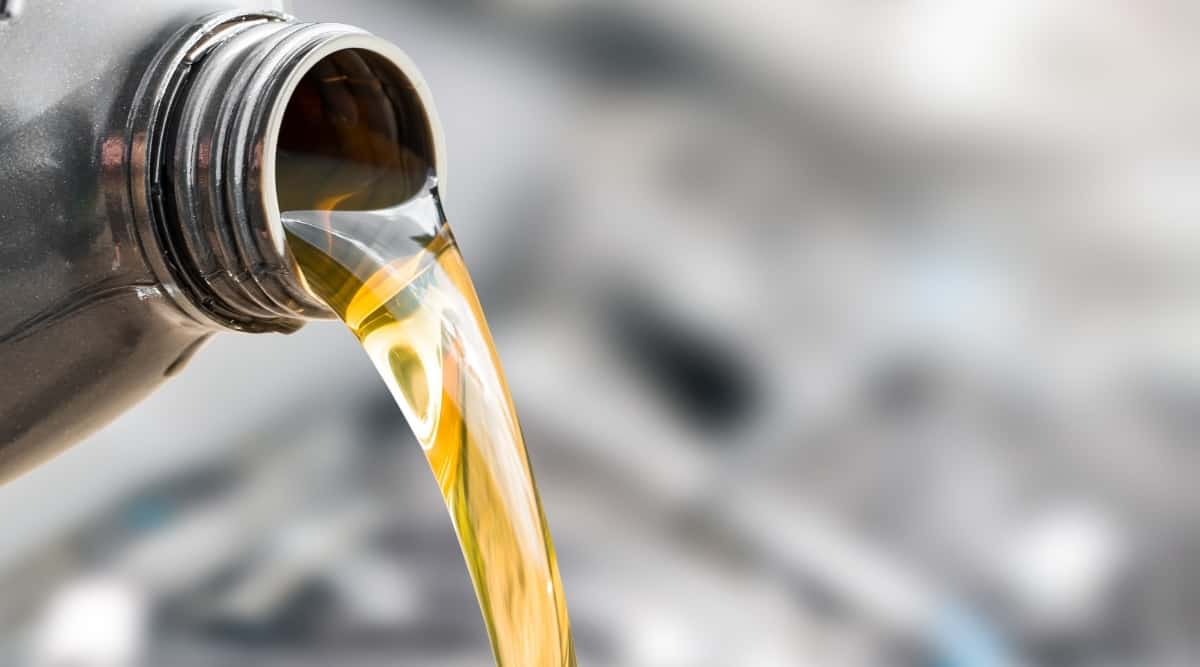
Next, check the oil level in the engine. If it is low, add the recommended oil according to the manufacturer’s guidelines. Make sure to also check the fuel level and fill up if necessary. Using the correct type of fuel is vital for the proper functioning of your pressure washer.
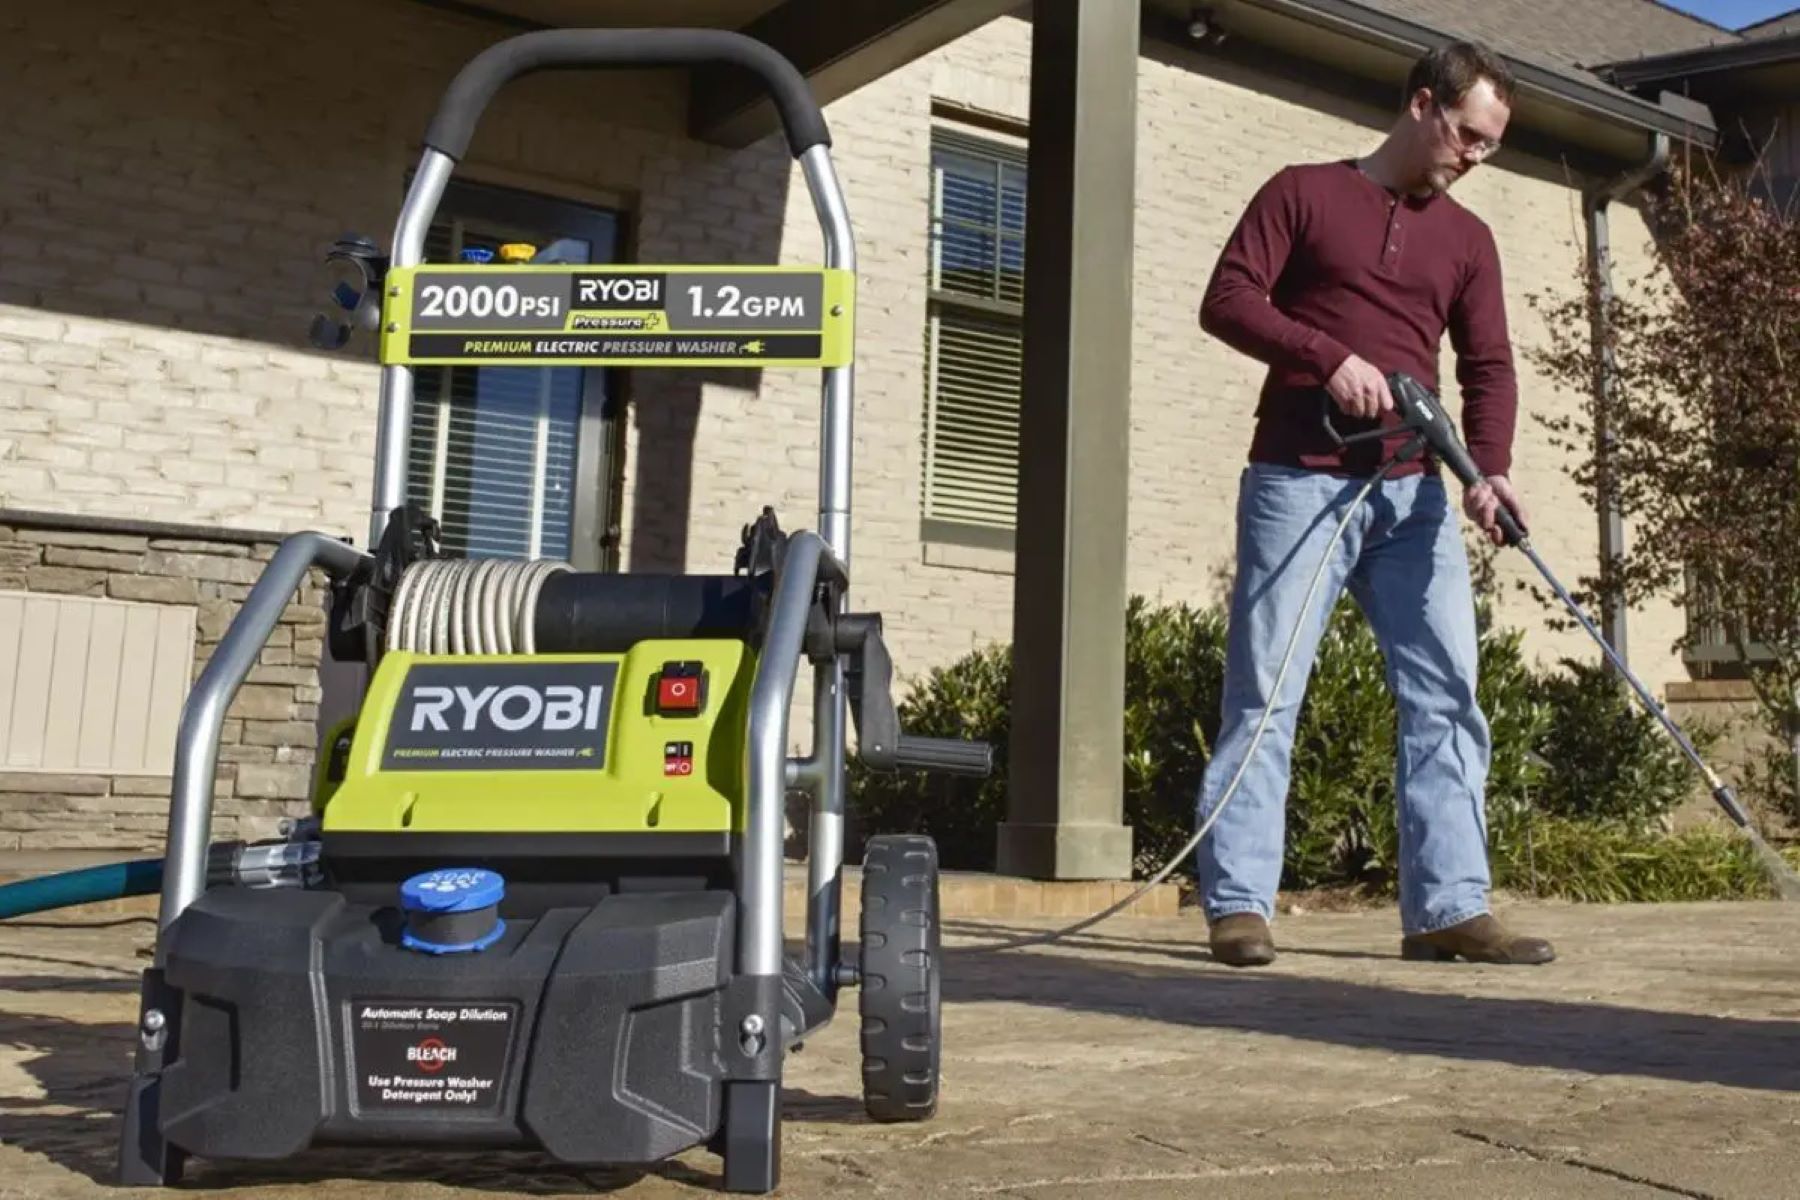
Step 4: Connecting to a Water Source
Locate the water inlet on the pressure washer and connect the water hose. Ensure that the connection is tight to prevent any leaks during operation. It is important to use a hose with the proper diameter and length, as recommended by the manufacturer, to guarantee optimal performance.
Read more: How To Start A Craftsman Pressure Washer
Step 5: Priming the Pressure Washer
To prime your Ryobi pressure washer, engage the choke by pulling it out or turning it to the “On” position. Locate the fuel valve and turn it to the “On” position as well. This will allow fuel to flow to the engine. Hold the spray gun trigger while pulling the starter cord to initiate the priming process.
Step 6: Starting the Pressure Washer
Place the pressure washer on a flat and stable surface. Grab the starter cord firmly and pull it with a quick, smooth motion. The engine should start running smoothly. If it doesn’t start on the first attempt, wait a few seconds and try again. Once the engine is running, release the trigger on the spray gun.
Step 7: Post-Starting Checks
After starting the pressure washer, check for proper water flow from the spray gun. You should see a steady stream of water coming out. Inspect the pressure washer for any abnormal sounds or leaks. If you notice any issues, consult the user manual or contact Ryobi customer support for guidance.
By following these steps and adhering to the manufacturer’s guidelines, you can confidently start your Ryobi pressure washer and tackle your cleaning tasks effectively. Remember to always prioritize safety and proper maintenance to ensure optimal performance and longevity of your pressure washer.
Disclaimer: This article serves as a general guide for starting a Ryobi pressure washer. Always refer to the specific instructions provided by the manufacturer for your model.
How to Start a Ryobi Pressure Washer
Starting a Ryobi pressure washer may seem like a daunting task, but with the right guidance, it can be a breeze. In this article, we will walk you through the step-by-step process of starting a Ryobi pressure washer, ensuring that you can tackle your cleaning tasks efficiently and effectively.
Read more: Who Makes Ryobi Pressure Washers
Introduction: Understanding the Importance of Proper Starting Procedures
When it comes to operating any machinery, including a pressure washer, understanding the proper starting procedures is crucial. Not only does it ensure the longevity and optimal performance of your equipment, but it also prioritizes your safety while using it.
Starting a Ryobi pressure washer incorrectly can lead to malfunctions, damage to the equipment, and even potential harm to yourself or others in the vicinity. It is important to follow the manufacturer’s guidelines and recommendations to ensure a smooth and safe operation.
Proper starting procedures help prime the pressure washer, ensuring that the engine receives adequate fuel and spark to ignite. This initial process is crucial for smooth operation and prevents any potential issues during use.
Additionally, by following the correct starting procedures, you can identify any potential issues or malfunctions before they cause further damage to the machine. This allows for timely repairs and maintenance, increasing the lifespan of your Ryobi pressure washer.
Moreover, understanding and practicing proper starting procedures can optimize the efficiency and effectiveness of your pressure washer. By starting it correctly, you ensure that the machine is ready to deliver the required water pressure for effective cleaning, allowing you to complete your tasks more efficiently.
Lastly, adhering to the manufacturer’s recommended starting procedures is essential for warranty and maintenance purposes. Failure to follow these guidelines may void the warranty or impact any potential service or repairs covered under warranty.
By taking the time to understand the importance of proper starting procedures for your Ryobi pressure washer, you are setting yourself up for success. Not only does it ensure a safe operating environment, but it also enhances the performance, longevity, and efficiency of your equipment, allowing you to complete your cleaning tasks with ease.
In the following steps, we will guide you through the proper process of starting your Ryobi pressure washer. Let’s dive in!
How to Start a Ryobi Pressure Washer
Starting a Ryobi pressure washer may seem like a daunting task, but with the right guidance, it can be a breeze. In this article, we will walk you through the step-by-step process of starting a Ryobi pressure washer, ensuring that you can tackle your cleaning tasks efficiently and effectively.
Key Takeaways:
- Proper starting procedures for a Ryobi pressure washer are crucial for safety, efficiency, and equipment longevity. Following manufacturer guidelines and best practices ensures smooth operation and optimal performance.
- Prioritizing safety, assembling components correctly, and performing post-starting checks are essential steps for starting and maintaining a Ryobi pressure washer. Adhering to manufacturer guidelines promotes safe and efficient operation.
Read more: How To Use Ryobi Pressure Washer
Step 1: Safety Precautions
Prioritizing safety is essential when operating any machinery, including a pressure washer. Before starting your Ryobi pressure washer, it is crucial to ensure a safe working environment and wear appropriate protective gear.
The first step in creating a safe working environment is to select an appropriate location for operating the pressure washer. Choose an open area with good ventilation to prevent the buildup of exhaust fumes. Keep the workspace free of tripping hazards or clutter that may impede your movement.
It is also important to check the general condition of the pressure washer. Inspect the cord and plug for any damages or fraying. If any issues are detected, refrain from using the machine and have it repaired or replaced by a qualified technician.
Now let’s talk about personal protective gear. When operating a Ryobi pressure washer, it is essential to protect yourself from potential hazards. Wear safety goggles to shield your eyes from splashes, debris, and chemicals. Gloves will not only protect your hands from chemicals but also provide a better grip on the equipment.
Additionally, ear protection may be necessary, especially if you anticipate prolonged exposure to loud noise generated by the pressure washer. Earplugs or earmuffs can help minimize the risk of hearing damage.
Lastly, it is crucial to familiarize yourself with the user manual provided by Ryobi. The manual contains important safety instructions specific to your model, including any potential hazards and precautions you need to take during operation. Make sure to read and understand the manual thoroughly before starting the pressure washer.
By ensuring a safe working environment and wearing appropriate protective gear, you are taking essential steps to prevent accidents and injuries while operating your Ryobi pressure washer. Safety should always be a top priority. Now that we have covered safety precautions, let’s move on to the next step: assembling the pressure washer.
How to Start a Ryobi Pressure Washer
Starting a Ryobi pressure washer may seem like a daunting task, but with the right guidance, it can be a breeze. In this article, we will walk you through the step-by-step process of starting a Ryobi pressure washer, ensuring that you can tackle your cleaning tasks efficiently and effectively.
Step 2: Assembling the Pressure Washer
Once you have taken the necessary safety precautions, it’s time to assemble your Ryobi pressure washer. Proper assembly is essential to ensure that all components are securely connected and ready for use.
The first step is to unpack and organize all the components that came with your pressure washer. Lay them out on a flat and clean surface, making it easier to identify and work with each piece.
Next, locate the spray gun, hose, and nozzles. These are the essential components that need to be properly attached. Ensure that the spray gun is securely connected to the water outlet on the pressure washer. It should click into place or have a locking mechanism to prevent any accidental disconnection during use.
Attach the high-pressure hose to the spray gun by screwing it on tightly. Make sure there are no visible gaps or leaks between the hose and spray gun connection. A secure connection is vital to maintain optimal pressure and prevent any loss of performance.
Now, it’s time to attach the appropriate nozzle to the spray gun. The nozzle determines the spray pattern and intensity, allowing you to customize the pressure according to your cleaning needs. Ryobi pressure washers often come with multiple nozzle options, such as a 0-degree, 15-degree, 25-degree, and 40-degree nozzle. Select the nozzle that suits your cleaning requirements and securely attach it to the spray gun.
As you assemble the pressure washer, refer to the user manual provided by Ryobi for specific instructions on how to align and attach the components. Each model may have slight variations in the assembly process, so it’s important to follow the manufacturer’s guidelines.
By unpacking and properly attaching the spray gun, hose, and nozzles, you are ensuring that your Ryobi pressure washer is ready to deliver high-pressure water for effective cleaning. With the proper assembly done, you are now ready to move on to the next step: preparing the pressure washer.
How to Start a Ryobi Pressure Washer
Starting a Ryobi pressure washer may seem like a daunting task, but with the right guidance, it can be a breeze. In this article, we will walk you through the step-by-step process of starting a Ryobi pressure washer, ensuring that you can tackle your cleaning tasks efficiently and effectively.
Step 3: Preparing the Pressure Washer
Before starting your Ryobi pressure washer, it is crucial to properly prepare the machine by checking the oil and fuel levels.
Start by checking the oil level in the engine. Locate the oil filler cap on the pressure washer’s engine and remove it. Take a clean cloth or paper towel and wipe the dipstick clean. Insert the dipstick back into the oil filler hole without screwing it in. Pull it out again to check the oil level. The oil should be within the recommended range marked on the dipstick. If the oil level is low, you will need to add the appropriate oil recommended by Ryobi. Slowly pour small amounts of oil and recheck the level until it reaches the recommended range. Be cautious not to overfill the oil as it can lead to internal engine damage.
Next, confirm the fuel level in your Ryobi pressure washer. Locate the fuel tank, usually positioned near the engine. Remove the fuel tank cap and visually inspect the fuel level. If it is low, you will need to fill it up with the appropriate fuel recommended by Ryobi. Ensure that you use the correct type of fuel, such as unleaded gasoline, and avoid using stale or contaminated fuel. Be mindful not to overfill the tank, as it can cause fuel spills and potential hazards during operation.
Always refer to the user manual provided by Ryobi for specific instructions on checking and adding oil and fuel for your particular pressure washer model. Following the manufacturer’s guidelines will ensure proper lubrication and fuel supply to the engine, contributing to the smooth and efficient operation of your pressure washer.
By checking the oil level and adding if necessary, as well as confirming and filling up the fuel level, you are ensuring that your Ryobi pressure washer is properly prepared for use. With these preparations done, you are now ready to move on to the next step: connecting the pressure washer to a water source.
How to Start a Ryobi Pressure Washer
Starting a Ryobi pressure washer may seem like a daunting task, but with the right guidance, it can be a breeze. In this article, we will walk you through the step-by-step process of starting a Ryobi pressure washer, ensuring that you can tackle your cleaning tasks efficiently and effectively.
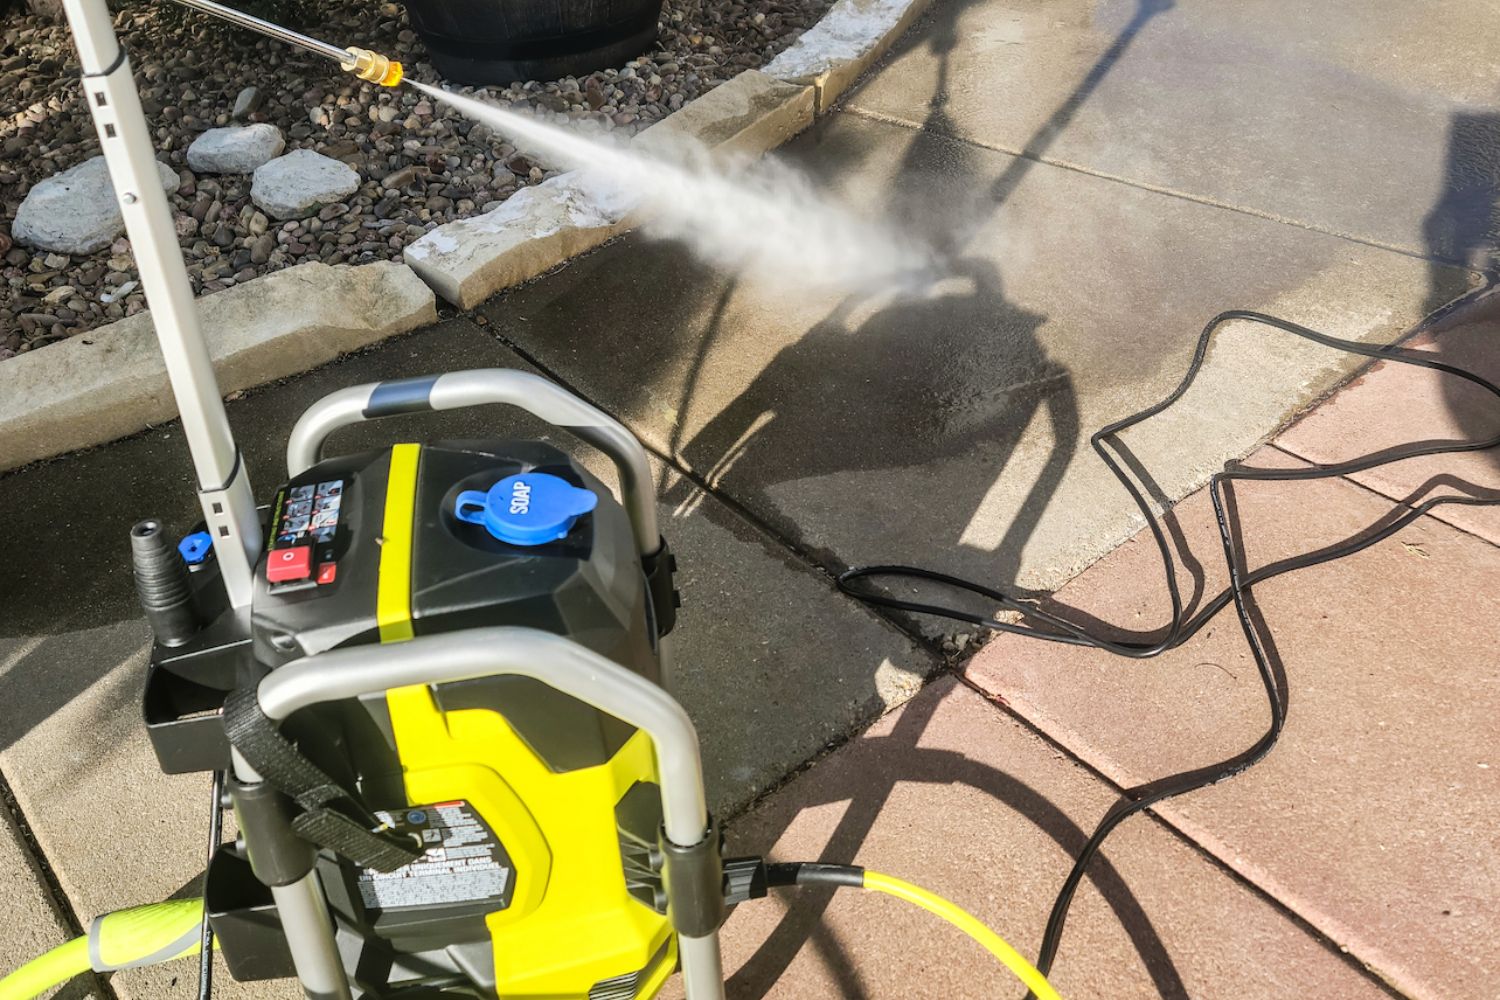
Step 4: Connecting to a Water Source
Now that you have prepared the pressure washer, it’s time to connect it to a water source. Proper water connection is crucial to ensure a steady supply of water to the pressure washer, allowing it to operate at its full potential.
Start by locating the water inlet on your Ryobi pressure washer. This is usually a threaded connection point where the water hose will be attached. It is important to check for any debris or blockages in the water inlet and remove them if present. A clear and unobstructed water inlet ensures a smooth flow of water and prevents any potential damage to the pressure washer.
Once you have located the water inlet, connect the water hose to it. Ensure that the end of the water hose is threaded and matches the size and type specified by Ryobi for your pressure washer model. Place a washer or gasket on the threaded end of the water hose to create a tight seal when attaching it to the water inlet. This helps prevent any leaks during operation.
Align the threaded end of the water hose with the water inlet and turn it clockwise to tighten it. Make sure to avoid over-tightening, as this can cause damage to the threads or the connection point. It’s essential to achieve a secure connection without any visible gaps or leaks.
After connecting the water hose, it’s a good practice to turn on the water source gradually and inspect the connection for any leaks. If you notice any leaks, try tightening the connection further or replacing the washer/gasket to ensure a watertight seal.
It is important to note that some Ryobi pressure washers may require additional connections, such as a filter or pressure regulator, depending on the model and the water source. Refer to the user manual provided by Ryobi for specific instructions on additional connections, if applicable.
By locating the water inlet on the pressure washer and securely connecting the water hose, you are ensuring a proper water supply for your Ryobi pressure washer. With the water connection established, you are now ready to move on to the next step: priming the pressure washer.
How to Start a Ryobi Pressure Washer
Starting a Ryobi pressure washer may seem like a daunting task, but with the right guidance, it can be a breeze. In this article, we will walk you through the step-by-step process of starting a Ryobi pressure washer, ensuring that you can tackle your cleaning tasks efficiently and effectively.
Read more: How To Start A Craftsman Pressure Washer
Step 5: Priming the Pressure Washer
Once you have connected the water source, it’s time to prime your Ryobi pressure washer. Priming is an essential step to ensure that the fuel and the engine are properly prepared for starting.
Start by engaging the choke and fuel valve. Locate the choke lever on the pressure washer engine and move it to the “On” or “Closed” position. This restricts the air flow and allows for a richer fuel mixture during the initial priming process. You should also locate the fuel valve, usually on the side or bottom of the fuel tank, and turn it to the “On” position to allow fuel to flow to the engine.
Next, it’s time to pull the starter cord for the initial priming. Position yourself in a comfortable stance near the pressure washer. Firmly grasp the starter cord handle and give it a smooth, rapid pull. This action helps to initiate the fuel flow and primes the engine for starting. Be prepared for some resistance as you pull the cord, but avoid yanking it forcefully, as it can cause damage to the recoil mechanism or the engine.
If the engine doesn’t start on the first pull, do not panic. Wait a few seconds to allow the engine to decompress, and then give it another try. It may take a few attempts to start the engine, especially if it’s the first time using the pressure washer or if it has been sitting idle for a while.
Once the engine starts running smoothly, make sure to disengage the choke by moving the choke lever to the “Off” or “Open” position. This allows for normal air flow and ensures smooth operation. Remember to also make sure the fuel valve remains in the “On” position.
It is important to note that different models of Ryobi pressure washers may have slightly varying starting procedures. Always refer to the specific instructions provided in the user manual for your particular model.
By engaging the choke and fuel valve, and pulling the starter cord for the initial priming, you are preparing your Ryobi pressure washer for smooth and efficient operation. With the priming process completed, you are now ready to move on to the next step: starting the pressure washer.
How to Start a Ryobi Pressure Washer
Starting a Ryobi pressure washer may seem like a daunting task, but with the right guidance, it can be a breeze. In this article, we will walk you through the step-by-step process of starting a Ryobi pressure washer, ensuring that you can tackle your cleaning tasks efficiently and effectively.
Step 6: Starting the Pressure Washer
With the pressure washer properly primed, you are now ready to start the engine and get cleaning. Follow these steps to start your Ryobi pressure washer:
1. Place the pressure washer on a stable surface: Find a flat and stable surface to set up your pressure washer. This will ensure safe and reliable operation during use. Avoid placing the pressure washer on uneven or slippery surfaces that may cause it to wobble or tip over.
2. Pull the starter cord firmly: Locate the starter cord, which is usually positioned on the side of the engine. Firmly grasp the handle of the starter cord and give it a quick, firm pull. This action will engage the engine and start it running. Be sure to maintain a steady grip on the handle and use a quick pulling motion to generate enough force to start the engine.
If the engine doesn’t start on the first attempt, don’t worry. Give the starter cord another firm pull. It may take a few tries, especially if it’s the first time starting the pressure washer or if it has been sitting idle for a while.
3. Allow the engine to warm up: Once the engine starts running, let it warm up for a few moments. This will ensure that all components are properly lubricated and ready for optimal performance. Use this time to double-check that the choke lever, if applicable, is moved to the “Off” or “Open” position for normal air flow.
4. Check for proper water flow: With the engine running, squeeze the trigger on the spray gun to check for proper water flow. You should see a steady and consistent stream of water coming out of the nozzle. If there is no water flow or it is weak, check for any blockages or kinks in the water hose and ensure that the water source is turned on and supplying sufficient water pressure.
It is essential to follow these starting procedures as outlined in the user manual provided by Ryobi for your specific model. Every pressure washer may have slight variations in starting instructions, so referring to the manual ensures proper operation.
By placing the pressure washer on a stable surface and pulling the starter cord firmly to start the engine, you are ready to unleash the power of your Ryobi pressure washer. With the engine running, you can now move on to the final step: post-starting checks.
How to Start a Ryobi Pressure Washer
Starting a Ryobi pressure washer may seem like a daunting task, but with the right guidance, it can be a breeze. In this article, we will walk you through the step-by-step process of starting a Ryobi pressure washer, ensuring that you can tackle your cleaning tasks efficiently and effectively.
Step 7: Post-Starting Checks
After successfully starting your Ryobi pressure washer, it’s important to perform a few post-starting checks to ensure everything is in proper working order. These checks will help you confirm that the pressure washer is functioning as expected and identify any potential issues that may require attention.
1. Confirm proper water flow from the spray gun: Squeeze the trigger on the spray gun and observe the water flow. It should come out in a steady and consistent stream. If the water flow is weak or interrupted, check for any blockages in the nozzle, hose, or spray gun. Clear any obstructions and ensure that the water source is providing adequate pressure.
2. Check for any abnormal sounds: Listen closely to the pressure washer’s engine as it runs. It should have a smooth and consistent sound. If you notice any unusual or excessive noise, such as knocking or grinding sounds, it may indicate a mechanical issue. In such cases, it’s recommended to consult the user manual or reach out to Ryobi customer support for further guidance.
3. Look for any signs of leaks: Inspect the pressure washer for any signs of water or fuel leaks. Common areas to check include connections, hoses, and the engine. Leaks can lead to reduced performance or potential damage to the equipment. If you notice any leaks, tighten connections or replace faulty parts as necessary to ensure proper operation.
Performing these post-starting checks allows you to ensure the pressure washer is operating as it should and address any potential issues promptly. Proactive maintenance and troubleshooting help maintain the longevity and optimal performance of your Ryobi pressure washer.
Remember, it’s important to follow the manufacturer’s guidelines and consult the user manual specific to your pressure washer model for any maintenance or troubleshooting procedures. Each model may have slightly different recommendations, so it’s best to refer to the official documentation provided by Ryobi for the most accurate and up-to-date information.
By confirming proper water flow from the spray gun, checking for any abnormal sounds, and inspecting for leaks, you can feel confident in the functionality of your Ryobi pressure washer. Now, you’re all set to tackle your cleaning tasks with ease and efficiency.
Disclaimer: This article serves as a general guide for starting a Ryobi pressure washer. Always refer to the specific instructions provided by the manufacturer for your model.
Conclusion: Importance of Following Manufacturer Guidelines and Best Practices for Starting and Maintaining a Ryobi Pressure Washer
Starting and maintaining a Ryobi pressure washer requires careful attention to detail and adherence to the manufacturer’s guidelines. Following these guidelines not only ensures the safe and efficient operation of your pressure washer but also promotes its longevity and optimal performance.
One of the key reasons for following the manufacturer’s guidelines is safety. Ryobi provides specific instructions regarding proper assembly, safety precautions, starting procedures, and maintenance tasks for each pressure washer model. By following these guidelines, you reduce the risk of accidents and ensure a safe working environment for yourself and others.
In addition to safety, following the manufacturer’s guidelines helps optimize the performance of your Ryobi pressure washer. By properly assembling the components, checking and adding oil and fuel, connecting to a water source correctly, priming the machine, and starting it according to the recommended procedures, you ensure that all parts are functioning as intended. This promotes reliable water flow, efficient cleaning power, and overall peak performance.
Regular maintenance is also essential for the longevity of your pressure washer. By following the maintenance guidelines provided by Ryobi, you can identify and address issues before they become major problems. This might include regular oil changes, cleaning or replacing filters, and inspecting hoses and connections for wear or damage.
In addition to following manufacturer guidelines, there are some best practices that can enhance your experience with a Ryobi pressure washer. These include:
1. Familiarize yourself with the user manual: The user manual is a valuable resource that provides detailed instructions specific to your model. Take the time to read and understand it thoroughly before operating your pressure washer.
2. Use the recommended accessories and cleaning detergents: Ryobi may provide specific accessories, nozzles, and cleaning agents that are designed to work optimally with their pressure washers. These can enhance cleaning performance and protect the machine from damage.
3. Store your pressure washer properly: After each use, be sure to clean and dry the pressure washer, particularly the pump and hoses. Store it in a dry and secure area, protecting it from harsh weather conditions and potential damage.
4. Regularly inspect and clean components: Periodically check the hoses, connections, and nozzles for any buildup or blockages. Clean or replace them as needed to maintain optimal performance.
By following manufacturer guidelines and implementing these best practices, you can ensure the safe and efficient operation of your Ryobi pressure washer. Whether you are tackling home cleaning projects or professional ventures, a well-maintained and properly operated pressure washer can make your tasks easier and more effective.
Remember, always consult the manufacturer’s guidelines and user manual specific to your Ryobi pressure washer model for the most accurate instructions and recommendations. With the right knowledge and proper care, your Ryobi pressure washer will continue to serve you well for years to come.
Disclaimer: This article serves as a general guide for starting and maintaining a Ryobi pressure washer. Always refer to the specific instructions provided by the manufacturer for your model.
Now that you’ve got the hang of starting your Ryobi pressure washer, why not dive deeper into keeping your home in top shape? Our next guide provides essential insights on routine upkeep for your living space. Maintaining a home isn’t just about cleaning — it involves regular inspections and updates to ensure everything’s functioning as it should. Don’t miss out on learning vital home upkeep tips that save time and money down the road.
Frequently Asked Questions about How To Start A Ryobi Pressure Washer
Was this page helpful?
At Storables.com, we guarantee accurate and reliable information. Our content, validated by Expert Board Contributors, is crafted following stringent Editorial Policies. We're committed to providing you with well-researched, expert-backed insights for all your informational needs.


0 thoughts on “How To Start A Ryobi Pressure Washer”