Articles
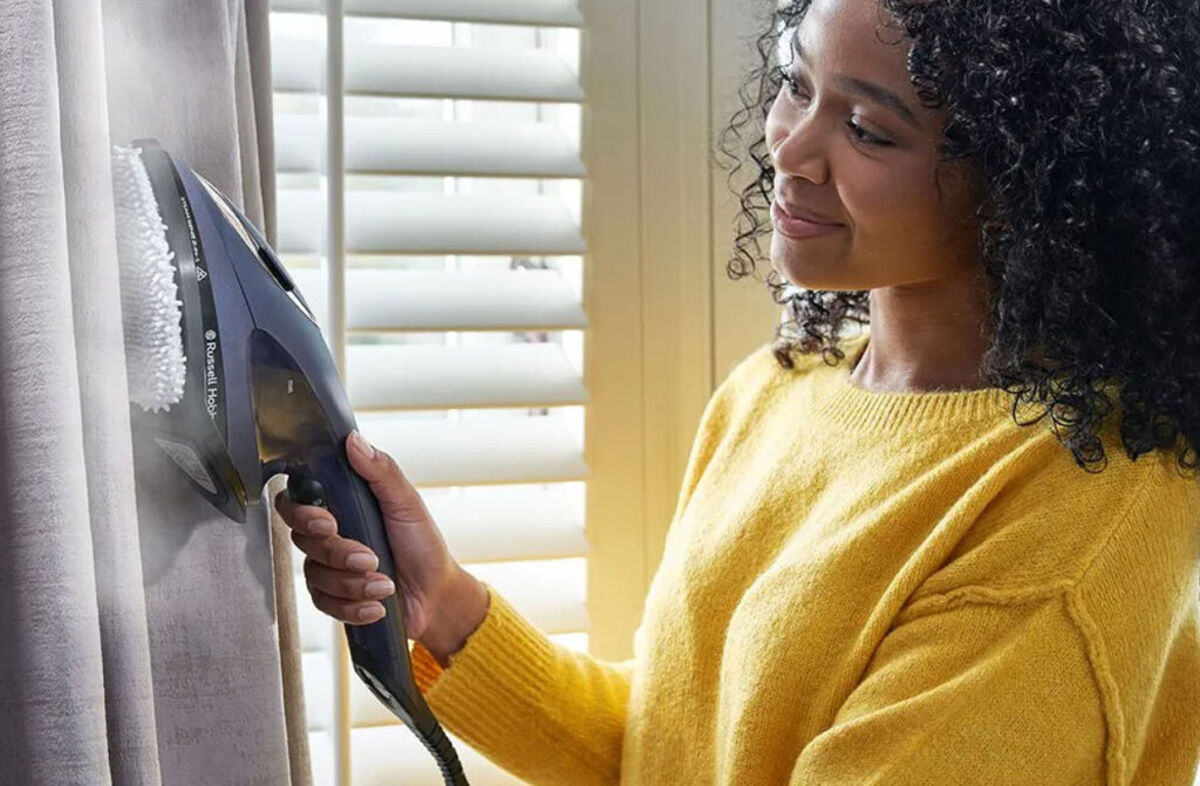
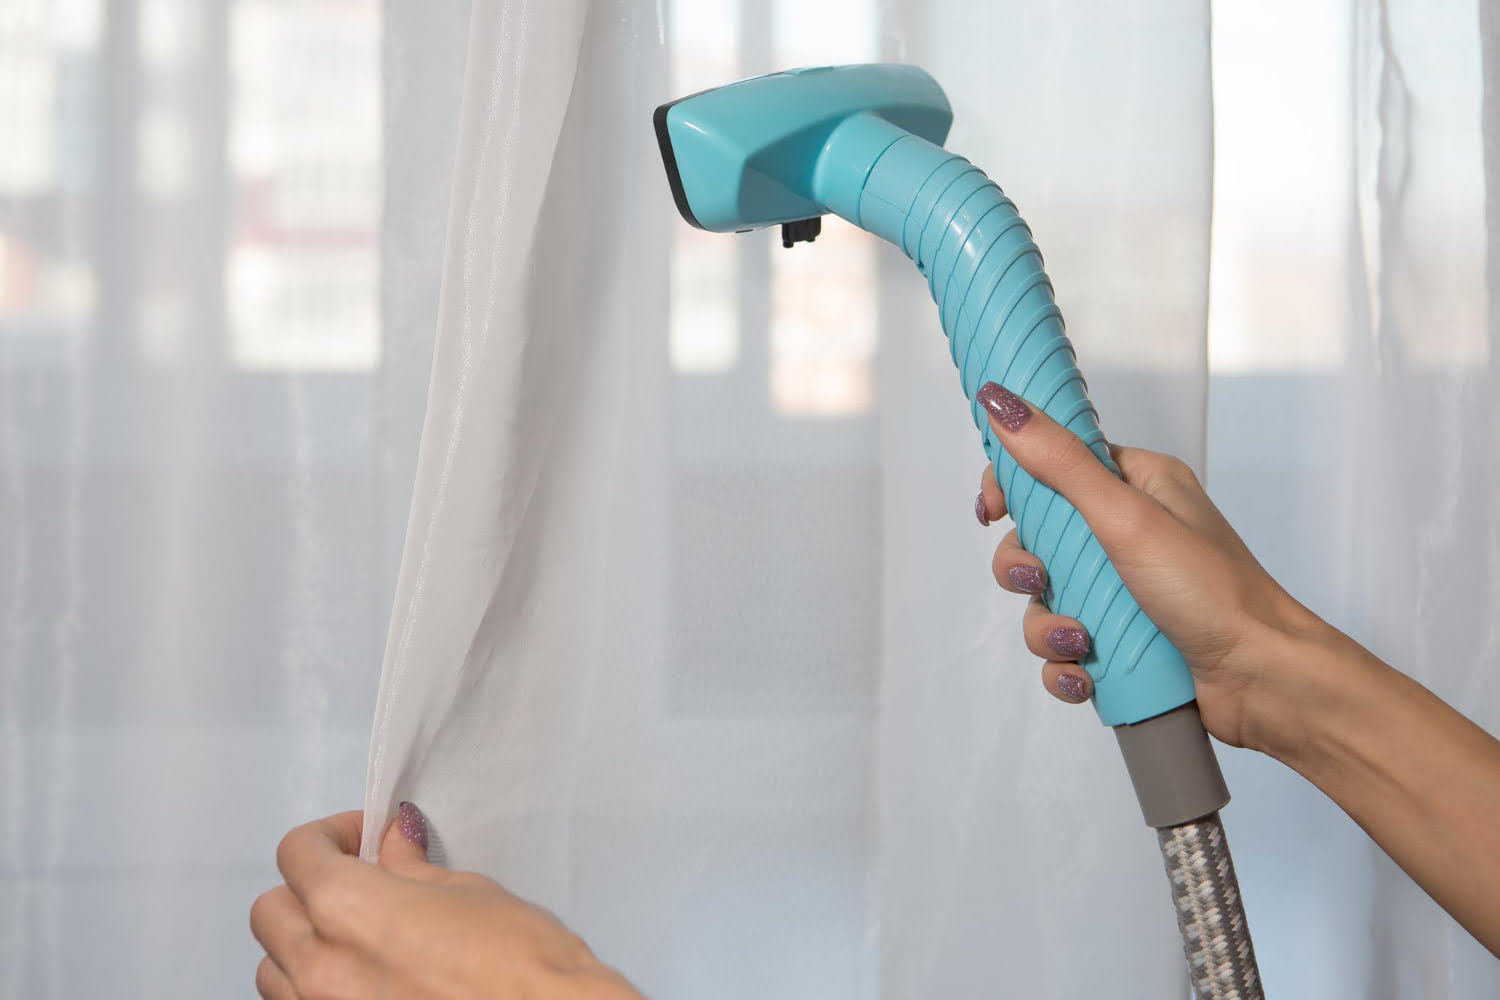
How To Steam Curtains With A Steamer
Modified: January 19, 2024
Learn how to effectively steam your curtains using a steamer in this informative article. Discover the best techniques and tips for achieving wrinkle-free curtains!
(Many of the links in this article redirect to a specific reviewed product. Your purchase of these products through affiliate links helps to generate commission for Storables.com, at no extra cost. Learn more)
Introduction
Welcome to the world of curtain steaming! In this article, we will explore the wonderful benefits of using a steamer to refresh and revitalize your curtains. Steaming is an effective and efficient method of removing wrinkles, odors, and allergens from your curtains, leaving them looking clean and fresh.
Curtains play a significant role in transforming the look and feel of any room. They not only add a touch of elegance and style but also serve practical purposes such as providing privacy, blocking out light, and insulating against heat and cold. However, over time, curtains can accumulate dust, dirt, and stubborn wrinkles, which can dull their appearance. This is where a steamer comes in handy.
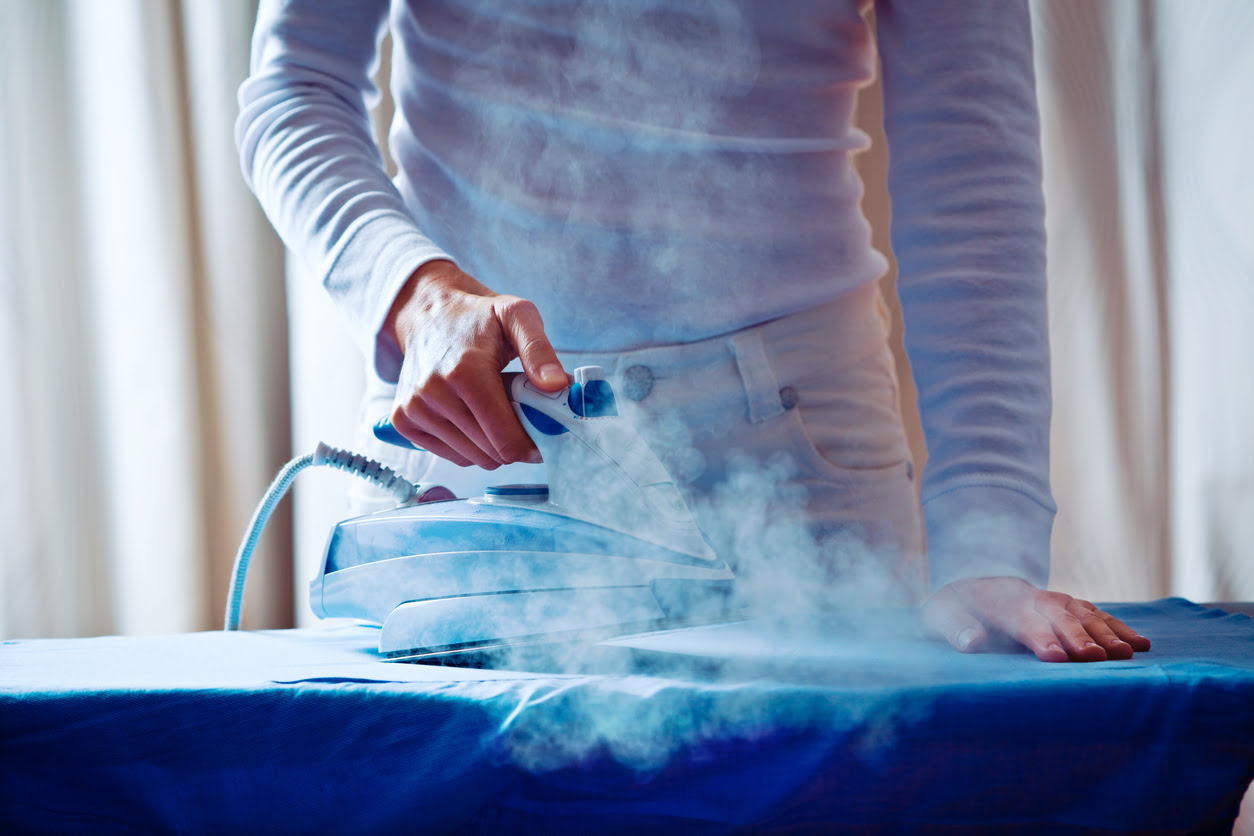
Steaming curtains has become increasingly popular as a quick and convenient alternative to traditional methods like washing or ironing. Not only does steaming save you time and effort, but it also helps to preserve the fabric and color of your curtains. Additionally, steam has the added benefit of sanitizing and eliminating allergens, making it an ideal choice for those with allergies or sensitivities.
Whether you’re preparing your home for a special occasion, refreshing your curtains after a long winter, or simply maintaining their cleanliness, steaming is a fantastic solution. It’s a versatile, eco-friendly, and effective way to keep your curtains looking their best.
In the next sections, we will explore the benefits of steaming curtains, learn how to choose the right steamer for your needs, and discover the step-by-step process of steaming your curtains to perfection. So, let’s dive in and transform your curtains into a refreshing focal point of your home!
Key Takeaways:
- Steaming curtains offers a convenient, eco-friendly, and versatile solution for removing wrinkles, sanitizing, and preserving fabric quality. With the right steamer and proper preparation, you can achieve professional-looking results without the hassle of washing or ironing.
- Prioritizing safety, efficient steaming techniques, and regular maintenance are essential for achieving optimal results and prolonging the lifespan of your steamer. By following these guidelines, you can enjoy beautifully steamed curtains that enhance the overall look and feel of your space.
Read more: How To Steam Hair With Steamer
Benefits of Steaming Curtains
Steaming curtains offers a range of benefits that make it an attractive option for homeowners. Let’s explore some of the key advantages:
- Wrinkle Removal: One of the main benefits of steaming curtains is its ability to effectively remove wrinkles. Unlike traditional ironing, steaming allows for gentle removal of wrinkles without direct contact with the fabric. This helps to preserve the integrity of delicate or sensitive curtain materials, preventing any potential damage.
- Time-saving and Convenient: Steaming is a time-saving method compared to washing and ironing curtains. With a steamer, you can quickly and easily remove wrinkles and refresh your curtains without the need for extensive preparation or setting up an ironing board. It’s a convenient solution for busy individuals or those who are looking for a hassle-free way to maintain their curtains.
- Preserves Fabric Quality: Unlike washing, which can cause wear and tear on certain curtain materials, steaming is a gentle process that helps to preserve the quality and longevity of your curtains. The steam heat helps to relax the fibers, restoring the curtain’s natural drape without putting excessive stress on the fabric.
- Sanitizes and Eliminates Allergens: Steaming not only removes wrinkles but also kills bacteria, dust mites, and allergens that may be present in your curtains. This is particularly beneficial for individuals with allergies or respiratory sensitivities, as it helps to create a cleaner and healthier environment.
- Non-Toxic and Eco-Friendly: Steam is a natural cleaning agent that requires no harsh chemicals. By choosing to steam your curtains instead of using chemical cleaners, you are promoting a more environmentally friendly approach to cleaning and reducing your carbon footprint.
- Versatility: Curtains come in various styles, fabrics, and sizes. The great thing about steaming is that it can be used on almost all types of curtains, including delicate sheer curtains, heavy drapes, and even blackout curtains. Regardless of the material or design, steaming is a safe and effective method for keeping your curtains looking fresh and presentable.
With these impressive benefits, it’s no wonder that more and more homeowners are turning to curtain steaming as their go-to method for maintaining and revitalizing their curtains. Whether you’re preparing for a special event, spring cleaning, or simply want to keep your curtains looking their best, steaming is a reliable and efficient solution that will help you achieve the desired results.
Choosing the Right Steamer for Curtains
When it comes to steaming curtains, having the right steamer for the job is crucial. Here are some factors to consider when choosing the perfect steamer:
- Type of Steamer: There are two main types of steamers available: handheld steamers and standing steamers. Handheld steamers are portable and easy to use, making them a popular choice for smaller curtain panels. Standing steamers, on the other hand, come with a larger water reservoir and a more powerful steam output, making them ideal for steaming larger or more heavily wrinkled curtains.
- Water Capacity: The water capacity of the steamer determines how long you can steam before refilling. If you have multiple curtains to steam or you prefer extended steaming sessions, look for a steamer with a larger water tank capacity. This will save you from frequent refills and allow for uninterrupted steaming.
- Steam Power: The steam power, usually measured in watts, determines how quickly and effectively the steamer can remove wrinkles. For thicker or more stubborn wrinkles, a higher wattage steamer will provide more power and efficiency. Consider the thickness and fabric of your curtains to determine the ideal steam power for your needs.
- Steam Output: The amount of steam produced by the steamer per minute is another important factor to consider. A higher steam output will ensure more efficient and quicker steaming. Look for steamers with adjustable steam settings, allowing you to customize the steam output based on the fabric and condition of your curtains.
- Attachments and Accessories: Some steamers come with a variety of attachments and accessories that can enhance your steaming experience. Look for features such as a fabric brush attachment for removing lint and pet hair, a crease attachment for creating sharp folds in your curtains, and a steam bonnet for protecting delicate fabrics. These additional attachments can greatly expand the functionality of your steamer.
- Ease of Use and Mobility: Consider the weight and design of the steamer. A lightweight and compact steamer will be easier to maneuver and store. Also, check if the steamer has a long power cord and a convenient handle or grip for comfortable and effortless steaming.
- Safety Features: Look for safety features such as an automatic shut-off function when the water runs low or when the steamer gets too hot. This will protect both you and your curtains from potential accidents.
- Reviews and Recommendations: Finally, read reviews and seek recommendations from reliable sources or other users. This will give you valuable insights into the performance, durability, and customer satisfaction of the steamer you are considering.
By carefully considering these factors, you can select a steamer that is well-suited to your specific curtain steaming needs. A reliable and efficient steamer will make the process easier and more effective, ensuring that your curtains look flawless and perfectly steamed.
Preparing the Curtains for Steaming
Before you start steaming your curtains, it’s important to properly prepare them to ensure the best results. Follow these steps to prepare your curtains for steaming:
- Remove Any Hardware: Take down any curtain rods, hooks, or clips from the curtains. This will make it easier to handle and steam the curtains without any obstructions.
- Dust and Vacuum: Use a soft brush attachment on your vacuum cleaner to gently remove any dust or loose particles from the curtains. Pay attention to the pleats, folds, and edges where dust tends to accumulate. This step will prevent any dirt from getting steamed into the fabric.
- Spot Treat Stains: Inspect your curtains for any visible stains or spots. Use a gentle fabric stain remover or a mixture of mild detergent and warm water to spot-treat any stains. Be sure to follow the instructions provided by the stain remover to avoid damaging the fabric.
- Check Fabric Care Instructions: Review the fabric care label on your curtains to determine the recommended care instructions. Some fabrics may be suitable for steaming, while others may require more delicate or specific cleaning methods.
- Test on a Small Area: It’s always a good idea to test the steamer on a small, inconspicuous area of the curtains before proceeding. This will help you ensure that the steam does not cause any damage or discoloration to the fabric.
- Unfold and Straighten: Unfold the curtains and gently straighten any creases or folds. This will allow the steam to penetrate evenly and remove wrinkles more effectively. Smooth out the fabric with your hands or use a fabric brush to align any misaligned seams or hems.
- Choose an Appropriate Steaming Surface: Place your curtains on a suitable steaming surface, such as a hanging garment rack or a flat surface covered with a clean towel or cloth. Make sure the surface is stable and secure to prevent accidents while steaming.
- Allow Adequate Space: Ensure that there is enough space around the curtains to maneuver the steamer effectively. This will help you reach all areas of the curtains and minimize the risk of accidental contact with the steamer.
- Protect Surfaces: If you are steaming your curtains indoors, place a protective barrier, such as a plastic sheet or an old towel, on the floor or furniture to prevent any water droplets or condensation from affecting the surfaces.
By following these preparation steps, you will set the stage for a smooth and successful curtain steaming process. Taking the time to properly prepare your curtains will ensure optimum steaming results and help maintain the quality of your curtains for years to come.
Setting Up the Steamer
Now that your curtains are ready, it’s time to set up your steamer for optimal performance. Follow these steps to properly set up your steamer:
- Filling the Water Tank: Begin by filling the water tank of your steamer with clean, distilled or filtered water, as recommended by the manufacturer. Avoid using tap water, as it may contain minerals or impurities that could potentially clog the steamer.
- Attaching the Steamer Head: Depending on the type of steamer you are using, attach the appropriate steamer head or nozzle. For handheld steamers, this usually involves securely attaching the steam nozzle to the body of the steamer. For standing steamers, follow the manufacturer’s instructions to attach the steamer head to the nozzle pole.
- Powering On the Steamer: Plug in your steamer and switch it on. Allow it some time to heat up and generate steam, as indicated by the manufacturer’s instructions. This typically takes a few minutes.
- Adjusting the Steam Settings: Most steamers come with adjustable steam settings. Depending on the fabric and condition of your curtains, select the appropriate steam intensity or temperature. Start with a lower setting for delicate fabrics and gradually increase if needed.
- Ensure Proper Steaming Distance: Hold the steamer nozzle at a distance of about 6 to 8 inches away from the curtains. This will provide an optimal balance between the steam’s heat and its effectiveness in removing wrinkles.
- Check the Steam Flow: Test the steamer to ensure a steady and continuous flow of steam. If there are any interruptions or uneven steam distribution, troubleshoot as per the manufacturer’s instructions.
- Verify Safety Features: Familiarize yourself with the safety features of your steamer, such as automatic shut-off or indicator lights for low water level or overheating. This will help you take necessary precautions and prevent any accidents.
- Prepare a Clean, Dry Cloth: Keep a clean, lint-free cloth or towel nearby to catch any excess water or condensation while steaming. This will help prevent water droplets from dripping onto your curtains.
- Ensure Adequate Lighting: Position your steaming setup in a well-lit area, so you can easily spot any missed wrinkles or areas that require more attention while steaming.
By following these steps, you will ensure that your steamer is properly set up and ready to effectively remove wrinkles from your curtains. Taking the time to properly set up your steamer will result in optimal steaming performance and help you achieve the best possible outcome for your curtains.
When steaming curtains with a steamer, start from the top and work your way down in smooth, overlapping strokes to remove wrinkles and refresh the fabric. Be careful not to let the steamer touch the fabric for too long to avoid damaging it.
Read more: How To Steam Veggies With A Steamer
Steaming the Curtains
Now that you have prepared your curtains and set up your steamer, it’s time to start steaming! Follow these steps to effectively steam your curtains:
- Start from the Top: Begin by steaming the top portion of the curtains, working your way down towards the bottom. This will help gravity assist in removing any wrinkles and ensure that the steam penetrates evenly throughout the fabric.
- Hold the Steamer at a Proper Distance: Hold the steamer nozzle about 6 to 8 inches away from the fabric. Move the steamer in a slow and steady motion across the surface of the curtains. Avoid holding the steamer too close or staying in one spot for too long, as this can result in excessive moisture or potential damage to the fabric.
- Steam in Vertical Strokes: Work in vertical strokes from the top to the bottom of the curtains, overlapping each stroke slightly. This ensures complete coverage and helps to remove any stubborn wrinkles.
- Pay Extra Attention to Problem Areas: If there are specific areas with deep or stubborn wrinkles, such as hems or pleats, give them some extra attention. Hold the steamer over these areas for a few extra seconds to allow the steam to work its magic.
- Smooth Out the Fabric: As you steam each section of the curtains, use your free hand or a fabric brush to gently smooth out the fabric and remove any remaining wrinkles. This will help achieve a polished and finished look.
- Check for Missed Wrinkles: After steaming the entire curtain, step back and visually inspect the fabric. Look for any missed wrinkles or areas that require additional steaming. If necessary, go back and steam those spots again until you are satisfied with the results.
- Allow the Curtains to Dry: Once you have finished steaming, allow the curtains to air dry completely before rehanging them. This will ensure that any residual moisture evaporates and prevents water stains or damage to the fabric.
- Smooth Out Any Remaining Wrinkles: If you notice any slight wrinkles after the curtains have dried, gently use your hands or a fabric brush to smooth them out. Alternatively, you can hang the curtains back up and allow the weight of the fabric to naturally remove any remaining wrinkles over time.
By following these steps, you will effectively steam your curtains, removing wrinkles and leaving them looking fresh and revitalized. Enjoy the satisfaction of seeing your curtains transformed into a beautiful focal point of your room!
Tips for Efficient Curtain Steaming
To make the most out of your curtain steaming experience, consider these helpful tips for efficient and effective results:
- Prevent Over-Steaming: Avoid over-steaming by using short bursts of steam on each section of the curtain. This prevents excessive moisture buildup and potential damage to the fabric.
- Work in Sections: Divide large or wide curtains into manageable sections and steam one section at a time. This allows you to give proper attention to each area and ensures that no wrinkles are missed.
- Steam Both Sides of the Curtain: For curtains that are exposed on both sides, such as sheer curtains, be sure to steam both sides to achieve a uniform and wrinkle-free appearance.
- Use Steam in Difficult Areas: When dealing with stubborn wrinkles, use the steam nozzle to focus the steam directly onto the problem areas. You can also gently pull on the fabric while steaming to smooth out any deep creases.
- Steam in a Well-Ventilated Area: Steaming curtains can release moisture into the air. To prevent condensation or unpleasant odors, ensure that the room is properly ventilated. Open windows or use a fan to promote air circulation.
- Keep the Steamer Clean: Regularly clean your steamer by following the manufacturer’s instructions. Removing calcium buildup or mineral deposits will ensure optimal performance and prolong the lifespan of your steamer.
- Perform Regular Maintenance: In addition to cleaning, perform regular maintenance tasks such as descaling or checking for loose connections. This will help keep your steamer in good working condition and ensure consistent steam output.
- Store the Steamer Properly: After use, allow your steamer to cool down before storing it in a safe and dry place. Ensure that the cord is neatly wrapped and the steamer is stored in an upright position, if applicable.
- Test with Caution: When using a steamer for the first time on delicate or unknown fabrics, always test it on a small inconspicuous area to ensure that the steam does not cause any damage or discoloration.
- Read the Manufacturer’s Instructions: Familiarize yourself with the specific instructions and recommendations provided by the manufacturer of your steamer. This will help you maximize its efficiency and avoid any potential misuse or damage.
By following these tips, you can ensure that your curtain steaming process is efficient, effective, and enjoyable. With practice, you’ll become more comfortable and proficient in achieving beautifully steamed curtains that enhance the overall look and feel of your space.
Safety Precautions While Steaming Curtains
While steaming curtains is generally a safe and straightforward process, it’s important to prioritize safety to prevent accidents and ensure a smooth steaming experience. Keep these safety precautions in mind:
- Read the User Manual: Familiarize yourself with the user manual and follow the manufacturer’s instructions carefully. This will help you understand the steamer’s specific safety features and recommendations.
- Wear Protective Gear: To protect your hands from accidental steam burns, consider wearing heat-resistant gloves while operating the steamer. This is especially useful when working with higher temperature settings.
- Avoid Contact with Hot Surfaces: Take caution to avoid touching the hot surfaces of the steamer or the steam nozzle while in use. Always hold the steamer by the designated handles or grips to minimize the risk of burns.
- Keep a Safe Distance: Maintain a safe distance between the steamer nozzle and your body or any other objects. This will prevent accidental steam burns or damage to nearby items.
- Turn Off and Unplug when Not in Use: Always turn off and unplug the steamer when not in use. This will prevent any accidental activation and reduce the risk of electrical hazards.
- Beware of Hot Water: The water inside the steamer can get extremely hot. Use caution when handling the water tank or refilling it to avoid scalding. Allow the steamer to cool down completely before attempting to refill the water tank.
- Use a Stable Steaming Surface: Ensure that your steaming surface, whether it’s a hanging garment rack or a flat surface, is stable and secure. This will prevent the steamer from tipping over and reduce the risk of injury or damage.
- Avoid Steaming Electrical Outlets: Be cautious not to steam near or around electrical outlets or switches. Water and electricity do not mix well, so it’s important to keep the steamer away from any potential electrical hazards.
- Ventilate the Area: Steaming curtains can release moisture into the air, which can create a humid environment. Ensure that the room is adequately ventilated to prevent condensation on surfaces and maintain a comfortable atmosphere.
- Store the Steamer Properly: After use, allow the steamer to cool down before storing it in a safe and dry place. Ensure that the cord is neatly wrapped and avoid leaving the steamer in a position where it can be easily knocked over or damaged.
By adhering to these safety precautions, you can protect yourself, your surroundings, and your curtains while enjoying the benefits of steaming. Remember to prioritize safety at all times to ensure a smooth and worry-free curtain steaming experience.
Frequently Asked Questions (FAQs)
Here are some commonly asked questions about steaming curtains:
- Can I steam all types of curtains?
- Do I need a special steamer for curtains?
- Should I clean my curtains before steaming?
- How often should I steam my curtains?
- Can steaming remove all wrinkles from curtains?
- Can steaming curtains remove odors?
- Can I steam curtains while they are hanging?
- Can I steam curtains made of delicate fabrics?
- Can I use tap water in my steamer?
- Can I steam curtains that have been recently washed?
Yes, steaming is suitable for most types of curtains, including sheer curtains, drapes, and blackout curtains. However, it’s essential to check the fabric care label for any specific instructions or limitations.
While it’s not necessary to have a dedicated curtain steamer, it can be helpful to choose a steamer that offers adjustable steam settings and comes with appropriate attachments. This allows for more control and precision when steaming your curtains.
It’s recommended to dust and vacuum your curtains before steaming to remove any loose dirt or particles. However, if your curtains have visible stains, it’s best to spot-treat or clean them according to the manufacturer’s instructions before steaming.
The frequency of steaming curtains depends on factors such as the fabric, location, and level of use. As a general guideline, steaming them every few months or whenever you notice wrinkles or odors is a good practice to keep them looking fresh and well-maintained.
Most wrinkles can be effectively removed through steaming. However, deep or stubborn wrinkles may require additional attention and multiple steam passes to fully eliminate. It’s important to be patient and persistent when steaming such wrinkles.
Yes, steaming curtains can help eliminate mild odors, such as those caused by smoke or cooking. The heat from the steam helps to neutralize and freshen up the fabric. For stronger odors, you may need to use additional odor-eliminating methods or consider professional cleaning.
Yes, you can steam curtains while they are hanging. However, for better access and more effective results, it’s recommended to remove the curtains and steam them on a suitable surface, such as a hanging garment rack or a flat surface covered with a clean towel.
Yes, you can steam delicate fabrics, but it’s important to use low or gentle heat settings and maintain a safe distance from the fabric to avoid any damage. Performing a small spot test on an inconspicuous area is also advisable to ensure the fabric can withstand steaming.
It’s best to use clean, distilled, or filtered water in your steamer to prevent mineral deposits or impurities from causing clogs or affecting the performance of the steamer. Tap water may contain minerals or chlorine that could potentially damage the steamer.
It’s generally recommended to allow curtains to air dry fully before steaming them. Steaming damp curtains may result in longer steaming times and may not produce the desired wrinkle-removing effects. Ensure that your curtains are completely dry before steaming.
These are just a few common questions about steaming curtains. If you have any other specific inquiries or concerns, it’s always best to refer to the manufacturer’s instructions or seek professional advice.
Read more: How To Steam Idli In Steamer
Conclusion
Steaming curtains is a fantastic and efficient way to remove wrinkles, freshen up the fabric, and maintain the overall appearance of your curtains. With a steamer, you can achieve professional-looking results without the hassle of washing or ironing.
Throughout this article, we have explored the numerous benefits of steaming curtains. From wrinkle removal and fabric preservation to sanitization and eco-friendliness, this method offers a host of advantages that make it an attractive choice for homeowners.
Choosing the right steamer is essential for achieving optimal results. Consider factors such as the type of steamer, water tank capacity, steam power, and attachments to ensure that you have the ideal steamer for your specific curtain steaming needs.
Before steaming, it’s important to properly prepare your curtains. Remove any hardware, dust and vacuum, spot treat stains, and review the fabric care label to ensure you’re following the recommended care instructions. This preparation will ensure that you achieve the best possible outcome when steaming.
Setting up the steamer correctly is crucial for efficient and effective steaming. Fill the water tank, attach the appropriate steamer head, adjust the steam settings, and verify safety features before beginning the steaming process. This will ensure that your steamer is ready and optimized for removing wrinkles from your curtains.
When steaming the curtains, work in sections, hold the steamer at a proper distance, and smooth out the fabric as you go. Pay attention to any problem areas and thoroughly steam until all wrinkles are gone. Take your time and visually inspect the curtains to ensure a thorough steaming job.
To enhance efficiency, follow helpful tips such as preventing over-steaming, working in sections, and using steam in difficult areas. Additionally, prioritize safety by wearing protective gear, maintaining a safe distance, and being cautious around hot surfaces and water.
By steaming your curtains on a regular basis, you can enjoy their fresh and wrinkle-free appearance, as well as the health benefits of sanitization. Remember to store your steamer properly and perform regular maintenance to prolong its lifespan and ensure consistent performance.
In conclusion, steaming curtains is a time-saving and effective method for keeping them looking vibrant and well-maintained. With the right steamer, proper preparation, and adherence to safety precautions, you can enjoy the satisfaction of beautifully steamed curtains that elevate the style and ambiance of your home.
Frequently Asked Questions about How To Steam Curtains With A Steamer
Was this page helpful?
At Storables.com, we guarantee accurate and reliable information. Our content, validated by Expert Board Contributors, is crafted following stringent Editorial Policies. We're committed to providing you with well-researched, expert-backed insights for all your informational needs.
0 thoughts on “How To Steam Curtains With A Steamer”