Articles
How To Steam Milk With A Steamer
Modified: January 6, 2024
Learn how to steam milk with a steamer in this informative article. Discover the step-by-step process and tips for perfecting your milk steaming technique.
(Many of the links in this article redirect to a specific reviewed product. Your purchase of these products through affiliate links helps to generate commission for Storables.com, at no extra cost. Learn more)
Introduction:
Steamed milk is a popular addition to various hot beverages, such as lattes, cappuccinos, and macchiatos. The smooth and velvety texture of steamed milk adds a luxurious touch to your favorite caffeinated drinks. While steaming milk may seem like a daunting task, it’s actually quite simple and can be easily accomplished with the help of a steamer.
In this article, we will guide you through the process of steaming milk using a steamer. Whether you’re a home barista or an espresso enthusiast, mastering this skill will elevate your coffee game to new heights.
Key Takeaways:
- Elevate your coffee game by mastering the art of steaming milk with a steamer. Understand the components, perfect your technique, and achieve the ideal consistency and temperature for a luxurious coffee experience.
- Avoid common mistakes and troubleshoot challenges to consistently produce high-quality steamed milk. Experiment, practice, and embrace the joy of creating velvety textured milk to elevate your favorite hot beverages.
Read more: How To Steam Milk Without Steamer
Understanding the Steamer:
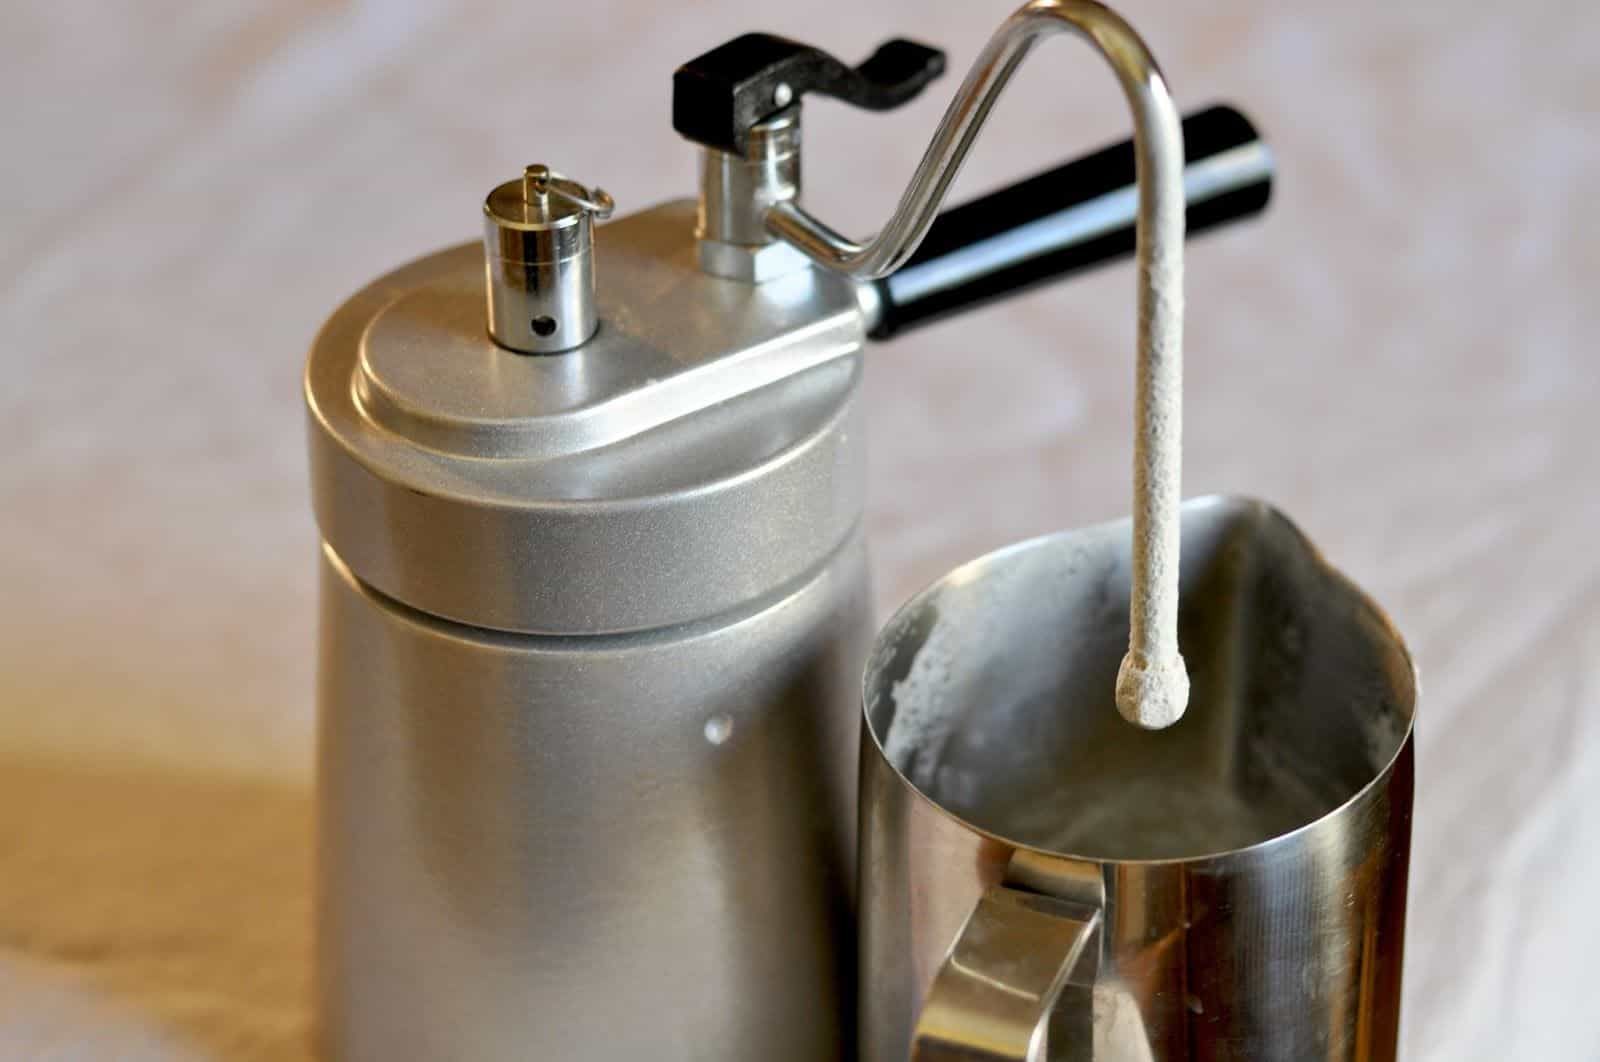
Before we dive into the process of steaming milk, it’s important to understand the different parts of a steamer and how it functions. A typical steamer consists of a steam wand, a boiler, and various temperature and pressure controls.
The steam wand is the most crucial component of a steamer. It is a metal tube that releases steam when activated. The steam is used to heat and froth the milk. The temperature and pressure controls allow you to adjust the steam output and ensure optimal milk steaming conditions.
Some steamers have additional features, such as a built-in thermometer or frothing pitcher. These extra tools can be handy for monitoring the temperature of the milk and achieving consistent results.
It’s worth noting that steamers commonly found in coffee shops and espresso machines are generally more powerful and efficient compared to smaller handheld steamers designed for home use. However, with the right technique and practice, you can still achieve excellent results with a home steamer.
Now that you understand the basic components of a steamer, let’s move on to preparing the milk for steaming.
Preparing the Milk:
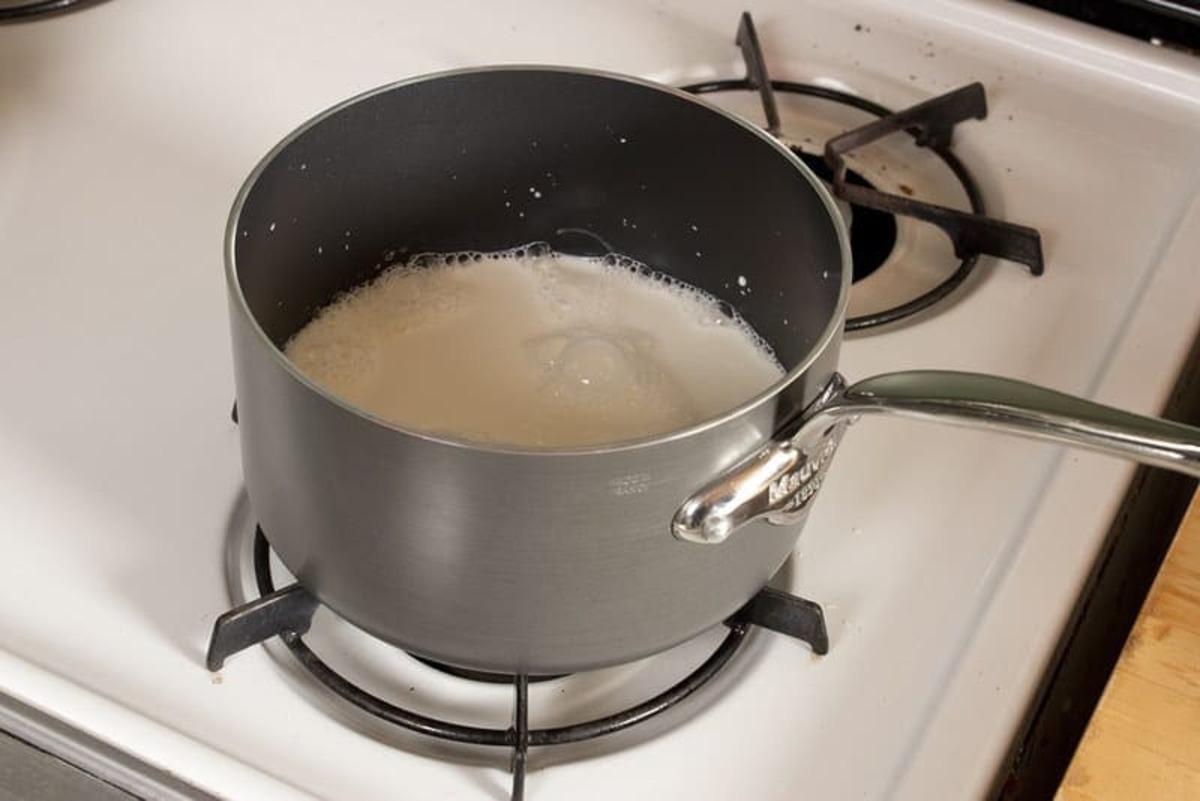
Before steaming the milk, it is important to start with cold, fresh milk. Whole milk is ideal for steaming as it has a higher fat content, which contributes to a creamier and richer texture. However, you can also use low-fat or non-dairy alternatives like soy or almond milk.
Begin by pouring the desired amount of milk into a clean and cold metal steaming pitcher. To avoid any splattering or mess, only fill the pitcher up to one-third of its capacity. This will leave enough space for the milk to expand as it is being steamed.
For best results, it’s recommended to purge the steam wand before inserting it into the milk. To do this, briefly turn on the steam wand and allow steam to escape for a few seconds. This removes any water condensation that may have collected in the wand from the previous use.
Once the steamer is ready and the milk is in the pitcher, it’s time to position the steamer wand and start the steaming process. We will cover this in the next section.
Positioning the Steamer Wand:
Positioning the steamer wand correctly is essential for achieving the perfect steamed milk. The angle and depth at which you insert the wand can make a significant difference in the results.
Start by placing the steaming pitcher on a stable surface, ensuring that it is positioned at an angle. The angle should allow the steam wand to be inserted just below the surface of the milk.
Tilt the pitcher slightly to create a swirl in the milk. This swirling motion helps distribute the steam evenly and creates a smooth and creamy texture.
Next, carefully insert the steam wand into the milk. The general rule of thumb is to position the wand slightly off-center, towards the side of the pitcher. This helps create a whirlpool effect as the steam is introduced, aiding in the frothing process.
As you insert the wand, ensure that the tip is just below the surface of the milk. You don’t want it touching the bottom or sides of the pitcher, as this can create unwanted noise and turbulence.
Once the wand is properly positioned, you’re ready to start steaming the milk. Let’s move on to the next section to learn how to achieve the right steamed milk consistency.
Steaming the Milk:
Steaming the milk is a delicate process that requires attention and technique. It’s important to control the steam pressure, duration, and movement of the wand to achieve the desired results. Follow these steps to steam the milk:
- Turn on the steam wand and allow it to purge any remaining water or condensation. This ensures that you’re working with pure steam.
- Position the steam wand just below the surface of the milk, at the desired angle and depth.
- Activate the steam by turning the steam wand on fully. You should hear a distinct hissing sound as the steam enters the milk.
- While holding the pitcher with your free hand, start to move the wand in a circular motion. This motion helps create a whirlpool effect and ensures even distribution of heat.
- Continue to steam the milk until it reaches the desired temperature. For most beverages, a temperature of around 150°F to 160°F (65°C to 70°C) is ideal. However, it’s always best to refer to the specific recipe or your personal preference.
- As the milk heats up, you will notice the volume increasing and bubbles forming on the surface. This is normal and indicates that the milk is being properly aerated. However, be mindful not to overheat the milk or create too much foam.
- Once the milk reaches the desired temperature, turn off the steam wand and remove it from the pitcher.
It’s important to note that different types of milk may require slight variations in steaming time and temperature. Additionally, personal preferences for milk texture and foaminess may also influence the steaming process. Practice and experimentation will help you discover the perfect technique for the best results.
Now that you’ve steamed the milk, let’s move on to the next section to learn how to achieve the right steamed milk consistency.
When steaming milk with a steamer, always start with cold milk and purge the steam wand before and after use to prevent any milk from getting into the steam wand. This will help maintain the cleanliness of the steamer and ensure a better quality steamed milk.
Read more: How To Steam Milk On An Espresso Machine
Achieving the Right Steamed Milk Consistency:
Creating the perfect steamed milk consistency depends on personal preference and the type of beverage you’re preparing. Here are some tips to help you achieve the desired results:
- Microfoam: If you’re looking to create a creamy, velvety texture with minimal foam, focus on incorporating a microfoam technique. This involves steaming the milk to achieve tiny, velvety bubbles that blend seamlessly into the milk.
- Froth: For a beverage that calls for a more prominent layer of foam, such as a cappuccino, you’ll want to incorporate more air into the milk. This can be achieved by adjusting the position of the steam wand and increasing the steam pressure. Keep in mind that a cappuccino typically has equal parts espresso, steamed milk, and frothed milk.
- Texture: The texture of steamed milk can vary depending on personal preference. Some prefer a smooth and silky texture, while others enjoy a thicker and more substantial mouthfeel. Experiment with different techniques and milk types to find the texture that suits your taste.
Remember to pay attention to the temperature of the milk as well. Overheating the milk can result in a burnt or undesirable taste. Aim for a temperature range of 150°F to 160°F (65°C to 70°C), as this provides the perfect balance between warmth and beverage enjoyment.
As you become more experienced, you’ll develop a sense of the desired milk texture and temperature. Practice and experimentation are key to mastering the art of steaming milk and achieving the perfect consistency for your favorite beverages.
In the next section, we’ll discuss some common mistakes to avoid when steaming milk.
Common Mistakes to Avoid:
While steaming milk may seem straightforward, there are a few common mistakes that can hinder the quality of your steamed milk. Being aware of these mistakes will help you avoid them and achieve better results. Here are some common mistakes to watch out for:
- Not starting with cold milk: Using warm or room temperature milk to steam can result in uneven heating and affect the consistency of the steamed milk. Always start with cold milk for the best results.
- Overheating the milk: Heating the milk above the recommended temperature can result in a burnt flavor and a less enjoyable drinking experience. Keep a close eye on the temperature and avoid overheating.
- Incorrect steam wand positioning: Positioning the steam wand too deep or too shallow in the milk can affect the frothing process. Aim for the correct depth, just below the surface, to achieve the desired results.
- Not purging the steam wand: Forgetting to purge the steam wand before steaming can result in water condensation mixing with the milk and affecting the texture and taste.
- Improper swirling motion: Creating a gentle swirling motion in the milk with the steam wand ensures an even distribution of heat and a smoother texture. Avoid aggressive or uneven movements that can lead to inconsistent results.
- Not cleaning the steam wand: After steaming, it’s important to clean the steam wand thoroughly to remove any leftover milk residue. Failure to do so can affect the flavor of future beverages and potentially damage your equipment.
By avoiding these common mistakes and practicing proper technique, you’ll be able to consistently steam milk to perfection.
In the next section, we’ll discuss some troubleshooting tips to help you overcome any challenges you may face while steaming milk.
Troubleshooting Tips:
Steaming milk can sometimes present challenges, but with a few troubleshooting tips, you can overcome them and achieve excellent results. Here are some common issues and their solutions:
- No foam: If you’re having trouble creating foam, ensure that you’re using fresh and cold milk. Milk that is too warm or has been sitting out for too long can affect foam formation. Additionally, check that the steam wand is positioned correctly and that there is enough steam pressure. Experimenting with different milk types can also help in achieving better foam.
- Too much foam: If your milk has too much foam, it could be due to over-heating or excessive aeration. Pay close attention to the temperature of the milk as you steam it to avoid over-heating. Additionally, adjust the position of the steam wand to control the amount of air incorporated into the milk.
- Burnt taste: A burnt taste can result from overheating the milk or scorching it. Avoid leaving the steam wand in the milk for too long and monitor the temperature closely. If the milk has a burnt taste, it’s best to start with fresh milk and adjust your steaming technique.
- Large bubbles: Large bubbles in steamed milk can indicate improper technique or improper positioning of the steam wand. Ensure that you’re using the correct position, angle, and depth with the steam wand. Practice creating a vortex with the swirling motion to encourage small, smooth bubbles.
- Inconsistency: If you are having trouble with consistency in your steamed milk, it may require more practice and adjustments in technique. Pay attention to the temperature, pressure, and the movement of the steam wand. With perseverance and experimentation, you’ll be able to achieve consistency over time.
Remember, mastering the art of steaming milk takes time and practice. Don’t be discouraged if you encounter challenges along the way. With these troubleshooting tips, you’ll be well-equipped to overcome any issues and create beautifully steamed milk.
Now that you have learned about troubleshooting, let’s conclude our discussion on steaming milk.
Conclusion:
Steaming milk is a skill that can greatly enhance your coffee experience. With the right technique and practice, you can create velvety textured milk that adds a delightful touch to your favorite hot beverages. By understanding the steamer, properly preparing the milk, positioning the steam wand, and steaming the milk with precision, you can achieve the perfect consistency and temperature.
Throughout the process, it’s important to avoid common mistakes such as using warm milk, overheating the milk, and improper steam wand positioning. By following troubleshooting tips and making adjustments as needed, you’ll be able to overcome challenges and consistently produce high-quality steamed milk.
Remember, experimentation and practice are key to mastering the art of steaming milk. As you become more familiar with the process and develop your own techniques, you’ll be able to make adjustments based on personal preference and specific beverage recipes.
So go ahead, equip yourself with a steamer, cold fresh milk, and start practicing. Discover the joy of creating perfectly steamed milk to complement your favorite coffee creations.
Happy steaming!
Frequently Asked Questions about How To Steam Milk With A Steamer
Was this page helpful?
At Storables.com, we guarantee accurate and reliable information. Our content, validated by Expert Board Contributors, is crafted following stringent Editorial Policies. We're committed to providing you with well-researched, expert-backed insights for all your informational needs.


0 thoughts on “How To Steam Milk With A Steamer”