Articles
How To Store Arroz Con Leche
Modified: December 7, 2023
Learn how to properly store arroz con leche with our helpful articles. Discover the best tips and tricks to keep this delicious dessert fresh and flavorful.
(Many of the links in this article redirect to a specific reviewed product. Your purchase of these products through affiliate links helps to generate commission for Storables.com, at no extra cost. Learn more)
Introduction
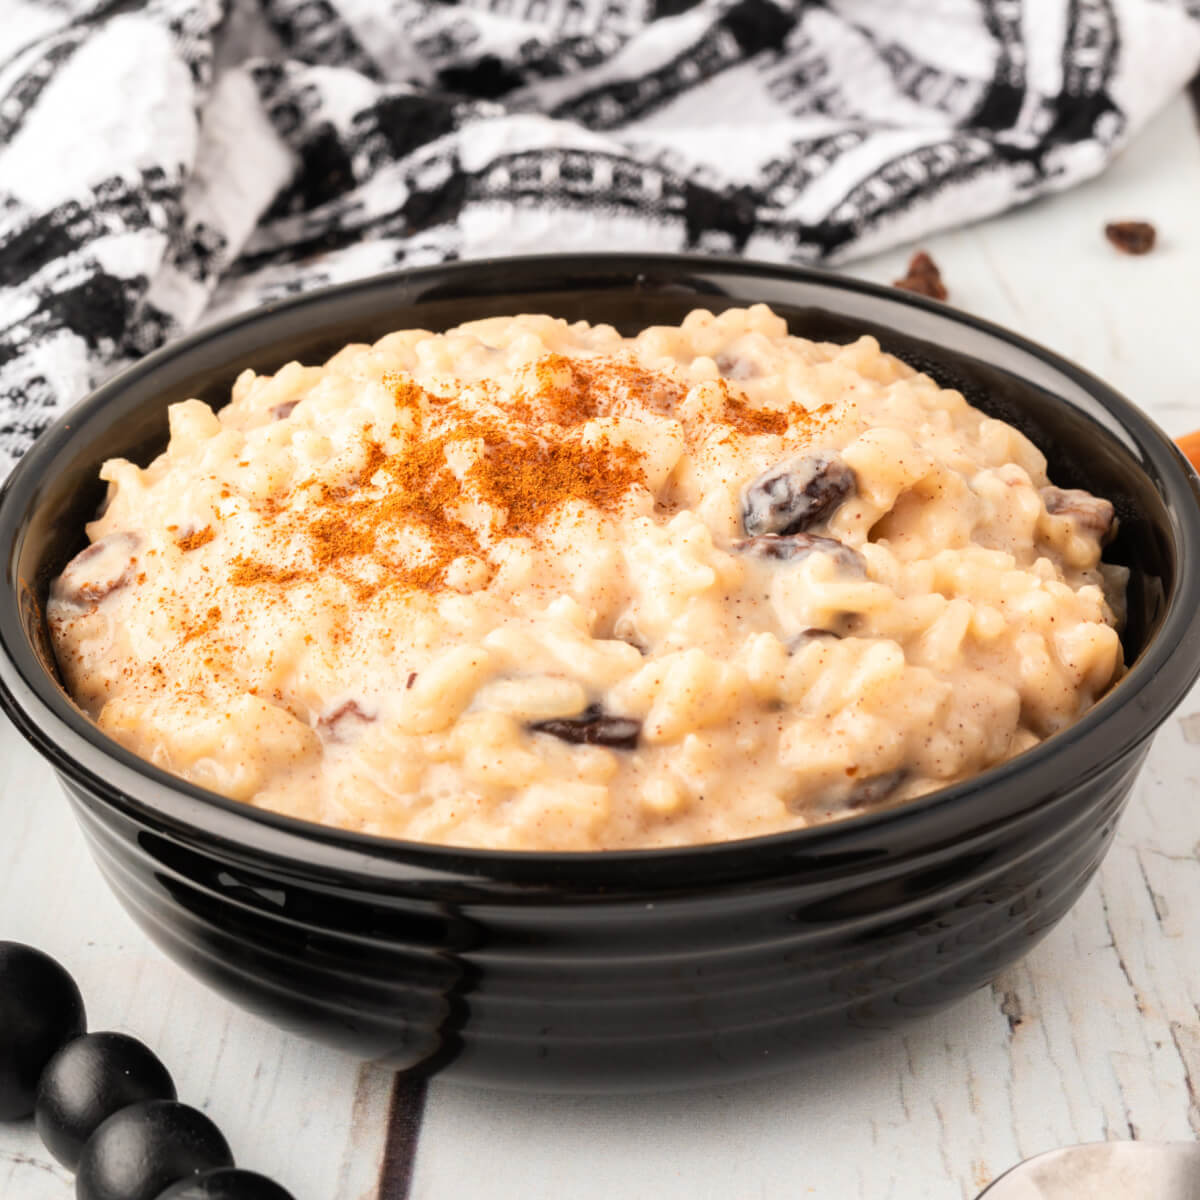
Arroz con Leche, also known as rice pudding, is a delicious and comforting dessert that has been enjoyed in various cultures around the world for centuries. It is made by simmering rice in milk and sweetening it with sugar and spices. This creamy and aromatic dessert is often served warm and garnished with a sprinkle of cinnamon.
While arroz con leche is typically enjoyed fresh, there may be occasions when you have leftovers or want to make a larger batch to store for later. In this article, we will guide you on how to store arroz con leche properly to maintain its flavor and texture.
Before we delve into the storage process, let’s take a look at the key ingredients needed to make arroz con leche.
Key Takeaways:
- Arroz con Leche is a versatile and comforting dessert that can be enjoyed warm or chilled, and its rich, luscious texture is achieved through the careful combination of key ingredients such as rice, milk, sugar, cinnamon sticks, and vanilla extract.
- The process of making arroz con leche is not just about creating a delightful dessert; it’s about the joy of cooking, the memories shared, and the connections forged through the experience of preparing and savoring this classic treat.
Ingredients
To make a delicious arroz con leche, you will need the following ingredients:
- Rice: Choose a medium-grain or long-grain rice variety such as Arborio or Jasmine rice. These types of rice will give the pudding a creamy texture.
- Milk: Whole milk or evaporated milk works best for arroz con leche as they add richness and creaminess to the dessert.
- Sugar: Granulated sugar is the most common sweetener used in arroz con leche. You can adjust the amount of sugar according to your taste preferences.
- Cinnamon sticks: Cinnamon sticks are used to infuse the pudding with a warm and aromatic flavor. They can be removed before storing the dessert.
- Vanilla extract: A small amount of vanilla extract adds a subtle and delightful flavor to the rice pudding.
- Raisins (optional): Some recipes call for the addition of raisins to add a chewy texture and a touch of sweetness. However, this ingredient is optional and can be omitted if desired.
Now that you have gathered the ingredients, let’s move on to the steps involved in preparing arroz con leche.
Rice
Rice is the main ingredient in arroz con leche and plays a crucial role in achieving the desired texture and consistency of the dessert. It is important to select the right type of rice that can absorb the liquid and soften during the cooking process.
When making arroz con leche, it is recommended to use medium-grain or long-grain rice. These varieties have a higher starch content, which allows them to release starch while cooking and contribute to the creamy consistency of the pudding.
One popular choice for arroz con leche is Arborio rice, which is commonly used in risotto and other creamy rice dishes. Arborio rice is known for its ability to absorb a large amount of liquid, resulting in a rich and creamy pudding.
Another option is Jasmine rice, which has a delicate floral aroma and a slightly sticky texture when cooked. Jasmine rice can also create a creamy and flavorful arroz con leche.
When preparing the rice for arroz con leche, it is important to rinse it under cold water to remove excess starch. This helps prevent the rice from becoming sticky and clumping together while cooking.
After rinsing the rice, you can proceed to the next step of cooking it with water. The rice and water mixture will create a base that will later be combined with milk and other ingredients to create the creamy and delicious arroz con leche.
Now that we have covered the importance of choosing the right rice, let’s move on to the next ingredient – milk.
Milk
Milk is a key component in arroz con leche, providing the creamy and luscious texture that makes this dessert so delightful. It is essential to use the right type of milk to achieve the desired consistency and flavor.
When making arroz con leche, it is recommended to use whole milk or evaporated milk. These types of milk contain a higher fat content, which adds richness and creaminess to the pudding. The fat in the milk also helps bind the ingredients together and contributes to the smooth texture of the dessert.
If you prefer a lighter version of arroz con leche, you can use low-fat or skim milk. However, keep in mind that the dessert may have a slightly thinner consistency compared to using whole milk.
When heating the milk for arroz con leche, it is important to do it slowly and gently. Gradually heating the milk helps prevent it from scorching or curdling. You can heat the milk in a saucepan over low to medium heat, stirring occasionally to prevent it from sticking to the bottom of the pan.
The milk is typically added to the cooked rice along with other ingredients, such as sugar and cinnamon sticks. The mixture is then simmered over low heat to allow the flavors to meld together and for the rice to absorb the creamy goodness of the milk.
Now that we have covered the importance of using the right type of milk, let’s move on to the next ingredient – sugar.
Sugar
Sugar is a crucial ingredient in arroz con leche, as it adds sweetness and enhances the overall flavor of the dessert. The amount of sugar used can vary depending on personal preference and the desired level of sweetness.
Granulated sugar is the most commonly used sweetener in arroz con leche recipes. It easily dissolves and distributes evenly throughout the pudding, ensuring every bite is perfectly sweetened. You can adjust the amount of sugar according to your taste, adding more or less as desired.
When adding sugar to the arroz con leche, it is recommended to do so after the rice has cooked and the milk has been added. This allows the sugar to fully incorporate into the pudding mixture without interfering with the rice’s cooking process.
One pro tip to infuse the arroz con leche with an extra touch of flavor is to use brown sugar or alternative sweeteners such as honey or maple syrup. These options can add a subtle caramel-like taste to the dessert, elevating its flavor profile.
When adding sugar, it is important to stir the pudding mixture consistently to ensure the sugar dissolves completely. This will prevent any graininess in the final dessert and ensure a smooth and creamy texture throughout.
The amount of sugar used may also depend on the other ingredients in the recipe. For example, if you plan to add raisins to the arroz con leche, the natural sweetness of the raisins may reduce the amount of additional sugar needed. Adjust the sweetness level to suit your taste preferences.
Now that we have covered the importance of sugar in arroz con leche, let’s move on to the next ingredient – cinnamon sticks.
Read more: How To Store Tres Leches Cake
Cinnamon sticks
Cinnamon sticks are a flavorful and aromatic addition to arroz con leche, providing a warm and comforting essence to the dessert. They contribute to the overall taste profile and add a delightful hint of spice.
Cinnamon is a versatile spice that is commonly used in various cuisines around the world. It pairs exceptionally well with the creamy texture of arroz con leche, creating a harmonious blend of flavors.
When making arroz con leche, it is best to use whole cinnamon sticks rather than ground cinnamon. Whole cinnamon sticks infuse the pudding with a subtle and nuanced cinnamon flavor throughout the cooking process.
Adding cinnamon sticks to the arroz con leche is a simple process. Once the rice is cooked and the milk has been added, you can place the cinnamon sticks directly into the mixture. The heat from the pudding will release the aromatic oils and flavors from the cinnamon sticks, infusing the entire dessert.
As the arroz con leche simmers, the cinnamon sticks will continue to release their flavors. Be sure to stir the pudding regularly to ensure the cinnamon is evenly distributed.
Before storing the leftover arroz con leche, remember to remove the cinnamon sticks. Leaving them in the pudding for an extended period can overpower the flavors and result in an overly spiced dessert.
The combination of rice, milk, sugar, and cinnamon sticks creates a delightful base for the arroz con leche. However, there are a few additional ingredients that can be added to enhance the taste. Let’s explore the next ingredient – vanilla extract.
Vanilla Extract
Vanilla extract is a beloved ingredient in desserts, including arroz con leche. It adds a subtle and aromatic flavor that complements the creamy rice pudding perfectly.
Vanilla extract is derived from the pods of the vanilla orchid and contains compounds that contribute to its rich and sweet scent. It is a versatile ingredient widely used in baking and cooking to add a touch of warmth and depth to dishes.
When incorporating vanilla extract into arroz con leche, a little goes a long way. A small amount is usually sufficient to infuse the dessert with its distinctive flavor. Start by adding about half a teaspoon and adjust according to your taste preferences.
The best time to add vanilla extract to the arroz con leche is after the pudding has been simmering and the flavors have melded together. It is added towards the end of the cooking process to ensure that the delicate fragrance does not evaporate during prolonged heating.
When adding vanilla extract, stir the arroz con leche gently to evenly distribute the flavor. Be cautious not to overmix, as this can cause the rice to break down and affect the overall texture of the dessert.
Using high-quality pure vanilla extract is recommended for the best flavor. Avoid using imitation vanilla or vanilla-flavored syrups, as they may not provide the same depth and complexity of taste.
With the addition of vanilla extract, the flavor profile of your arroz con leche will be enhanced, creating a more indulgent and satisfying dessert.
Next, let’s explore an optional ingredient that can add a burst of sweetness and texture to the arroz con leche – raisins.
Raisins (optional)
Raisins are a popular and optional ingredient in arroz con leche, providing a burst of sweetness and a delightful chewy texture. They add a playful twist to the creamy rice pudding and can be enjoyed by those who appreciate the added dimension of flavor.
Raisins are dried grapes and come in various sizes and colors, such as golden, black, or red. They are naturally sweet and provide a concentrated burst of fruitiness to the dessert.
If you choose to add raisins to your arroz con leche, it is important to ensure that they are plump and moist. Dry or hardened raisins may not provide the desired texture and can affect the overall taste experience.
To incorporate raisins into your arroz con leche, you can add them during the cooking process after the rice has cooked and the milk has been added. This allows the raisins to soften and absorb some of the creamy liquid, becoming tender and flavorful.
Alternatively, you can also soak the raisins in warm water or rum before adding them to the arroz con leche. This step will help plump them up and infuse them with additional moisture and flavor.
If you prefer a more evenly distributed texture, you can stir the raisins into the arroz con leche just before serving. This ensures that each spoonful of the dessert contains a burst of sweetness from the raisins.
Keep in mind that the addition of raisins is optional, and you can omit them if you prefer a smoother and more simple arroz con leche experience. The choice is yours, and it ultimately depends on your personal preferences and taste.
Now that we have covered all the key ingredients and optional additions, let’s move on to the steps involved in making and storing arroz con leche.
Steps
- Rinse the rice: Start by rinsing the rice under cold water to remove any excess starch. This helps to prevent the rice from becoming sticky while cooking.
- Cook rice with water: In a saucepan, add the rinsed rice and cook it with water according to the package instructions. This will partially cook the rice before adding it to the milk mixture.
- Heat the milk: In a separate saucepan, heat the milk over low to medium heat until it is warm. Avoid boiling the milk as it can scorch or curdle.
- Combine rice and milk: Once the rice is partially cooked, drain any excess water and add the rice to the warm milk. Stir well to combine.
- Add sugar and cinnamon sticks: Add the desired amount of sugar and cinnamon sticks to the rice and milk mixture. Stir well to ensure the sugar dissolves and the cinnamon infuses the pudding with its flavor.
- Simmer and stir: Reduce the heat to low and simmer the arroz con leche, stirring occasionally. This helps to prevent the rice from sticking to the bottom of the pan and ensures even cooking.
- Add vanilla extract: Once the rice is tender and the pudding has reached your desired consistency, remove the pot from heat and stir in the vanilla extract. This adds a delightful aroma and flavor to the dessert.
- Optional: Add raisins: If desired, add raisins to the arroz con leche and stir well to distribute them evenly. They will add a burst of sweetness and texture to the dessert.
- Serve and enjoy: Transfer the arroz con leche to serving bowls or cups. Garnish with a sprinkle of cinnamon, if desired. The dessert can be served warm or chilled, depending on your preference.
Now that you know the steps to make arroz con leche, it’s important to understand how to properly store the leftovers to maintain its flavor and texture. Let’s discuss the storage process in the next section.
Read more: How To Store Dulce De Leche
Rinse the rice
The first step in preparing arroz con leche is to rinse the rice. Rinsing the rice under cold water helps to remove any excess starch on the grains. This step is important to prevent the rice from becoming sticky and clumping together while cooking.
To rinse the rice, follow these simple steps:
- Measure the desired amount of rice for your recipe.
- Place the rice in a fine-mesh sieve or colander.
- Hold the sieve or colander under cold running water. Gently swirl the rice around with your hands or a spoon.
- Continue rinsing the rice until the water runs clear. This indicates that most of the excess starch has been removed.
- Give the rice a final shake to drain any excess water.
By rinsing the rice, you are ensuring that each grain cooks independently and avoids clumping together. It also helps to achieve a light and fluffy texture for your arroz con leche.
After rinsing the rice, you can proceed to the next step of cooking it with water. This will partially cook the rice before combining it with the milk mixture to create the creamy and delicious dessert.
Now that you have completed the first step, let’s move on to cooking the rice with water in the next section.
Store arroz con leche in an airtight container in the refrigerator for up to 3-4 days. Make sure to stir it well before serving as it may thicken in the fridge.
Cook rice with water
After rinsing the rice, the next step in making arroz con leche is to cook the rice with water. This initial cooking step partially cooks the rice and helps to achieve the desired texture for the finished dessert.
To cook the rice with water, follow these steps:
- In a saucepan, add the rinsed rice.
- Add the appropriate amount of water according to the package instructions. The ratio of rice to water may vary depending on the type of rice you are using.
- Bring the water to a boil over medium-high heat, stirring occasionally to prevent the rice from sticking to the bottom of the pan.
- Once the water has reached a rolling boil, reduce the heat to low and cover the saucepan with a lid.
- Allow the rice to simmer for the recommended cooking time specified on the rice package. This will vary depending on the type of rice you are using.
- After the cooking time is complete, remove the saucepan from the heat and let it sit covered for a few minutes to allow the excess moisture to be absorbed.
- Remove the lid and fluff the cooked rice with a fork.
The partially cooked rice will now serve as the base for your arroz con leche. It is important to note that the rice won’t be fully cooked at this point, as it will continue to cook and soften when combined with the milk mixture later in the recipe.
With the rice cooked and ready, it’s time to move on to heating the milk, which will create the creamy and luscious texture of the arroz con leche. Let’s proceed to the next step.
Heat the milk
Heating the milk is a crucial step in making arroz con leche as it helps to create the creamy and luxurious texture of the dessert. The gentle heating process allows the milk to release its natural flavors and infuse the rice with its richness.
To heat the milk for arroz con leche, follow these steps:
- Pour the desired amount of milk into a saucepan.
- Place the saucepan over low to medium heat on the stovetop.
- Stir the milk occasionally with a spoon or whisk to prevent it from scorching or forming a skin on the surface.
- Continue heating the milk until it becomes warm, but avoid boiling it as this can alter the taste and texture.
- Once the milk is warm, it is ready to be combined with the partially cooked rice and other ingredients to create the creamy base of the arroz con leche.
It is important to heat the milk slowly and gently to ensure even heating and prevent it from curdling. Stirring the milk occasionally during the heating process helps to distribute the heat evenly and prevents a skin from forming on the surface.
Now that the milk is warmed, we can move on to the next step of combining the rice and milk to create the delectable arroz con leche. Let’s proceed to the next section.
Combine rice and milk
Now that you have cooked the rice and heated the milk, it’s time to combine these two key ingredients to create the creamy base of your arroz con leche. This step is essential for the rice to absorb the flavors of the milk and develop its rich and luscious texture.
To combine the rice and milk, follow these steps:
- Transfer the partially cooked rice to the saucepan containing the warm milk.
- Gently stir the rice and milk together using a spoon or spatula, ensuring that all the rice is fully submerged in the milk.
- Continue stirring for a few minutes to evenly distribute the rice throughout the milk.
- Make sure there are no lumps of rice and that the mixture is smooth and well-combined.
Combining the rice and milk is a crucial step in the arroz con leche-making process. It allows the rice to further soften and absorb the creamy goodness of the milk, resulting in a deliciously smooth and creamy texture.
Once the rice and milk are combined, it’s time to add the sweetness and aroma to the dessert with the inclusion of sugar and cinnamon sticks. Let’s move on to the next step.
Read more: What Are The Pros And Cons Of Astro Turf
Add sugar and cinnamon sticks
To infuse your arroz con leche with the perfect balance of sweetness and warm spice, it’s time to add sugar and cinnamon sticks to the mixture. These ingredients will enhance the overall flavor and aroma of the dessert.
To add sugar and cinnamon sticks to your arroz con leche, follow these steps:
- Sprinkle the desired amount of granulated sugar over the rice and milk mixture. The amount of sugar can be adjusted based on your preferred level of sweetness.
- Add 1-2 cinnamon sticks to the mixture, depending on your personal taste preferences. The cinnamon sticks will infuse the arroz con leche with a warm and comforting flavor.
- Stir well to ensure that the sugar dissolves and the cinnamon sticks are evenly distributed throughout the mixture.
The sugar helps balance the flavors of the arroz con leche and adds a delightful sweetness to every spoonful. The cinnamon sticks infuse the dessert with a warm and aromatic taste, creating a cozy and comforting experience.
Keeping the cinnamon sticks in the mixture as it simmers will allow the flavors to deepen and intensify. However, it’s important to remove the cinnamon sticks before storing the leftover arroz con leche to prevent the flavors from becoming overpowering.
With the addition of sugar and cinnamon sticks, your arroz con leche is now ready to simmer and develop its rich flavors. Let’s move on to the next step, where the magic begins!
Simmer and stir
Once you have added the sugar and cinnamon sticks to your arroz con leche, it’s time to allow the mixture to simmer. The simmering process will help the rice further soften and absorb the flavors, resulting in a creamy and delicious dessert.
To simmer and stir your arroz con leche, follow these steps:
- Reduce the heat to low and cover the saucepan with a lid.
- Allow the arroz con leche to simmer gently for about 20-25 minutes, stirring occasionally to prevent the rice from sticking to the bottom of the pan.
- Stirring the mixture intermittently will help distribute the heat evenly and prevent the rice from clumping together.
- Continue simmering and stirring until the rice is tender, and the pudding reaches your desired consistency. The pudding should have a creamy and thick texture.
The simmering process allows the rice to absorb the creamy milk and blend the flavors together. It also gives the cinnamon sticks time to infuse the dessert with their warm and aromatic taste.
As you simmer the arroz con leche, keep an eye on the consistency and adjust the cooking time according to your preference. Some people prefer a slightly thinner pudding, while others like it thicker and more substantial.
During this step, your kitchen will be filled with the delightful aroma of the arroz con leche as it cooks. The anticipation for the final result will start to build!
Now that your arroz con leche has simmered to perfection, it’s time to add the finishing touch and elevate the flavor profile with the addition of vanilla extract. Let’s move on to the next step.
Add vanilla extract
To add a touch of sweet and aromatic flavor to your arroz con leche, it’s time to incorporate the delightful essence of vanilla extract. This step will enhance the overall taste profile of the dessert and bring a subtle hint of warmth to each bite.
To add vanilla extract to your arroz con leche, follow these steps:
- Remove the saucepan from the heat once the rice is tender and the pudding has reached your desired consistency.
- Add a small amount of vanilla extract, about ½ to 1 teaspoon, to the arroz con leche.
- Stir well to ensure that the vanilla extract is evenly distributed throughout the dessert.
The addition of vanilla extract adds depth and complexity to the arroz con leche, enhancing its overall flavor profile. It complements the creaminess of the rice pudding and provides a subtle aromatic note that is both comforting and enticing.
Be sure not to overpower the dessert with too much vanilla extract. Start with a small amount and adjust according to your taste preference. The goal is to enhance the flavors of the arroz con leche, rather than overpowering them.
With the vanilla extract added, your arroz con leche is now beautifully infused with a delightful vanilla aroma. But if you’re a fan of the optional ingredient, raisins, it’s not too late to add them. Let’s move on to the next step and explore how to incorporate raisins into your dessert.
Optional: Add raisins
If you enjoy a burst of sweetness and a chewy texture in your arroz con leche, adding raisins can be a delightful option. These small dried fruits add an extra layer of flavor and a playful pop of texture to the creamy dessert.
To add raisins to your arroz con leche, follow these steps:
- Ensure that you have plump and moist raisins that are free of any stems or debris.
- If desired, you can soak the raisins in warm water or rum for a few minutes to help plump them up and infuse them with additional moisture and flavor.
- Once the arroz con leche is cooked and removed from the heat, take a handful of raisins and gently stir them into the mixture.
- Continue stirring to evenly distribute the raisins throughout the dessert.
The addition of raisins introduces a burst of natural sweetness and a chewy texture to your arroz con leche. Each bite becomes a delightful combination of smooth and creamy rice pudding with a pop of flavorful raisins.
However, it’s important to note that adding raisins is entirely optional. If you prefer a smoother and more straightforward arroz con leche experience, feel free to omit the raisins.
Now that your arroz con leche is complete, it’s time to serve and enjoy the delicious culmination of flavors and textures. Let’s move on to the final step of this process.
Read more: What Are The Pros And Cons Of A Pergola?
Serve and enjoy!
Congratulations, your homemade arroz con leche is now ready to be enjoyed! The creamy, sweet, and aromatic dessert is sure to delight your taste buds and bring comfort to your soul.
To serve your arroz con leche, follow these steps:
- Divide the warm arroz con leche into individual serving bowls or cups.
- If desired, sprinkle a dash of ground cinnamon on top of each serving for an extra touch of flavor and visual appeal.
- You can serve the arroz con leche either warm or chilled, depending on your preference.
- If serving chilled, allow the arroz con leche to cool to room temperature, then cover and refrigerate until it is thoroughly chilled and set.
- When serving chilled arroz con leche, you can garnish each portion with a sprinkle of ground cinnamon or a few raisins for an added touch of presentation.
Arroz con leche is a versatile dessert that can be enjoyed on its own or paired with a variety of accompaniments. You can serve it alongside a cup of hot coffee or tea for a comforting treat, or perhaps with a dollop of whipped cream or a sprinkle of chopped nuts for added texture and indulgence.
Whether you’re savoring a warm bowl of arroz con leche on a cold winter day or enjoying a chilled portion during the summer months, this classic dessert is sure to bring joy and satisfaction to your palate.
Remember to savor each spoonful of your homemade arroz con leche, appreciating the love and effort that went into creating this delightful dessert. Share it with family and friends, or simply relish it as a comforting treat for yourself.
Now, it’s time to sit back, relax, and enjoy your delicious homemade arroz con leche. Bon appétit!
And that concludes our guide on how to make and enjoy arroz con leche. We hope you find this process rewarding and the end result a feast for your senses. Happy cooking and savor every mouthful of this delightful dessert!
For a visual guide check this video out!
Conclusion
Arroz con leche, with its creamy texture and comforting flavors, is a beloved dessert that has been enjoyed in various cultures for generations. From the first step of rinsing the rice to the final moment of serving and savoring the dessert, making arroz con leche is a process that brings joy and satisfaction to both the cook and the lucky recipients of this delicious treat.
Throughout this guide, we have explored the key ingredients and steps involved in making arroz con leche. From choosing the right type of rice and heating the milk to adding sugar, cinnamon sticks, vanilla extract, and optional raisins, each component plays a critical role in creating the perfect balance of sweetness, creaminess, and comforting warmth.
By following the steps outlined, you can create a batch of arroz con leche that is rich, luscious, and bursting with delightful flavors. Remember to adjust the sweetness, thickness, and additional ingredients according to your personal preferences, as cooking is an opportunity for personal expression and creativity.
Whether you choose to enjoy your arroz con leche warm or chilled, it is a dessert that can be served on any occasion. Its versatility and comforting qualities make it suitable for family gatherings, special celebrations, or simply as a sweet treat to brighten up your day.
So, why not treat yourself and your loved ones to a homemade batch of arroz con leche? The process is as rewarding as the end result, and you’ll be rewarded with a satisfying dessert that warms the heart and delights the taste buds.
Now that you have all the knowledge and guidance, it’s time to put your skills to the test and embark on the culinary adventure of creating your very own arroz con leche. Embrace the process, have fun experimenting with flavors and textures, and enjoy the delicious rewards.
Remember, making arroz con leche is not just about the dessert itself. It’s about the memories that are created, the joy experienced during the cooking process, and the connections forged through sharing this delightful treat with others.
So go ahead, gather your ingredients, roll up your sleeves, and embark on the journey of making arroz con leche. May your kitchen be filled with comforting aromas and your taste buds be delighted with every spoonful.
Enjoy the delightful journey of creating and savoring this classic dessert. Happy cooking!
Frequently Asked Questions about How To Store Arroz Con Leche
Was this page helpful?
At Storables.com, we guarantee accurate and reliable information. Our content, validated by Expert Board Contributors, is crafted following stringent Editorial Policies. We're committed to providing you with well-researched, expert-backed insights for all your informational needs.


0 thoughts on “How To Store Arroz Con Leche”